« January 2014 »
S M T W T F S
1 2 3 4
5 6 7 8 9 10 11
12 13 14 15 16 17 18
19 20 21 22 23 24 25
26 27 28 29 30 31
You are not logged in. Log in
Entries by Topic
All topics  «
3D paperwork
A - Z challenge 5
A - Z challenge 7
A - Z challenge round 4
A to Z challenge round 3
A to Z round 2
A to Z round 6
A-Z round 1
Around the House
Art Challenges
Artist Trading Cards
Backgrounds
Beads
Bible Journaling
Books
Boxes
Collage
Color Challenge
Coloring
cookbook
Die Cuts
Digital Projects
Digital Stamps
Drawing
Dry Embossing
Fabric Stuff
Fantastic Folds
Field Trip
Home Decor
How Does Your Garden Grow?
Hymnal Art
In The Kitchen
In the studio
Jewelry
Lettering
Links
Multi-Technique
Music to Work By
Musings
Nail Art
New Work
Online Class
Other Hobbies
Other Projects
Painting
Paper Embroidery
Paper Piecing
Photo
Pretty Paper
Quilting
Random
reading
Scrap Recovery
scrapbooking
Sewing
Sketch Challenge
Some Backlog
Stamping
Stencils
Stickers
Supplies
Teabag Folding
Techniques
Testing
tips and tricks
Tutorial
Web resources
Welcome to my Blog
Work By My Friends
workflow
Writing
Blog Tools
Edit your Blog
Build a Blog
RSS Feed
View Profile
Group One
In & Out of Studio 3D
Friday, 31 January 2014
Operation Write Home sketch 15
Topic: Sketch Challenge

OWH sketch 15 is very simplistic:


Yawn...

I put together a floral with some antique script and then... um... OK, let's add a large word stamp. Then, hmmmm... Oh, let's just go nuts with gold peel-off borders and corners.


I can live with that!

Ddd 


Posted by studio3d@ccgmail.net at 12:01 AM PST
Thursday, 30 January 2014
Operation Write Home sketch 14 - part B
Topic: Sketch Challenge

Another version of OWH sketch 14 shown here:

This time I was less concerned about the effect of having something on a weird angle as I chose to use a floral sticker and it had a natural curve that let it look balanced.

I keyed off the sticker to choose colors for the background papers and the sentiment block.


I had additional stickers on the sheet so I added one to the upper right to provide continuity in the design.

Ddd


Posted by studio3d@ccgmail.net at 12:01 AM PST
Wednesday, 29 January 2014
Operation Write Home sketch 14 - part A
Topic: Sketch Challenge

OWH sketch 14 is another one that I decided to make twice. Here's the sketch:


At first I thought I was going to have a fight about putting that left panel on an angle because, in my mind it looks contrived. But I behaved myself and did it their way.

I had some giant floral stickers and cut one down to the prescribed dimensions. Simple papers chosen to for their color match to the illustration were used for backing but I had to create a frame for the picture to separate it from them.

I chose the clock paper for the strip on the right to go with the sentiment I had chosen.


The sentimentwas too plain so I added doodle lines in fine line brown pen.

Ddd 


Posted by studio3d@ccgmail.net at 12:01 AM PST
Tuesday, 28 January 2014
Operation Write Home sketch 13
Topic: Sketch Challenge

If I had not created this challenge to use every one of the sketches in order I would have skipped over OWH sketch 13:

I don't like the 'sentiment' skewed across the front; the main block is too large; those two 'outrigger' elements don't make for a cohesive design. Now that I'm done complaining... I just made changes to suit myself (as always).

I added another panel to contain the sentiment, added another sticker to it to create a diagonal line between the other two in the corners and cut the main panel down to allow for a border paper.


I'm still not overly fond of it but I 'did the assignment' so I could proceed to something I liked better.

Ddd 


Posted by studio3d@ccgmail.net at 12:01 AM PST
Monday, 27 January 2014
Operation Write Home sketch 12
Topic: Sketch Challenge

Sometimes a very simple sketch calls for a very simple treatment. Here's the starting point for OWH sketch 12:

I found a sheet of gold peel-off nautical stickers in my stash to use. The panels needed to be fairly plain to allow the stickers to show up so I chose two hues of brown tone-on-tone dot. I chose the background paper for the soft blue-green color and because the ombre effect of it creates the illusion of fading away into the distance.


The only bordering on this one is around the sailboat panel whick is also popped up on foam tape.

Ddd 


Posted by studio3d@ccgmail.net at 12:01 AM PST
Sunday, 26 January 2014
Operation Write Home sketch 11
Topic: Sketch Challenge

Having exhausted OWH sketch 10 we're moving on to number 11.


Well, that's where I started anyway! The band at the top was boring in only one print so I selected two. Then it looked top heavy so I added strips at the bottom as well. All the papers were selected to go with the clock paper panel.


I chose a light brown bordering paper and stamped a sentiment for bordering where there is none in the sketch. It is popped up on foam tape.

Ddd 


Posted by studio3d@ccgmail.net at 12:01 AM PST
Saturday, 25 January 2014
Operation Write Home sketch 10 - part F
Topic: Sketch Challenge

But wait! There's more... just one more though.

We're still on OWH sketch 10 and then tomorrow we'll move on to another sketch.

Occasionally I have inspiration to make a kid's card and it was due. I chose some teddy bear stickers that have, as you can see, a holographic silver over-print in some areas.

Two of the bears had blue bows ao I put them on matching tags and made them the side pieces. The silver-bow bear got to be in the center and raised up on foam tape as a feature.

Green patterned paper was bordered in blue along with the tags and all went over a plain salmon cardstock (yes, it really is salmon - use your imagination)!

I stamped the sentiment on blue dot textured cardstock. This was a little too plain so I added two ribbon flags and popped the sentiment up on foam tape.

Ddd 


Posted by studio3d@ccgmail.net at 12:01 AM PST
Friday, 24 January 2014
Operation Write Home sketch 10 - part E
Topic: Sketch Challenge

Tired of OWH sketch 10 yet? Here's the sketch for reference:

A good thing to have on hand is a sheet of button stickers when you have a 6x6 paper with sewing patterns on it! Add some striped paper to mimich fabric and you're well on the way to a coordinated card.

For interest I used two buttons on each tag and raised one on a pop-dot over the other.

The tags were kept in a neutral color as was the sentiment tab and all were bordered with a chocolate brown.

Ddd 


Posted by studio3d@ccgmail.net at 12:01 AM PST
Thursday, 23 January 2014
Operation Write Home sketch 10 - D
Topic: Sketch Challenge

This is absolutely my favorite of the OWH sketch 10 cards I made from this sketch:

I built everything around a single dragonfly sticker I had on hand. Then I backed a couple of peel-off stickers of dragonflies and mounted all on matching tags.

A complementary paper for the crosspiece gives these the feel of scientific illustrations. I gave each tag a fine line of doodling with a brown pen and mounted the center one up on foam tape with a piece of twine tied in.


By using a plain chocolate brown background the illustrated panel and the sentiment tab are really the stars.

Ddd 


Posted by studio3d@ccgmail.net at 12:01 AM PST
Wednesday, 22 January 2014
Operation Write Home sketch 10 - C
Topic: Sketch Challenge

More yummy versions of OWH sketch 10 are coming up. Here's the sketch again:

I found these awesome tulip stickers in my stash and knew I had to use them on this project. The background rose toned paper was chosen for its good match to the flowers.

I gave them each a green tag to rest on, banded in more of the rose cardstock and popped the center one up on foam tape.

I stamped the sentiment on a patterned paper and rounded the bottom corners. Then I bordered it along with the crosspiece with mint green.

Ddd 


Posted by studio3d@ccgmail.net at 12:01 AM PST
Tuesday, 21 January 2014
Operation Write Home sketch 10 - B
Topic: Sketch Challenge

Here is round two of the OWH sketch 10. As a reminder, here's the sketch:

For this second model I used a plain dark green background and let the elements be the star of the show. Three clear sticker of sewing elements were placed on the tags, matching tag colors to stickers, and all of them were bordered in pink.

I used pink to border the crosspiece of black and white stripe as well.

The tab sentiment was also stamped on pink and a faux stitching line was added on its edge.

Ddd

Posted by studio3d@ccgmail.net at 12:01 AM PST
Monday, 20 January 2014
Operation Write Home sketch 10 - A
Topic: Sketch Challenge

I went a little nuts with OWH sketch 10. I kept getting out supplies trying to decide what to put on the little tags it called for. Then, I found that I had enough tags to use all of the elements so I made up this sketch 6 ways!

Here's the sketch:

I selected some puffy acrylic stickers and green tags for this version. Playing off of the stickers I chose a pink patterned paper background and a light pink sentiment block, treated like a tab.

I added a black and white patterned strip for the crosspiece.

The layering pieces got black bordering but I did not put a border on the background paper.

Ddd


Posted by studio3d@ccgmail.net at 12:01 AM PST
Sunday, 19 January 2014
Operation Write Home sketch 09
Topic: Sketch Challenge

Back to the OWH sketches for a while. I can say confidently that they will be posted for a 'while' since I already sat down and did a whole slew of them in one sitting.

Today I'm sharing sketch 09 shown here:

Some of these sketches are really simplistic so they do require some additional creativity to make them interesting. In this case, I accomplished that by a combination of interesting papers and use of bordering.

I also changed the image block to the sentiment and created a tab block where the sentiment was designated.


I also added a thin washi tape across the bottom of the arrow print and added three rhinestones in the tab block for design balance.

Ddd 


Posted by studio3d@ccgmail.net at 12:01 AM PST
Updated: Tuesday, 14 January 2014 8:37 AM PST
Saturday, 18 January 2014
Love Goes Round and Round
Topic: Paper Embroidery

Assignment: Make a paper embroidery card in a different shape.

OK, I choose 'round'.

I love the way the heart takes shape out of a simple circle when stitched in two layers. This is a free pattern from Pinbroidery.com and I chose to use verigated thread.

After stitching I cut the piece into a circle. Then I cut the same size circle from a folded card base, overlapping slightly to keep the fold inside the top arc.


I sandwiched cotton lace between the stitched layer and the card base as I mounted them together.

Ddd 


Posted by studio3d@ccgmail.net at 12:01 AM PST
Friday, 17 January 2014
Take My Hand
Topic: Paper Embroidery

The stitching on today's card is simple, but that is where the simplicity ends.

I started the base with violet to match the right hand stitching and then tore successive layers of lace paper and coral papers. I added some strips of torn washi tape and added color to them with alcohol marker. A strip of cotton lace layered with rhinestones finishes off the left edge.


I added two heart-shaped rhinestone stickers in pink as the finish.

Ddd 


Posted by studio3d@ccgmail.net at 12:01 AM PST
Thursday, 16 January 2014
Puppy Love
Topic: Paper Embroidery

I got in a little time for stitching cards. I had a challenge to make a card featuring a dog. I love this free pattern from StitchingCards.com too so I decided to use that.

I don't do the stitching as the pattern was designed as I like the body parts to be open rather than filled. I decided to use verigated thread to add interest.

A dark brown was used as a border around the dotted base and the stitched panel. Then, from a page of printed tags I punched a half-circle text piece and added faux stitching around it.

I used a couple of heart brads, colored them black with alcohol marker and added white highlights with paint pen. These make the eyes in this love-struck puppy.

Ddd 


Posted by studio3d@ccgmail.net at 12:01 AM PST
Wednesday, 15 January 2014
Operation Write Home sketch 08
Topic: Sketch Challenge

Here's where we went off the rails! OWH sketch 08:

Now that is just too boring for words! So I kept ONE element of the sketch - the diagonal line and went off in my own direction.

I cut the two halves down so I would have a border showing from the card base. Then I mounted the diagonal pieces. I arranged the first card with the patterned paper was on the upper left. This was followed by a large chipboard rose cluster. The yellow of the roses picks up yellow from the patterned paper. I used the green from the leaves and stems for the card base. Instead of placing the sentiment as it was on the sketch, I added it to the lower right corner using more of the yellow from the roses.

The second card was turned on its head so the patterned paper was on the lower right. I used the same paper for the sentiment as the backing paper which appears to be more restful. I added a white dashed border around the plain blue paper with a gel pen.


Initially, I had planned to make only one card from each of these sketches but sometimes if the materials are at hand it is just as easy to make 2, or 3, or 4.

Ddd


Posted by studio3d@ccgmail.net at 12:01 AM PST
Tuesday, 14 January 2014
Operation Write Home sketch 07
Topic: Sketch Challenge

I am enjoying working from sketches on this self-assigned mission. I hope the pleasure holds out!

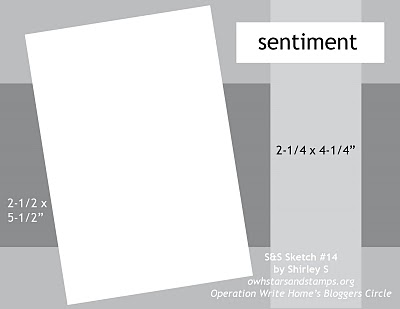
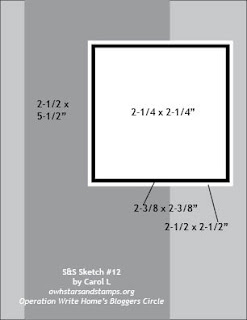
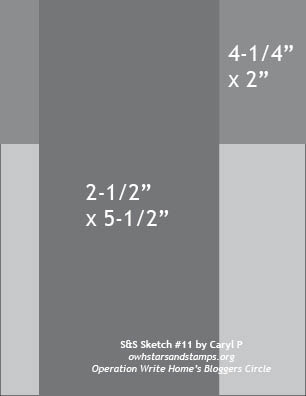
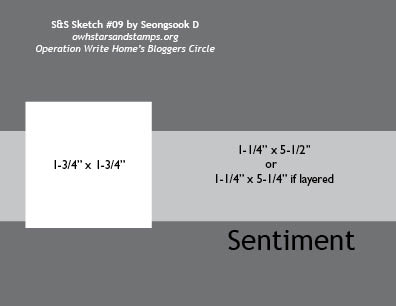
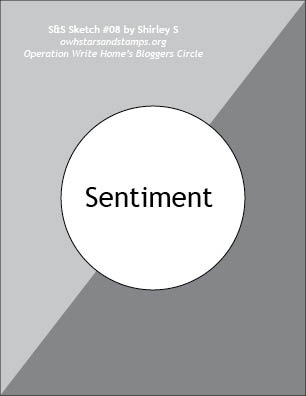
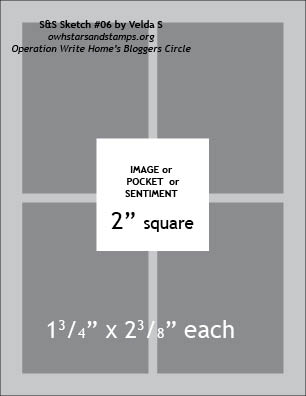
Today I worked with OWH Sketch 07:


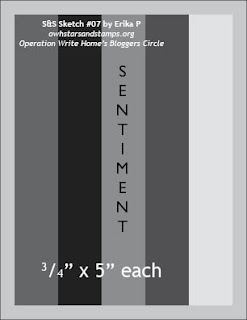
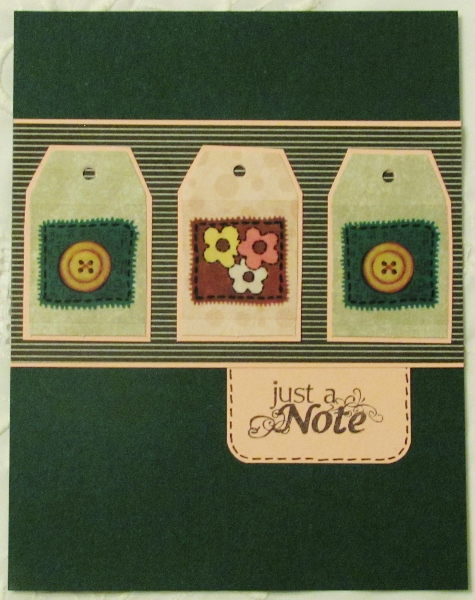
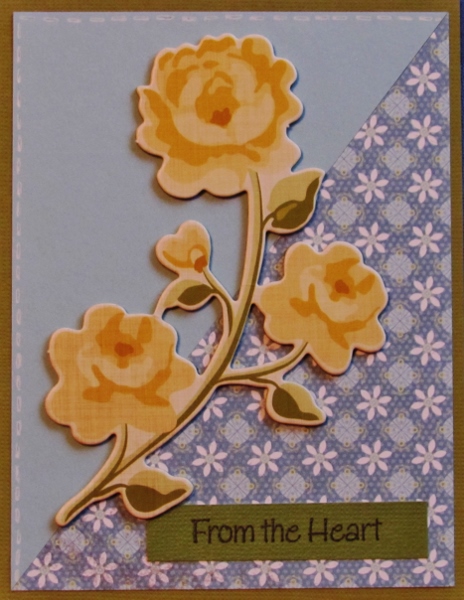
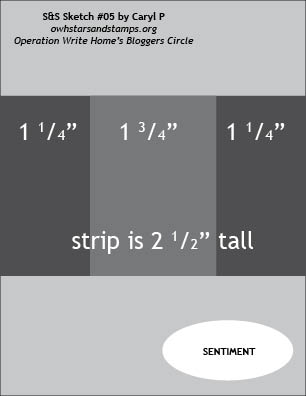
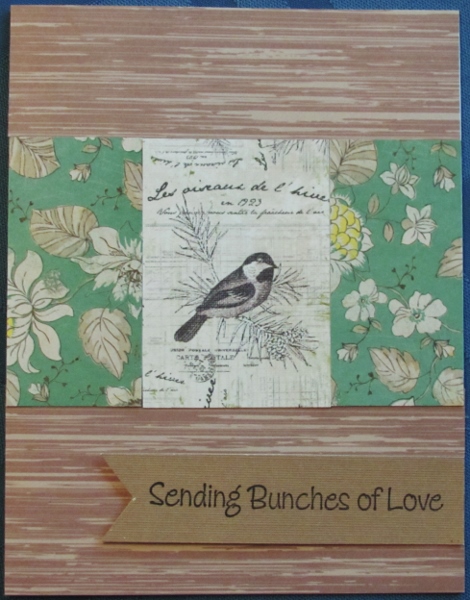
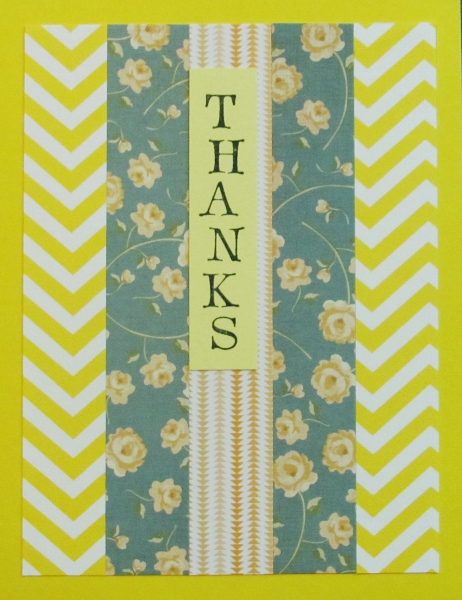
You can see that the original idea was to use 5 different papers across the span but I liked it much better with a symetrical look so that is what I used. I have few stamps that use a vertical sentiment but this one is large enough to be a focal point and I had it already stamped on 3 different bits of cardstock. These gave me the color keys to start selecting papers. I decided the center of each one would be a strip from a single piece of patterned paper and cut it apart into color range strips.

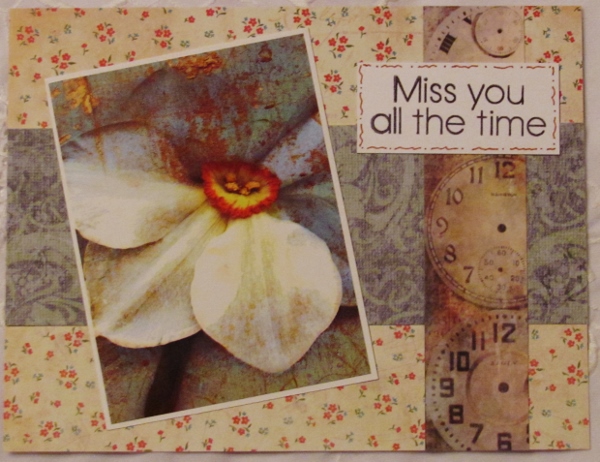
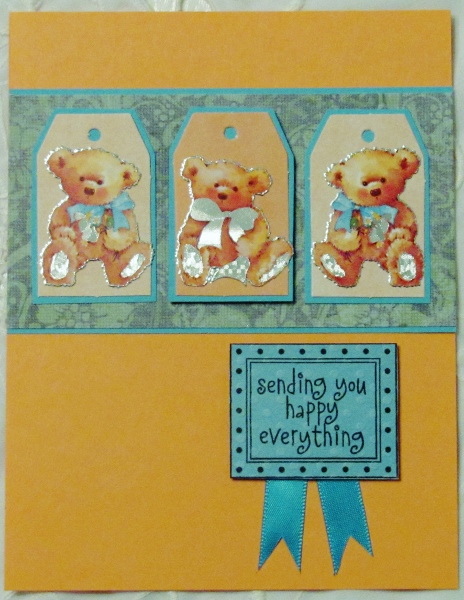
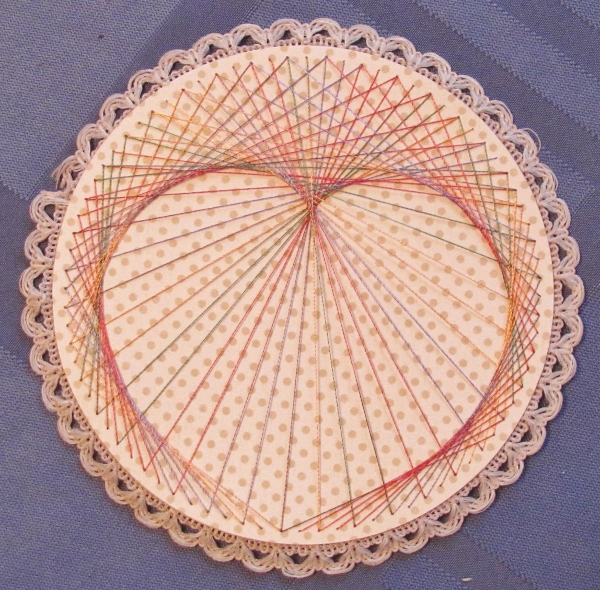
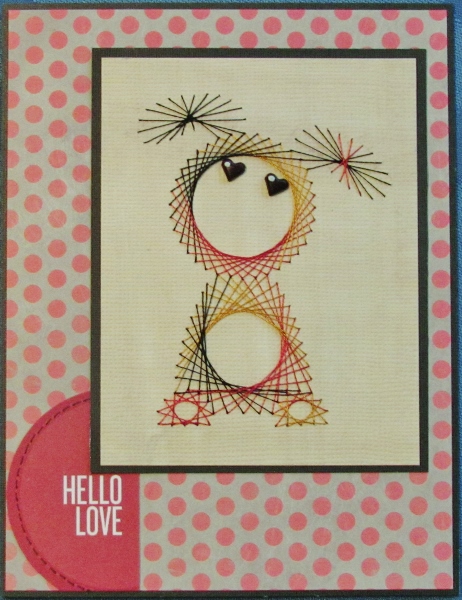
I started with the blues. These were all out of the scrap bins and look nice together without being matchy-matchy.


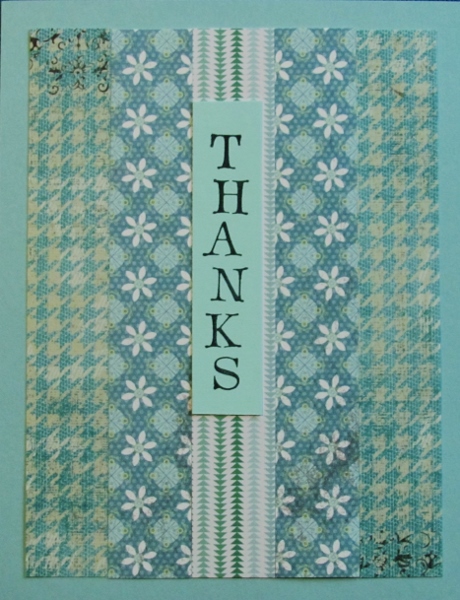
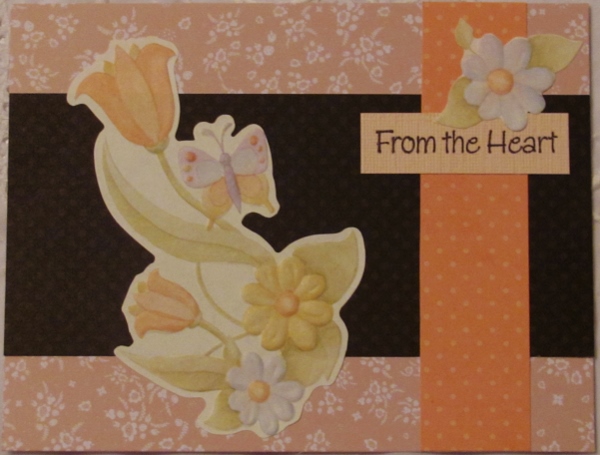
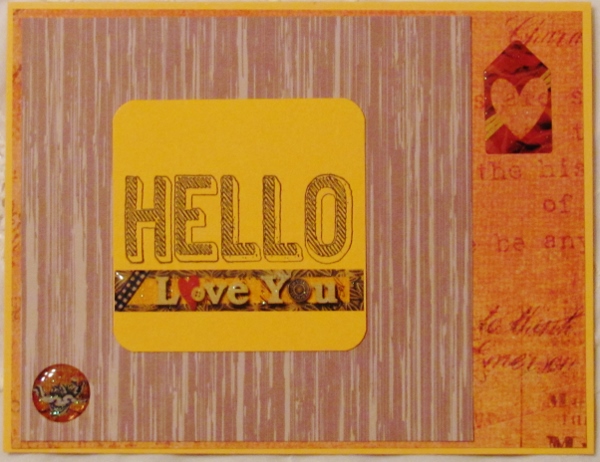
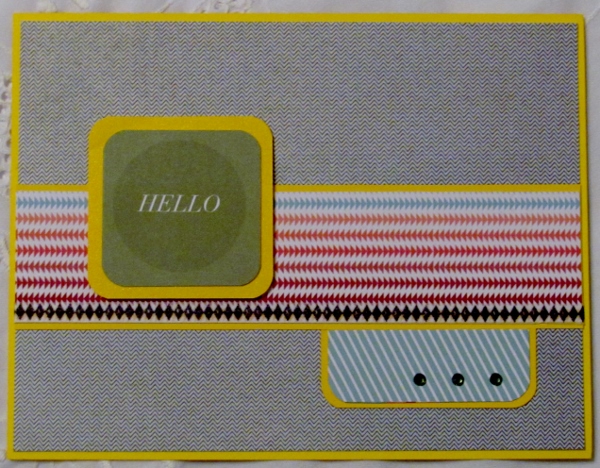
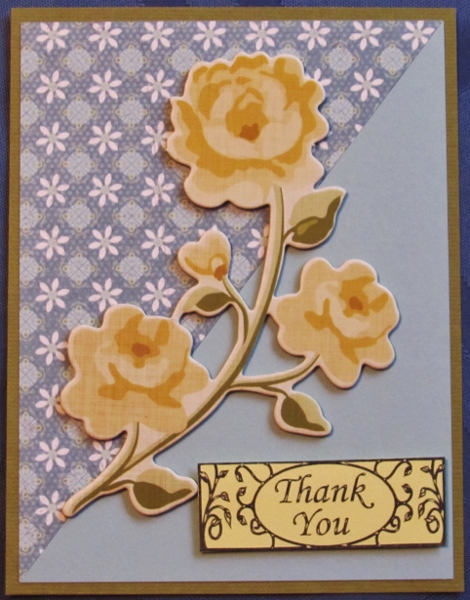
Yellow was the next sentiment color. I chose to go with a range of values from pale to vibrant and the blues in the floral calm the piece a little.

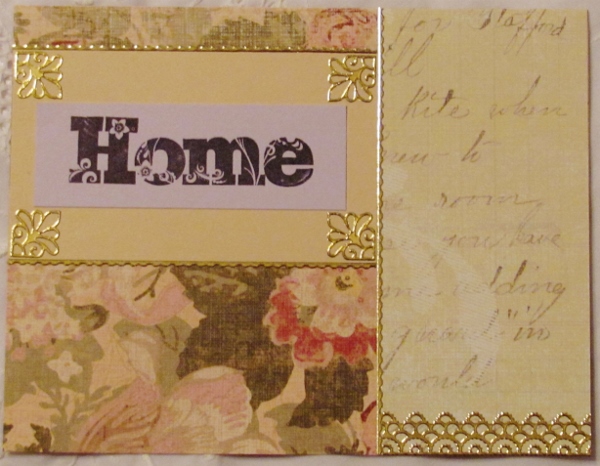
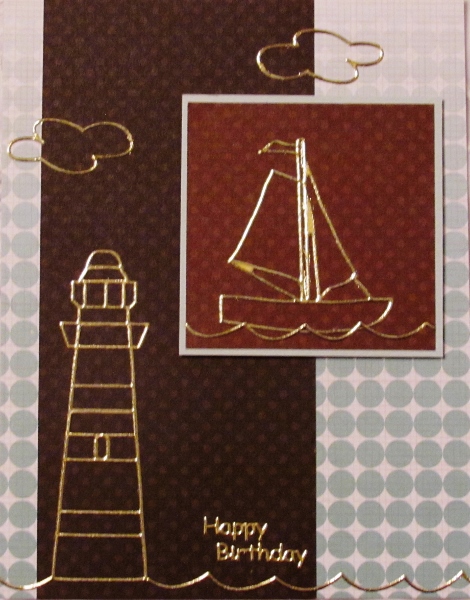
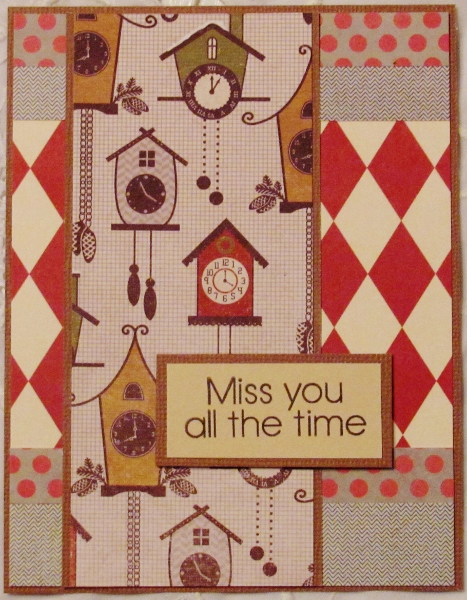
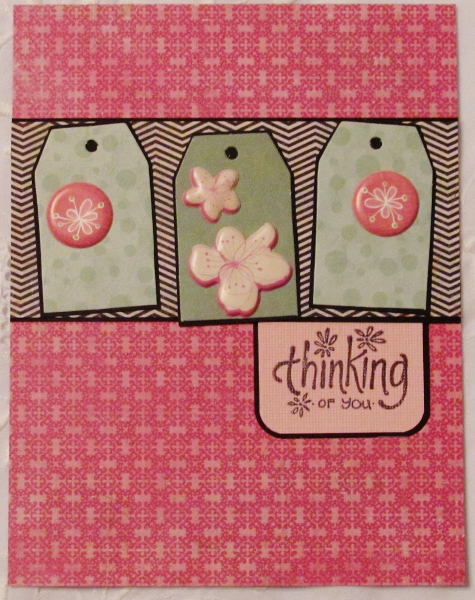
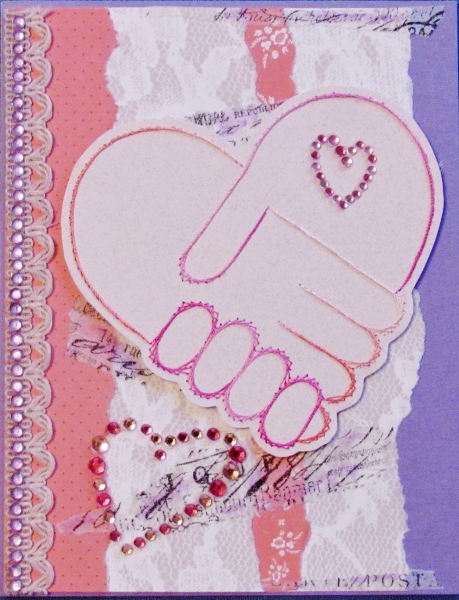
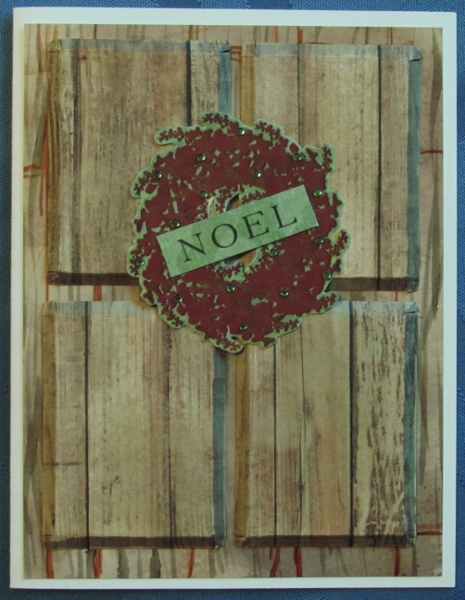
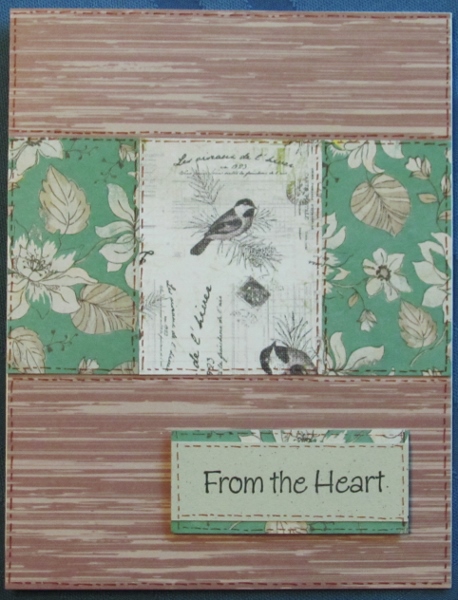
The last strip of feature paper was in the red range and my sentiment was stamped on a creamy white. I went to the scrap bins for reds but it was all too nerve-jangling so I opted for cream and black instead and let the interest all be in the patterns.


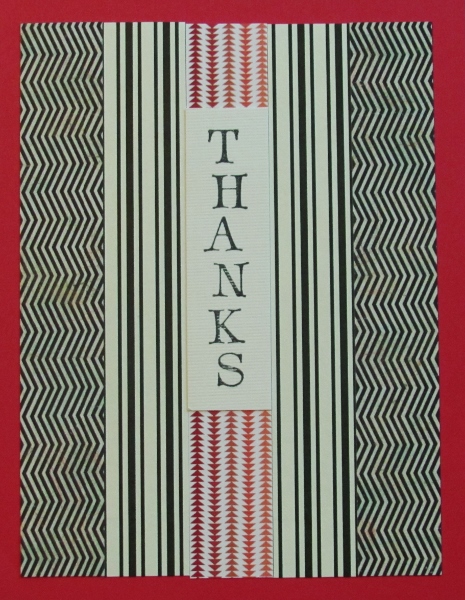
I brought the red back in as the card base color.

Ddd 


Posted by studio3d@ccgmail.net at 12:01 AM PST
Monday, 13 January 2014
Operation Write Home sketch 06
Topic: Sketch Challenge

Sometimes a sketch just hollers out what it wants to be! Such was the case with OWH sketch 96:

When I saw this I immediately thought of a paneled door with a wreath on it. The effort was all in execution.

I had an awesome woodgrain scrap and cut that up into the 4 panels. Since I did not have any more for the door base I created some on glossy paper with ink pads and markers. It did not have to be precise because so little of it shows in the end.

I used a scoring board to score 1/8" from all the edges of the panels and turned them back to crease. I had to clip the corners so they would not wrinkle or bunch up.  Each panel got a full coverage of foam tape on the back and was adhered to the door base. I then used alcohol markers in warm greys to shadow the sides of the panels (Copic W7 for right and bottom, Copic W5 for left and top).

The wreath is a clear sticker adhered to a green printed background and trimmed out. The same green was used to back the clear text sticker.


I added tiny green rhinestones to the wreat as a finishing touch.

Ddd


Posted by studio3d@ccgmail.net at 12:01 AM PST
Sunday, 12 January 2014
Operation Write Home sketch 05
Topic: Sketch Challenge

Using OWH sketch 05 was rough going until I found a little snippet of paper left on the desktop that fit the scale perfectly.

Here is the sketch:


I followed the sketch faithfully until I got to the oval sentiment. The little bird on a script background was paired with a floral paper over a woodgrain. Then I simply added a sentiment strip with a flag-cut end.


I had a bit more of the bird paper but not enough to make the block as tall as the sketch. So I just narrowed that whole strip, keeping all the background papers the same as before. I framed up a stamped sentiment with some of the floral and popped it up on foam tape.

I decided to try out some detailing on this version and bordered every piece with some faux stitching in brown pen. I think this gives it a more rustic look.

Ddd


Posted by studio3d@ccgmail.net at 12:01 AM PST

Newer | Latest | Older