« August 2014 »
S M T W T F S
1 2
3 4 5 6 7 8 9
10 11 12 13 14 15 16
17 18 19 20 21 22 23
24 25 26 27 28 29 30
31
You are not logged in. Log in
Entries by Topic
All topics  «
3D paperwork
A - Z challenge 5
A - Z challenge 7
A - Z challenge round 4
A to Z challenge round 3
A to Z round 2
A to Z round 6
A-Z round 1
Around the House
Art Challenges
Artist Trading Cards
Backgrounds
Beads
Bible Journaling
Books
Boxes
Collage
Color Challenge
Coloring
cookbook
Die Cuts
Digital Projects
Digital Stamps
Drawing
Dry Embossing
Fabric Stuff
Fantastic Folds
Field Trip
Home Decor
How Does Your Garden Grow?
Hymnal Art
In The Kitchen
In the studio
Jewelry
Lettering
Links
Multi-Technique
Music to Work By
Musings
Nail Art
New Work
Online Class
Other Hobbies
Other Projects
Painting
Paper Embroidery
Paper Piecing
Photo
Pretty Paper
Quilting
Random
reading
Scrap Recovery
scrapbooking
Sewing
Sketch Challenge
Some Backlog
Stamping
Stencils
Stickers
Supplies
Teabag Folding
Techniques
Testing
tips and tricks
Tutorial
Web resources
Welcome to my Blog
Work By My Friends
workflow
Writing
Blog Tools
Edit your Blog
Build a Blog
RSS Feed
View Profile
Group One
In & Out of Studio 3D
Tuesday, 5 August 2014
Operation Write Home - sketch 120 - repeat
Topic: Sketch Challenge

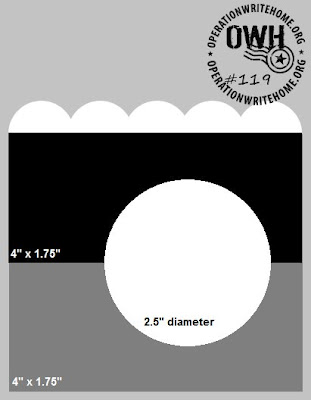
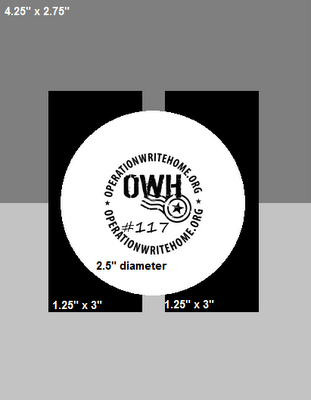
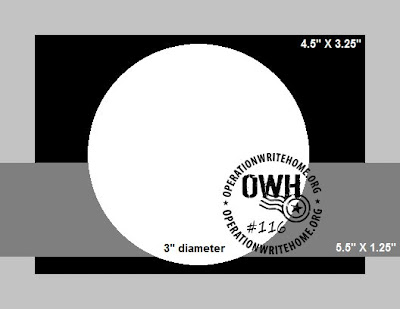
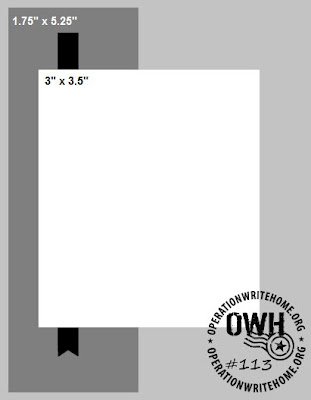
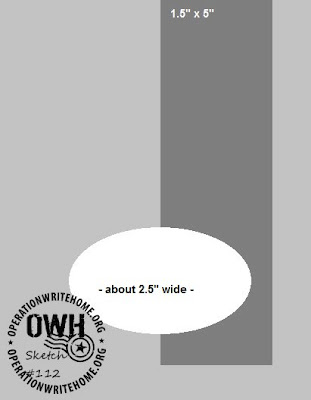
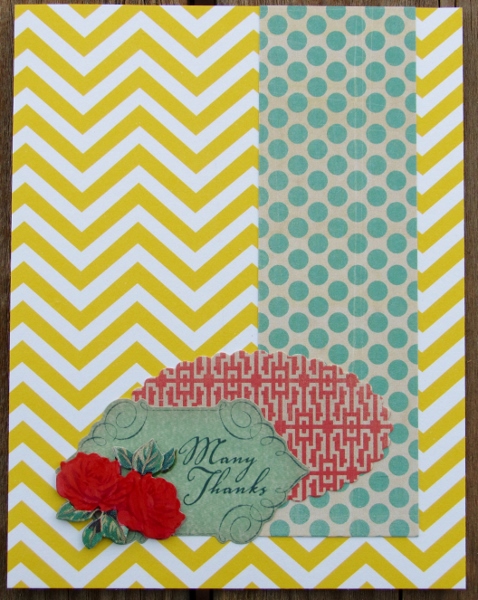
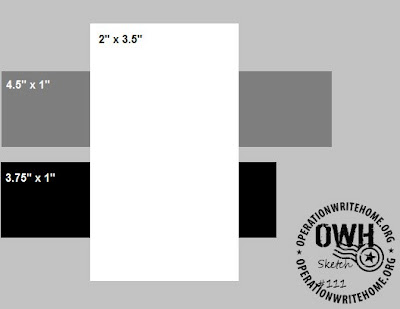
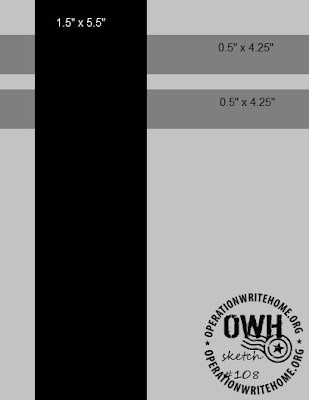
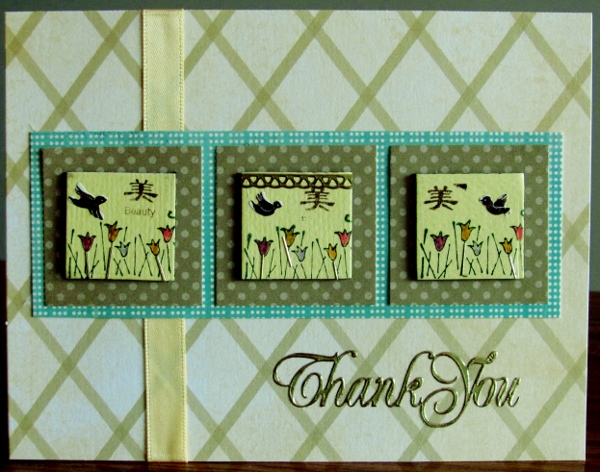
Before I started this challenge I didn't realize how many of the OWH sketches I had used before! Here is a reprise of sketch 120 from May 15, 2012.

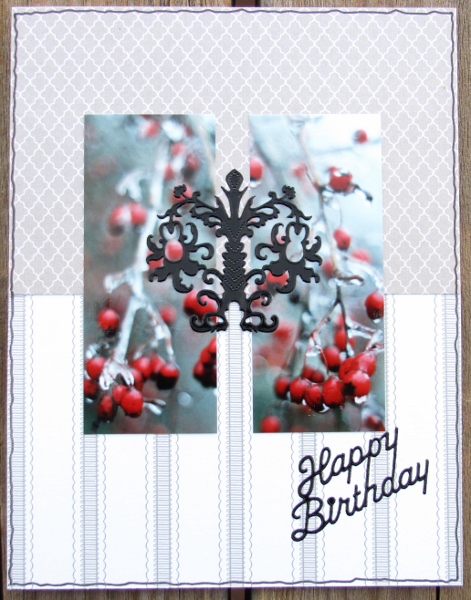
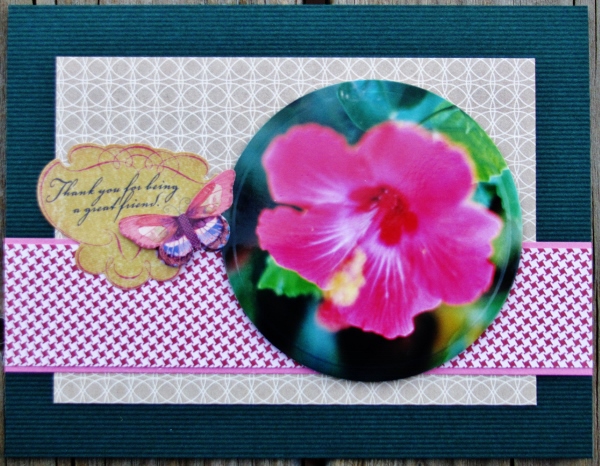
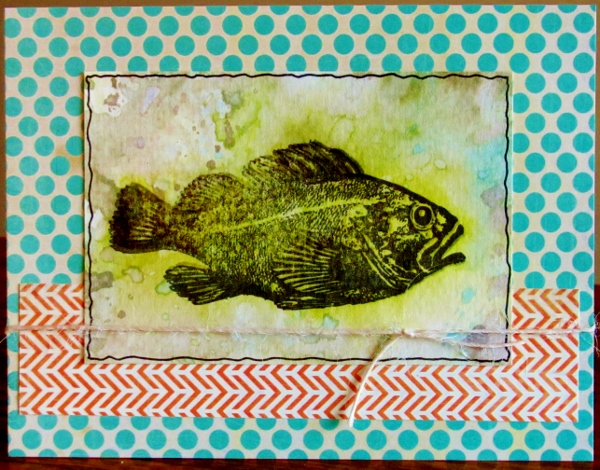
I actually did a ton of these but used up scraps to create a pinwheel in place of the oval. These sometimes got stickers for sentiments or other sticker decorations on the card. Also, some of the cards were used with the sketch upside down.

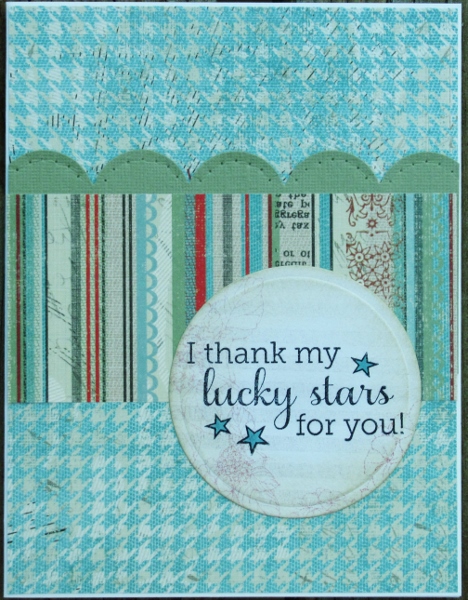
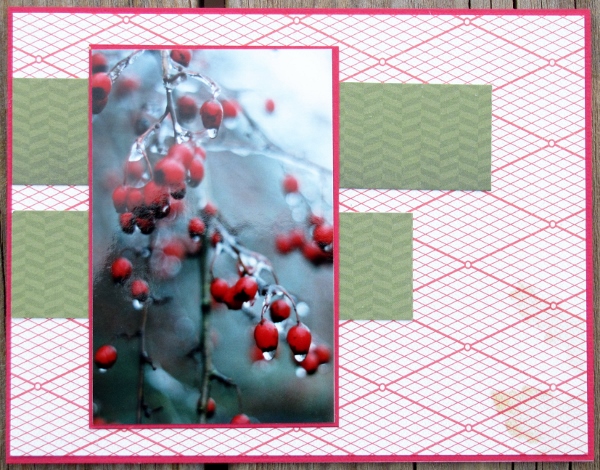
Here are a couple from that session:


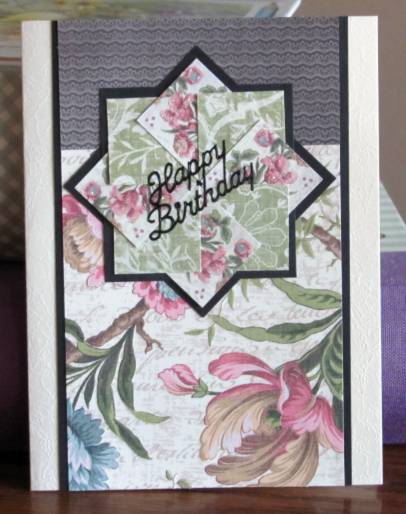
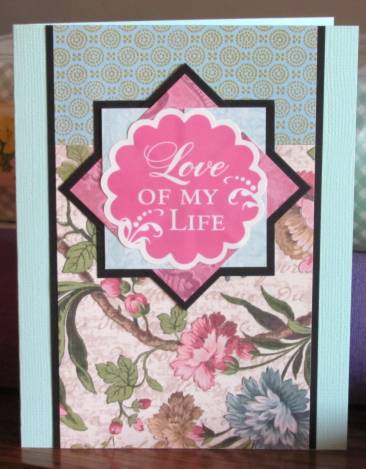
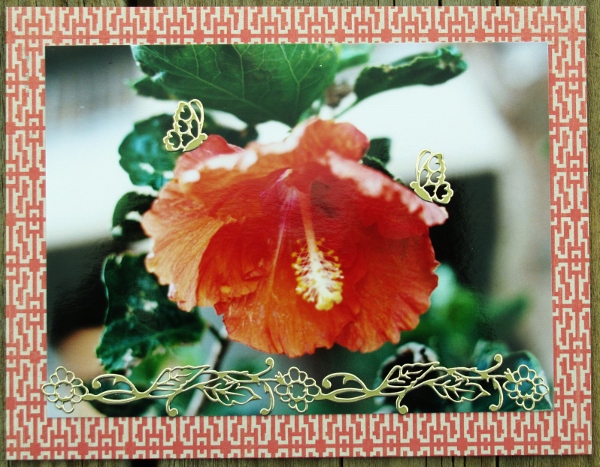
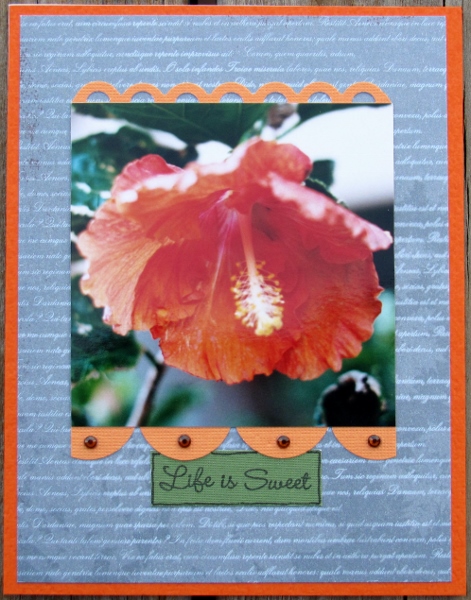
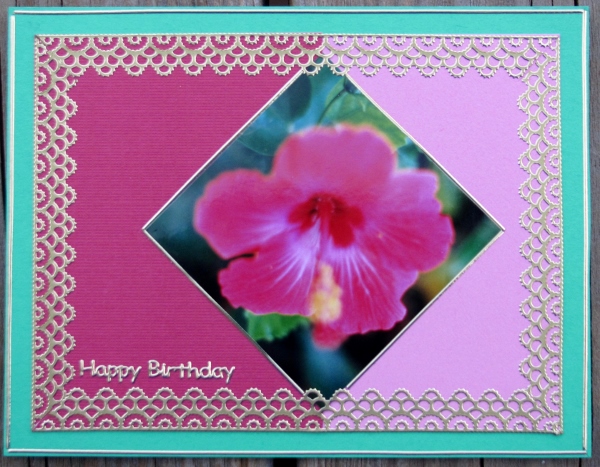
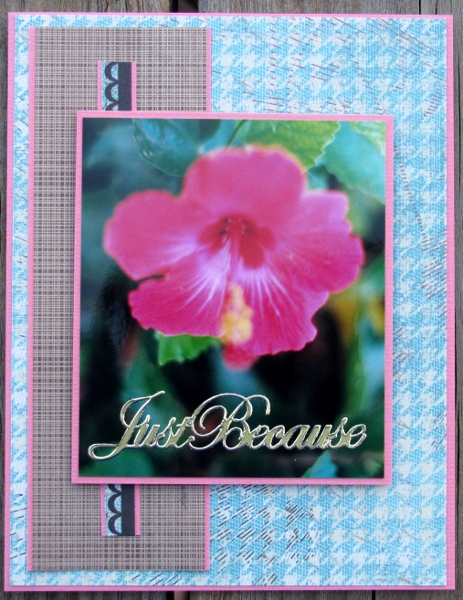
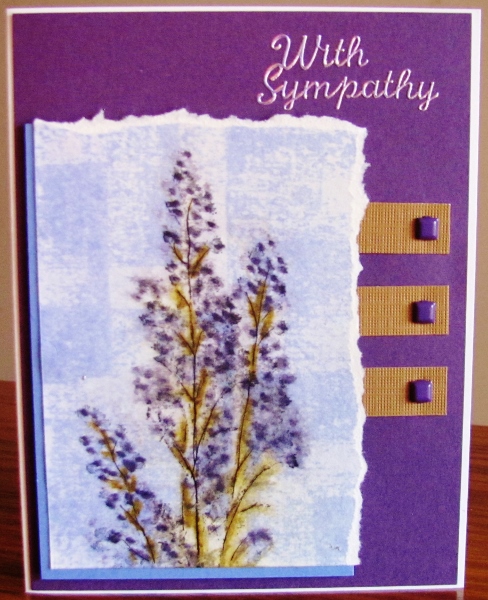
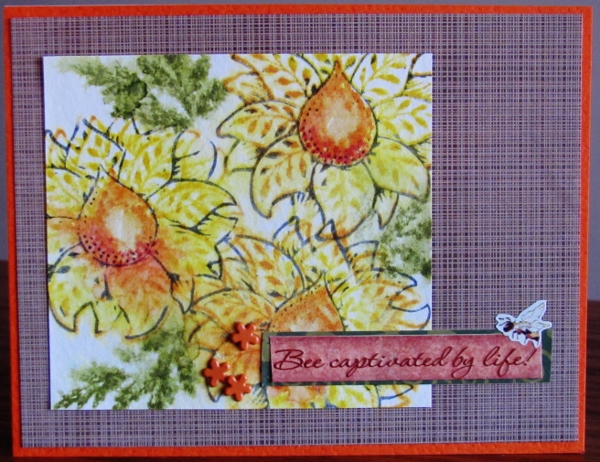
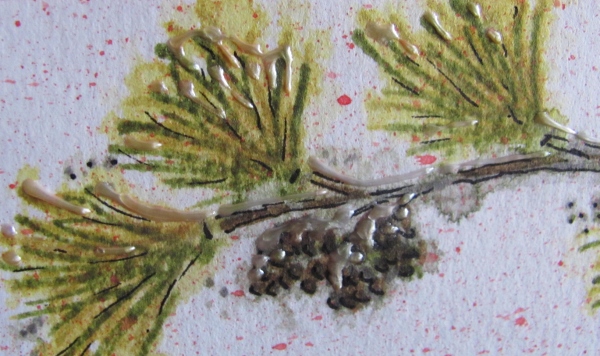
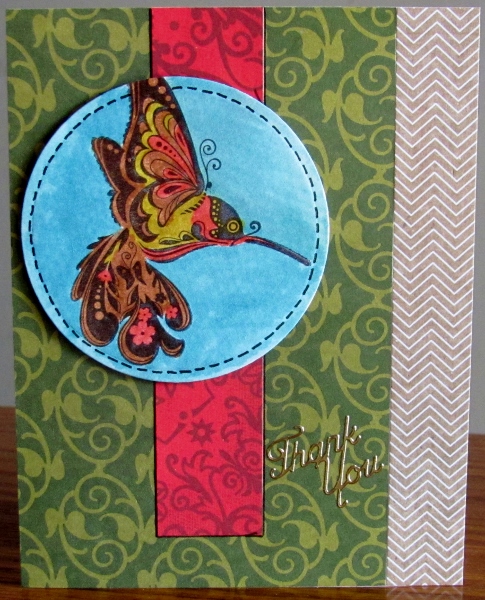
By chance, these two favorites use the same floral background paper.

Ddd


Posted by studio3d@ccgmail.net at 12:01 AM PDT
Monday, 4 August 2014
Operation Write Home - sketch 119
Topic: Sketch Challenge

I had some confusion over whether I had used this sketch before or not. The sketch was in my blog folder for 2012 but in the day by day photos I cannot find a card that looks anything like it.

So, I did a new card for OWH sketch 119:

I see that the upper paper in the sketch is part of the background but I just made the top and bottom strips the same. My scallop punch leaves little indents around the edge - but not consistently deep - so I went back with a craft pick and turned them into holes.

The circle element was die cut and embossed in my Cuttlebug  with a Spellbinders die. Then I darkened the edges with Distress Ink and stamped the sentiment.

I used Distress Marker to color the stars to match the houndstooth background paper.

Ddd


Posted by studio3d@ccgmail.net at 12:01 AM PDT
Sunday, 3 August 2014
Sparkle and Shine
Topic: Nail Art

I like to celebrate the WHOLE summer with red, white and blue in my house and, if my nails are long enough to do up, that theme carries over onto them.

Though not as long as I like them to be with a real flashy treatment, I did have a go at them. 

I began with a double doat of blue and red, working from opposite ends of the nails on alternate fingers. Then I layered on a coat of silver glitter that just lets the color peek through.

A couple of coats of clear topcoat smooths out the rough texture left by the glitter.

These will last a couple of weeks and then I'll have to think of something new for the last few weeks of summer. What to do?

Ddd


Posted by studio3d@ccgmail.net at 12:01 AM PDT
Saturday, 2 August 2014
Orange You Glad
Topic: Scrap Recovery

I recently took on the task of reviewing every photo we own and organizing them by topic. We had generally printed duplicates of every roll so we would have some to send to relatives but this meant I had a lot of duplicates that were never used. I tossed all redundant ones, blurry ones, and random 'whatever' shots.

I also culled out what I called 'artistic' pictures - usually photos of flowers that were taken who-knows-where and who-knows-when. These got put in an envelope to use in crafting.

So, it was time to make some cards and I decided to use florals as the feature element for a while.

First up is a close-up of a hibiscus - one of my favorite flowers. This one was in bright orange, which is a color I don't commonly use on my cards. I selected a muted orange patterned paper and did a straightforward framing of the whole photo.

I added some gold peel-off stickers of butterflies and a vine as accents.

Ddd


Posted by studio3d@ccgmail.net at 12:01 AM PDT
Updated: Tuesday, 15 July 2014 7:15 AM PDT
Friday, 1 August 2014
Operation Write Home - Sketch 118
Topic: Sketch Challenge

A new month today but still the same project! Moving on to OWH sketch 118:

I like the little scallops in the sketch and find that I don't use them as often as I probably should. I have two great scallop punches and decided to use them both to create a little more interest.

I had one more of the photos and it happened to be the same one that I started the whole process with - the orange hibiscus.

I brought back the orange background and covered this with a grey beaturing white text print. This created a calm setting for the floral banded on the top and bottom by those punched scallops.

I shifted the feature toward the top of the card so I had room to add a stamped and bordered sentiment panel at the bottom. Some orange rhinestones in the centers of the large scallops are the finishing touch.

Ddd


Posted by studio3d@ccgmail.net at 12:01 AM PDT
Thursday, 31 July 2014
Operation Write Home - Sketch 117
Topic: Sketch Challenge

Well, now! This is a sketch that is really different from the norm. Here is OWH sketch 117:

Yes, I had more photos - this time a duplicate of the icy berry branch. I cut it into two for the vertical bars. Then I found two papers with greys that match the photo and assembled to this point.

I couldn't bring myself to plop a big round element in the center, covering so much of the photo elements. In its place I used a 'round-ish' black Dazzles sticker that evokes the feeling of tree branches.


I added a black peel-off sticker for the sentiment and a doodle line with black marker for framing.

Ddd


Posted by studio3d@ccgmail.net at 12:01 AM PDT
Wednesday, 30 July 2014
Operation Write Home - Sketch 116
Topic: Sketch Challenge

On with the show - time for OWH sketch 116:

Still with some photos on hand I used one for the round element on this card. The background on the card is really a forest green - what is with this silly camera?

The background paper is filled with overlapping circles that echo the round floral. The pink and red patterned paper underlines the floral which has a border impressed into it.

I needed room for the sentiment sticker on the left so the round floral was pushed to the right. I also popped it up on foam tape to match the level of the 3D sticker.

Ddd


Posted by studio3d@ccgmail.net at 12:01 AM PDT
Tuesday, 29 July 2014
Operation Write Home - Sketch 115
Topic: Sketch Challenge

Now up to OWH sketch 115 in this long self-challenge:


Another flower photo, this time in soft pink, became the focus for this sketch. I used a large block of pink for the middle ground and set this against a field of red patterned paper. A black doodle line sets them apart.

A strip of green with a leafy pattern echoes the photo. This follows the sketch pretty faithfully.

I used a gold Dazzles sticker for the sentiment.

Ddd


Posted by studio3d@ccgmail.net at 12:01 AM PDT
Monday, 28 July 2014
Operation Write Home - Sketch 114
Topic: Sketch Challenge

OWH sketch 114 is 'not quite lopsided enough' in my opinion:

You can see the diamond is off center but it is at a place where one is not quite sure if it was meant to be centered but didn't quite make it. I should have just slid it all over where it looked better but I stuck with the sketch measurements.

I started by selecting two pinks in solids to maintain the graphic look of the sketch. A bright green (yes, green not aqua like it looks in the photo) background matches the photo.

Then I used some lacy gold peel-off sticker trim to create a frame. Some fine line gold sticker frames the green background.

The sentiment is also gold peel-off sticker.

Ddd


Posted by studio3d@ccgmail.net at 12:01 AM PDT
Sunday, 27 July 2014
Operation Write Home - Sketch 113
Topic: Sketch Challenge

Today we're looking at OWH sketch 113:


This a more exciting sketch than yesterday, to start with.

I went back to the old photos and selected another hibiscus, this time in dark pink. I chose medium pink as a bordering element and added a houndstooth background and a mesh strip in colors to enhance those in the photo.

The thin strip is a printed element from along the edge of the houndstooth page.


I added a text sticker from a sheet of silver Dazzles where I had cut the photo with the extra dark at the bottom.

Ddd


Posted by studio3d@ccgmail.net at 12:01 AM PDT
Saturday, 26 July 2014
Operation Write Home - sketch 112
Topic: Sketch Challenge

I think OWH sketch 112 is pretty 'cut and dried' - and boring!


I decided to zip it up a little and started with patterned papers in the primary colors: a yellow chevron, a blue dot, and a red lattice. I used a scalloped oval to cut out the red and put the card together.

Yep, still boring!

I went through the sticker file and found a 3D unit with the right color of blue. The roses were too pink so I went over them with an alcohol marker to make them match the red.


And there you have sketch 112... sort of.

Ddd


Posted by studio3d@ccgmail.net at 12:01 AM PDT
Friday, 25 July 2014
Operation Write Home - Sketch 111
Topic: Sketch Challenge

Yesterday was a little break from the sketch challenges but today we are right back at it. Here is OWH sketch 111:

I decided to keep using the old photographs and today I selected this branch with berries encased in ice. I added decorative papers to pull out colors from the photo.

The particular paper pad I was using is a little 'over distressed' in my view because there is no way the bottom right corner doesn't look like I spilled coffee on it. There was no way to cut the paper to eliminate this section or to cover it up, either.

I bordered the photo to make it stand out more:

What with the ice, this one will go into a pile for 'winter' cards.

Ddd


Posted by studio3d@ccgmail.net at 12:01 AM PDT
Thursday, 24 July 2014
New Kids On the Block
Topic: Around the House

We are always happy to see the deer wandering through the backyard and had caught sight of 4 different ones this spring. One looked very round and we assumed this was a pregnant doe and waited anxiously for the appearance of a fawn.

A couple of weeks ago we finally saw when she brought them out of hiding - yes... two of them! This is the fourth year that a doe has dropped twins and nested them in our pasture. Most likely it is the same doe and the others hanging about could be her female children from previous summers.

We finally managed to catch the little family with the camera and are ahppy to report that they all appear healthy.

What fun!

Ddd


Posted by studio3d@ccgmail.net at 12:01 AM PDT
Wednesday, 23 July 2014
Operation Write Home - sketch 110
Topic: Sketch Challenge

AGAIN I find myself in need of a Sympathy Card - three of them in three weeks' time. Cry

I just kept going with the OWH sketches and it was time for number 110.


Using the watercolor stamping technique, I colored up this single sprig stamp using Distress Markers. Then I misted with water and dried with a heat gun. I repeated this process with darker markers. When the second run was dry I applied a Distress Ink pad directly to the paper and misted that too. Final details were added with fine black marker.


I wanted this to have a softer look so I tore two edges to bring it down to the prescribed size. I played with the placement of the elements a bit to leave room for the sentiment.

The sentiment is a silver peel-off sticker which I colored with alcohol marker before removing from the backing sheet. The feature panel is popped up on foam tape.

Ddd


Posted by studio3d@ccgmail.net at 12:01 AM PDT
Tuesday, 22 July 2014
Operation Write Home - sketch 109
Topic: Sketch Challenge

You get a BIG image space to work with on OWH sketch 109:

I used a line art flower for my watercolor stamp image. I colored it with Distress Markers, stamped and misted with water. The orange centers were done the same way in a separate step as were the green leaves.

When all was to my liking I colored the stamp with a blue Distress Marker and stamped over the dry images.

Instead of the large embellishment I used a cluster of three orange brads.

Ddd


Posted by studio3d@ccgmail.net at 12:01 AM PDT
Monday, 21 July 2014
Operation Write Home - sketch 108
Topic: Sketch Challenge

I turned OWH sketch 108 on its side to use with the image I had stamped:

For the watercolor stamping on this card I colored on the stamp with Distress Markers and 'huffed' on it before pressing to the watercolor paper. This was misted with water and dried with the heat gun.

I used darker versions of the markers to add details and spritzed again and dried. Then I added water to some Barn Door Distress Ink and used a brush to add color flecks.

The papers were selected on color alone.

Since the papers were winter I wanted to reinforce that with the stamped image. So I added a bit of Liquid Pearls like snow on the needles and pine cones.

I added in some fine black pen work for definition.

Ddd


Posted by studio3d@ccgmail.net at 12:01 AM PDT
Sunday, 20 July 2014
Operation Write Home - sketch 107
Topic: Sketch Challenge

I wanted to try out more of the watercolor stamping technique and started in with OWH sketch 107:

When I did this technique before, I stamped a slew of them all at the same time and all with just two stamped images. This time I worked on a single image and made the card from it before moving on to the next sketch. This kept all of them looking different from one another.

For this one I stamped the image on watercolor paper with a stamp I had inked with three greens in Distress Ink pads. The image was misted with water to get it to blend and I dried it with the heat gun. I then used three colors of Distress Ink pads on my craft sheet and spritzed that with water. The image paper was dipped into the wet ink and dried - several times - to get the distressed and splotchy look I was aiming for. The final step was to ink the image with black and stamp over the original image.

I trimmed it down to the specifications in the sketch and drew in a black fine border.

The rest is just layering of papers and the addition of a strand of twine knotted in place.

Ddd


Posted by studio3d@ccgmail.net at 12:01 AM PDT
Saturday, 19 July 2014
Operation Write Home - sketch 106
Topic: Sketch Challenge

A new stamp gets a break-out for OWH sketch 106:

I started this card wanting to feature a new stamp set. I stamped the image on watercolor paper and used Distress Markers to color it in. I added water to the image after coloring using an aquabrush.

The image was cut out with a round die which I also used to impress the edge into it.

Papers to got with the image were selected and assembled before popping up the image on foam tape:

I added a gold peel-off sticker for the sentiment.

Ddd


Posted by studio3d@ccgmail.net at 12:01 AM PDT
Friday, 18 July 2014
Operation Write Home - sketch 105
Topic: Sketch Challenge

Sometimes a little silliness is in order. OWH 105 was my opportunity:


I started by stamping a flower head on watercolor paper and using Distress Marker ink and an aquabrush to to the coloring. I cut it out using a round die and left it in the die to impress the rim around the edge.

A crazy paper for the background set the tone for the rest of this. I cut the three paper strips using colors from the image and assembled the card front while popping the image up on foam tape.

I added the stamped sentiment as a banner at the left and then found that the flower head was just 'floating' there. So I used a fine line black marker to sketch in a stem and two leaves. I used a Distress Marker to color these in for a little whimsy.

Ddd


Posted by studio3d@ccgmail.net at 12:01 AM PDT
Thursday, 17 July 2014
Operation Write Home - sketch 104
Topic: Sketch Challenge

And now, back to some original works. I haven't used OWH sketch 104 before:

I can't remember why I had three 'inchies' laying on the desktop but  they sure fit the bill for this sketch. I framed them up in the 1.5 inch squares called for in the sketch and continued with the layering specified.

I decided to 'split' the center element by moving the ribbon to the left and substituting a sentiment for the bow, moved to the right.


Those inchies are leftovers from years ago and were made with stamps (flowers and chop), stickers (birds, trim and gold stems) on yellow chipboard.

Ddd


Posted by studio3d@ccgmail.net at 12:01 AM PDT

Newer | Latest | Older