« September 2014 »
S M T W T F S
1 2 3 4 5 6
7 8 9 10 11 12 13
14 15 16 17 18 19 20
21 22 23 24 25 26 27
28 29 30
You are not logged in. Log in
Entries by Topic
All topics
3D paperwork
A - Z challenge 5
A - Z challenge 7
A - Z challenge round 4
A to Z challenge round 3
A to Z round 2
A to Z round 6
A-Z round 1
Around the House
Art Challenges
Artist Trading Cards
Backgrounds
Beads
Bible Journaling
Books
Boxes
Collage
Color Challenge
Coloring
cookbook
Die Cuts
Digital Projects
Digital Stamps
Drawing
Dry Embossing
Fabric Stuff
Fantastic Folds
Field Trip
Home Decor
How Does Your Garden Grow?
Hymnal Art
In The Kitchen
In the studio
Jewelry
Lettering
Links
Multi-Technique
Music to Work By
Musings
Nail Art
New Work
Online Class  «
Other Hobbies
Other Projects
Painting
Paper Embroidery
Paper Piecing
Photo
Pretty Paper
Quilting
Random
reading
Scrap Recovery
scrapbooking
Sewing
Sketch Challenge
Some Backlog
Stamping
Stencils
Stickers
Supplies
Teabag Folding
Techniques
Testing
tips and tricks
Tutorial
Web resources
Welcome to my Blog
Work By My Friends
workflow
Writing
Blog Tools
Edit your Blog
Build a Blog
RSS Feed
View Profile
Group One
In & Out of Studio 3D
Thursday, 11 September 2014
Stretch Your Stamps 2 - Day 1 - Backgrounds - Reverse (2)
Topic: Online Class

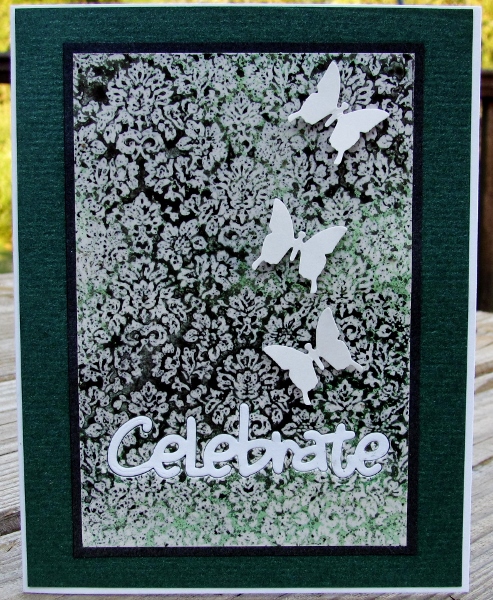
This card uses the same brocade stamp as those shown yesterday but with a different technique entirely.

The stamp in inked with Versamark and stamped on white cardstock. Then it is embossed in clear powder.

The page is then sprayed with glimmer sprays in a couple of colors. The ones I had that were not clogged turned out to be black and green. These are rubbed into the open areas of the card and dried.

The last step is to place the cardstock between pieces of paper towel and scratch paper and iron it until the embossing melts and absorbs into the covering papers.

I used a die to cut the sentiment out of the panel and then cut another one from white. The panel is adhered to the background and the white word inlaid into the opening.

I used shimmer papers for the bordering and backing and finished with three butterflies punched from white cardstock.

Ddd


Posted by studio3d@ccgmail.net at 12:01 AM PDT
Wednesday, 10 September 2014
Stretch Your Stamps 2 - Day 1 - Backgrounds - Reverse
Topic: Online Class

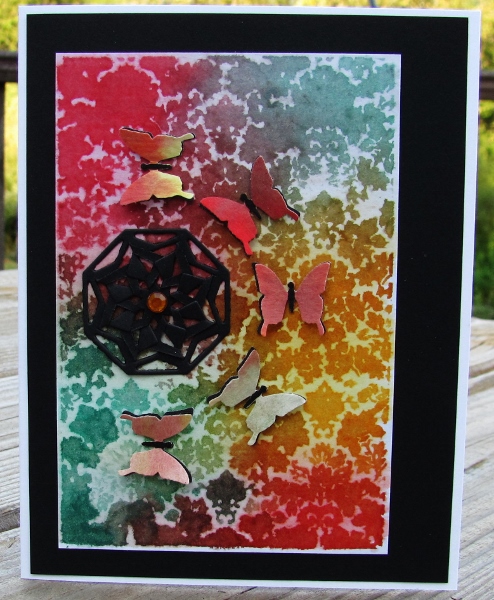
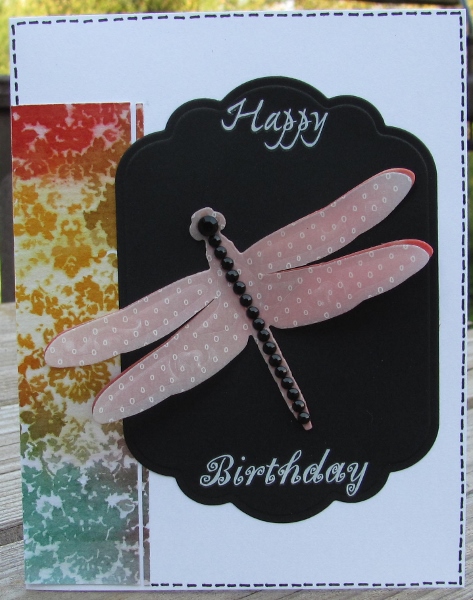
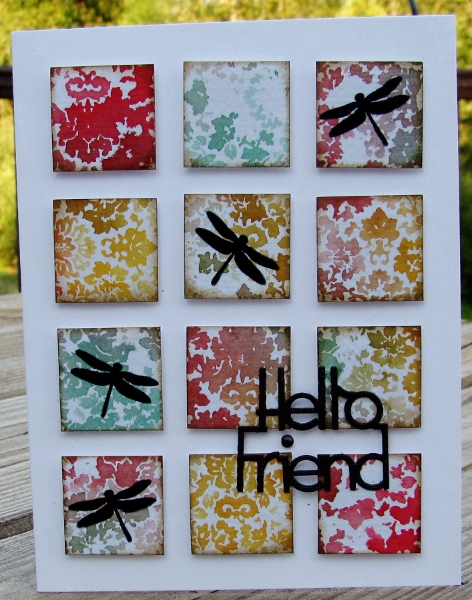
Still Day 1 of the online class but we've switched to 'reverse' backgrounds. Well, the class did but I didn't have one so I just decided to use a 'brocade' stamp that had the same feel as theirs.

The technique used had Distress Ink pads pressed onto a craft sheet and sprayed with water. The stamp is pressed into them and moved just enough to leave no un-inked areas. Then the stamp is pressed gently onto watercolor paper and allowed to dry. 

While that is drying the ink is sprayed again and stamped onto another sheet. And this is repeated for a third impression. This gives three color values.

I used the original impression (the brightest) on a black background to intensify the colors. I cut and assembled a black 'cut and tuck' diecut. This is surrounded with 5 black punched butterflies which are overlaid with colored ones.

The second impression didn't have a panel of useable area so I trimmed off a wide and a very narrow strip to use on a white card base. I added a black diecut panel to back a dragonfly diecut with layers of both inked watercolor paper and vellum. The dragonfly was decorated with black rhinestones and a sentiment in white rubons was created before decorating the outer edge with black dashed lines.

The third impression was a beautiful pastel panel. I cut it into 1" squares and inked the edges with Distress. These were adhered to a white card base with foam tape. Dragonfly silhouettes were stamped onto random blocks and a diecut black sentiment was glued to the face. The 'I' is dotted with a black rhinestone.


That made a trio of beauties!

Ddd 


Posted by studio3d@ccgmail.net at 12:01 AM PDT
Tuesday, 9 September 2014
Stretch Your Stamps 2 - Day 1 - Backgrounds - Lines
Topic: Online Class

Wow! Long title, huh?

I took an online class last month on learning more ways to use stamps I already own. The instructors selected two stamps for each category and spent two days covering techniques.

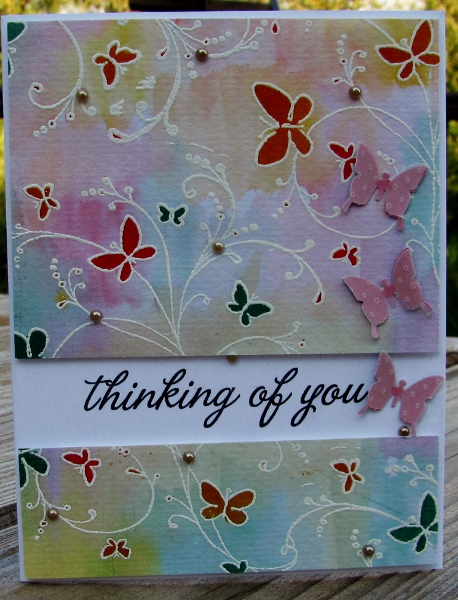
This is the first background stamp I used for the class - an overall pattern in line art. The one used in class was a graphic grid of sorts.

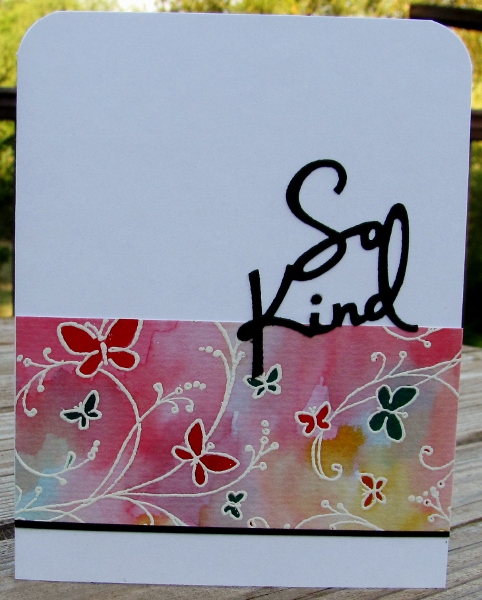
The technique was to stamp on watercolor paper with Versamark and emboss in white. Elements were watercolored and, before they dried, a brush with clear water was swished over them to dilute the color and spread it into the background. Then the background was dried. the original colors were again painted onto the elements and dried.

For this first card I cut the painted panel down to create a top and bottom panel and mounted them on foam tape on a white card base. The sentiment was stamped in the open space and the background was embellished with sticky back pearls and punched butterflies.

I used the left over piece of the created background as a strip across a white card base. This was combined with a black diecut sentiment and a thin black strip below the colored panel.


I used a 1/2 inch corner chomper to round the top corners.

Ddd


Posted by studio3d@ccgmail.net at 12:01 AM PDT
Thursday, 27 December 2012
Setting Myself Up to Succeed
Topic: Online Class

I found a link to an inspiring-looking month-long FREE online class series starting in January. Industry leading artists will be offering daily workshops on the topic of 'Creative Jumpstart'. Well, who couldn't use a little inspiration from the pros?

So I jetted right over to http://nathaliesstudio.com/2012/12/20/creative-jumpstart-2013/ and got myself signed up to play along. Join us! Lesson links come daily via email.

There are also prizes offered by the instructors and by the workshop sponsorers. Name-brand art products, too.

Last year over 4500 people participated! WOW! So many people seeking inspiration.

I'm ready to go... bring it on!

Ddd


Posted by studio3d@ccgmail.net at 12:01 AM PST
Monday, 6 August 2012
Stretch Your Stamps - Day 1
Topic: Online Class
I took an online class recently called Stretch Your Stamps. Popular stamp artists focus on multiple ways to use the stamps you already have to get more mileage from them. Day 1 the lessons were ways to use background stamps. I don't have a lot of these and didn't have the one they used for the lessons, so I just pulled out the 3 I did have: A field of dots, a distressed plaid, and swirls with butterflies.

Our first lesson was using Cut 'n Dry felt pad and reinkers to make a custom rainbow stamp pad. I've had the material for years and have not used it yet, so 'yay for me'. I used Adriondack reinkers to create an ink pad that is color bands on a diagonal.

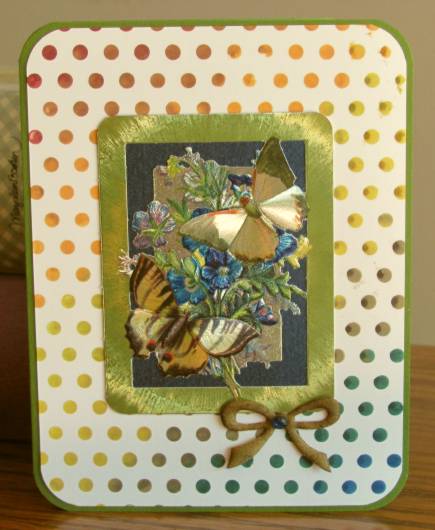
This first card uses the dot background on the ink pad. I used the background to feature a foil illustration and tied everything together with rounded corners. The bow is fabric and I added a sticky rhinestone to the center.

Then I made a whole bunch of these backgrounds with the distressed plaid stamp. On this card I stamped the Hero Arts / OWH house and hearts directly on the background. I used a water brush to blend the background colors in these areas. Then I drew stems for the hearts and stamped grass. The greeting is from my pre-stamped file and I rounded two corners and placed stamped and cut out clouds on top.


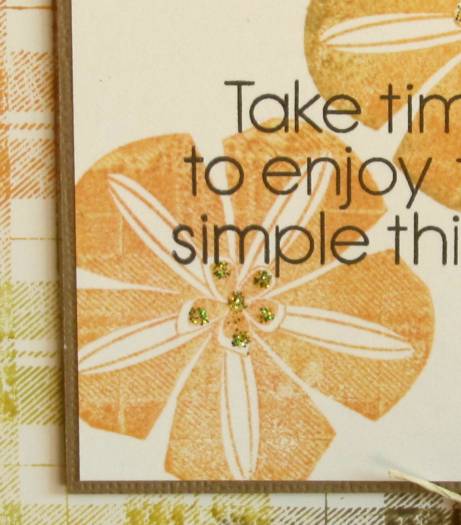
I used another of the rainbow backgrounds for the next lesson which was using a background stamp to 'kiss off' some of the ink on a solid stamp. I used the same plaid to kiss the flower stamp, added a sentiment and mounted with a scrappers floss winding accent. Here is a full view:
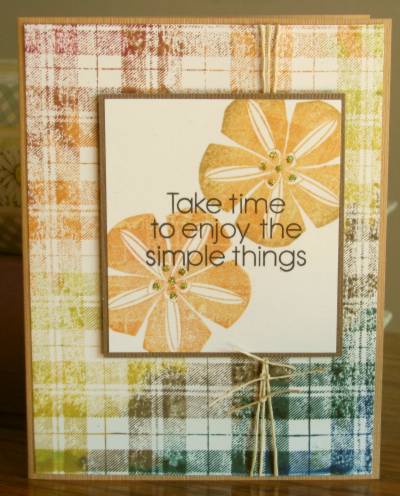
And on the close-up you can see the kissed plaid better. Also note that I added green Stickles to the flower centers.

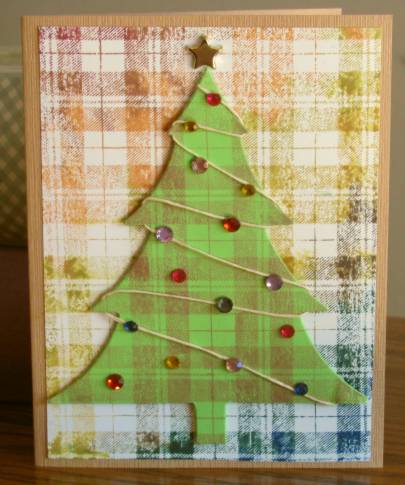
I also used the rainbow plaid for the background on this next card. The lesson for this one was using the background stamp on a shaped element. I used mine on the die-cut tree creating what I call a 'scotch pine'. LOL! I popped it up on foam tape aligned with the plaid in the background and then added a winding of scrappers floss and sticky rhinestones. I also added a star brad to the tree top. (A very 'country' Christmas)
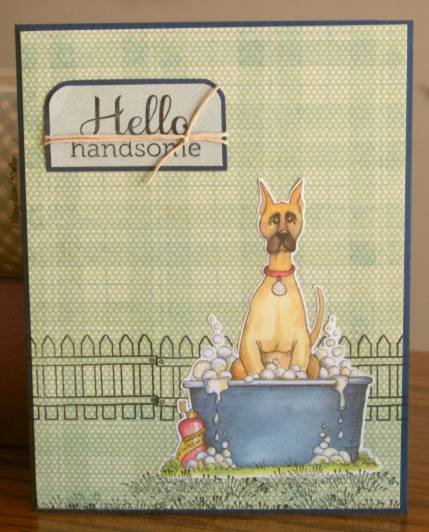
Next lesson was using a background stamp on patterned paper. I inked the plaid in three shades blue chalk ink and stamped on dotted green paper. I stamped the fence from the Hero Arts / OWH set and cut out the image from the scrapbooking page-a-day calendar. The paper for the text has a subtle white/blue dot pattern and I gave it a twist of scrappers floss. The grass is a stamp of several impressions.
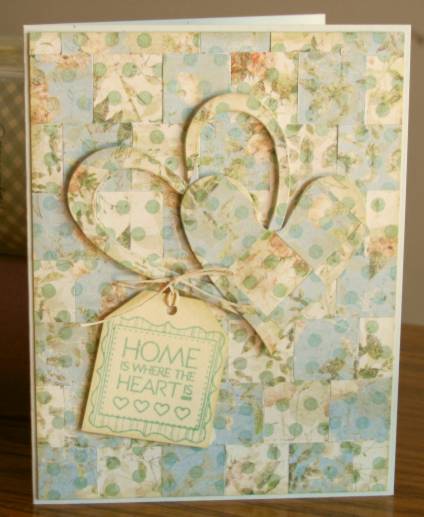
The next lesson was stamping on TWO patterned papers with different ink colors, cutting the papers into shapes and reassembling them. I had two papers that were the same print but one had a cream background and one blue. I stamped both with the dots background and cut 3/4 inch squares. These were reassembled over a xyron background. There was enough for the card front plus so I used the plus to die-cut the hearts. These were then popped up on foam tape. I stamped the tag and tied it to the heart with scrappers floss.
And, finally, I used a smaller background stamp with swirls and butterflies. I inked with one color of chalk ink and stamped and then repeated with 5 other ink colors. I used Distress Markers to color in the butterflies. I placed a strip of dark green to tone down some of the purple that was too bright at the bottom. Then I die-cut two butterflies in colors to match the background and layered them so the top one has its wings raised. The greeting is from the pre-stamped bin.
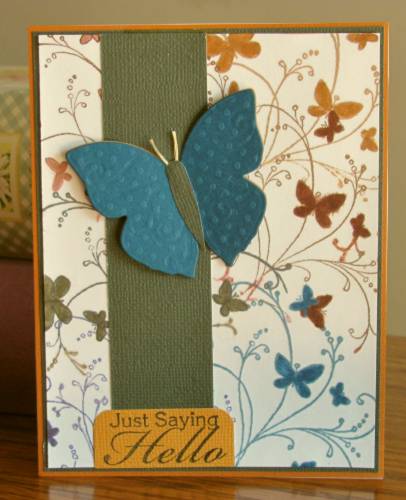
And so ends Day 1 of the class. If the rest of the class is this informative, I will be VERY happy.

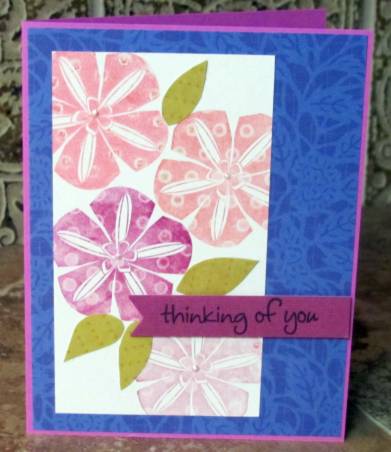
I made extras of the backgrounds while I had the materials out and put together a few more cards. This one is from the 'kissing' technique. I used the dotted background stamp on the solid flower. By adding some cut out leaves and some liquid pearl flower centers I had a great feature panel for a card. I added it to a blue background from the scrapbooking page-a-day calendar and popped up a sentiment on foam tape.

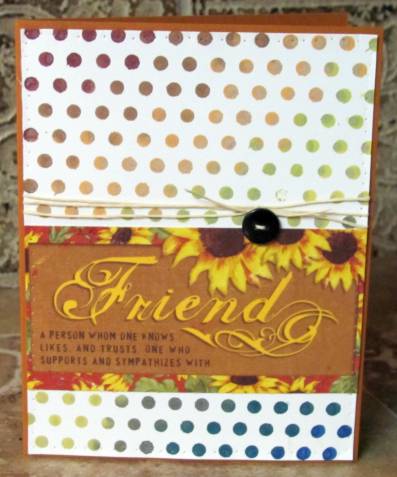
This one with the dots background just got a printed tag cut down for it, a twist of twine and a button. I mounted on colored cardstock base.

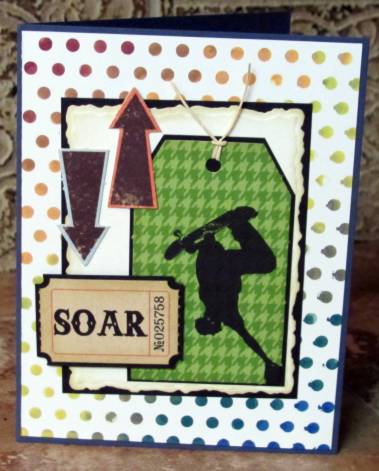
Anotherdotted background got a printed tag, an addage ticket, a deckle die-cut panel all backed with black plus two die-cut arrows and a bit of twine for the tag. This one got a denim blue cardstock base.

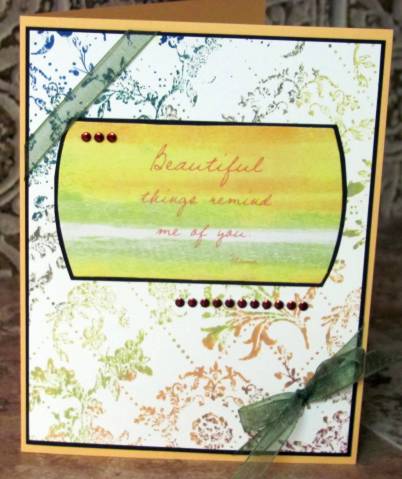
For this one I used a different background - one I had inked up but set aside from class as I wasn't really pleased with it. Then I found this printed tag and it suddenly had more appeal. I backed both with a thin black border and tied some sheer moss-green ribbon on the diagonals. As a final touch I added some red 'nail head' sticker dots.
A total of 11 cards from day one.

Ddd


Posted by studio3d@ccgmail.net at 12:01 AM PDT
Updated: Tuesday, 31 July 2012 5:32 PM PDT
Newer | Latest | Older