« January 2016 »
S M T W T F S
1 2
3 4 5 6 7 8 9
10 11 12 13 14 15 16
17 18 19 20 21 22 23
24 25 26 27 28 29 30
31
You are not logged in. Log in
Entries by Topic
All topics  «
3D paperwork
A - Z challenge 5
A - Z challenge 7
A - Z challenge round 4
A to Z challenge round 3
A to Z round 2
A to Z round 6
A-Z round 1
Around the House
Art Challenges
Artist Trading Cards
Backgrounds
Beads
Bible Journaling
Books
Boxes
Collage
Color Challenge
Coloring
cookbook
Die Cuts
Digital Projects
Digital Stamps
Drawing
Dry Embossing
Fabric Stuff
Fantastic Folds
Field Trip
Home Decor
How Does Your Garden Grow?
Hymnal Art
In The Kitchen
In the studio
Jewelry
Lettering
Links
Multi-Technique
Music to Work By
Musings
Nail Art
New Work
Online Class
Other Hobbies
Other Projects
Painting
Paper Embroidery
Paper Piecing
Photo
Pretty Paper
Quilting
Random
reading
Scrap Recovery
scrapbooking
Sewing
Sketch Challenge
Some Backlog
Stamping
Stencils
Stickers
Supplies
Teabag Folding
Techniques
Testing
tips and tricks
Tutorial
Web resources
Welcome to my Blog
Work By My Friends
workflow
Writing
Blog Tools
Edit your Blog
Build a Blog
RSS Feed
View Profile
Group One
In & Out of Studio 3D
Sunday, 24 January 2016
Top Of the Heap
Topic: Quilting

And as my final baby quilt top for the church project I created a 14 x 14 grid of 2.5 inch squares that were the final small scraps from all the other baby quilt tops I had made.

This collection of scraps was brighter than those I used in the last grid quilt and I enhanced that by using a bright turquoise border.


This is number 23 - and I am done!

Ddd


Posted by studio3d@ccgmail.net at 12:01 AM PST
Saturday, 23 January 2016
Paper Bingo Three
Topic: Paper Piecing

And here we are with my third misguided papercraft bingo. I'm not sure yet if I will go back and try to create with the CURRENT bingo challenge, or not. For this card I used "Paper Piecing", "Patterned Paper" and "Ribbon".

For this one I chose a couple of background papers I had created a while back and combined them. The back layer, bordered by a white shimmer cardstock over a magenta base card, is an alcohol ink/metallic marble on glossy cardstock. Over this I used a diecut shape cut from a wrinkle-free Distress panel.

For the stamped image, I colored all the skin with alcohol markers and paper pieced the hair, clothing and bunny.

I used a craft knife to trim close around the image, separating it from its white background. I used a die to cut two skinny hearts from shimmer paper and used them behind the image as wings.

I used glimmer gel pen on the flowers in her hair, her eyes, the lace hem and the buttons on her boots.

I was liking this glimmer so I added it to the rim of the diecut background and on both edges of the ribbons.

I used a large silver peel-off greeting at the top of the card.

Ddd


Posted by studio3d@ccgmail.net at 12:01 AM PST
Friday, 22 January 2016
Bingo Papercrafting
Topic: Paper Piecing

With still the wrong bingo challenge in hand I used the paper piecing parts I had set aside to make another card. This time I used, from the bingo grid, "Paper Piecing", "Candy Dots" and "Blue".

I chose a white cardstock with embossing on it and sponged on blue Distress Ink to show off the texture, rounded the corners and mounted it on a blue card base - also with rounded corners.

On the stamped image, I used alcohol markers to color all the skin areas and the ground and then paper pieced the hair, clothing and bunny with scrapbook papers.

I used gel pens to color in the flowers in her hair and on her apron, her eyes and the buttons on her boots.

I only had clear candy dots so used them over the flowers on the apron.

I used a craft knife to cut along the edges of the image and slid the halves of a die cut butterfly in to replace the stamped wings. These were popped up on foam tape.


I rounded the corners on the image panel and popped it up on foam tape over the background. Then I used glitter dust gel pen over the wings and the lace on her hemline.

Ddd


Posted by studio3d@ccgmail.net at 12:01 AM PST
Thursday, 21 January 2016
Craft Bingo
Topic: Paper Piecing

I am SO-O-O-O-O lost! I set aside a papercrafting challenge to work on later and then, when I pulled it out, I pulled out an OLD one that looked similar to it instead. So I made three cards for the challenge and then can't use them for that after all!

The challenges were both papercrafting bingo where a 3 x 3 grid is filled with techniques, colors, etc and you make a card that uses three of them that appear in a line in any direction - 8 combinations are possible.

So, for the first card I chose to use "Birthday", "Yellow", and "Paper Piecing".

Quite a while back I had stamped an image on various scrapbook papers as well as on a white background. Then I put them all in an envelope to use later... hey, it's later!

On the white layer I used alcohol markers to color all the areas of skin. Then I cut all the papers and layered them onto the hair, clothing and bunny.

I used alcohol markers to color a ground for her and colored her wings with very pale yellow.

I bordered the trimmed image with bright yellow and popped it up on foam tape over sheet music I had sponged yellow and grey Distress Inks onto.


For embellishments I added rhinestones over the flowers in her hair, Liquid Pearls to the buttons on her boots and the flowers on her dress and glitter dust gel pen to her wings.

I used a large silver Dazzle sentiment at the top.

Ddd


Posted by studio3d@ccgmail.net at 12:01 AM PST
Wednesday, 20 January 2016
Leftover Stencil Pattern
Topic: Backgrounds

I had one more of the stencil impressions, this one was a 'second generation' pull so it did not have as much ink on it. I decided to trim it down and use it 'as is' rather than trying to alter it.

I used a foil 3D image in an oval and centered it on the background.

I also used a coordinating strip from the foil sheet to border the top and bottom.

There were four foil blocks in various colorings and I used one of these, raised up on foam tape, to display silver peel-off text.


I placed this on a violet base card with a border showing all around.

Ddd


Posted by studio3d@ccgmail.net at 12:01 AM PST
Tuesday, 19 January 2016
Three Step Background
Topic: Backgrounds

I went to a lot of trouble to create a great background and then covered it up! LOL!

When I made the December 2015 'Tag' from Tim Holtz, I used a piece of white cardstock to blot off the extra Distress Stain from the stencil after spraying it. It's been sitting on my work table waiting for inspiration and this was the day.

The stencil was this one:


The Distress Stain had been sprayed through the stencil (blue in color) and the leftover stain stayed on the surface. When the white cardstock was pressed onto it the stencil itself made the impression, not the holes in the stencil.

The next step I took, after trimming the piece to card size, was to do a letterpress technique using picked raspberry Distress ink and a Cuttlebug folder called Ornamental Iron.

I smeared the ink on the inside of the folder and centered the blue printed layer inside it. When it was run through the Cuttlebug the ink was transferred at the same time as the impression was being raised. This also made three colors as the blue original and the raspberry letterpress combined where they overlaid into a violet.

The third step was to take a Distress Ink pad in Black Soot and swipe it over the top of the raised areas of the ornamental iron impression.

I really liked the way this came out. However, it was pretty bright to use it on the card with the images I had chosen so I overlaid it with vellum to mute it.

I added a 3D tea time image to the front with some ribbon across the bottom to serve as a table.


I mounted this on a violet base card and used a silver peel-off greeting sticker.

Ddd


Posted by studio3d@ccgmail.net at 12:01 AM PST
Monday, 18 January 2016
Bug-Eyed
Topic: Paper Embroidery

Next up in the series of paper embroidery cards I got done was one for a swap on Owls. I found a free pattern of an owl that I had never done up before. Just ugly enough to be cute.

I selected a patterned orange and cream background cardstock and stitched with various shades of orange and brown.

I added white gel pen to the center of the eyes as the placement on the cardstock had them coming out with two different colors.

I selected a matching leafy background for an additional layer and bordered both layers with chocolate brown.


This turned out to be a fall card even though it will be swapped out in February.

Ddd


Posted by studio3d@ccgmail.net at 12:01 AM PST
Sunday, 17 January 2016
R Is For Roses
Topic: Paper Embroidery

Seems that, between all the groups I belong to, there are several swaps or challenges every year with the theme 'roses'. But it is a topic I like so I do most every one.

I do own several patterns where the embroidery itself forms the roses. But I had a great diecut foil 3D picture and decided to use that in a frame.

I used a verigated pink thread for one series of scrolls and a burgundy for the other, matching the colors in the flowers. I did the stitching on a cardstock with extremely small chevrons in gray and white.

When I got to the steps of mounting I cut off the ends of the cardstock and turned them over to show a two-toned pink houndstooth.


The photo shows this with too much blue. The burgundy layering matches the thread in the darker scrolls.

Ddd


Posted by studio3d@ccgmail.net at 12:01 AM PST
Saturday, 16 January 2016
That Is So Slick
Topic: Paper Embroidery

I got new swap assignments for the new year so I set about selecting patterns for them, choosing cardstock to stitch on and filing them in monthly order to work on.

I got the first three done in pretty good order.

The first of these is for a swap called Winter Sports. I chose a pattern with an ice skating snowman. 

The cardstock has cute banners hanging at the top and it makes it look like he/she is on a rink.

I chose threads to go with the banner colors, using various pinks. The blades of the skates are silver metallic thread.

I added three word stickers (colored with pink marker), added tiny button brads and mounted it on cardstock with a shiny silver border showing.

Ddd


Posted by studio3d@ccgmail.net at 12:01 AM PST
Friday, 15 January 2016
Quilt Top Baby Project - Number 22
Topic: Quilting

The tops for the baby quilt project are not due until the 16th so I took scraps from the other ones I had made and cut up enough 3 1/2 inch squares to do another. The result is a 12 x 12 grid with a 2 1/2 inch border of navy blue.

This is number 22 for the project:


This will make a great quilt for a little boy.

Ddd


Posted by studio3d@ccgmail.net at 12:01 AM PST
Thursday, 14 January 2016
12 Tags Of 2016 - January
Topic: Multi-Technique

Sure enough, Tim Holtz returned with a monthly tag challenge for 2016. Each month he will reprise two old tag techniques he has done in past years and combine them into one tag. I am joining in again - right on the heels of finishing my last tag of 2015!

Here are the two tags Tim combined:


And here is the tag he made for January 2016:


Here is the process I used to create my version:

- Choose a stamp for the chalkboard center of the card (I chose a birthday message)

- Select a cardstock and apply metal foil tape to the top and the bottom edges (I used card-sized rather than a tag)

- Emboss just the metal areas with an industrial look folder (I used diamond plate) 

- Use felt blending tool to apply black alcohol ink to metal areas (Tim  did his with black Distress Paint)

- Use soft cloth or paper towel to wipe away excess ink to reveal metal

- Dry with a heat tool

- On black cardstock, ink stamp with Distress Embossing ink and cover with Frosted Crystal Embossing Powder and heat with heat tool (I did not have these products so I inked my stamp and made the impression with a glue stamp pad. Then I ground some white chalk and tapped it into the glue and dried it with a heat gun)

- Scribble over the image with white chalk including background

- Use fingers to rub in chalk

- Tear top and bottom edges 

- Adhere chalk layer to metal layer using brads

- Trim sides of chalk image to fit on metal layer

- Adhere gear embellishments using brads

- Use strong adhesive to mount piece to a base card

Here is my finished card:


What a great card for a guy - all that industrial look. We're off to a good start.

Ddd


Posted by studio3d@ccgmail.net at 12:01 AM PST
Wednesday, 13 January 2016
12 Tags of 2015 - A Late Creation For December
Topic: Die Cuts

Despite my best intentions - making all of the 12 tags of 2015 by Tim Holtz - I got so wrapped up in the holidays that I didn't get December's done last year. But I decided to go ahead and make it anyway, even though it is a month late.

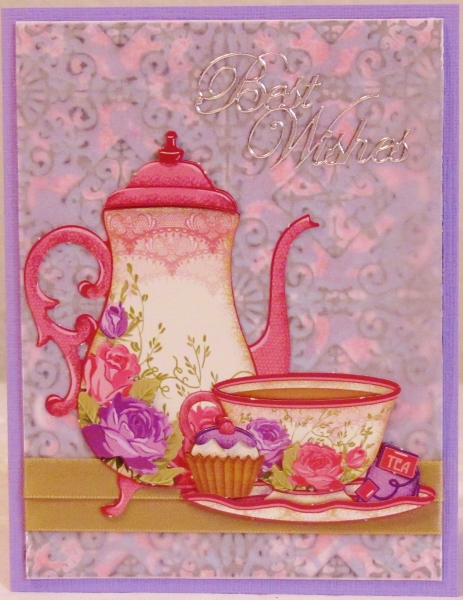
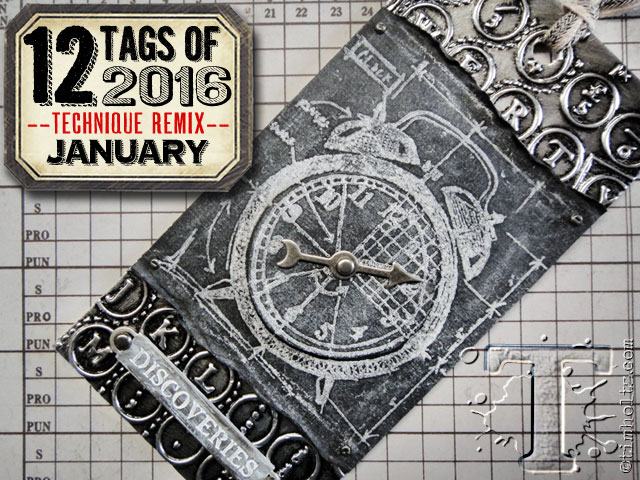
Here is the original tag created by Tim:

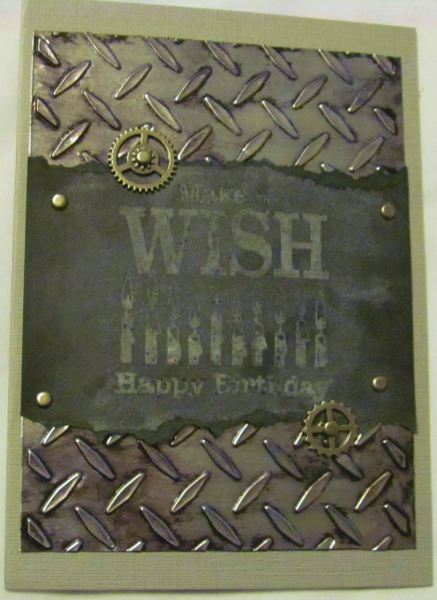
Once again, I chose to make a showpiece instead of a tag. Here is the process I used.

- Cut a piece of grasscloth wallpaper sample into  the desired size.

- Place on paper towel

- Use Distress Stain to tint the piece

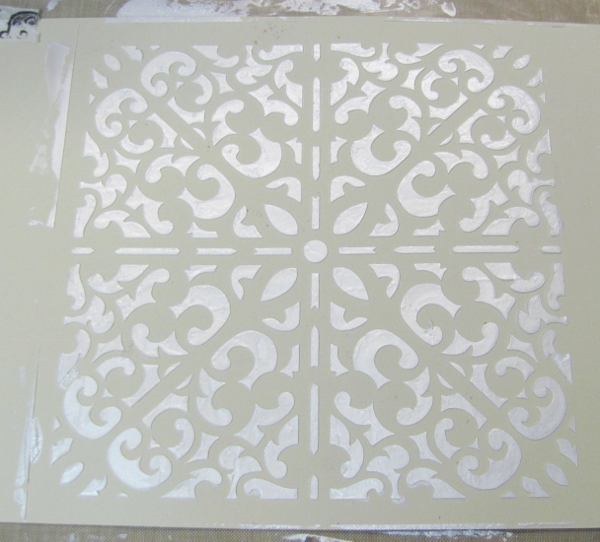
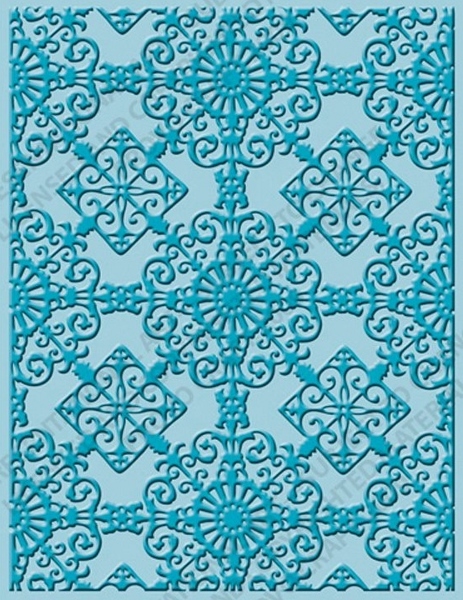
- Lay stencil over the piece and spritz with another color of Distress Stain

- Place a clean paper towel over the top and blot away extra ink

- Remove stencil and dry piece with a heat gun

- Run piece through Xyron to apply adhesive to the back

- Adhere to stiff backing and trim backing to size

- Ink edges of piece and backing

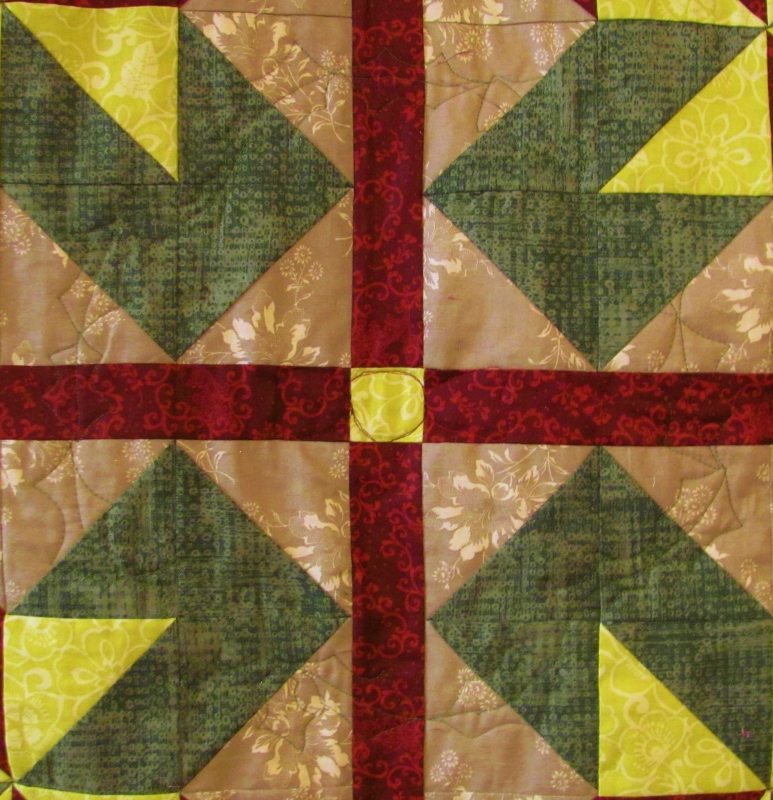
- Select various greens of kraft core cardstock and a red piece for other parts

- Diecut different greenery from each color of kraft core

- Sand surface with sanding block

- Lightly ink edges with Distress Ink

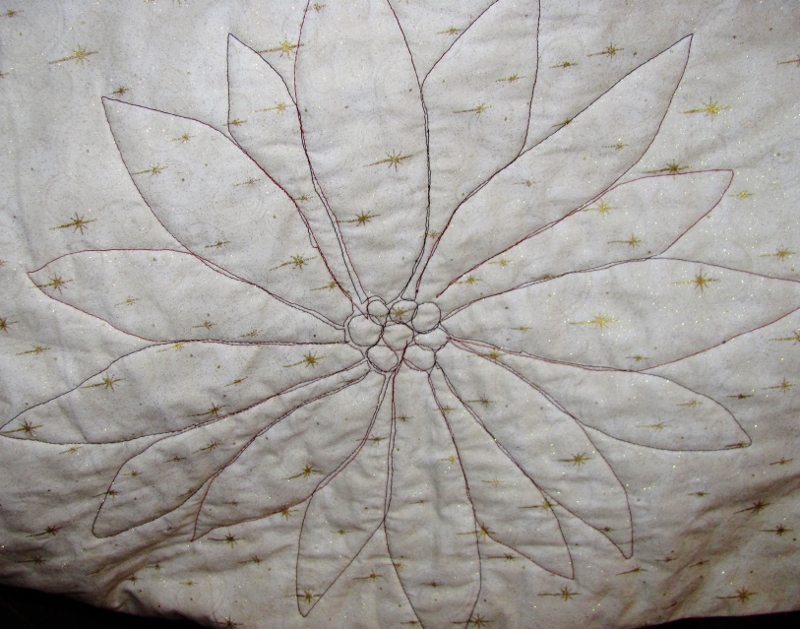
- On the base piece, trace a circle

- Gently crunch and crumple the diecut foliage

- Use glossy Accents to adhere greenery around the circle

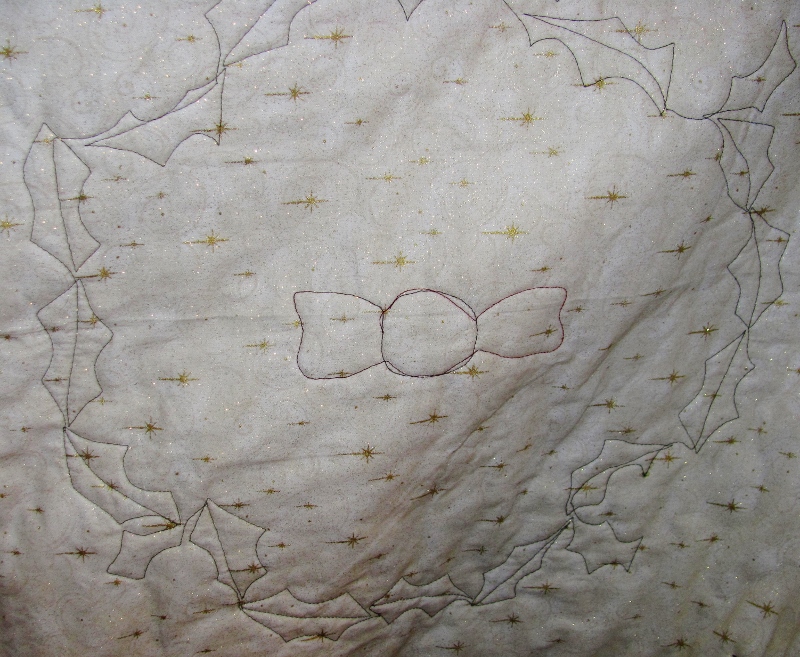
- Create a dimensional bow from red kraft core cardstock

- Adhere bow to bottom of wreath using Glossy Accents

- Punch tiny dots from red kraft core cardstock. Adhere to wreath in twos and threes as holly berries

- Diecut greeting from red kraft core cardstock

- Sand surface with sanding block

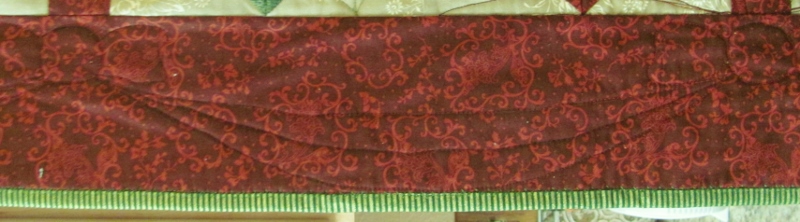
- Cut a piece of sage green kraft core into a wide strip and ink edges with Distress

- Attach to main piece with small brads

- Adhere greeting to strip with Glossy Accents

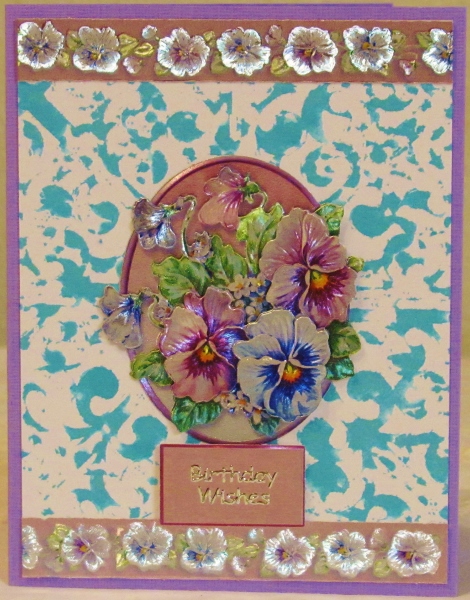
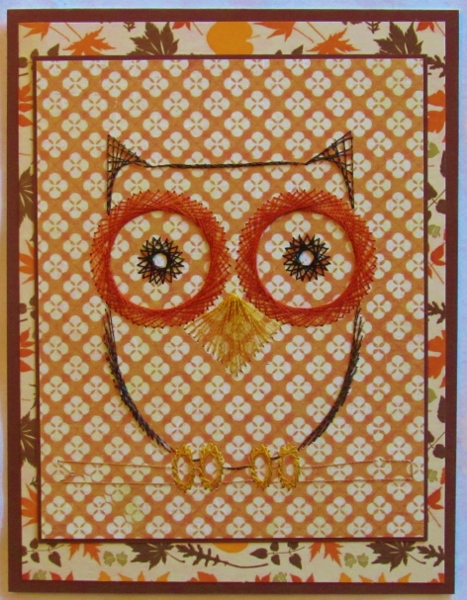
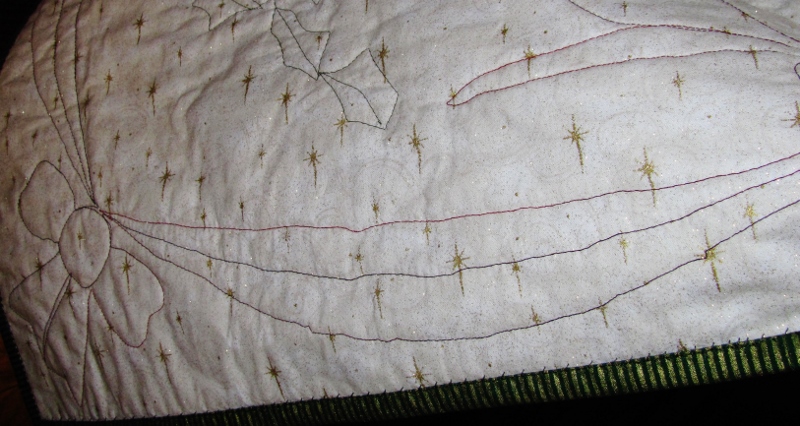
And here is the final piece:


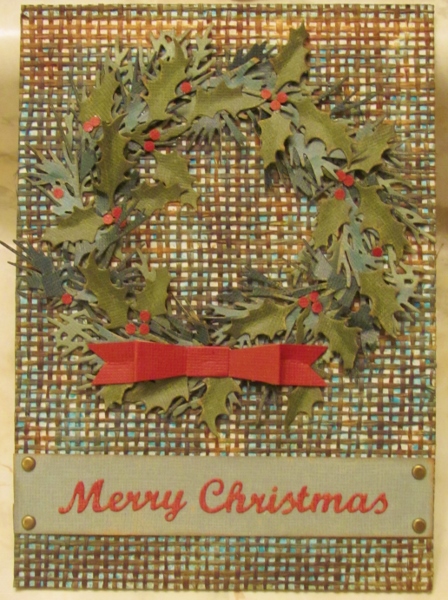
And, finally I am truly done with the 2015 'tags' series.

I do intend to give it a go for 2016 as well, so we'll see where that takes us.

Ddd


Posted by studio3d@ccgmail.net at 12:01 AM PST
Tuesday, 12 January 2016
Maple Leaf - No Rags
Topic: Quilting

This is the final quilt I pieced on the November 2015 quilting cruise. The instructor was Kimberly Einmo.

We were sent an illustration ahead of time along with the yardages we would need and cutting instructions. We cut the fabrics as specified and packaged them with coding so we would be able to quickly access the right ones for each step.

The class was taught with step by step directions and the use of a special ruler that Kimberly designed (and I bought).

The illustrated quilt design had  similar colors in solids and the center was an appliqued sunshine graphic, giving the quilt a southwestern feel. I chose similar colors but chose prints that featured fall flowers. then I created four maple leaves to applique on the center panel.

The quilt design stopped with the sunburst area but this left it too small for my taste. So I added a wide border in the background color to expand it.


The starburst areas end up looking like maple leaves, as well.

I quilted all the teal areas with vines and leaves and all of the starbursts with an echo line 3/8 inch inside them.

The finished size is about 48" square.

Ddd


Posted by studio3d@ccgmail.net at 12:01 AM PST
Monday, 11 January 2016
Sour Patch
Topic: Quilting

The second class I took on the quilting cruise in November (2015) was a mystery quilt with instructor Kimberly Einmo.

Before I signed up for this class I took a mystery class on Craftsy with her as the instructor to see if I liked her style. Out of that came two lovely quilts from my stash.

For this class we were sent a set of direction on how to select fabrics, how much of each to buy and cutting instructions for each one. These were then labeled and packaged so we could easily pull out the right pieces to work with at each step.

Kimberly would have us pull out the specific fabrics cut to the right sizes and stitch them according to the current 'clue'. Then those pieces would be cut, if needed, and set aside. When we had worked through all the clues we had a sizeable stack of blocks which were then laid out according to her pattern and assembled into the mystery quilt.

We had even precut our two borders and binding!

I worked through all the available 'open sew' times and got my whole top done.


I did not take batting or the backing with me so I had to wait to assemble this at home. I quilted it with diagonal lines that go through all the large blocks and the purple small blocks - about 8 inches apart. A stitch in the ditch line runs on either side of the inner blue border as well.

The finished quilt is about 61 inches square and will be set aside to gift to someone special when the occasion arises.

Ddd


Posted by studio3d@ccgmail.net at 12:01 AM PST
Sunday, 10 January 2016
3D From Studio 3D
Topic: Quilting

Yay and Hooray! I finished one of the three quilts I made on the quilting cruise in November.

The 11-day cruise, through Quilting Seminars At Sea, went from Fort Lauderdale to the Bahamas, Curacao, Aruba, Columbia, the Panama Canal, Panama and Costa Rica.

When we were in port we were free to go as we wished. Then on the days at sea we had classes from 8:30 am to 4 pm. We had pre-selected from one of 4 workshops to take from the 4 instructors who were with us.

I took 2 classes with Kimberly Einmo and one from Karen Combs and finished a quilt top in each one of them. Of course, we had 'open sew' time when we could go in to work on our projects on the machines that were provided by Janome.

The first class I took was the one with Karen so that is the quilt that I backed, quilted and bound first.

We used fabric designed by Karen that contains dark, medium and light across the fabric, providing all the shades needed to create her 3D effects. The pattern we worked on is called 'A Chip Out Of Every Block'.

We got to choose the colors we wanted to use from about 20 available. I chose to use all blues and greens to make a banner for my fireplace end wall.

By turning half the blocks upside-down they are changed from being a solid block with a corner missing to a room with a box in the corner.

I quilted with just a stitch in the ditch around the perimeter of each area of value.


I am really pleased with how this came out.

Ddd


Posted by studio3d@ccgmail.net at 12:01 AM PST
Saturday, 9 January 2016
Boxed Bag
Topic: Sewing

I ran across a video tutorial ( https://www.youtube.com/watch?v=KChUsEJPHqk ) on making a small boxed bag like would be used for cosmetics. The process looked so easy that I jotted a few notes to myself and went right to the studio to give it a try.

As it happened, I had the same fabrics that I had used for this duffel bag (black floral exterior and teal polkadot interior):

What I did not have was more of the teal zipper but I found a raspberry one in my stash so I was off to the races.

The project takes only a 14" zipper, two exterior fabric pieces (8 x 10), two interior fabric pieces (8 x 10), two fusible interfacing (8 x 10) and two tabs (2 x 3).

It uses straight and zigzag stitches throughout and also uses a standard and a zipper foot.

Total construction took less than one hour.

Here are a couple of exterior views


And one showing the interior:


The finished size is about 3 x 5 x 7. This will go in my duffel when I use it as a carryon bag so I can corral my phone, medications and other small items.

Ddd


Posted by studio3d@ccgmail.net at 12:01 AM PST
Friday, 8 January 2016
Personalized Calendar
Topic: Digital Projects

I recently bought some things at an online store and one of the perks was to provide me with a coupon code for a FREE PERSONALIZED CALENDAR from Shutterfly. I only had to pay shipping which was very reasonable.

I want to be very clear, I have no affiliation with this company and did not receive any solicitation or compensation for this review. I am just a happy customer.

I just had to click on the link that came in my email to start the process. I got to select my desired 'theme' for the background of the pages, choose which photos (my own) to use on each month as well as on the cover, select layouts for the photos, add captions to the photos, and input my own family's birthdays and anniversaries.

I got to preview everything before it went 'to press' and they warned me when some of my photos were not high enough resolution to reproduce optimally.

The whole design process was clearly guided and took only about 1 1/2 hours. The most time consuming part was inputting all the personal dates.

I decided to make a calendar for the quilt studio out of it and included favorite quilts I made in 2015.


The finished calendar is produced on heavy glossy cardstock of 8 1/2 x 11 pages. It is spiral bound at the top.

Thank you, Shutterfly!

Ddd


Posted by studio3d@ccgmail.net at 12:01 AM PST
Thursday, 7 January 2016
Re-Creating a Favored Card
Topic: Dry Embossing

Some time ago I created a dry-embossed card using the letterpress method - which colors the background and leaves the raised areas white. I particularly liked the way it turned out and pulled it out to copy when I needed multiple sympathy cards to send.

The original one used a stamped sentiment but for this version I used a gold peel-off sticker on the raised, bordered panel.


They have drop-shadows drawn in with a coordinating marker and little bits of Stickles along the top edges of the pattern.

Ddd


Posted by studio3d@ccgmail.net at 12:01 AM PST
Wednesday, 6 January 2016
Colorado Christmas
Topic: Quilting

I'm really not as late as it appears in completing this Christmas quilt. I finished it up on December 23 but had already filled the blog postings up to today with the last of the Christmas cards.

I wanted the quilt to be in the seasonal colors but not to be so bright as traditionally used. So I dug in the stash and found burdundy, mottled green, taupe and greenish yellow.

These sat for a while waiting for inspiration until I saw the tutorial on the Missouri Star Quilt Company for the block called 'Colorado'. I played with the coloring in EQ7 and decided to make the center pinwheels with the yellow to represent the Star of Bethlehem.

The construction method makes a bazillion half-square triangles which are arranged into this 14-inch block:

Actually, the outer border showing is the sashing and cornerstones between the blocks.

The blocks are arranged so that all the greens come together around one cornerstone and all the reds around the next cornerstone. What this does is create a secondary pattern.

On the red sections I quilted a poinsettia:

I used verigated dark red thread and a 'sketch' style rather than a very controlled outline. Here you can see the stitching on the back:


Where the green blocks formed I quilted a bow in the center surrounded by a holly wreath:


I used green thread for this and here you can see the view from the back:

The 4-inch borders are quilted with bows and garland and the finish is a green and gold striped binding:


You can see the quilting pretty well on the photo above so the back view shows how I treated the corners:


I am delighted with how this came out! This will be a quilt for me to keep.

It is a very generous 70 x 84 inches.

Ddd


Posted by studio3d@ccgmail.net at 12:01 AM PST
Tuesday, 5 January 2016
Bowl Buddies

Over the past few years I have seen a number of people make 'bowl buddies' for friends and family. These are a shaped pot holder that goes into the microwave with the bowl so removal of hot foods can easily be removed without burning the hands.

I wanted to make these as a gift for Christmas so set about looking for instructions. The best I found were at http://www.lisalewiskoster.com/2013/12/microwave-bowl-potholders.html.

I purchased some microwave-safe batting - like that used for making 'potato bags' and selected two sets of complimentary fabrics. The recipient has two sizes of bowls for use in her microwave so I custom fit two sizes of bowl buddies.

I cut the batting 3/4 inch smaller than the fabric to keep the edges from being too bulky at the end. I did the quilting (the first step in the process) with a medium-sized meander.

The final products are reversible.

This is the smaller one 'in use':

and...


This is the larger one 'in use':

and...


I cut up the rest of the batting while I was at it and cut enough of these fabrics to make 3 more of each color combination. All of the quilting has been done on them and I set them aside so I can make them whatever size is needed on short notice.

Ddd


Posted by studio3d@ccgmail.net at 12:01 AM PST

Newer | Latest | Older