« April 2016 »
S M T W T F S
1 2
3 4 5 6 7 8 9
10 11 12 13 14 15 16
17 18 19 20 21 22 23
24 25 26 27 28 29 30
You are not logged in. Log in
Entries by Topic
All topics  «
3D paperwork
A - Z challenge 5
A - Z challenge 7
A - Z challenge round 4
A to Z challenge round 3
A to Z round 2
A to Z round 6
A-Z round 1
Around the House
Art Challenges
Artist Trading Cards
Backgrounds
Beads
Bible Journaling
Books
Boxes
Collage
Color Challenge
Coloring
cookbook
Die Cuts
Digital Projects
Digital Stamps
Drawing
Dry Embossing
Fabric Stuff
Fantastic Folds
Field Trip
Home Decor
How Does Your Garden Grow?
Hymnal Art
In The Kitchen
In the studio
Jewelry
Lettering
Links
Multi-Technique
Music to Work By
Musings
Nail Art
New Work
Online Class
Other Hobbies
Other Projects
Painting
Paper Embroidery
Paper Piecing
Photo
Pretty Paper
Quilting
Random
reading
Scrap Recovery
scrapbooking
Sewing
Sketch Challenge
Some Backlog
Stamping
Stencils
Stickers
Supplies
Teabag Folding
Techniques
Testing
tips and tricks
Tutorial
Web resources
Welcome to my Blog
Work By My Friends
workflow
Writing
Blog Tools
Edit your Blog
Build a Blog
RSS Feed
View Profile
Group One
In & Out of Studio 3D
Wednesday, 13 April 2016
Polka Pants
Topic: Sewing

I decided it was time to break out the pants patterns I bought at the Sewing and Stitchery Expo last month. I chose to work with the DVD/Pattern called Master Pants from FitNice System.


I took my measurements, drew out the tissue pattern, made some alterations as recommended and then made my 'muslin' (sample) from a warm gray flannel with yellow dots.

They turned out great and though there were a few more adjustments to make for future finished trousers, these will be great for hanging out around the house.

Yes, I'm wearing my furry slippers for this viewing.

Don't judge MY shape, just the pants.

Ddd


Posted by studio3d@ccgmail.net at 12:01 AM PDT
Tuesday, 12 April 2016
Choking Hazard
Topic: Sewing

While I was in the mode of alterations I dug out a top that has pockets on the sides near the underarms for carrying materials out of sight. I use mine for wallet, cash, etc. when traveling.

The problem was that the neckline was so high that it rested up around the throat. Not only was it uncomfortable to wear but I have no tops with necklines that high so it came off like I was wearing a high-neck white t-shirt under everything - NOT a good look.

I fixed this by putting the garment on, topping it with my lowest neckline top, and marking the opening with a Sharpie marker. Then I took it off and made a line 1/4 inch outside that marked line.

The new neckline was then enclosed in fold-over elastic which was sewn with a tripple-stitch zig-zag.

The last step was to take a tuck at the end of the V-neck.

This is the result:


The garment is body-hugging so the ripple on the neckline disappears when it is being worn.

Ddd


Posted by studio3d@ccgmail.net at 12:01 AM PDT
Monday, 11 April 2016
Hemmed In
Topic: Sewing

I bought a blouse about this time last year and have only worn it occasionally. The other day I realized what it was that I was having an issue with - the elastic in the hem.

This elastic made the back of the blouse ride up to the waistline in the back but was loose enough that the hem dropped down in the front. The result was very unattractive.

I decided to remove the elastic and re-hem the blouse so it would just hang free.

This is the result:


Such a simple fix!

Ddd


Posted by studio3d@ccgmail.net at 12:01 AM PDT
Sunday, 10 April 2016
Special To Me
Topic: Stamping

The last couple of days I told you about a technique I found at http://stamptv.ning.com/video/embossing-over-watercolor called embossing over watercolor.


By scribbling on watercolor paper with three values of a color and of green where you want flowers and leaves then spritzing with water and using a heat gun to dry the piece, you set up for a floral background.

Versamark is used to stamp solid flower heads over the colored areas and solid leaves over the green areas then they are embossed with clear powder and a heat gun.

Sponging over the surface with dark ink lets the flowers and leaves shine through and then any extra ink is buffed off with a paper towel.

The second piece I did had better composition and more even results so I decided to use it as a whole background.


I tied twine in three strands and added a pre-stamped sentiment with a border popped up on foam tape.

Each flower got a pink rhinestone center and the whole piece was added to a green base card.

Ddd


Posted by studio3d@ccgmail.net at 12:01 AM PDT
Saturday, 9 April 2016
Watercolor Under Gloss
Topic: Stamping

I started yesterday telling you about a technique I found at http://stamptv.ning.com/video/embossing-over-watercolor called embossing over watercolor.


On watercolor paper you scribble three values of a color where you want flowers, then three values of green where you will stamp the leaves.

You spritz with water and use a heat gun to dry the piece.

Stamp solid flower heads with Versamark over the colored areas and  solid leaves over the green areas then emboss with clear powder a heat gun.

Sponge over the surface with dark ink and buff any extra off with a paper towel.

This is the second half of the first piece I made:


I mounted this on foam tape over a chevron paper and a text strip. Then I tied with twine and added a text tag.

The base card is burgundy cardstock.

Ddd


Posted by studio3d@ccgmail.net at 12:01 AM PDT
Friday, 8 April 2016
Embossing Over Watercolor
Topic: Stamping

I was watching some video tutorials on my favorite blogs the other day and ran across a technique I had not used before. If you want to see the original, visit Gina K Designs at http://stamptv.ning.com/video/embossing-over-watercolor for a technique she calls embossing over watercolor.


Start with watercolor paper and scribble three values of a color where you want flowers, then three values of green where you will stamp the leaves.

Spritz the surface with water and let the colors bleed. When it gets where you want it to be, use a heat gun to dry the piece.

Ink a solid flower head with Versamark embossing ink and stamp over the colored areas, Ink solid leaf with Versamark ink and stamp over the green areas. Cover with clear embossing powder and set with heat gun.

Use a foam tool and dark ink to sponge over the surface. The embossing will resist the ink but you can buff any extra off with a soft cloth or paper towel.

With the first one I made, I cut the piece in two and made separate cards out of them.

The first is shown here

I used walnut ink for the dark background. I made a base card with a green floral and strips of coordinating papers.

I added twine and a little tag before popping the focal up on foam tape.

Ddd


Posted by studio3d@ccgmail.net at 12:01 AM PDT
Thursday, 7 April 2016
Sunset Nails
Topic: Nail Art

Here are the products I used to create nails with a sunset look:

From the left - base coat, two coats of sheer white, makeup sponge with stripes of purple, red and copper and used to sponge on the nails. This was done twice. The sheer with glitter went on over the top, followed with clear topcoat.

This is a messy process so it takes a lot of cotton swabs dipped in polish remover to get all the over-sponging off the cuticles and sides of the fingers.


I like the effect of a sunset sky.


As always, I'm a fan of layering glitter on my nails, so that adds to my satisfaction with this manicure.

Ddd


Posted by studio3d@ccgmail.net at 12:01 AM PDT
Wednesday, 6 April 2016
S Is For Swirls
Topic: Paper Embroidery

The paper embroidery alphabet swaps are marching right along. The current one assigned us to do Swirls for the letter S.

I flipped through a lot of borders and frames for one that I liked, thinking I would add some 3D florals to it.

But then I ran across this cupcake with swirled icing and I knew that was what I wanted to stitch.

I picked an embossed white cardstock with more swirls and pricked out the pattern on that.

I chose a bright verigated thread for stitching and then used a lighter thread for the candle plus light yellow for the flame.

I mounted the stitched panel on a bright floral over a white base card.


I used a colored flower with a rhinestone center and a silver peel-off for embellishment.

Ddd


Posted by studio3d@ccgmail.net at 12:01 AM PDT
Tuesday, 5 April 2016
Charm Cuff
Topic: Jewelry

When I ran into a particularly long wait time at the fabric cutting counter in Joann Fabrics I had time to wander up and down Every.Single.Aisle. and it STILL wasn't my turn yet.

However, I had plenty of time to paw through the closeout bins at the ends of aisle and found some great bargains. One of my scores was these cuff bracelets with screw-off endcaps allowing one to add large beads and charms. I got one for $1.49 as well as a package with two gold ones, and some different styled wrap-around ones.

The charms they were selling were hideous so I brought home just the bracelets.

For this one I added some square beads with symbols and initials, silver spacer rings and charms on jump-rings.


Ready for a birthday coming up next month.

Ddd


Posted by studio3d@ccgmail.net at 12:01 AM PDT
Monday, 4 April 2016
Marbled Eggs
Topic: Backgrounds

I have lots of that shaving cream background left so I decided to use some of ut to cut eggs directly out of. I was able to get three eggs from each of two sheets.

I decorated each of the eggs with white peel-off stickers and layered them on printed backgrounds.

This card with a woodgrain background got a printed strip and a rub-on greeting. 


A more busy background with a dotted strip makes for a more lively picture. I used a gold peel-off sentiment.


I combined two sentiment rub-ons for the last card featuring dots and a little flowered strip.


On each of these cards, the let egg is mounted up on foam tape.

Ddd


Posted by studio3d@ccgmail.net at 12:01 AM PDT
Sunday, 3 April 2016
Eggcelent
Topic: Backgrounds

When I cut the eggs out of the white on yesterday's cards I ended up with two whole eggs ready to add to a third card. BONUS!

I used a bit of Distress to shade the lower edge and then decorated them with rows of little flower stickers.

The right eggs is flat against the background while the left one is raised up on foam tape.


I added text with a rub-on and placed the background on a white base card.

Ddd


Posted by studio3d@ccgmail.net at 12:01 AM PDT
Saturday, 2 April 2016
Hollow Eggs
Topic: Backgrounds

I saw an image of a card the other day with a colored egg on it and immediately had the idea of using some of the shaving cream backgrounds as the coloring for Easter eggs on cards.

For the first ones I drew and cut out two eggs from white cardstock. Then I filled in the void with white peel-off stickers before attaching the piece over a shaving cream background.

This one in landscape format was cut smaller to leave a wide border showing. The corners were then decorated with white sticker.


On this portrait orientation I added white sticker borders to the two sides of the card.

This one also got a silver peel-off sentiment.

Ddd


Posted by studio3d@ccgmail.net at 12:01 AM PDT
Friday, 1 April 2016
Just a Short Hop
Topic: Quilting

I got an email notice that a small quilt shop nearby was participating in a shop hop. The way this works is that one goes to a quilt shop, collects the instructions and fabrics for a single block and then 'hops' on to the next store/stop. There is a folder to keep track of your visits and you get it stamped. Each store usually has a drawing and there is often a big drawing from those who complete all the stops.

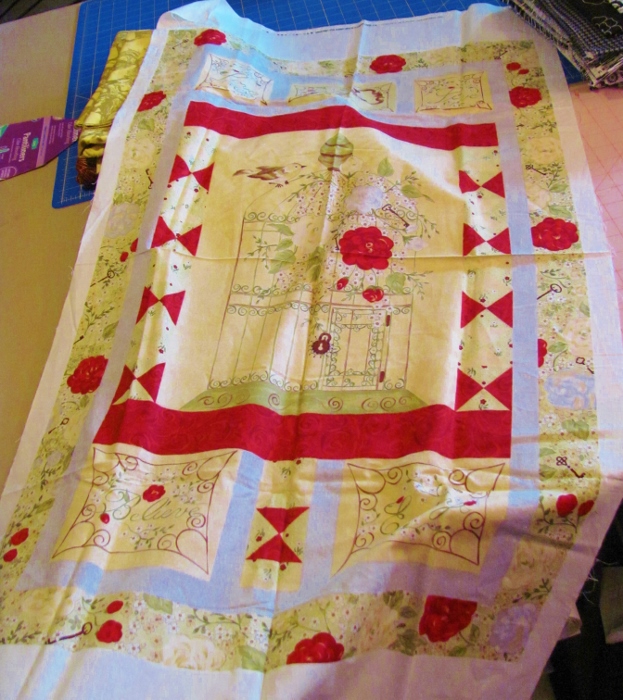
Well, I went to the first shop and collected my folder and block kit. This shop is about 20 miles from me. A look at the folder showed me that there was a participating shop only 10 miles from home so that was our next stop.

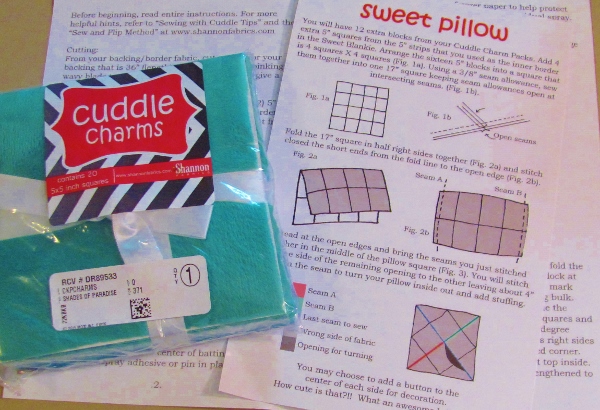
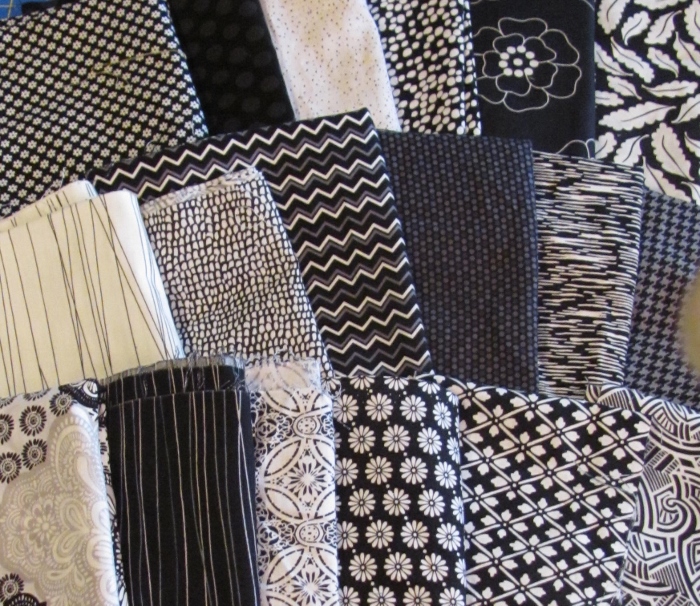
This one was getting ready for some renovations so there was a large section of yardage on discount. I managed to stay away from those bolts but did get sucked into the four large bins of fat-quarters priced at $1.

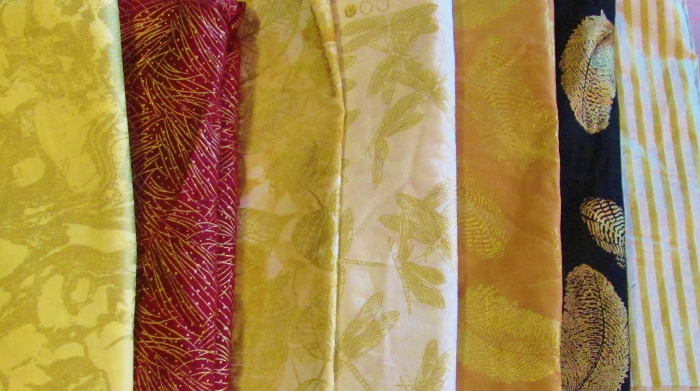
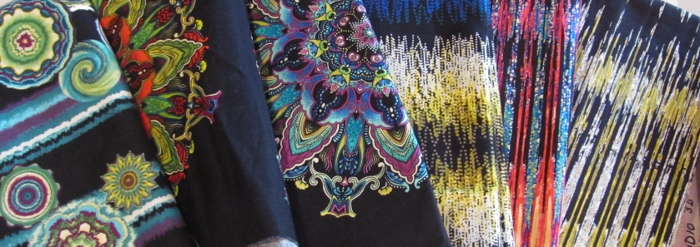
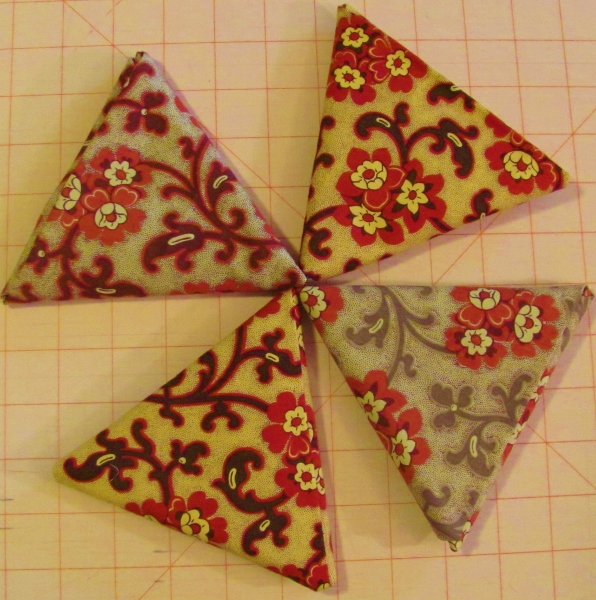
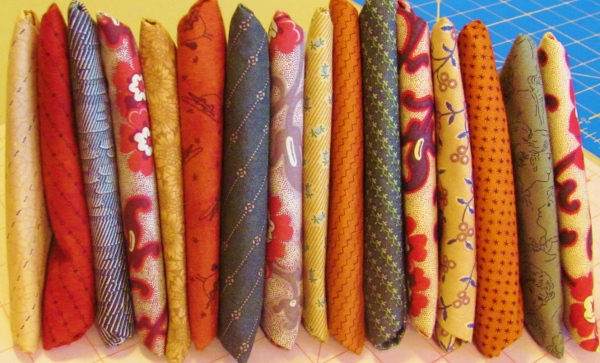
I first found a print that had various background colors. I bought a total of four

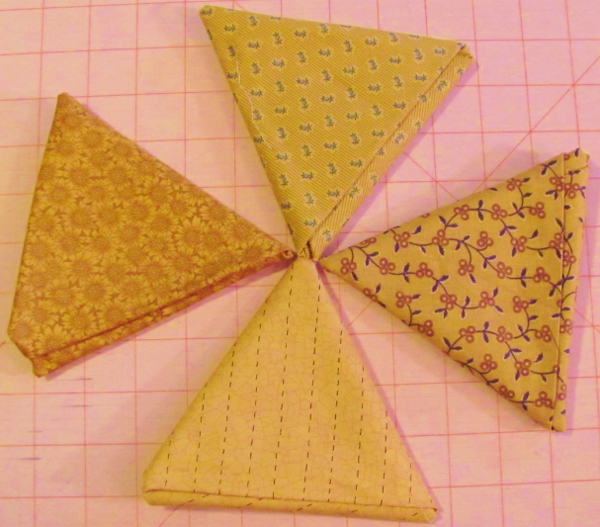
Then I chose, to go with the prints, four goldens:
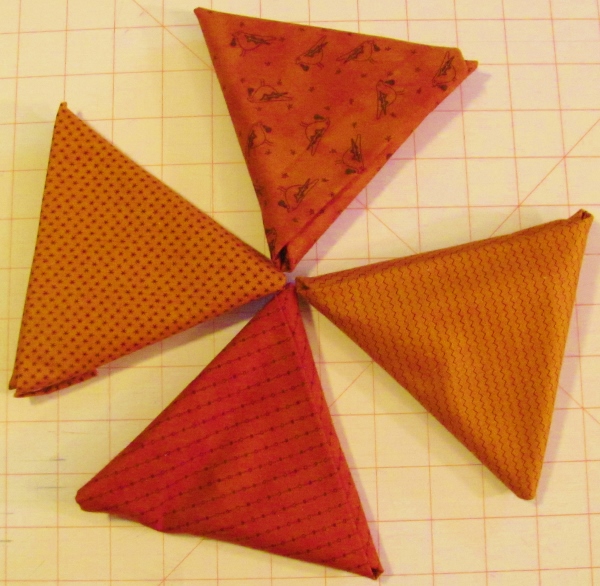

Four rusts:


and four greens:


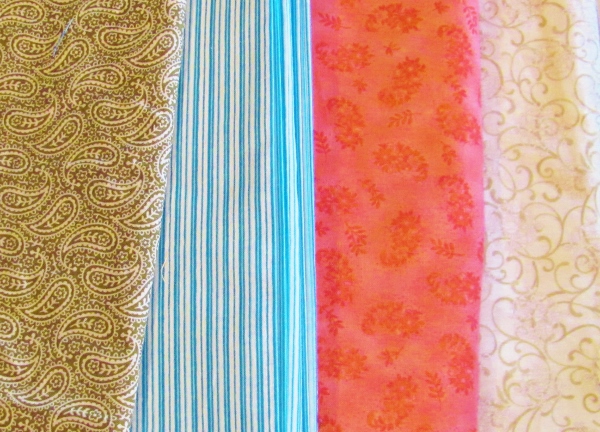
So for $16 I have 4 yards of coordinating fabrics for some future project:


The followup to the shop hop story is that the rest of the participating stops are 30 to 50 miles away and in all directions. One could waste a LOT of gas driving all over for 'free' blocks.

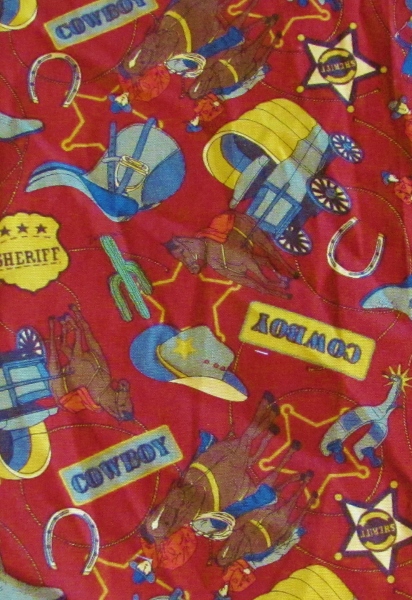
So, we stopped with two. Sadly, the second block kit is truly lame - a faux red-work image and strips to border it twice. I would have been very upset if this was a block I traveled a great distance for.

I think I am done with shop hops.

Ddd


Posted by studio3d@ccgmail.net at 12:01 AM PDT
Thursday, 31 March 2016
Expo - Freebies
Topic: Field Trip

Wow! That's a lot of blog entries on an expo that I was at for only 48 hours!

There were a couple of booths that had free items.

One was the cuddle fabrics that (in exchange for your email address) gave a packet of 5-inch squares and a pattern for making a pillow of them:


Then, in my bag of purchases, one booth put in a card with fabric calculation charts


And that's all there is to tell...

Ddd


Posted by studio3d@ccgmail.net at 12:01 AM PDT
Wednesday, 30 March 2016
Fabric Stash - Black and White
Topic: Field Trip

The first trip to the dumpster diving vendor yielded three small scale black and white prints. So every time I went back I looked for more B&W in different patterns.

I ended up with eighteen! Ad I have more than one piece of three of them.

My intention is to make a quilt of only black and white.

Ddd


Posted by studio3d@ccgmail.net at 12:01 AM PDT
Tuesday, 29 March 2016
Fabric Stash - Shiny Stuff
Topic: Field Trip

I love finding fabrics with a metallic print on them. The dumpster diving yielded several pieces.


Probably not being used together but they are beautiful to look at as a group!

Ddd


Posted by studio3d@ccgmail.net at 12:01 AM PDT
Updated: Wednesday, 9 March 2016 9:29 AM PST
Monday, 28 March 2016
Fabric Stash - Spirograph
Topic: Field Trip

One of the most unique fabric selections I made in the dumpster diving was several colors of fabrics that look like radio interference, spirograph, and medallions.

I am anxious to find a way to use these together on a quilt.


There are quite generous sized pieces of all of these allowing for a lot of options in design.

Ddd


Posted by studio3d@ccgmail.net at 12:01 AM PDT
Sunday, 27 March 2016
Fabric Stash - Hashes Two Ways
Topic: Field Trip

 These hashed or linen-look fabrics may not be used together in the end.

That purple does not really have all that blue in it - camera issues.

Ddd


Posted by studio3d@ccgmail.net at 12:01 AM PDT
Saturday, 26 March 2016
Fabric Stash - Random Selections
Topic: Field Trip

When you go dumpster difing at the fabric-by-the-pound vendor there are always fabrics that don't go with anything else you've selected but they are just too neat to leave behind.

I bought lots of those:


This one is not totally random as I have a set of 2 inch squares that have a cowboy theme. This will be used somehow with those.

And one panel print:


I haven't used panel prints before. There were lots of them in the dumpsters but motly 'cute', 'Christmas', 'roosters', etc. I will probably turn this into a passages quilt.

Ddd


Posted by studio3d@ccgmail.net at 12:01 AM PDT
Friday, 25 March 2016
Fabric Stash - Color Match
Topic: Field Trip

First I fell in love with the ferns sa=o imagine my delight when butterflies turned up with the same colors.

I have no idea if these were meant to go together but the colors match so they will go in the same project in MY house.


I can hardly wait to get started planning projects!

Ddd


Posted by studio3d@ccgmail.net at 12:01 AM PDT

Newer | Latest | Older