« September 2016 »
S M T W T F S
1 2 3
4 5 6 7 8 9 10
11 12 13 14 15 16 17
18 19 20 21 22 23 24
25 26 27 28 29 30
You are not logged in. Log in
Entries by Topic
All topics  «
3D paperwork
A - Z challenge 5
A - Z challenge 7
A - Z challenge round 4
A to Z challenge round 3
A to Z round 2
A to Z round 6
A-Z round 1
Around the House
Art Challenges
Artist Trading Cards
Backgrounds
Beads
Bible Journaling
Books
Boxes
Collage
Color Challenge
Coloring
cookbook
Die Cuts
Digital Projects
Digital Stamps
Drawing
Dry Embossing
Fabric Stuff
Fantastic Folds
Field Trip
Home Decor
How Does Your Garden Grow?
Hymnal Art
In The Kitchen
In the studio
Jewelry
Lettering
Links
Multi-Technique
Music to Work By
Musings
Nail Art
New Work
Online Class
Other Hobbies
Other Projects
Painting
Paper Embroidery
Paper Piecing
Photo
Pretty Paper
Quilting
Random
reading
Scrap Recovery
scrapbooking
Sewing
Sketch Challenge
Some Backlog
Stamping
Stencils
Stickers
Supplies
Teabag Folding
Techniques
Testing
tips and tricks
Tutorial
Web resources
Welcome to my Blog
Work By My Friends
workflow
Writing
Blog Tools
Edit your Blog
Build a Blog
RSS Feed
View Profile
Group One
In & Out of Studio 3D
Thursday, 8 September 2016
The Word and Pictures
Topic: Bible Journaling

I've been seeing the work of some artists on the internet who are doing Bible journaling. It is a combination of artwork, lettering and devotions - working in the pages of an actual Bible.

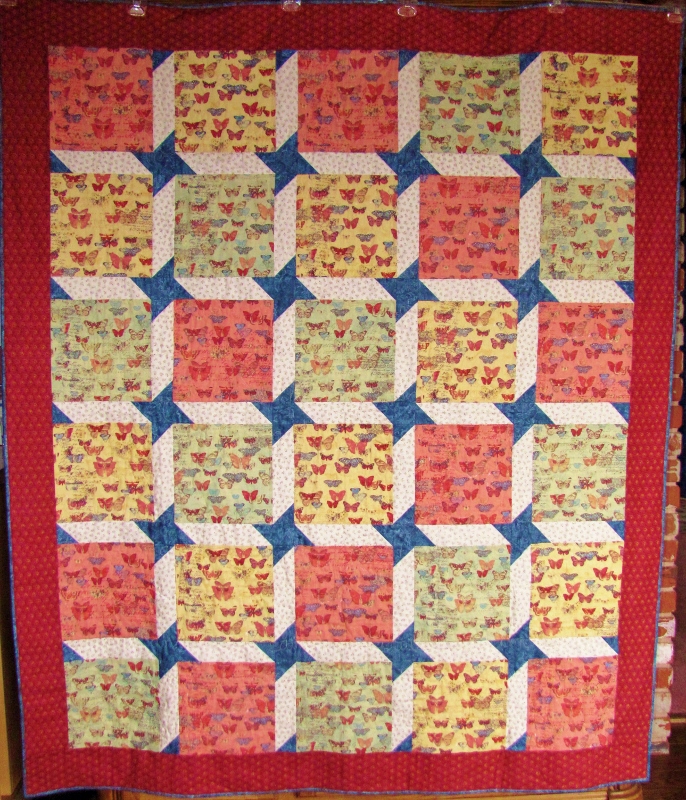
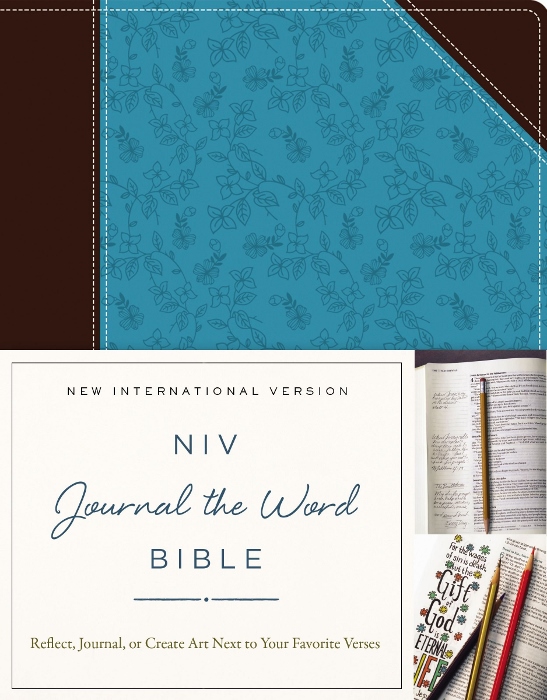
For my birthday, I asked for a journaling Bible and chose this one (NIV):


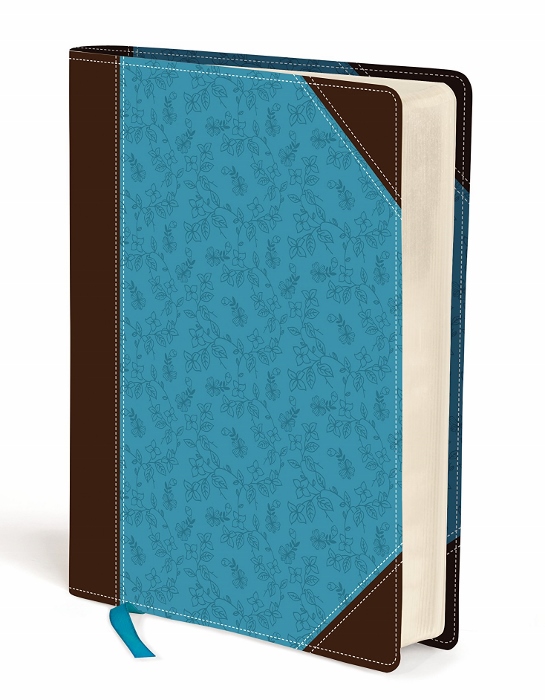
It is designed specifically for journaling so it has wide margins on the outer edges which are lightly lined. This edition is called "Journal the Word". A nice blue and brown imitation leather cover provides stability and it lays fairly flat while working in it.


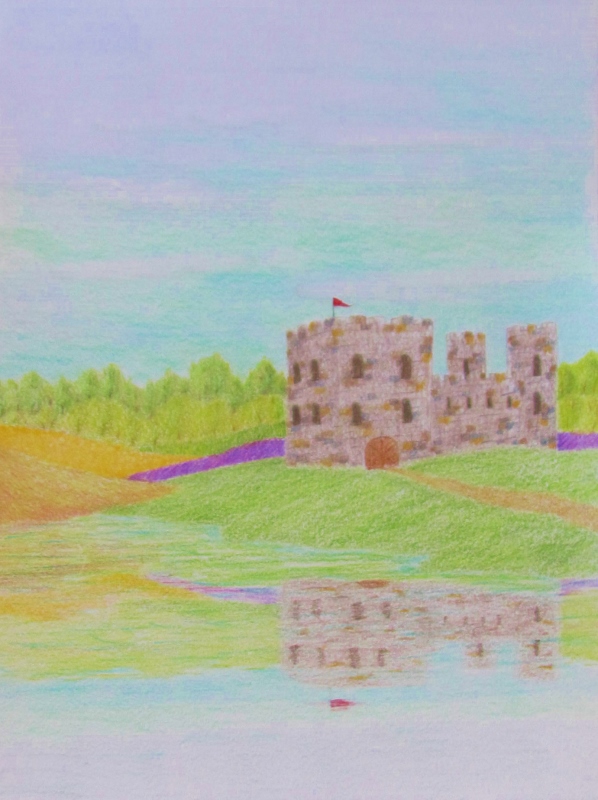
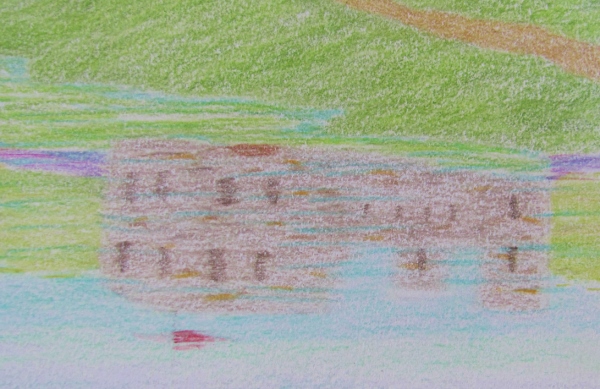
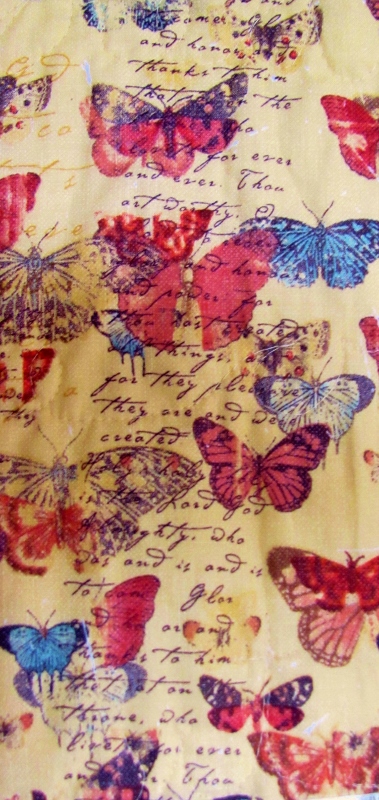
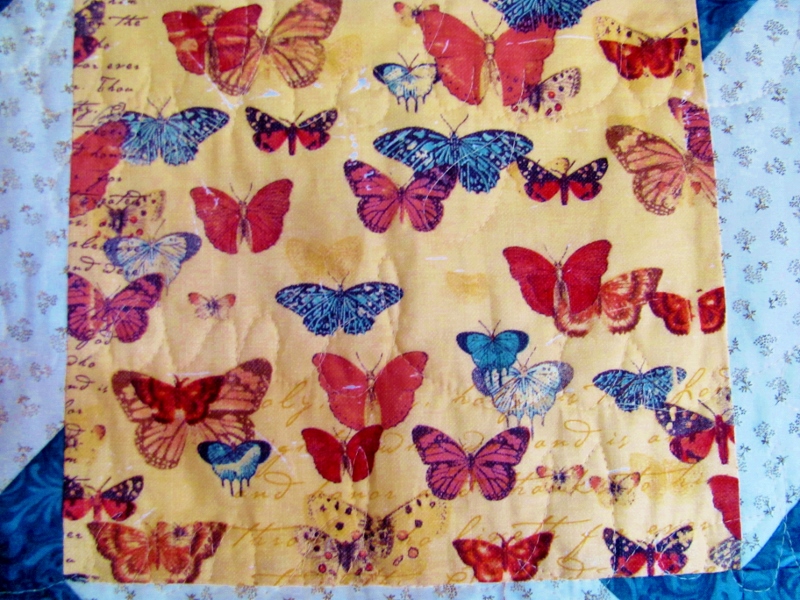
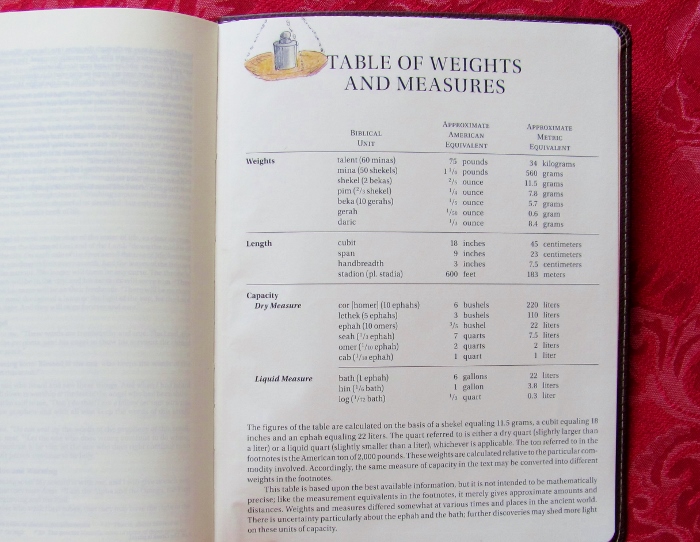
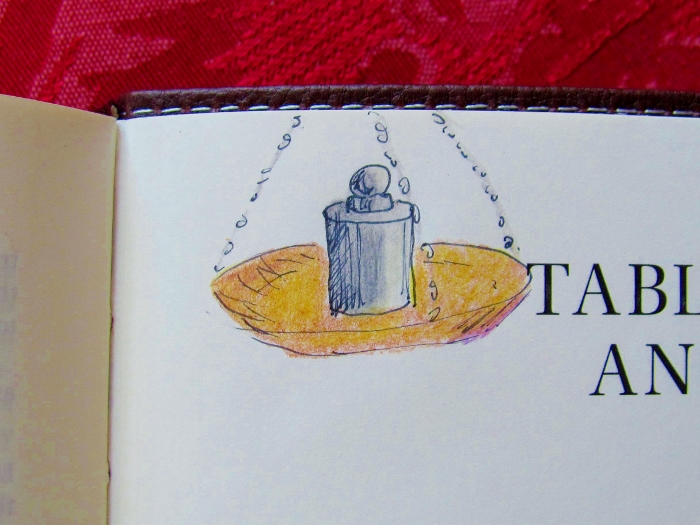
I wanted to try out the pen and the colored pencils for how they react on the page (and to make sure the pen would not bleed through). So I decided to do a very small illustration on the last page. My chance that was the page describing the weights and measures.


The pen I chose is a .005 black permanent marker which does not bleed through the paper. I colored with my new Prismacolor pencils which go in very smoothly and blend nicely on this paper.


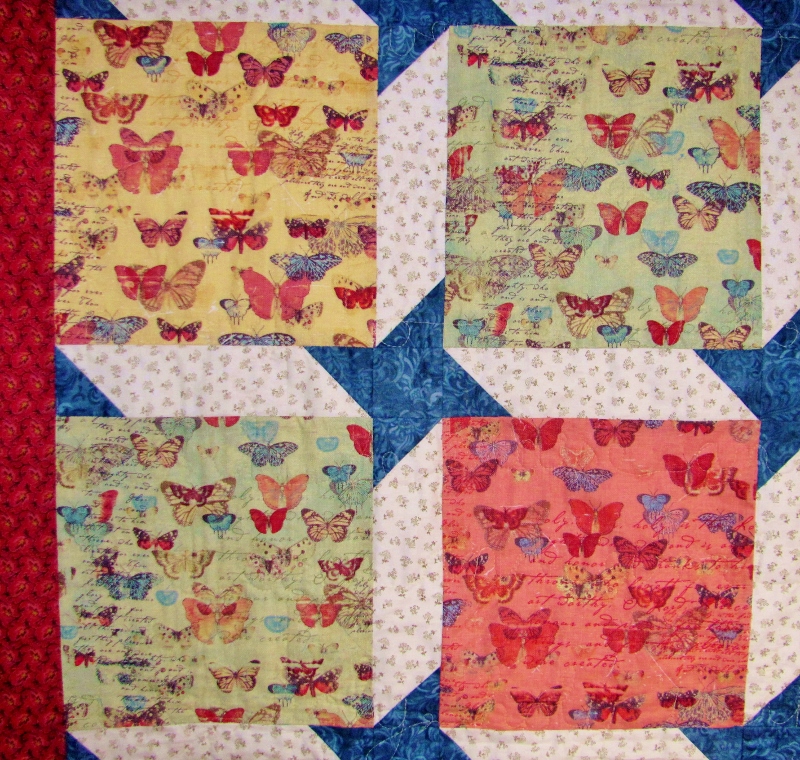
For my first journal page I turned to Psalm 100:4.

I used pencil to lightly letter the scripture in the provided margin and draw an illustration over the text of the page.

I used a rainbow of colors to do the text first:


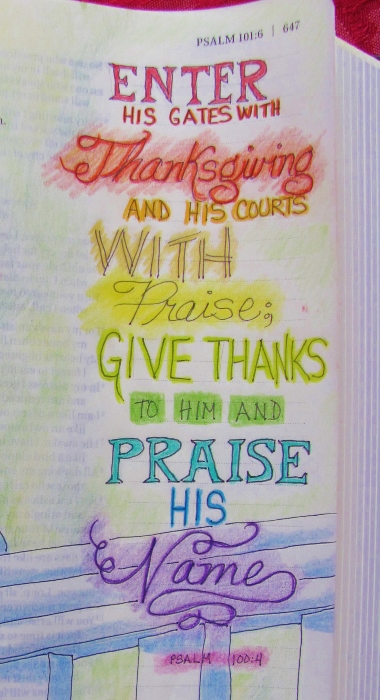
Then I went on to color the 'gate' which is represented by a pillar and railing:


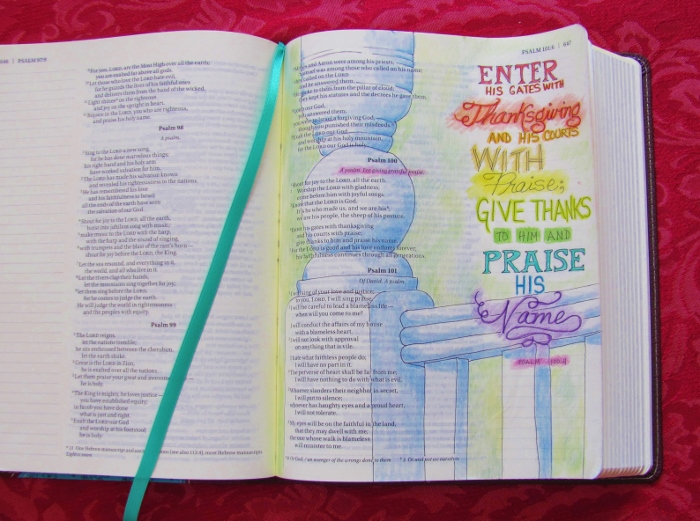
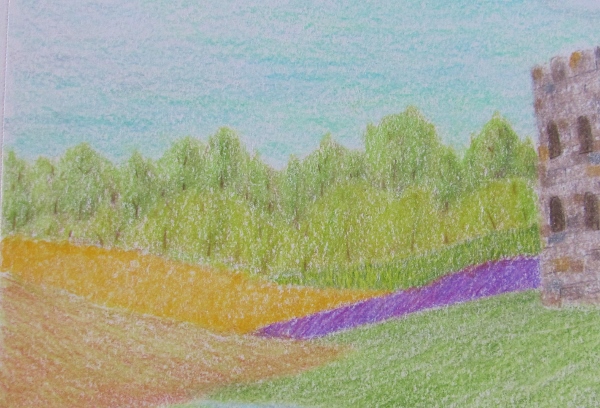
I used a variety of greens to create an impression of foliage in the background.


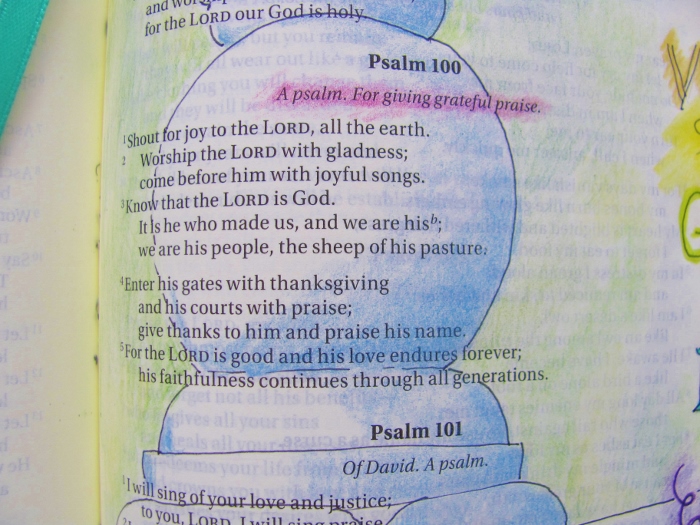
I added a bit of coloring over an in-text description of the psalm:


This method of devotion encourages one to dwell on the meaning of the scripture while creating art that relates to the words.

I hope to do much more of this as I found it to be relaxing and spiritually uplifting.

Ddd


Posted by studio3d@ccgmail.net at 12:01 AM PDT
Wednesday, 7 September 2016
For Holding More Stuff
Topic: Fabric Stuff

I used the same fabrics to create a second origami fabric box. It was easy because I cut all the parts together.

For this one I turned down the top edge differently so it makes a deeper cuff but without any fabric triangle showing.

This has the effect of making a taller box even though it is the same size on the width of the sides. As a comparison, here is the first one again:


This fold up just like the other one but makes a more compact piece.


I'm wondering about covering a mat board with matching fabric to strengthen the bottom. Of course, it would have to come out to collapse the box but it still might me fun to try.

Ddd


Posted by studio3d@ccgmail.net at 12:01 AM PDT
Tuesday, 6 September 2016
There's More Stars Out Tonight
Topic: Fabric Stuff

Of this color combination I made a total of 6 folded fabric stars.


These are the same size as the red and green ones shown yesterday - 3/4 inch across each of the center squares for a total of 3 inches across the star.

I also stitched hanging strings (silver cord) to each star as they are intended to be Christmas ornaments.


The red and green ones were finished up too, with gold hanging cords.

Ddd


Posted by studio3d@ccgmail.net at 12:01 AM PDT
Monday, 5 September 2016
Hanging It Up
Topic: Fabric Stuff

Another fabric craft I found on the internet was woven star ornaments. With these there WERE written directions... in German.

So I gave it a run anyway, working from the photos.

I chose some Christmas colors.


I think these are called Morovian stars but they come out looking like a little quilt block.


The width of the fabric strips is 3/4 inch (starts with a 3 inch wide strip folded in half and then the sides to the middle - like a double-fold bias tape).


These require no stitching, other than when I attach the hanging strings (not done yet).

Ddd


Posted by studio3d@ccgmail.net at 12:01 AM PDT
Sunday, 4 September 2016
Won't You Be My Buddy?
Topic: Fabric Stuff

Last Christmas when I made a couple of microwave bowl buddies (shaped potholders) I cut a bunch of extra parts and set them aside. While I was rooting through the studio I unearthed them and decided to construct a couple of them for myself.

These look familiar because they are the same fabrics I used on the previous set.

Here is a view with a bowl in place.


And a view without the bowl.


This is the other color scheme.


And of course, they are reversible.


I put them in the cupboard with the bowls so we will remember to use them. If I put the in with the other potholders I'd forget them until the food was already hot.

Ddd


Posted by studio3d@ccgmail.net at 12:01 AM PDT
Saturday, 3 September 2016
Here, Hold My Stuff
Topic: Fabric Stuff

I went trolling on the internet for some 'fabric gift ideas' and found an origami bin to make. Unfortunately, there were NO written instructions, just pictures. Some of the steps looked a lot like teabag folding which I have done a lot of so I decided to give it a try.

I chose some fabric I got at a recent yard sale and one from the stash that went well with it. I used these together in a quilt top not too long ago (but haven't shown it because it is not done.)

There is an iron-on stabilizer on the back of the patterned fabric and both pieces start at 17 1/2 inches. They are sewn fronts together and then turned right-side-out.

After that it is all origami folding followed by stitching the upper rim flaps down.

It finishes at about 7 inches square.


This would be good for catching scraps at the sewing machine or while hand-sewing.

When done, the whole thing folds flat.


Pretty cool, huh?

Ddd


Posted by studio3d@ccgmail.net at 4:56 PM PDT
Saturday, 27 August 2016
Castles On My Mind
Topic: Coloring

I don't know if I mentioned that I recently bought myself a set of 72 Prismacolor colored pencils. I've only worked with student grade pencils and watercolor pencils but I wanted to try the wax based pencils of a professional grade.

I did a landscape sketch out of my head and transfered it to colored pencil paper.

When selecting colors for a landscape you need to have choices in greens and blues. I did a lot of layering to get variety in the trees and grasses and it was then that I realized that the 72 colors I had were not that many more than a box of 64 crayons!

Here is my picture:


My favorite part of this is the trees in the distance. This is actually where I started:


I am actually very pleased with the reflection as well. I struggle with representing water but this time it turned out really well.


The whole drawing had a lot of tooth to it so I used aPrismacolor colorless blender on the whole thing. It improved it a lot.

I may still do some refinement on this to bring in more contrast since it is a little flat.

Ddd


Posted by studio3d@ccgmail.net at 10:19 AM PDT
Wednesday, 24 August 2016
I'm a Traveling (wo)Man
Topic: Around the House

I had a sudden desire to change the decor in our guest room. The old theme was lighthouses and I knew someone who would make good use of the items.

Within an hour I had brainstormed with Mom about a new theme and gathered items from storage, other rooms in the house and from various collections.

Here's what I came up with:

A new headboard treatment made with a sarong from Tahiti:


An over-the-bed display - a mounted butterfly and a painted feather, both from Costa Rica:


A nightstand display for the left side of the bed. A ceramic box I painted on a cruise, Dutch shoes from a friend in Holland, a tile from a cruise (for a coaster), and a little jar 'cruise fund':


For the right hand nightstand there is a map-covered frame, a ceramic box, a little jar of sand from Hawaii, another cruise tile, and some Dutch birds from my friend in Holland:


The main display is on the bureau. On the wall is a frame of multiple butterflies from St. Martin, a stone globe picked up in Alaska, a box made on a cruise, a silver woven box from Mexico, a conch shell from Grenada, in the back is a leather box from Venezuela and in front is a large plate I painted on a cruise, perched on its edge is a frog box from Puerto Rica, and then there is  box from the Beleek factory in Ireland. The globe bookends hold handmade and altered books with travel themes and on the right is a puzzle box from Costa Rica.

This eclectic mix of elements is only the tip of the volume of travel items that I could have selected from as I buy boxes wherever I travel and make crafts on almost every cruise. But these things went well together and cover a wide scope of places we have traveled.

I may do something more by adding artwork created with maps. I do have additional wall space to play with in this room, so there will probably be more to come.

Ddd


Posted by studio3d@ccgmail.net at 12:01 AM PDT
Tuesday, 23 August 2016
V is for Vintage
Topic: Paper Embroidery

Wow! It's REALLY close to the end of the alphabet on this series of paper embroidery swaps.

We are up to 'V' and the assignment was to make something vintage. I chose a pattern for an antique carriage and actually stitched it using the proscribed threads! That's a rarity.


Because there was so much gold in it I made the first border of gold and then matched the base card to the seat cushion and hood.

The greeting is a gold peel-off sticker.

Ddd


Posted by studio3d@ccgmail.net at 12:01 AM PDT
Monday, 22 August 2016
What Bug Is This?
Topic: Random

Sometimes, no topic suits and you just have to add a new category. Thus the topic 'Random'.

As I was out on the deck today I spied this beetle that I had never seen before. Hmmm. I 'googled' beetle identification oregon and then scrolled through pictures till I found one that looked like him.

Identification: Western Conifer Seed Bug

If its purpose is to eat the seeds of conifers, what it it doing on my deck that is not even made of wood? Unknown.

In any case, I thought it was interesting - if a little creepy.

Ddd


Posted by studio3d@ccgmail.net at 11:24 PM PDT
Sunday, 14 August 2016
One Bright Summer Day
Topic: Quilting

This is the last quilt that I had sandwiched back in June. All the rest will have to wait for layering until September.

I used a pattern shared by one of the ladies in our quilting group. Several of them had made one or more of their tops for the baby quilts using this and I had some fabril left from a previously cut project that I knew would look great.

The black floral started out life as a wide striped fabric. I just cut out full blocks as big as the stripe would allow and adjusted all the other parts to fit that. 

The black border is a rosebud print that I bought a few years back and put it away waiting for inspiration. It perfectly coordinated with the floral.

I used up the very last of the floral in making the corner blocks for the outer border.


I kept the quilting very simple on this. I did echo quilting 1/2 inch from all the black fabrics and then stitched in the ditch down the yellow/green thirds.

I also did free-motion quilting as an outline to all the peach colored roses - one in each block.


The backing is a tone-on-tone peach leafy print. I used yellow in making the 1/4" binding.

Ddd


Posted by studio3d@ccgmail.net at 9:38 PM PDT
Wednesday, 10 August 2016
Tuxedo Twist
Topic: Quilting

I haven't been sitting idly between blog posts. It's just that I've been working on many projects but not bringing them to completion. I don't often post 'in progress' items, so it leaves idle time here.

In fact, I have been working on SIXTEEN quilts which are a various stages from pieces cut to waiting for quilting. Many of them are ready for backing but, without the space to spread them out, I will have to wait until I go back to group at church to sandwich them.

I did finish one today that I had sandwiched back in June.

I used the block construction called Stack, Shuffle and Slide (I used this on two of the baby quilt tops last winter) and selected only black and white fabrics. These came mostly from the 'fabric-by-the-pound' bin at the Sew and Stitchery Expo, though a few were in my stash. The fabrics were sorted dark to light and, at the insistence of my hubby, I threw in a few fucshia.


I arranged it so the darks trace a zig-zag on the diagonal.

The backing is also black and white:


In keeping with the modern feel of this project, I quilted with meandering squares in white thread.


Back to the machine.

Ddd


Posted by studio3d@ccgmail.net at 7:49 PM PDT
Tuesday, 9 August 2016
The Color or the Flower?
Topic: Color Challenge

Since this was a color challenge I used 'fuchsia' as the color but used a different flower in my design - the rose - which is, by coincidence, also a color.

I started with white core cardstock and ran it through the Cuttlebug with a thin metal die to cut the rose elements. I added the rubber mat and used the same die to emboss the flowers. Then I sanded the surface to expose the white core, lending dimension.

I had some printed cardstock and cut four strips to create a frame around the attached elements. The aperture is cut by the die.

I added the separated elements to the front and the back of the attached element using foam tape.

I added a piece of white-printed vellum behind the aperture and used a marker to color in some of the dots. I lined the area behind the vellum with a dark cardstock.

I used the same marker to color some white corner stickers and added them.


So, 'rose' or 'fuchsia' or what-have-you, there is my card for the color challenge.

Ddd


Posted by studio3d@ccgmail.net at 8:21 PM PDT
Thursday, 4 August 2016
Open Sesame
Topic: Field Trip

Snapping pictures, cropping and editing from a trip to the coast.

I wanted to record the late afternoon shadows on this rustic door. It looked like a subject I might want to tackle with my new colored pencils. 

I got the set of 72 PrismaColors and have not had a chance to play with them yet.


Love the shadows of the leaves, the wood grain and the various greens.

Ddd


Posted by studio3d@ccgmail.net at 11:52 AM PDT
Wednesday, 3 August 2016
12 Tags of 2016 - August
Topic: Multi-Technique

Right on schedule, Tim posted his technique remix tag for August. And with only a little delay I created my own version.

Here are the techniques Tim combined:


And here is the tag he created using them:


This is another of those cases where I did not have the product to do a major part of this project, so I used a work-around. More about that later.

Here are the steps I used:

- Cut piece of manila cardstock to work on (I cut mine from an old file folder)

- Put out some Distress Stain on a non-stick craft sheet (I used a blue and a green)

- Very lightly, roll a brayer through the stain to cover it with droplets of color

- Quickly and lightly roll across the 'tag' in one direction

- Spritz with water to allow stain to blend a little. Dry with heat tool

- Apply some brown Distress Ink with a blending tool

- Flick on water to create droplets. Dry with heat tool

- Use distress tool to rough up all four edges

- Apply Distress Ink to roughed edges

- Select a piece of printed cardstock for the overlay

- Diecut a 'grid' (I did not have any grid dies so I used two sizes of round punches and created my own pattern of holes)

- Paint grid with light layer of Distress Paint

- Dry, sand and ink then divide into three pieces

- Adhere to three corners of the prepared 'tag'

- Use the diecut (punches in my case) to cut some other materials to inset into the holes in the grid

- Lay out and then adhere punches to some of the holes

- Diecut scrolls from black cardstock

- Adhere to tag

- Embellish design with words, stickers, labels, charms, etc. (In my case I used three chipboard bird stickers and some 'chit-chat' word stickers)

- I skipped the step of stitching along selected edges

- Spatter surface with black flecks

- Use Sharpie pen to add details (I outlined some of the chit-chat words and drew eyes on the birds)

- Cut base card and mount the decorated piece on it

Here is the card I created:


When I do these 'tags' I follow along with Tim and make step by step notes (like those above) with no sketches or photos. Then I take that cryptic list to the studio and start looking for products and supplies that I can use to get a similar effect.

After creating, I photo it and bring it back up to make these notes. That is the first time I have a side-by-side comparison of the end products.

So, there you go, another month complete.

Ddd


Posted by studio3d@ccgmail.net at 10:13 AM PDT
Friday, 29 July 2016
I Can Do Without That
Topic: Musings

I'm sure everybody has them... things that every one else thinks are so trendy and you can't stand them.

I run into this a lot in quilting and sewing. Here is a partial list of things I can do without:

HEXIGONS - Affectionately refered to as 'hexies'. These just do not appeal to me at all.

YO-YOs - Grandma used to make these and decorate liberally with them. YUK!

POM-POMs - Doesn't matter what you put them on, they look tacky.

RICK-RACK - Comes in giant, regular and itty-bitty. Same as Pom-Poms... tacky.

HOUNDSTOOTH -  As a subtle, tone-on-tone for a wool skirt it might be nice. But much of it is just too much.

PAISLEY - Subtle, mixed with other motifs, in very small doses. THAT I can live with. Sort of.

And when you get out of the sewing world, there are some other irritants...

'POP' OF COLOR or MAKES IT 'POP' - I am SO over hearing these phrases. Especially on decorating shows.

HOT MESS - I don't know who came up with this phrase, but it wasn't then, nor is it now, cute.

AMAZING - If everyone who uses this is truly that amazed, they need to get out more. Let's save it for things that we truly are genuinely amazed by.

AWESOME - Same as 'amazing'

There are probably many more, and I undoubtedly use many myself that others would put on their list, but for now, that is all I will burden you with.

Ddd


Posted by studio3d@ccgmail.net at 9:25 AM PDT
Wednesday, 13 July 2016
U is for United States
Topic: Paper Embroidery

It's been a while since I did a paper embroidery project - in fact, the last one was for this same alphabet challenge! It won't be long until the alphabet will be used up and I don't know what the host has in mind to do after that happens.

In the meantime, today we are up to 'U' and the theme 'United States'.

Since I was choosing my pattern at about the same time as Independence Day the natural tendency was to lean toward using a flag, fireworks or some other 'holiday' imagery.

But I got over that thought as soon as I ran across my pattern of the flying bald eagle with its patriotic banner.

I pricked it out on a flecked white cardstock and stitched with realistic coloring.

Other than trimming, I did not do anything else (stamping etc) that might compete with the image.

I did mount it on the card with a red border which gives it a more patriotic punch with the red, white and blue combination.


You can see in the photo that I decorated the envelope, too. Those dots and dashes continue all around the face of it. A simplified flag was drawn on the flap (one blue star and four red stripes). I hand wrote "God Bless America" in the white spaces between the red stripes.

Ddd


Posted by studio3d@ccgmail.net at 9:48 AM PDT
Thursday, 7 July 2016
Angels' Song
Topic: Quilting

When at the BIG fabric store I fell in love with a particular print and actually bought it in three colors. Then I selected some other prints that echoed the colors that they had in common. It wash't until I got them home that I realized that the script printed in the background was scripture! Cool.

I wanted the butterfly fabric to be a true feature on a quilt and knew I had the right pattern when the Missouri Star Quilt Company tutorial for the Friendship Star Sashing came out. It was perfect - using huge blocks with all of the design work taking place in the sashing.

I arranged the blocks to create an off-center concentric diamond shape and used a medium blue for the stars and a dull red for the outer border.


Here you can see how the snowballed ends of the sashing combine with a matching cornerstone block to create the friendship stars.


The scriptures (Revelation 4: 8, 11, 5:13) are repeated over and over in different colors and sizes across the fabric.


Here you can see a little bit of the quilting. I quilted the scriptures in script across the surface. "Holy, holy, holy is the Lord God Almighty, who was, and is, and is to come. You are worthy, our Lord and God, to receive glory and honor and power, for you created all things, and by your will they were created and have their being. To him who sits on the throne and to the Lamb be praise and honor and glory and power, for ever and ever."


This will go as a gift for a departing pastor from our church staff.

Ddd


Posted by studio3d@ccgmail.net at 5:14 PM PDT
Monday, 4 July 2016
3rd Quarter Bingo Challenge
Topic: 3D paperwork

It being the beginning of the 3rd quarter of the year, the papercrafts group was issued a new challenge with a tic-tac-toe board. We were to make a card using the three items from any single line in any direction.

This is the board:

Wood       Punch      3D

Dots        Autumn     Cork

Sequins    Animal      Brown


I chose the top row: Wood, Punch, 3D and set to work.

For the wood I used a cardstock printed with boards. I used corner punches and a foil finish 3D image of a door knocker.

I mounted the door knocker on the wood printed piece and bordered this in brown. In the background (with subtle dots) I used individual letter dies to spell out 'new home' which I backed with more brown which also borders the entire piece.

I used corner punches all around and topped them with silver peel-off corner stickers that I had tinted with alcohol markers.

I used a double layer of peel-off text sticker in the space between the diecut words. This word was also tinted with alcohol markers.


Perfect timing for sending to someone whose new home purchase closes this week.

Ddd


Posted by studio3d@ccgmail.net at 5:31 PM PDT
Sunday, 3 July 2016
Speedy Delivery
Topic: Books

Whoosh! Shutterfly is fast on delivery of the books I have designed. I ordered this one late on June 29 and received it in the mail on July 2.

The subject I chose for my book this time was the use of my hand-carved stamps. I have been carving for years - sometimes with a craft knife and sometimes with Speedball carving tools, sometimes using erasers (both pink and white) and sometimes using pink or white carving medium. Personally my preference is for the carving tools on pink carving medium. I think it yields a much better result.

In any case, I have quite a collection of hand-carved stamps and use them a fair bit. Some are more popular than others: Hummingbird, Roses and Butterfly.

For the book, I collected photos of projects and grouped them by the stamps I used along with simple labeling.

The cover piece is made with watercolors, overstamped with the butterfly:


I had two photos of projects using the Two Feathers stamp:


The next spread features the Window on the left page and the Phoenix on the right:


Until I gathered the photos, I didn't realize that I had put a red bow-tie on the Penguin every time I used it! On the right page the Raccoon goes fishing every time:


On this left page I featured the Hat and the Llama. The right page has three stamps - Aladdin's Lamp, a Hibiscus, the Dragonfly:


This whole spread is single uses of different stamps. On the left are Crayons, a Dip Pen, a Lightbulb and a Fingerprint. On the right page are a Moon, a Postage Stamp and Fish Skeleton:


You can tell what my favorite stamps are by how many times I have used them. This whole spread is on the Hummingbird. Although mostly cards, I do have a set of coasters I made using white tiles:


This next spread features single stamps around the edges and one card that combines them all in the center. On the left is the Lighthouse. At the top-right are two different Fish and the lower-right shows the Tulip Cluster. The center card uses all except the Tropical Fish.


The most used stamp is a set of 3 Roses. There is a full bloom, a half bloom and a bud. This spread uses single blossoms:


This page spread features the full set of 3 Roses. Through the use of judicious masking I am able to create small to large bouquets:


Another favorite stamp to use time and time again is the Butterfly. The parchent box with the butterfly on the lid was created by my sister-in-law for a wedding. The card on the front cover of the book is not repeated here:


The last page features the Iris:


On the back cover I included the actual Panda stamp I carved for my grandson but never used on a project. My other grandson has a Train Engine I carved but never stamped.


The back cover also includes Author and Studio information.

Another fun project is 'in the books'.

Ddd


Posted by studio3d@ccgmail.net at 12:20 PM PDT

Newer | Latest | Older