« September 2016 »
S M T W T F S
1 2 3
4 5 6 7 8 9 10
11 12 13 14 15 16 17
18 19 20 21 22 23 24
25 26 27 28 29 30
You are not logged in. Log in
Entries by Topic
All topics  «
3D paperwork
A - Z challenge 5
A - Z challenge 7
A - Z challenge round 4
A to Z challenge round 3
A to Z round 2
A to Z round 6
A-Z round 1
Around the House
Art Challenges
Artist Trading Cards
Backgrounds
Beads
Bible Journaling
Books
Boxes
Collage
Color Challenge
Coloring
cookbook
Die Cuts
Digital Projects
Digital Stamps
Drawing
Dry Embossing
Fabric Stuff
Fantastic Folds
Field Trip
Home Decor
How Does Your Garden Grow?
Hymnal Art
In The Kitchen
In the studio
Jewelry
Lettering
Links
Multi-Technique
Music to Work By
Musings
Nail Art
New Work
Online Class
Other Hobbies
Other Projects
Painting
Paper Embroidery
Paper Piecing
Photo
Pretty Paper
Quilting
Random
reading
Scrap Recovery
scrapbooking
Sewing
Sketch Challenge
Some Backlog
Stamping
Stencils
Stickers
Supplies
Teabag Folding
Techniques
Testing
tips and tricks
Tutorial
Web resources
Welcome to my Blog
Work By My Friends
workflow
Writing
Blog Tools
Edit your Blog
Build a Blog
RSS Feed
View Profile
Group One
In & Out of Studio 3D
Thursday, 22 September 2016
Bible Journaling - John 6:35
Topic: Bible Journaling

I am finding that the colored pencil Bible journaling is so relaxing and personally rewarding.

For today, I decided to work in the book of John.

I tried out a different lettering style - tall, skinny, high center - and used a bit of a pictogram as well (little loaf of bread at the top.)

I did more scroll-work than usual amongst the lettering and colored the letters pretty much as before. I used fairly bright colors here since the illustration is monochrome.

The scripture is illustrated with a loaf and a slice of bread.

These small pictures are a great way to get comfortable with my colored pencils, too.

Ddd


Posted by studio3d@ccgmail.net at 4:53 PM PDT
Monday, 19 September 2016
Storming the Castle
Topic: Coloring

I reviewed my colored pencil drawing of the castle from August 27 and I found that the tones across the board were too similar. There just wasn't enough contrast.

So I pulled out the colored pencils again and set to work intensifying and working on shading and shadows.

I'll give you a side by side so you can see the changes:


I'm much happier with it now.

Ddd


Posted by studio3d@ccgmail.net at 12:01 AM PDT
Sunday, 18 September 2016
Fruit Of the Spirit - Bible Journaling
Topic: Bible Journaling

Many years ago I did a devotional called 'The Fruit of the Spirit is bananas' in which each of the fruits is assigned a real fruit to represent it. The only ones I can still remember are bananas=joy, apples=goodness, grapes=self-control, and kiwi=meekness. Also, the basket that holds them all = love.

So, for the fruits of the Spirit scripture (Galations 5:22-23) I created a drawing using these plus other fruits to round out the fruit basket.

These include orange=faithfulness, plum=forbearance, cherries=patience, lemon=peace, and pear=kindness. After the fruits were drawn in ink, I wrote the fruit's word inside the outline and then colored it.

The word LOVE is used as a weaving on the basket.

I colored the outline letters with a color-blending going from turquoise to green to orange to purple.


I grew up on the King James Bible and now use the NIV. The scriptures that I have memorized are in my head in KJV so I am torn, sometimes, on that version to use in the journaling.

So far, I am using NIV since that is the translation of Bible I am working in. I may break out of this occasionally when the KJV is so overwhelmingly 'right' to my brain. More than likely, these will be things like the 23 Psalm and the Lord's Prayer. We'll see.

Ddd


Posted by studio3d@ccgmail.net at 8:32 PM PDT
Saturday, 17 September 2016
More In the Travel Room
Topic: Around the House

I found more things to include in the travel-themed guest room which meant that some of the previous things needed to be moved around.

First in the door you come to the dresser. I didn't change anything on the top display but did take away the butterflies that were on the wall. In their place, I hung a little burlap bag that was a free gift when we bought coffee there.


Next is the corner wall that is on the right side of the window. I moved the single butterfly and a painted feather (both from Costa Rica) here. Below, over the back of the chair, is a blanket from Mexico.

The left side of the window now has the display piece with multiple butterflies we got in St. Martin. It is above the corner shelf on which the contents remain the same.


Above the bed is now a framed display of six quilt blocks. When we went on the quilt cruise last fall, each of the quilters brought a block they had made using the same fabric. The theme was 'life's a beach'. Everyone voted for their favorite (teachers, quilters, crew, people who wandered in...) and the top two quilters got to take home half of the blocks. I came in second! I chose six of these - four with palm trees and two with patchwork blocks - and got 12 x 12 frames to mount them in. (the one in the lower left is mine)


On the left side of the bed, the corner shelf display remains the same.


Did you catch the addition here?

Long ago I painted this watercolor called St. Thos. St. from a photo I took in St Thomas. It never felt finished so I put it away. When I took it out for another look I got out the fine-line black pens and added defining lines and shading to it. I had the brown mat on hand and mounted it in that.


I added a handmade doll made in Africa that I got at an event at a women's event at church.

Not shown (because I forgot to photograph it) is the metal trash can that I covered with scrapbook paper that features old postcards. 

I also have on order an 8x10 of the photo I took as we sailed under the Golden Gate Bridge this spring. It will hang above the switchplate in the door alcove.


THEN the room will be complete - until we travel some more and collect more treasures!

Ddd


Posted by studio3d@ccgmail.net at 9:14 PM PDT
Friday, 16 September 2016
A Whole Lot Of Wonderful
Topic: How Does Your Garden Grow?

I had a good day in the garden earlier this week and then forgot to post the photo!

For the most part production has been good this year. We have a couple of newcomers to the party - patty pan (scallop) squash which has been a raging success, and butternut which are producing well but not ready to harvest yet. 

We also tried out some yellow pear tomatoes - a 'cherry tomato' size - which are a bit mealy for my taste. The other two tomato plants, roma and beefsteak, are very late in ripening and not very good. They, too, are a bit mealy/mushy and some got centipedes eating into them. Harrumph!

Great jub, zucchini! You really outdid yourself. I have made 32 big loaves of bread, umpteen packets of roasted squash for the freezer, eaten lots, given away many, and even threw one away that was too huge and had gotten hard. 

The sweet banana peppers had a much better year than in the past but the green bell peppers were only mildly successful. Great yield from the carrots, beets and green onions.

Cucumbers have more on the vine than previous years but they are supposed to be growing up to 8 inches long and are only getting to about 5. Very sweet though.

So, how about a gander at one day's pick:


I'm thinking that the cukes need to be in the ground instead of in one of the barrels and will try that next year.

Of course, long gone are the green beans and peas. And I have totally given up on radishes as they have been disastrous every year - not worth the agravation.

The corn has tassled and we have some ears forming. Seem to only have one ear per stalk so it's a good thing we planted twice as many. 

Good Eating!

Ddd


Posted by studio3d@ccgmail.net at 9:30 AM PDT
Monday, 12 September 2016
More In the Word
Topic: Bible Journaling

I did another page of Bible journaling today. For this page I selected Proverbs 18:10.

I drew and colored the text down the left side of the page margin.

For the artwork I sketched out a castle (fortress) from an old magazine photo and colored it with my colored pencils.


I had checked out a few books on 'creative lettering' from the library and used some of their ideas for the text, including the addition of flourishes, banners, shaped spaces and texture fills.

Ddd


Posted by studio3d@ccgmail.net at 6:36 PM PDT
Friday, 9 September 2016
Doing Dinner
Topic: In The Kitchen

What a big day!

I gleaned a bunch of recipes via Pinterest for what many are calling 'dump dinners'. They are assembled into gallon ziplock (I used vacuum seal) bags and kept in the freezer. On the night before serving they are thawed in the fridge and then in the morning they are dumped into a crockpot to cook on low heat.

Out of all the recipes I had printed I selected 25 to make and did a comprehensive shopping list (marking off the supplies I had on hand). 

Yay! It was 'geezer day' at the supermarket where there is a discount on store brand products for over 55 shoppers. I also had a fist full of coupons so it was the perfect day to shop.

Back at home I sorted the supplies by type. I had an area for all the produce:


One area for meats:


and an area for all the add-ins:


This essentially took all of my counter space so I had to do all the prep work on the surface of the range!


I chopped, stirred, measured, poured, combined, sealed, and labeled.

Hubby cleaned up after me and transported everything to the freezers until I was finally done - 7 hours later.

Only one recipe was duplicated and I ended up with 26 dinners. 


All of these meals will produce left-overs so I suppose we really have 52 meals.

Next time I will limit myself to 10 recipes for a shorter day.

Ddd


Posted by studio3d@ccgmail.net at 12:01 AM PDT
Thursday, 8 September 2016
The Word and Pictures
Topic: Bible Journaling

I've been seeing the work of some artists on the internet who are doing Bible journaling. It is a combination of artwork, lettering and devotions - working in the pages of an actual Bible.

For my birthday, I asked for a journaling Bible and chose this one (NIV):


It is designed specifically for journaling so it has wide margins on the outer edges which are lightly lined. This edition is called "Journal the Word". A nice blue and brown imitation leather cover provides stability and it lays fairly flat while working in it.


I wanted to try out the pen and the colored pencils for how they react on the page (and to make sure the pen would not bleed through). So I decided to do a very small illustration on the last page. My chance that was the page describing the weights and measures.


The pen I chose is a .005 black permanent marker which does not bleed through the paper. I colored with my new Prismacolor pencils which go in very smoothly and blend nicely on this paper.


For my first journal page I turned to Psalm 100:4.

I used pencil to lightly letter the scripture in the provided margin and draw an illustration over the text of the page.

I used a rainbow of colors to do the text first:


Then I went on to color the 'gate' which is represented by a pillar and railing:


I used a variety of greens to create an impression of foliage in the background.


I added a bit of coloring over an in-text description of the psalm:


This method of devotion encourages one to dwell on the meaning of the scripture while creating art that relates to the words.

I hope to do much more of this as I found it to be relaxing and spiritually uplifting.

Ddd


Posted by studio3d@ccgmail.net at 12:01 AM PDT
Wednesday, 7 September 2016
For Holding More Stuff
Topic: Fabric Stuff

I used the same fabrics to create a second origami fabric box. It was easy because I cut all the parts together.

For this one I turned down the top edge differently so it makes a deeper cuff but without any fabric triangle showing.

This has the effect of making a taller box even though it is the same size on the width of the sides. As a comparison, here is the first one again:


This fold up just like the other one but makes a more compact piece.


I'm wondering about covering a mat board with matching fabric to strengthen the bottom. Of course, it would have to come out to collapse the box but it still might me fun to try.

Ddd


Posted by studio3d@ccgmail.net at 12:01 AM PDT
Tuesday, 6 September 2016
There's More Stars Out Tonight
Topic: Fabric Stuff

Of this color combination I made a total of 6 folded fabric stars.


These are the same size as the red and green ones shown yesterday - 3/4 inch across each of the center squares for a total of 3 inches across the star.

I also stitched hanging strings (silver cord) to each star as they are intended to be Christmas ornaments.


The red and green ones were finished up too, with gold hanging cords.

Ddd


Posted by studio3d@ccgmail.net at 12:01 AM PDT
Monday, 5 September 2016
Hanging It Up
Topic: Fabric Stuff

Another fabric craft I found on the internet was woven star ornaments. With these there WERE written directions... in German.

So I gave it a run anyway, working from the photos.

I chose some Christmas colors.


I think these are called Morovian stars but they come out looking like a little quilt block.


The width of the fabric strips is 3/4 inch (starts with a 3 inch wide strip folded in half and then the sides to the middle - like a double-fold bias tape).


These require no stitching, other than when I attach the hanging strings (not done yet).

Ddd


Posted by studio3d@ccgmail.net at 12:01 AM PDT
Sunday, 4 September 2016
Won't You Be My Buddy?
Topic: Fabric Stuff

Last Christmas when I made a couple of microwave bowl buddies (shaped potholders) I cut a bunch of extra parts and set them aside. While I was rooting through the studio I unearthed them and decided to construct a couple of them for myself.

These look familiar because they are the same fabrics I used on the previous set.

Here is a view with a bowl in place.


And a view without the bowl.


This is the other color scheme.


And of course, they are reversible.


I put them in the cupboard with the bowls so we will remember to use them. If I put the in with the other potholders I'd forget them until the food was already hot.

Ddd


Posted by studio3d@ccgmail.net at 12:01 AM PDT
Saturday, 3 September 2016
Here, Hold My Stuff
Topic: Fabric Stuff

I went trolling on the internet for some 'fabric gift ideas' and found an origami bin to make. Unfortunately, there were NO written instructions, just pictures. Some of the steps looked a lot like teabag folding which I have done a lot of so I decided to give it a try.

I chose some fabric I got at a recent yard sale and one from the stash that went well with it. I used these together in a quilt top not too long ago (but haven't shown it because it is not done.)

There is an iron-on stabilizer on the back of the patterned fabric and both pieces start at 17 1/2 inches. They are sewn fronts together and then turned right-side-out.

After that it is all origami folding followed by stitching the upper rim flaps down.

It finishes at about 7 inches square.


This would be good for catching scraps at the sewing machine or while hand-sewing.

When done, the whole thing folds flat.


Pretty cool, huh?

Ddd


Posted by studio3d@ccgmail.net at 4:56 PM PDT
Saturday, 27 August 2016
Castles On My Mind
Topic: Coloring

I don't know if I mentioned that I recently bought myself a set of 72 Prismacolor colored pencils. I've only worked with student grade pencils and watercolor pencils but I wanted to try the wax based pencils of a professional grade.

I did a landscape sketch out of my head and transfered it to colored pencil paper.

When selecting colors for a landscape you need to have choices in greens and blues. I did a lot of layering to get variety in the trees and grasses and it was then that I realized that the 72 colors I had were not that many more than a box of 64 crayons!

Here is my picture:


My favorite part of this is the trees in the distance. This is actually where I started:


I am actually very pleased with the reflection as well. I struggle with representing water but this time it turned out really well.


The whole drawing had a lot of tooth to it so I used aPrismacolor colorless blender on the whole thing. It improved it a lot.

I may still do some refinement on this to bring in more contrast since it is a little flat.

Ddd


Posted by studio3d@ccgmail.net at 10:19 AM PDT
Wednesday, 24 August 2016
I'm a Traveling (wo)Man
Topic: Around the House

I had a sudden desire to change the decor in our guest room. The old theme was lighthouses and I knew someone who would make good use of the items.

Within an hour I had brainstormed with Mom about a new theme and gathered items from storage, other rooms in the house and from various collections.

Here's what I came up with:

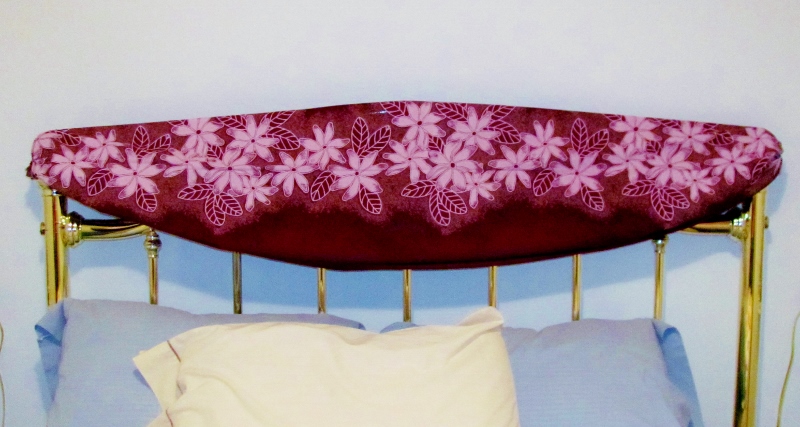
A new headboard treatment made with a sarong from Tahiti:


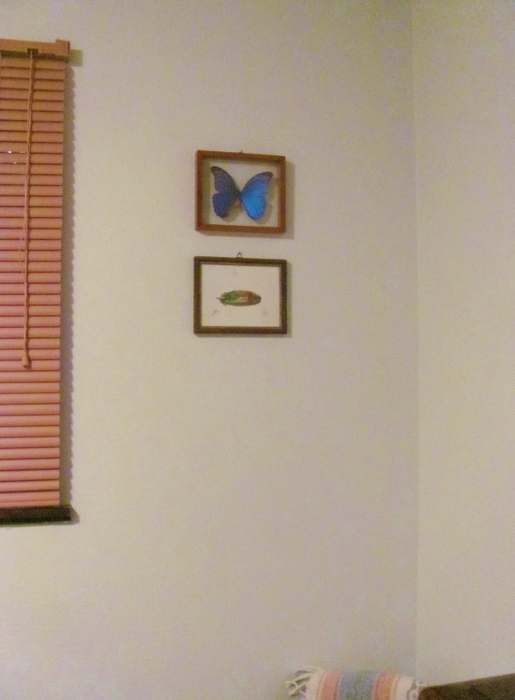
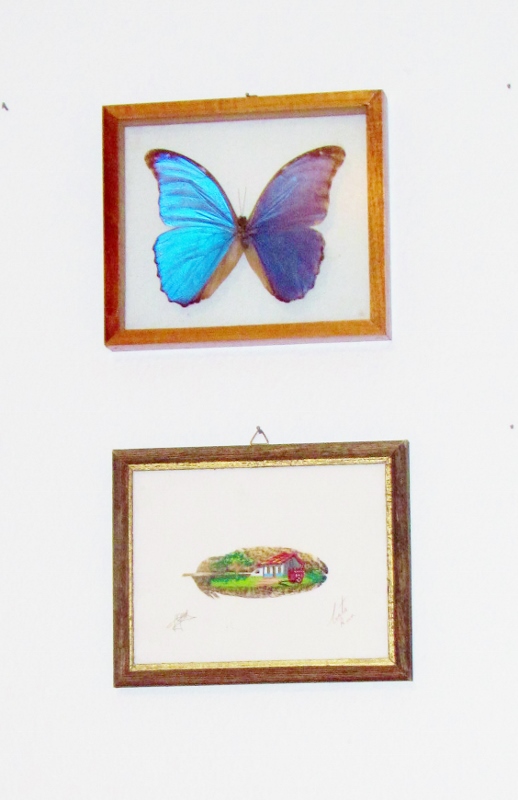
An over-the-bed display - a mounted butterfly and a painted feather, both from Costa Rica:


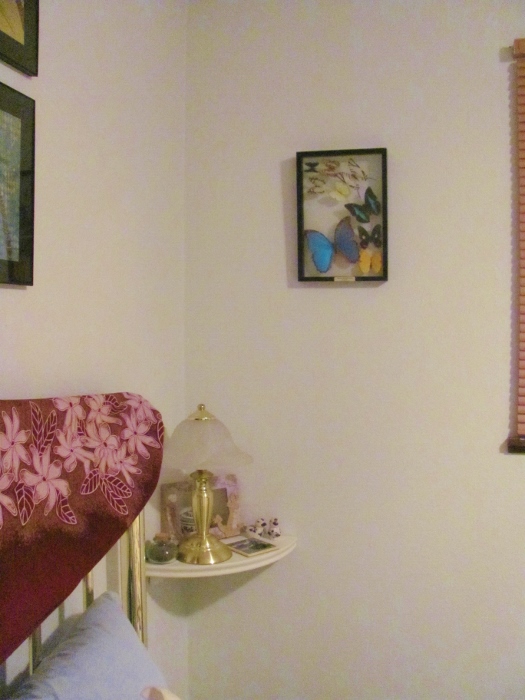
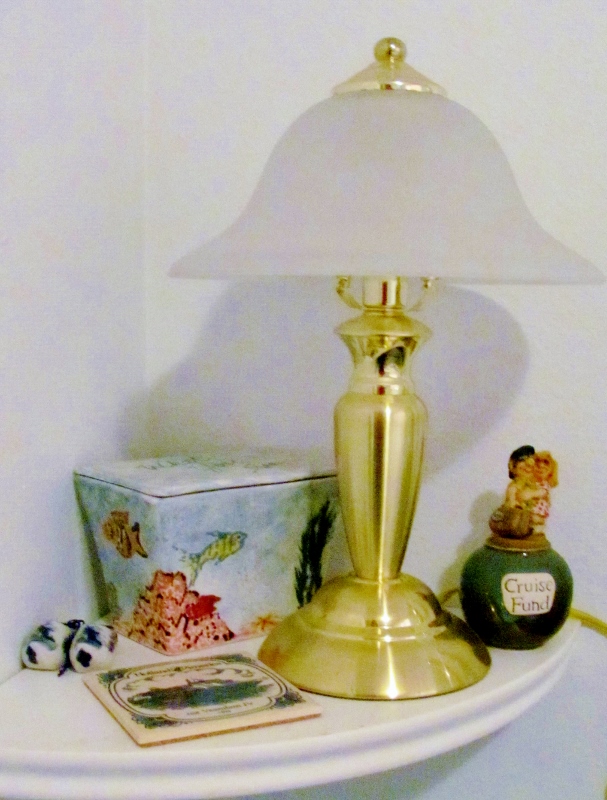
A nightstand display for the left side of the bed. A ceramic box I painted on a cruise, Dutch shoes from a friend in Holland, a tile from a cruise (for a coaster), and a little jar 'cruise fund':


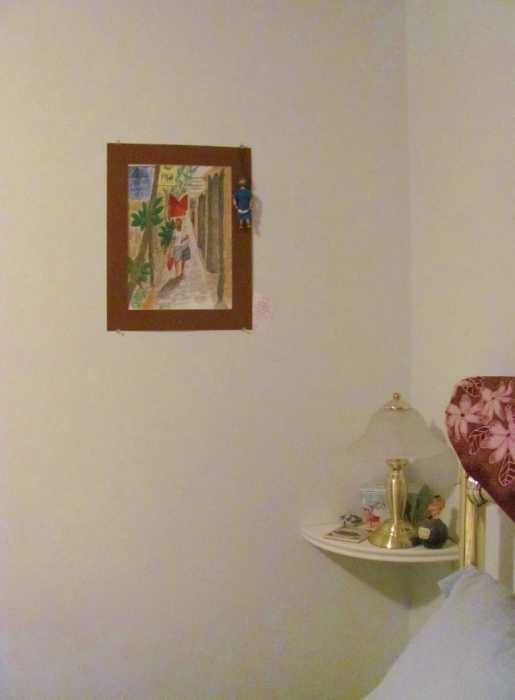
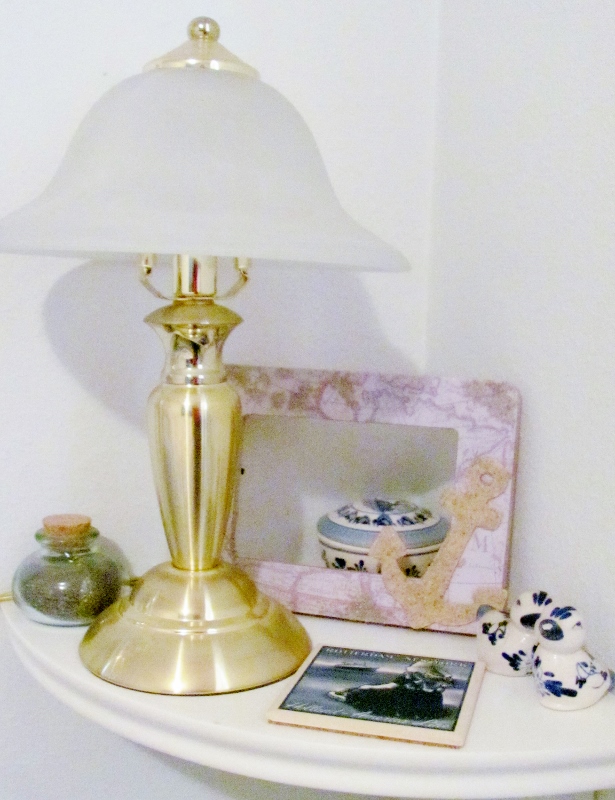
For the right hand nightstand there is a map-covered frame, a ceramic box, a little jar of sand from Hawaii, another cruise tile, and some Dutch birds from my friend in Holland:


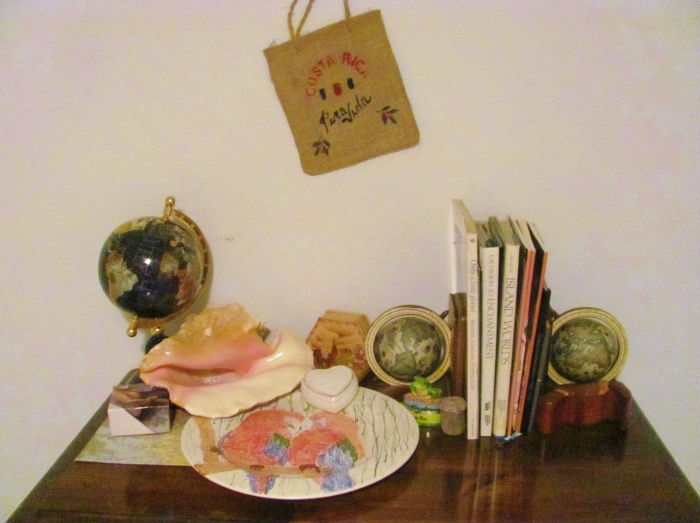
The main display is on the bureau. On the wall is a frame of multiple butterflies from St. Martin, a stone globe picked up in Alaska, a box made on a cruise, a silver woven box from Mexico, a conch shell from Grenada, in the back is a leather box from Venezuela and in front is a large plate I painted on a cruise, perched on its edge is a frog box from Puerto Rica, and then there is  box from the Beleek factory in Ireland. The globe bookends hold handmade and altered books with travel themes and on the right is a puzzle box from Costa Rica.

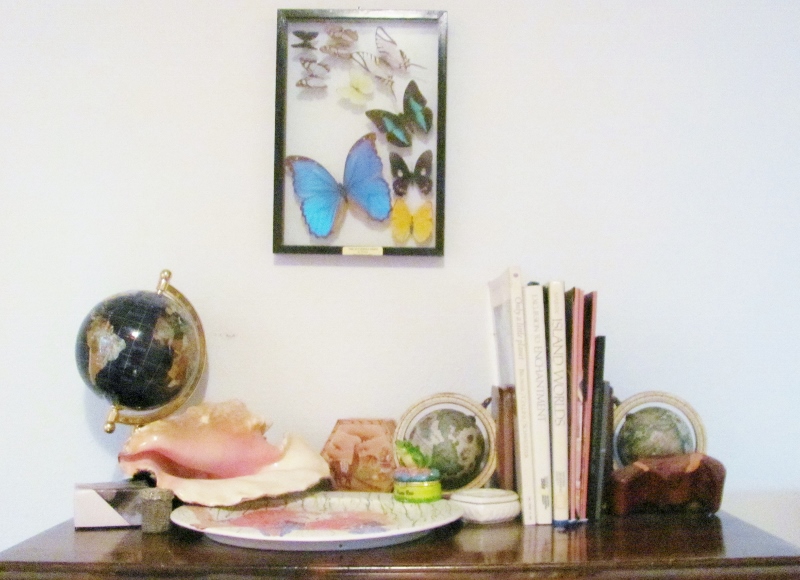
This eclectic mix of elements is only the tip of the volume of travel items that I could have selected from as I buy boxes wherever I travel and make crafts on almost every cruise. But these things went well together and cover a wide scope of places we have traveled.

I may do something more by adding artwork created with maps. I do have additional wall space to play with in this room, so there will probably be more to come.

Ddd


Posted by studio3d@ccgmail.net at 12:01 AM PDT
Tuesday, 23 August 2016
V is for Vintage
Topic: Paper Embroidery

Wow! It's REALLY close to the end of the alphabet on this series of paper embroidery swaps.

We are up to 'V' and the assignment was to make something vintage. I chose a pattern for an antique carriage and actually stitched it using the proscribed threads! That's a rarity.


Because there was so much gold in it I made the first border of gold and then matched the base card to the seat cushion and hood.

The greeting is a gold peel-off sticker.

Ddd


Posted by studio3d@ccgmail.net at 12:01 AM PDT
Monday, 22 August 2016
What Bug Is This?
Topic: Random

Sometimes, no topic suits and you just have to add a new category. Thus the topic 'Random'.

As I was out on the deck today I spied this beetle that I had never seen before. Hmmm. I 'googled' beetle identification oregon and then scrolled through pictures till I found one that looked like him.

Identification: Western Conifer Seed Bug

If its purpose is to eat the seeds of conifers, what it it doing on my deck that is not even made of wood? Unknown.

In any case, I thought it was interesting - if a little creepy.

Ddd


Posted by studio3d@ccgmail.net at 11:24 PM PDT
Sunday, 14 August 2016
One Bright Summer Day
Topic: Quilting

This is the last quilt that I had sandwiched back in June. All the rest will have to wait for layering until September.

I used a pattern shared by one of the ladies in our quilting group. Several of them had made one or more of their tops for the baby quilts using this and I had some fabril left from a previously cut project that I knew would look great.

The black floral started out life as a wide striped fabric. I just cut out full blocks as big as the stripe would allow and adjusted all the other parts to fit that. 

The black border is a rosebud print that I bought a few years back and put it away waiting for inspiration. It perfectly coordinated with the floral.

I used up the very last of the floral in making the corner blocks for the outer border.


I kept the quilting very simple on this. I did echo quilting 1/2 inch from all the black fabrics and then stitched in the ditch down the yellow/green thirds.

I also did free-motion quilting as an outline to all the peach colored roses - one in each block.


The backing is a tone-on-tone peach leafy print. I used yellow in making the 1/4" binding.

Ddd


Posted by studio3d@ccgmail.net at 9:38 PM PDT
Wednesday, 10 August 2016
Tuxedo Twist
Topic: Quilting

I haven't been sitting idly between blog posts. It's just that I've been working on many projects but not bringing them to completion. I don't often post 'in progress' items, so it leaves idle time here.

In fact, I have been working on SIXTEEN quilts which are a various stages from pieces cut to waiting for quilting. Many of them are ready for backing but, without the space to spread them out, I will have to wait until I go back to group at church to sandwich them.

I did finish one today that I had sandwiched back in June.

I used the block construction called Stack, Shuffle and Slide (I used this on two of the baby quilt tops last winter) and selected only black and white fabrics. These came mostly from the 'fabric-by-the-pound' bin at the Sew and Stitchery Expo, though a few were in my stash. The fabrics were sorted dark to light and, at the insistence of my hubby, I threw in a few fucshia.


I arranged it so the darks trace a zig-zag on the diagonal.

The backing is also black and white:


In keeping with the modern feel of this project, I quilted with meandering squares in white thread.


Back to the machine.

Ddd


Posted by studio3d@ccgmail.net at 7:49 PM PDT
Tuesday, 9 August 2016
The Color or the Flower?
Topic: Color Challenge

Since this was a color challenge I used 'fuchsia' as the color but used a different flower in my design - the rose - which is, by coincidence, also a color.

I started with white core cardstock and ran it through the Cuttlebug with a thin metal die to cut the rose elements. I added the rubber mat and used the same die to emboss the flowers. Then I sanded the surface to expose the white core, lending dimension.

I had some printed cardstock and cut four strips to create a frame around the attached elements. The aperture is cut by the die.

I added the separated elements to the front and the back of the attached element using foam tape.

I added a piece of white-printed vellum behind the aperture and used a marker to color in some of the dots. I lined the area behind the vellum with a dark cardstock.

I used the same marker to color some white corner stickers and added them.


So, 'rose' or 'fuchsia' or what-have-you, there is my card for the color challenge.

Ddd


Posted by studio3d@ccgmail.net at 8:21 PM PDT

Newer | Latest | Older