« January 2017 »
S M T W T F S
1 2 3 4 5 6 7
8 9 10 11 12 13 14
15 16 17 18 19 20 21
22 23 24 25 26 27 28
29 30 31
You are not logged in. Log in
Entries by Topic
All topics  «
3D paperwork
A - Z challenge 5
A - Z challenge 7
A - Z challenge round 4
A to Z challenge round 3
A to Z round 2
A to Z round 6
A-Z round 1
Around the House
Art Challenges
Artist Trading Cards
Backgrounds
Beads
Bible Journaling
Books
Boxes
Collage
Color Challenge
Coloring
cookbook
Die Cuts
Digital Projects
Digital Stamps
Drawing
Dry Embossing
Fabric Stuff
Fantastic Folds
Field Trip
Home Decor
How Does Your Garden Grow?
Hymnal Art
In The Kitchen
In the studio
Jewelry
Lettering
Links
Multi-Technique
Music to Work By
Musings
Nail Art
New Work
Online Class
Other Hobbies
Other Projects
Painting
Paper Embroidery
Paper Piecing
Photo
Pretty Paper
Quilting
Random
reading
Scrap Recovery
scrapbooking
Sewing
Sketch Challenge
Some Backlog
Stamping
Stencils
Stickers
Supplies
Teabag Folding
Techniques
Testing
tips and tricks
Tutorial
Web resources
Welcome to my Blog
Work By My Friends
workflow
Writing
Blog Tools
Edit your Blog
Build a Blog
RSS Feed
View Profile
Group One
In & Out of Studio 3D
Sunday, 29 January 2017
A Walk In the Woods
Topic: Quilting

I signed up for a mystery quilt for New Year's Day.

Prior to the day of, we were provided with guidelines on selecting 6 fabrics that would contrast and blend well in the pattern and how much of each to have on hand.

Then, over several days we were given cutting instructions for various colors and instructed on labeling them.

On New Year's Day the designer released instructions every few hours - 'stitch A1 squares to B2 triangles to create X number of usits that look like this' (for example).

Of course, nobody could actually sew as fast as the instructions were published as many steps were time-consuming or complicated.

It took me about a week to finish, including layout and assembly of the quilt top. I then had to wait for the next quilting get-together at the church to use the big tables to sandwich the quilt. That caused another delay as bad winter weather cancelled the first scheduled session.

Finally, I got it all together and then this week I got to quilt it. I did this with loopy vines and leaves all over the top.


The name fo this quilt has a two-fold origin. One is the arrows pointing this way and that over the pattern. The other is the fabric selection.

You can see in this close-up that there is a leafy forest floor, a wood grain and a sweet little country plaid. I also used a green and a blue as well as a dark brown with gold circles.


I used the dark brown for the backing and the little plaid for the binding.

On to the next.

Ddd


Posted by studio3d@ccgmail.net at 1:21 PM PST
Wednesday, 25 January 2017
Bible Journaling - Matthew 10:31
Topic: Bible Journaling

When I have read through this section of scripture in the past, I have always zeroed in on the phrases 'the hairs of your head are numbered' and 'fear not'. This time I wanted to focus on the fact that God treasures us and finds us to be of great worth to himself.

I looked up photos of sparrows on the internet to get their shape and coloring right. I wanted to make sure they looked like sparrows and not like robins, hawks or parrots! Good photo reference is essential.

I had just thumbed through a book on botanical drawing and took a few photos from the back pages. In that, I studied the structure of a branch that I could incorporate into the drawing for the birds to perch upon.

I drew with a pencil, traced with fine-line pen, erased the pencil lines and added colored pencil to the drawing.

Various lettering styles were pencilled in, inked and colored before I added lots of doodle swirls and colored them.


I used my favorite color to lightly color the sky as my finishing touch.

Ddd


Posted by studio3d@ccgmail.net at 2:23 PM PST
Friday, 20 January 2017
Bible Journaling - Zephaniah 3:17
Topic: Bible Journaling

I trolled Pinterest for Bible Journaling ideas when I first started and have combined several for this scripture. Some used the keyboard or the staff for other scriptures.

The roses were sketched in from memory of some I once saw. I used the lines in the journaling border as a guide to drawing the keyboard - very handy. I looked up 'treble clef' to get the shape and shading right.

The handwriting on the scripture is my own and I used notes for all the dots over the 'j' and 'i's.

My extra-fine line pen is getting low on ink so I moved up to a wider tip for the inking. It lends more weight to the drawing over the coloring.

The colored pencil work was used primarily on the roses, leaves and goldenrod, but I did use some smudged color on the staff, treble clef and scripture.


You'll also note that I started dating the artwork above the reference at the top of the page. I went back to my already-posted pages and added the dates on them as well.

Ddd


Posted by studio3d@ccgmail.net at 9:18 PM PST
Monday, 16 January 2017
Bible Journaling - Philippians 4:8
Topic: Bible Journaling

As soon as I started considering this scripture for Bible journaling this was the image that popped into my head (no pun intended). I had to do some searching to find a reference photo for it as I could not remember what it was called.

"Phrenology [from Wikipedia] is a pseudomedicine primarily focused on measurements of the human skull, based on the concept that the brain is the organ of the mind, and that certain brain areas have localized, specific functions or modules. Although both of those ideas have a basis in reality, phrenology extrapolated beyond empirical knowledge in a way that departed from science." The phrenology head is a kind of 'map' to the mind that these people used.
 
I searched and found several models of this and used one as the basis for a rough drawing in my sketchbook several weeks ago. When I decided to do this scripture today I worked only from that drawing and basically redesigned the head to sketch into my Bible. The key elements carried over from the original were the dividing lines on the top of the head designating the various areas.
 
The second reference I used was on drawing scrolls, which I had photographed into my phone from a drawing book. I also looked up font references on how to draw and shade chiseled lettering.
 
Next, I wrote the 'thoughts' from the scripture into the areas outlined on the head.
 
With these items sketched in place with pencil, I was able to ink in the scripture and the illustration and finish with colored pencils.

I made the colored areas match the lettering on the scroll, used a variety of greys to shade and model the head, and did the same for the scrolls.


Because the phrase 'whatever is' was repeated over and over in the scripture I turned it into a simple bulleted list with this phrase as the header.

I put the reference into a 3D box to mimic the sculptured head.

Ddd


Posted by studio3d@ccgmail.net at 12:54 PM PST
Saturday, 14 January 2017
Bible Journalling - Psalm 119:105
Topic: Bible Journaling

This will be a scripture that is familiar to most, although I learned it in the KJV when I was a child and this version sounds 'not quite right' to my ear. But since I am doing my work in an NIV Bible I stick to that in the art and quotes.

I first drew the lantern in a sketchbook and then looked up a photo to see where I had gone wrong. It was mostly right, though I had forgotten those supporting bars along the outside.

After the lantern, I drew in the path and followed that by the various roadside materials.

The lettering is my own invention, too.


I went back to a single page illustration as this called for a more vertical layout.

Ddd


Posted by studio3d@ccgmail.net at 5:33 PM PST
Wednesday, 11 January 2017
Bible Journalling - Psalm 139:17-18
Topic: Bible Journaling

Ooooh, I love it when a project comes out exactly like I planned it!

Last time I had my Bible journalling out I made a note of several scriptures I wanted to illustrate and did some rough pencil sketches in a notebook. So, when I got ready to work today, I already had a starting place.

I selected Psalm 139:17-18 to illustrate with a beach scene.

As usual, I completed the sketch in the Bible with fine-line black pen and used colored pencils to finish it.

I don't know why the photo does not show it, but on the lettering (the wider parts) are double lines with purple colored between them to match the distant hills.


This was drawn and colored completely from the imagination. The only reference I used was a look-up of a photo of a sandpiper so I could get the pose correct.


I added lots of little dots around the critters and around the last words in the quote, "the grains of sand", to join them to the illustration.

Ddd


Posted by studio3d@ccgmail.net at 9:06 PM PST
Saturday, 31 December 2016
2016 Wrap-Up
Topic: Multi-Technique

And so ends another year...

This year, instead of reviewing only my 10 favorite projects of the year, I decided to compile a list of accomplishments for the year on the blog.

First I ought to point out, as a reminder, that this was the year I stopped creating art to 'feed the blog' and started using the blog only as new art was completed, letting it happen in its own time. This began the first of June just as I had completed 9 years of posting art daily. It was a milestone moment and I chose to make the change that would allow me to relax a bit and let the art develop on its own schedule. The result was 69 blog entries June-December rather than the 217 that it would have taken to fill every day. I like it!

So, what did I do with all that time?

Quilting: completed 20 (baby quilts and lap quilts), 1 tree skirt, 6 placemats (retro campers), pieced 4 tops (lap quilts ready to be quilted), cut all the pieces for 1 quilt, started 2 mystery quilts (in progress).

Sewing: made 6 microwave bowl buddies, 1 small boxed bag, 4 pairs of pants, 2 pillowcases, 2 fabric origami boxes, 9 woven fabric ornaments, 2 zippered makeup bags, 1 insulated lunch bag.

Bible Journalling: This was a totally new endeavor started in September. I have 9 pages completed (pen and ink with colored pencils).

Artwork: 1 colored pencil drawing.

Digital projects: 3 calendars from Shutterfly, 5 books from Shutterfly, 10 cards from Shutterfly.

Challenges: 16 projects using Tim Holtz's Twelve Tags series for inspiration.

Gardening: A shared endeavor with Mom.

In the Kitchen: 26 Freezer to Crockpot meals (haven't sampled all of them yet but we're making note of the ones we want to make again), Preserving from the garden to go in the freezer (corn on the cob, breaded scallop squash, butternut mash, diced tomatoes, roasted summer squash, diced peppers).

Jewelry: 1 bracelet.

Cards: 143 hand made.

Travel: California coastal cruise, Riverboat cruise, Omaha NE, Lynchburg TN, Ephrata WA.

Miscellaneous: 2 watercolor pieces (using stamps for the sketch), 1 decorated blank book (for use as a travel journal).

Grand total: 288 items plus travel and gardening.

I also read 195 magazine issues and innumerable books (including all the assignments for a 16 in 2016 challenge)

Yep, I keep busy!

I would point out that, this year, my very favorite art-related activity is not something I created but a place we visited. We only scheduled a few hours for our visit to The Getty Center (Museum) in Los Angeles. We were mesmerized by all we saw but had to pick and choose as we rushed through. We had to totally skip the Maplethorpe exhibit, the sculpture gardens, and entire centuries of artwork. I loved standing in front of original paintings and sculptures by the world's renouned artists throughout time. I want to go back. I want to spend days there. I want to see it all! I also want to visit other museums like the Smithsonian, the Louvre, the Metropolitan, etc. I LOVE ART!

So, goodbye 2016. Hello 2017, here's to another art-filled year.

Ddd


Posted by studio3d@ccgmail.net at 9:14 AM PST
Tuesday, 27 December 2016
12 Tags of 2016 - December
Topic: Multi-Technique

I did it! I really, really did it! I finished all of the 2016 12 tags in 2016! LOL.

I wasn't sure I was going to get this last one done but when I realized I needed some 'thank you' cards for Christmas gifts received.

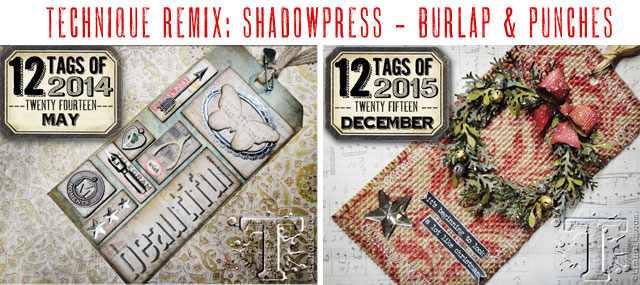
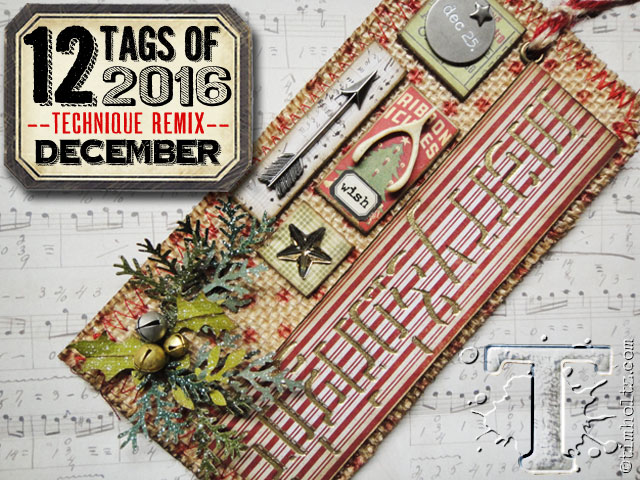
Here are the techniques that Tim Holtz combined:


And this is the tag he created:


I made cards this time out and here are the steps I used (I left out some of Tim's process):

- apply versamark ink to the inside front of a word embossing folder

- put colored cardstock in the folder and run theough the Cuttlebug

- scoop gold embossing powder onto the versamark ink

- melt embossing powder with heat tool

- select metal embellishments including some with text

- use wet glue to apply metal embellishments to colored cardstock. trim

- use Xyron to adhere text paper to a colored base card

- use wet glue to adhere the mounted metal embellishments to the card front

- use Cuttlebug to cut out 'greenery' from colored cardstock

- adhere to card front

- add rhinestones to serve as berries in the greenery

- glue a white card liner inside

Here are the four cards I made:


Challenge met!

Ddd


Posted by studio3d@ccgmail.net at 7:50 PM PST
Friday, 23 December 2016
Christmas Surprise
Topic: Quilting

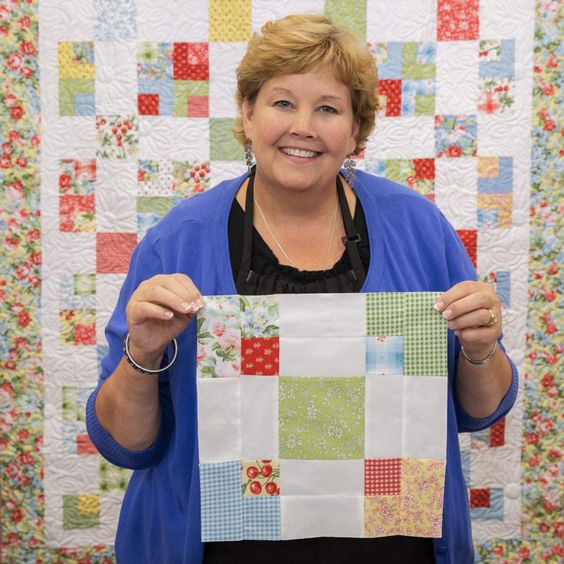
With the best of intentions I selected an assortment of Christmas fabrics and cut 5-inch squares to follow a tutorial from Missouri Star Quilt Comapny.

I went off the rails on the very first step! We were supposed to construct a 9-patch like this (the colored patches are all different though):


Instead, I made ALL my 9-patches like this:


You gotta understand that the blocks are a variety of colors. On mine, though, the centers are all the same (I'll show you later why).

Then the instructions showed to slice the 9-patch blocks like this and swap the cut-off sides to antoher block:


I realized that with my four white corners, the swapping out of the cut-off sides would bring back more white corners. Shoot!

So I sliced mine all ther way to the sides in both directions like this:


When the tutorial swaps out the cut-off sides with another block they get this:


Mine was NOT going to work that way so I swapped out those white corners for 2 1/2 inch colored squares (using all the same ones) and then added 1/2 inch sashing between all the elements. Mine looks like this:


AWESOME!

Put 12 of their blocks together and you get this:


Here's a picture from the tutorial:


I decided mine needed 2 inch sashings and cornerstones so the layout became like this:


And here is the final result:


So, here's why I used the same center block in all the 9-patches. I had this adorable chickadee fabric:


Here's the block:


Beautiful gold metallic sashing with block corners and red cornerstones:


As I was working on the blocks I had every intention of finishing this off with cheery prairie points around the edges. But I put in that shiny gold sashing and it threw a little tantrum and declared itself much too sophisticated for those country-style trimmings.

So I added a gold over-printed red backing (it is of the same line as the featured chickadees).


Then I used the green holly from the block corners for the binding.

I call this quilt Christmas Surprise because it surprised me from the very first step where I went wrong.

I'll be keeping this one for myself.

Ddd


Posted by studio3d@ccgmail.net at 8:19 PM PST
Thursday, 22 December 2016
Here To Help
Topic: Collage

I needed a card as an encouragement for someone going through some tough times. My immediate thought was the phrase 'hold it together' and I had a flash of all the things we use to do just that.

So I layered a patterned cardstock on the front of a base card and went to town embellishing it with fasteners of all sorts. I included: stitching, binder clip, bobby pin, knotted ribbon, clothes pin, paper clip, padlock, brad, button, hair clip, safety pin, bandaid, staples, washi tape  and velcro!

I used different sets of letter stickers to spell out: "when you know where to look"


Then the message continues on the inside: "you'll find the way to hold it together"

You can see in this view where the velcro was used - to hold the card closed.

I used more knotted ribbon, stapled on, to hold a charm of praying hands.

The white block is just where I covered the personal message I added to the bottom of the card.

Ddd


Posted by studio3d@ccgmail.net at 7:54 PM PST
Wednesday, 21 December 2016
12 Tags of 2016 - November
Topic: Multi-Technique

This project will almost catch me up with the 2016 tag series - though I chose another display piece instead of a tag.

I also changed the theme from 'Thanksgiving' to 'travel' for my project.

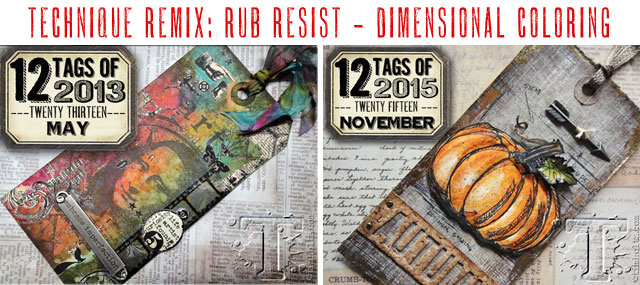
Here are the two techniques Tim combined:

And this is the Tag he created:

These are the steps I used to create my project:

- Apply rubons around the edges of base piece (I used landscape themed and postal images)

- Color background with Distress Stain - blending colors and adding water to mottle

- Distress edges with tool and ink (I used walnut stain)

- Stamp a 'blueprint image' on the background - set aside

- Stamp same image several times on watercolor paper

- Watercolor these using Distress Marker as watercolors

- Deboss from the back to create 3D image

- Trim to colored image size

- Deboss 'forward' elements of other images and trim them out for 3D elements

- Mount layers together using foam tape

- Use Glossy Accents on the areas of the image that are 'glass'

- Use diecut words on the background

- Back the cutouts with colored cardstock

- Use Distress Marker to add drop shadows inside the text

- Layer the watercolored image stack over the stamped image on the background

- Spatter the whole piece with black Distress Ink

- Use brad to attach a charm

And here is the piece I did:


One more 'tag' project to complete and my year will be done.

Ddd


Posted by studio3d@ccgmail.net at 12:01 AM PST
Tuesday, 20 December 2016
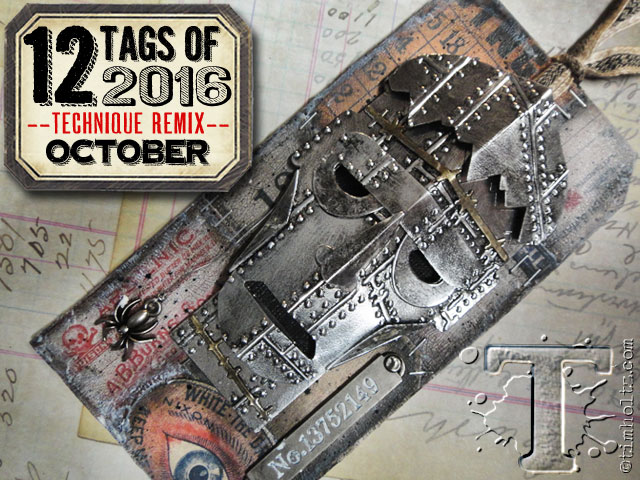
12 Tags of 2016 - October
Topic: Multi-Technique

I realized I got way behind on completing the projects Tim Holtz designed for his blog. With three projects left to do and only 11 days to get them done in the year assigned, I decided I had better get crackin'.

I had written out the steps Tim used when the bog posts first appeared but it had been so long that I had to look the post up before I started so I could refresh my mind on what the goal was!

Here is the techniques Tim combined:

And here is his project for October:


Tim went all out for Halloween in the October tag but, it being so late, I decided to go in a whole different direction. Here are the steps I used for my project:

- On a base surface create a patchwork collage of various elements according to the desired theme, using a matte medium as a glue and a sealant. 

- I started with two papers with cutout sections. These I overlaid with printed tissue paper, then I went to town with all sorts of butterfly stickers, staying with the more realistic-looking ones.

- Allow the collage to fully dry

- Lightly sand edges

- Apply Picket Fence Distress Stain over surface and wash/wipe away some to create a shabby effect

- Use Distress Ink pad in Black Soot to darken the edges of the panel

- Use Distress Marker in Black Soot to create a drop shadow under all the butterflies and immediately smudge with finger to soften

- Spatter with black ink

- Use word dies to punch out the word 'beautiful' in the background

- Back the work cut-out with bright paper

- Stamp hand-carved butterfly on bright paper and again on shimmer paper

- Carefully cut out both butterflies

- Stamp just the antennae on the background

- Glue the shimmer paper butterfly to the background, aligning with the antennae

- Use wet glue to attach only the body of the bright butterfly to the shimmer layer

- Fold up the wings on the bright layer and then attach to the shimmer layer using a small bit of foam tape

Ready for the reveal?


You can see I once again made a display piece instead of a tag. I chose to make this one for use in the Spring.

Ddd


Posted by studio3d@ccgmail.net at 5:24 PM PST
Monday, 19 December 2016
Bible Journaling - John 10:27
Topic: Bible Journaling

Today I set aside the quilting projects and got out my journalling Bible.

I had collected some photos of sheep from the internet onto my phone so I decided to use John 10:27 as the reference.

I sketched the sheep in my sketchbook and outlined it in dark black ink. This allowed me to trace it in pencil into the Bible where I used the black fineline marker to finalize the illustration. I added curly wool to him and then finished with colored pencils.

The text section was sketched out in pencil directly on the page and then refined with the black fine line marker.


I highlighted the scripture in the text where it passes behind the head of the sheep.

Ddd


Posted by studio3d@ccgmail.net at 3:18 PM PST
Wednesday, 7 December 2016
When Were You Last Carded?
Topic: Scrap Recovery

I usually work on Christmas cards throughout the year but I haven't been working a lot on cards for a while now. When I opened my card box I found I had FOUR cards done for Christmas! That will NOT do.

I pulled out my 'parts and starts' drawer and found I had three years' worth of card fronts saved from ones we had received from friends and family. 

I set to work trimming down the artwork I wanted to re-use. Then I went through my bin of Christmas papers and selected one to go with each illustration. Next it was on to choosing a solid bordering paper.

I cut all the parts to size and layered them on white base cards. I was working in two basic sizes: 5.5 x 4.25 and 6 x 4.5 (these were the envelope sizes I had on hand).

The final step was to pull out the Christmas sticker bag and find appropriate color/style stickers for each card face. I did not do this with those whose artwork already contained a sentiment.

These are the cards I ended up with - four photos:


My last batch of cards were part of a "10 Free" offer from Shutterfly. I didn't make the cards by hand but the illustration is a photo of a hummingbird painting that I did and uploaded to the site.


NOW I'm ready to write our Christmas letter and get to addressing the envelopes. I will probably have leftovers to start the bin for next year.

Ddd


Posted by studio3d@ccgmail.net at 7:46 AM PST
Monday, 5 December 2016
It's Beginning to Look Like Christmas
Topic: Quilting

For a couple of years I have been wanting to make a quilted tree skirt but had to wait until I found just the right pattern. In the November/December 2015 issue of Fons and Porter's Love of Quilting magazine I found just what I wanted. Then this summer I chose a perfect range of fabrics in the outdoor sale at Fabric Depot.

Not a one of the fabrics are Christmas fabrics. One of them has a little red flower on a white field but it is more of a daisy-like shape. No trees, no hokly, no snowflakes, no snowmen or santas or reindeer. They are just red, green and toast in small geometric patterns.

The pattern uses a LeMoyne Star and lots of diamonds.


It also uses THIRTY-SIX 'Y' SEAMS! Holy moly, that's a lot! Special templates are used to trim the corners of the squares so they fit together at the edges and the LeMoyne Star was supposed to be trimmed with a special tool but I wasn't going to buy it just for this project so I developed my own trimming method. this caused my triangles in the stars to become paralellograms instead. (No mistakes - just creative choices).

AND if one is not an expert at binding corners they will be by the end of this - 9 outer corners and 8 inner corners. A circle at the center used bias binding which was a new process for me.

Here is the over-all view:


I added ties to the open edges to close the back:


I pieced the back so I wouldn't have to buy more yardage to make one large piece. This is where eight of the Y seams are (in those outer edges).


I like this project very much! time to trim the tree.

Ddd


Posted by studio3d@ccgmail.net at 7:24 PM PST
Saturday, 26 November 2016
Floaters
Topic: Around the House

While we were looking through the binoculars at the beaver we could see a bir partially concealed standing at the far side of the pond. I took several photos of it and enlarged them to try to identify it.


In this one he is in the upper left of the screen:


Here's a color enhanced one:


Color enchanced one of him in the water:


Here he is with his girlfriend:


In my mind the term 'wood duck' sprang to mind and when I looked it up there he was pictured. Whoever took this photo had a much better view and got this great photo of both the male and female wood duck.


Isn't he beautiful? There are various versions of wood ducks with slightly different patterning, but this is the closest I found - given the restricted view we had

We've not had any of these before and we've been here since 1989!

10 Canada geese have moved into the pasture across the road and down one house. They totally ignore the 5 horses that live there.

Then today we saw 10-12 hummingbirds flitting in and out of the branches of the maple tree in the front yard.

The birds are taking over!

Ddd


Posted by studio3d@ccgmail.net at 2:38 PM PST
Friday, 25 November 2016
The Back and Forth
Topic: Around the House

Now that fall is here and the leaves hav cleared from the trees, we have a nice view of the neighbor's pond again. When the air is still we watch for ripples on the water as a signal that the beaver is out and about.

The other day we watched with the binoculars as braches were gathered from the north side of the pond and transported to the south (the whole pond is a little less than 1/2 acre)

We had watched a documentary on beavers last year so we know that they use the trees and branches for two thing - building their dens and stocking food for winter (they eat the bark from small branches).

We also assume this is a male beaver and not too old as it is new to the area and the males go off to set up a new home site when they have finished their apprenticeship of building with their parents and are ready to find/attract a mate. We're guessing, since he was here last year too, that he is about 4 years old.

In any case, after watching with the binoculars, it occured to us to see if we could get photos.


fun, huh?

We're still not too thrilled with his den-building as he has changed the place where the creek exits so it no longer goes under the pasture access through the culvert but flows over it about 50 feet away.

Giant rodents - gotta love em!

Ddd


Posted by studio3d@ccgmail.net at 10:18 AM PST
Wednesday, 23 November 2016
Bible Journalling - Psalm 147:4
Topic: Bible Journaling

The journal page I did in my Bible this time is Psalm 147:4.

I started with the lettering this time and tried to make creative designs. 

I wanted to use a night sky for obvious reasons and needed a base to ground it. To do that I drew a night skyline of high-rises and residences. I colored these with black, dark greys, dark brown and dark green.


The sky is colored with layers of three pencils - a red-violet, a purple and a dark blue. These were worked around drawn stars.


Some of my favorite parts of the lettering are: the numbering, the moon as the letter 'C', a star in each letter of the word 'each', and a name badge for the word 'name'.

This whole area was colored in a variety of yellows.

Ddd


Posted by studio3d@ccgmail.net at 12:01 AM PST
Tuesday, 22 November 2016
Rainbow Pencils
Topic: Coloring

Since I bought my set of 72 Prismacolor pencils I have kept them in their original order in the tin, carefully removing individual pencils to color with and returning them to the same slot when done.

The drawback to this was that each of the three trays was a 'step up' from the next smaller set of pencils so had a full range of colors. Each had a few greens, a few reds, a few yellows...

To color a tree, for instance, I might pull and use greens from al three trays and it was difficult to compare tones and tints to find the ones I wanted.

I broke down and pulled all the pencils out of the trays and arranged them by chroma. The first two trays are the rainbow rundown: red, orange, yellow, green, blue, indigo, violet. The third tray contains the two metallics (gold and silver) the white and black and all the browns, warm greys and cool greys.


This arrangement made them so much easier to work from.

I'll show tomorrow the Bible journalling page I worked from this new pencil lineup.

Ddd


Posted by studio3d@ccgmail.net at 12:01 AM PST
Monday, 21 November 2016
Simple Celebration
Topic: Paper Embroidery

Many times the concept is more attractive than the execution... I think that is true of the card being shared today.

I had a butterfly to embroider and blank area on a floral card. I chose colors to complement the floral and stitched by the directions.

I ended up with a flat, lifeless piece.

I tried to rescue it with the use of a bright stamped greeting bordered in the same color as the butterfly.


I pulled in more of the yellow by using it for the card base and allowing a border to show all around the card.

Ddd


Posted by studio3d@ccgmail.net at 12:01 AM PST

Newer | Latest | Older