« September 2017 »
S M T W T F S
1 2
3 4 5 6 7 8 9
10 11 12 13 14 15 16
17 18 19 20 21 22 23
24 25 26 27 28 29 30
You are not logged in. Log in
Entries by Topic
All topics  «
3D paperwork
A - Z challenge 5
A - Z challenge 7
A - Z challenge round 4
A to Z challenge round 3
A to Z round 2
A to Z round 6
A-Z round 1
Around the House
Art Challenges
Artist Trading Cards
Backgrounds
Beads
Bible Journaling
Books
Boxes
Collage
Color Challenge
Coloring
cookbook
Die Cuts
Digital Projects
Digital Stamps
Drawing
Dry Embossing
Fabric Stuff
Fantastic Folds
Field Trip
Home Decor
How Does Your Garden Grow?
Hymnal Art
In The Kitchen
In the studio
Jewelry
Lettering
Links
Multi-Technique
Music to Work By
Musings
Nail Art
New Work
Online Class
Other Hobbies
Other Projects
Painting
Paper Embroidery
Paper Piecing
Photo
Pretty Paper
Quilting
Random
reading
Scrap Recovery
scrapbooking
Sewing
Sketch Challenge
Some Backlog
Stamping
Stencils
Stickers
Supplies
Teabag Folding
Techniques
Testing
tips and tricks
Tutorial
Web resources
Welcome to my Blog
Work By My Friends
workflow
Writing
Blog Tools
Edit your Blog
Build a Blog
RSS Feed
View Profile
Group One
In & Out of Studio 3D
Friday, 8 September 2017
Bible Journaling - Isaiah 52:7
Topic: Bible Journaling

With a bit of a busy week (again) I did the lettering lessons hit and miss. The font this time was named 'beautiful'.

The first lesson I worked on was skipping right to the full alphabet. I found it extremely challenging to make this cursive alphabet 'stand up' so it looks more italics that it is supposed to.


I am not overly fond of the lowercase U when it connects with some letters. Just looks strange. You'll notice below that some letters that have a trailing loop do strange things when juxtaposed with the leading loop on the R.

We also worked on designing wreaths this week.

For my 'in the Bible' journaling I chose Isaiah 52:7 because I have been wanting to this one for some time.


Idea for the feet was found on Pinterest.

Ddd


Posted by studio3d@ccgmail.net at 12:57 PM PDT
Thursday, 31 August 2017
Lettering - 'Strength' font
Topic: Lettering

I never did get around to journaling a scripture for the 'strength' font we were taught this week - what a whirlwind my week turned into!

I did get the first day done with the font name as the practice word:


Then on Tuesday I got the full alphabet done:


Thursday I did a scripture on a journal page:


I kind of went nuts with the doodling on this page!

All week long I looked up scriptures on 'strength' and 'strong', trying to come up with one that I could illustrate. I never did come up with anything so I dodn't carry this font into my Bible.

One fine day, it will be the perfect alphabet to use for something, just not this week!

Ddd


Posted by studio3d@ccgmail.net at 1:00 PM PDT
Saturday, 19 August 2017
Bible Journaling - Romans 12:18
Topic: Bible Journaling

When I was looking up verses on PEACE to do yesterday I had a hard time deciding between two of them. So I decided to do the other one toda y and here we are with Romans 12:18.

I decided to make this one all about the lettering and wording so did minimal work on the illustrating.


Istarted with the words and then added frames, banners and ribbons around them to tie them together. This was a bit of fun to do.

Ddd


Posted by studio3d@ccgmail.net at 3:20 PM PDT
Friday, 18 August 2017
Bible Journaling - Isaiah 26:3
Topic: Bible Journaling

This week, the lettering lesson on the Bible journaling Facebook group was titled 'peace'.

I went directly to writing the alphabet in both upper- and lower-case.


To use it in my Bible, I illustrated Isaian 26:3 with Multnomah Falls, an iconic, semi-local tourist attraction in the Columbia Gorge, Oregon.

I worked from photos on Pinterest (there are many).

To me, waterfalls are very peaceful and this is one of our favorites.


I love these lettering lessons!

Ddd


Posted by studio3d@ccgmail.net at 2:17 PM PDT
Sunday, 13 August 2017
A Little Sparkle On Your Rainbow
Topic: Online Class

Day Six of the Online Card Class on Rainbows was for three techniques that did not fit into the categories presented on days 1-5.

First up was Kristina with using a rainbow of liquid dots to create flowers around a stamped sentiment on a white card.

I didn't have the materials she used but I had a whole rainbow of Stickles so I set about making flowers with those. I used dots, lines and teardrops to create these sparkly bits of deliciousness.


I liked this so much, I made a second card. Both were cut a little larger and mounted on shimmery yellow card bases.


Then Laura had us stamp (mask and stamp again) a large floral and color it with Copic markers. She showed several ways of arranging the rainbow but I really prefered this version with each flower head as its own rainbow. I colored a white diecut word t match the orange hues.


I went over all the lines with a Sharpie and added dots with a white pen to the stamens.

I skipped the third lesson, although I do plan to do it at some point (using acrylic paints on a gelli plate).

Don't know what is planned for the 'wrap up day'. And then the class will be over.

Ddd


Posted by studio3d@ccgmail.net at 12:00 PM PDT
Saturday, 12 August 2017
Layers of the Rainbow
Topic: Online Class

We're on to day 5 of the Rainbow Maker Online Card Class.

I skipped using the lessons offered by Kristina and Laura, just completing several taught by Jennifer. These took a lot of time to dry (overnight) whitch explains the delay in posting.

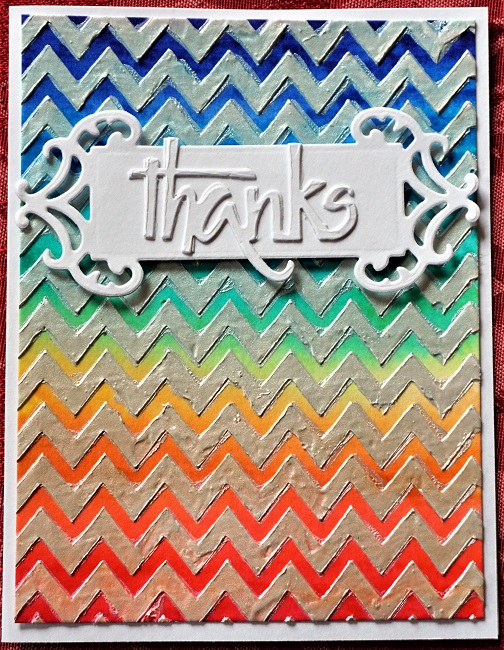
For the first card we were instructed to use watercolor markers in stripes on watercolor paper, spritz with water and let blend to one side. After drying with a heat tool we used a stencil and texture mousse applied with a blending tool. I did not have any mousse so I used a palette knife to apply Heritage Handicrafts Dimensional Paint in Snow White.

Part of the directions, after completing all the backgrounds were on ways to layer white diecuts for elegant embellishments.

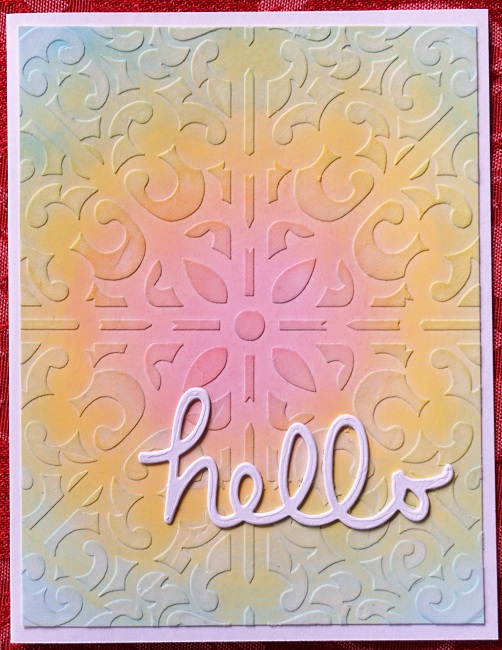
Technique two was to create a radiant blend using only three colors blended in concentric circles. I used a semi-glossy cardstock which made the colors more pastel. Jennifer then used glitter paste through a stencil in a radiating pattern. I had neither a radiating stencil or glitter paste so I used some modeling paste that dries semi-transparent.

The sentiment is three stacked white diecuts.

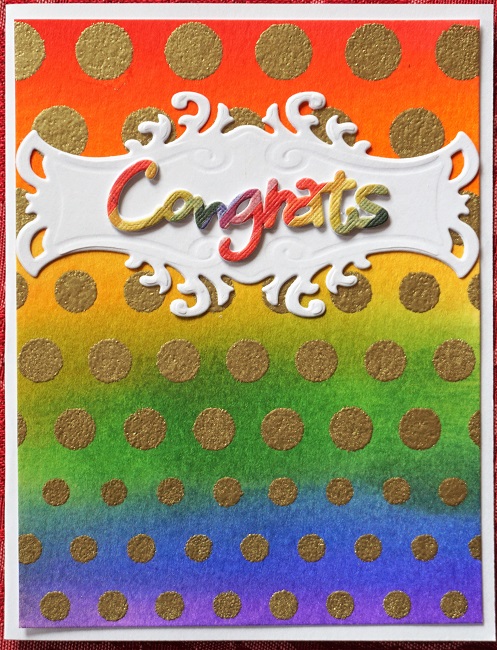
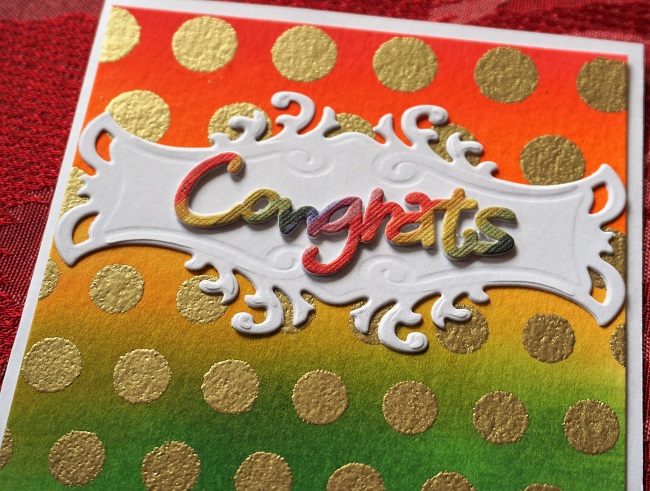
This faux watercolor is applied with Distress Inks and a blending tool then spritzed with water to allow it to blend when held to one side. After drying with a heat tool a stencil was laid on it and Versamark ink pressed through the holes. I did not have irridescent embossing powder like Jennifer used so I went with gold.

I added a white diecut panel and one of the leftover sentiment diecuts from day two.

Here's a better look at the shine of the gold embossing:
The next card starts out with a soft rainbow applied with blending tools. After thoroughly drying with a heat tool, a stencil is laid on and Versamark applied over the whole exposed surface. Mine was a reverse stencil so the Versamark actually ends up on the background. She embossed with clear sparkle embossing powder but I only had regular clear.

After cooling, another layer of Distress Ink is blended on the rainbow which darkens where the stencil covered.

I did my original rainbow with lighter colors and the ending one with brighter colors to make the distinction even more apparent. I finished off with stacked diecuts.
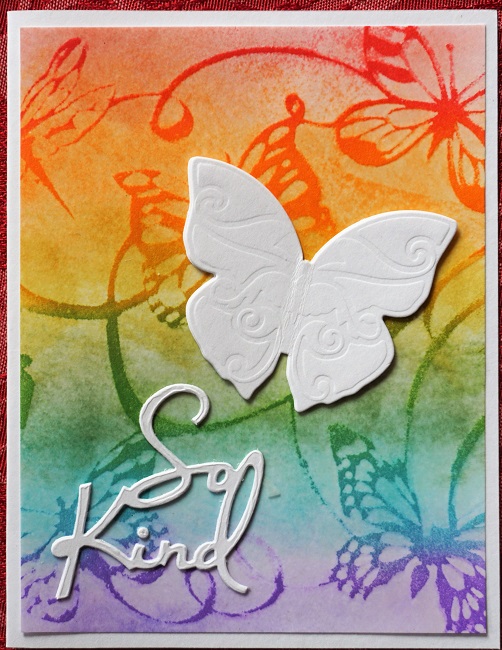

After finishing the lessons I had parts left over so I used them to create a bonus card.
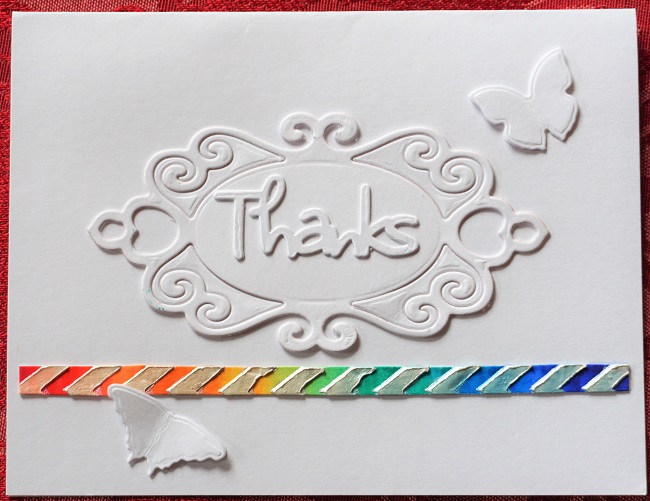

One more day of class - I'd better go get busy.

Ddd


Posted by studio3d@ccgmail.net at 4:49 PM PDT
Bible Journaling - Mark 3:35
Topic: Bible Journaling

Again, this post will be a lot of lettering - a new-to-me font, followed by a Bible journaling page using it.

On day one, the challenge was to letter the assigned words in the new font:


Note the little eyeballs in the letters.

On day two, for the full alphabet I chose to skip the thickened lines on the lowercase letters:


Day three, we were instructed to letter a few familiar words in the font and to do some double-line doodles:


On to day four where we lettered a scripture. I stayed with the theme of 'eyes' for mine:


I thinkthe eyes on every letter makes them look to busy. You start to see them as just dots instead of eyes.

So, for my Bible journal page I left most of the dots off the lowercase letters, only using a couple here and there:


I got an idea for illustrating this from some clipart online.

Ddd


Posted by studio3d@ccgmail.net at 4:04 PM PDT
Thursday, 10 August 2017
You Need Water for a Rainbow
Topic: Online Class

Online Card Class - Day 4 - For these lessons we dug out our watercolors. Actually, we had some choices in what we wanted to use for watercoloring supplies. I used my Windsor Newton watercolor paints for some and Distress Inks for others. All the cards were made with watercolor paper.

Kristina taught watercolor blending skills. We created a background and then diecut words from it and mounted over white cardstock.


The letters that were popped out from card one found a new home on black cardstock along with some gold peel-off stickers.

Laura demonstrated using Distress inks on acrylic blocks to smoosh color bands onto watercolor paper. I added text pre-printed on vellum.

Next, we were invited to apply these same colors in a circle on a sandwich bag, spritz with water and smoosh the card onto it. A white diecut medallion was combined with a pre-stamped sentiment strip.

We then did the same technique using a non-stick craft sheet for inking.

Laura next showed how to create a resist background using Versamark ink and clear embossing powder. The craft sheet smoosh technique was used for the inking. I diecut the sentiment 3 times from black and once from white and glued them in a stack for the card front.


When I was done making these backgrounds, I continued to spritz the craft sheet with water and dab a cardstock into it for a bonus background. This one also got a diecut medallion and a pre-printed vellum.


Debby used watercolors to paint big dots, letting them barely touch to allow the colors to bleed. She shared the concept of turning them into balloons with a figure to hold the strings. I didn't have a figure to stamp so I hand-drew the little cat. I also created this sentiment with three black and one white diecuts stacked up.

Since I didn't stay up till after midnight creating these, I get to actually post them on the day they were made.

Ddd


Posted by studio3d@ccgmail.net at 9:32 PM PDT
Rainbows to Die For
Topic: Online Class

Day 3 of the Online Card Class featured diecutting.

I made just three cards for this lesson. The first combines 1) use of nested circle dies used to cut out rainbow parts along with 2) handfulls of skinny strips mounted vertically to a backing in rainbow order and diecut into a word. Then 3) a cloudy sky background was created with an embossing folder and I cut it apart to layer with the rainbow.


Card number two uses more of the nested circle dies for a rainbow and the cloudy sky folder, but without the blue inking. This also uses a diecut sentiment in white made up of 3 layers of cardstock.


The last card uses scraps from the narrow strips mounted on cardstock. I used some to cut a sentiment on the diagonal to the stripes, some to hand-cut a cake and candle and the rest to cut plain strips. All were combined on a white card along with one of the rings from the nested circle dies.


The biggest lesson I learned was the importance of using waxed paper between the letter dies and the cardstock. The words just fall out instead of having to dig them out of the dies.

Ddd


Posted by studio3d@ccgmail.net at 8:51 PM PDT
Wednesday, 9 August 2017
Stamping Out Rainbows
Topic: Online Class

Day 2 of the Online Card Class I'm taking had it's focus on stamping using rainbow colors.

First up was Jennifer with a first- and second-generation rainbow stamped in a grid. I used a chevron heart where she used a solid. I added three layers of diecut sentiment and a striped background.


This was followed by layered stamping, using overlapping colors to create a more complete rainbow. There are actually only 6 colors used on these crayons. The effect is created entirely by stamping one color on top of another.The crayon stamp is one I hand carved years ago. Again, I used a striped background and triple layered diecut sentiment.


The instructor, Laura, taught how to make ombre plaid rainbows using three border stamps and blending ink on them. I bordered in black, popped up a color circle and added a triple thick diecut sentiment.


Carissa demonstrated several ways of getting a sentiment inked into a rainbow. I didn't use any of her embossing techniques, just straight up inking. I trimmed out the sentiment by hand and mounted it on a black banner strip. Layered over black and white background bordered in coral.

I'm liking this rainbow theme!

Ddd


Posted by studio3d@ccgmail.net at 12:05 AM PDT
Tuesday, 8 August 2017
Blended Rainbows
Topic: Online Class

I started an online class yesterday at the Online Card Classes site. This one has a focus on using rainbow coloring.

The lessons for the first day (three instructors) taught how to do TWELVE different blending styles and then turned several into finished cards.

Mine may use different supplies, a change in style, other finishing and most certainly stamps unlike theirs.

This one uses blending around the edge and is then overstamped with black ink. I finished by blending some spot coloring into the flowers and bird, added a sentiment and tiny rhinestones:


The next is center blending with black overstamping. The front panel has been run through the Cuttlebug with a texture folder at the top and bottom. Finishing includes popped-up mounting and rhinestones:


We switched from blending tools to stencil brushes for the next one. The color is applied from one edge in rainbow bands. Then a stencil was laid on top and more of the same colors were brushed on. I turned mine so the color was at the bottom and stamped the bottles over it.


When stamping the card above I stamped the image again onto a blank card to clean off the stamp. Then I used the image to clean off my stencil brushes and it gave me this soft image. I stamped a black sentiment over the top and finished with rhinestones.


On this, rather than using a whole rainbow of colors, it uses only red yellow and blue. All the secondary colors are from blending these. It has been flecked with water to create the mottled effect.


One of the lessons was creating a stripedy background using the edges of thepads of pigment inks. I, on the other hand, used my Distress Inks. As I added more color it was leaning toward the orange so I finished going in that direction and created a sunset sky instead of a rainbow. The skyline is a stencil that I inked with Archival black.


 Finally, I stamped those bottles again and used the direct-to-paper technique to spot-color them.


...and that was day ONE!

Ddd


Posted by studio3d@ccgmail.net at 8:52 AM PDT
Friday, 4 August 2017
Bible Journaling - Psalm 97:11
Topic: Bible Journaling

As promised yesterday, here is the scripture I did using the 'zealous' font:


I opted to use only the uppercase letters for balance and styling. The lowercase just would not hang on the wires nicely.

Again, I used a few elements from the letterin lessons in the new book: Hand Lettering for Relaxation by Amy Latta.

Ddd


Posted by studio3d@ccgmail.net at 5:49 PM PDT
Thursday, 3 August 2017
Lettering With Zeal
Topic: Lettering

First of all, I have a book recommendation for anyone who wants to learn/improve their hand lettering skills. I bought mine from Amazon.

This is a beautifully designed workbook that has guided lessons on different fonts, doodles, embellishments and various stylings and personalizations.


But that is not the source of the lettering I have been using in my Bible journaling lately. However, I have been making use of the decorative elements I've learned there.

The Bible journaling site I follow had us practicing and using a font that was only created in uppercase.

Monday we practiced a word in the font:


Tuesday, we wrote out the alphabet and created a lowercase alphabet for it:


Wednesday was for practice of words in both upper- and lowercase letter. This was where I started practicing adding some doodles:


Finally, on Thursday, we used the new alphabet to write out a scripture in a notebook. 


The instructor started the week by guiding us to focus on 'zealous' for this alphabet. But, along the way, I changed my focus to power and light.

Tomorrow will show the Friday assignment of using the new font in our Bible.

Ddd


Posted by studio3d@ccgmail.net at 5:29 PM PDT
Friday, 28 July 2017
Bible Journaling - Isaiah 55:12
Topic: Bible Journaling

As promised, here is the assignment for day #5 in the Lettering Lodge, using the 'joy' font and 'twisty ribbon'.

I worked in imagery for all the parts of the verse and even turned the twisty ribbon into a musical staff.

I had fun dreaming up this layout and researching on Pinterest to find photos of the elements I wanted to use in order to get the perspective right. This was especially important for the wrought iron gates.


I drew double lines on most of this as I had done so on the gates and then needed to do the same on the background as it was fading away with only a single thin line.

I found myself singing the song while I was doing the lettering - and still catch myself humming it today!

Ddd


Posted by studio3d@ccgmail.net at 10:37 AM PDT
Thursday, 27 July 2017
Bible Journaling - Psalm
Topic: Bible Journaling

We're back in the Lettering Lodge doing homework with a faux brush font nicknamed 'Joy'.

This font starts with neatly drawn cursive. Then an additional line is added to the downstrokes and the space is filled in.

The first day we practiced a few words to get the feel of the font:


The second day we wrote out the entire alphabet in upper- and lower-case:


The third day we wrote out familiar words and learned to make twisted ribbons:


Finally, on the fourth day we were given a specific scripture to write out 'on plain paper' and decorate with ribbons. I figured, if I'm going to all the trouble to write it out and decorate it, I might as well do it in the Bible and add art:


Tomorrow we will be instructed to do a full Bible journal page in our Bible using the font and a ribbon. I've already done mine but I'll restrain myself and not post it until then.

Ddd


Posted by studio3d@ccgmail.net at 8:06 PM PDT
Tuesday, 18 July 2017
Bible Journaling - 2 Corinthians 12:9
Topic: Bible Journaling

It seems when I learn a new font for the Lettering Lodge on the Bbile Journaling Facebook page I follow, I immediately want to write out the whole alphabet. Then, depending on the 'word' that is assigned to that font I start thinking about verses I can journal with that font.

The group is doing one word on Monday, the alphabet on Tuesday, a surprise assignment on Wednesday, a verse on paper on Thursday and then using the font in the Bible on Friday.

I can't work that slow. I end up doing the word AND the alphabet on Monday, looking for verses on Tuesday and journaling in the Bible by Wednesday...Thursday at the latest.

If they did it all in one day, I would be OK with that!

So, this week it was a font they called Grace. It has a bit of Native American art vibe to it.

I changed up little bits in the font to come up with this page (the uppermost word is a different font by the same artist):


As you can see, the lowercase letters re not very exciting - the rounder letters have a diamond-ish feel to them, but everything else is just basic printing.

So, when I wrote out the verse in my Bible, I used all uppercase letters. Again, I edited bits of the letters and then I did some creative coloring to give them a bit more pizazz.


For the hands, I used an illustration sheet that taught how to draw this particular pose and then traced to the back of the paper to get the reverse image. 

I took a photo of the tiny sketch with my phone, turned up the contrast and enlarged it and then used the screen under my bible like a lightbox to trace the hands.

It was a new process for me.

Ddd


Posted by studio3d@ccgmail.net at 3:43 PM PDT
Friday, 14 July 2017
Bible Journaling - Jonah 2:2 and 9
Topic: Bible Journaling

Yesterday I used the new font 'Grateful' which was shown the other day to journal in Jonah.

The lettering instructor included some inspiration on creating decorative wreaths and some traditional symbols for the word 'grateful'.

I combined all three elements for my page.


This kind of page treatment works when there is no specific 'picture' to illustrate the selected scripture.

I did include a little whale to set off the scripture reference in the upper right. :)

Ddd


Posted by studio3d@ccgmail.net at 12:01 AM PDT
Thursday, 13 July 2017
Slipcase for Colored Pencil Box
Topic: Boxes

It was hard to select a topic category for this entry because 'technically' what I made is related to bookbinding. But I'm using the end product for something else so I'm classifying it as a Box.

Remember the other day when I had an 'aha moment' on making a slipcover for my metal box of colored pencils. I wanted to do this so they would look like the other materials in the stack of Bible journaling supplies.

Reminder: this is what the box looks like:


...and how out of place it looked in the stack:


I searched on YouTube and found a great set of four videos by bookbinder Sage Reynolds that were extraordinarily detailed and perfect for my purposes. He covers every detail that leads from raw board to a beautiful and completely custom slipcase. You can watch yourself at https://www.youtube.com/watch?v=ccWnUQqFyKg&list=PLKThD7m8NDz7k4HVV0g27Sjzrd3RgkujP.

I didn't have some of the materials he used so I mounted the lining paper with spray adhesive, assembled the case with Ranger's Glossy Accents, and attached the cover papers with a foam brush and Matte Medium (generally used for collage). 

The lining paper is Tim Holtz's Idea-ology Melange Tissue Paper from a roll. The cover paper is Dollar Tree kraft gift wrap. I added a spine strip so it would liik more like the other box 'books' in the stack. This was a scrap of mulberry paper.

I was so excited to show you this project that I didn't wait for the glue to dry before taking pictures. This explains any dark areas on the papers, especially the spine.

Here is the basic look of the slipcase:

Another view:

Here you can see the lining paper better and get a look at the great way the edges are finished:

Look how neatly the pencil box fits into the slipcase:

And how well it fits all the way in the case:


It even looks good 'standing' on the shelf:


But the best thing is how nice it looks in the stack of other supplies:


Well, I must say, this turned out every bit as good as my 'vision'.

Ddd


Posted by studio3d@ccgmail.net at 12:01 AM PDT
Wednesday, 12 July 2017
The Future of Lettering
Topic: Lettering

I was noodling around the other day and wanted to design lettering with a futuristic vibe.

My practice paper was 1/4-inch grid so I started working around the grid blocks, using the verticals the horizontals and the 45-degree angle.

Here is my final design. There are no uppercase letters for this alphabet:


You can see that some of the letters are very wide. In the sample words at the bottom you'll note that I only used 1/8-inch for letter spacing and 1/4-inch for word spacing. Also, on occasion, there is an opportunity to overlap some letters for a better look.

I did a little dot embellishment on one sample word.

Feel free to use these letters in your own work but do not reproduce this alphabet for sale or distribution, either my drawn letters or the same letters you have re-drawn. Feel free to direct others back to this page for inspiration.

Ddd


Posted by studio3d@ccgmail.net at 11:01 AM PDT

Newer | Latest | Older