Topic: Lettering
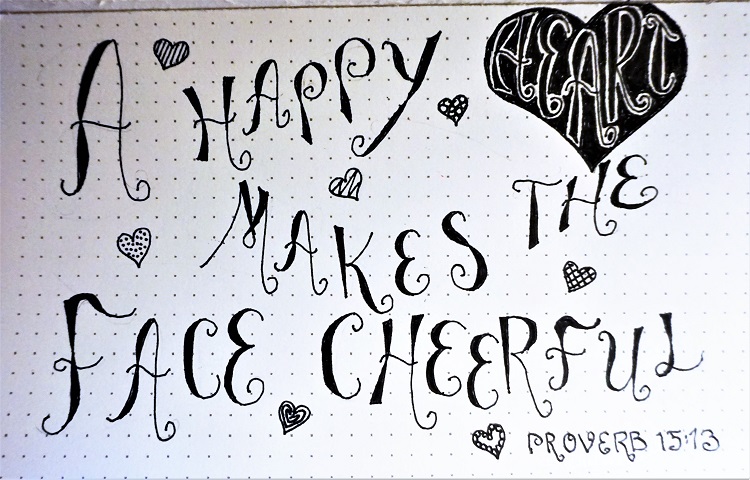
Back on October 29 I posted about designing some lettering for my Bible based on some illuminated manuscripts we saw at the Getty. Since then I developed that post into a lesson plan to teach on the Bible Journaling Facebook page I belong to.
Here it is:
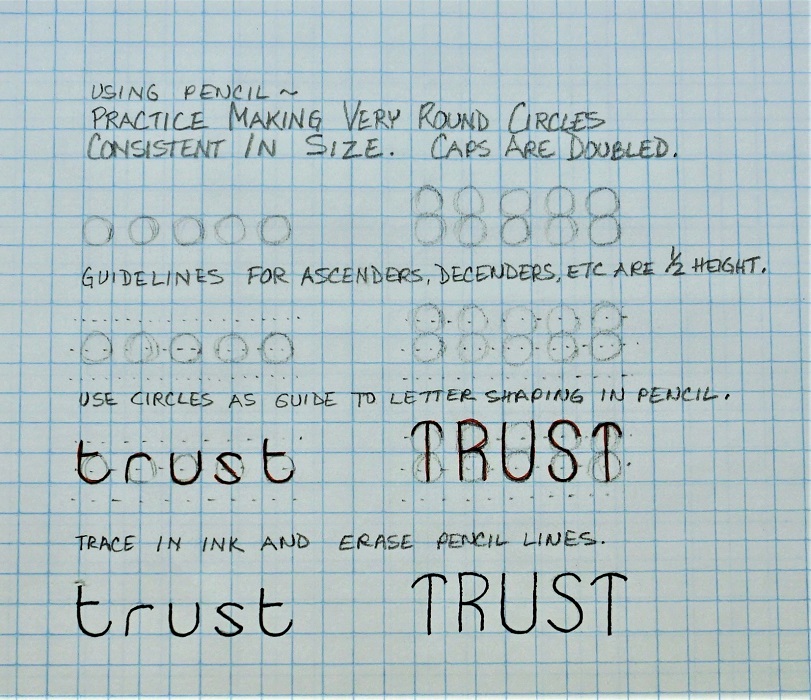
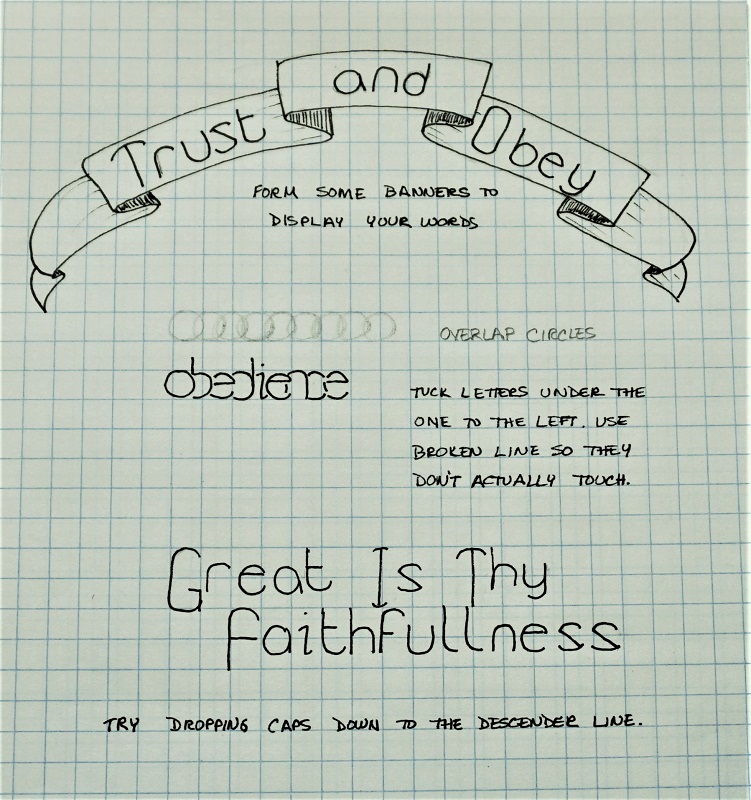
This week’s set of lessons are a real departure from our usual fonts. But there is a very good reason for this and by the end of the week it will all come together into a spectacular page for your Bible journaling.
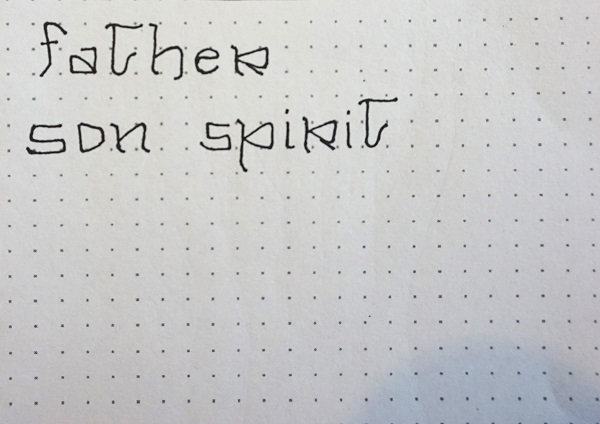
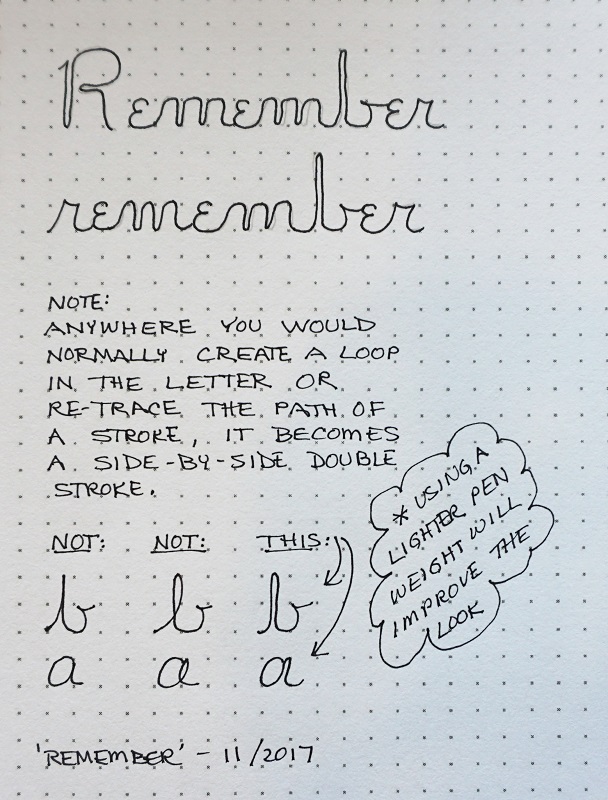
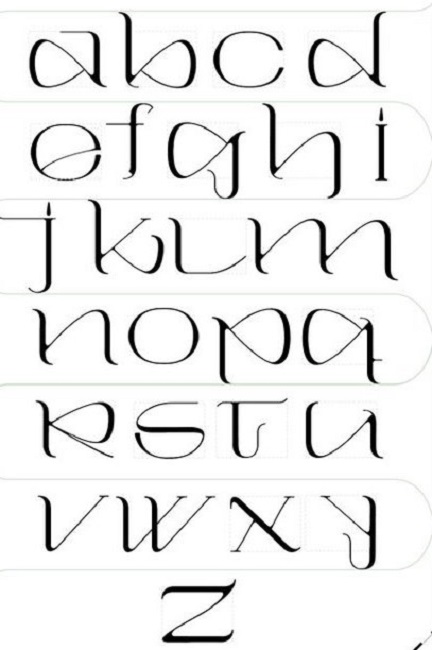
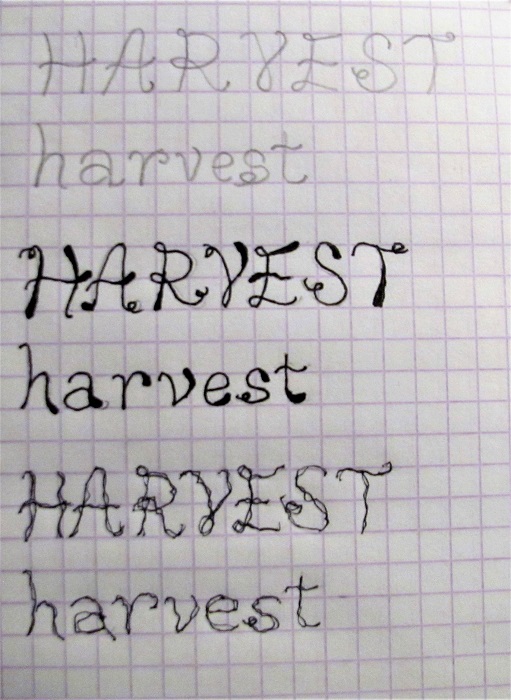
The font has some odd shapes but you’ll notice a lot of rounded triangulars and a little slanted tip on many letters.
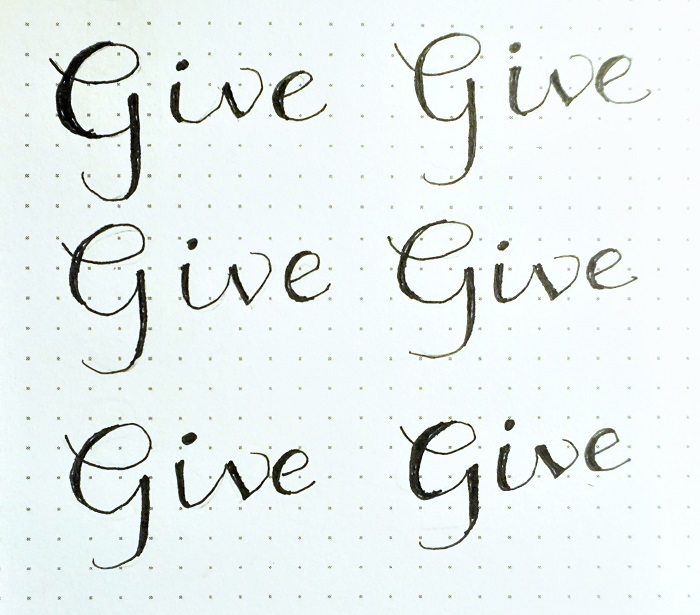
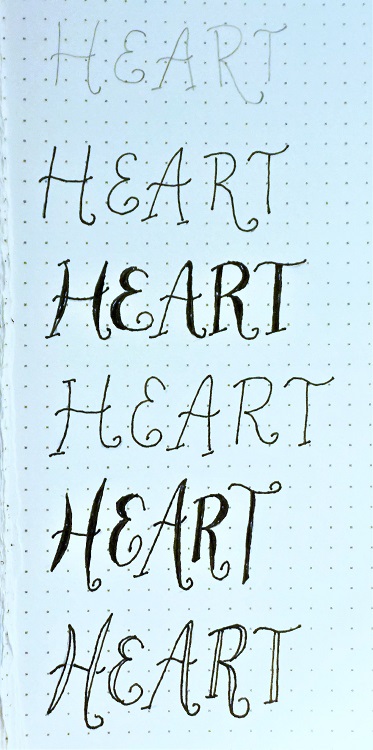
We will be focusing on God the Father, Son and Spirit this week so those are the words we’re writing today.
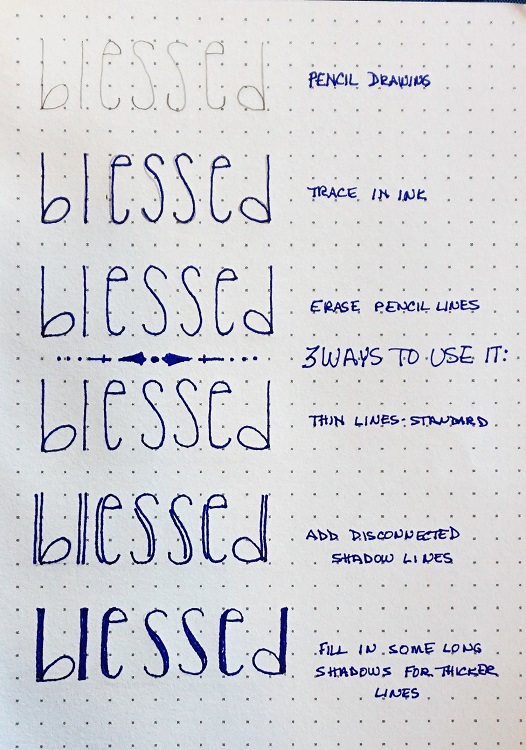
Remember to draw your letters in pencil several times to get the feel of them, trace them in ink and then go back and erase the pencil.
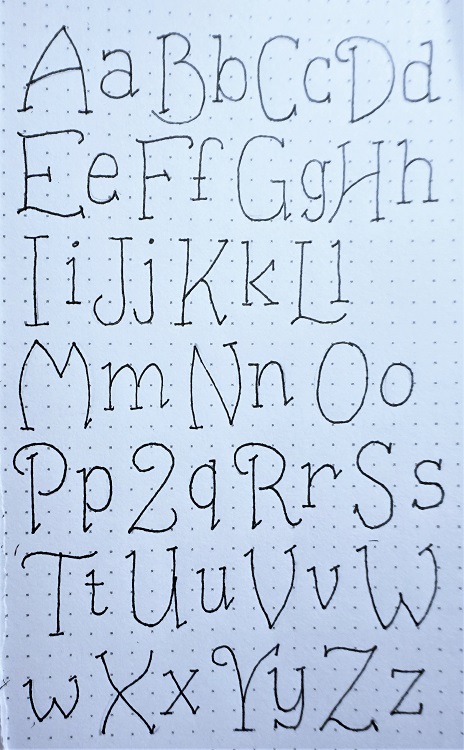
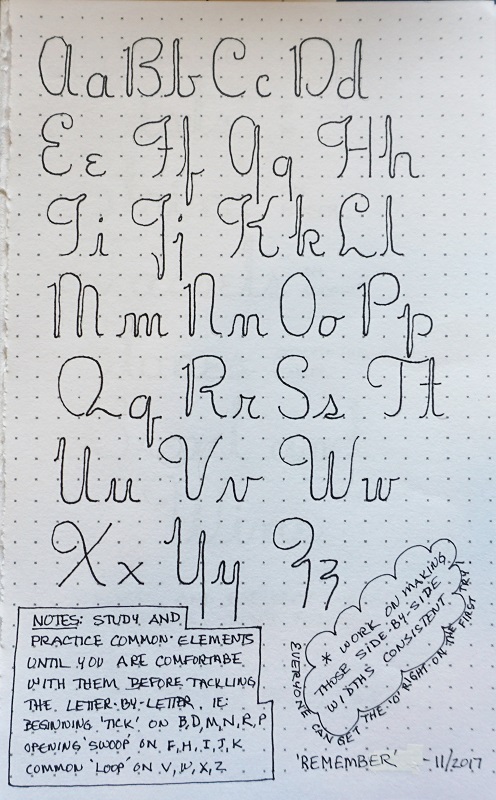
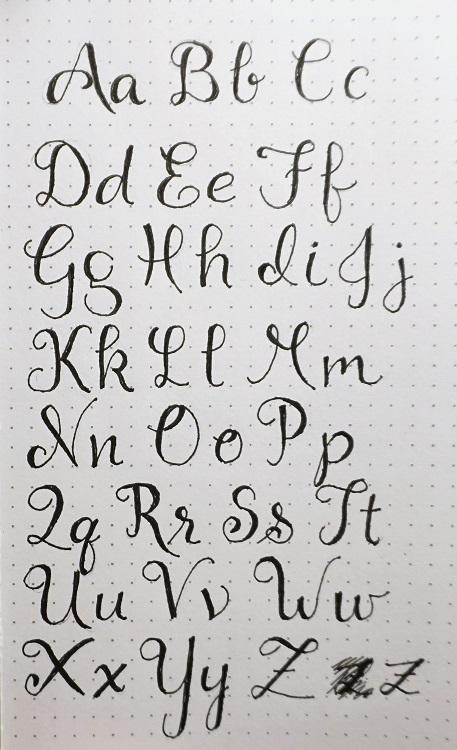
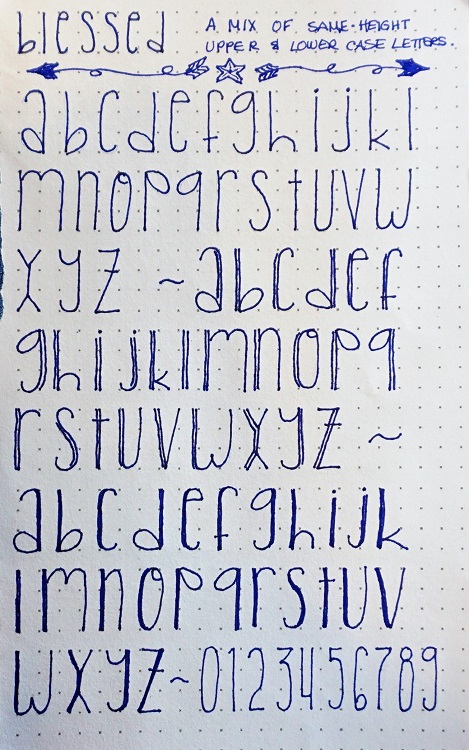
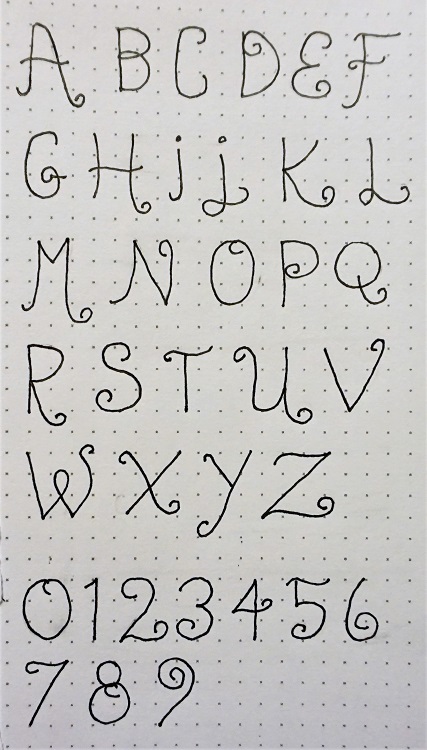
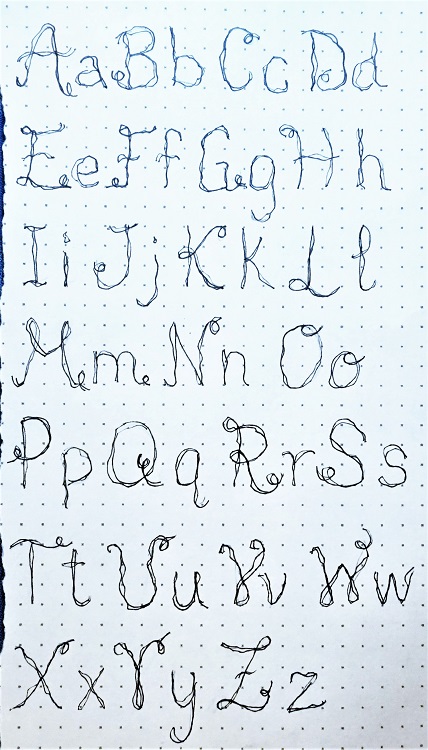
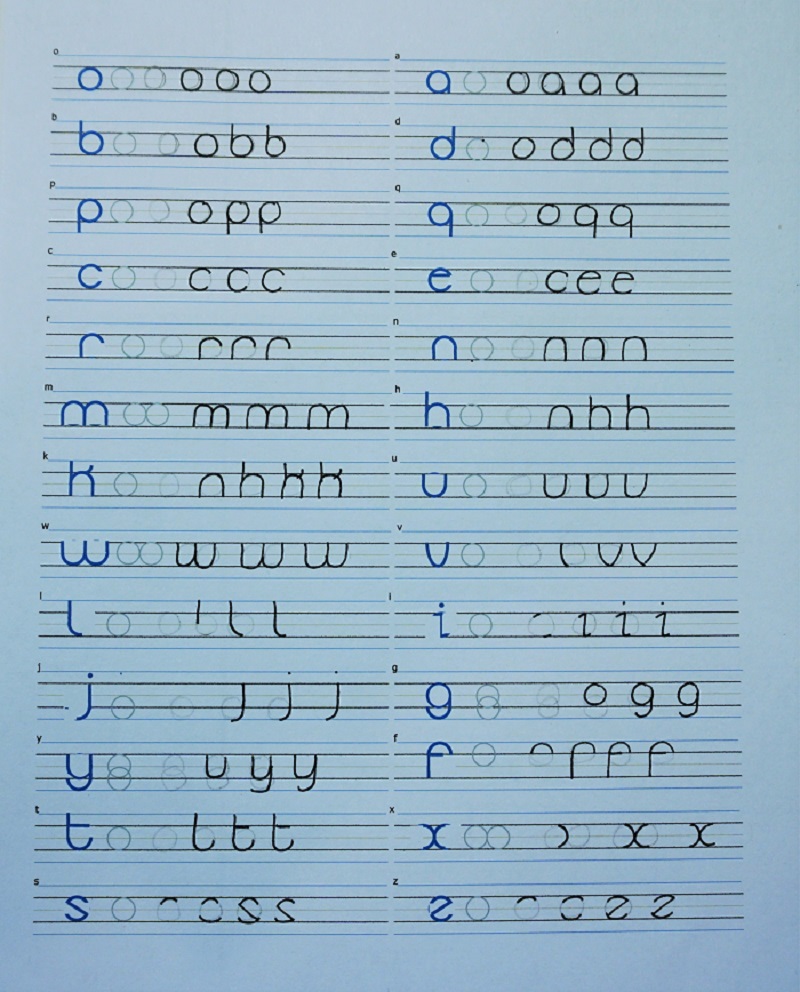
Today we’ll get a look at the full alphabet for the week’s font.
This is an old-fashioned looking font as I wanted something ‘antiquated’ for our special project this week.
Trace the letters several times in pencil to get them into muscle memory. Then ink over them and erase the pencil.
When you’ve practiced with the lines spread out like they are in the sample, try a set using slightly shortened ascenders and descenders and NO SPACE between the lines. Hmmm… curious? It’s part of the special project I’ve designed for this week.

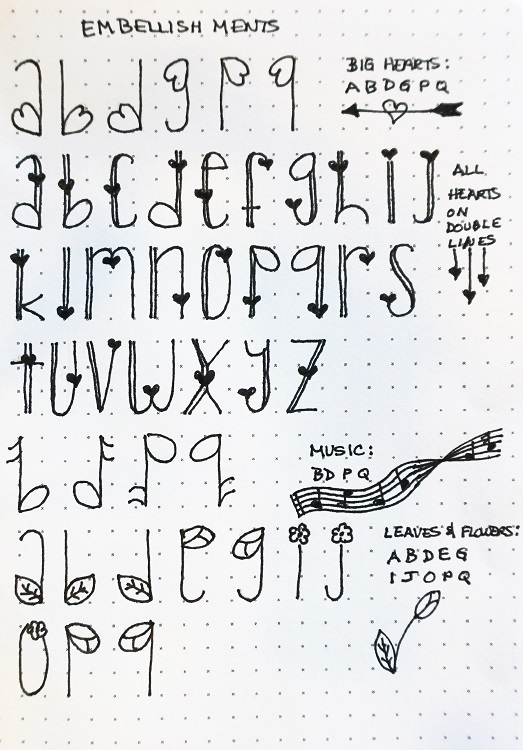
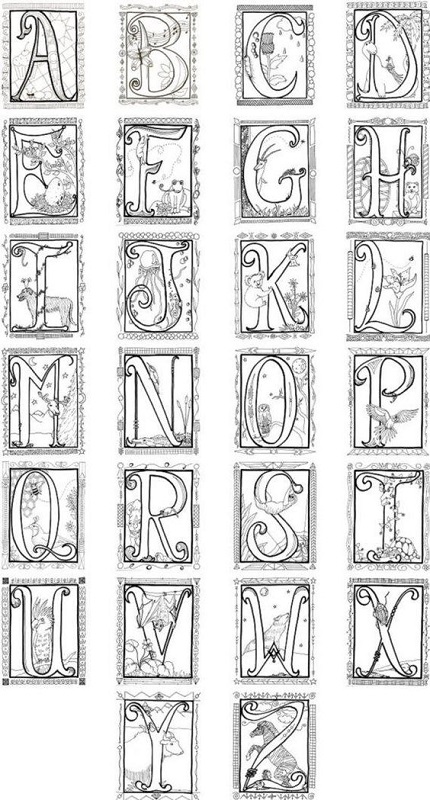
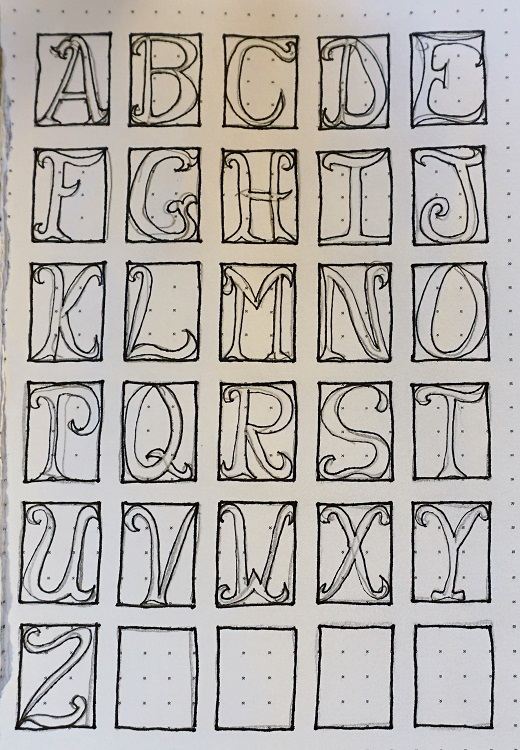
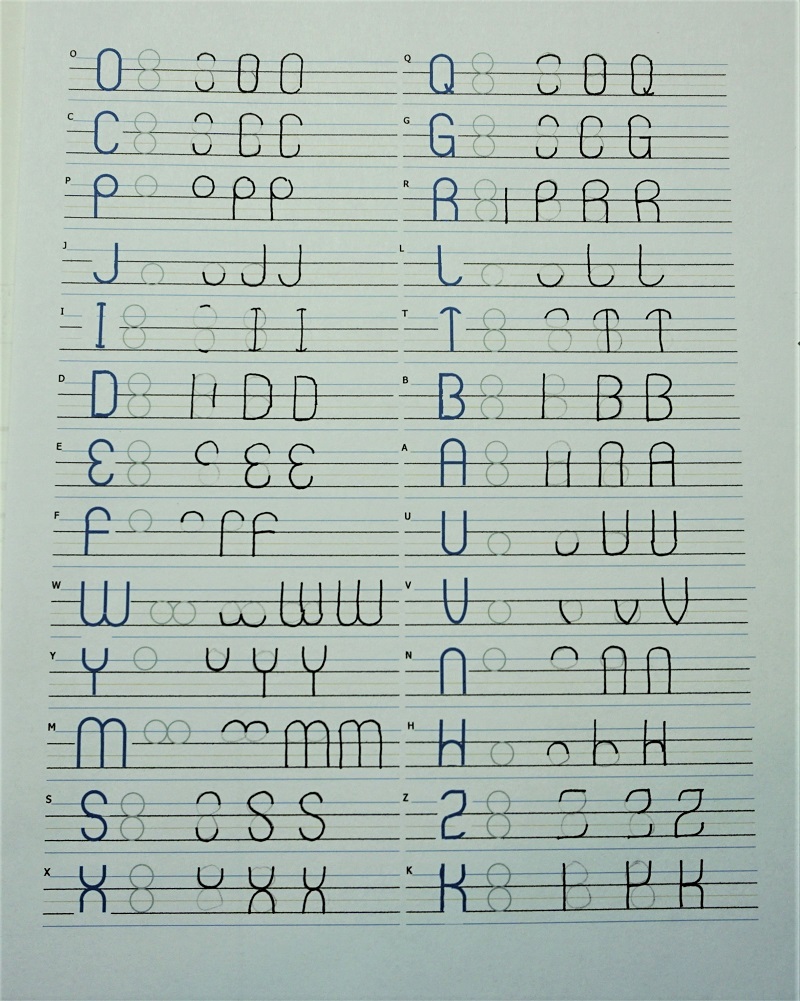
Well, today is an intensive learning day. You get to learn another alphabet!
Although you will be designing all of these capitals, you’ll be relieved to know that you will only be using one or two in your finished project and on your Bible page. But you only have to do this designing one time and then you’ll have ALL the letters for your reference on future projects!
There will follow today two additional posts since only one photo can be added to each comment and there is a step-by-step process to follow.
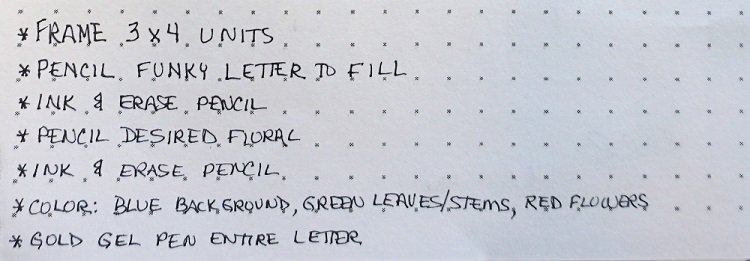
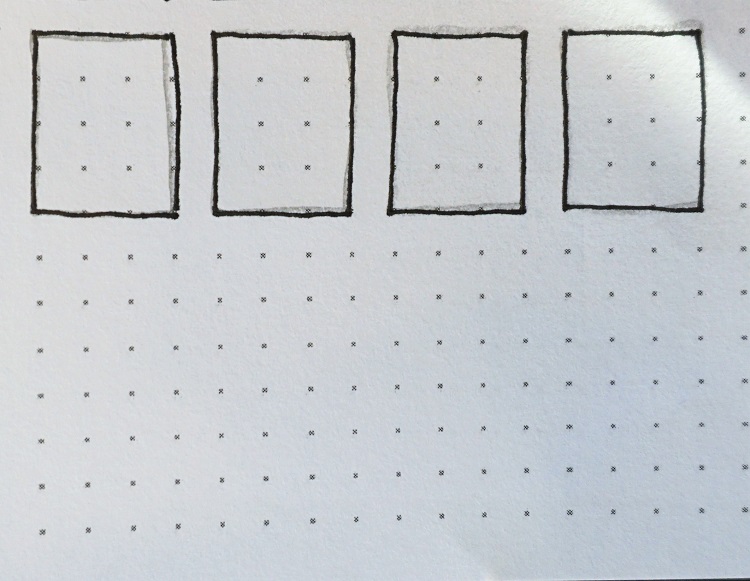
First, for each letter, draw (in pencil) a box that is 3 units wide and 4 units tall. Ink the boxes and erase the pencil. Now (in pencil) draw one letter per box with casual ‘funky’ letters that fill the boxes all the way out to the edges.
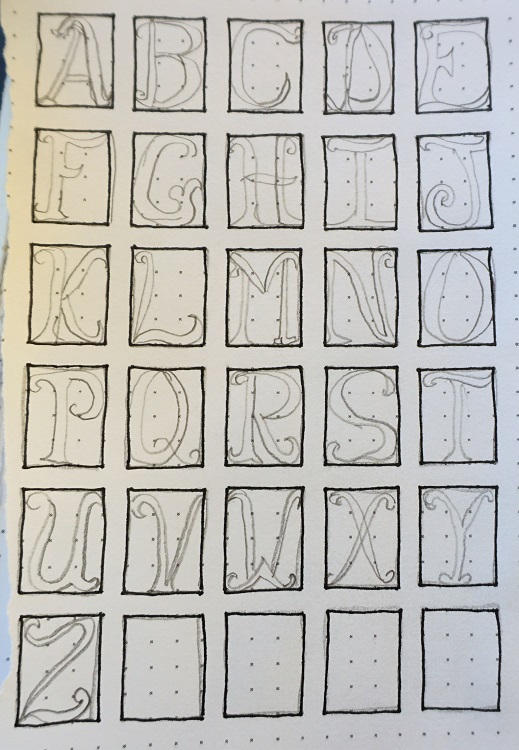
Ink the letters and then erase the pencil.

Using pencil again, fill the backgrounds of each letter with sketched flowers, lines, diamond grids, whatever you want. They don’t even have to be the same. You’ll just have lots of choices for backgrounds when you actually draw up a boxed letter for your project.
Ink the backgrounds while not crossing into the letter forms.
Now erase the pencil a final time to reveal your illuminated letters.

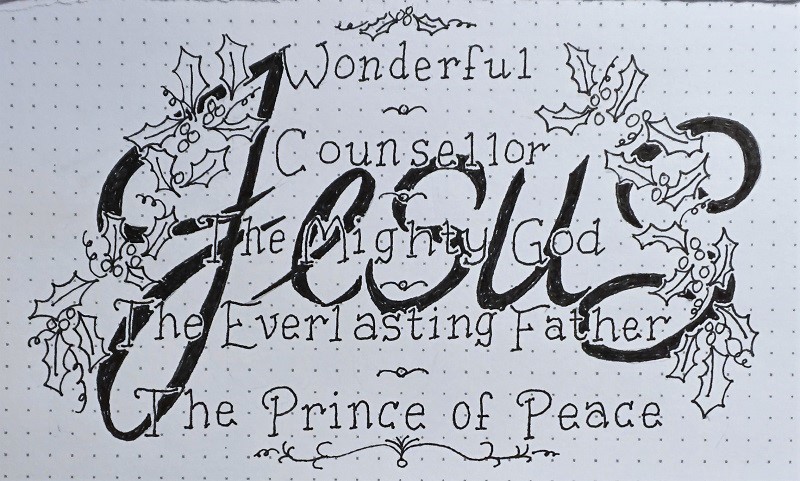
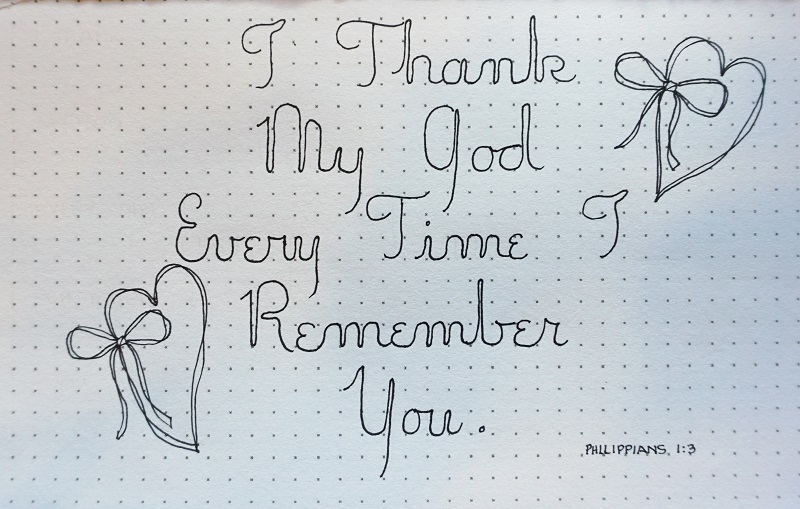
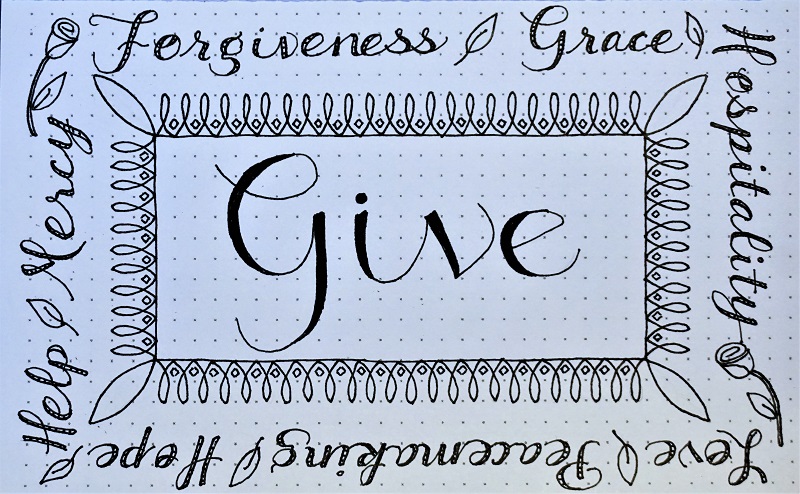
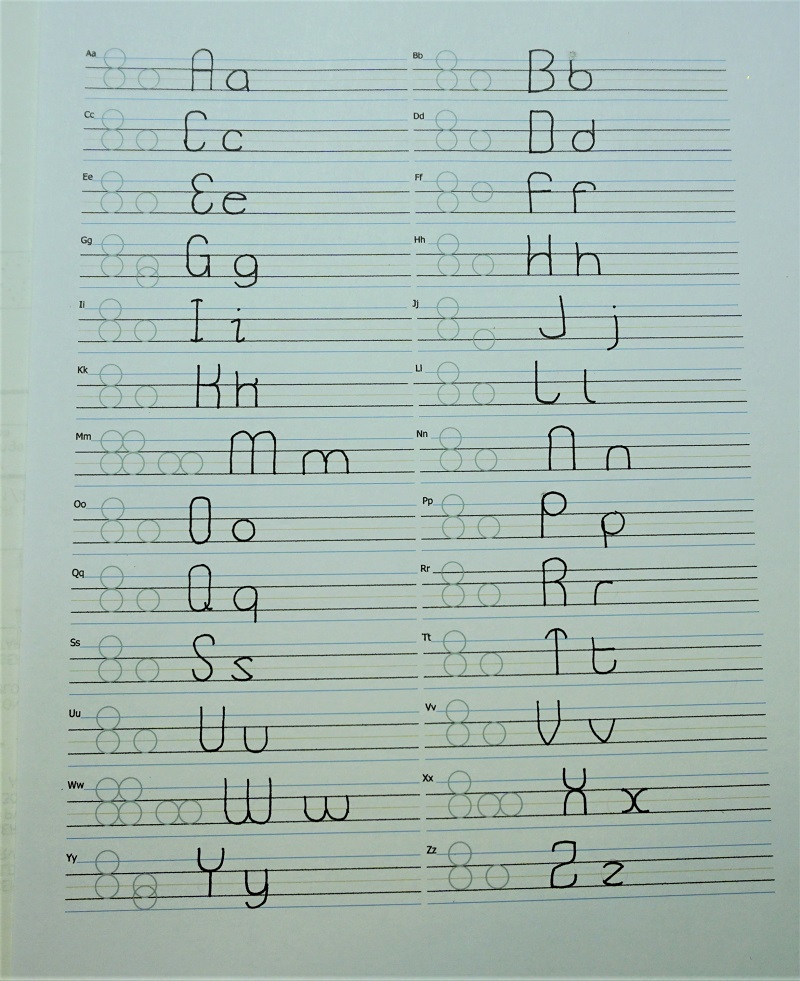
Now we are going to put the two alphabets together.
I was inspired to design this lettering series by a couple of museum visits – a trip to Dublin, Ireland where we viewed the originals of the Book of Kells and a recent trip to the Getty Museum in Los Angeles where we viewed a whole room of illuminated manuscripts and pages in prayer books and Bibles. Even though they were in foreign languages the artistry and beauty were so moving.
Anyway, back to the project. Today also has three posts to get in all the examples for the step-by-step process.
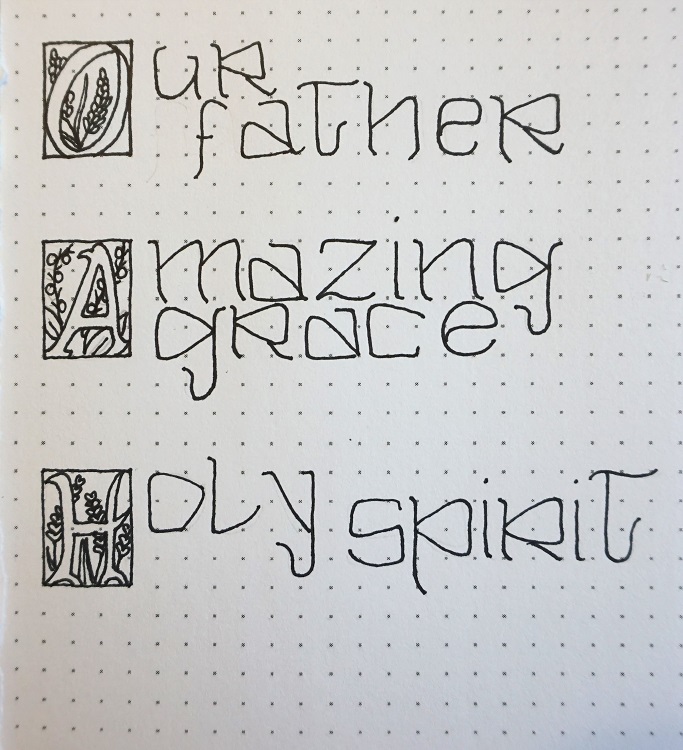
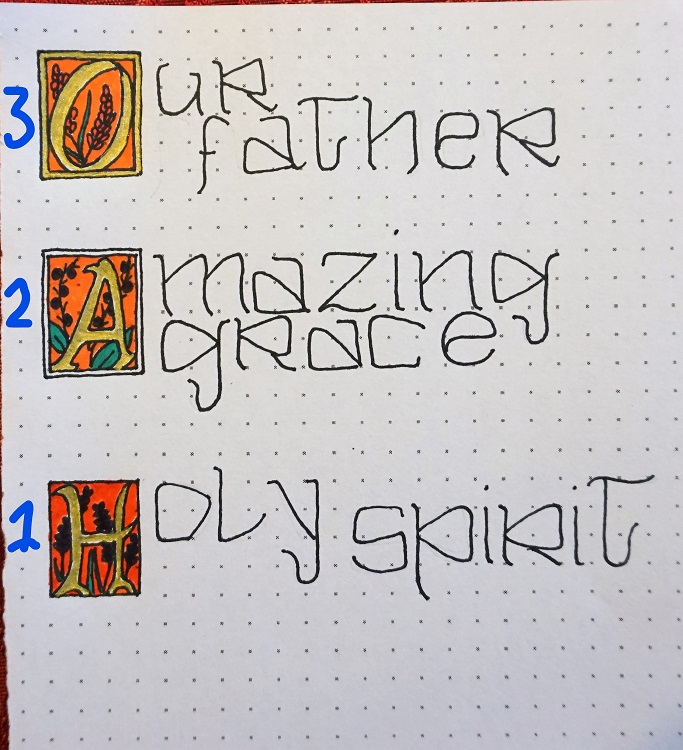
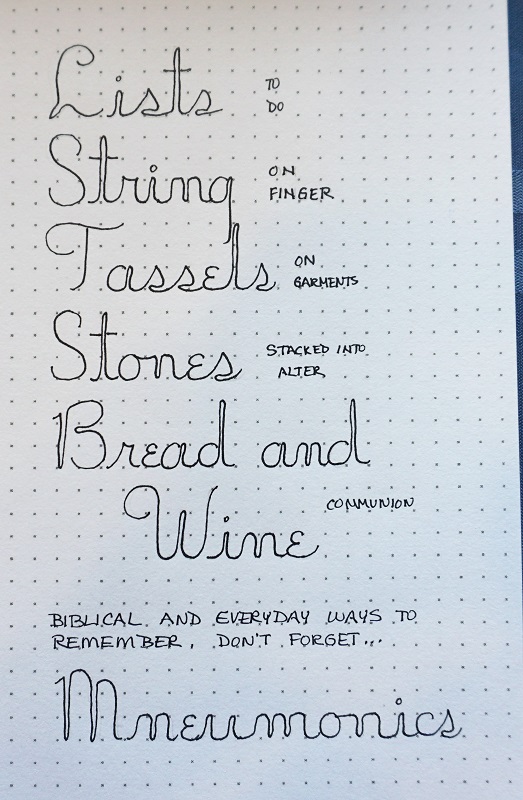
First, decide on a few two-word phrases that you’d like to work on. The first letter of the first word will be the one that uses the large block letter with whatever background you choose to use. Then in the original alphabet complete the remainder of the phrase.
These letters will be half the height of the block letter and their lines will not have a space between them. You’ll also shorten those ascenders and descenders so the letters do not actually touch one another.
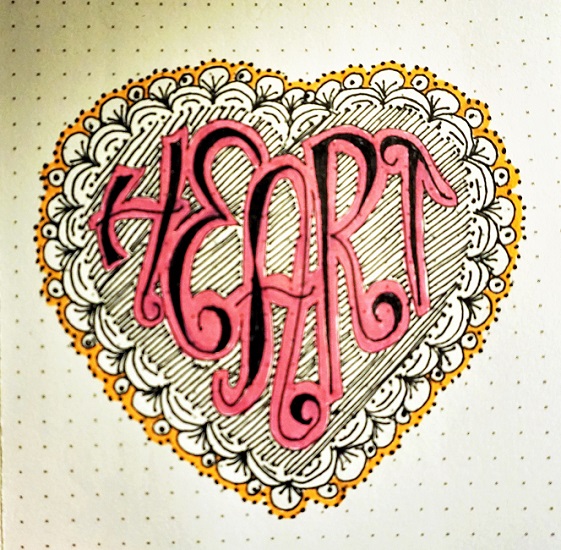
Next, use markers or colored pencils to fill the design in the background of your block letters. Use bright, vivid colors as you are mimicking the inks that were available to the scribes in the early centuries.
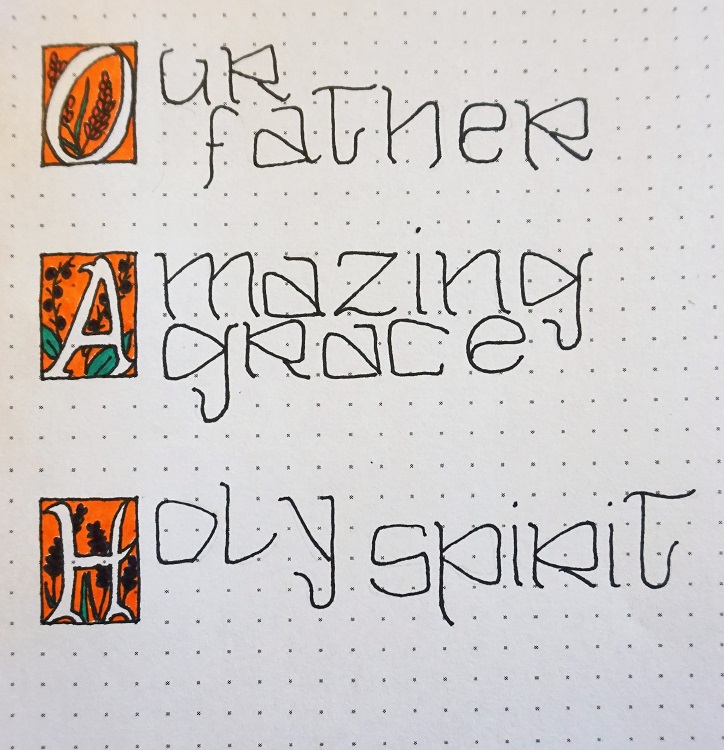
On this next illustration I showed the finishing steps in reverse (sorry about that). First, (shown at the bottom) use gold gel pen to fill only the letter inside the block. You could also use metallic colored pencils. Second, draw a box around the block. Third, fill the new border with the gold gel pen.
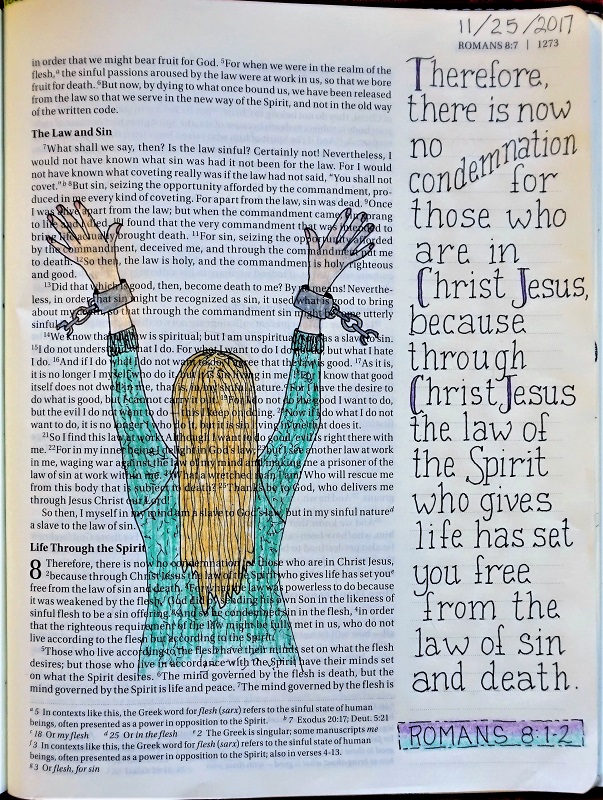
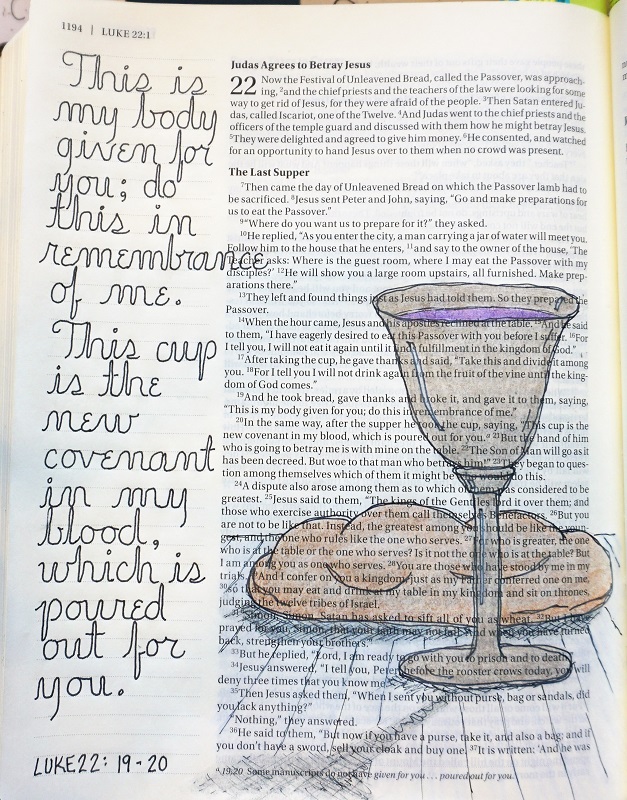
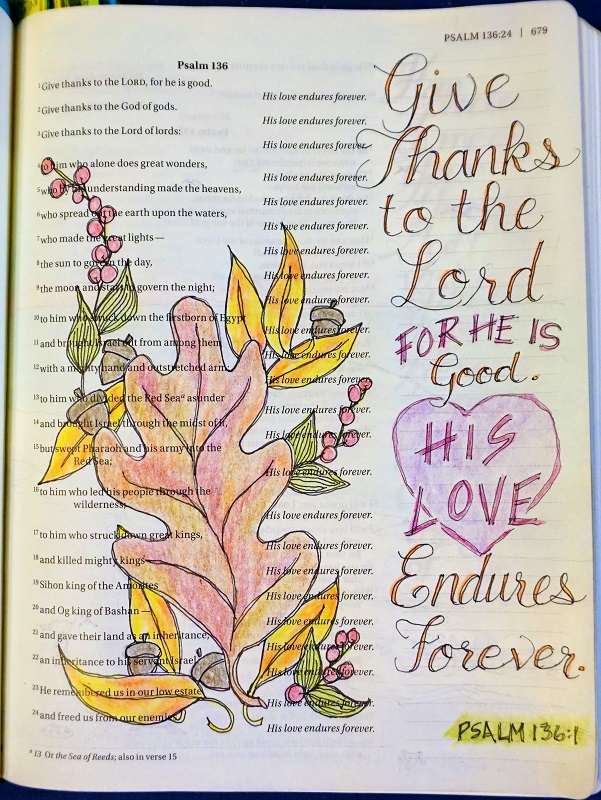
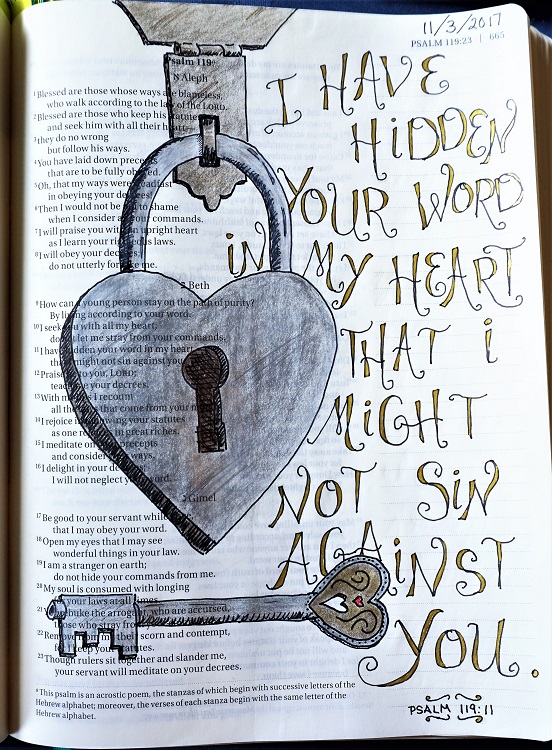
Now we’ll finally take the illuminated manuscript design to our Bible.
So, why did I choose ‘father, son and spirit’ as the words of the week? It was to be an inspiration looking at celebrating the full majesty of God. I had in mind that those words could help you choose a scripture that would embody reverence and adoration.
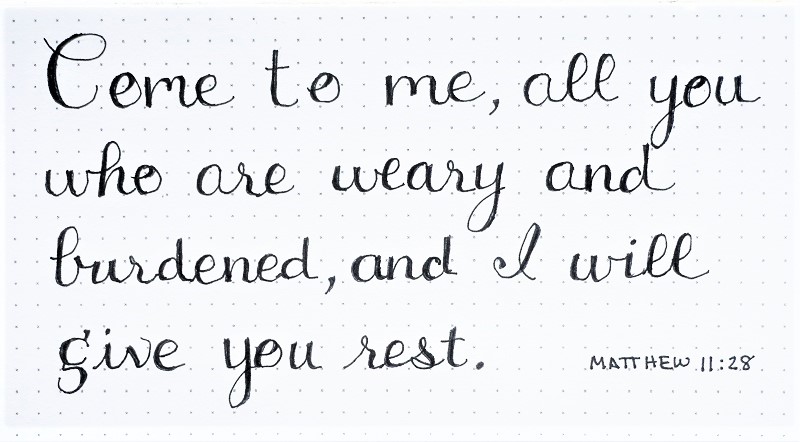
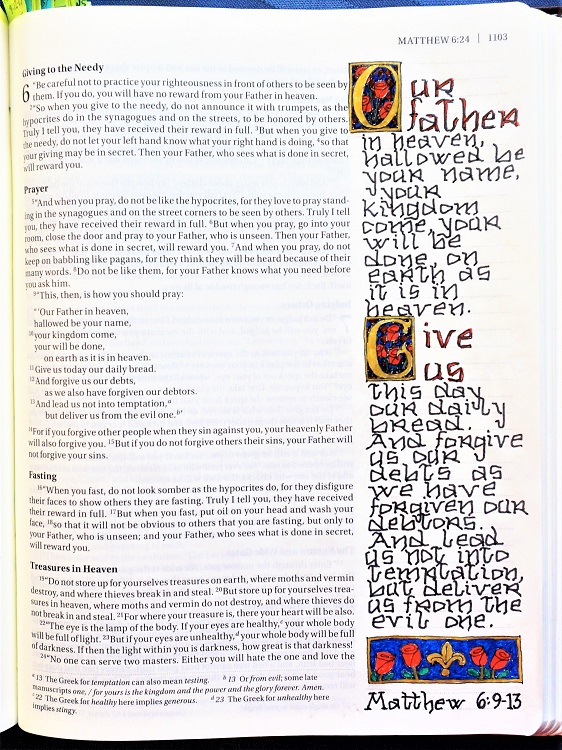
Now, YOU will select a scripture that you feel suits the character of the illuminated manuscript. I chose the Lord’s Prayer for my Bible (Matthew 6:9-13). Some other good selections might be John 1:1-3, Psalm 23, Psalm 8, Luke 1:46-55, Luke 6:20-22, Isaiah 9:6-7, Revelation 4:8b + 11, Revelation 15:3b -4, Isaiah 12:1-6. There are so many more though!
I had two sections that I wanted to use the large illuminated letters on. I penciled in the block for the first one followed by the first two words of the section in two lines like our Thursday lesson. The rest of the section was penciled in with VERY small print (one line of text in each space of the guidelines) using the original font for this week. Remember to use those condensed ascenders and descenders. Then came penciling in the next block, feature words and text.
I Inked it all. In inking this piece, note that the small font looks more like the manuscripts in the museums if a heavier tip pen is used. It wants to look denser than a standard print. Don’t you love it?
I erased all the pencil at this point. Then I penciled in the letters in the illumination blocks and inked those and erased the pencil. Next, I penciled the backgrounds to the illuminated letters and inked those. I went back and penciled double lines on the feature words next to the illuminated letter and inked those. I then erased ALL the pencil marks remaining before adding color to the Illuminated letter and filled between those lines of the feature words, all with colored pen.
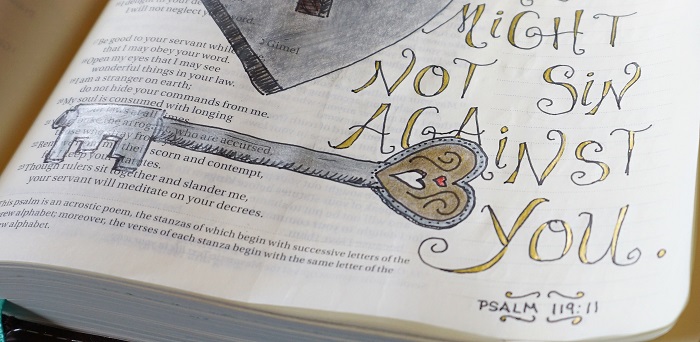
Finally, I added the gold gel pen to the illuminated letters. I had a space left at the bottom of the page so I filled it with a decorated block that matches the illuminated letter blocks.
***Remember to work in pencil first, then ink your work and erase the pencil before adding any coloring***

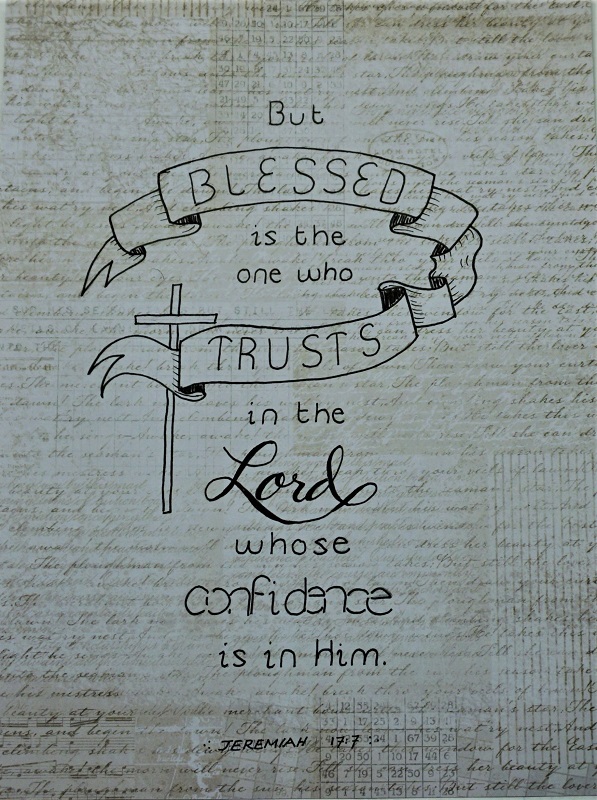
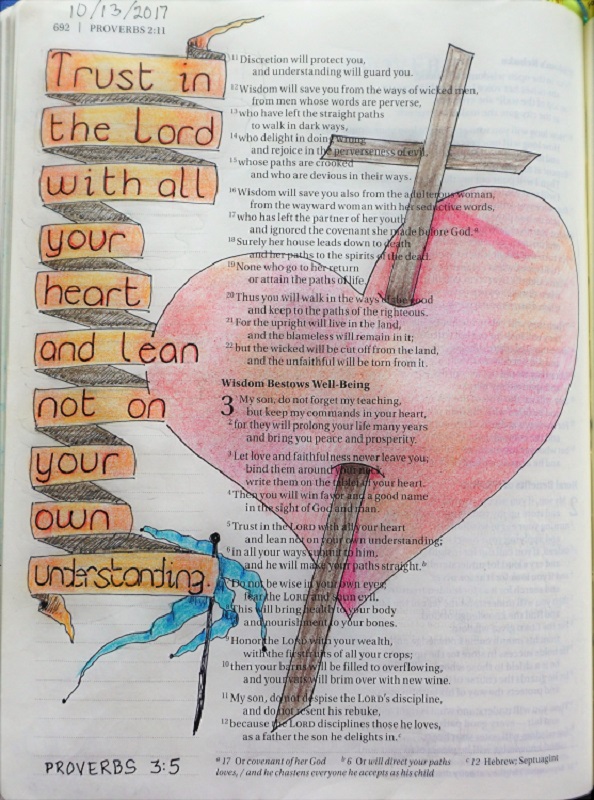
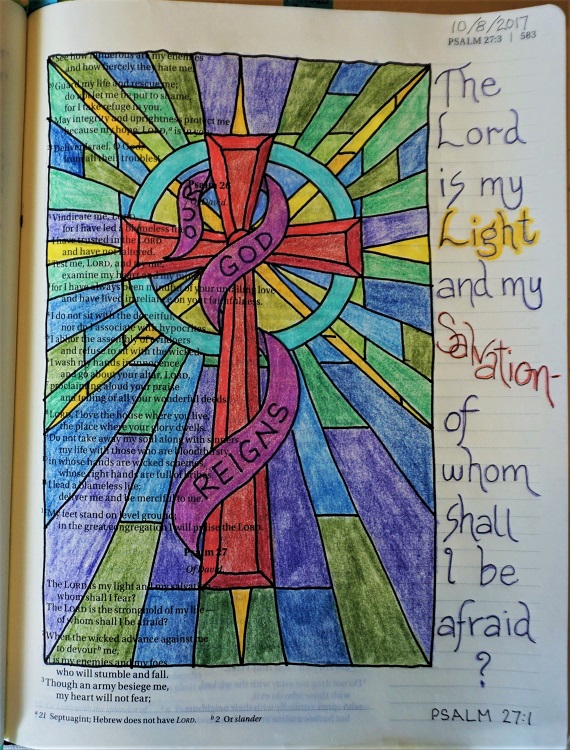
Want to see some of the ‘inspiration pieces’?
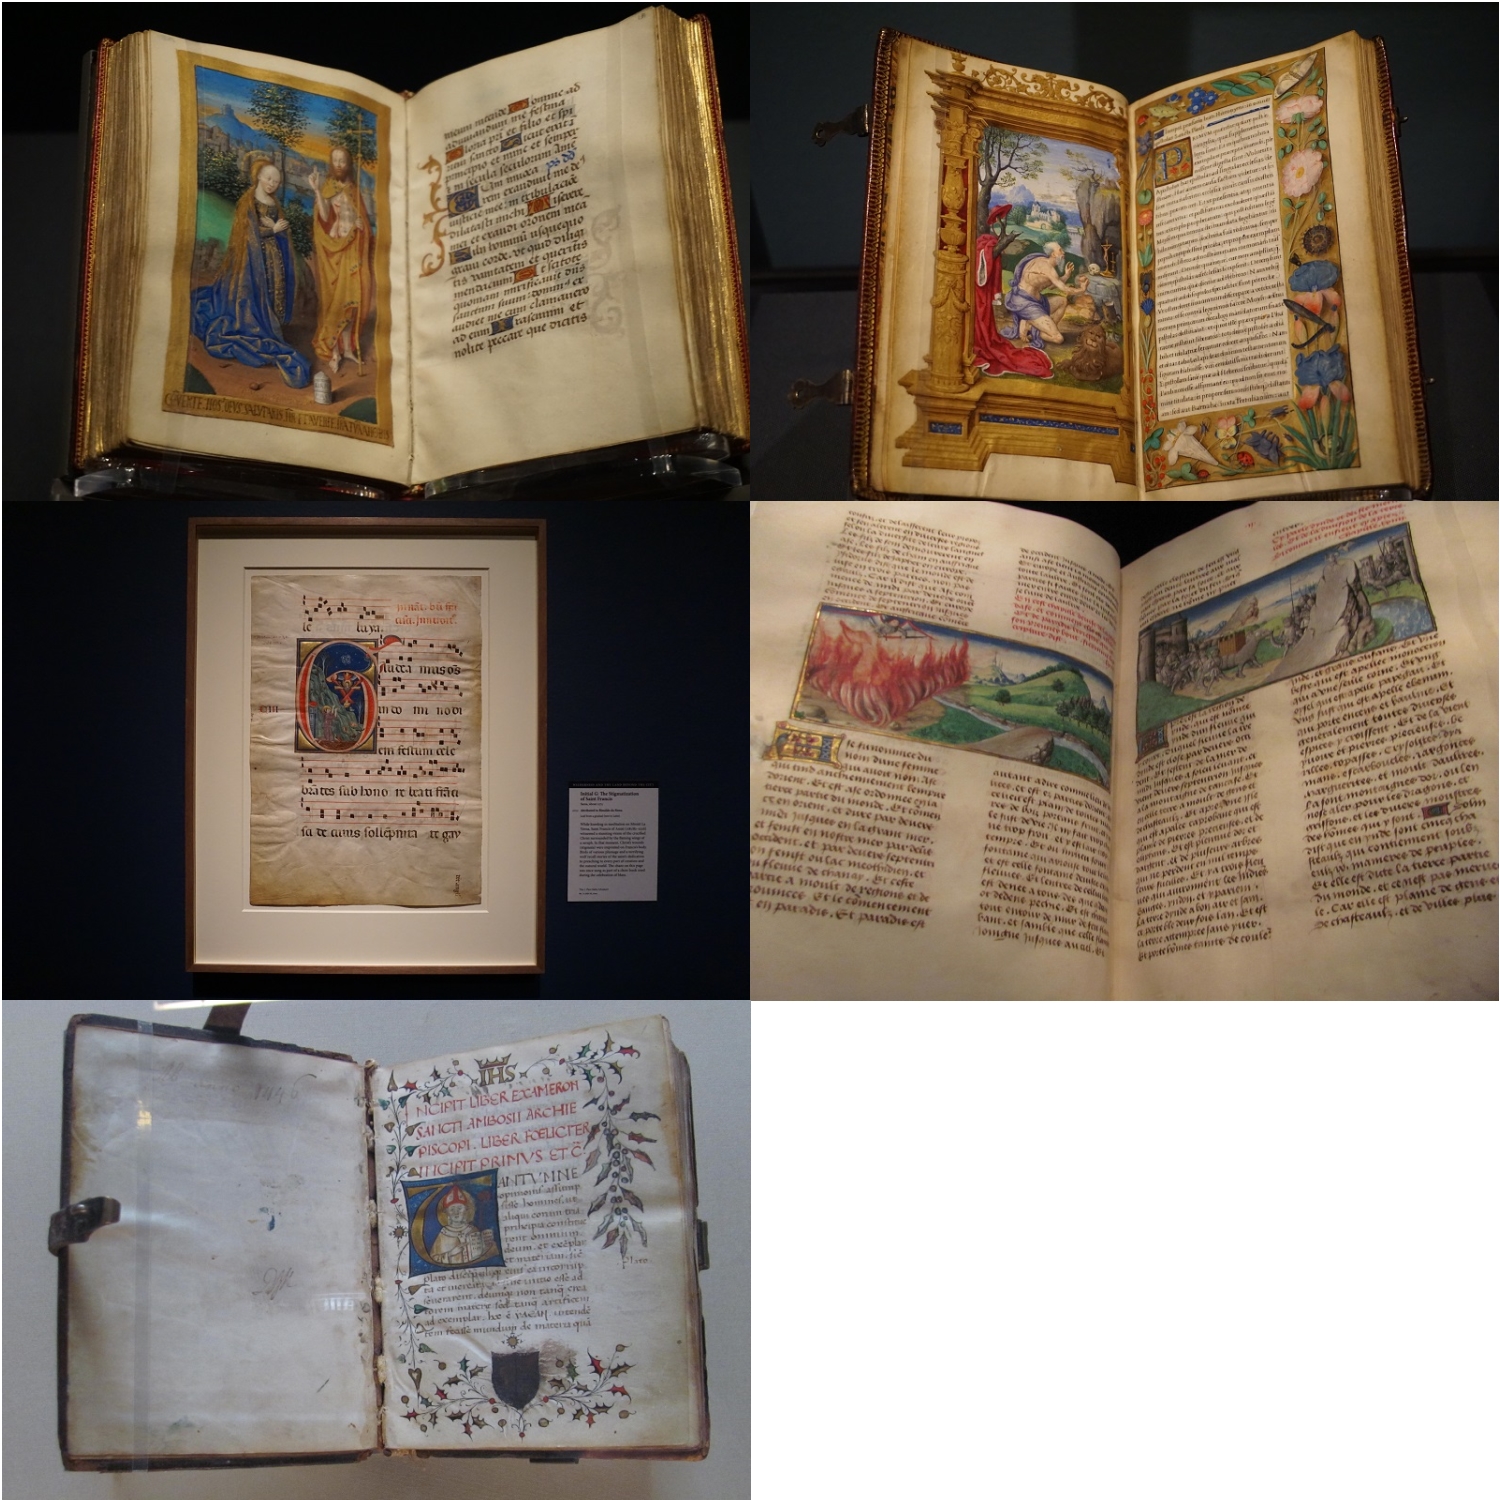
I love this style and may be doing some further work along these lines.
Ddd


