« April 2018 »
S M T W T F S
1 2 3 4 5 6 7
8 9 10 11 12 13 14
15 16 17 18 19 20 21
22 23 24 25 26 27 28
29 30
You are not logged in. Log in
Entries by Topic
All topics  «
3D paperwork
A - Z challenge 5
A - Z challenge 7
A - Z challenge round 4
A to Z challenge round 3
A to Z round 2
A to Z round 6
A-Z round 1
Around the House
Art Challenges
Artist Trading Cards
Backgrounds
Beads
Bible Journaling
Books
Boxes
Collage
Color Challenge
Coloring
cookbook
Die Cuts
Digital Projects
Digital Stamps
Drawing
Dry Embossing
Fabric Stuff
Fantastic Folds
Field Trip
Home Decor
How Does Your Garden Grow?
Hymnal Art
In The Kitchen
In the studio
Jewelry
Lettering
Links
Multi-Technique
Music to Work By
Musings
Nail Art
New Work
Online Class
Other Hobbies
Other Projects
Painting
Paper Embroidery
Paper Piecing
Photo
Pretty Paper
Quilting
Random
reading
Scrap Recovery
scrapbooking
Sewing
Sketch Challenge
Some Backlog
Stamping
Stencils
Stickers
Supplies
Teabag Folding
Techniques
Testing
tips and tricks
Tutorial
Web resources
Welcome to my Blog
Work By My Friends
workflow
Writing
Blog Tools
Edit your Blog
Build a Blog
RSS Feed
View Profile
Group One
In & Out of Studio 3D
Saturday, 14 April 2018
The Promise Of Fine Lettering
Topic: Bible Journaling

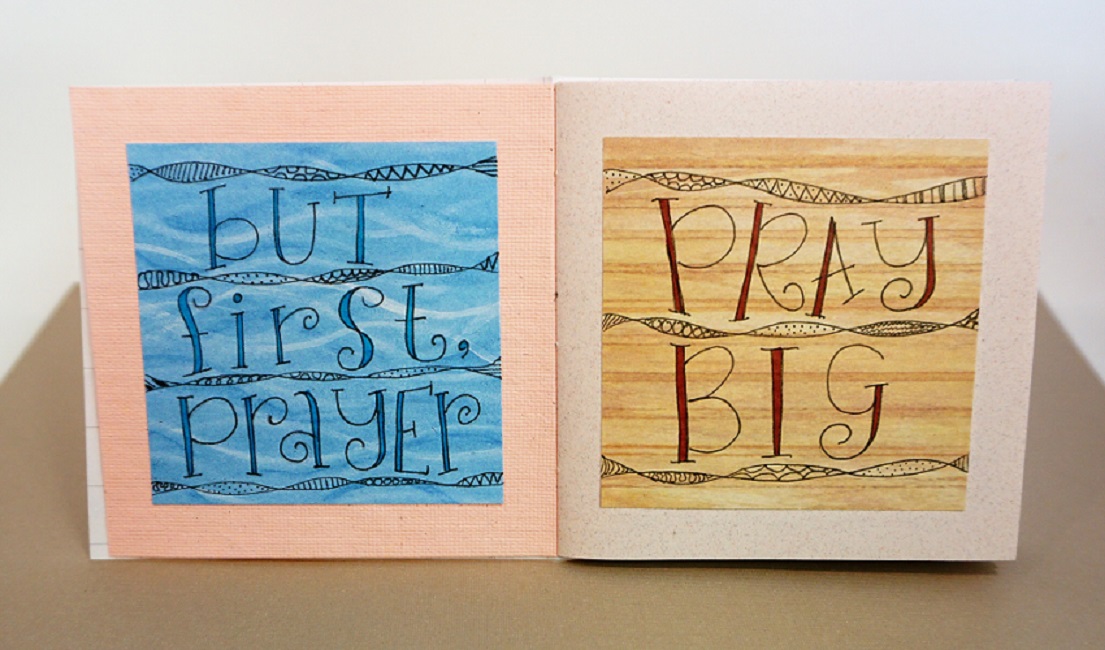
Last week I tutored another class on lettering in a style I called 'Promise'. Thi was a combination of two different lettering alphabets that I tweaked to use together - one for the upper-case and wone for the lower-case.

As we go through the daily lessons you'll note some issues I had with some letters and how I solved them.

MONDAY

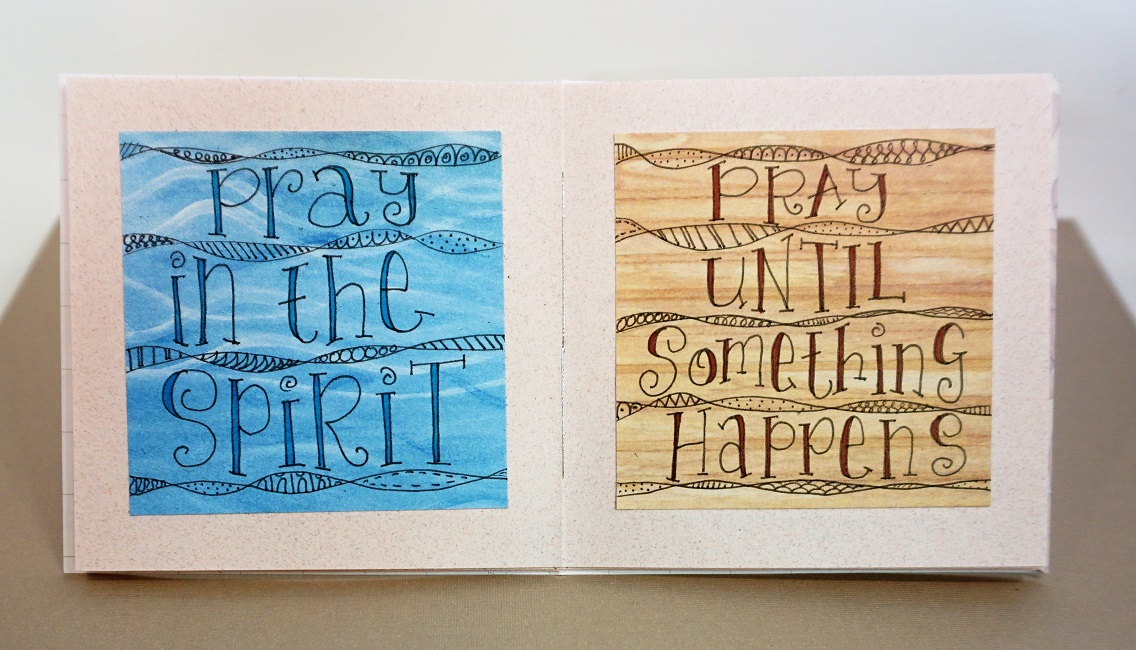
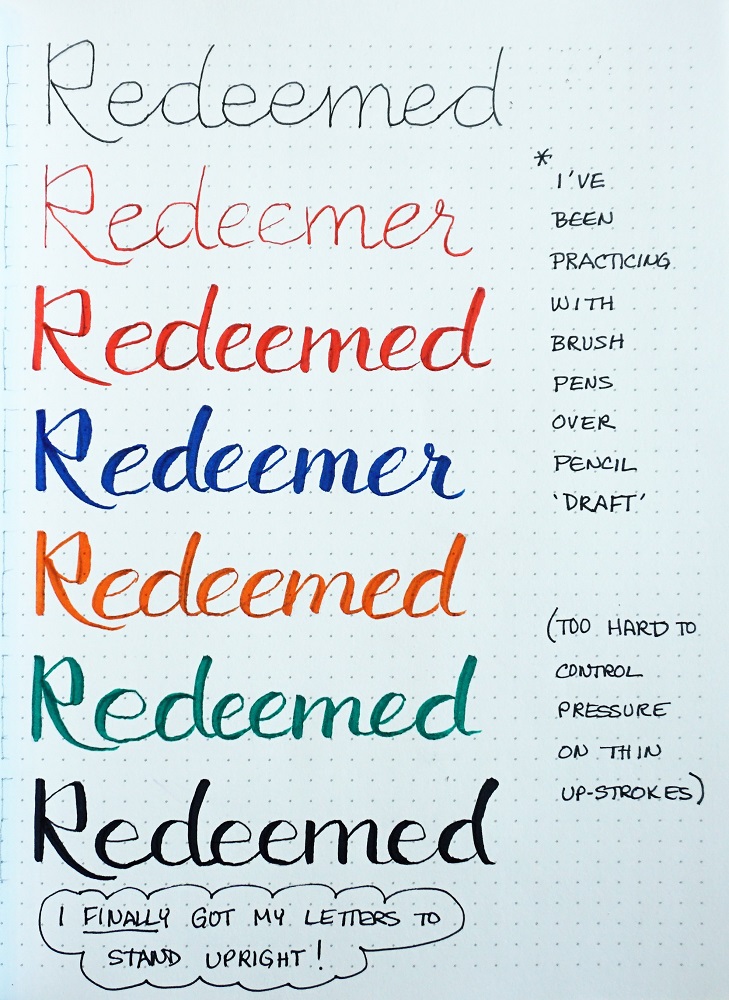
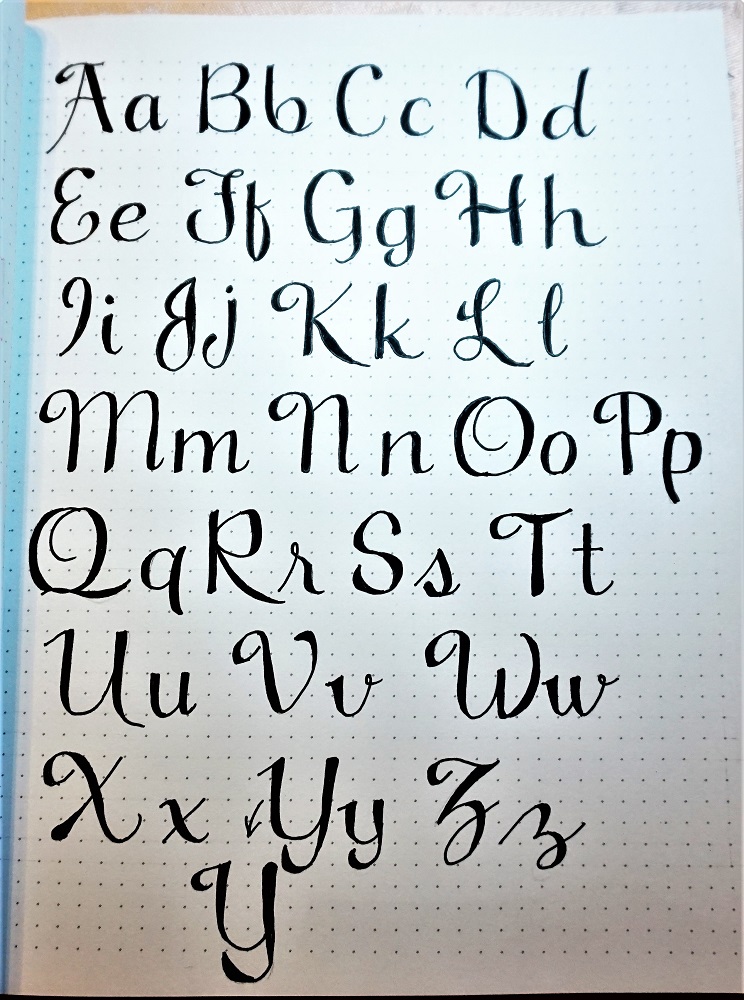
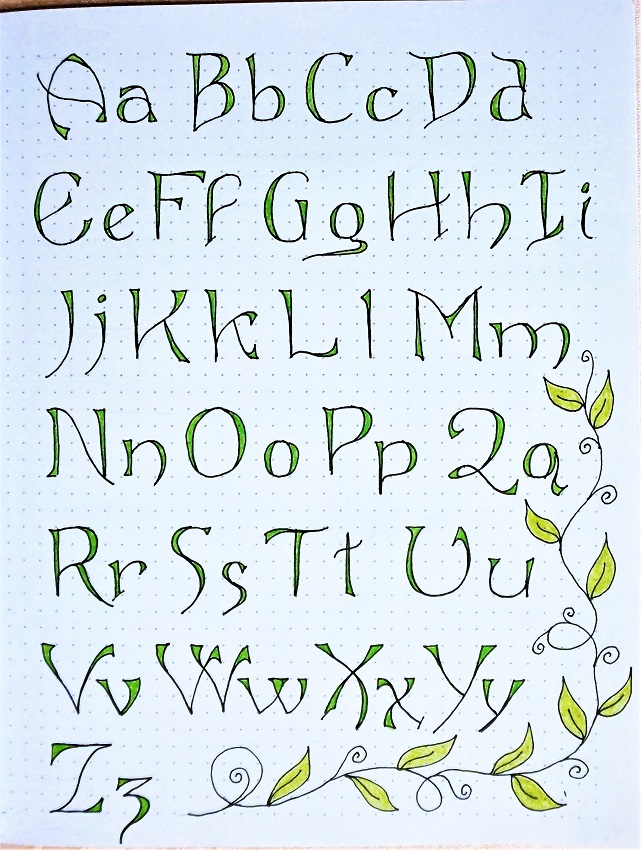
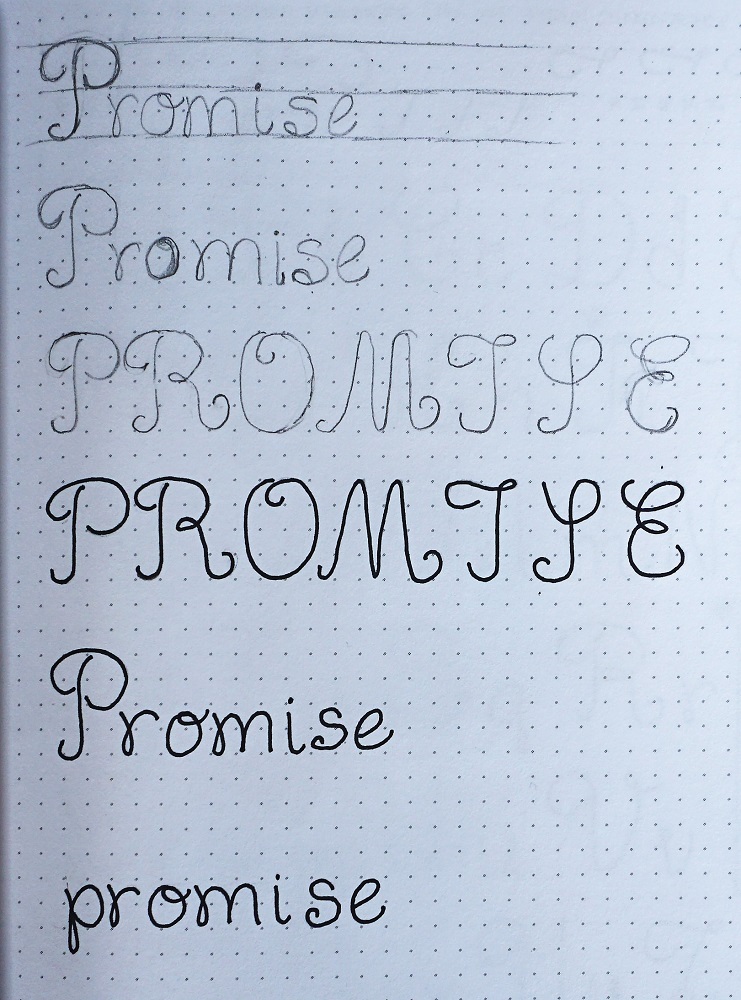
Welcome to another week of lessons in the Lettering Lodge! We are going be learning a semi-script that I call ‘Promise’.

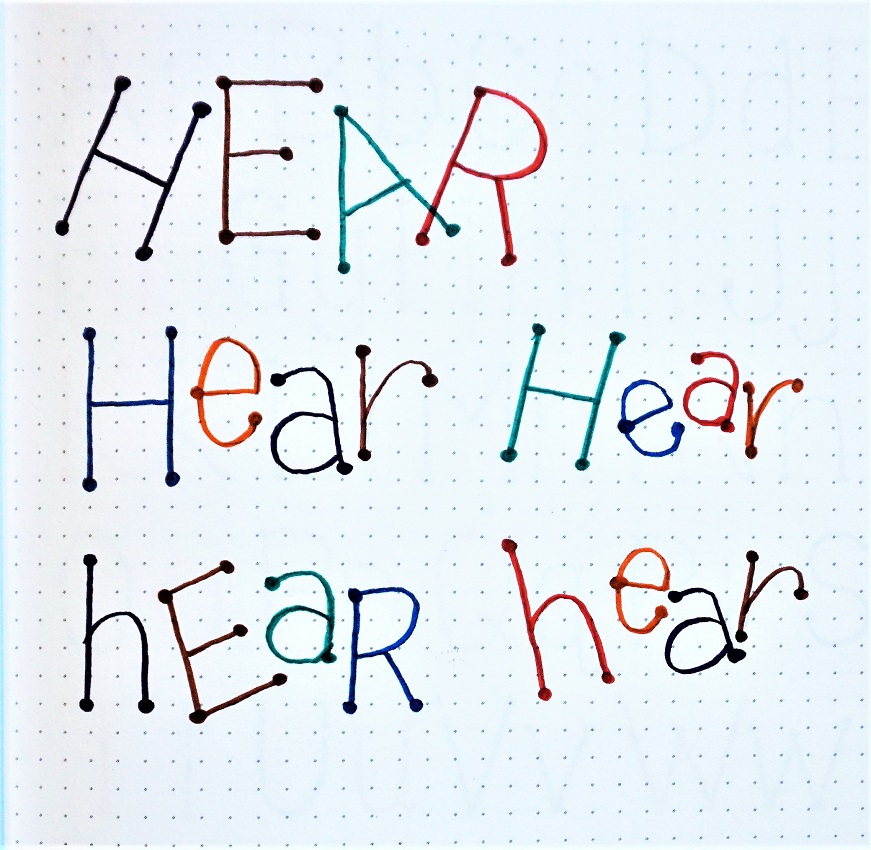
I say semi-script because there are scrolls on both the upper- and lower-case letters (like a script) but there is no connection between individual letters (like a print). These letters are very upright, leaning neither to the left or right.

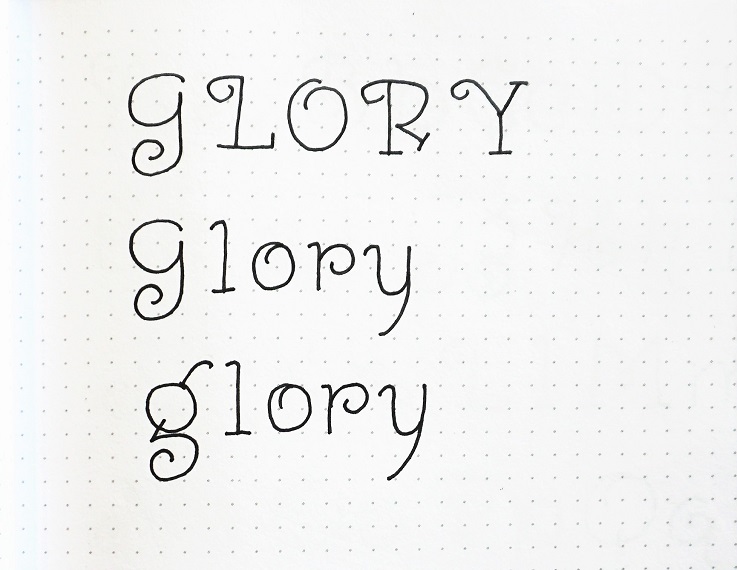
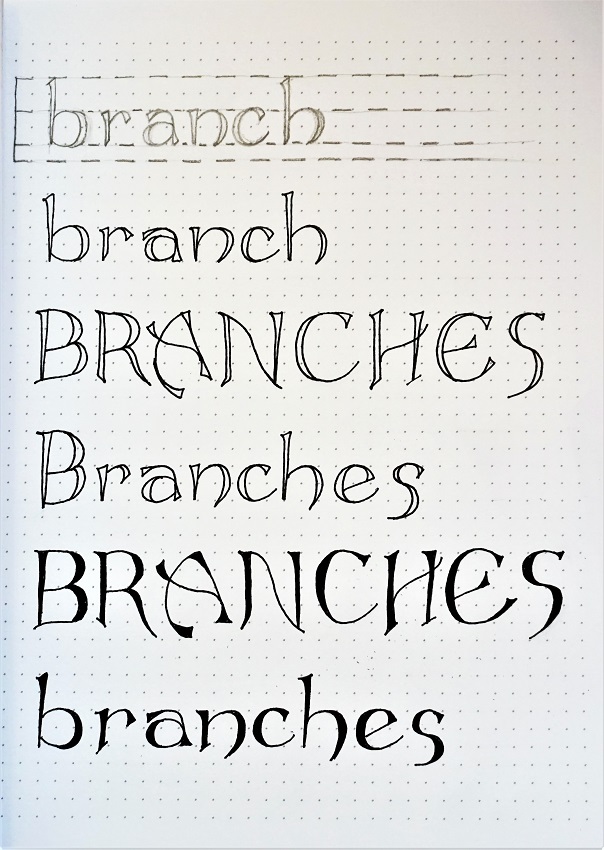
The height of the lower-case letters is slightly LESS than half of the uppers.

Work on getting those swoops right, you’re going to be using them a lot!

You’ll note that words written in all caps are not very readable. The word you’ll write out is just for practice.

So, have a go at this – remembering to draw in pencil until you have good forms, then ink, then erase your pencil.


TUESDAY

Since there are several loops, swoops and scrolls that are common between letters, practice some of these along the upper edge of your page. It will make it easier to write consistent letters if you get these forms into muscle memory first.

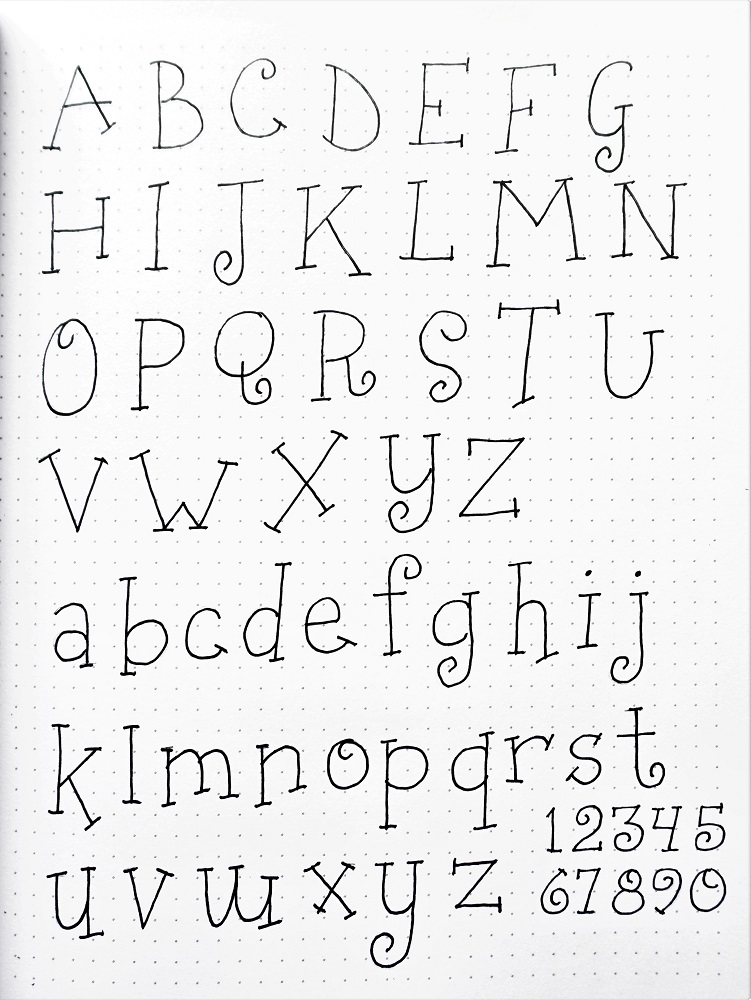
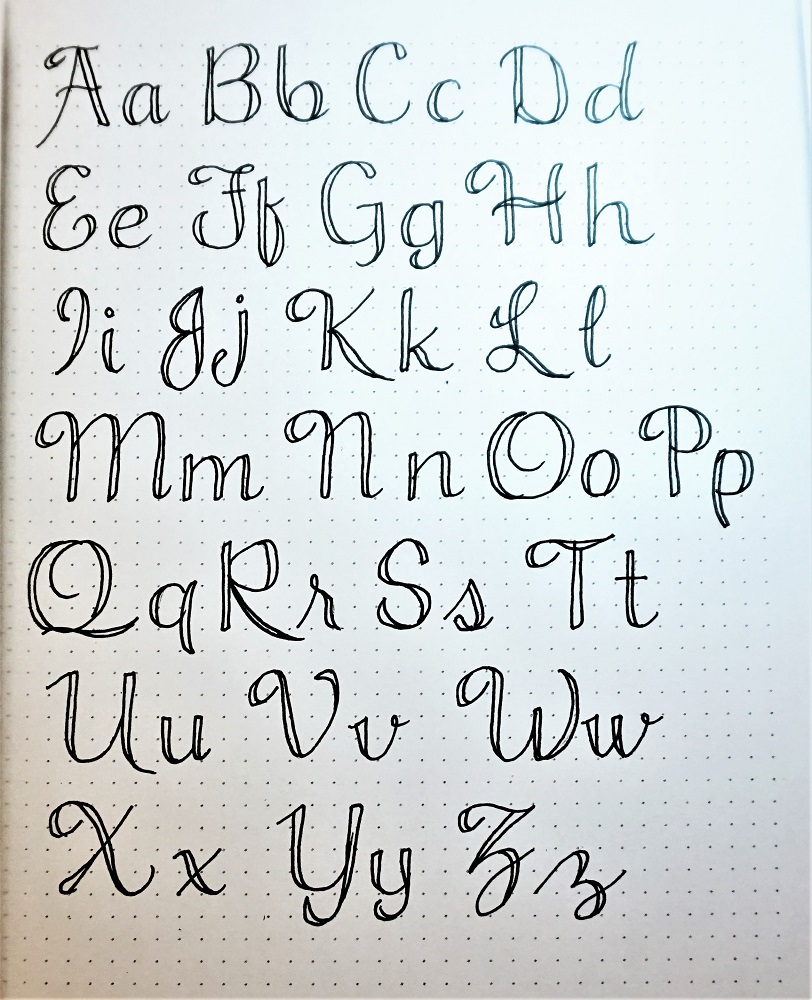
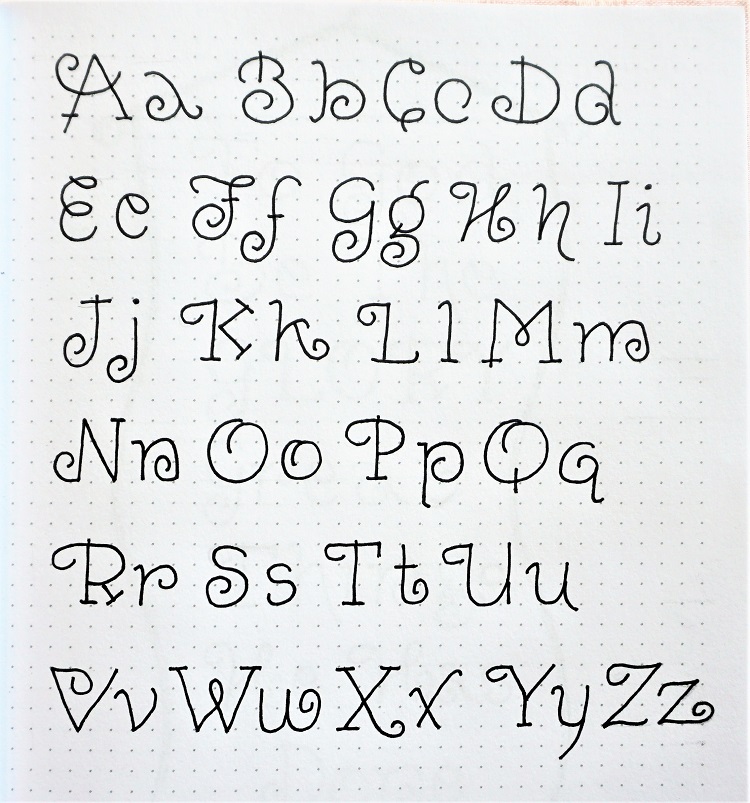
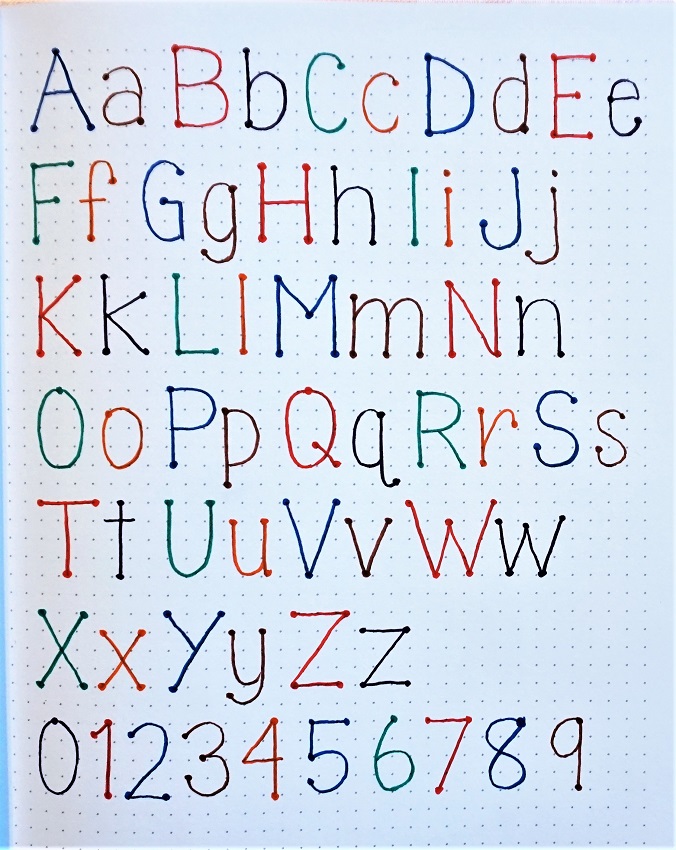
As you look over the alphabet page below, please note the two alternate forms for the letters ‘I’ and ‘T’. I actually did all the homework lessons this week with the original forms and found I did not like them. The original ‘T’ looks like a ‘C’ and the original ‘I’ looks like a ‘T’. So, I gave the ‘I’ to the ‘T’ and made a new form for ‘I’. IT IS PERFECTLY ACCEPTABLE TO DO THIS YOURSELF IF THERE IS A LETTER THAT YOU DON’T LIKE! Just create a new letter form that uses elements common to the style. In fact, I noted yesterday that a couple of people have already switched out the upper-case S for a form they liked better.

So, as you write out your alphabet, substitute in the letter forms as YOU like them and this will become your personal reference sheet as you complete more assignments this week (and in the future).


WEDNESDAY

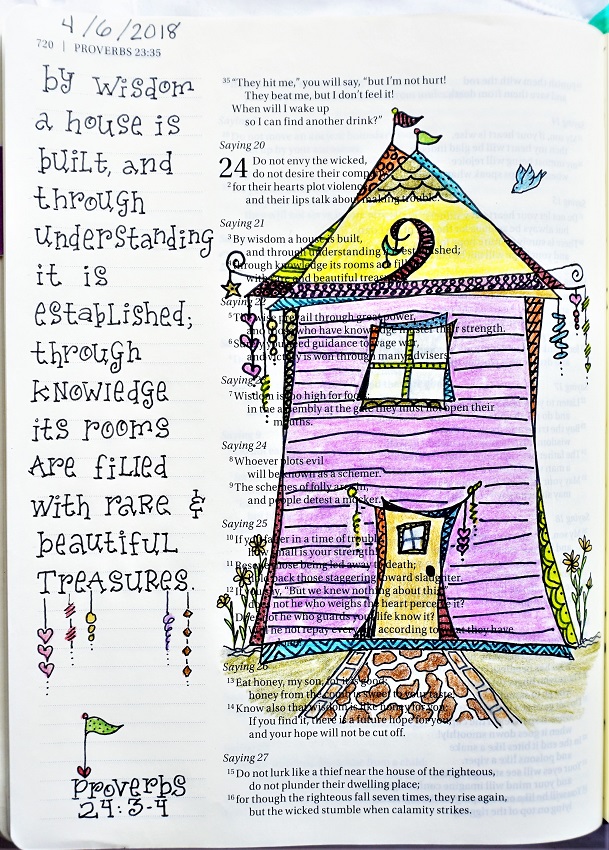
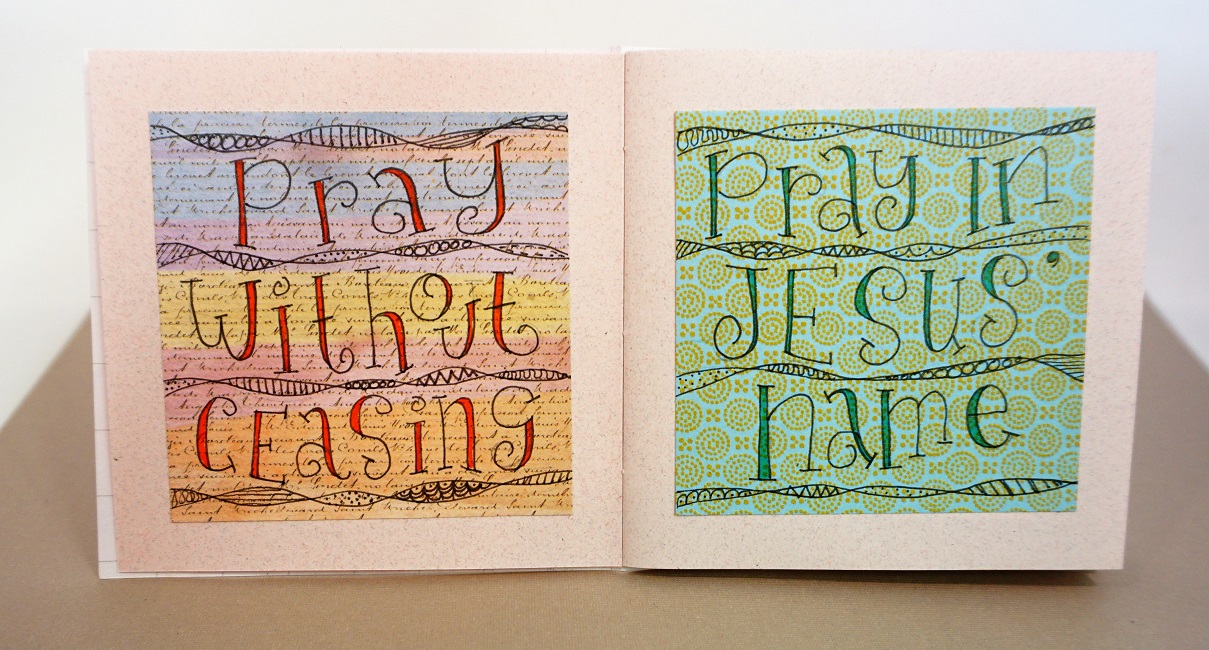
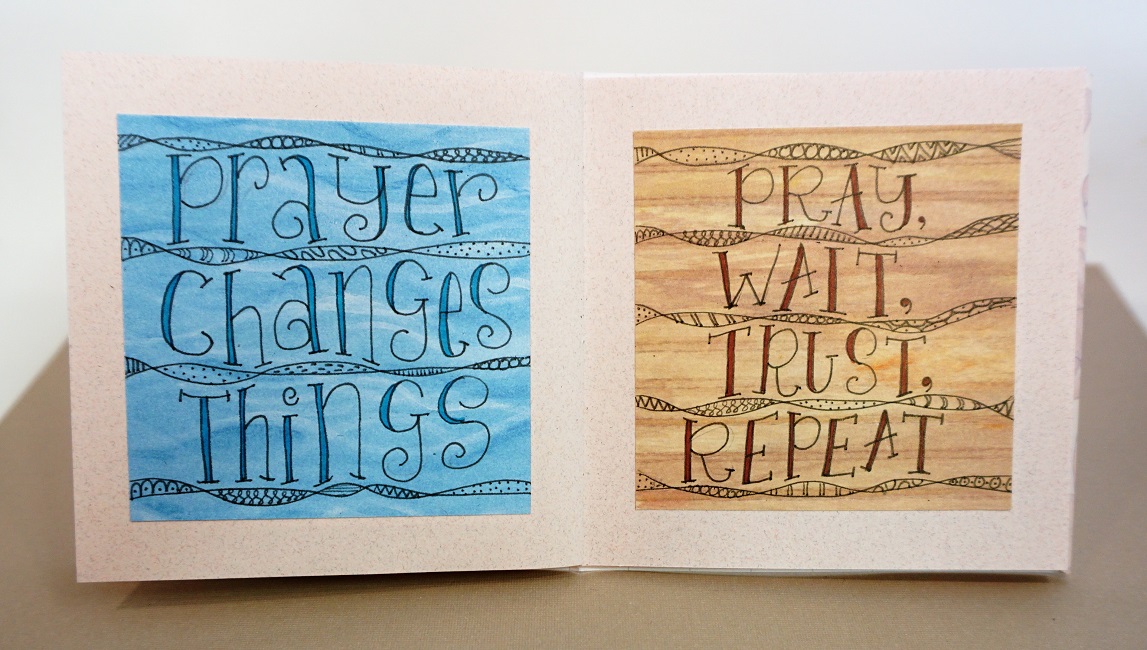
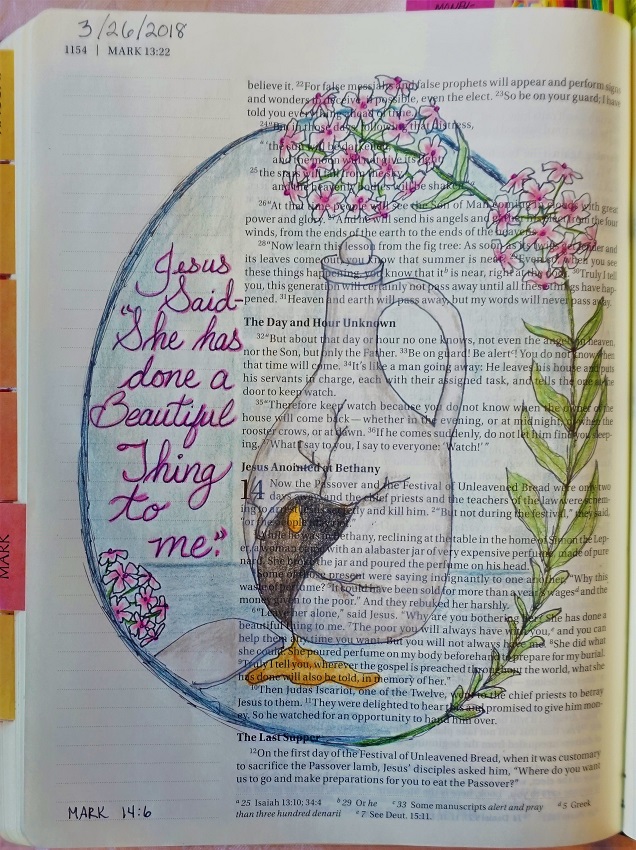
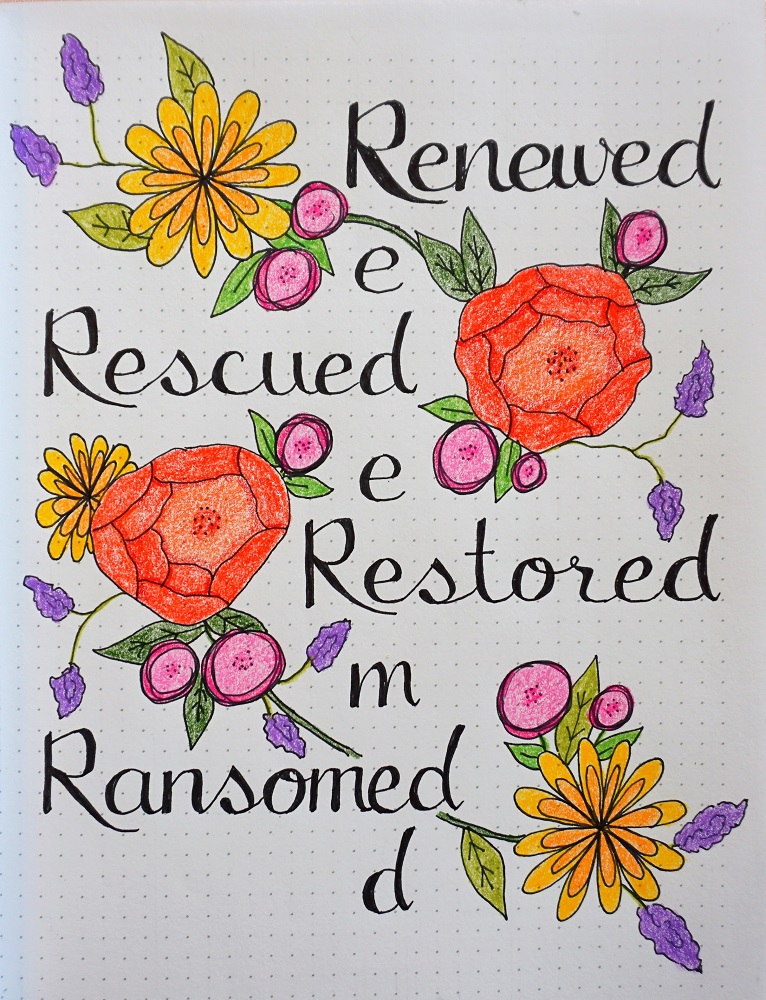
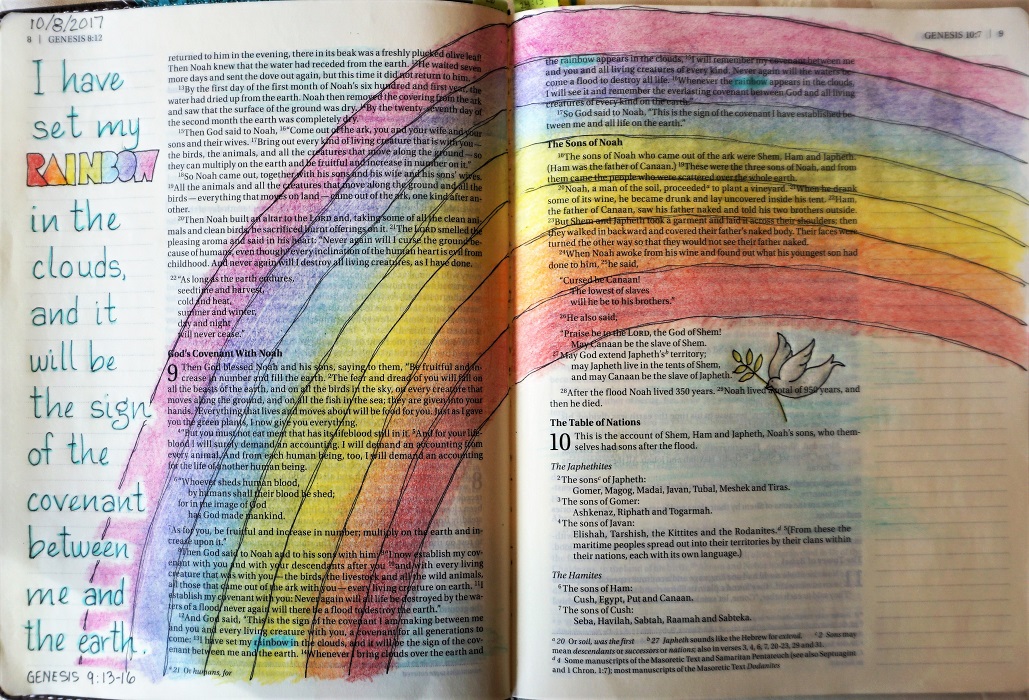
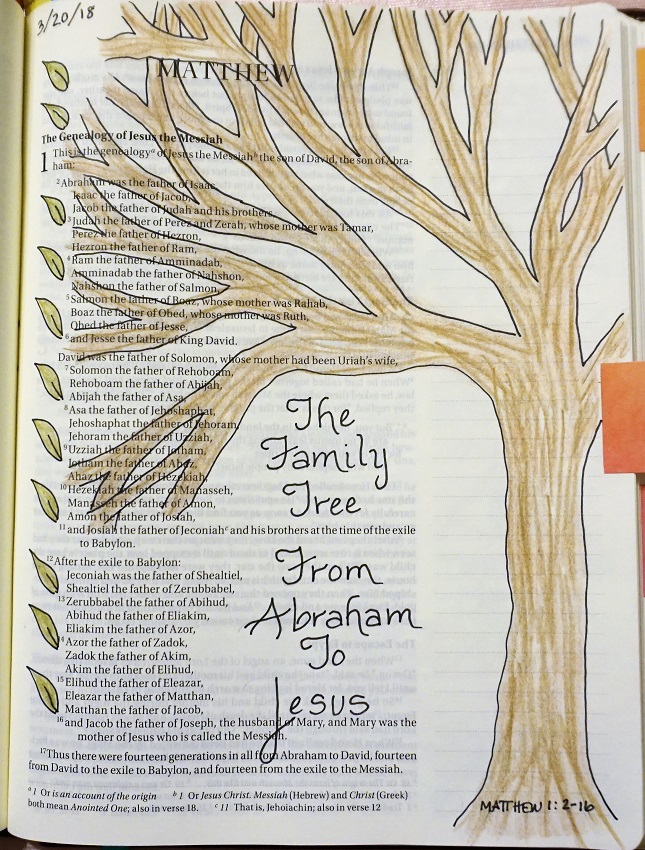
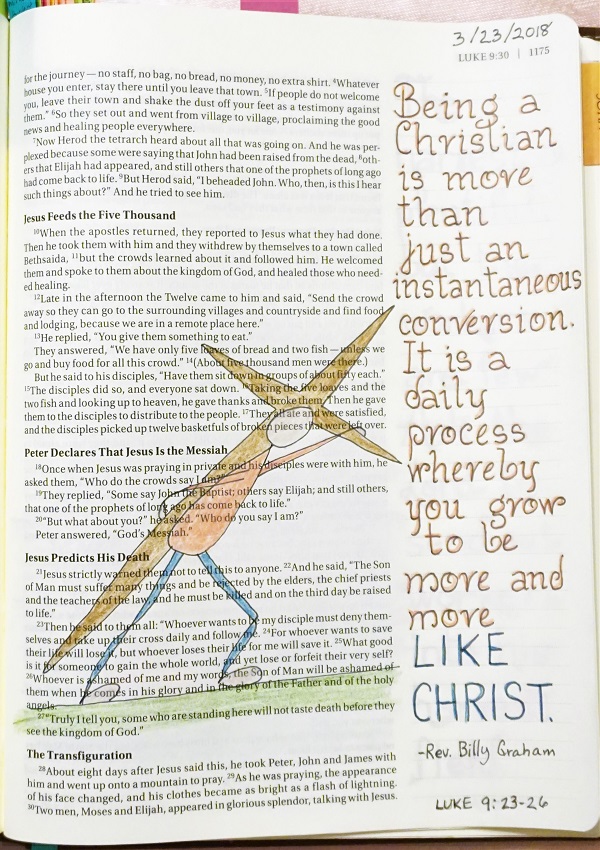
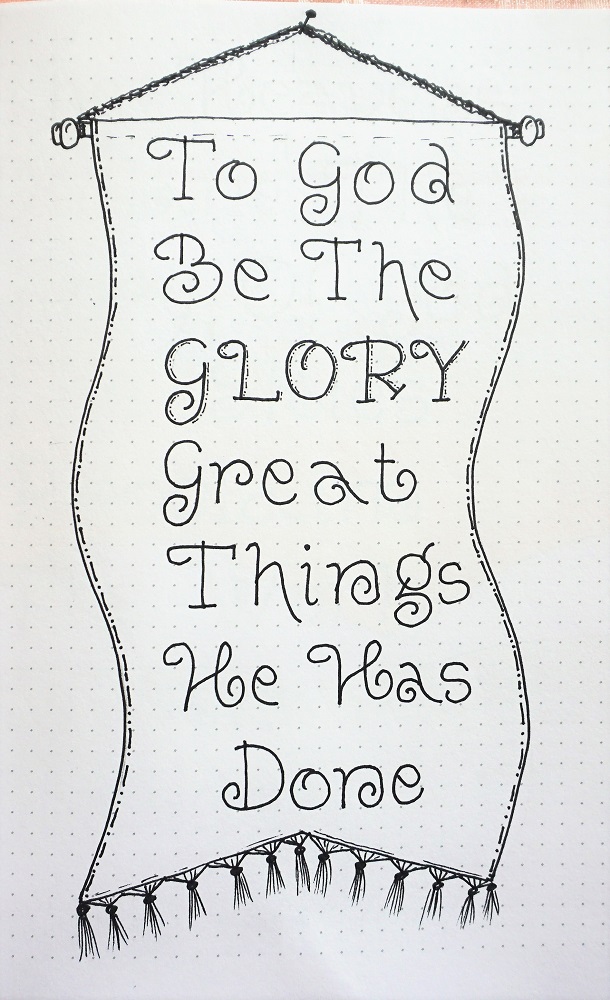
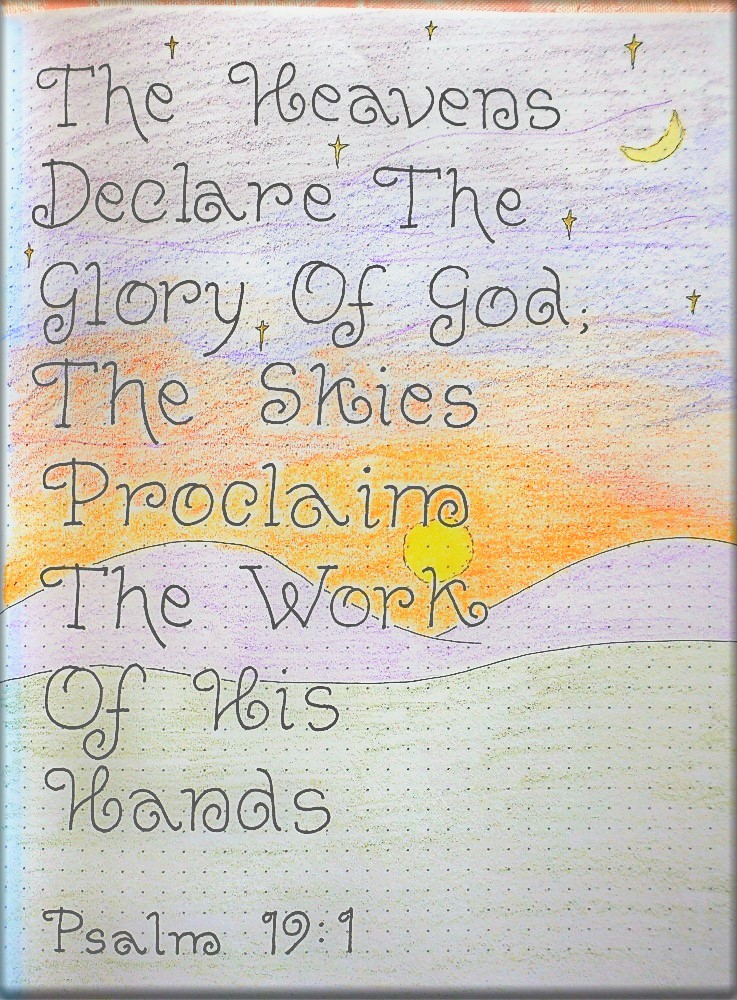
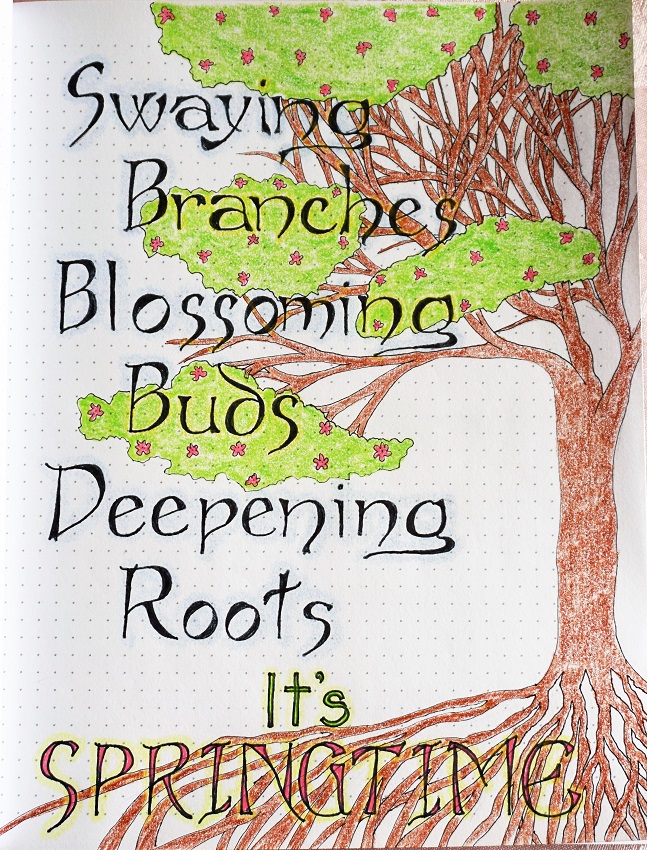
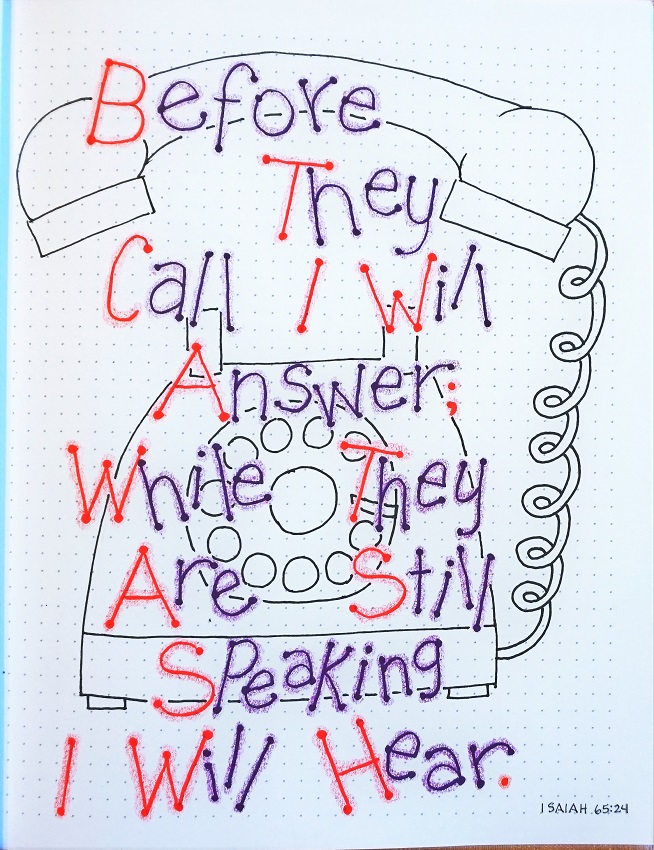
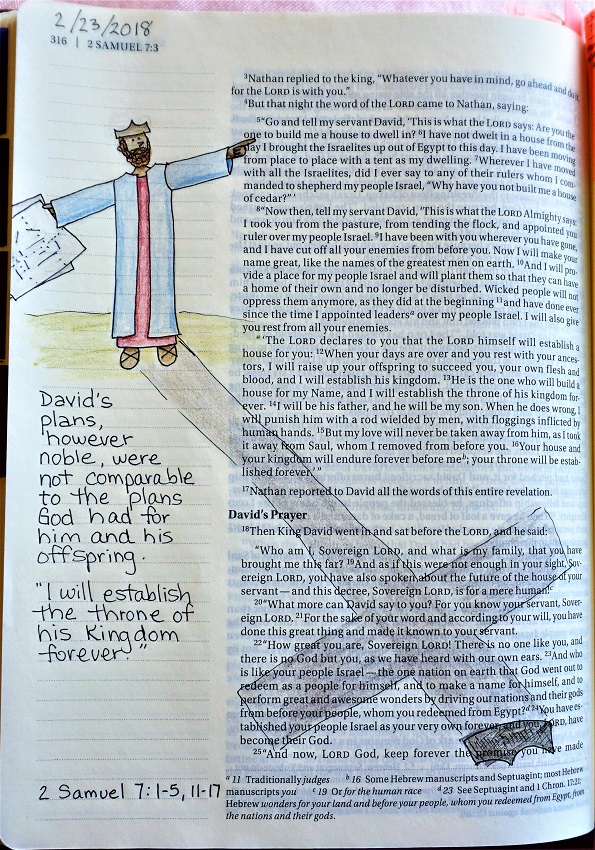
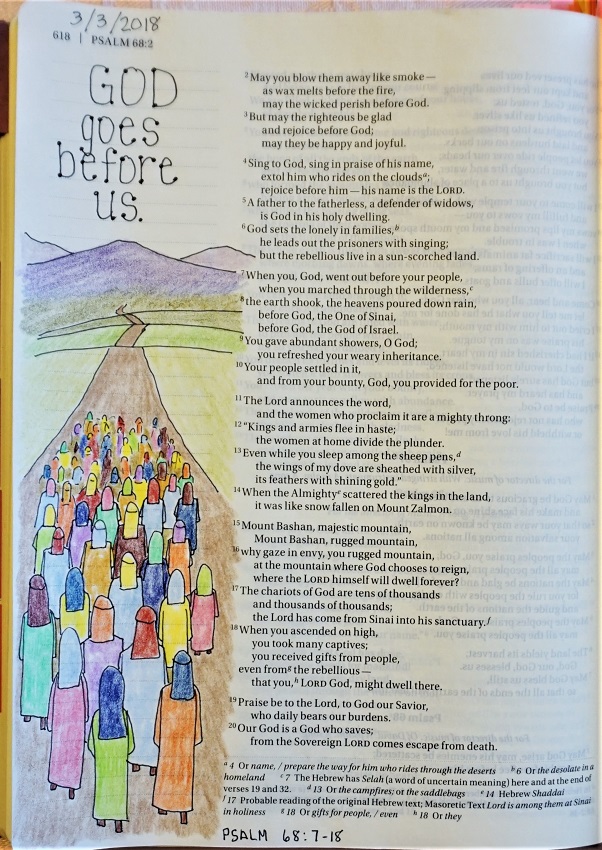
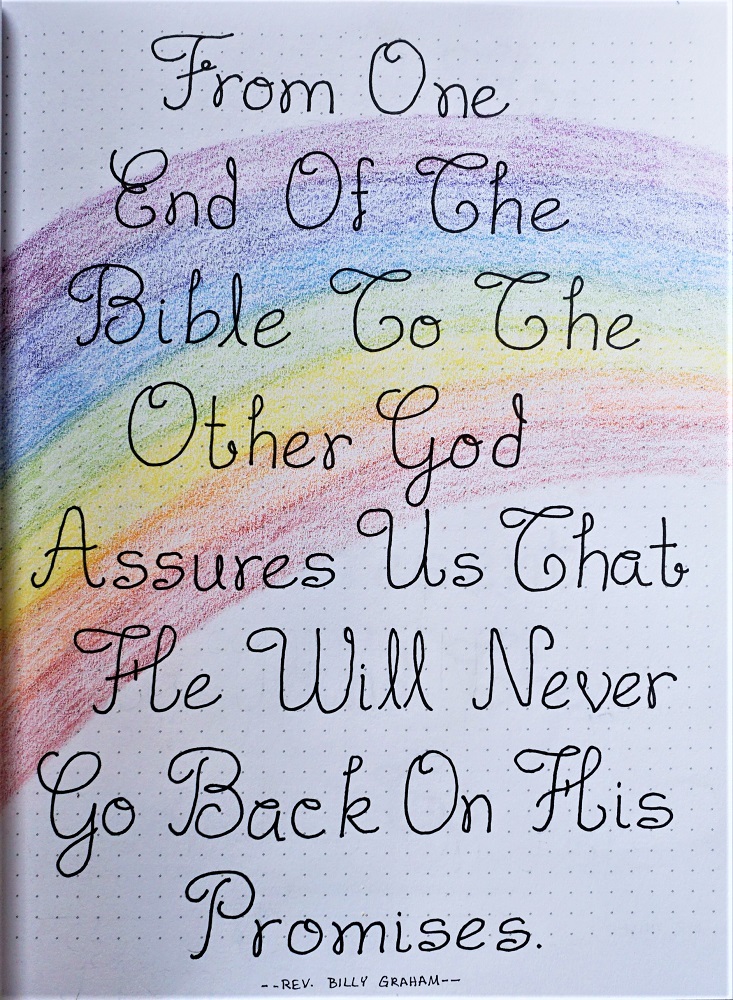
Find a song or quote about God’s promises and write it up as a reminder of His faithfulness. I used a quote from Rev. Billy Graham.

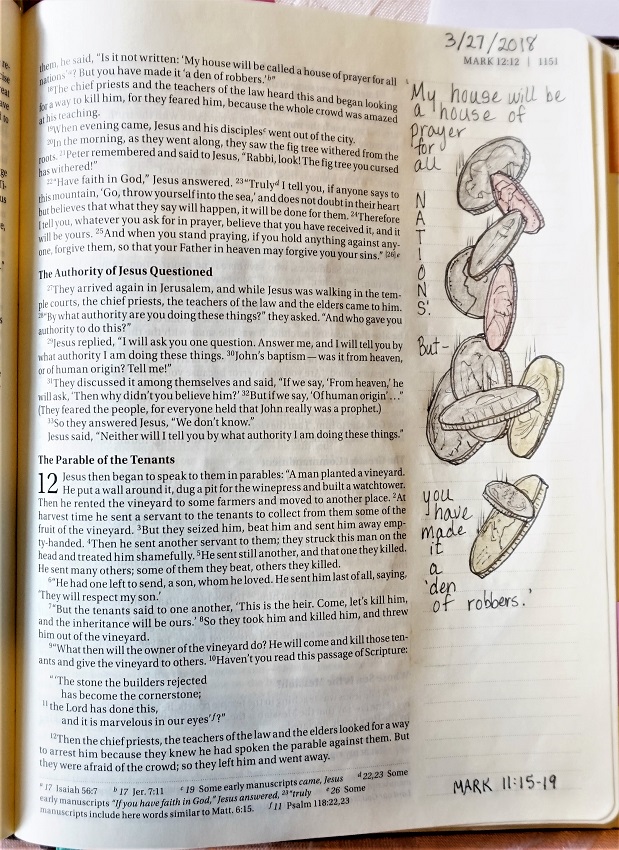
NOTE ON USE OF CAPITALS: I find that I like to capitalize every word (even the articles) when working on a full page like this. It looks nice and gives lots of practice on the large letter forms.

Unfortunately, all of those upper-case ‘T’s look too much like ‘C’s or ‘G’s so it is easy to read: “Go, Che and Chat”. This is why I gave those alternate forms yesterday!

Remember P-I-E (pencil, ink, erase) and decorate the page if you wish. I used the rainbow as a reminder of God’s promise.
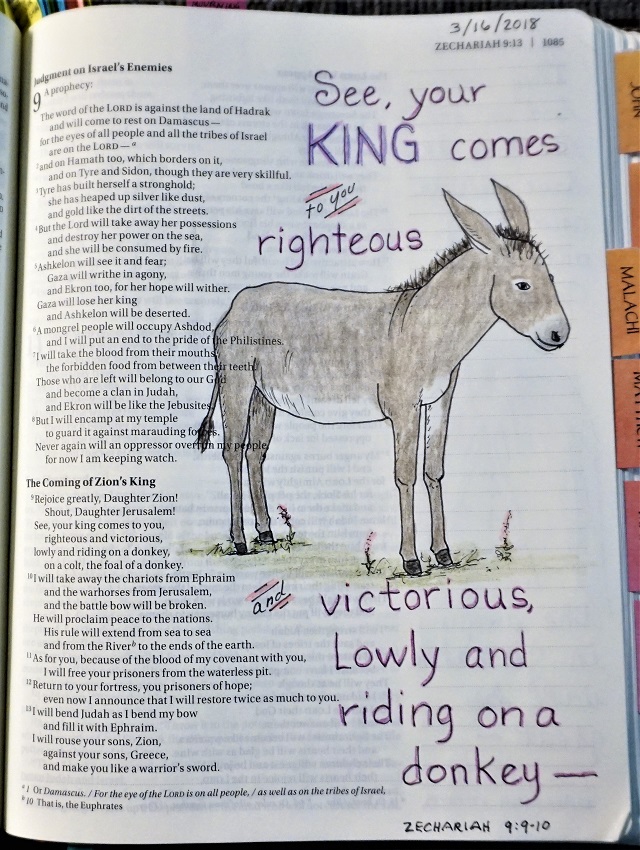


THURSDAY

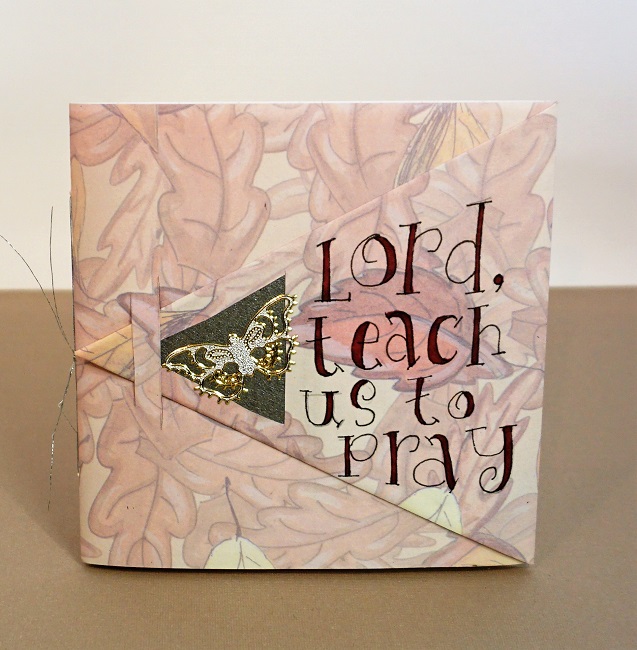
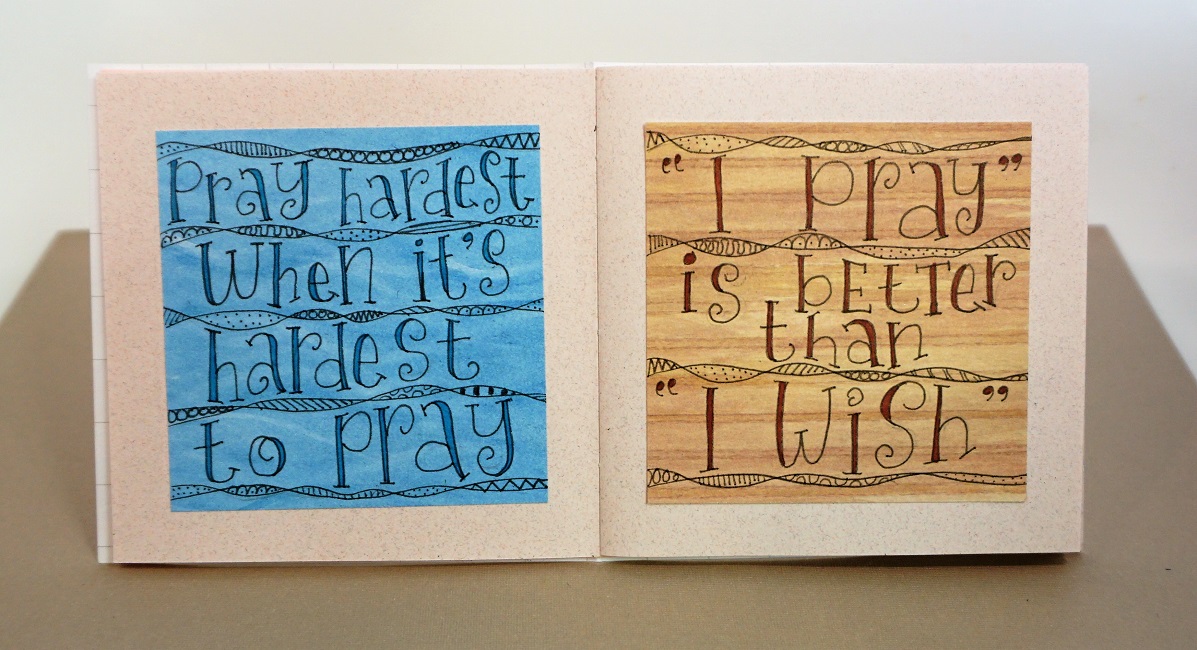
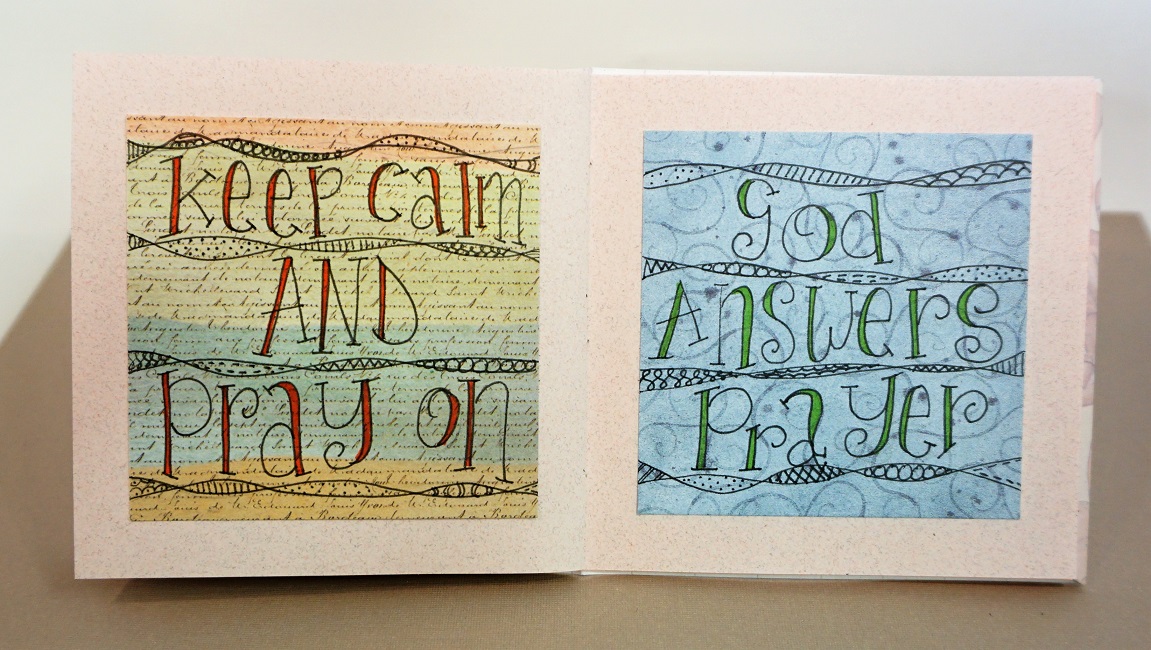
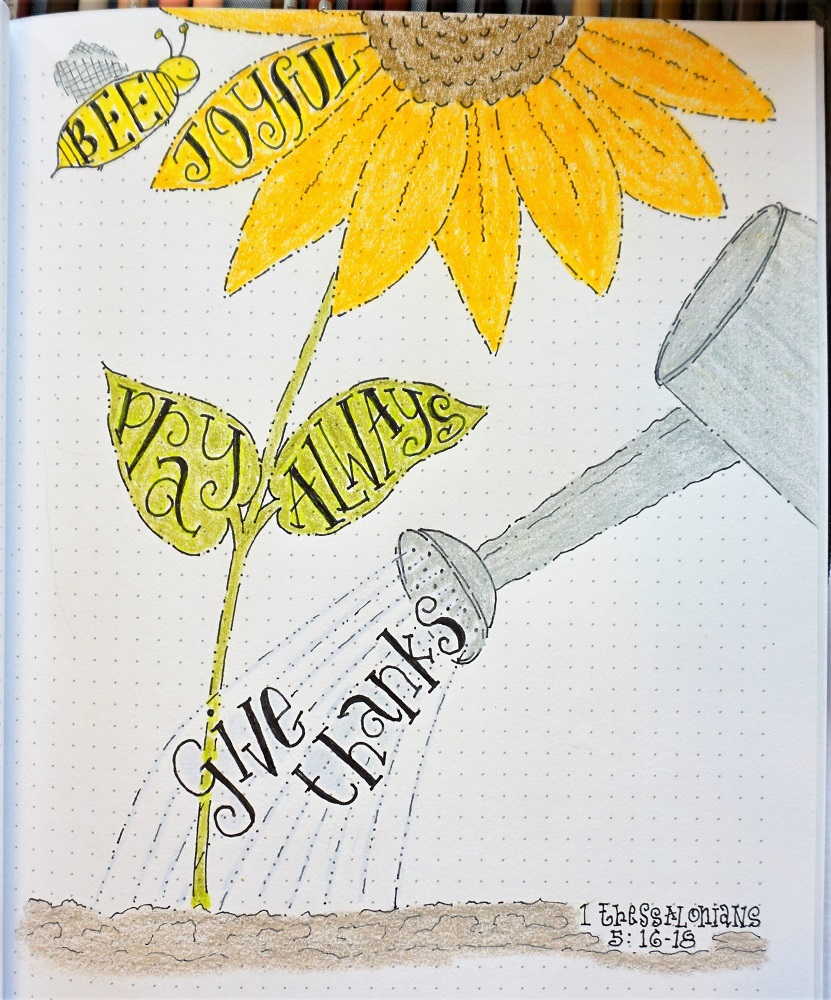
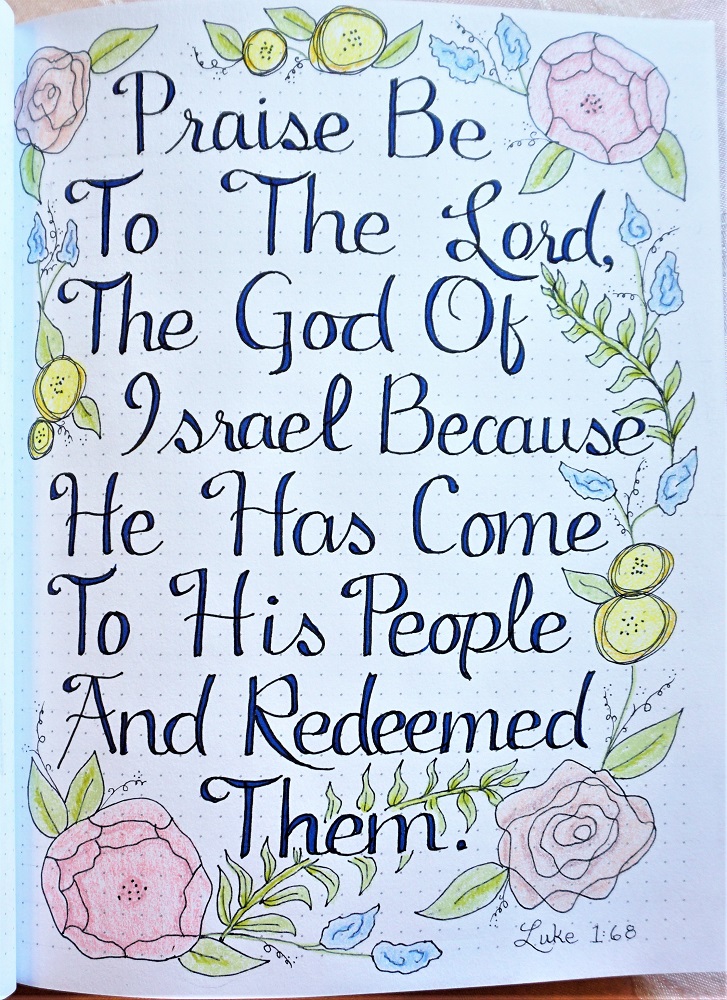
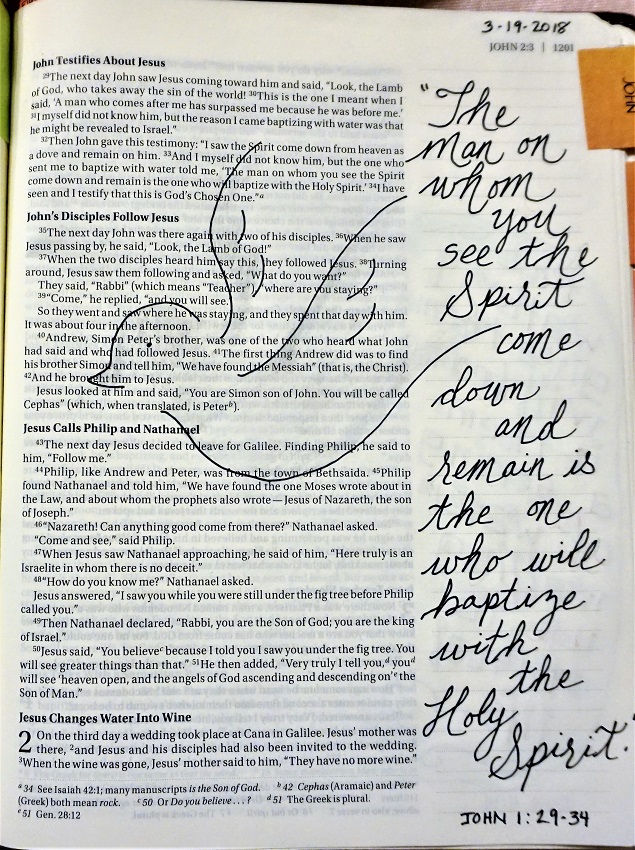
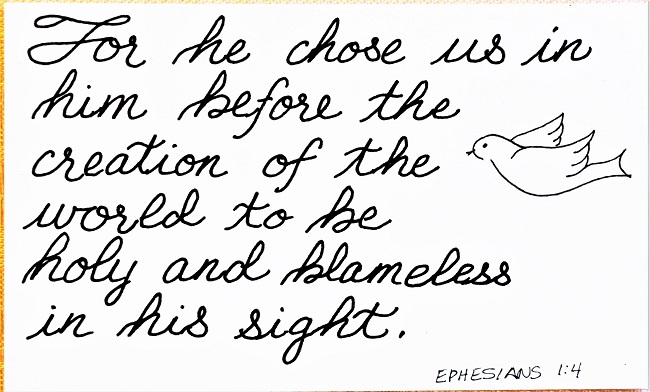
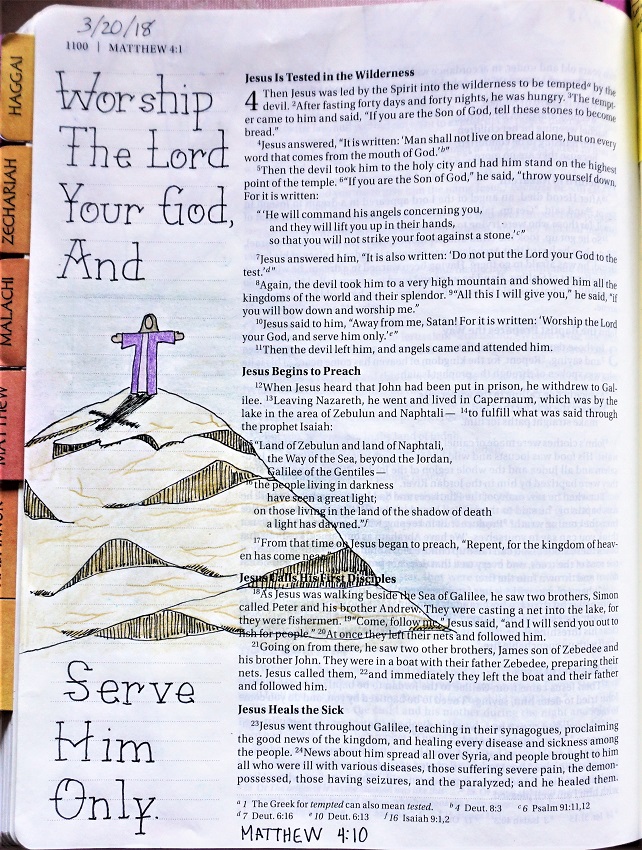
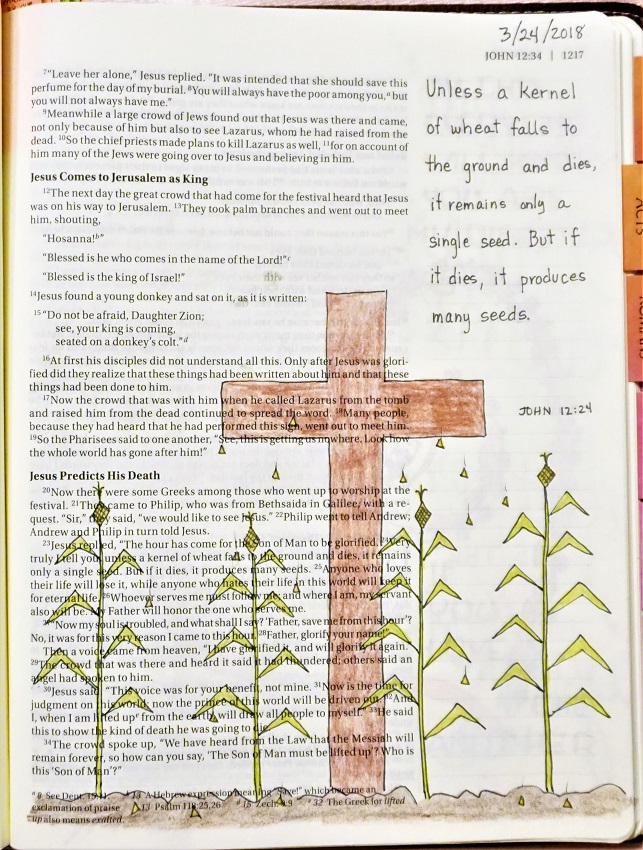
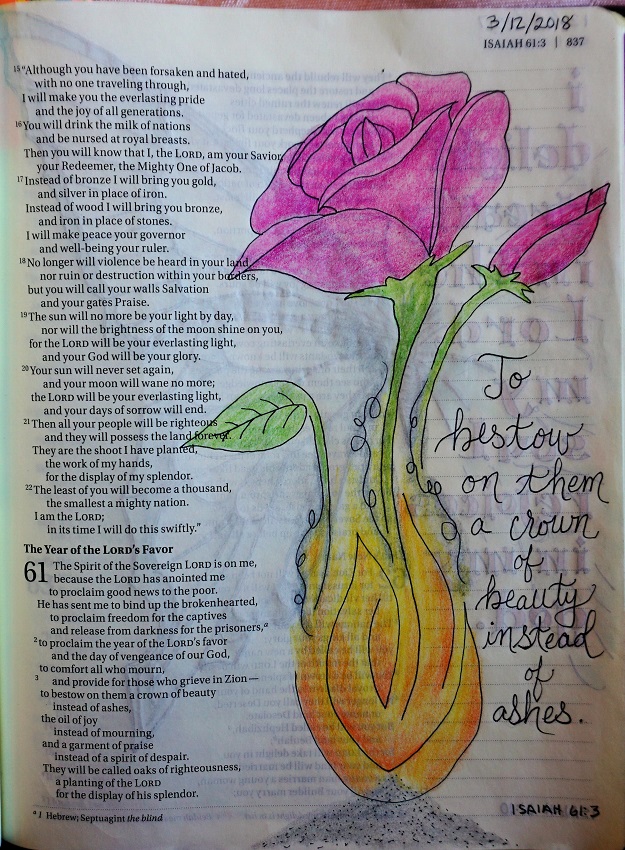
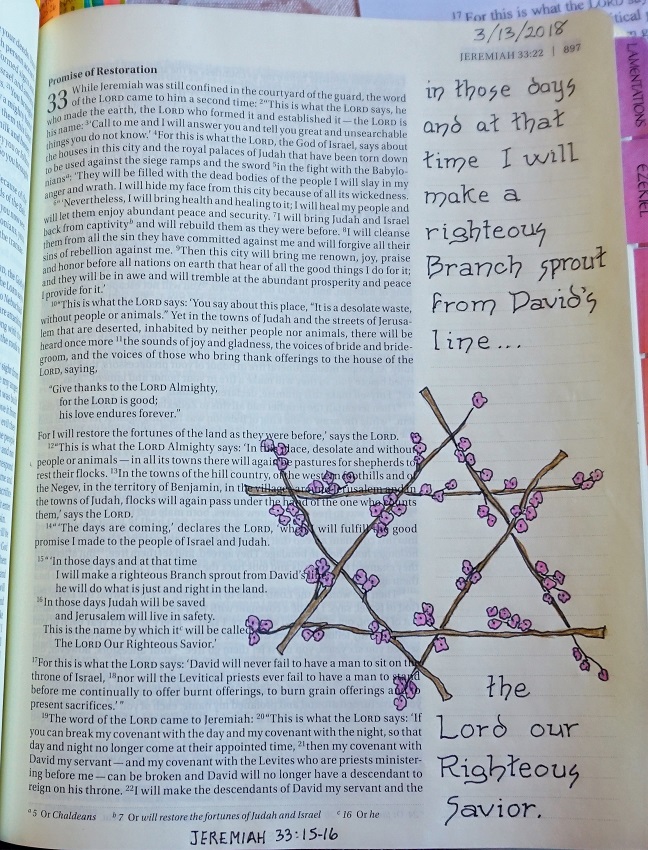
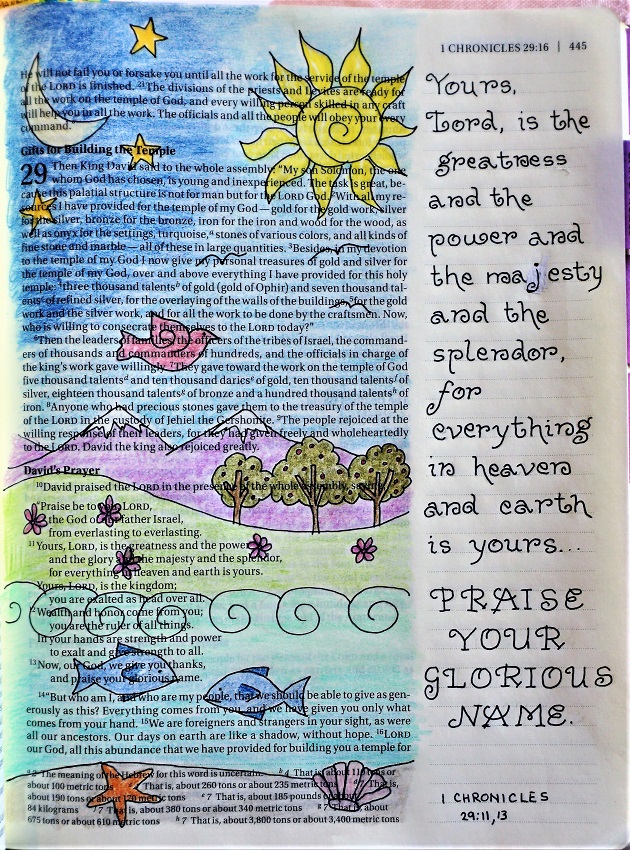
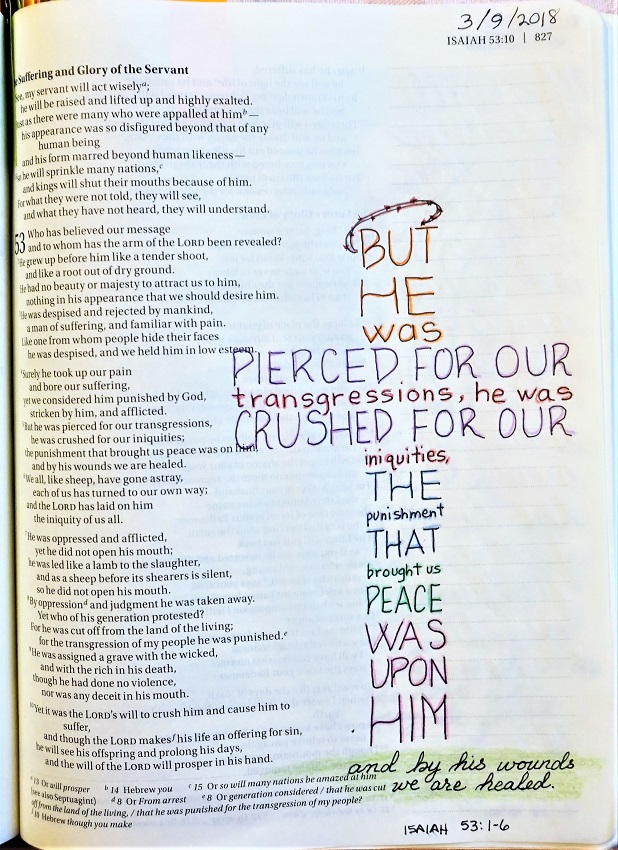
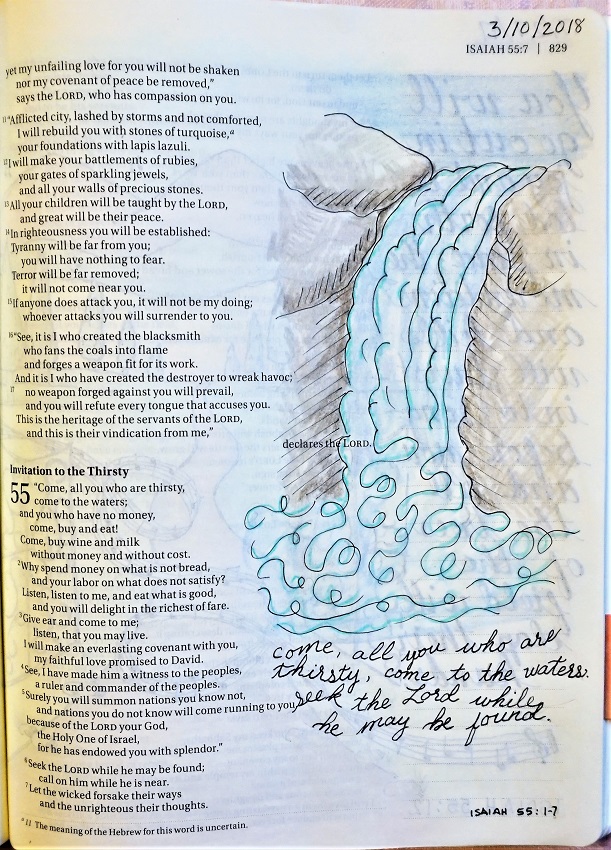
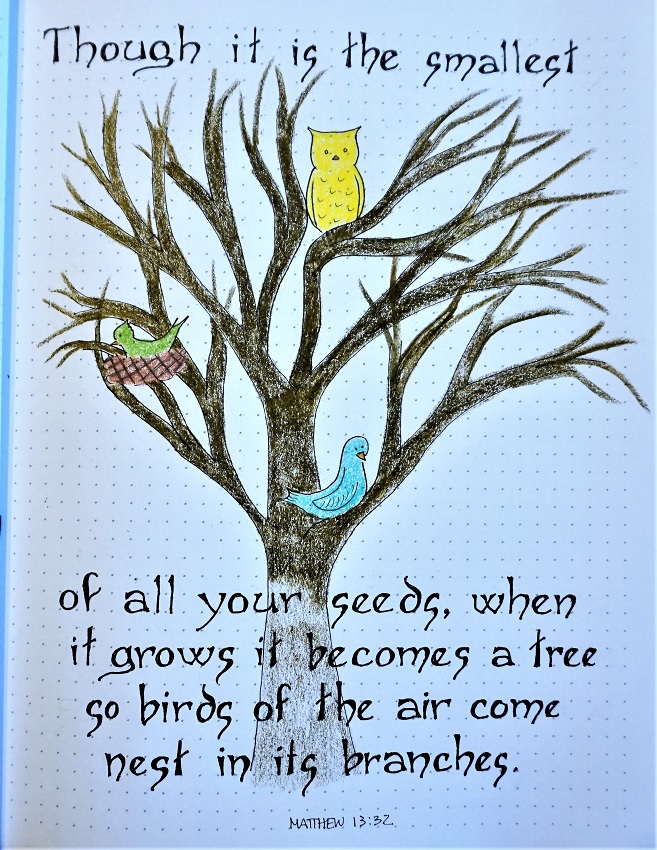
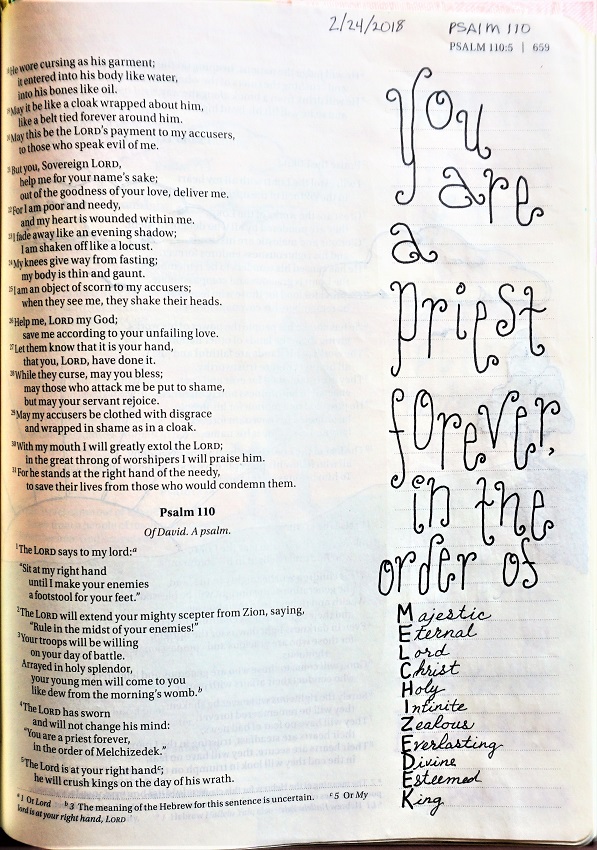
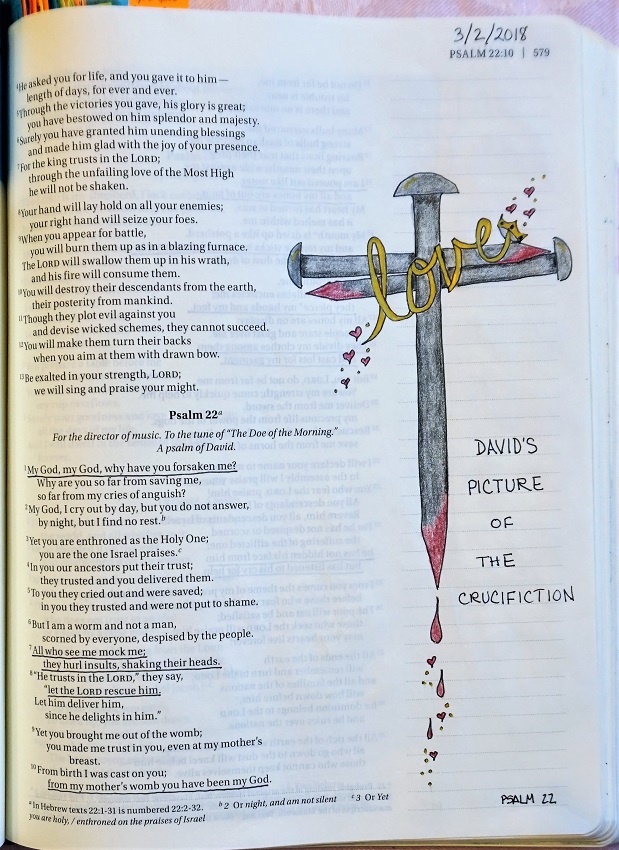
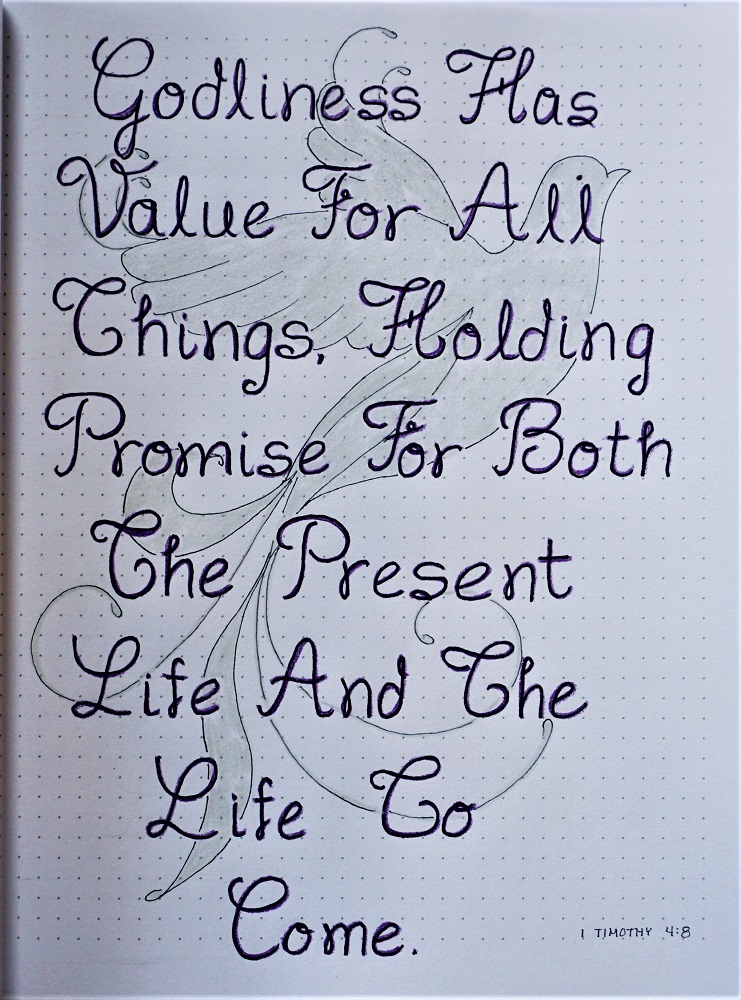
Today, use the ‘promise’ font to write out a ‘promise’ scripture in your journal, practice notebook or on plain paper.

NOTE ON CENTERING: If you want to center the words on your page, write and ink them on a practice sheet first. Then I usually pencil in a center mark on EACH LINE separately and pencil in a center line on the final page, top to bottom. This gives me a target. Then place the ‘final’ page over top of the practice piece and use a light box or a window to trace the words. You can slide the original sideways in whichever direction you need to center the lines on the page.

Another way to center them is to fold the practice paper right above the line of text and align its center line with the one on the final page. Then copy the letters on the final page just above the corresponding letter on the practice page. Repeat these steps as you move down the page.

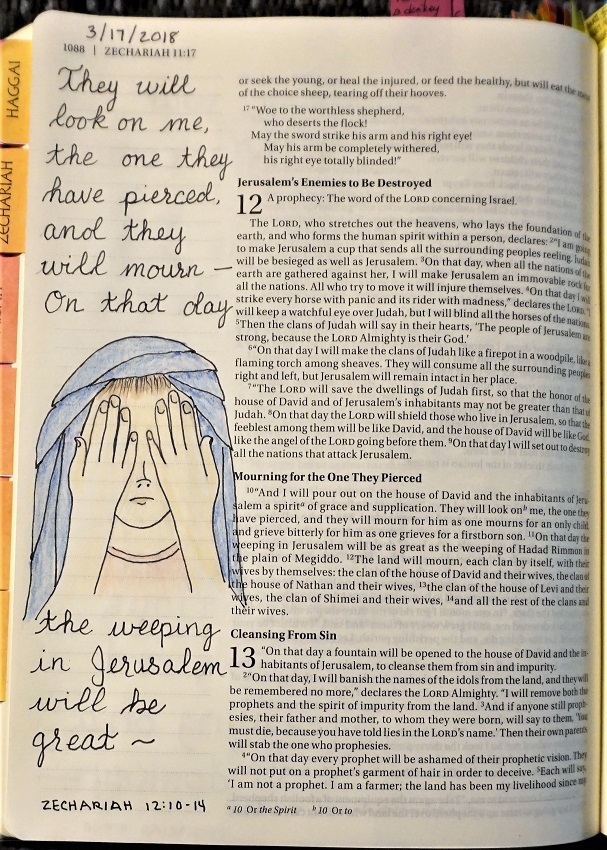
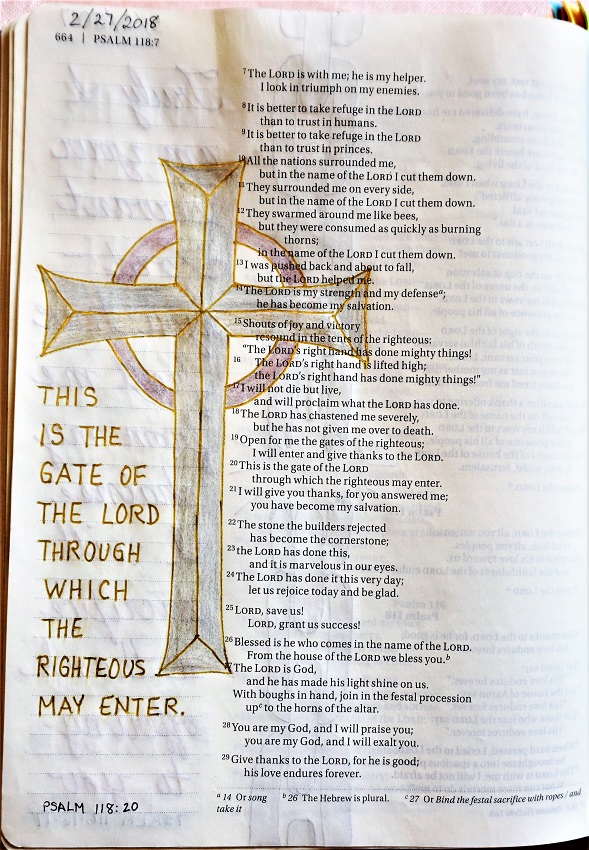
If you want to decorate your page, do all the inking of the letters first using a heavier weight line and erase their pencil guides. Sketch your artwork in pencil and ink it in very thin line pen. Erase those pencil lines before coloring. I used a dove representing the Spirit of God. This is a fancier version of the Drawing Room dove, with swoops and swirls added to the wings and tail.
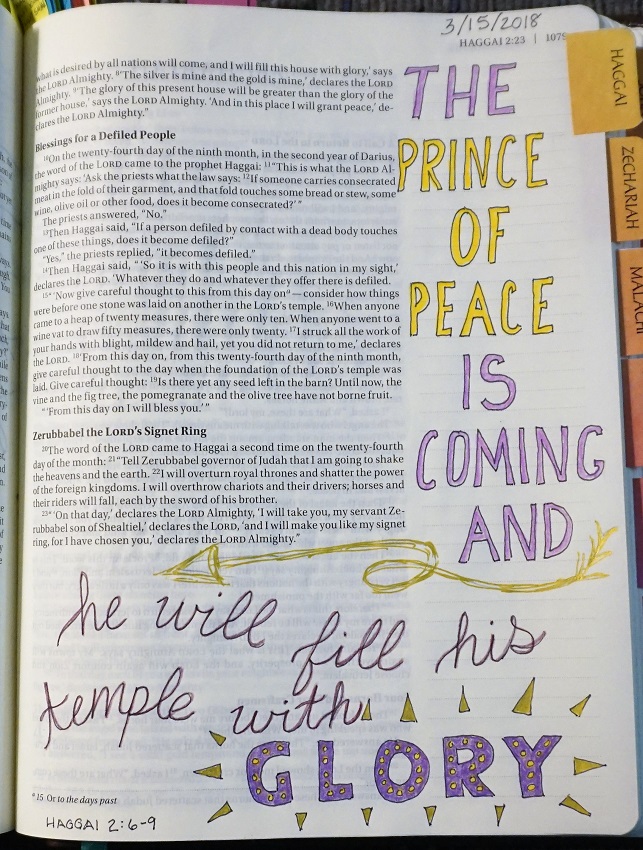
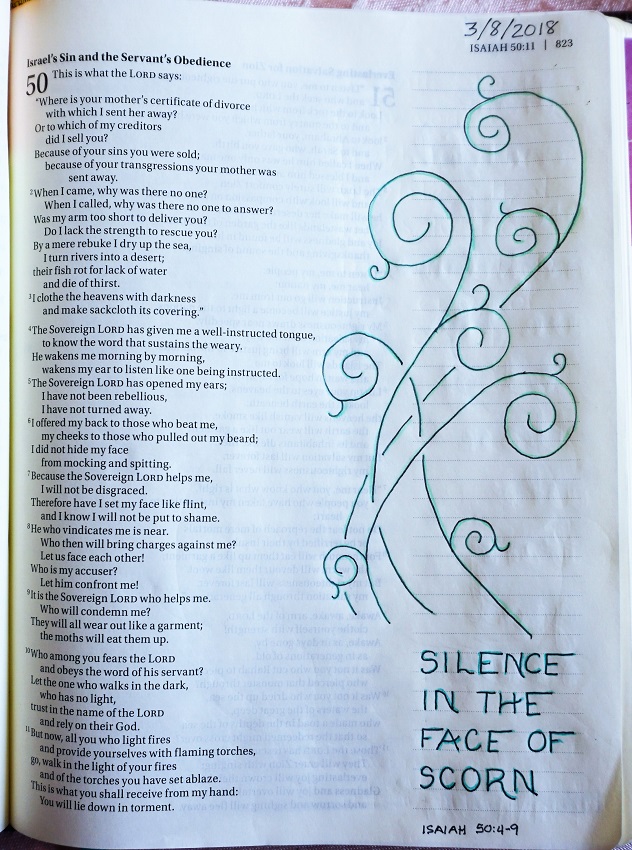


FRIDAY

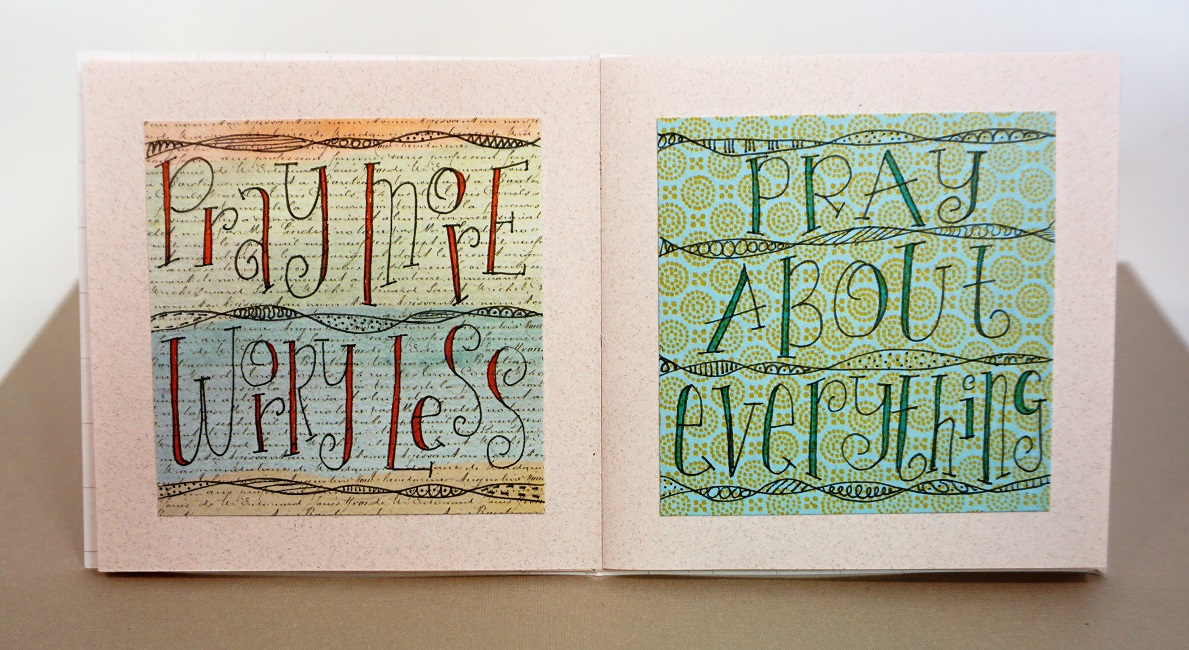
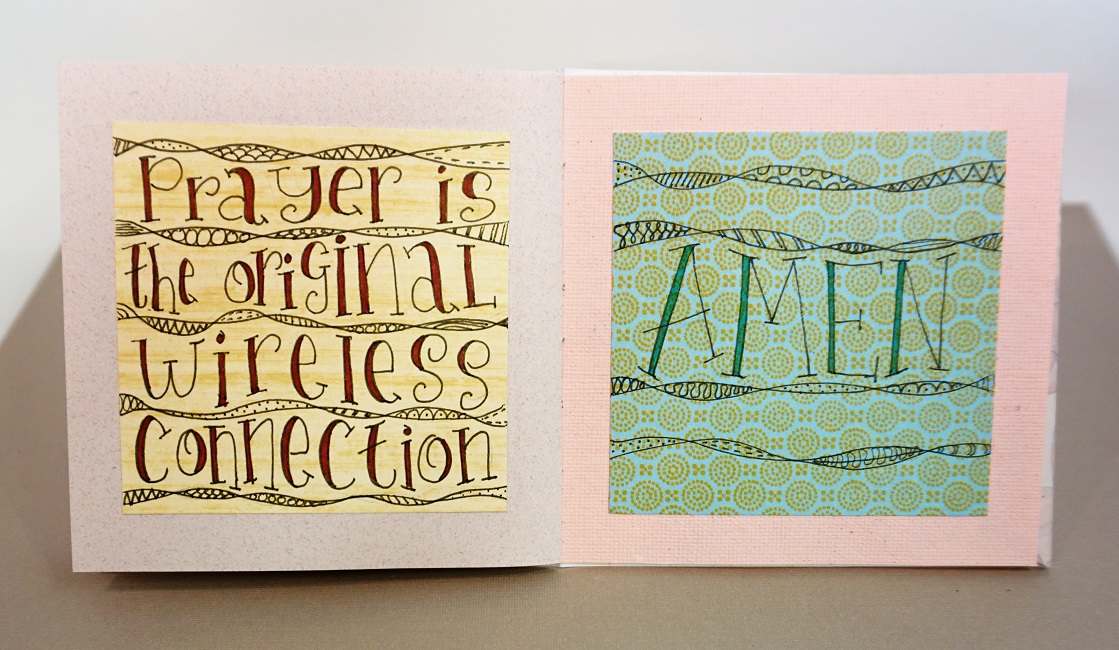
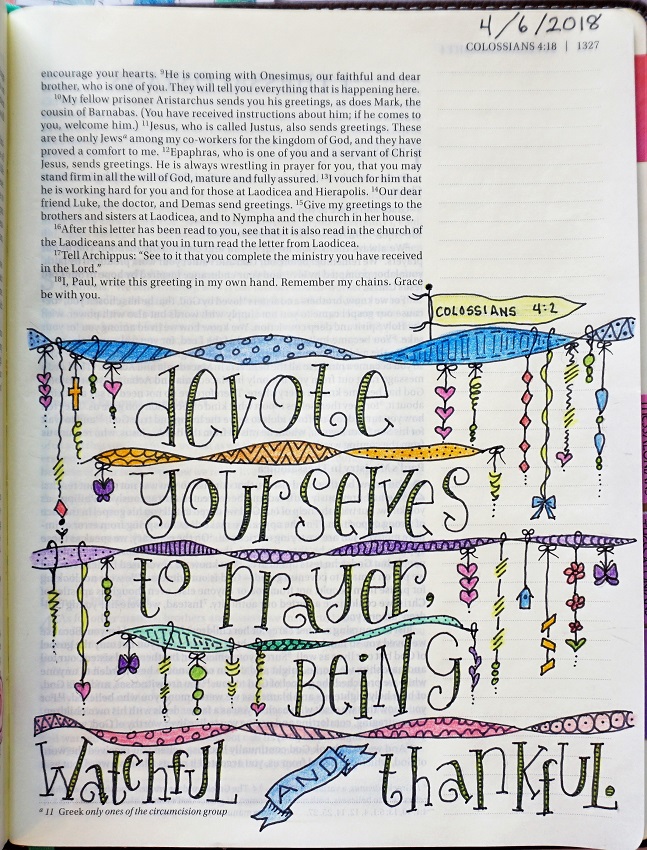
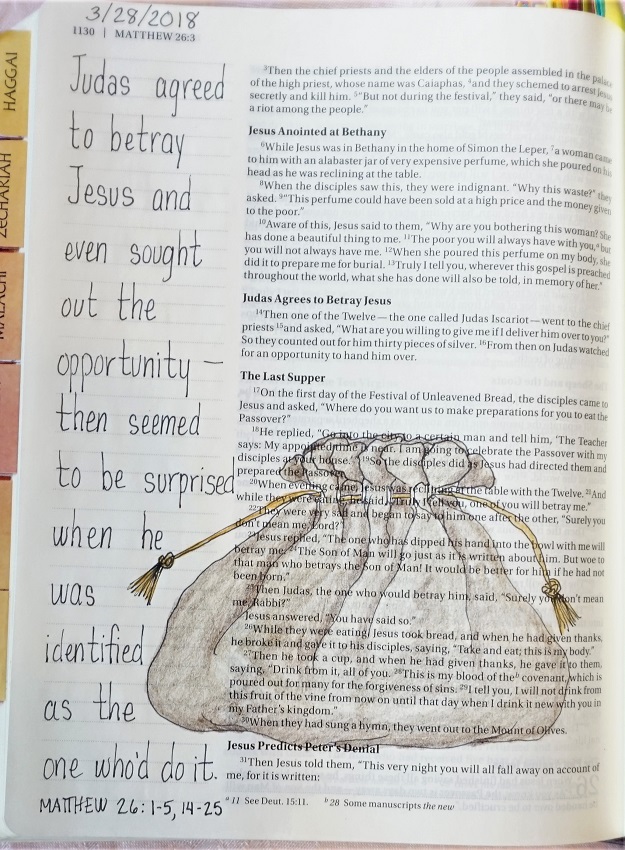
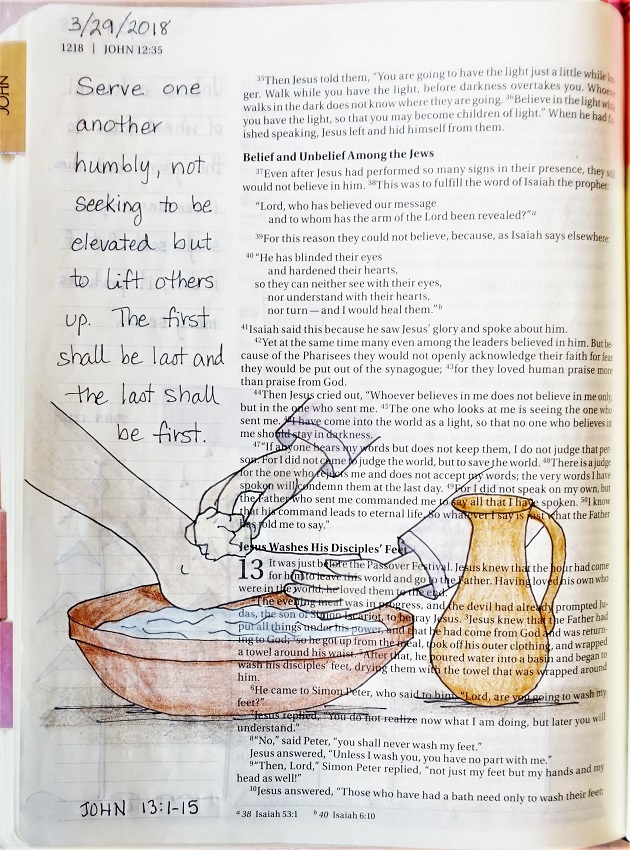
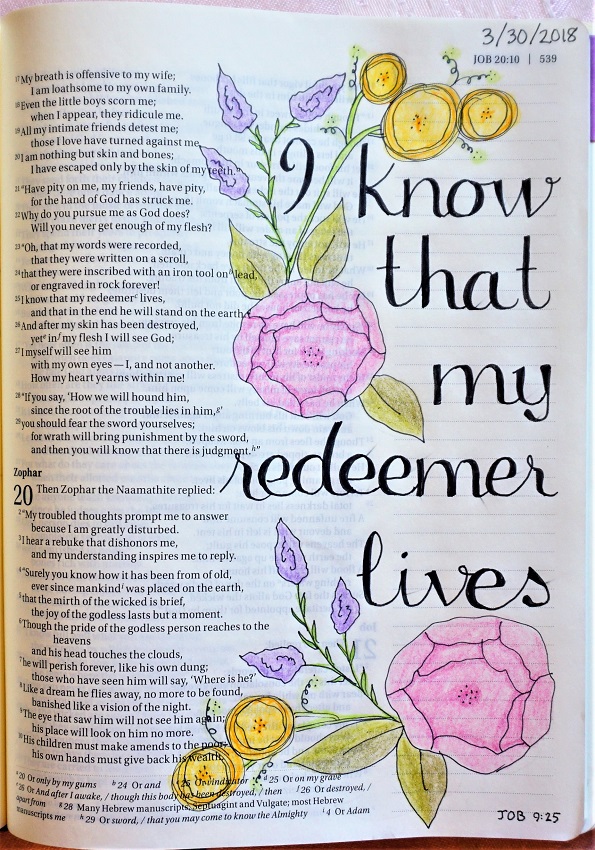
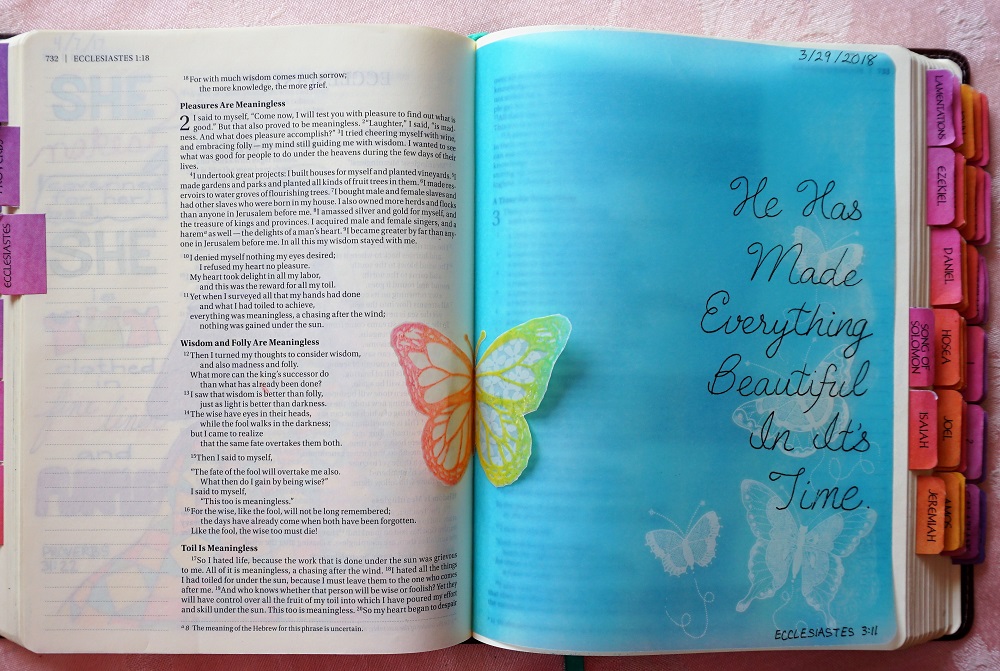
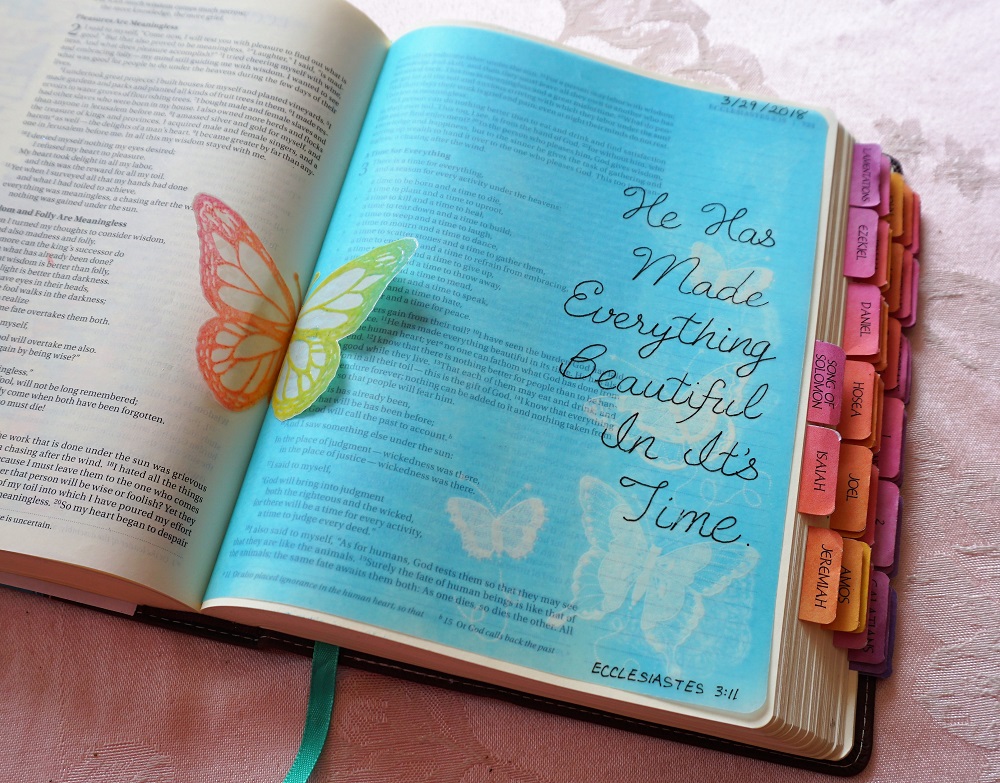
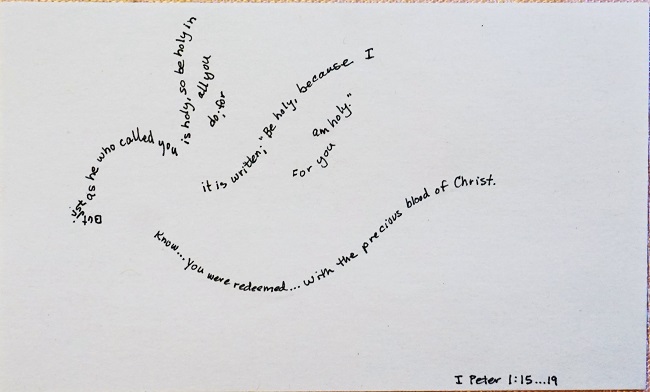
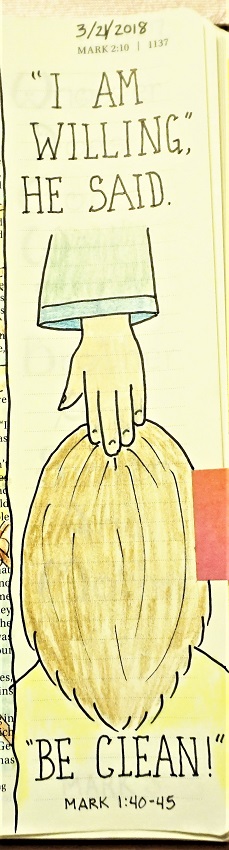
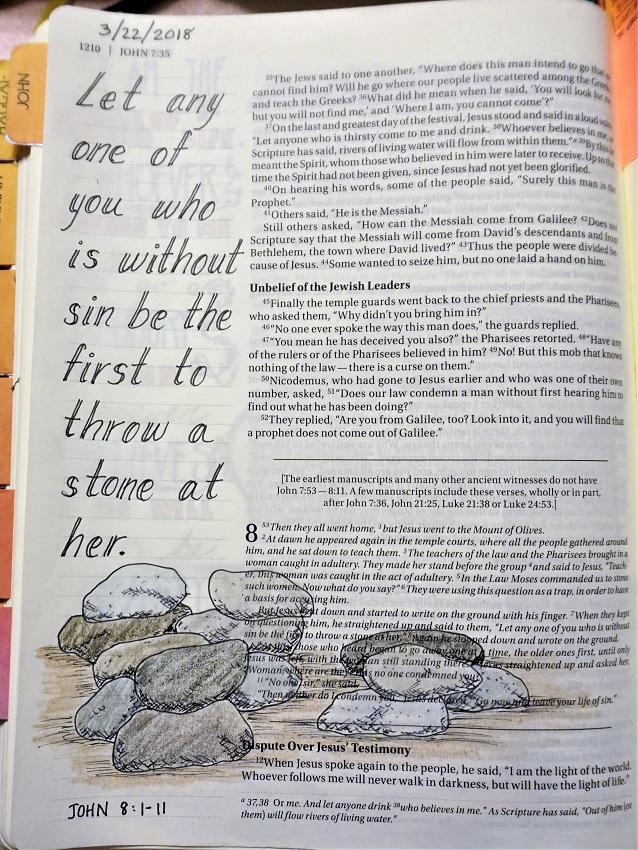
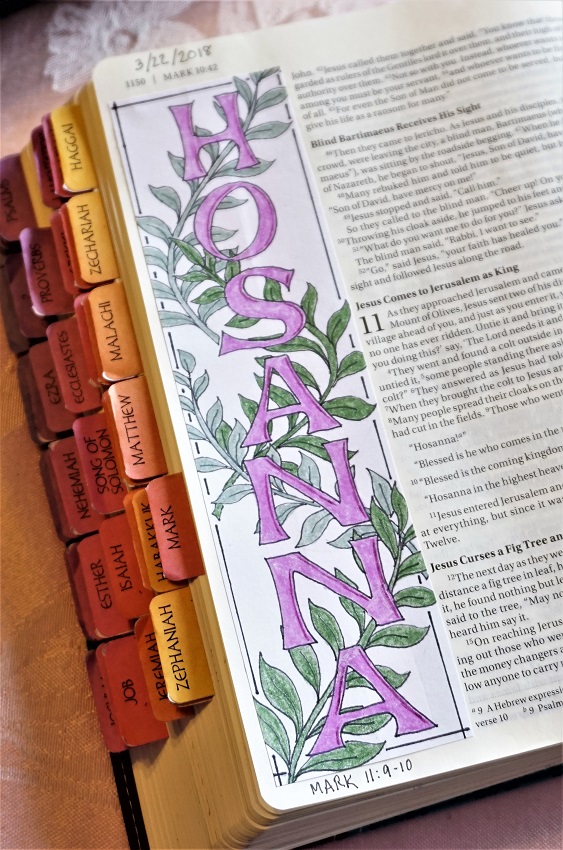
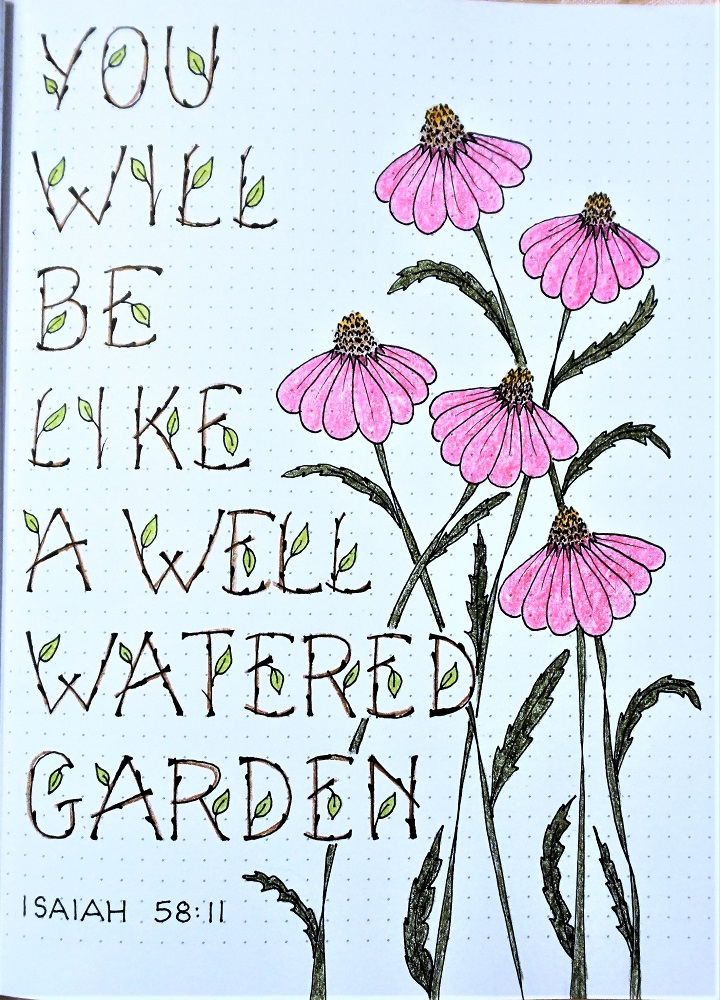
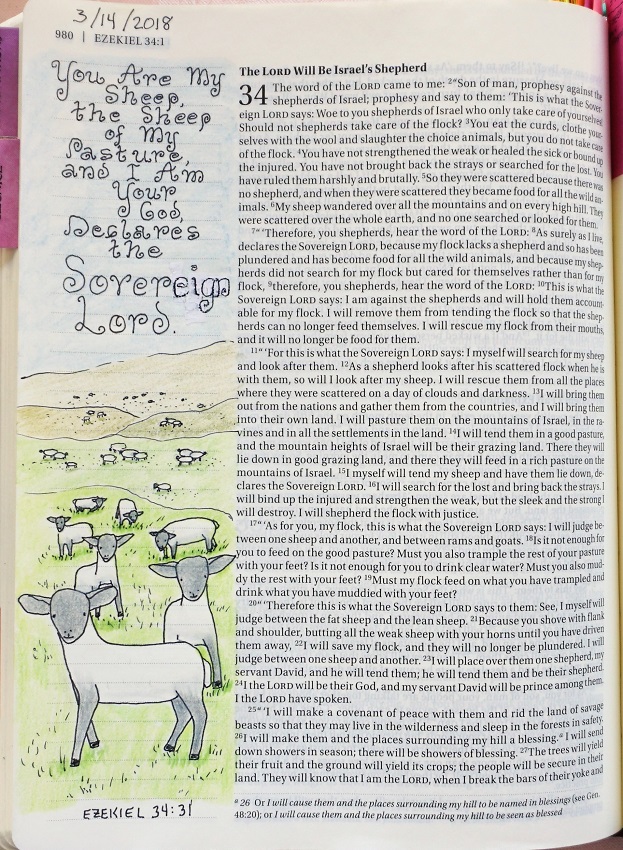
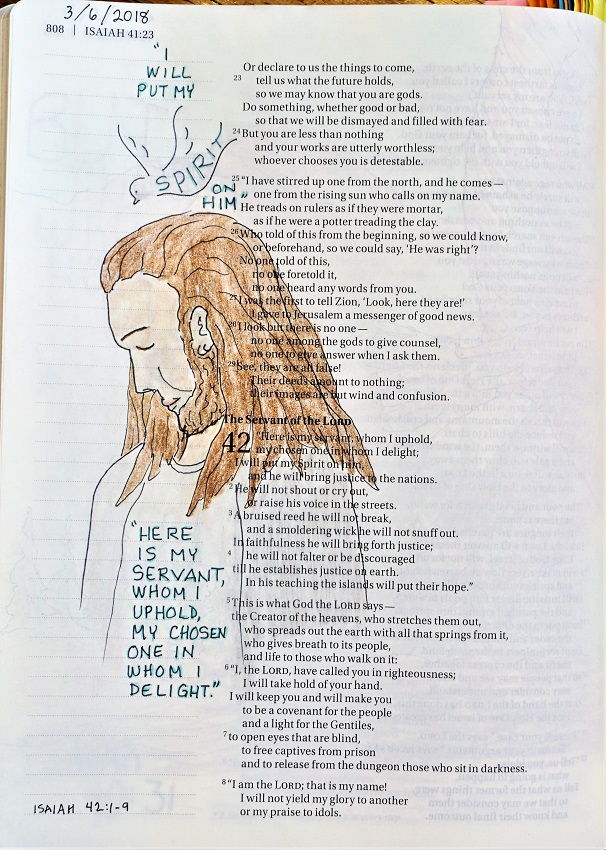
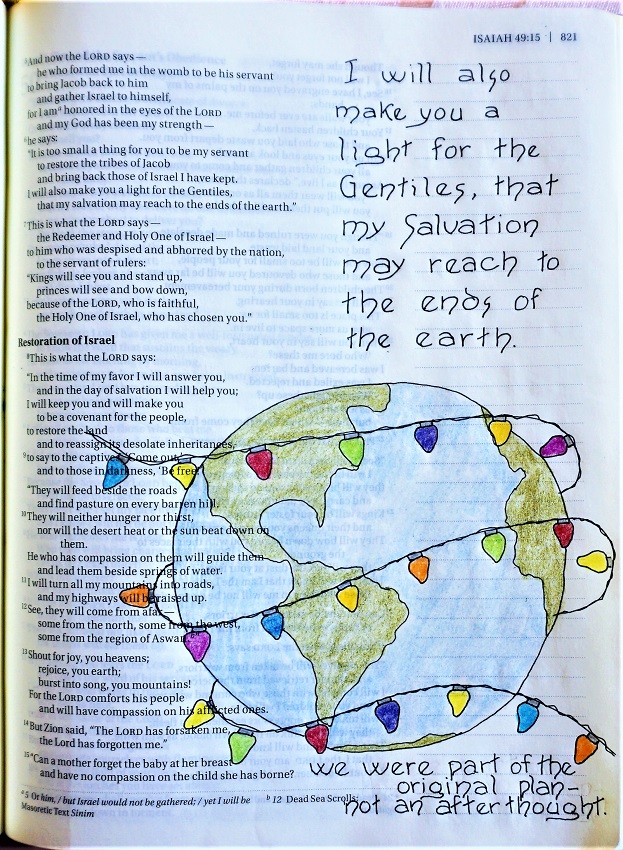
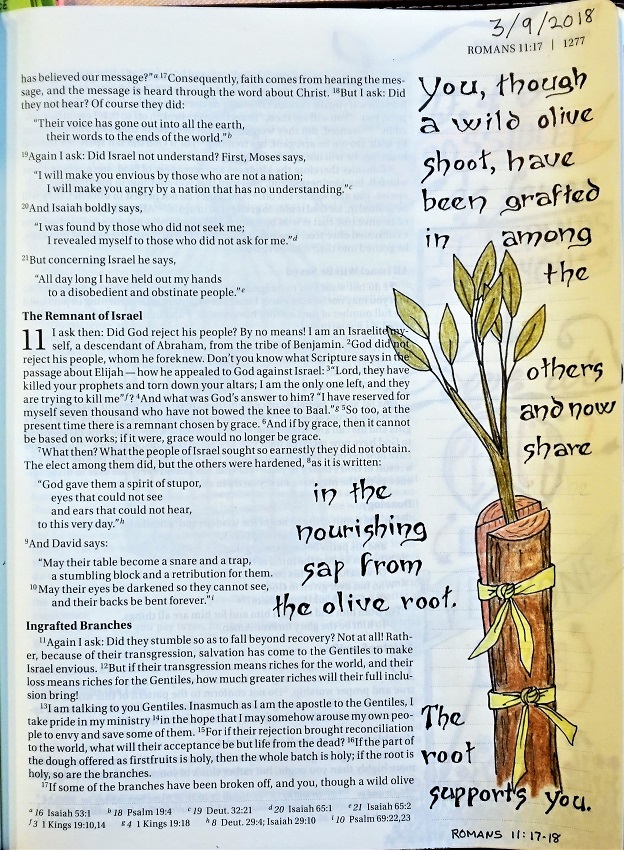
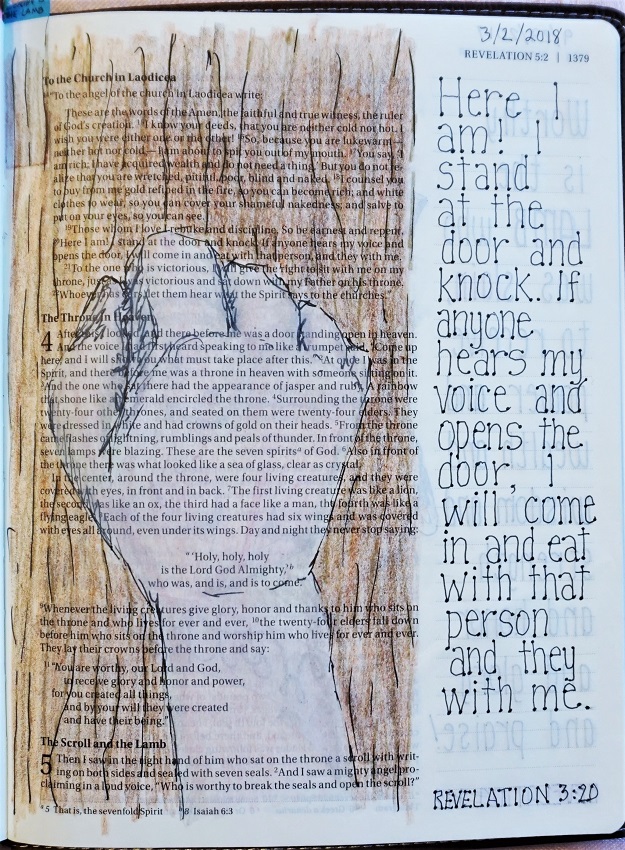
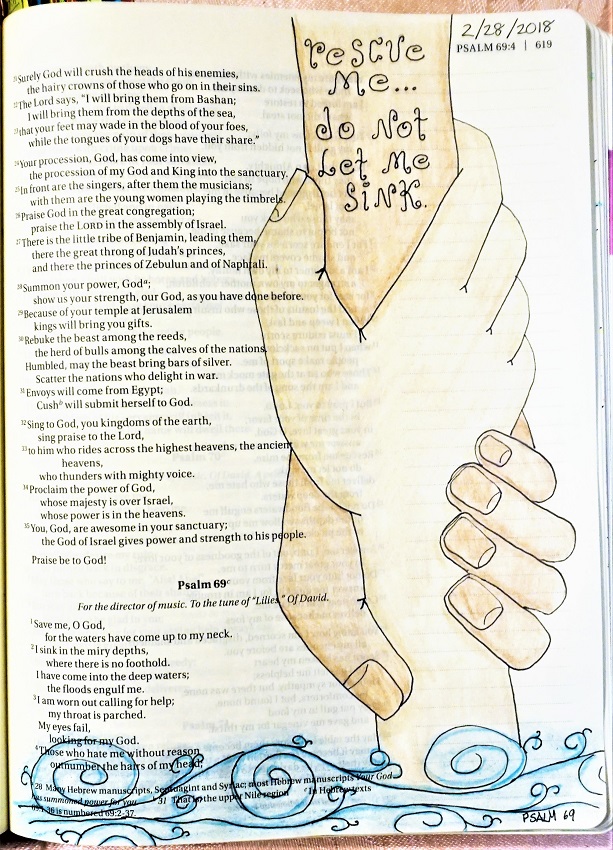
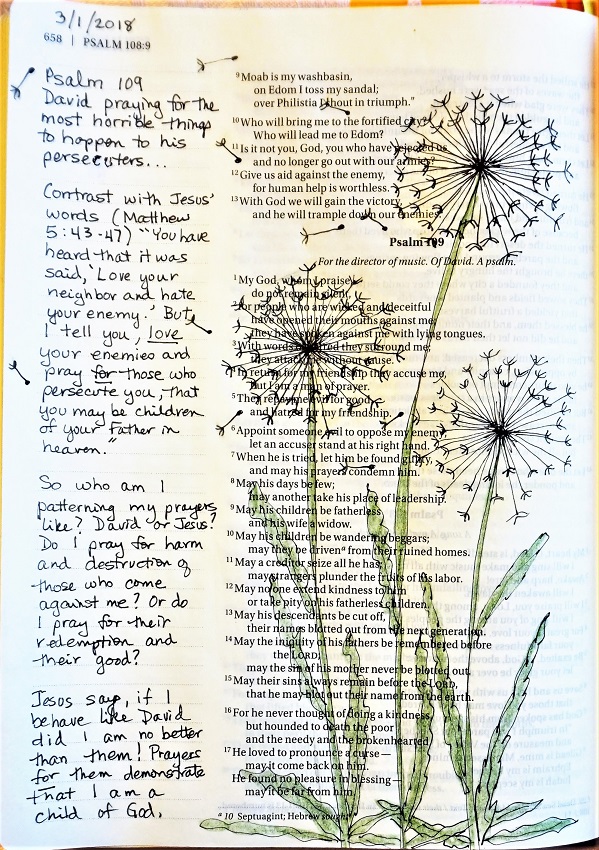
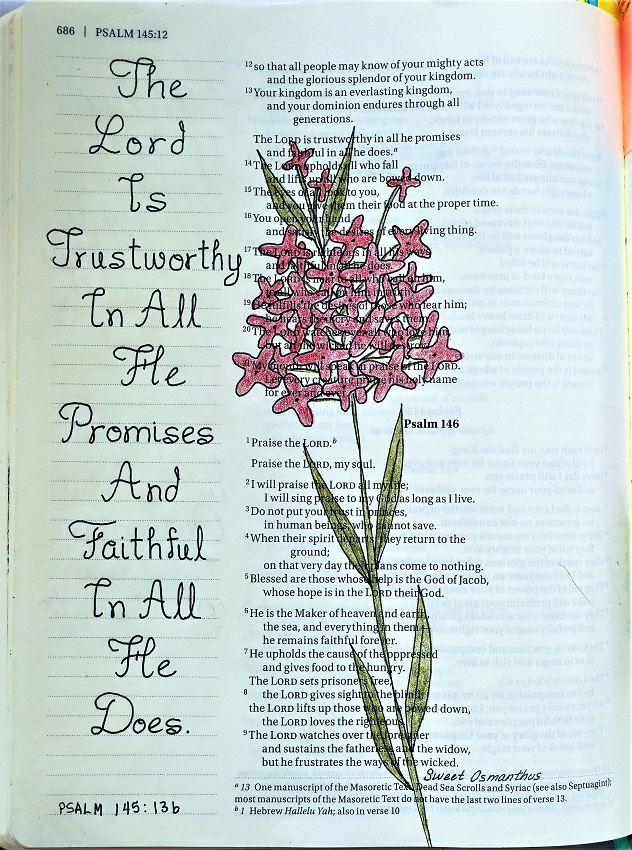
Now we will bring the ‘promise’ font to our Bibles.

This is the point at which I swapped out the alternate ‘T’ and ‘I’ letterforms. Isn’t that so much more readable?

Don’t forget that all our work is done with the P-I-E (pencil, ink, erase) process.


So that wraps up another week of lettering lessons - I'm on the schedule to teach lettering in the coming week, too, so there'll be another wrap-up next weekend.

Ddd


Posted by studio3d@ccgmail.net at 9:24 PM PDT
Saturday, 7 April 2018
Cheater Pants
Topic: Quilting

This quilt started out as a piece or yardage printed with a pattern of patchwork. I cut out 9 portions of the pattern, eliminating sections that I didn't want. What I ended up with was stars with 4-patch corners.

I pieced these together using sashings from a striped fabric (you've seen this fabric a lot lately on recent projects) and cornerstones I cut from scraps of other parts of the yardage.

I quilted this around the stars and the 4-patches.

The binding is made from scraps of the original yardage.

Ddd


Posted by studio3d@ccgmail.net at 8:42 PM PDT
Friday, 6 April 2018
Wonky Houses In the Drawing Room
Topic: Bible Journaling

The Drawing Room lesson this week garnered 12 shares of drawings in the group in 2 1/2 days! Everybody was having fun with this one.

The original idea was inspired by Joanne Fink.

You can find the lesson here  http://creative-bible-journaling.com/drawing-room-210-wonky-house/

Here is the Bible page I created from the lesson and I included the scripture text using the Lettering Lodge lesson from the week.


Oh, look! Those dangles were in the Drawing Room this week as well as Lettering Lodge. Total coincidence.

Ddd


Posted by studio3d@ccgmail.net at 5:39 PM PDT
Another Round of Lettering
Topic: Bible Journaling

I really like trading off with Ann when teaching lettering lessons. We always choose such different alphabets to bring to the students and fun spedial projects to include.

This was Ann's week to teach a lesson she called 'Pray'.

MONDAY was the introduction to the style with the focus word. This letter style is very casual print that features serifs and curls as well as randomly thickened letter parts.


As you can see, I did some of the fill with highlighter.

TUESDAY we got to see the whole alphabet. I focused on the structure and kept my letter sizes pretty consistent. In actual usage the letters will be more randomly sized.


WEDNESDAY our special project was to write on 3x5 card a quote about prayer, decorate it with decorated twisty ribbons and mount it on a larger piece of scrapbook paper. Did I do that? No I did not!

I had a small blank book made up in my studio and decided to write many quotes directly on scrapbook paper and mount them on the book pages.


THURSDAY we were supposed to write a verse on plain paper with the Pray font, include some decorated twisty ribbons AND add dangles. My design did not support the ribbons and dangles so I just left them off.

My scripture is also a paraphrase.


FRIDAY I did use the dangles and the twisty ribbons in my Bible.


I was fortunate enough to have a large chunk of blank paper at the end of the chapter where my scripture was located.

Ddd


Posted by studio3d@ccgmail.net at 5:16 PM PDT
Saturday, 31 March 2018
The Last Days of Lenten Bible Journaling
Topic: Bible Journaling

As promised yesterday, I have the last 6 days of Lenten Bible Journaling - 40 days of journaling every day from Genesis through the Resurrection.

Here are my final pages:

Monday we were inspired by Mark 14:3-9 - the story of the woman who broke her jar of perfume to anoint Jesus.


Tuesday we used Mark 11:15-19 where Jesus chased the moneychangers out of the temple.


Wednesday was for Judas' preparation to betray Jesus as told in Matthew 26:14-25


Thursday we dealt with John 13:1-15 where Jesus washed the feet of his disciples.


Good Friday we had a very long selection: John 19:1-37 on the trial and crucifiction of Jesus. I have other artwork on the crucifiction so I gave a sneak peek of the good news to come.


And the final piece was to be on Matthew 27:57-66 regarding the burial of Jesus and the guards at the tomb. But that's not the Good News of the gospel, so I changed my selection to Matthew 28 and documented the empty tomb.


Now THAT's the good news of Easter.

Ddd


Posted by studio3d@ccgmail.net at 10:07 PM PDT
Friday, 30 March 2018
Lettering For the Redeemed
Topic: Bible Journaling

The lettering lessons taught this week, by co-leader Ann, were titled 'Redeem' though we could use any form of the word (redeem, redeemed, redeemer, redemption). It is a beautiful faux brush script with very a upright stance and a few low-key curls.

I found myself singing and humming old hymns as I worked all week long. Songs like: "I Will Sing of My Redeemer", "There Is a Redeemer", "I Know My Redeemer Lives", "Redeemed, How I Love To Proclaim It" and "I'm Redeemed By Love Divine".

Monday we had our introduction to the word - I tried doing my practice in real brush marker and had only moderate success. I'm not very good with those yet.


Tuesday we got the whole alphabet. I made a copy of my sheet before filling in the spaces to aid me in drawing the letters when I started using them for real.

And after the filling in:


Wednesday we were supposed to write the word down the left side of the page and fill in with words that started with those letters. We also got instructions on creating different kinds of flowers for decoration.

I wasn't feeling the anagram activity so I made a crossword from mine. I reveled in using bright colors for my florals.


On Thursday we used this lettering style for a scripture verse. Mine was kinda long but it gave me lots of practice. This time I went for a pastel color scheme and added in a flower that I had taught as well as a palm branch disguising itself as a fern!


And Friday, as usual, was for using this style in our Bible. Much shorter verse!


Back tomorrow with the wrap-up of journaling for Lent.

Ddd


Posted by studio3d@ccgmail.net at 3:16 PM PDT
Thursday, 29 March 2018
Beautiful In Its Time
Topic: Bible Journaling

I had a bit of play today with an idea that's been floating around in my head for several weeks.

I've wanted to make some sort of insert in my Bible with vellum but had no idea how that would work. So here are the things I did (not necessarily in order)

-- The blue page is plain vellum with pre-printed white butterfly images on the corner.

-- I toned the vellum page on the back by smearing on 'Salty Ocean' Distress Ink and hitting it with a heat gun to dry it

-- I used a corner-rounder punch on the vellum

-- It is glued in only at the spine using 'multi-medium' glue

-- I lettered on the vellum using a Pigma Micron pen and tracing what I had drafted out on scratch paper (I see now that I used an apostrophe in a word where it does not belong. I will go back and add a butterfly sticker over it)

-- The butterfly is a stamp I hand-carved myself some time ago

-- The butterfly was stamped on vellum printed with tiny white flowers using a rainbow pigment pad

-- I embossed the butterfly with clear powder before cutting it out

-- The butterfly was folded and glued at the spine with the multi-medium


I love how the text can still be read through the blue vellum.

Ddd


Posted by studio3d@ccgmail.net at 2:34 PM PDT
Tuesday, 27 March 2018
Doves Take Flight
Topic: Bible Journaling

A while back, another of the Drawing Room lessons I illustrated was made available on the Creative Bible Journaling site, In 6 steps one can draw a simple dove to be used in their Bible illustrations.

That lesson, at http://creative-bible-journaling.com/the-drawing-room-206-simple-dove/ can be downloaded for your own use. Here are some of the ways I have used it and some similar:


Using just the wings:


And now, different versions of it have been created for use as tip-ins for Bible journaling. This page is available at

http://creative-bible-journaling.com/tip-in-project-111-doves/ 

 Have some fun with this artwork.

Ddd


Posted by studio3d@ccgmail.net at 3:55 PM PDT
Saturday, 24 March 2018
How To Save a Quilt Top
Topic: Quilting

I had made available to me a partially finished quilt top with six diagonally pieced string blocks. They had been arranged strangely and bordered several times. The top was not large enough and the 'design' was not something I wanted to just add more borders around.

I thought to spread out the string piecing a bit so I used a square ruler to 'extract' the pieced blocks, cut them on the diagonal across the strings and added a triangle of patterned fabric to bring it back square again. This gave me 12 blocks.

That activity shrank the overall size of the blocks and they weren't going to be enough. So I made 4 more string blocks in the same style as the originals, cut those diagonally and attahed the patterned fabric as with the first set. This gave me 8 more blocks for a total of 20.

I used sashing between and arranged them to create chevrons across with a 4 x 5 layout.


I added a border all around and quilted it with stitch-in-the-ditch around each block and on its diagonal.

The bonding matches the sashing on this lap quilt for Passages.

Ddd


Posted by studio3d@ccgmail.net at 11:16 PM PDT
Homework's Done
Topic: Quilting

Remember when I showed the recently made bracelet from the class at the Sew and Stitchery Expo in Puyallup? Well, today I finally finished all the other homework that I had left from three other classes I took.

First up was a class where we used Gelatos and Inktense Watercolor pencils to 'paint' a flower on muslin. Then we cut it out and mounted it to a background fabric with a fusible glue. With verigated thread we did thread painting over the flower. The instructor showed us a different way to bind it without any showing on the front side. Here is my finished wall hanging.


Another class had us learning to do free-motion embroidery. This was just like free-motion quilting but with no batting. We did have water-soluble stabilizer on both top and bottom. We stitched with verigated thread, following the lines on a provided illustration.

At home we had to soak off the stabilizer, add batting to the back and stitch around the image and trim away extra batting. The rest of the finishing was just like any other quilt with borders, quilting and binding.

And here is my finished wall hanging:


The third project was a wallet. The class was advertised as a 'serger project' but when we got to class the only use of the serger was a new feature - the machine sewed a chain stitch. REALLY!?!?! I wanted to learn to use a serger and I get a chain stitch? I could have constructed the whole project on a regular maching. Harrumph!

The other thing they were overly excited about was 'cork fabric'. May I just say... Big deal!

So, beyond that, we did make a wallet (with extremely poor instructors and assistants and instructions) and I had a lot of work to do at home, including the hardware.

I have several photos of this project. Here you see it closed.

I did all that top-stitching on the cork fabric, too.

Here is a view that shows the hardware.

That little tongue flips up straight out and then you can open the wallet.

This is a view of the outside when opened. There is a full zippered pocket for carrying currency.


And, finally, the inside view. On the top is a zippered pocket for coins and on the bottom are slots for credit cards.


You can see in the photo above how the hardware is held on with ittsy-bitsy screws.

So, homework all done - and it only took me three weeks to get it done!

Ddd


Posted by studio3d@ccgmail.net at 10:15 PM PDT
A Week of Lent Journaling and a Bonus
Topic: Bible Journaling

Another week flies by and the Bible journaling for Lent continues. This week I actually ended up with 7 pages instead of 6 (we don't do a page on Sundays) because of a glitch in the list of references. More about that later.

Anyway for Monday we had John 1:29-34. Since I had used a small dove earlier in the study for the prophesy of Jesus' baptism, I decided to include a larger version for the actual event.


On Tuesday I discovered that the page containing the reference had already been journaled on. However, I had done the full page on the left side but only the text portion on the right page. This left the journaling strip down the right margin unused and allowed me to fit in a very simple illustration of Jeses healing a leper from Mark 1:40-45


This is where the extra page comes in. The list of scriptures gave Matthew 1:4-11. Try as I might, without having the devotional book, I couldn't imagine why they had only used the center section from this chapter. So I decided to just use the entire genealogy and label it as the Family Tree of Jesus. When I mentioned my connundrum on the group, others said they had wondered the same thing. Here is what I journaled for Matthew 1:2-16.


The response, from someone who actually had the devotional book, was that the reference was backwards and should have read Matthew 4:1-11 (instead of 1:4-11) AHA!

So I went to the correct section, on the temptation of Christ, and journaled that. Notice the shadow of Jesus, foretelling the cross.  Also, this is a lettering stye that I will be teaching in a few weeks.


When I was a teen, a pastor preached on John 8:1-11, the adultrous woman, and gave every one of us a small rock painted with the number 1 - the first stone.


For my page on Luke 9:23-26 I found and used a quote by Rev. Billy Graham. I think I needed this reminder.


When I drew up the illustration for John 12:24 I made these lovely stalks of corn. But when I got ready to add the text, I realized it said 'kernels of wheat' and not 'kernels of corn'. Well, we've got corn now!

I used the cross as a backdrop to show the seed dying and falling to the ground.


Only one week of Lent scriptures to journal and then I'll be back to just one or two a week.

Ddd


Posted by studio3d@ccgmail.net at 12:12 PM PDT
Friday, 23 March 2018
Get Your Branches Ready For Palm Sunday
Topic: Bible Journaling

A new Drawing Room lesson is up over on the creative bible journaling blog. Go to http://creative-bible-journaling.com/drawing-room-208-palm-frond/ to download it.

You'll have to excuse the typos where 'hosanna' is misspelled in TWO different ways! My error entirely and it is being corrected.

Here is how I used it (with the correct spelling) in my Bible by making a margin glue-in strip of it.


So, how did I get here from the basic palm drawing lesson? These are the steps:

After you’ve learned to draw the palm fronds, here is how you can use them to recreate the Hosanna artwork for a border in your Bible.

1)
Pencil AND INK the letters, graduating them in size from top to bottom. You will want to use a font that is kind of chunky. Erase the pencil.

2) Pencil in the bottom palm frond. INK where it does not cross into any letters. Erase the pencil.

3) Continue with the next frond up – and keep doing this all the way to the top – inking and erasing the pencil as you go.

4) Color the fronds in alternating greens to help distinguish between them.

5) Color the letters (I used purple to acknowledge the royalty of Jesus).

6) Optional: Draw a broken border (Do not join to or cross the fronds)

Hope you enjoy this whether you follow the lesson to draw your own glued margin border, print out the one on the drawing lesson, make a bookmark from it... make it your own!

Have a blessed Palm Sunday

Ddd


Posted by studio3d@ccgmail.net at 10:41 AM PDT
Writing In the Garden - a lettering lesson
Topic: Bible Journaling

It was my week to teach lettering again and I went with a totally novelty style.

Here are the daily lessons:

MONDAY

This week we’ve got an ‘all caps’ font built out of little sticks and decorated with leaves. SO CUTE! We’re calling this font ‘garden’.

The base form is pretty standard printing with a little bit of crossover where ‘branches’ meet one another. Practice your basic letter forms in pencil.

Add bumps here and there on the lines as buds. Add thickening at the base ends of the lines.

Draw a line out from each letter and add one leaf. These can vary in placement when you have more than one of the same letter in a word.

Trace your letters, buds and leaves in ink and erase the pencil. LOOK, YOU JUST GREW A GARDEN!

TUESDAY

I think this alphabet looks very decorative just written out by itself!

Go about building your alphabet in the same step-by-step way as you did yesterday. Don’t work on it letter by letter. Instead, do the whole set of base letters, Then the whole set of buds and thickened stems, then all the leaves. You’ll get a more cohesive look this way.

Ink after all the forms are completed and erase your pencil.

I added a full set of numbers for this font as well. Who knows when you might need a few sprouting digits?

WEDNESDAY

Today, practice your letters on a ‘garden’ quote.

After inking and erasing your pencil, trace over your stems with a brown color. Use green for the leaves. Add some scrolls and little flowers to decorate the background.

THURSDAY

Now we will use our ‘garden’ font to write out a verse on paper. Feel free to use blank paper, lined paper, dot grid, or a journal.

You’ll note how I moved the leaves if they were placed too similarly on adjacent letters – this is especially true when there are double letters in a word.

I decorated my page using the coneflowers.

Use the same coloring as yesterday for the letters.


FRIDAY

We’re working in our Bible today, on a verse with the word ‘garden’.

You can see that I had to scale down the size of my letters to fit the space. You can’t go too small or you lose the definition of your letter forms. So, if your text is too long, just use your special letters to feature certain words. Do the rest of your text in an alternate font that is plainer and smaller.

I decorated my page with root vegetables as the Israelites were being instructed to ‘take root’ in exile.


I love doing these lessons to show people how easy it is to create beautiful writing for their projects.

Ddd


Posted by studio3d@ccgmail.net at 10:04 AM PDT
Saturday, 17 March 2018
Lenten Bible Journaling Continues
Topic: Bible Journaling

This week I completed days 23-28 of the Lenten Bible Journaling Challenge that I am participating in. Again, the scriptures chosen are part of a book that some in the Facebook group have access to. Others of us just have the list of scriptures and study on our own for the insignts God gives to us.

Day 23 - Isaiah 61:1-3 - I wanted this page to reinforce how the ashes are a side product of fire (suffering). The beauty comes out of suffering so I made the rose 'grow' out of the flames and smoke.


Day 24 - Jeremiah 33:14-18 - The intent here was to make the branches form the Star of David to represent David's line.


Day 25 - Ezekiel 34:23-31 - Here I practiced a little of the font from this week's Lettering Lodge tutorial and included a whole flock of sheep based on my recent Drawing Room tutorial.


Day 26 - Haggai 2:6-9 - I had no inspiration for an illustration of this scripture passage so I just did lettering in the royal colors of gold and purple.


Day 27 - Zechariah 9:9-10 - I found a step-by-step 'how to draw a donkey' lesson online and drew this cutie. I know the scripture said that it was the 'colt' of a donkey that would be ridden (and it was) but the drawing lesson was not for a colt. So we got an adult donkey. (Still cute)


Day 28 - Zechariah 12:10-14 - Just illustrated the weeping and mourning spoken of in the passage.


So, there you have it - 6 more days of Lent in Bible Journaling. We have two more weeks to go to completion.

Ddd


Posted by studio3d@ccgmail.net at 9:41 PM PDT
Beady, Beady, Beady
Topic: Jewelry

I attended the Sewing and Stitchery Expo in Puyallup Washington again this year, the first three days of March.

This year I decided to ONLY take classes that let me do hands-on creating. I ended up with 5 classes over three days (one full day and two half days).

I have not completed all my projects but will be posting each as those finishes happen (except for the one that I was so disgusted with that I threw it in the trash when I got home). So I will have a total of 4 art projects to share.

Today, I am very proudly showing a beaded bracelet. We paid for a kit of materials from the instructor and brought our own tools.

Without a clue what I was doing I was able to follow the wonderfully presented instructions and complete and attach three links for the start of my bracelet. The rest I finished at home this week, including the attachment of the clasp.

Here are some various views of my project:


One important thing this taught me was reading of the diagrams for beading that I've been looking at in the beading magazines for years. I feel like I could actually do a project from one of those articles with what I know now.

One thing I DO know is that I will be watching for this instructor in future years as I definitely liked her teaching style and her design asthetic.

Ddd


Posted by studio3d@ccgmail.net at 9:16 PM PDT
The Glory Of the Lord - Lettering Lesson
Topic: Bible Journaling

I was the leader for the Lettering Lodge on the Creative Bible Journaling Facebook site this past week.

I chose a curly font that only came in upper-case and went looking for a lower-case thathad a similar feel to it. I then manipulated letters from each to make them a good pairing and assigned the focus word 'Glory' to it.

Here is the lesson plan:


MONDAY

The whole concept of the Glory of the Lord is so awe-inspiring it is almost overwhelming. We’re going to focus on that this week as we explore and use this new font.

There are deep curls in both the upper- and lower-case letters. These are actually two separate fonts that I combined and then edited to make them more alike in their characteristics.

Pencil your letters first, then ink them and erase the pencil.

Let’s celebrate the glory of the Lord with our work!


TUESDAY

Here is the whole combined alphabet for the Glory font. Don’t these letters just give you a little thrill?

Practice the elements that are in common (the initial curl on the F, K, L, P, R, T, U, Y, Z) watch for the little extensions on the letters B, D, J, P, R, T. There are similar legs on the K and R. The same curl on O and Q.

When you practice these elements first you will make it easier to form your letters consistently.

Work in pencil until you like all your letter forms, then ink and erase the pencil.

Because these letters are so busy, keep them firmly on the base line. Bouncing them around will make them more difficult to read.


GOOD MORNING, WEDNESDAY!

Let’s use our new font to write some song lyrics containing the word ‘Glory’.

I find that using the initial capitals on every word adds continuity.

I decorated mine like a hanging banner, complete with tassels!

Just like on my lettering, I use the Pencil-Ink-Erase sequence on my pictures.


For our THURSDAY lesson we’ll practice by writing a verse on paper with our new word font.

I chose Psalm 19:1 and used colored pencils to blend a sunset since the verse refers to the skies.

Are you finding it easier and easier to form these letters after you’ve done them so much? That is the goal!


IT’S FRIDAY!

It’s the day we move on to using the Glory font in our Bibles. The thing I noticed was how much curlier the letters look in small size like this!

I borrowed the idea for the illustration from Joanne Fink’s book. One of the artists had something very similar for the creation story.

I hope you use this font in your Bible, too.


You'll note in the pages I did for Lent this week that I used this font even more.

Ddd


Posted by studio3d@ccgmail.net at 9:05 PM PDT
Saturday, 10 March 2018
Another Week of Lenten Bible Journaling
Topic: Bible Journaling

I have another week of Bible journaling pages done for Lent March 5-10.

Monday - Psalm 72:12-19

I wanted this page to read as a celebrations so I included lots of banners and bright colors.


Tuesday -Isaiah 42:1-9

As I read this selection I kept hearing echoes of the voice of God at the baptism of Jesus. 


Wednesday - Isaiah 49:7

Jesus is the one sent to light up the world so I encircled the globe with Christmas lights. This verse points out that the Gentiles were not an afterthought or saved because of the rejection of Jesus by the Jews. It was God's PLAN that he die for all because it was 'too small a thing' to save only the Jews.


Thursday -Isaiah 50:4-

Describes Jesus' silence in the face of his accusers, mockers and murderers.


Friday -Isaiah 53:1-6

I couldn't come up with an illustration for this scripture laying out the reason for the suffering and death of Christ - so I borrowed an idea from Pinterest.


Saturday -Isaiah 55:1-7

Beautiful words of invitation to drink of the living water.

Sunday will be a day 'off' from the Lenten Bible Journaling Challenge.

Ddd


Posted by studio3d@ccgmail.net at 6:43 PM PST
Friday, 9 March 2018
Another Lettering Style
Topic: Bible Journaling

Our instructor presented a lettering style that was more vintage than last week's dots. Not only are the letters full of graceful curves but the neds are widened to resemble 'branches' - the focus word.

Monday - learn to write the focus word in both open and filled letters:


Tuesday - learn the full alphabet - I did mine only in the open style so that I could see the structure of the letters. This way I can fill them when I do my projects.


Wednesday - we were to write words that had to do with branches. We also coordinated the activity with the Drawing Room and learned to draw trees.

I added leafy. blooming areas to my trees and wrote things that are happening this season:


Thursday was for writing a scripture in our journal or workbook:


And finally, Friday is for using the new style in the Bible. My selected scripture does not contain the focus word 'branches' but the spirit is there.


I was especailly pleased with how this grafted plant drawing turned out.

Ddd


Posted by studio3d@ccgmail.net at 6:58 PM PST
Sunday, 4 March 2018
Lettering in the Dot Style
Topic: Bible Journaling

The other instructor was in charge of teaching the lettering lessons this weel. She chose a dot style with the focus word 'hear'. These are the homework pieces I created:

Monday - learning the basic structure with the focus word:


Tuesday - Learning the whole alphabet in the new style


Wednesday - writing words of things we like to hear, We also learned arrows and banners.


Thursday - Using the font on a scripture in our notebook


and Friday we used the new font in our Bible on a scripture containing the word (or a form of it)


I am practicing more on drawing hands. Most of them are my OWN hand. In this case, I wanted to draw a 'right' hand but I had to draw with thatone! So I took a picture of it on my phone and drew from the picture.

Ddd


Posted by studio3d@ccgmail.net at 1:02 PM PST
Lenten Bible Journaling Challenge - days 9-16
Topic: Bible Journaling

Day 9 of the Lenten Bible Journaling challenge was 2 Samuel 7:1-5 and 1-17. This section of scripture talks about David's desire to build a house for God and God's greater plan to build a house through David. I made the builder/planner cast a foreshadowing cross.


Day 10 was Psalm 110. This refers to Christ being an eternal priest in the order of Melchezidek. I had absolutely no thoughts on illustration to accompany this so created an acrostic with the name to describe attributes of Jesus.


Day 11 was Psalm 2 where I focused on verse 12: Blessed are all who take refuge in him. I illustrated a downcast stick-man taking refugeunder the protective hand of God.


Day 12 covered Psalm 118:14-24. I only used verse 20 and illustrated it with a cross - the gate of the Lord through which the righteous may enter.


Day 13 is using Psalm 69:1-1. David describes himself as being in need of rescue. 


Day 14 - Psalm 109 - David calls down misfortune on his enemies. I contrasted this with Matthew 5:43-47 where Jesus instructs us to pray FOR our enemies and LOVE them. I used dandelion weeds as illustration.


Day 15 - Psalm 22 contains a picture of the coming crucifiction. There are scattered throughout it many phrases that we see repeated in the new testament surrounding the death and resurrection of Christ.

I borrowed an illustration from the internet but drew it myself.


Day 16 references Psalm 68:7-1. I used the early portion of this psalm and illustrated it with God's people marching out where God was leading them.


More to come as I continue to work my way through this study.

Ddd


Posted by studio3d@ccgmail.net at 12:27 PM PST

Newer | Latest | Older