« July 2020 »
S M T W T F S
1 2 3 4
5 6 7 8 9 10 11
12 13 14 15 16 17 18
19 20 21 22 23 24 25
26 27 28 29 30 31
You are not logged in. Log in
Entries by Topic
All topics
3D paperwork
A - Z challenge 5
A - Z challenge 7
A - Z challenge round 4
A to Z challenge round 3
A to Z round 2
A to Z round 6
A-Z round 1
Around the House
Art Challenges
Artist Trading Cards
Backgrounds
Beads
Bible Journaling
Books
Boxes
Collage
Color Challenge
Coloring
cookbook
Die Cuts
Digital Projects
Digital Stamps
Drawing
Dry Embossing
Fabric Stuff
Fantastic Folds
Field Trip
Home Decor
How Does Your Garden Grow?
Hymnal Art
In The Kitchen
In the studio
Jewelry
Lettering
Links
Multi-Technique
Music to Work By
Musings
Nail Art
New Work
Online Class
Other Hobbies
Other Projects
Painting
Paper Embroidery
Paper Piecing
Photo
Pretty Paper
Quilting  «
Random
reading
Scrap Recovery
scrapbooking
Sewing
Sketch Challenge
Some Backlog
Stamping
Stencils
Stickers
Supplies
Teabag Folding
Techniques
Testing
tips and tricks
Tutorial
Web resources
Welcome to my Blog
Work By My Friends
workflow
Writing
Blog Tools
Edit your Blog
Build a Blog
RSS Feed
View Profile
Group One
In & Out of Studio 3D
Saturday, 18 July 2020
Little Orphan Angles
Topic: Quilting

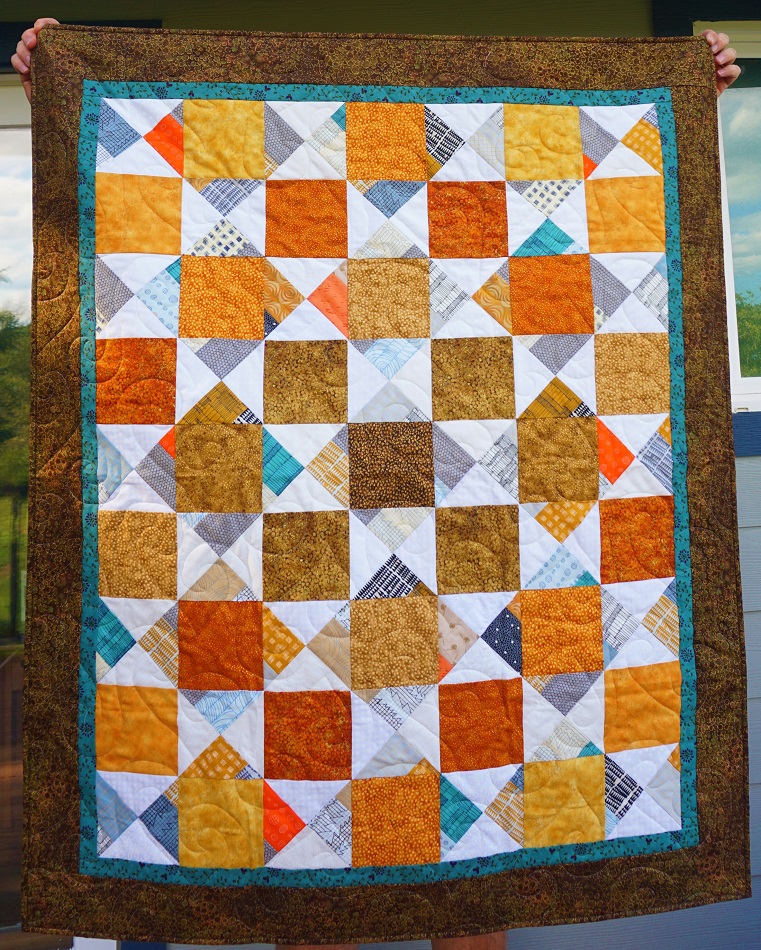
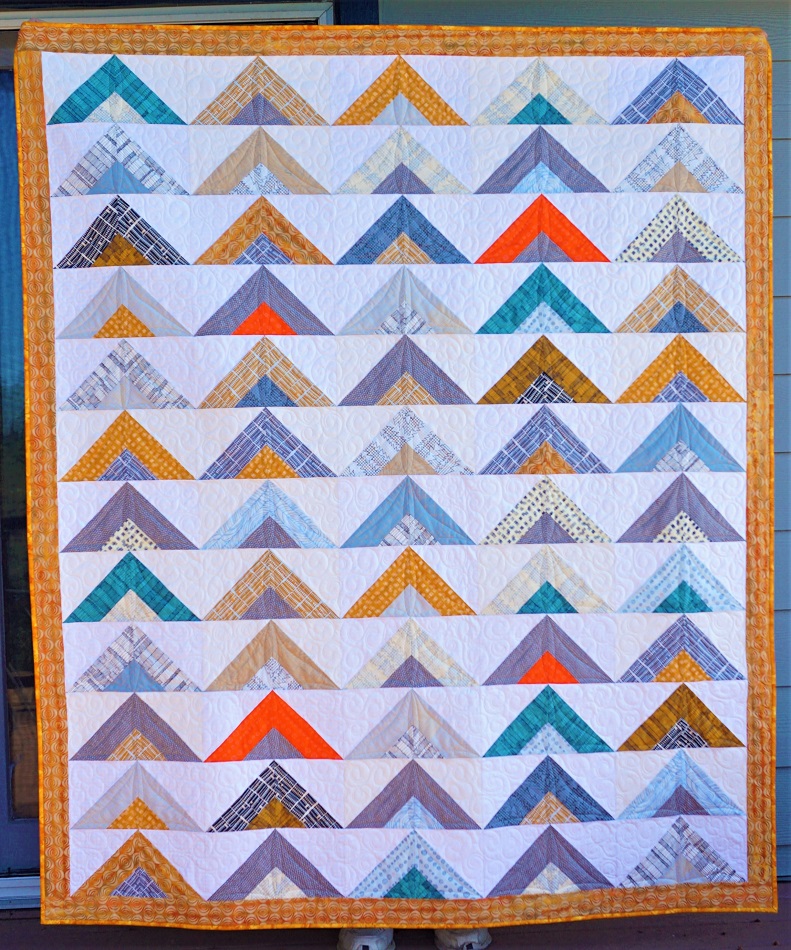
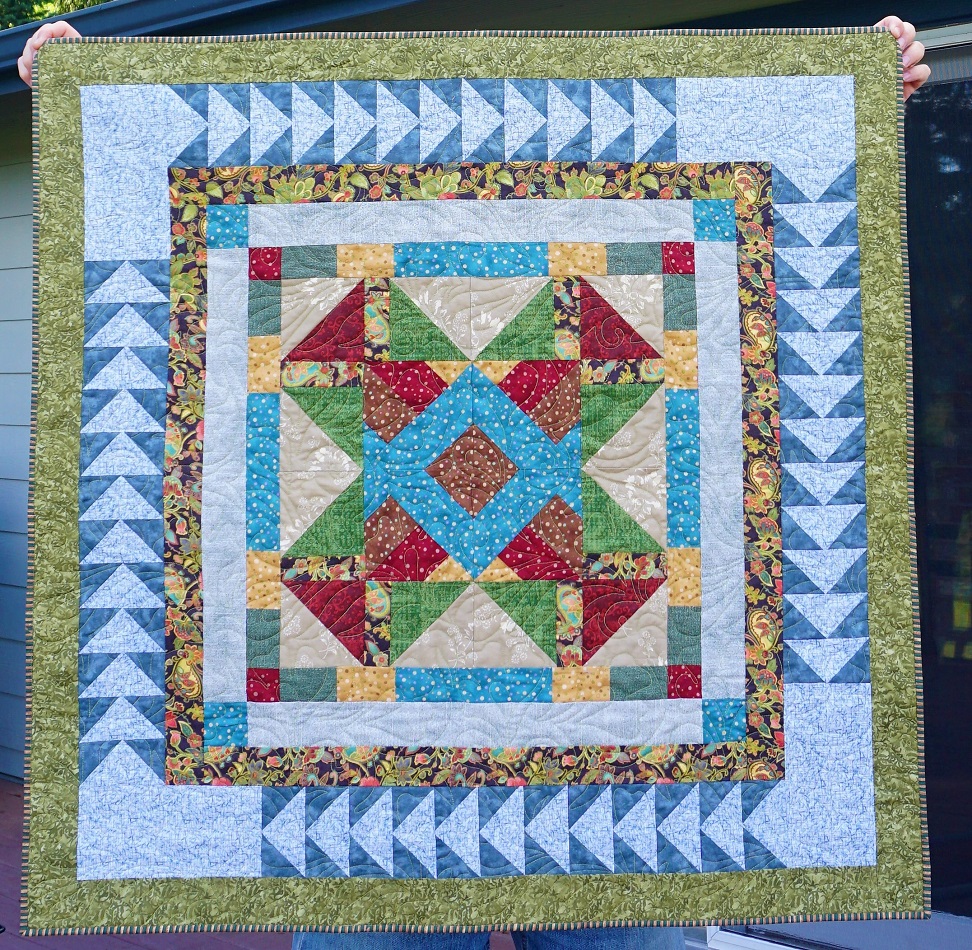
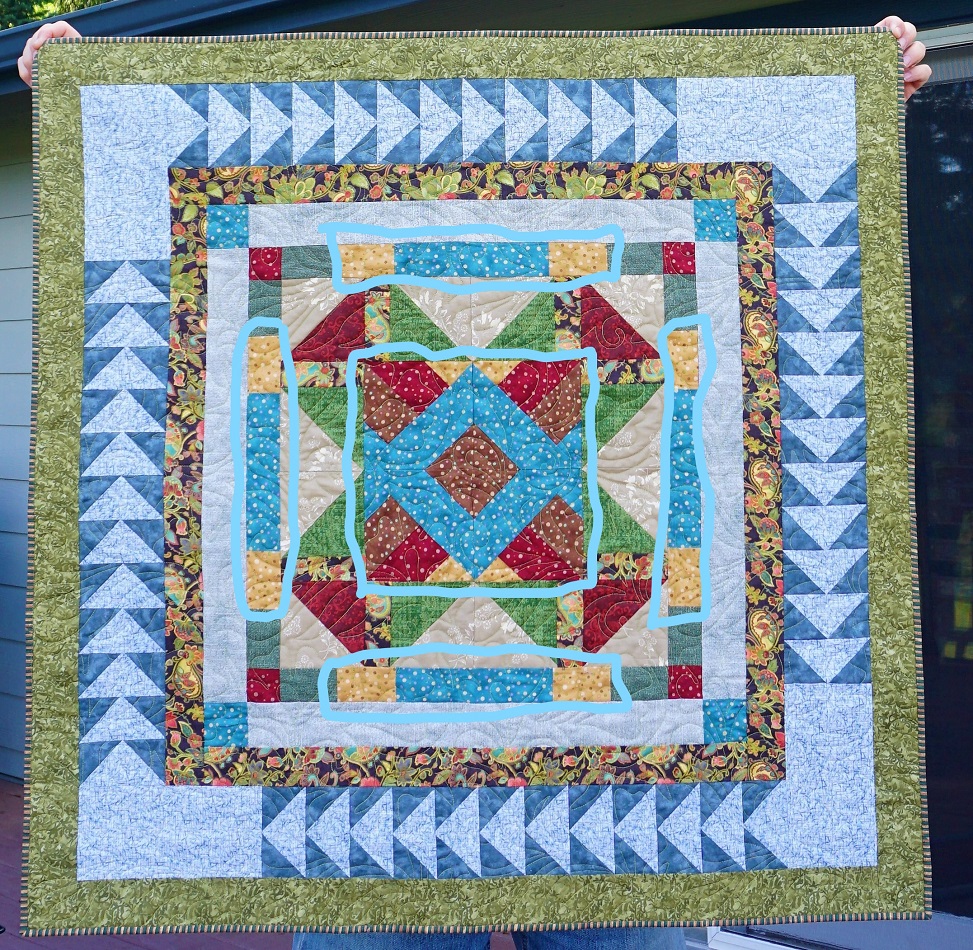
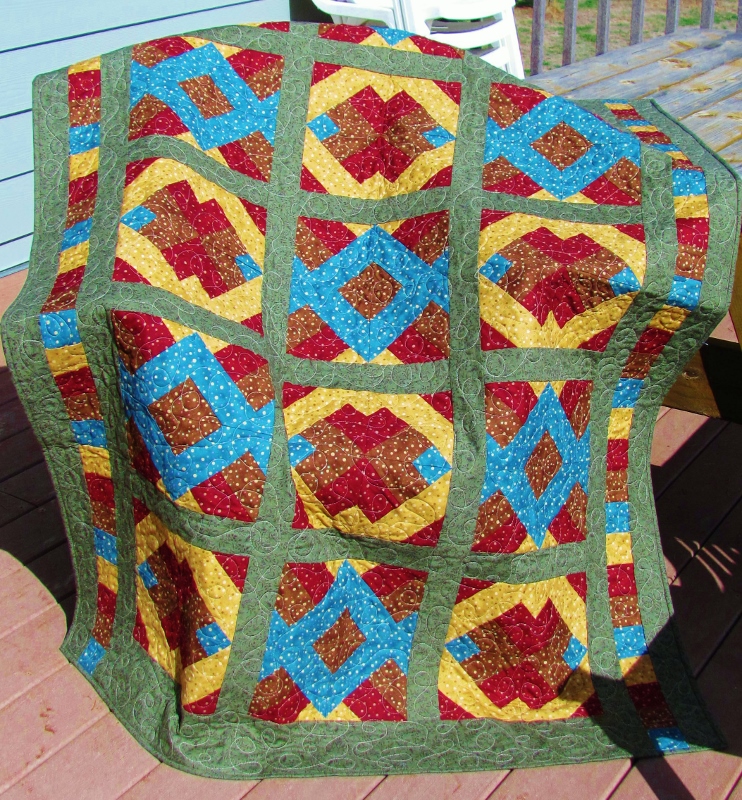
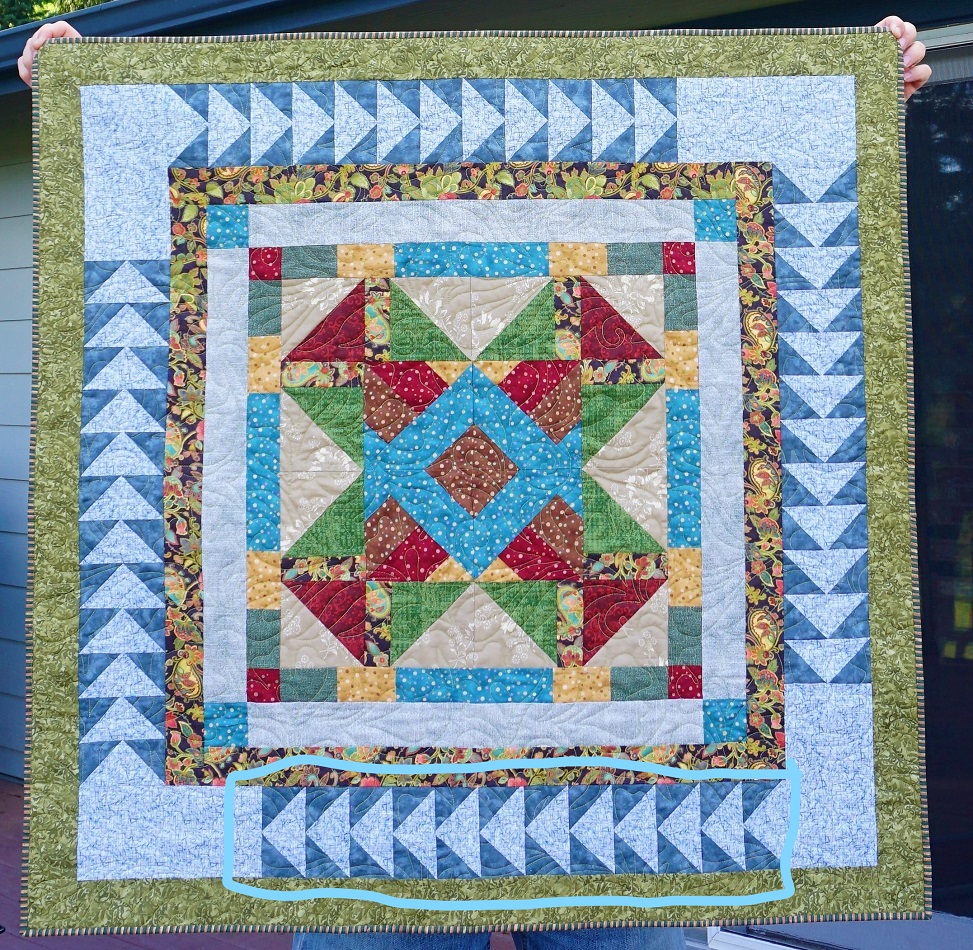
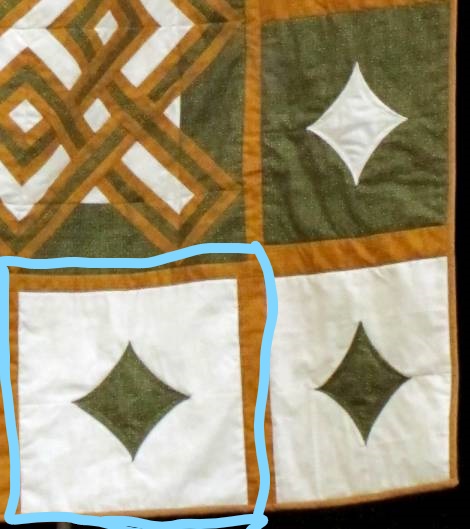
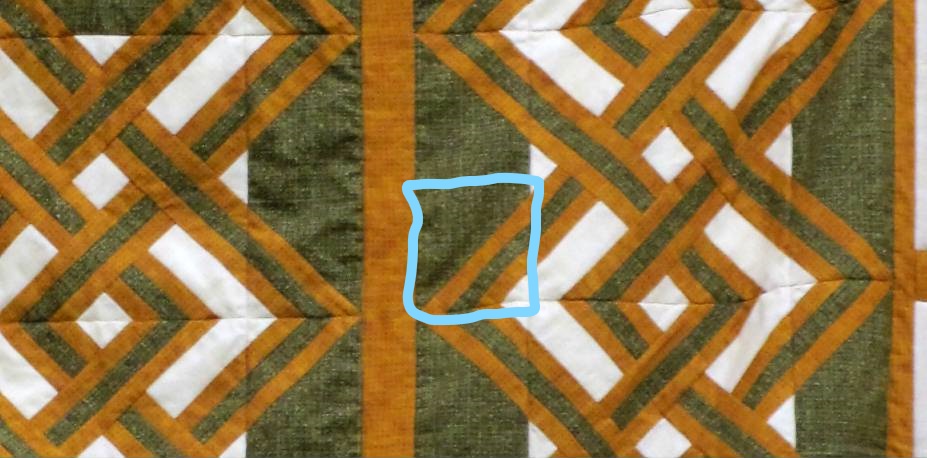
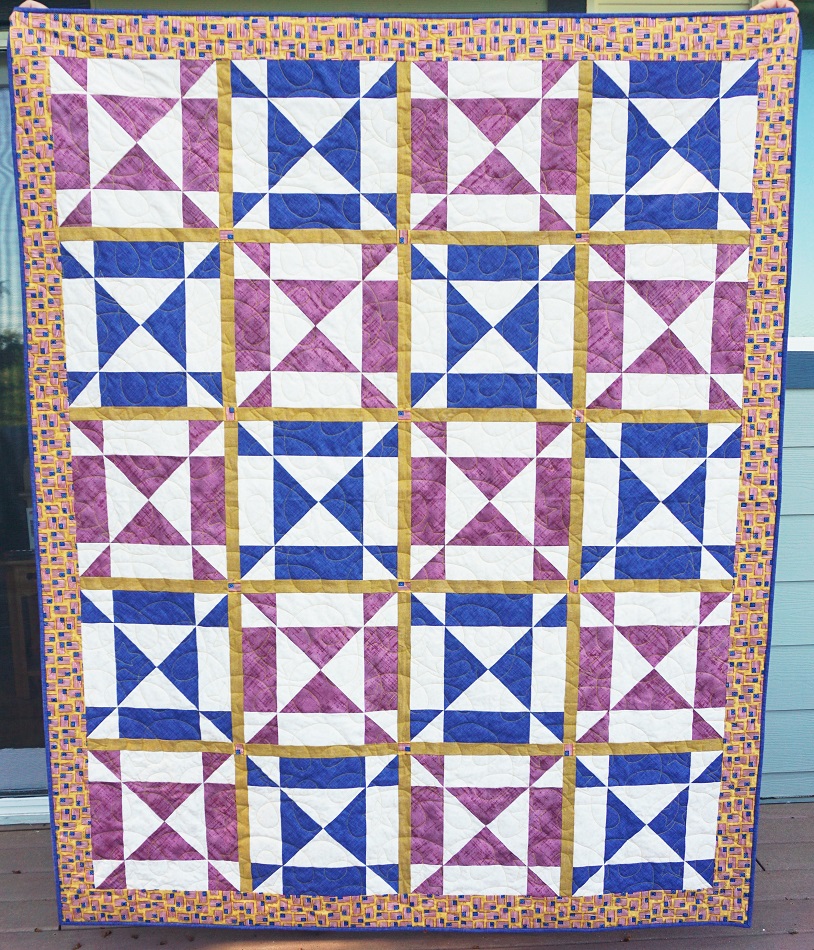
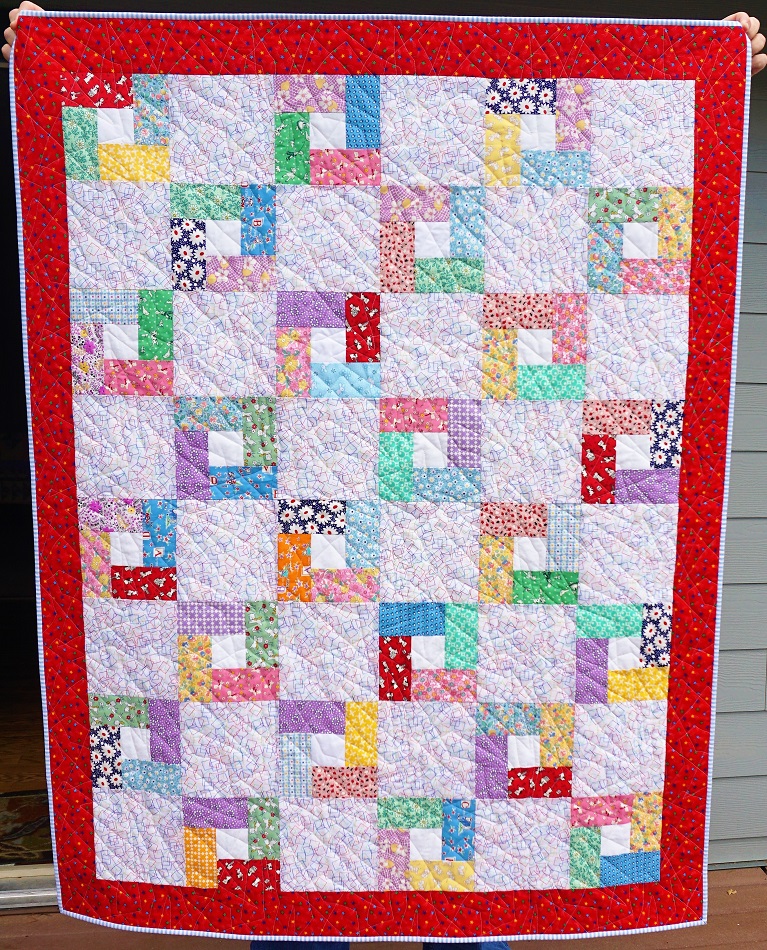
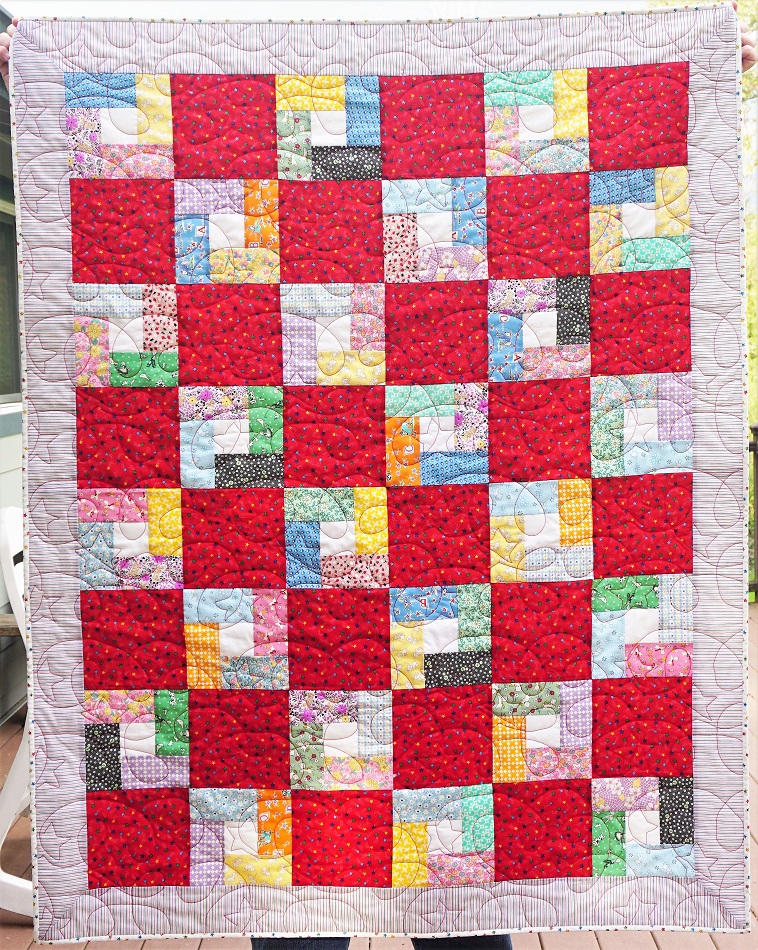
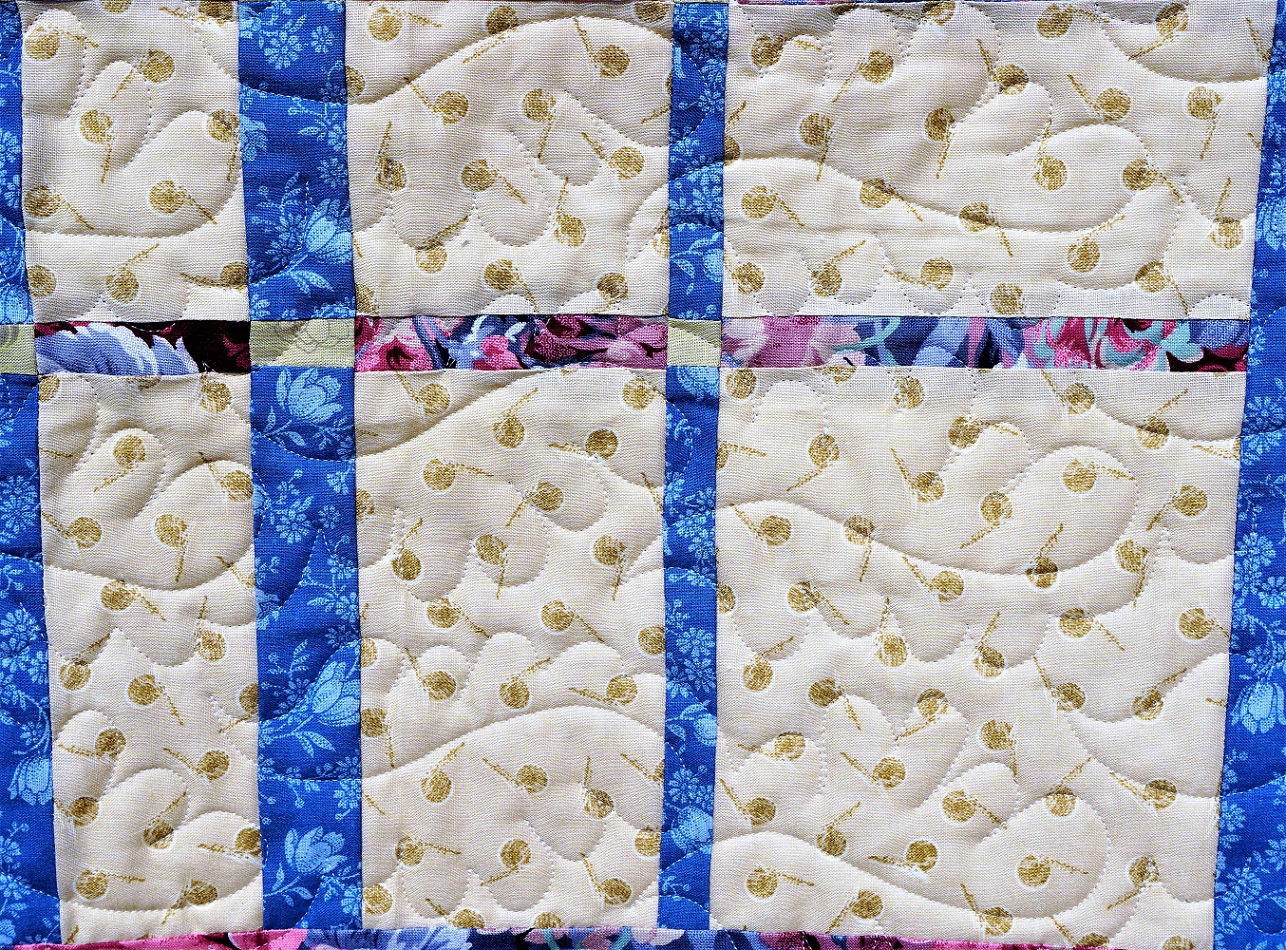
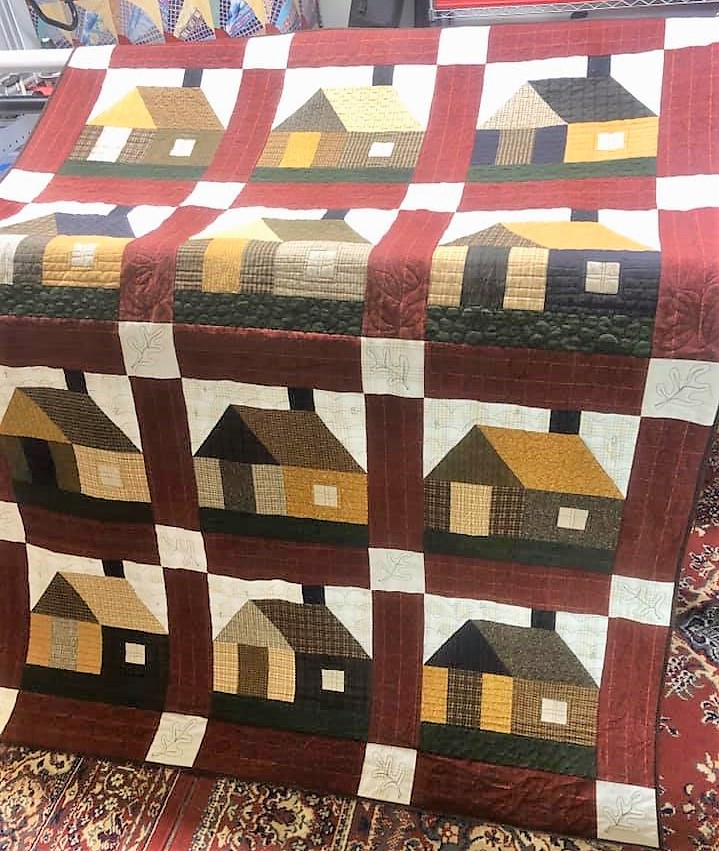
Well, I think I am done rooting in the 'orphan blocks' bin for a while! The 'Mitered Mania' quilt I made in January yielded 5 extra blocks and 2 additional strip triangles that did not match up. So I tore apart the 5th block into two triangles and made an arrangement with four blocks in the center with two triangles placed on each end.

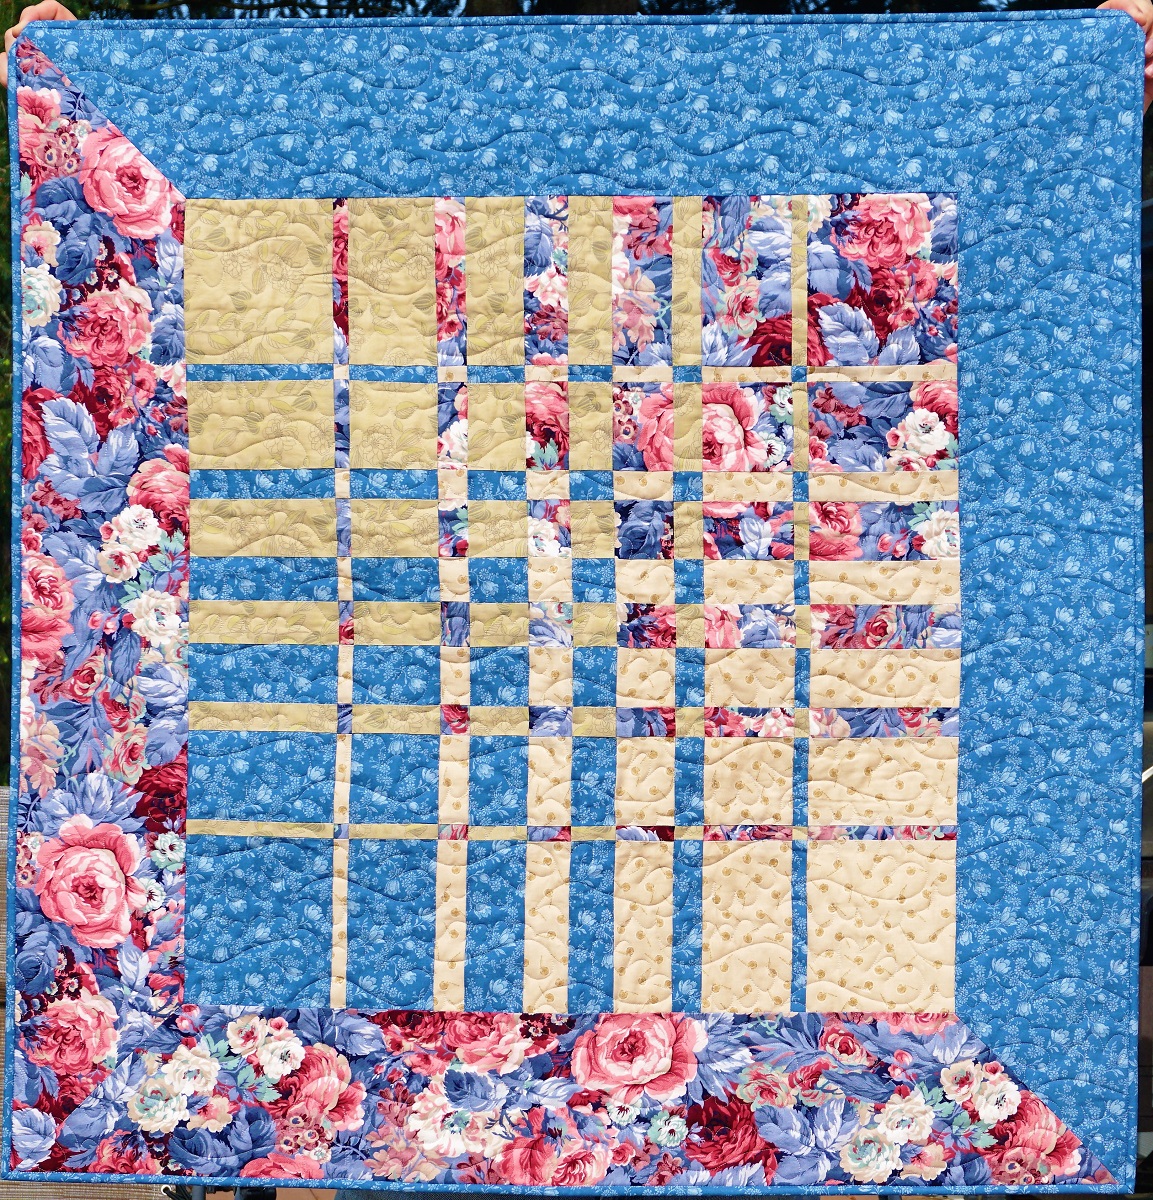
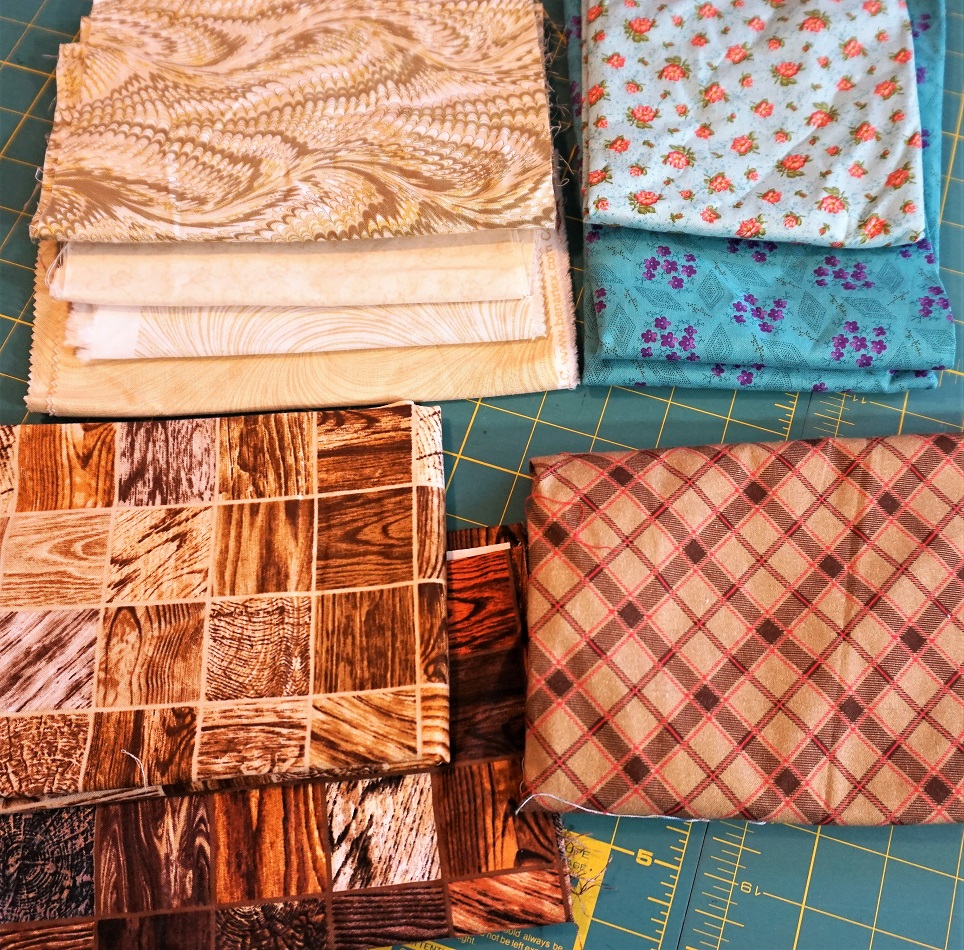
Strange shape. I pulled out some recently used backing fabric to add corner triangles and then side borders (blue floral). 

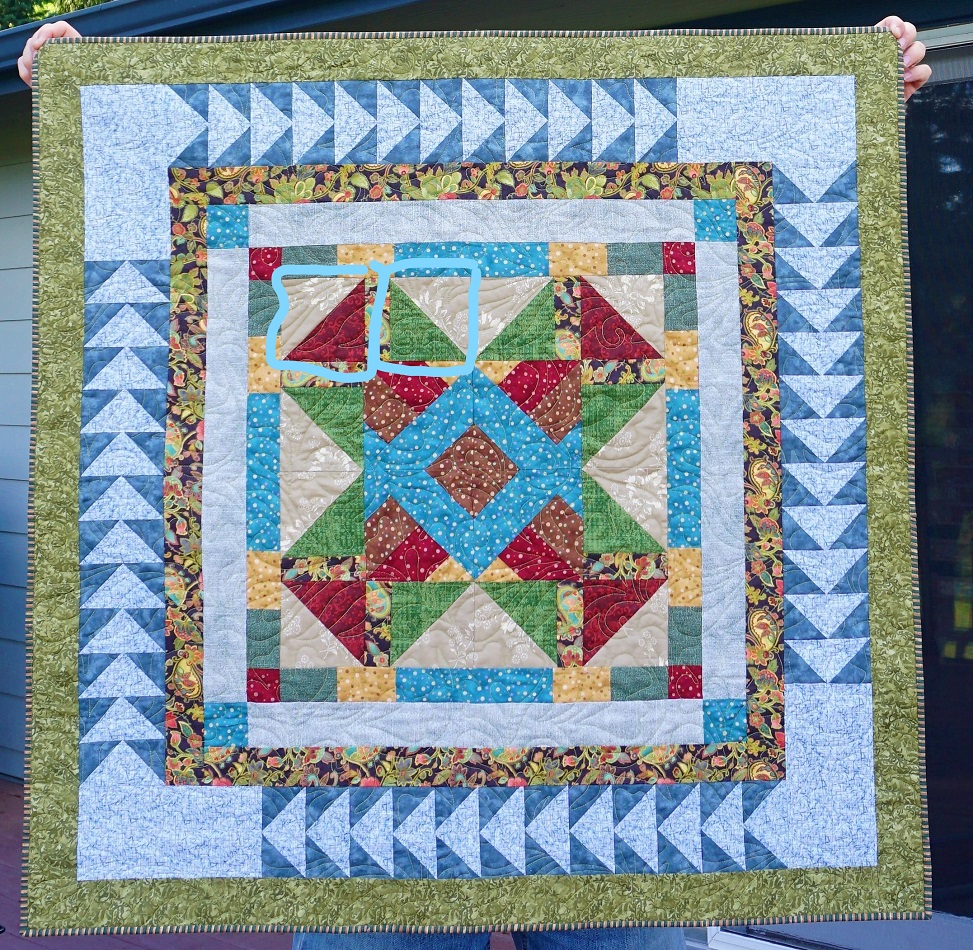
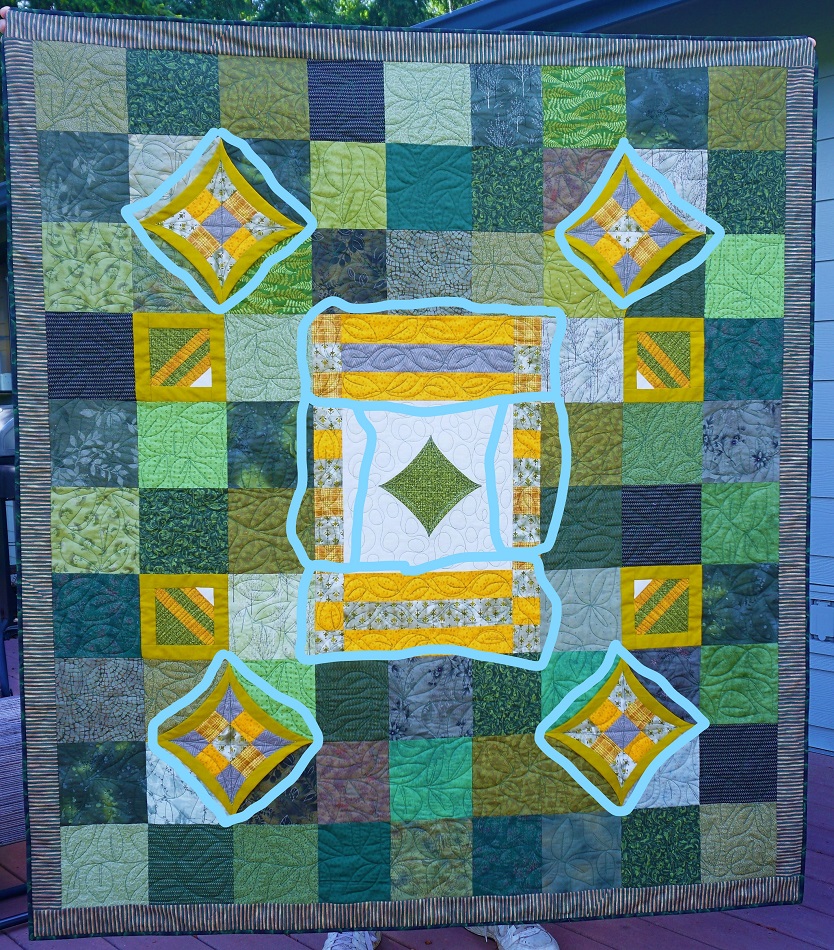
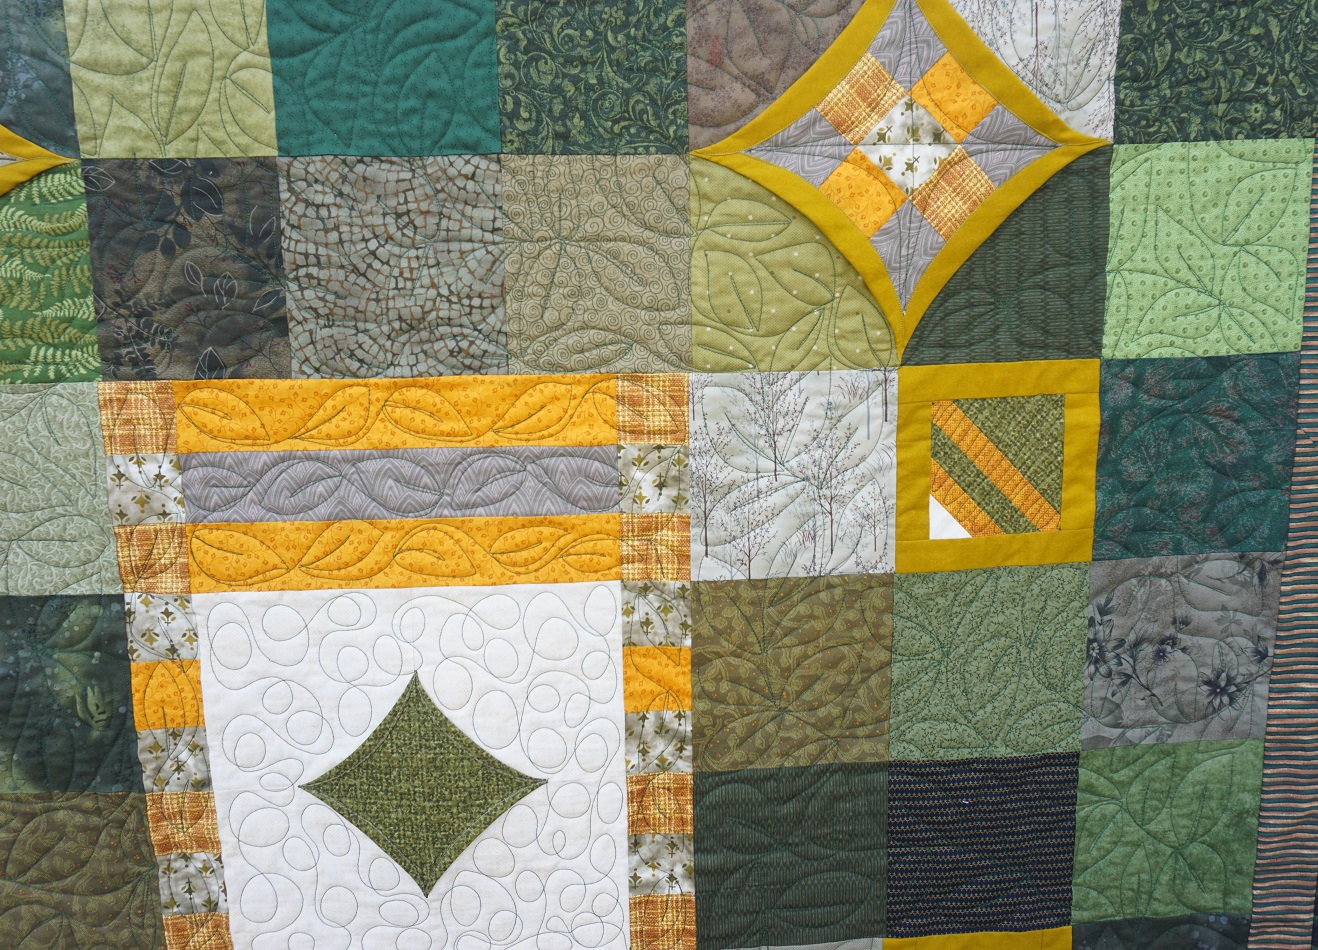
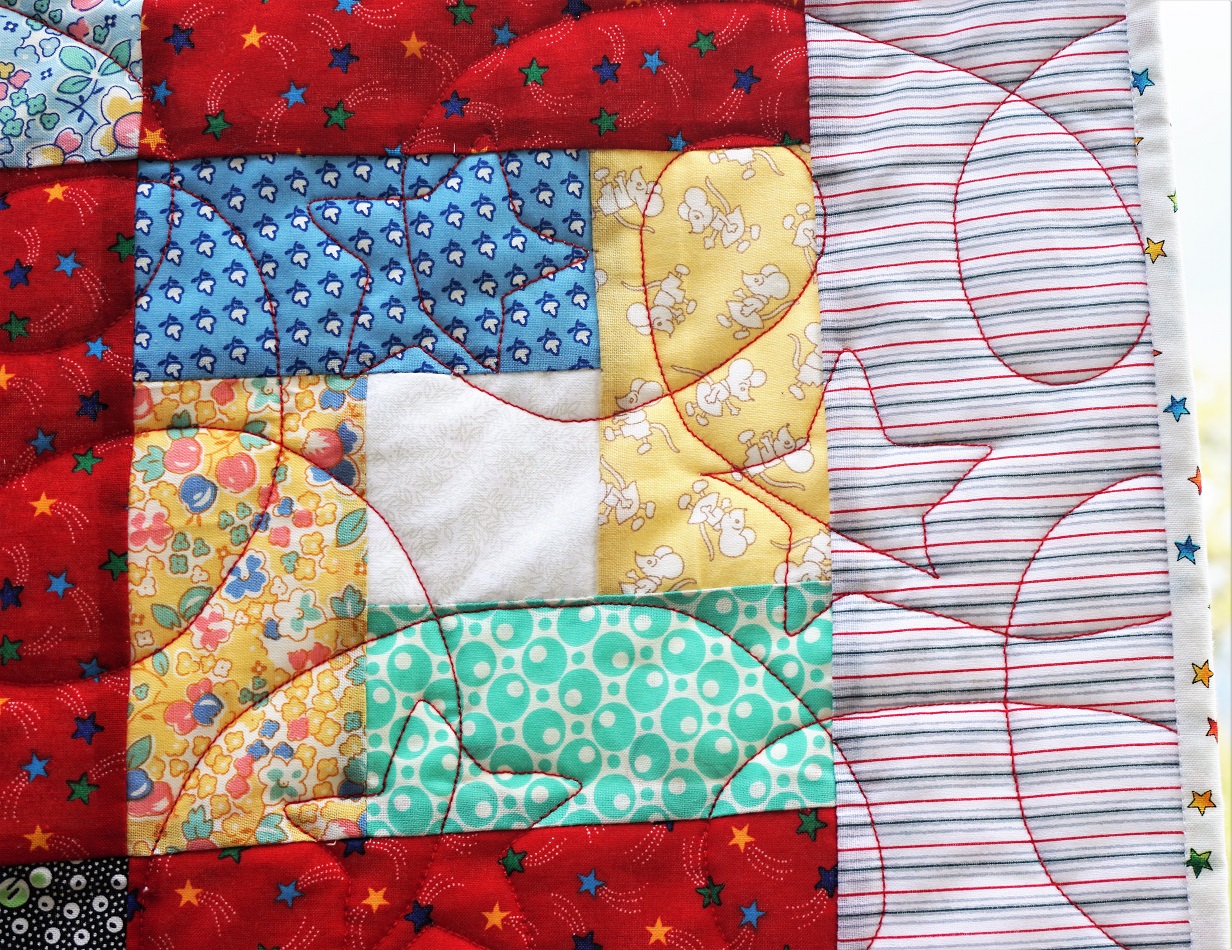
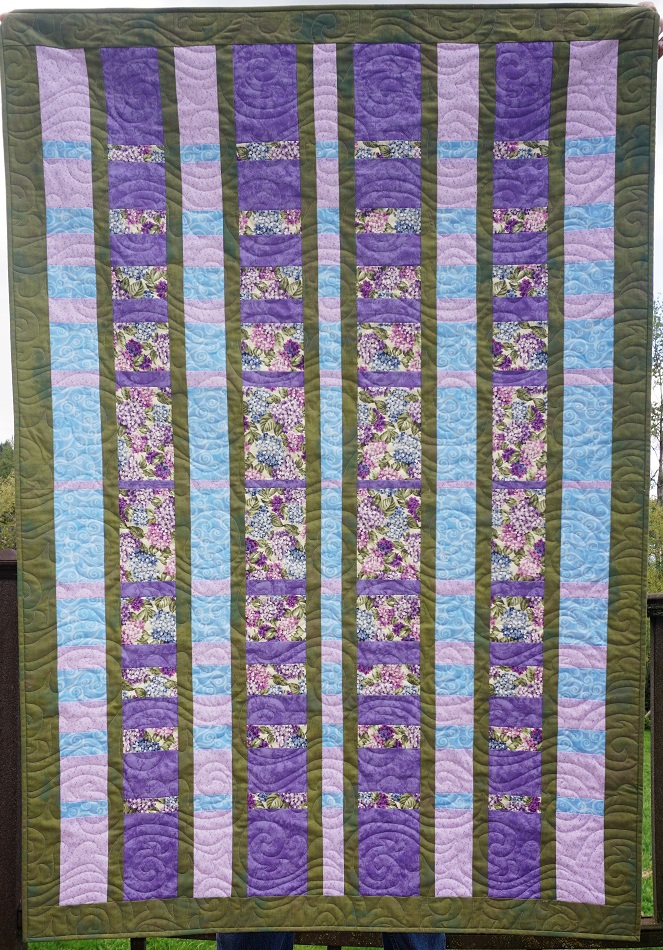
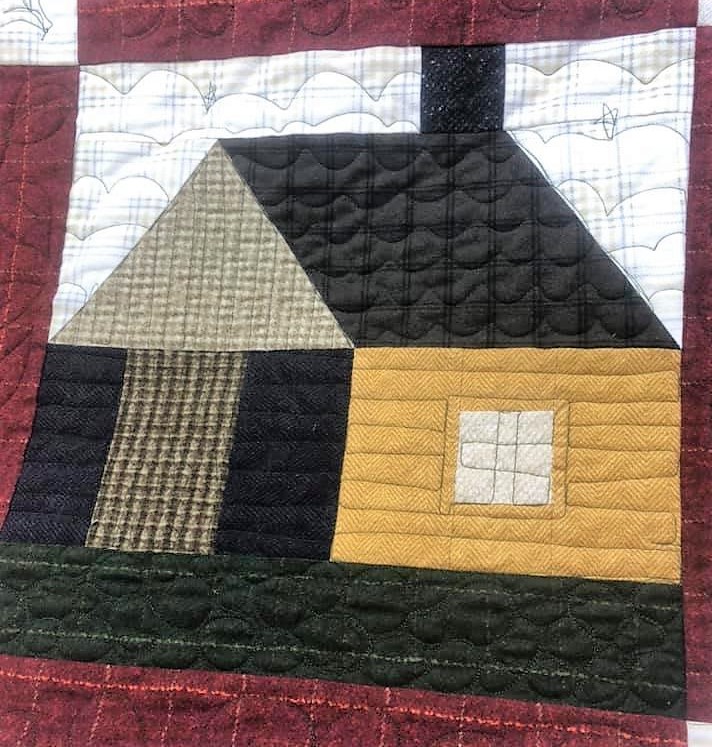
Still needing to grow this I looked in my drawer of fabrics with a variety of colors in them. Eureka! I found a piece of butterfly fabric with all the right colors. It was then that I noticed that the green strips in the blocks had butterflies. I used this new fabric (leftover from my sister's stash) for uneven borders to expand the width more than the length.

To keep expanding the size I pulled out another recent backing fabric (the yellow pinstripe was back for all of the last three quilts I finished) and added another round of uneven borders.


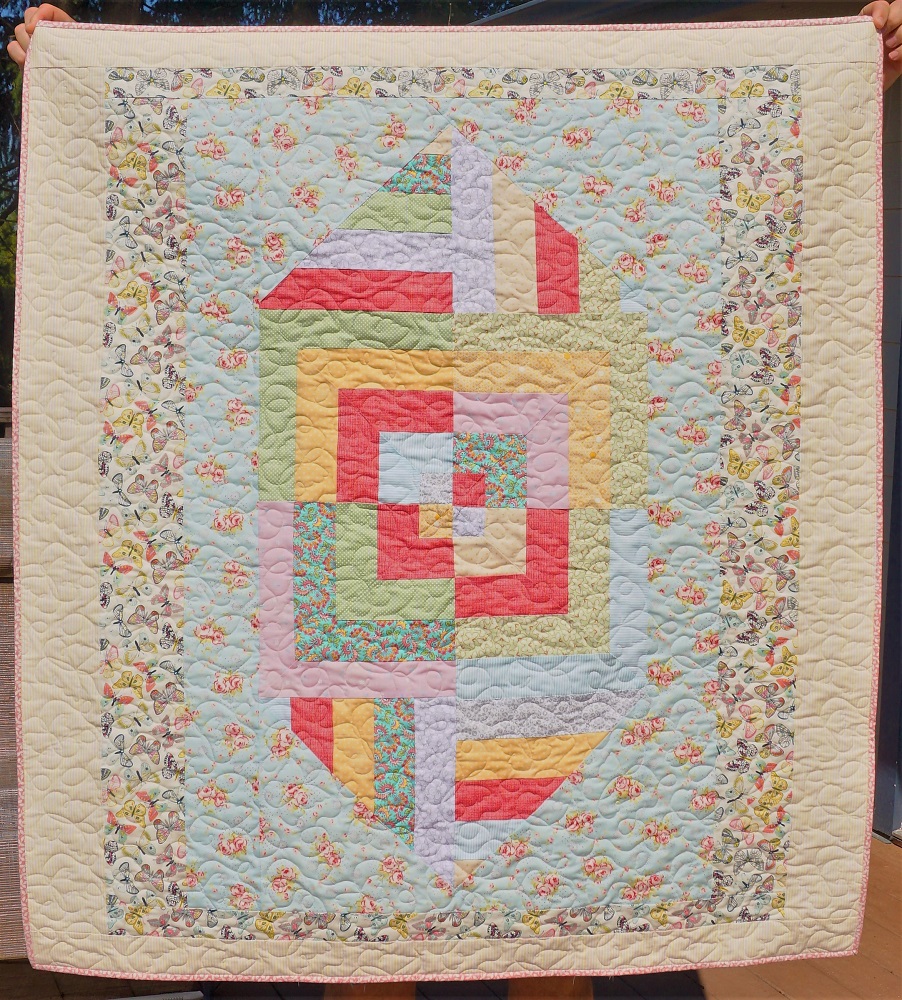
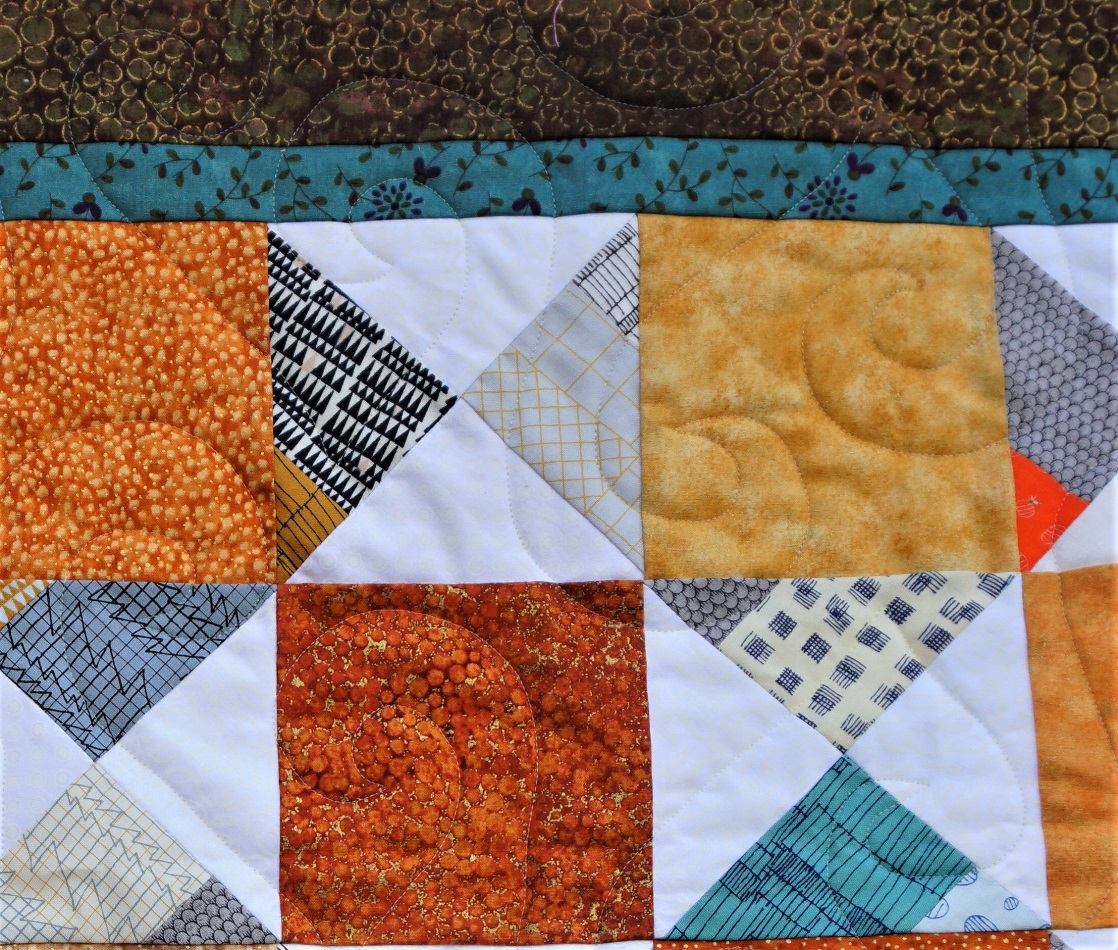
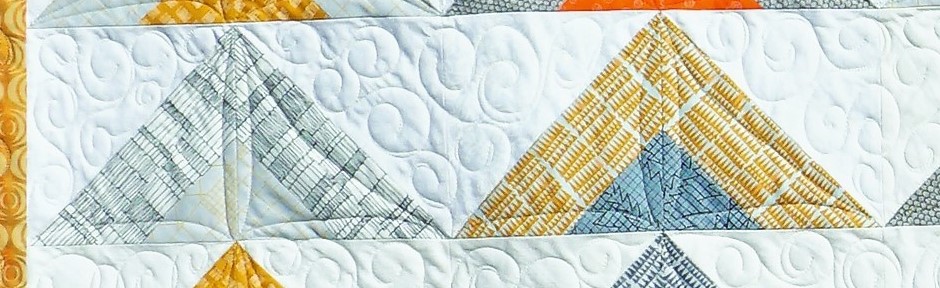
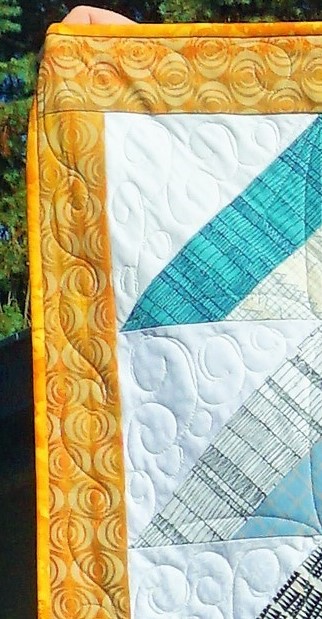
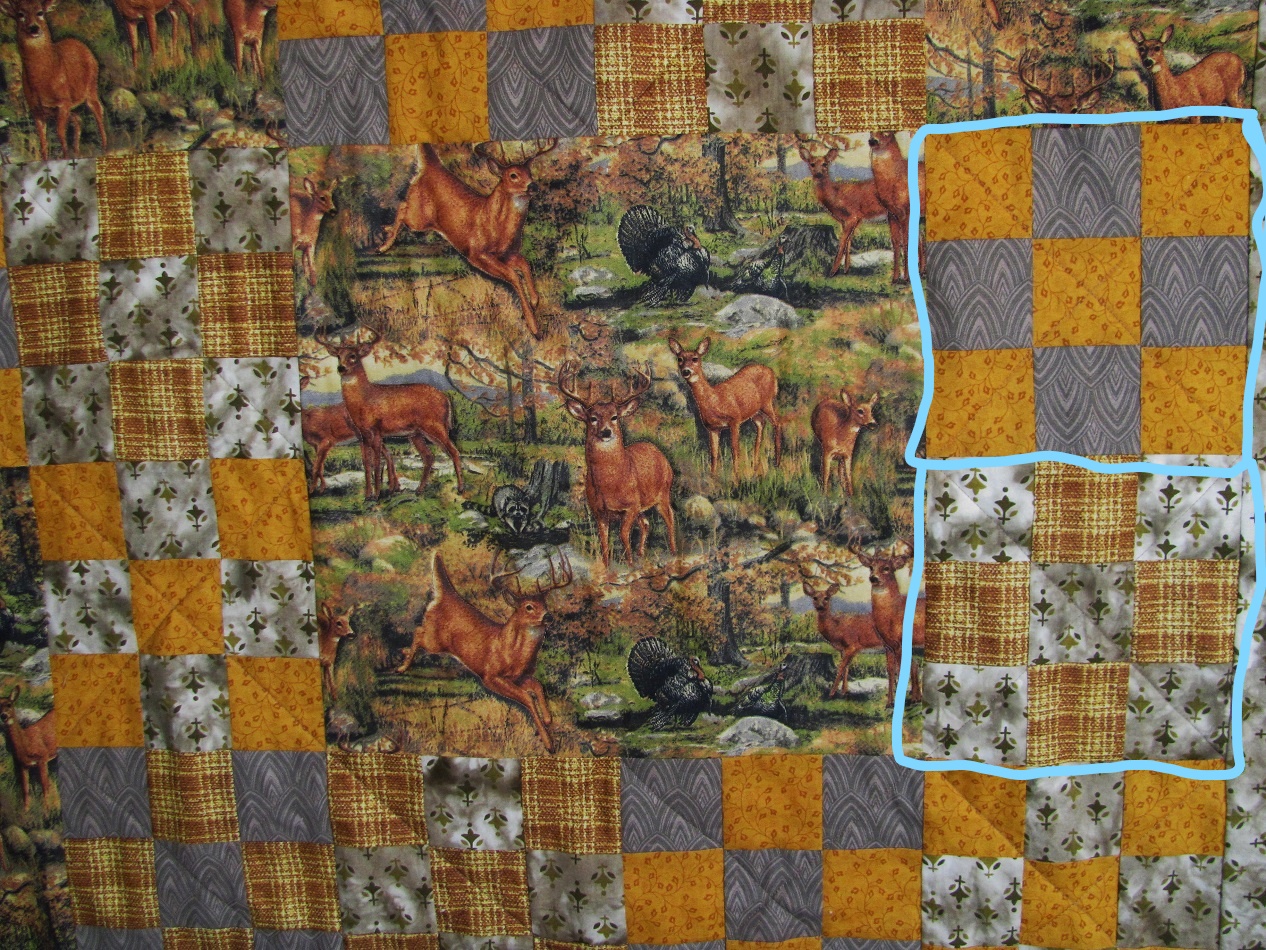
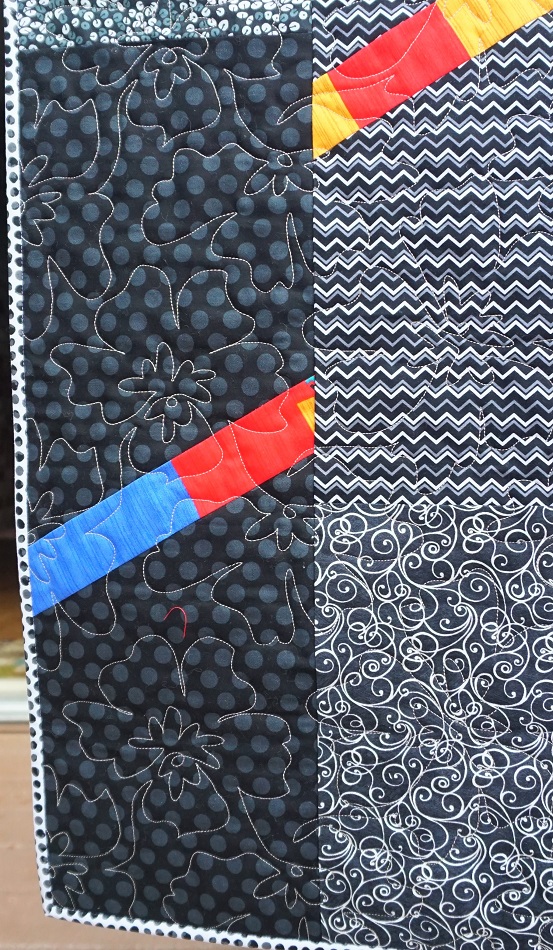
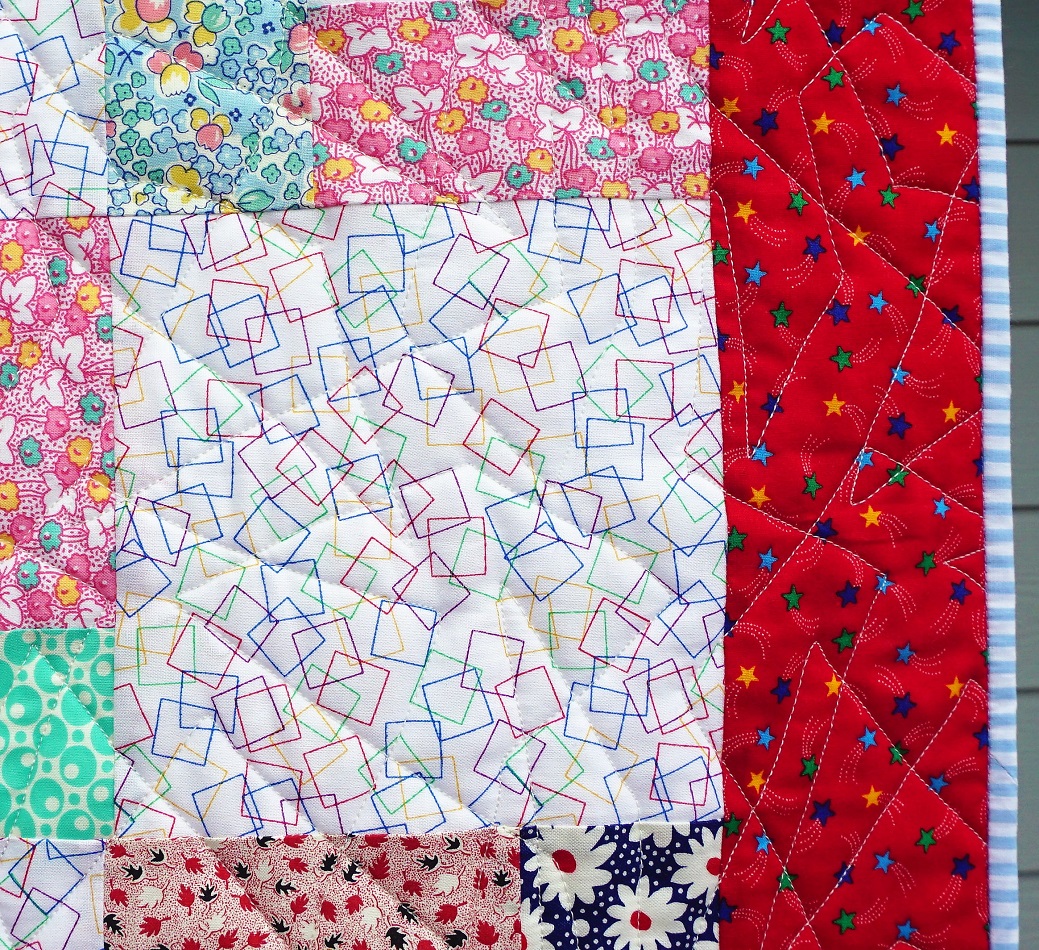
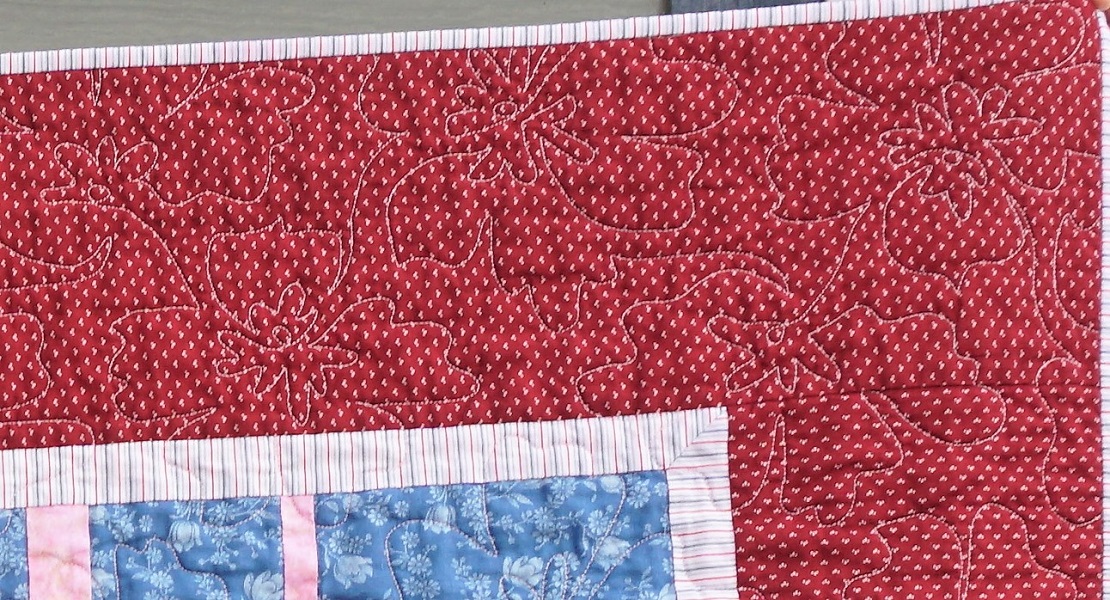
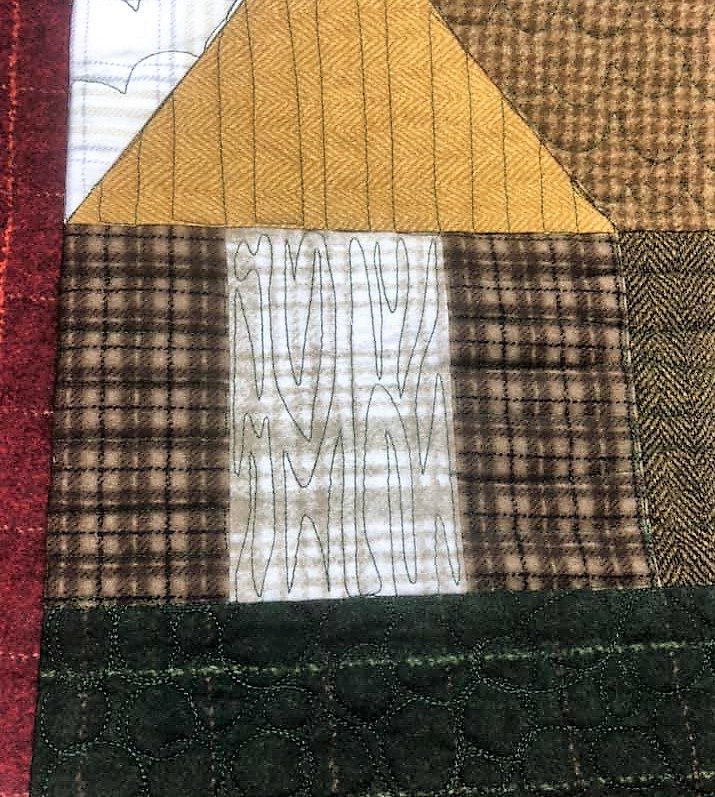
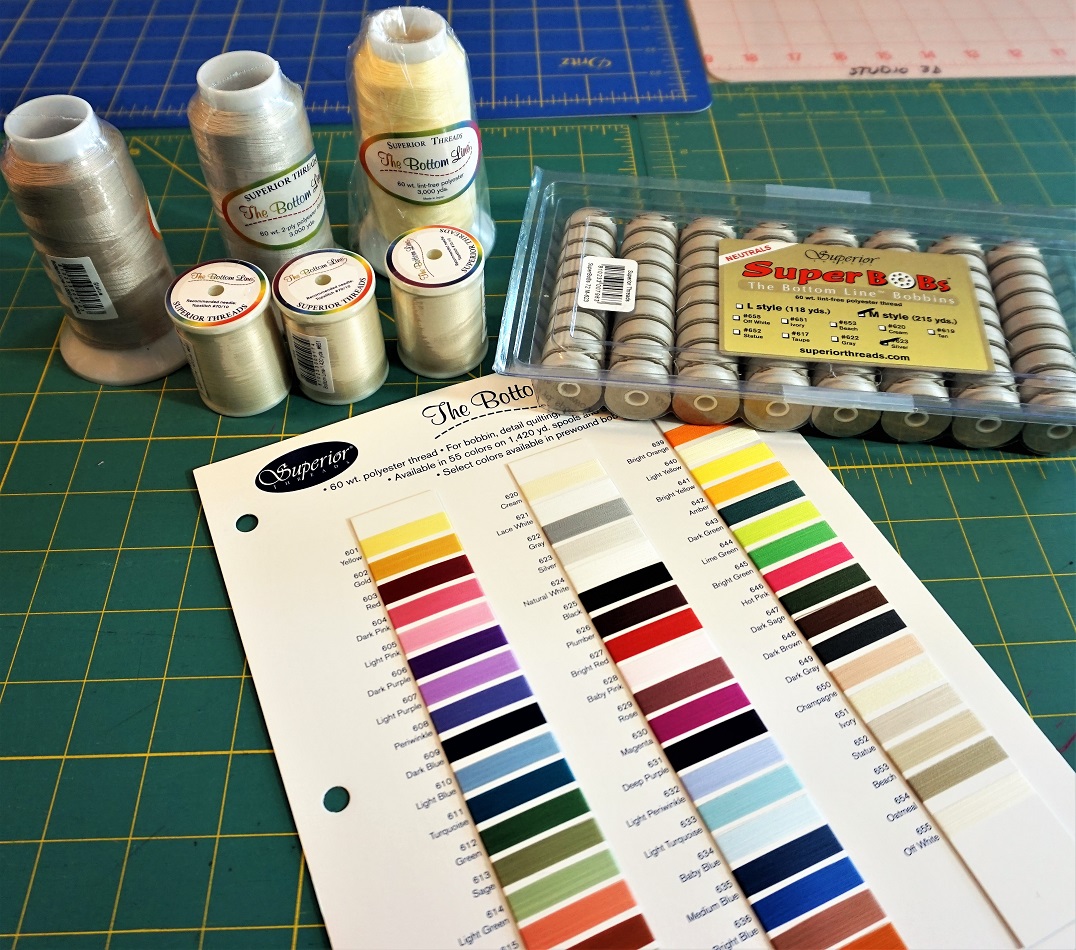
Now with a 'theme' of butterflies emerging I decided to quilt with loops and butterflies. I used a fine, light yellow thread for this.


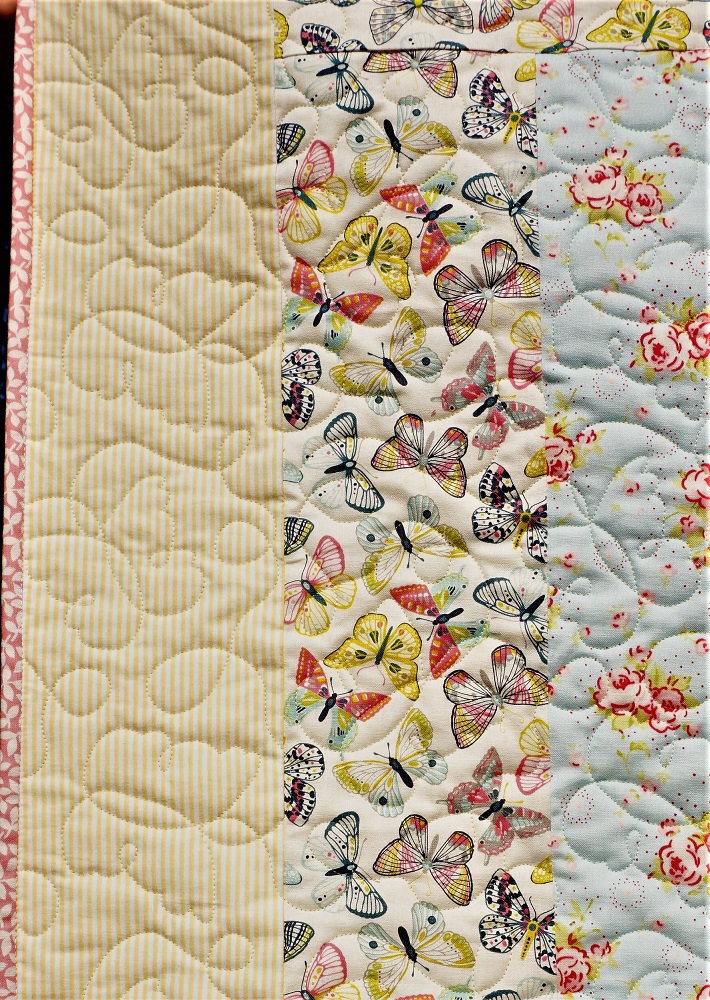
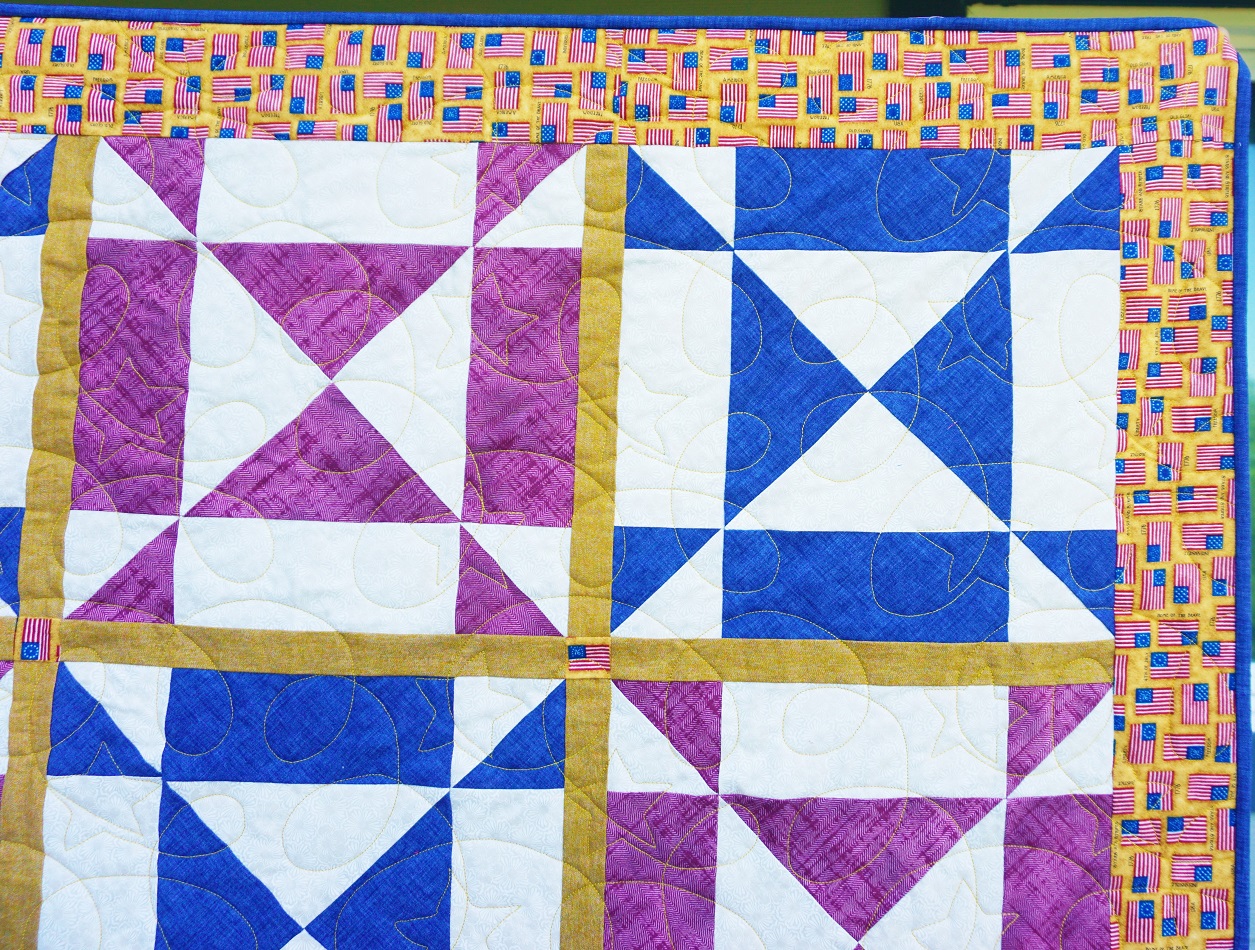
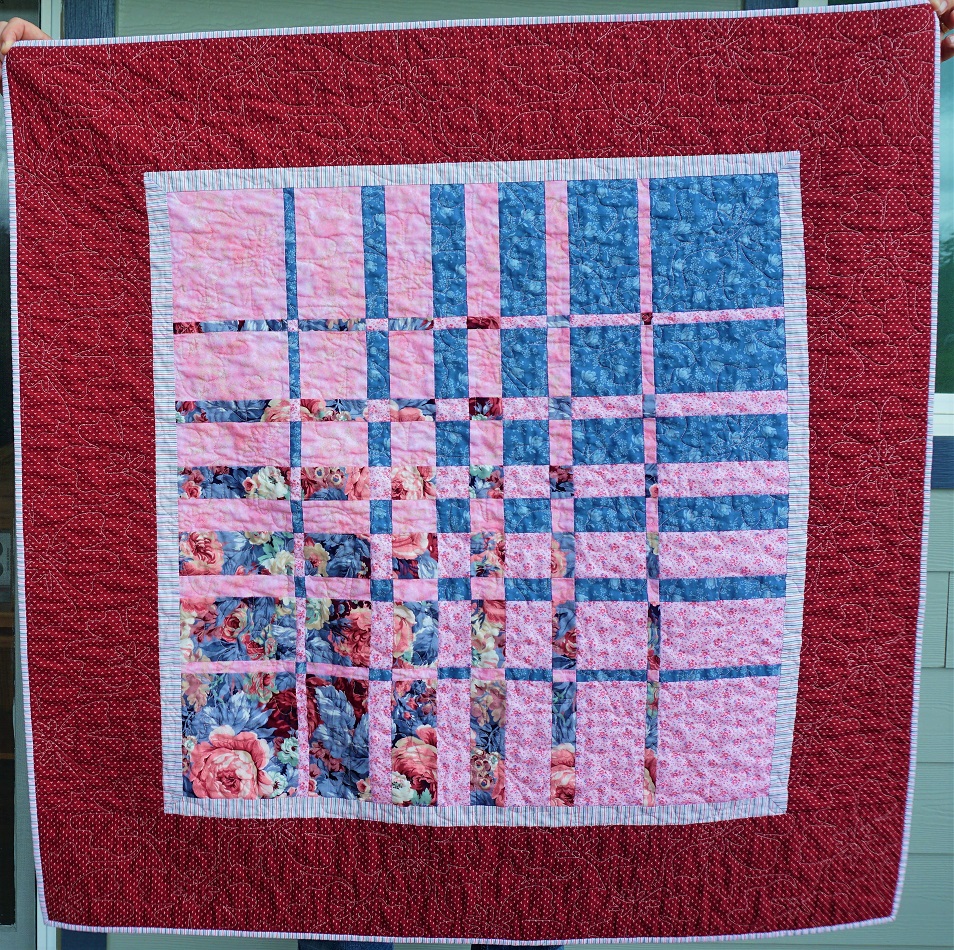
The binding is the same as the backing used on this quilt.

Ddd


Posted by studio3d@ccgmail.net at 11:55 AM PDT
Thursday, 16 July 2020
Point Taken
Topic: Quilting

Having used up all the squares I could get out of the recent strip sets I found that I still had an upright triangle that could be cut from each end of each set. I did this and when I opened them and rotated two of them together on the long edge they made little hourglass units.

Of course now I am dealing with true leftovers and having created all these units I had to figure out a way to set them together to create a quilt top. I measured the hourglass units and discovered I could sliver trim them and get 5 inch squares. This meant I could set them alternating with charm squares for a perfect fit.

The question was, 'do I have any charm squares?' Yay, the answer was, 'yes'!

I had leftovers of a couple of stacks in a range of orange/golden/rust that I set in a gradiant arrangement and alternated with the hourglasses turned this way and that to form a secondary pattern of diagonal squares.


How those metallic finish warm colors changed the look of these scraps (again). I accented the teal in the blocks by adding a narrow inner border.

Here you can see the metallic finish on the squares and the brown border as well as the edge to edge quilting.


I truly used up every scrap of these orphaned strip sets after cutting all I needed for that first quilt, 'Get To The Point'.

Ddd


Posted by studio3d@ccgmail.net at 6:40 PM PDT
Wednesday, 15 July 2020
More To The Point
Topic: Quilting

The reason for naming this quilt as I have is a direct result of the block origins.

You will remember the last quilt entry was titled 'Get To The Point' - an arrangement of mountain-like peaks. Well, when cutting the tube strips for that quilt one must match up identical squares. But it you cut more blocks to the end of the strip set you end up with one extra block that does not match anything. In fact, you could get one extra from each side making TWO mismatched blocks.

So I cut all those extras and then arranged them as pinwheels with no matching combinations. This was not large enough and I wanted some sashing so I went back to the orphan blocks bin and found several black and white blocks from my late sister's stash. These I cut into sashing for the verticals and then I cut whole black and white strips for the horizontal sashing.

A couple of borders brought it up to a small lap size.

Look how the orange border transforms the 'theme' from gold and gray of the previous quilt to a lovely orange and black, perfect for a fan of the Oregon State Beavers.


Even though the pinwheels are all straight lines and points I wanted to make the quilting in swirls to show their potential for movement.


This is a pantograph from Urban Elementz.

Ddd


Posted by studio3d@ccgmail.net at 12:01 AM PDT
Tuesday, 14 July 2020
Get To The Point
Topic: Quilting

This quilt has been languishing in the longarm pile because I couldn't decide how to do the quilting on it. I ended up doing a lot of research while other quilts jumped the line to get completed first. Sometimes it just happens that way.

The pattern for this was from an online blog entry and is a 'tube quilt' I used a jelly roll I picked up at a quilt guild's stash-buster sale for $10. I didn't really like the prints in the roll but for $10 I couldn't leave it there!

A tube quilt like this starts with two strips sewn together side by side, then laid on a wide strip of the background fabric and stitched up both sides, creating a tube.

One then cuts triangles from alternate side seams and, when they are pressed open they become a half-square triangle block with two colors in the one side and a solid background in the other. (Got that?)

As you move down the tube you get two block colorways depending on the side of the strips you car cutting from. Match up two that are the same and rotate one of them and you create a mountain.

These are placed side by side to create rows which are then stacked for the overall layout.

The jelly roll was not enough to complete enough matching sets so I threw in a few strips from my stash. The background is made up of a mixture of white-on-white fabrics.

When it came to the quilting I did not want to use an overall edge to edge design. This stumped me for quite a while but I finally settled on swirly clouds for the background and point to point arcs for the strip sets.


This was all done with free-motion quilting as was the continuous pattern in the borders.


This was a totally new process for me as I waited until all of the other quilting was done and then rolled the quilt forward and back on the machine to complete each section.

The binding was just a bit brighter than I would have liked but it was what I had on hand.

Ddd


Posted by studio3d@ccgmail.net at 10:02 AM PDT
Saturday, 11 July 2020
The Greatest of These
Topic: Quilting

This quilt was FOURTH on my list to finish. I had the first three already pieced, matched with backing and batting and ready to go on the longarm.

Then I caught a new glimpse of the supplies for this one and I just had to pull it out and work on it.

The supplies included two charm packs of coral solids that I got on sale for less than $5 each. I had cut four fabrics from my stash to have enough for the pattern. Speaking of that, the pattern was only a magazine ad for a fabric line from 3 years back and I couldn't find the actual pattern for it. Fortunately, it was a simple thing to see that I just needed half-square triangles and blocks with two snowballed corners.

The background fabric was from my stash, a print with a little basket-weave look to it.


As usual, my camera colors are off - this is much too orange. Think pink!

I used a new pantograph for the quilting pattern - hearts! and used pink thread top and bottom.


I had originally planned to bind with the same fabric as the outer border, but it just looked unfinished. So I pulled out a red and white stripe and I am SO glad I did.


This is a 52x60lap quilt that will be an engagement gift.

Ddd


Posted by studio3d@ccgmail.net at 3:14 PM PDT
Thursday, 25 June 2020
Wild Goose Chase
Topic: Quilting

More play with the orphan block bin....

First a peek at the final result and then a step-by-step on the source of the blocks used.

This is a smaller lap quilt which could be a wall hanging, too.


The starting point for this was the center block. The orphan bin also contained some leftover strip sets from the same source.


This was the source of all those dotted fabrics - From October 2015:


One of the blue blocks was what I had on hand


Then I matched in some half square triangles


Which were orphans of this quilt from Debember 2015


This quilt is ALL half square triangles and I used both the red/tan and the green/tan combinations.


I kept pulling scraps from the leftover 2 1/2 inch strips bag to build the size with borders upon borders.

When I got to a reasonable size I didn't want to put on a big clunky border so I found some fabrics that came to me from my sister's stash and played with my new Accuquilt cutter to create a bunch of flying geese. These were arranged going in one direction so they chase around the quilt.


Yesterday's quilt border leftovers provided the fabric for the striped binding. (In turn, the cut-offs from the backing on this one provided the binding for that one.)

Quilting is done using a pantograph that mimics the flowers in the dark bordering strip (and spacing pieces toward the center).

This was made in the "add a little and set aside till the next idea comes" manner and I quite like the final result.

Ddd


Posted by studio3d@ccgmail.net at 8:37 AM PDT
Wednesday, 24 June 2020
Random Nature of Things
Topic: Quilting

As long as I have been quilting (not quite 10 years) I have been saving the leftover blocks from quilts I have made. Sometimes it was because the pattern changed along the way so I didn;t need all I had made, sometimes the process of making the block made more than the pattern called for.

I keep all of these in a case labeled 'Orphan Blocks' although it sometimes contains strips sets that were sewn but not needed or parts of blocks.

I decided to sort through that bin and start with a block as the focal piece and then build around it with other blocks, partial blocks and strip sets that either used the same fabric or was coordinating in color combinations.

This is the first one I completed. After the main image I will show where the original blocks came from and note their vintage!


The feature block in the center came from the same original quilt as the diagonal stripes.


These were leftover parts from a Celtic Knot quilt I made in April 2012.


The white block with the cathedral window was part of the border.


The angled stripe blocks werepart of what made up the knots.


When rummaging for coordinating bits I found some that originated in this Quilt made in May 2014.


Parts that came from this were used here in the new quilt:


I used leftover 9-patch blocks to make faux cathedral windows to mimic the center block.

The borders around the center block came from leftover strip sets.


All of that green background was also salvage. A local lady was a manufacture's representative who had 'books' of fabric samples to take to the fabric stores so they could order stock. When those books were outdated she would put them in a big yard sale and sell the swatches by the pound. The swatches were all random sizes so I used my Accuquilt to cut standard 6.5 inch blocks.

You can see that the angled stripes were not large enough so I framed them in the same fabric used on the cathedral blocks. That framing fabric is the WRONG side of fabric recently used on the All-American Style quilt made earlier this year.

I quilted the green background with leaves and vines and also carried that in a more linear fashion into the strips bordering the center block.

The cathedral squares got some echoing curves and straight line quartering. I used a looping meander around the center cathedral block.


And there you have it - my first orphan block recovery project.

Ddd


Posted by studio3d@ccgmail.net at 10:21 PM PDT
Thursday, 4 June 2020
All-American Style
Topic: Quilting

This was an easy quilt to name. Pattern is a tutorial from Missouri Star Quilt Company called 'Turn Style'. Fabrics from my stash in red, white and blue. Fabric with historic American flags all over makes up the border and the cornerstones. Quilted with stars in bright yellow thread. It all came together as All-American Style.

The block pattern is a disappearing hourglass that starts with two ten inch squares - stitch, whack, stitch, repeat... Made in two color combinations and assembled by alternating the directions, separated by gold sashings.


Isn't that flag fabric neat? I wish I had bought much more of it when I was it originally. But I can't find it anymore.

I wanted the quilting to be noticable so I used bright yellow thread and stitched stars and swirls to stay with the patriotic theme.


The colors appear brighter than they actually are in this photo. I used the same blue for the binding.

Ddd


Posted by studio3d@ccgmail.net at 9:19 AM PDT
Monday, 25 May 2020
Ninty Eight Point Six
Topic: Quilting

On Facebook I got notification through one of the quilting groups I am on that a lady was sponsoring a 'quarantine quilt-along'. She would provide the pattern and do periodic instructions throughout the day. We would follow the directions and do our piecing between her live broadcasts.

I chose to pull black-and-white fabrics from my stash along with a fabrics I have disliked since the moment it came to me (from a grab-bag my sister-in-law got at an auction). Very strange piece.

My quilt ended up at 49 x 65.


Over 6000 people world-wide participated in the quilt-along.

So I finished this up today on the longarm machine. I used a pantograph of large flowers with cream thread. It doesn't put up too much contrast on the darker fabrics.

I chose a black on white dot for the binding.


Not my usual style at all. But there was no telling what the result was going to be before we started.

Because it was a quarantine quilt I named it Ninty Eight Point Six.

Ddd


Posted by studio3d@ccgmail.net at 8:30 PM PDT
Friday, 22 May 2020
Betty's Love Of Cabins
Topic: Quilting

A few years back our group was given a whole lot of fabric by the family of a lady who had passed away. Her name was Betty. We've all been using it and we refer to the results as 'Betty Quilts'.

One of the fabrics I took was printed with blocks of faux applique. I used some in a quilt before but I had 13 of the applique prints left. I cut them down to use as centers in 12" blocks created by adding three rounds of scrappy log cabin strips (cut using a friend's die cutter).

Twelve of the resulting blocks were sashed together with a dotted fabric and then I used more Betty fabric for the outer borders.


The over-arching theme of these fabrics is 'hearts'. So after I had quilted around the motif in the applique blocks, the applique blocks themselves and the sashings, I quilted free-hand hearts in all the outer borders.


Then I found the perfect fabric for the binding in my sister's stash - the perfect blue with little irregular hearts.

This will go to the hospital for their Passages program.

Ddd


Posted by studio3d@ccgmail.net at 6:14 PM PDT
Tuesday, 19 May 2020
Next In The Lineup
Topic: Quilting

Look to the title for the quilt name!

This quilt uses the other half of the blocks from the class I took at the Sew Expo (Constellation, posted on May 17).

Whereas that quilt mixed thm with big red blocks, this time I combined them with white blocks. When I split up the blocks for the two quilts I saved most of the bright prints for this one and those with softer colors on the other where they would not compete with the big reds.


How much that changes the look!

The white fabric blocks have awesome line art scattered squares that inspired the quilting. I got a pantograph with crazy angles and used it with white thread. This lets it blend in on the face of the quilt and only stand out on the red border. That border is the same fabric as the red blocks on the other quilt.


I finished this off with even more lines by adding a pinstriped binding.

Ddd


Posted by studio3d@ccgmail.net at 8:42 PM PDT
Sunday, 17 May 2020
Constellation
Topic: Quilting

The quilt for today is actually one of two I made using blocks from a class I took at the end of February. The pattern is called "Button Box" and was taught at the Sew and Stitchery Expo in Puyallup (Washington). It is actually a very basic block constructed with partial seaming. All of the fabric for the blocks was provided to us already precut.

I wouldn't have chosen these fabrics for myself but the instructor seemed to be pleased as punch about them.

In any case, I finished about half the blocks in class and the rest at home. From my stash I chose two different fabrics to interleave with the sewn blocks and made two tops for lap quilts.

For this one I used a bright red with multicolored stars. When I got it on the longarm today I pulled out a pantograph with stars and swirls and loaded up bright red thread for stitching.


Here is a closeup of the stitching on one block.


You'll recognize the border which is the same stripe used on the last convergence quilt I showed.

For the backing I had a large piece of white with multicolored stars. There was enough to use as the binding as well which you can see in the photo above.

While I had the big roll of batting on the table I decided to go ahead and cut the pieces I would need for the rest of the quilt tops I have done. So not I am ready with five more items ready for the longarm machine.

I actually have many more kits cut but I am MAKING myself wait to piece any more until all these are completed.

Sigh!

Ddd


Posted by studio3d@ccgmail.net at 8:48 PM PDT
Wednesday, 13 May 2020
Flung Flowers
Topic: Quilting

Back to a new quilt finish. And it is yet another of the convergence quilts.

In fact, if you scroll back a couple of days you'll find that this uses two of the same fabrics as the Ascending Roses quilt. That one I combined with two taupe fabrics and this one I combined with two pinks.

I also added a thin inner border before a wider dark border. I also used the same fabric from the narrow border for the binding.


I used a pink thread to do the quilting - a new pantograph I ordered with big flowers.


I like how this gives some interest to the very plain border fabric.

Ddd


Posted by studio3d@ccgmail.net at 3:46 PM PDT
Sunday, 10 May 2020
Ascending Roses
Topic: Quilting

This is my fifth quarantine quilt completed. Two were quilting only and were for family members. This one is the latest of three that will go to Passages at the hospital.

I actually have SEVEN more tops that I've pieced during this time at home that are waiting to have the longarm quilting and binding done.

This quilt is one ov several sets of fabrics I cut out for Convergence quilts. My hubby kindly consulted with me on the wide border and suggested the mitered corners using fabrics from the opposite corners. LOVE THIS!


The quilt finished at 38 inches square. More of a decorative throw instead of a lap quilt.

I wanted to get some new patterns of pantographs for the longarm quilting. While I was shopping I found a BUNCH that were free for download. They come in a pdf which you print at home. By copying multiples and taping them together you get the traditional roll. You just make enough to accomodate the quilt you are working on.

I used one of these free pantographs for this quilt.


And now I'm off to work on another.

Ddd


Posted by studio3d@ccgmail.net at 1:02 PM PDT
Wednesday, 29 April 2020
Converging Daydreams
Topic: Quilting

You may remember the 'convergence' quilts I made a while back. I was having so much fun with that pattern that I cut our PILES of parts to make more. I did make a couple of tops and set them aside when making masks so they haven't been quilted yet.

However, I had enough fabrics to cut TWO of a fabric I loved with multicolored lilacs on it. Well, I got to daydreaming about how I could combine those fabrics to make one larger quilt with the same feel to it.

I found, first of all, that trying to draw this idea on paper was worthless as every time something wasn't working out I had to erase the phole thing and start over. GAAAAAHH!

So I started working by the seat of my pants. 'What if..." and then cutting and interleaving and sewing back together. "Now if I do this..." and trying that out.

When I was all done I had a beautiful, if smallish, lap quilt. I was so excited by it that it went right to the head of the line of projects to go on the longarm machine.


I used a pantograph called 'paisley' to quilt this.

Ddd


Posted by studio3d@ccgmail.net at 5:28 PM PDT
Thursday, 23 April 2020
Log Cabins Under the Needle
Topic: Quilting

Well, I haven't given up on quilting even though none have made an appearance for quite some time. Actually, I have been making lots of quilt tops and setting them aside to quilt later.

In addition to that I made 137 face masks for distribution. We kept a few for ourselves and gave out some to friends and neighbors. I still had 108 to donate to the local hospital for staff to wear when not at work. they were delighted to get them.

When that was done I pulled out the last of the projects I was asked to do the quilting on from my late sister's materials. She had pieced a simple wall hanging, a top for a throw pillow and a large bed topper - all of them 100% flannel.

She had left behind a rough sketch of ideas on quilting the pillow and bed topper which I incorporated into the free-motion work I did on the longarm machine.

I didn't get any photos of the wall hanging as it was simple half-square triangles from the leftovers of the quilt.

Here is the bed topper:


The bottom is the closest to true colors. Here is one of the cabins close up:

Cornerstones each for an oak leaf:

The doors all have woodgrain:

 
Windows have a frame and sashing:


Each chimney has scrolled smoke coming out:


Vertical sashing features vines and leaves:


And every cabin sits on a stone foundation:


The throw pillow is a single cabin with the same red sashing (quilted the same way) all around. The pillow measured 22 inches, so you can see the scale of this bed topper.

The flannel was not as linty as I expected so I had few challenges in quilting these pieces.

Ddd


Posted by studio3d@ccgmail.net at 5:04 PM PDT
Sunday, 8 March 2020
Button Box Quilt CLass
Topic: Quilting

I took another workshop class at the sewing and stitchery expo - this one on making a specific quilt pattern.

All of the pieces were cut for us and they provided the thread and the machine to sew on.

Of the 50 blocks in the kit, I got 8 completed, another 19 done 3/4 of the way and the rest laid out with color choices so they are ready to go. The pattern gives a multitude of layouts and they had samples of these in the classroom that we could take pictures of for later deciding what to do with our blocks.


I'm not enamored with the fabrics they included! The supplies did not include sashing, backing, or batting. I may decide to make a bag or something for a kid out of these.

Ddd


Posted by studio3d@ccgmail.net at 12:01 AM PST
Saturday, 7 March 2020
Follow the Thread
Topic: Quilting

 At the sewing and stitchery expo I stopped in at the booth for Superior Threads to pick up somesupplies for my longarm quilting machine.

They only had ONE cone of the thread color I wanted but I picked up a couple of alternate 'neutrals. The spools are the same stuff and all are the same color. Off to the right you can see I picked up a big slab of prewound bobbins for the longarm.

In the foreground is the color card I picked up for this line of thread. When I got home this enabled me to catalog the random bobbins that came along with my machine and some that I bought in mixed lots.

Ddd


Posted by studio3d@ccgmail.net at 12:01 AM PST
Thursday, 5 March 2020
New Tools
Topic: Quilting

 I picked up some new tools at the sewing expo a few days ago.

FROM UPPER LEFT: This little ruler is 3x12 inches to have a smaller size for sub-cutting quilt pieces.

Directly to the right is a little silicone pad for laying a hot mini-iron - used when piecing.

 Right of that is a seam ripper to keep with my longarm machine. There is a standard sized head and a larger one. The cap on each end is rubberized so, after cutting the stitches, a pass of the head (like erasing) will pull out the loose threads.

At the bottom is a pack of the brand new 'super nonstick needles' from Schmetz. These are for my standard sewing machine. They allow you to stitch through sticky stuff (like sticky-back velcro, etc) without gumming up the needle. The booth only had size 14 left so, if I like them, I will pick up some 12s later.


Random stuff I had on my 'buy' list ahead of time.

Ddd


Posted by studio3d@ccgmail.net at 12:01 AM PST
Wednesday, 4 March 2020
Never Enough
Topic: Quilting

Because you can never have too many scraps in your stash, I picked up some random pieces from the 'fabric by the pound' booth.

No specific plans for any of these. Others were part of the fabrics shown for the bunny quilt.


What would YOU make with these?

Ddd


Posted by studio3d@ccgmail.net at 12:01 AM PST

Newer | Latest | Older