« September 2021 »
S M T W T F S
1 2 3 4
5 6 7 8 9 10 11
12 13 14 15 16 17 18
19 20 21 22 23 24 25
26 27 28 29 30
You are not logged in. Log in
Entries by Topic
All topics  «
3D paperwork
A - Z challenge 5
A - Z challenge 7
A - Z challenge round 4
A to Z challenge round 3
A to Z round 2
A to Z round 6
A-Z round 1
Around the House
Art Challenges
Artist Trading Cards
Backgrounds
Beads
Bible Journaling
Books
Boxes
Collage
Color Challenge
Coloring
cookbook
Die Cuts
Digital Projects
Digital Stamps
Drawing
Dry Embossing
Fabric Stuff
Fantastic Folds
Field Trip
Home Decor
How Does Your Garden Grow?
Hymnal Art
In The Kitchen
In the studio
Jewelry
Lettering
Links
Multi-Technique
Music to Work By
Musings
Nail Art
New Work
Online Class
Other Hobbies
Other Projects
Painting
Paper Embroidery
Paper Piecing
Photo
Pretty Paper
Quilting
Random
reading
Scrap Recovery
scrapbooking
Sewing
Sketch Challenge
Some Backlog
Stamping
Stencils
Stickers
Supplies
Teabag Folding
Techniques
Testing
tips and tricks
Tutorial
Web resources
Welcome to my Blog
Work By My Friends
workflow
Writing
Blog Tools
Edit your Blog
Build a Blog
RSS Feed
View Profile
Group One
In & Out of Studio 3D
Friday, 17 September 2021
Rosy Posies
Topic: Quilting

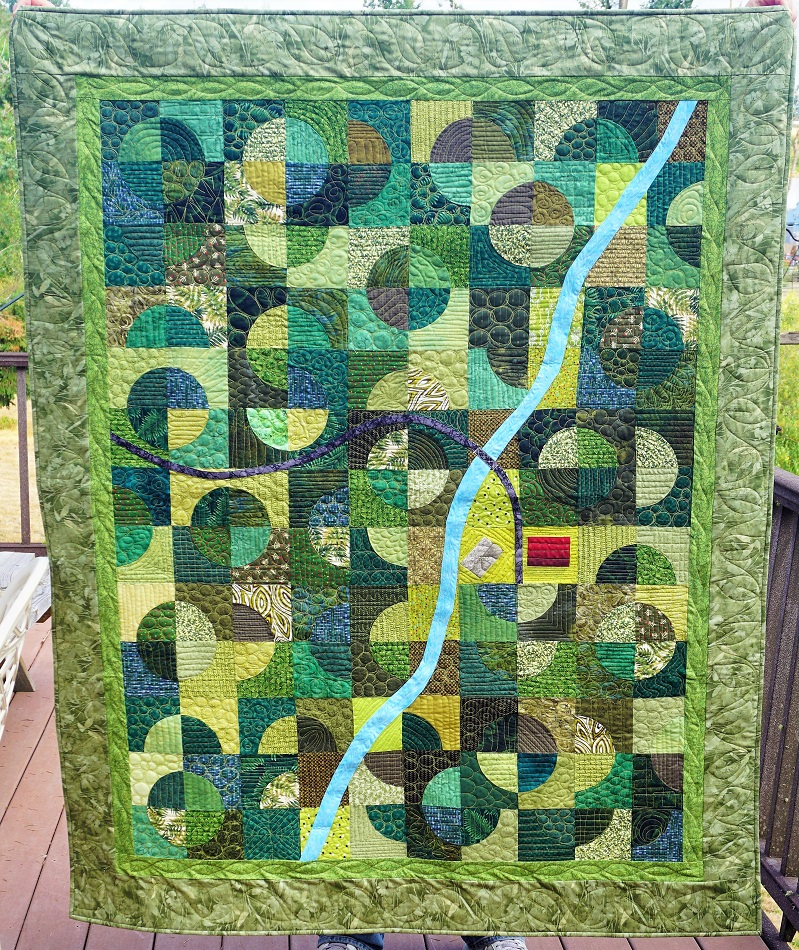
Did I mention before that during the February ice storm and power outage I cut out all the parts for SEVEN of the Magical Squares quilts? Not only that, but when I started piecing them I worked on them in lock-step - finishing step one on all of them, then step two on all of them, and so on. So all of the seven tops were finished at the same time. This kept me from having to figure out each step over and over again as I would if I had done each top all the way through and then started the next one from the beginning.

I made 5 other quilt top designs as well and then went out and bought all the backings for all 12 quilts. This explains how I am coming up with so many new quilts all in a row. All of them were ready to be longarmed and I just had to measure out the batting, trim the backing, and load 'em up.

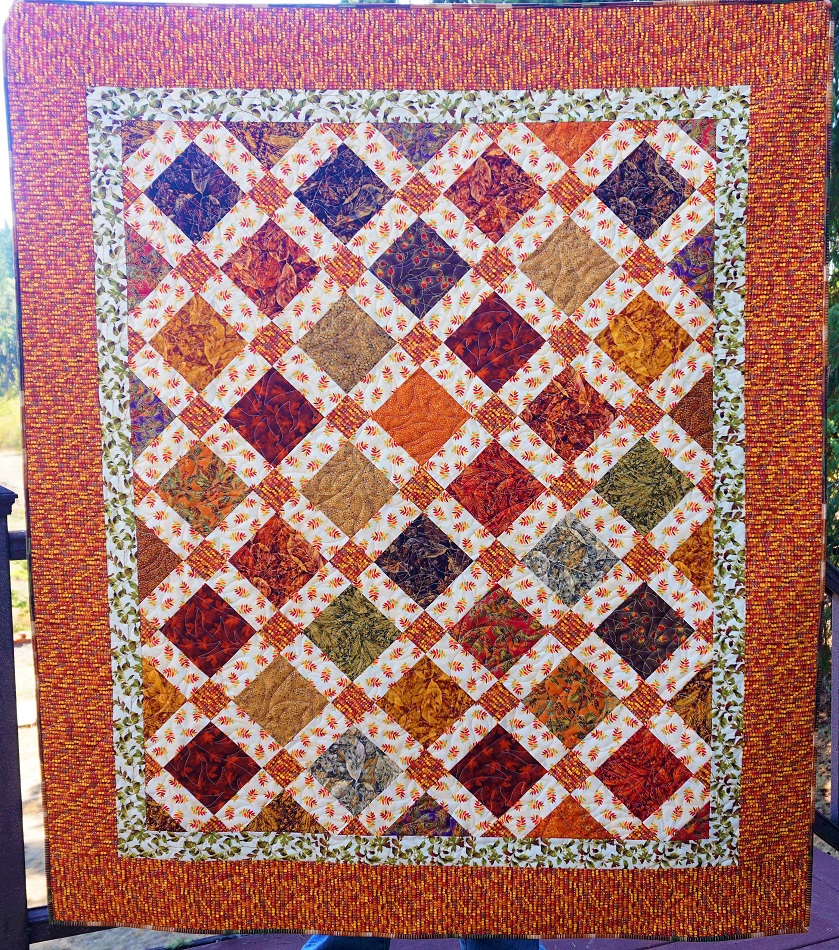
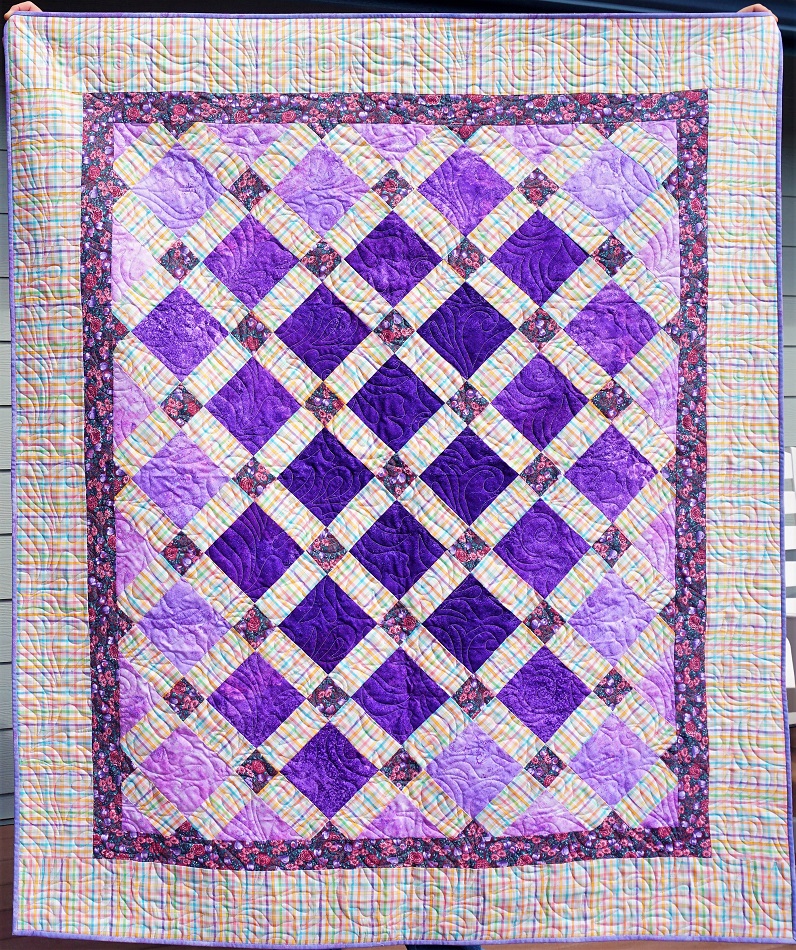
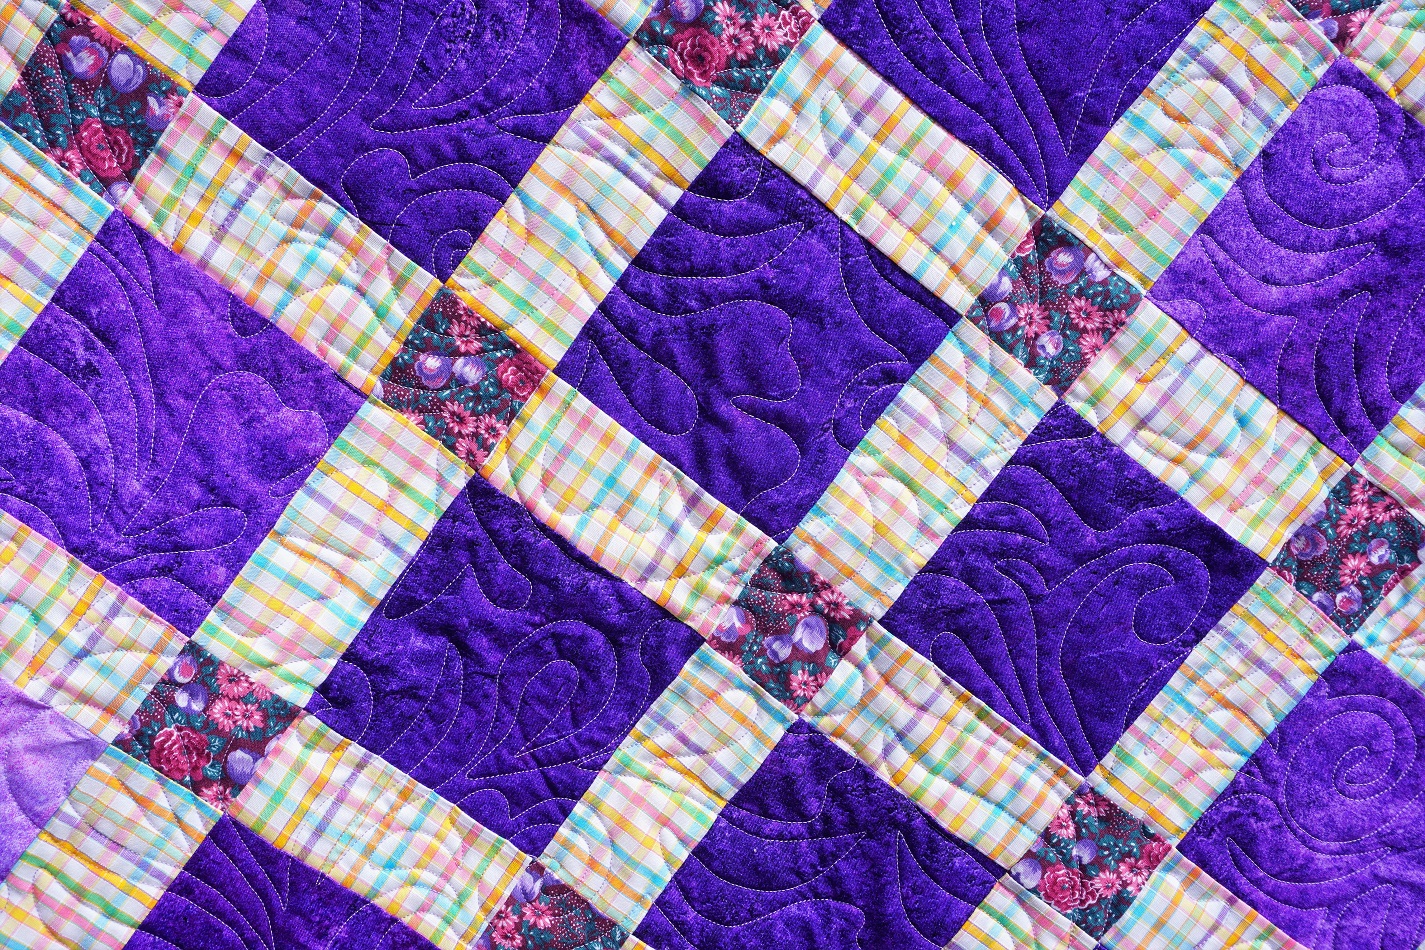
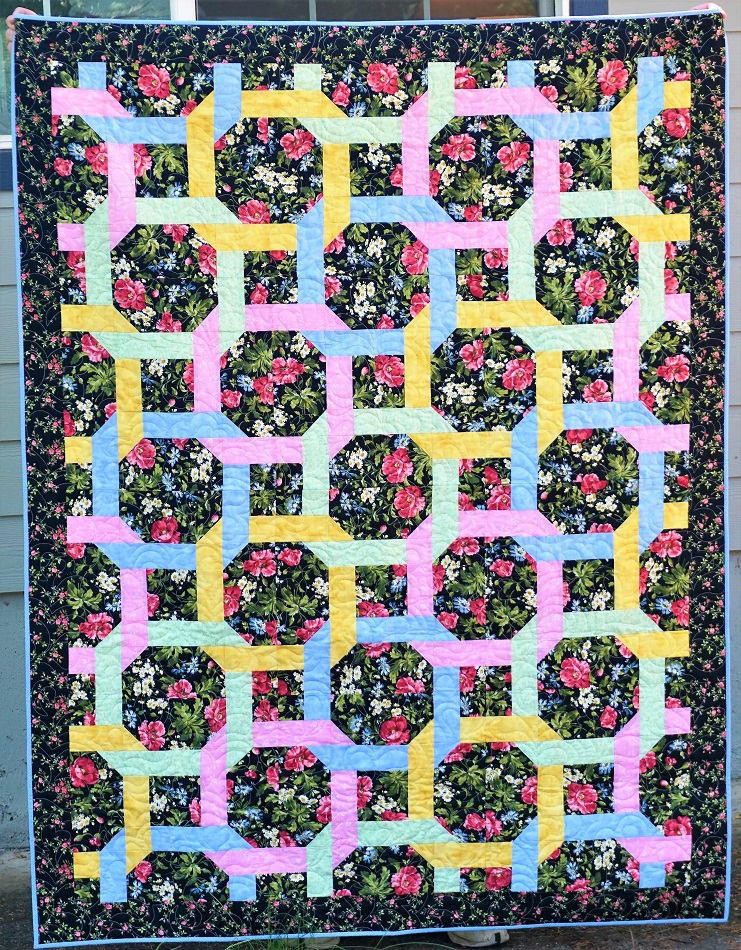
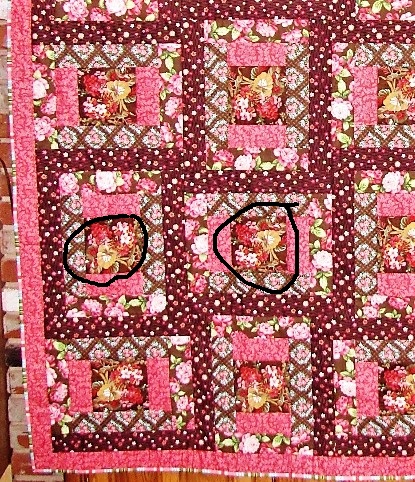
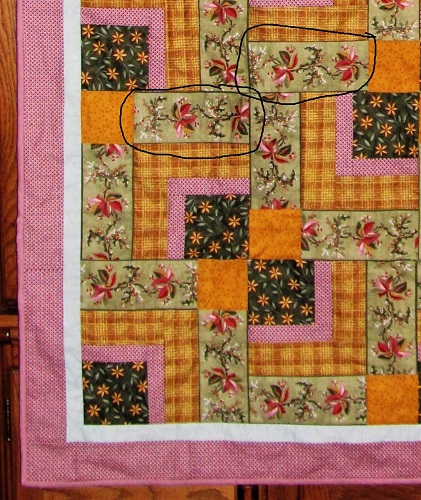
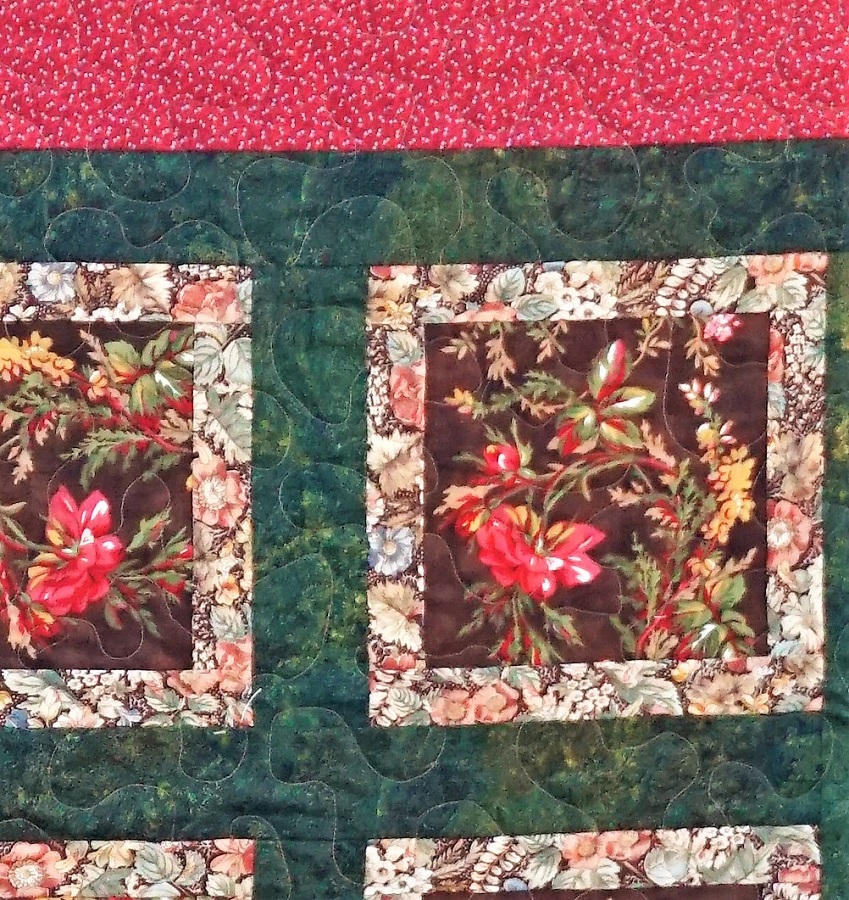
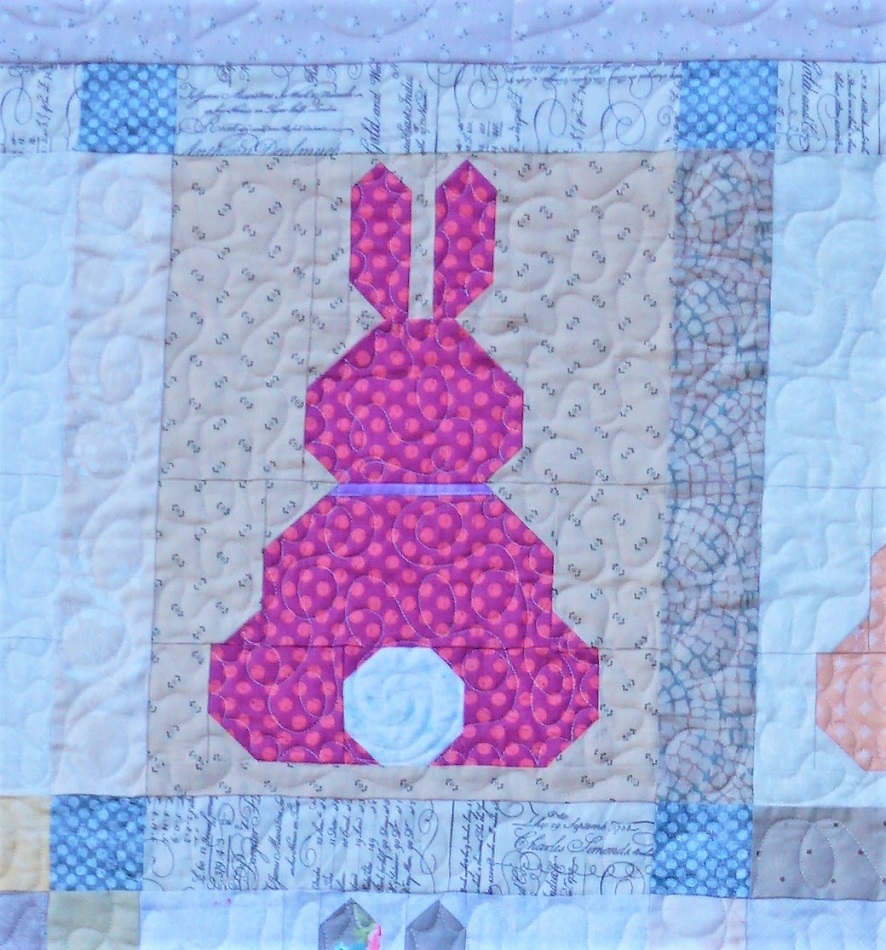
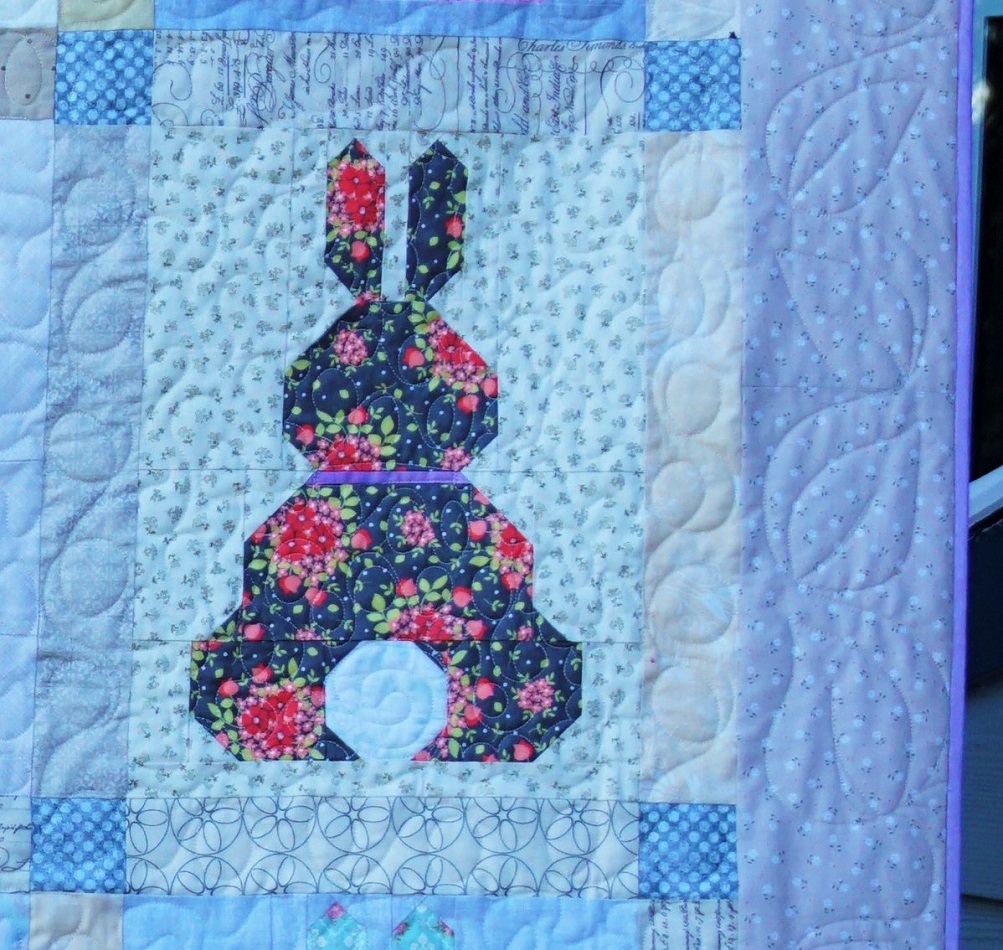
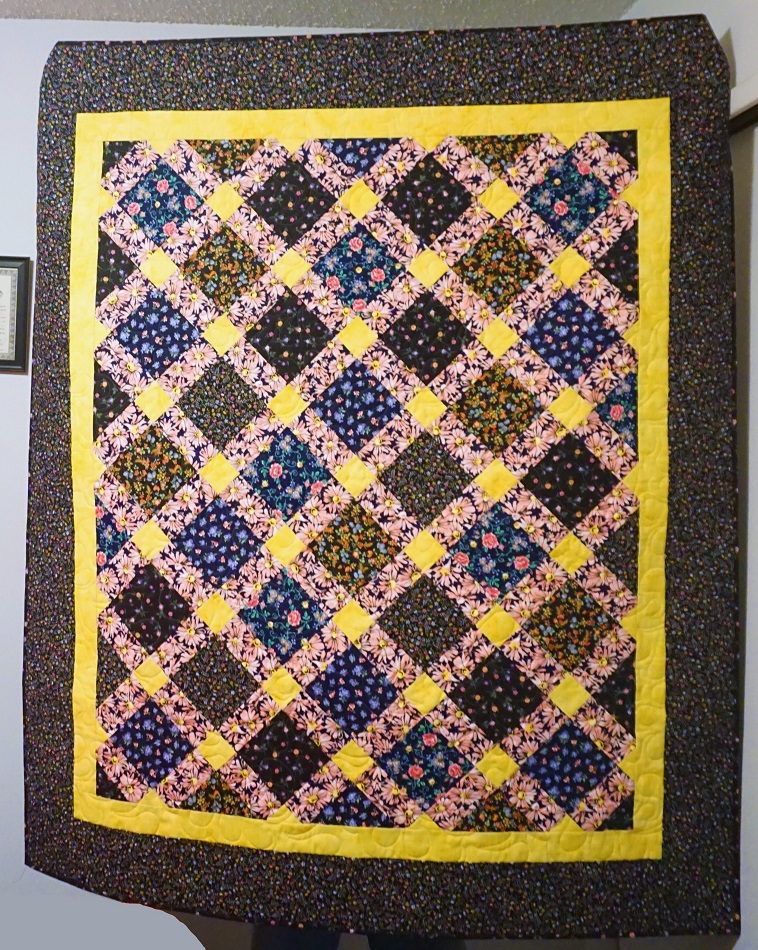
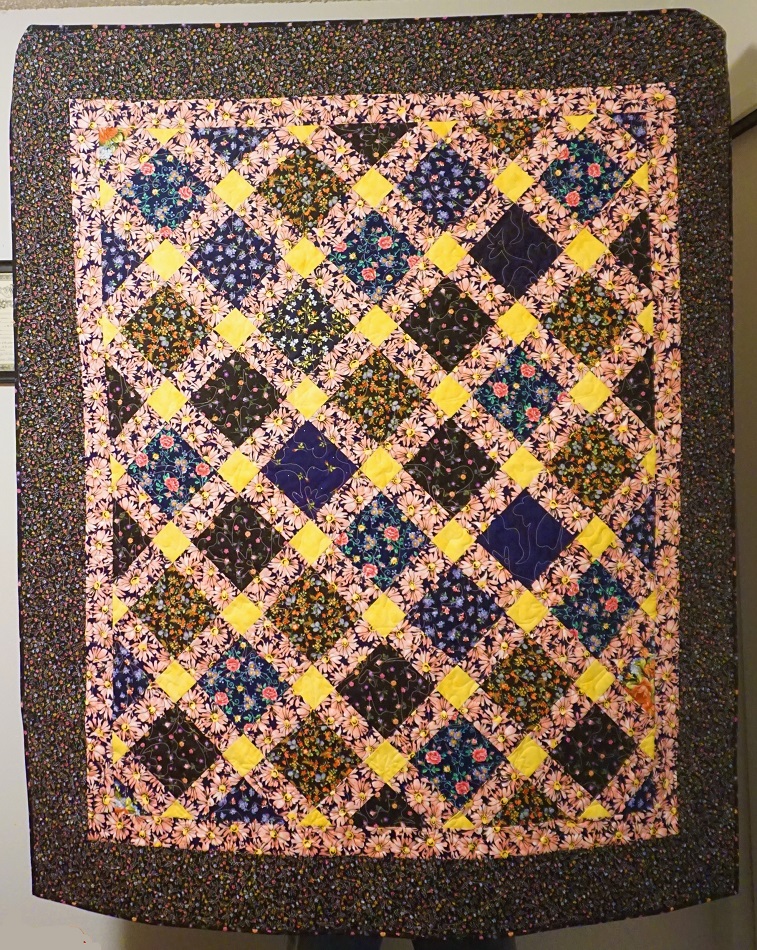
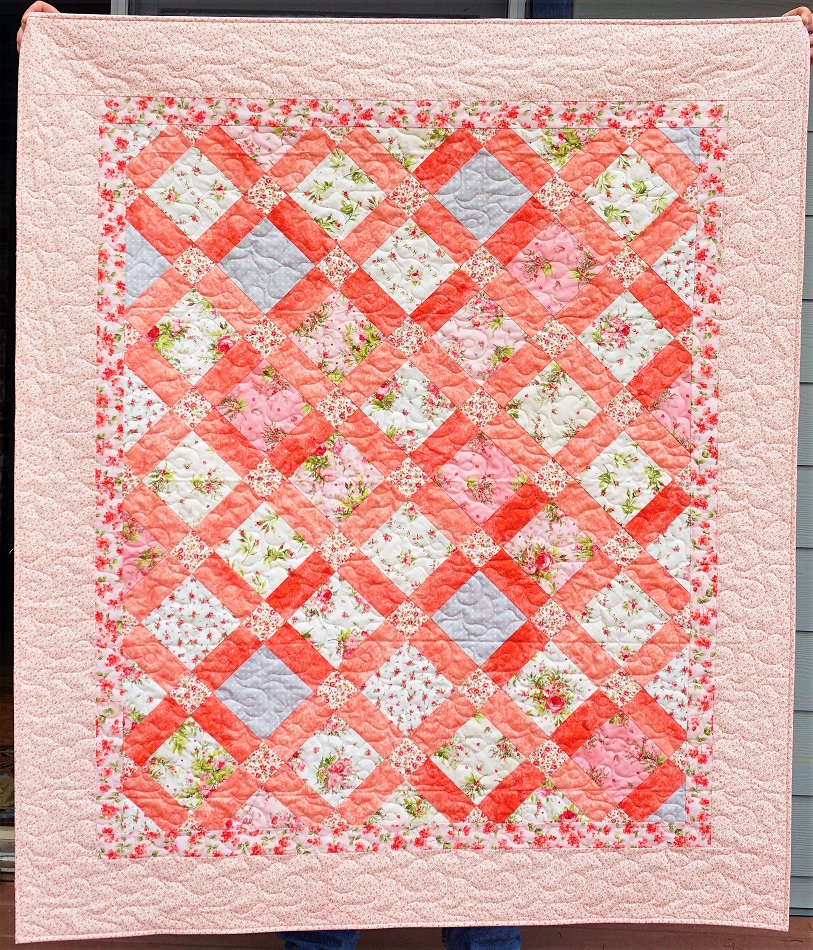
With that said, today I have complered another of these. When a fabric store was closing out I found a set of floral charm squares I liked. I bought 4 sets exactly alike. So the next few quilts have a similar look as far as the block centers. I changed out sashing, cornerstones, borders, etc so they are not identical. I guess you could say they are 'cousins'.

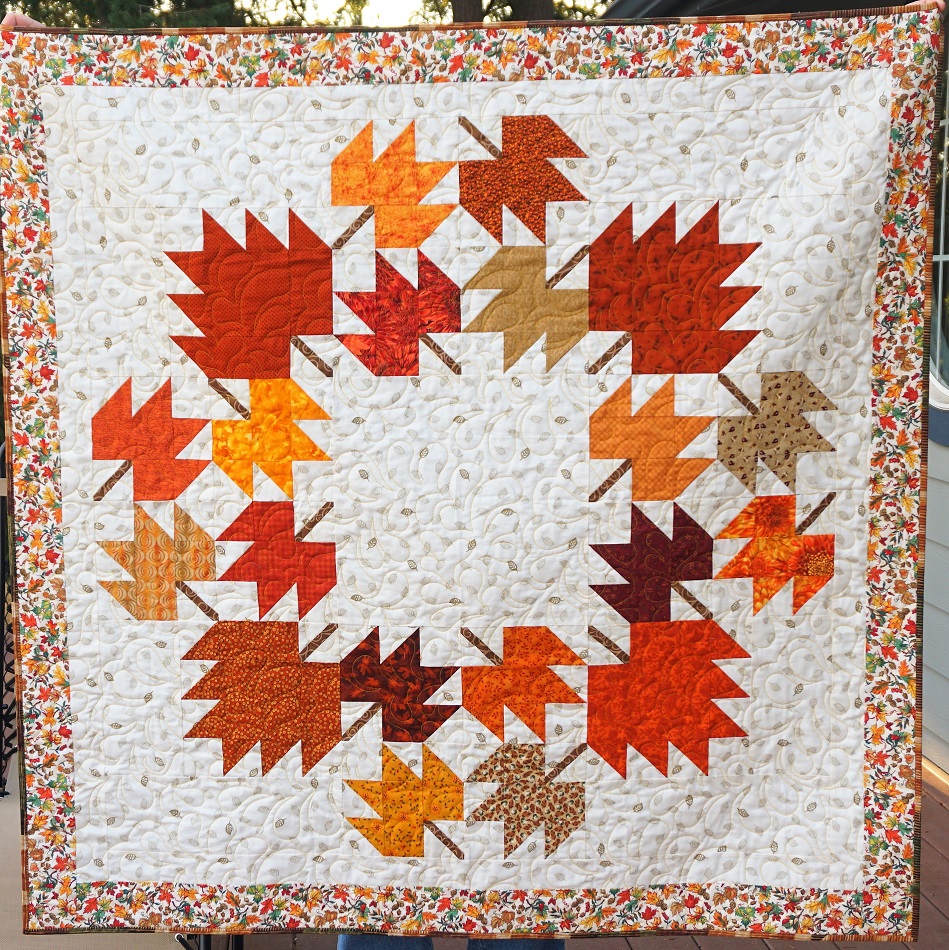
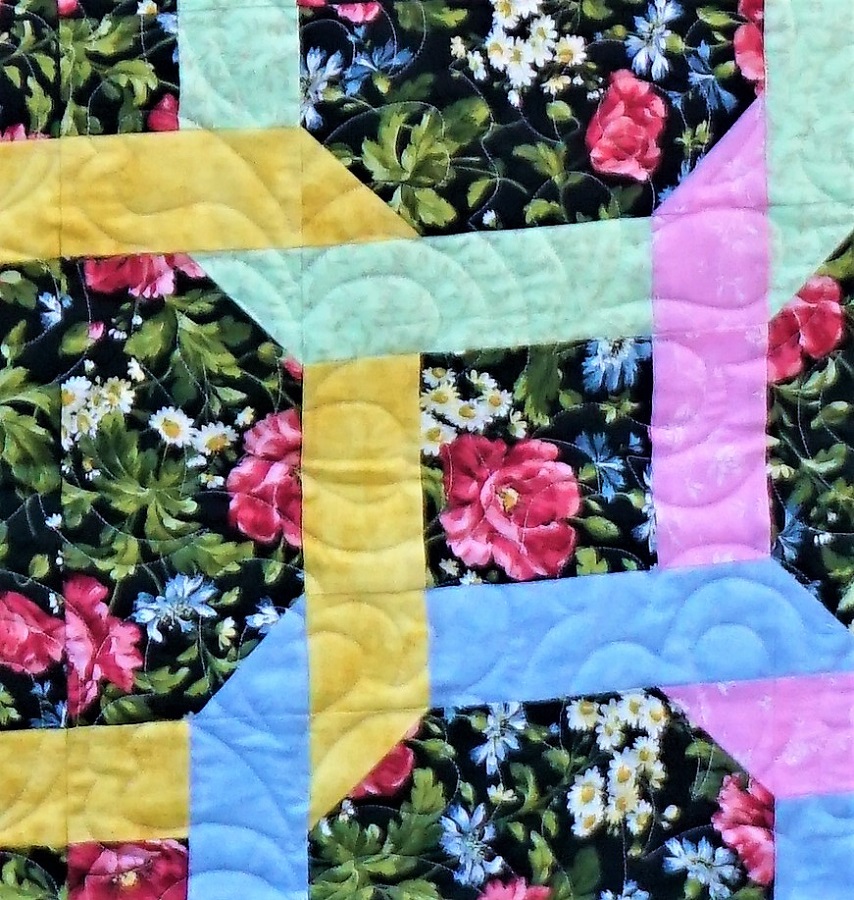
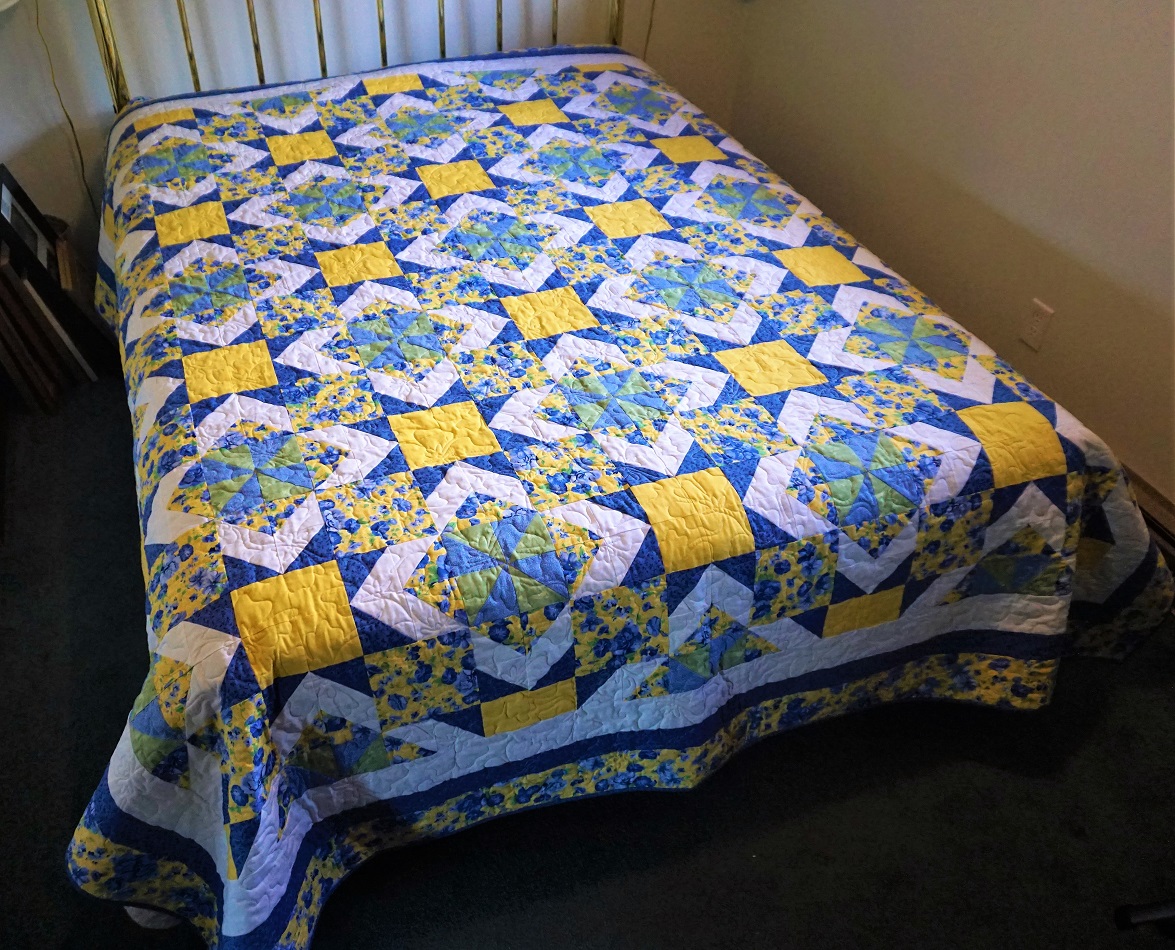
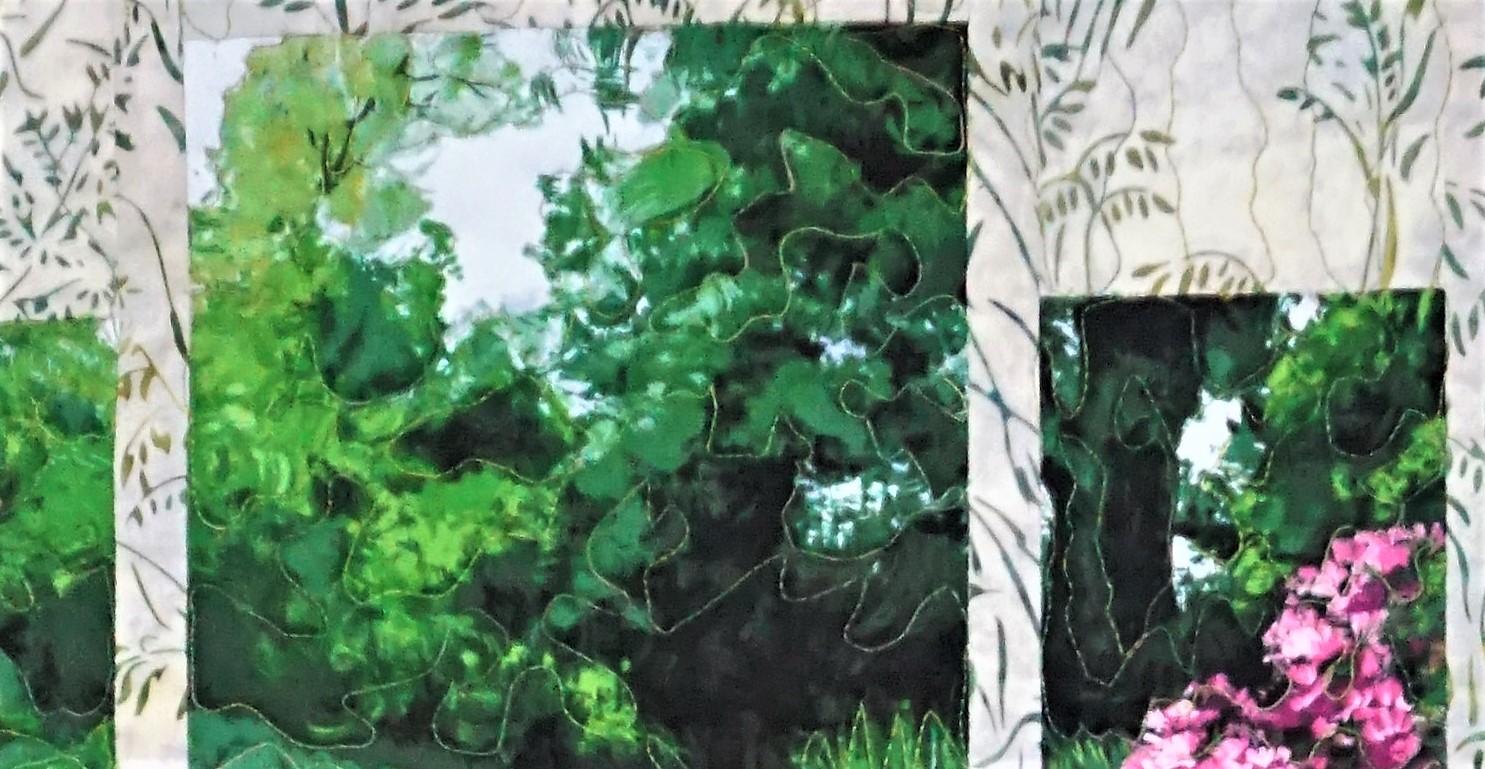
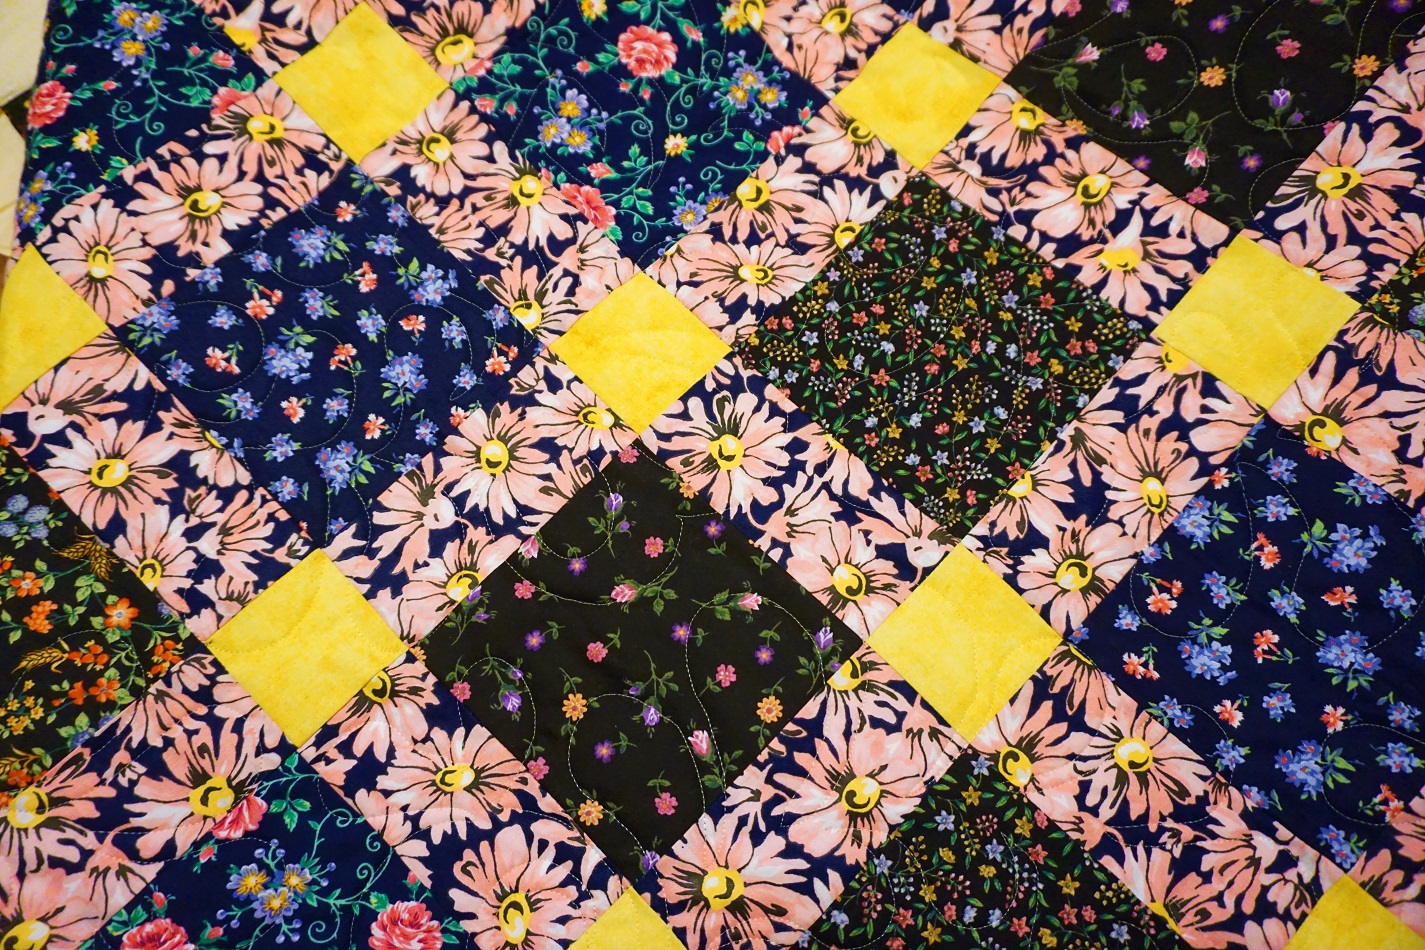
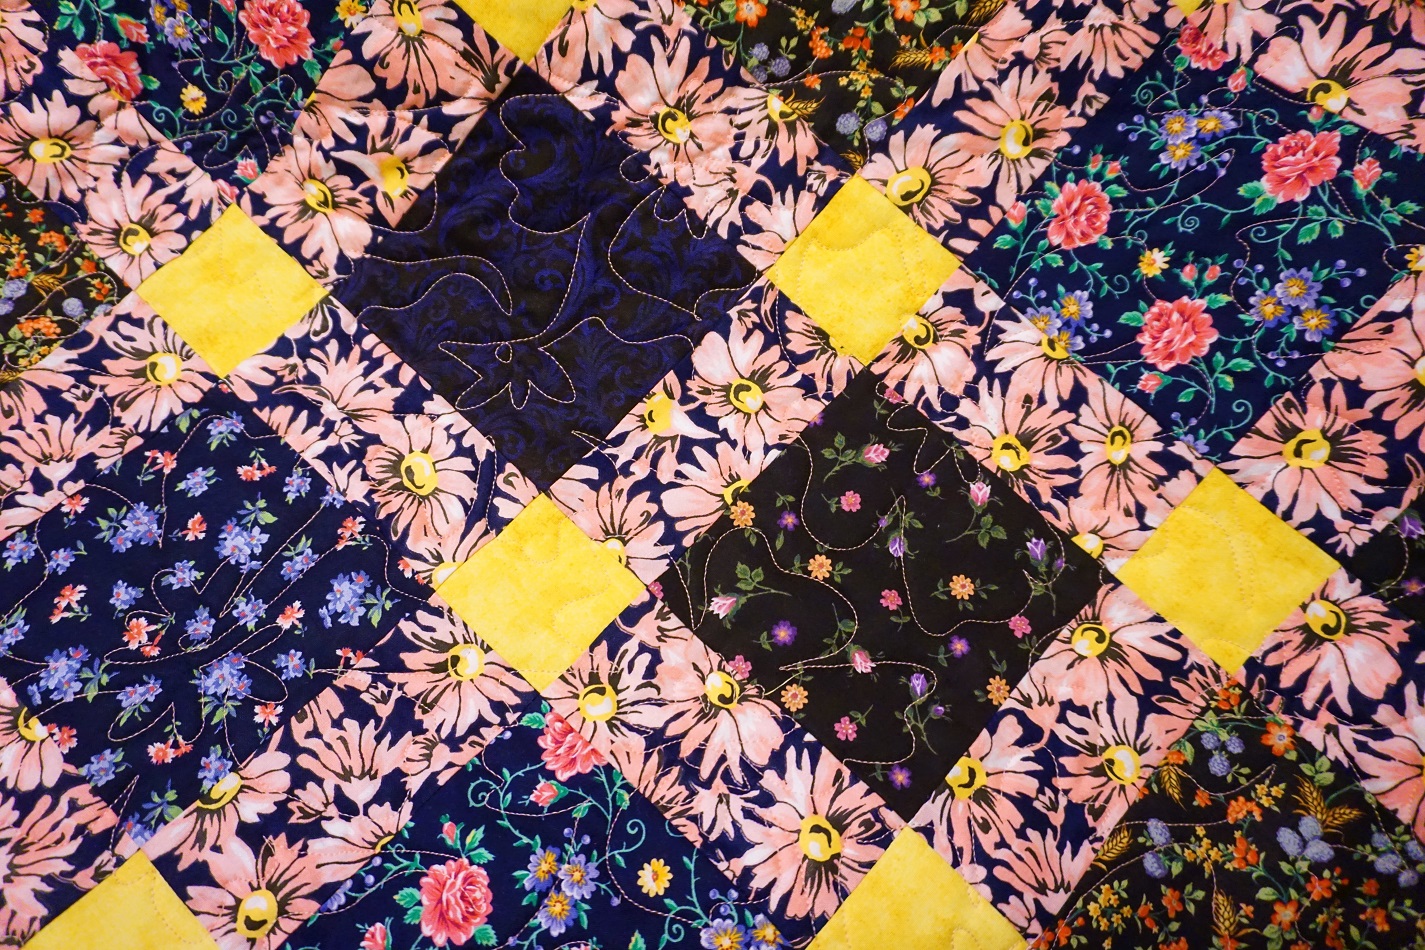
Today's quilt is called Rosy Posies because of all the focus on flowers that are pinks and apricot - many of them roses.


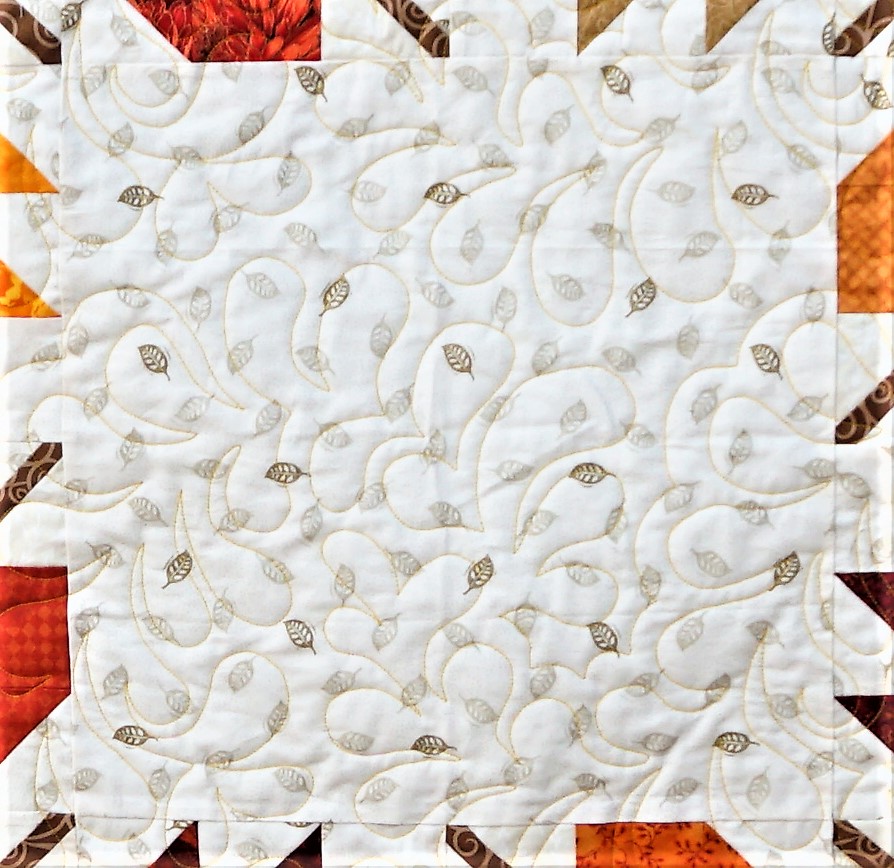
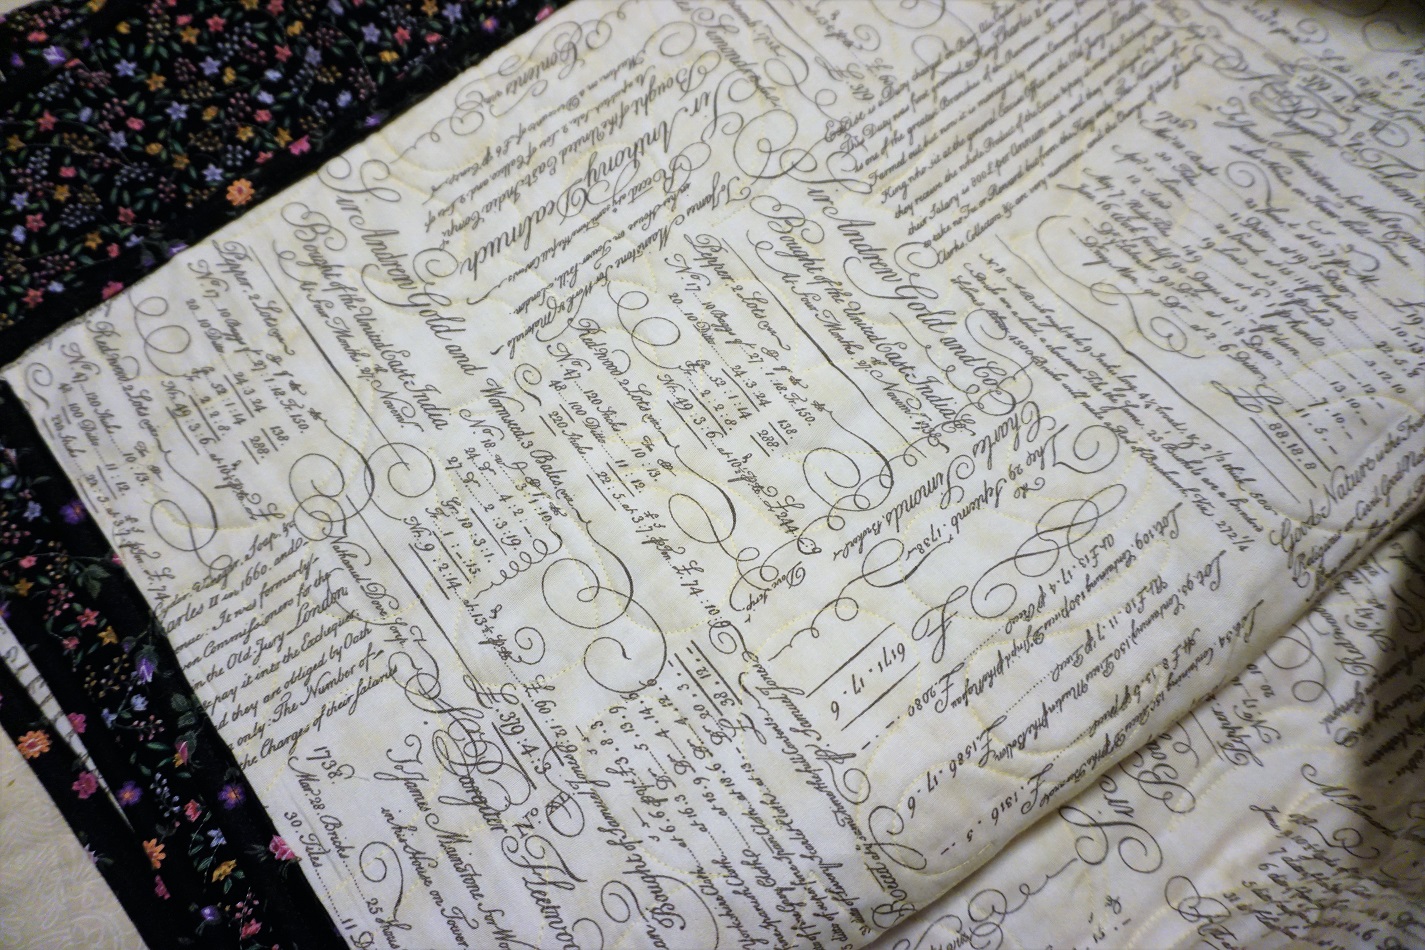
I used a large flower pantograph and pink threads to quilt it. I ended up needing just a smidgen more pink bobbin thread. I use pre-wound bobbins so I couldn't just wind a new bobbin. What to do? What to do?

I suddenly remembered some of my craft supplies in the other room and found a bottle of alcohol ink in the right shade. I dropped ink onto a partial bobbin of white thread and had an instant match! (not shown in the photo).


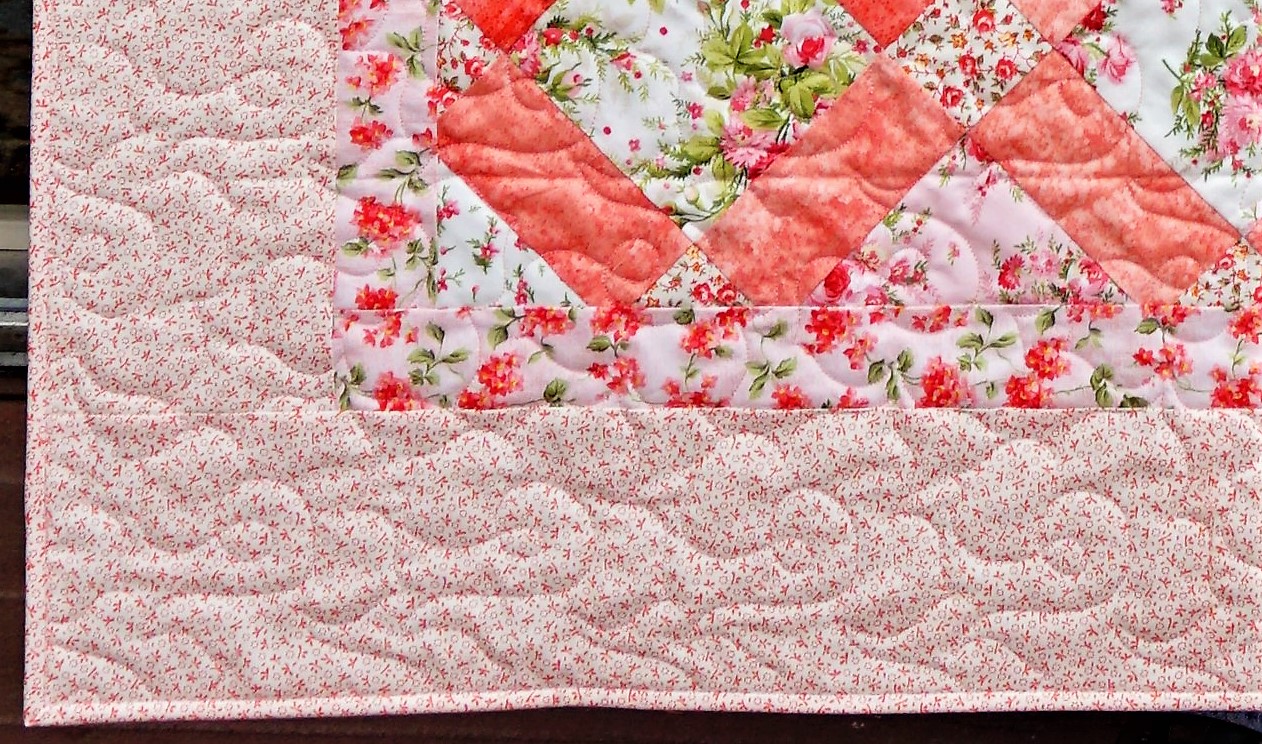
I just eeked out enough of the border fabric to make the binding (with about 18 inches left over). I should have named this quilt 'By the Skin Of My Teeth' !

Ddd


Posted by studio3d@ccgmail.net at 5:41 PM PDT
Thursday, 16 September 2021
Cornrows
Topic: Quilting

I'm working my way through the backlog of quilt tops - taking them to the longarm machine and getting them bound. Today, I finished up this fall-themed number using the Magical Squares pattern again.

I started with a charm pack of fall leaf prints and filled in with other leaf print fabrics from a vendor's sample book that I had picked up at a yard sale. I had the light leaf-print sashing from my sister's stash and the inner border print left over from some other project.


A bonus from my sister's stash was this awesome 'indian corn' print. I used it for the wide border as well as the cornerstones, and it served as the inspiration for the quilt name.


I used a large leaf pantograph in taupe thread. It is such a good match that this is the one area where it shows up well enough to show it to you.


This lap quilt will go to the hospital's Passages program.

Ddd


Posted by studio3d@ccgmail.net at 4:52 PM PDT
Monday, 13 September 2021
Two in June
Topic: Quilting

Back in June I participated in a quilt-along with GE Designs using her 'Hey, June' pattern. Following along online I finished all the blocks for her 'lap size' quilt by the end of the day but then realized it was much too large for my taste so I tore it all apart and split up the blocks based on the value of the browns in them.

I made up my own layout and ended up with two of her 'crib size' for my quilts.

I finally got around to quilting these last weekend and bound them today.


This is truly a pattern I will never make again.

Ddd


Posted by studio3d@ccgmail.net at 6:51 PM PDT
Sunday, 12 September 2021
Shades of Grape
Topic: Quilting

I got this quilt on and off the longarm as well as completing the binding in a single day. I am SO pleased with how it came together.

This is off the same pattern as a couple I finished this spring, Magical Squares. That's the one where the topis pieced on the square of grain then cut on a diagonat and swapped end to ent, cut again on the other diagonal and swapped side to side. When you turn it square again all the blocks are set on point. Then the border is added. 

With this version the most complicated thing was deciding where I wanted each of the shaded blocks to end up and calculating where they needed to be in the original layout to end up there with all the cutting and shuffling.


This was made with a charm pack that was cut from ombre fabric.

The quilting is a pantograph called Blooming Feathers done in lilac thread.


Exactly how I envisioned it!

Ddd


Posted by studio3d@ccgmail.net at 12:01 AM PDT
Friday, 3 September 2021
Maple Wreath Rag
Topic: Quilting

Well, now! If I actually go down to the longarm room and load up a quilt it doesn't take long at all to get it quilted and bound. But I DO have to GO DO IT!

I did get sidetracked on my way to do this one and ended up sorting and cleaning out a drawer of strips and smaller scraps. That done, I got back on track and set to work on quilt number TWO of the 12-quilt line-up.

The original quilt that this is based upon hangs in the library on the campus of Motlow State Community College in Moore County Tennessee. I took a photo of it years ago when I was visiting family and then made up my own directions to recreate it.


In showing it to peers online, I have continual questions about block sizes, unit sizes, Accuquilt dies that could be used... So I wrote a full set of illustrated directions for it giving both Accuquilt and rotary cutting directions in 5 different sizes!

Mine is made entirely of scraps - with a different fabric for each of the leaves.

I used a leaf print for the border and quilted with a feather edge-to-edge pantograph using yellow thread.


For reference in scale, this center block is 15 inches. Entire quilt is 52 inches square.


Still deciding where this quilt will end up.

Ddd


Posted by studio3d@ccgmail.net at 6:50 PM PDT
Tuesday, 31 August 2021
Nebraska In Plane View
Topic: Quilting

Seems like a VERY long time since the last posting. But I have not been idle. I have pieced TWELVE quilt tops but kept setting them aside to longarm later. I have finally come to a point where I felt I needed to set aside piecing and get to finishing up these projects!

The first one to come off the longarm was suggested by my son-in-law – A view of circle irrigation fields in Nebraska as seen from the air. I called it ‘Nebraska In Plane View’.

I used a friend’s Accuquilt cutting die for Drunkard’s Path to do all the cutting from my scraps of greens. I drew up a pattern and pieced the whole top. Then I whacked it apart and inserted a wide bias strip for the river. The road required me to make my own bias tape which I top-stitched along both edges. I created a bridge over the river with stitching, too. The farmhouse and the barn are paper-pieced and I added shading on and around them with alcohol markers.

Once on the longarm, I used green thread to made a variety of patterns of crops. Each border was quilted separately – serpentine for the inner border and leafy vines for the outer border.


Ready for a label and shipping off to my son-in-law - the man with the plan!

Ddd


Posted by studio3d@ccgmail.net at 5:30 PM PDT
Tuesday, 15 June 2021
Rings Around the Posies
Topic: Quilting

Back in February I watched a tutorial from the Missouri Star Quilt Company on a table runner they called 'Lots O Luck' in which four greens and a neutral were used to create interlocking rings.

I thought it would be neat to use that pattern with a black background floral that I had along with four pastels that appeared in the print.

This is made from a single 16" block which is simply turned top to bottom on alternate blocks to create the links. SO COOL!

In stitching the blocks I tried to turn the pink blooms to the outer edges of their area as much as possible so there would no be ones that were hacked in half in the middle of the smaller squares (which are made up of four-patches, nor the large center of the rings (which all have a seam up through the middle.


I had a small print floral in the same colors to use as the border and it is bound with a blue and white polka-dot.

Here you can see the quilting done with a pantograph on the longarm.


Ddd


Posted by studio3d@ccgmail.net at 12:01 AM PDT
Sunday, 13 June 2021
Granny's Parlor
Topic: Quilting

Once upon a time I bought a yardage of fabric with very wide floral stripes and narrower decorative strips. Over time I deconstructed it to use the best of the florals on a quilt (see circled areas on photo).


Then, later, I combined the narrower stripes with other random fabrics to create this quilt (again, see circled areas).


What I was left with was the parts of the wider strips with the less desirable floral areas. I could get 21 squares out of these.

I framed them out with 1" strips of a faded-looking floral that wouldn't draw attention to itself.

These were sashed with a dark green marbled print and set in a 4x5 arrangement (20 total).

The border was selected to pull colors from the blooms in the blocks.


All-in-all I think it looks very old-fashioned - like a vintage couch in a 'granny's parlor' so that led to the naming of it.

I used my domestic machine to quilt with an over-all meander.


To be gifted to hospital's Passages program.

Ddd


Posted by studio3d@ccgmail.net at 12:01 AM PDT
Thursday, 10 June 2021
Hop Skip Jump
Topic: Quilting

I was noodling around a couple of years back and came up with this bunny block pattern based on one I had seen online. I drew ip up in ElectricQuilt7 and LAST year I finally selected fabrics for it - all scraps.

When we had the lo-o-o-o-ng power outage in February, I took fabrics and cutting supplies into one of the rooms with good outdoor light and cut lots of kits for quilts. This was one of those.

At long last, It worked its way to the top of the pile so I got to assembling it. Not as easy as it would seem when matching the joins for pieces that took off at an angle.

But I have prevailed!

I set it 3 x 3 within sashing and bordered it to come up with a 40" baby quilt.


As you can see, there is not a single 'baby fabric' in the lot of them. But it is bright! I backed it with a flannel with confetti dots and quilted with a heart pantograph on the longarm.


This will go to a local non-profit that distributes to new mothers.

Ddd


Posted by studio3d@ccgmail.net at 12:01 AM PDT
Wednesday, 9 June 2021
Summer Dreams
Topic: Quilting

Look at me, all 'quilty' and everything!

I gifted a certificate for Christmas good for one Queen-size quilt. The recipients already had fabrics in mind to use and, remarkably, the palette was the same as the last projects I made: Blue and Yellow (with white).

I got to design the pattern to make the best use of the yardage provided and I added just a bit of light blue and light green to widen the options in the design.

This quilt finished at 90"x102".


Here is a close-up so you can see the quilting with a floral pantograph.


The customer was pleased.

Ddd


Posted by studio3d@ccgmail.net at 12:01 AM PDT
Tuesday, 13 April 2021
Very Complimentary
Topic: Quilting

As a complement to the placemats posted yesterday, the same family member requested the same pattern (Road to Oklahoma) in the same colors (blue and yellow) but designed as a bed runner for a queen bed. This is the first bed runner I have ever made.

On the traditional Road to Oklahoma there is a single block with a diagonal design which, when rotated on alternate blocks, forms the stars and chains. However, it also creates each of the large squares out of a four-patch - a seam right through the middle both ways. I did not find this attractive and also did not want the bulk of all those extra seams.

So, I worked backward from the end product layout and redrafted the pattern to be constructed in two different blocks - a sawtooth star and an uneven 9-patch. I cut all the parts with my Accuquilt using the 8-inch qube.

For assembly, I alternated each of the 9 pairs of blocks (making sure to keep the florals facing the right way) into a long unit and then constructed strips of the outer pieces and sewed them on. Last step - the 3-inch border.

I quilted on the diagonal throughout.


This fits a queen bed.

I had intended to bind in the same dark blue as the border but ran out of that fabric. I used the lighter blue for the binding which emphasizes the star points.

Ddd


Posted by studio3d@ccgmail.net at 10:19 AM PDT
Monday, 12 April 2021
Oklahoma Picnic
Topic: Quilting

Wow, it has been a long time since I posted on the blog! I am generally doing something that warrants posting, like Bible journaling (but I have been doing scripture writing, a devotional and verse mapping rather than artwork in the Bible or a hymnal) or traveling (none of that going on) or quilting (but I have been making tops and setting them aside to do in a batch).

Up to now, I've had nothing finished for posting.

However, I did make a couple of placemats on request. The pattern was already chosen (Road to Oklahoma) as was the palatte (blue and yellow). I used my Accuquilt cutter to make all the parts and the 6-inch qube made it easy.

Because I wanted the design centered on the 12x18 mat, the standard method of making the base block and twisting/turning to create the mat was not going to work. So I broke down the drawn design and cut parts to assemble in columns.

Here are the finished placemats (yes there were only 2, as requested.)

These were quilted in the ditch to maintain their clean look.

Ddd


Posted by studio3d@ccgmail.net at 12:01 AM PDT
Thursday, 11 February 2021
Beside the Still Waters
Topic: Quilting
"Beside The Still Waters"
 
When I went on a retreat to the beach about 3 1/2 years ago we stopped at a little roadside quilt shop (Garibaldi?) where several of us bought panel prints to make quilts. I just decided what I wanted to make with mine.
 
I used it to make a wall hanging with a pattern called Secret Window from Jordan Fabrics. The background fabric is a batik and I also used it on the back.


I quilted with a variegated green thread but found that there were contrasts in the wrong areas so I ‘re-variegated’ it using alcohol markers! Now it blends in better.


I did the quilting on my regular machine and it looks like I am sorely out of practice. In my defense, I was actually trying to follow the margins of the color variations, not trying to make a regular meander.
 
This wall hanging is for me to keep.
 
Ddd


Posted by studio3d@ccgmail.net at 5:16 PM PST
Tuesday, 9 February 2021
Garden Variety Bunnies
Topic: Quilting

I love a good pun or any play on words and often employ them in naming my quilts (in case you hadn't noticed).

Today I finished up this quilt for myself and, because each block is different and most are florals, I named it Garden Variety Bunnies.

This is from a pattern called Country Bunnies and I selected 16 fat quarters that went well together and a whole variety of neutrals for background. The only things that are common between all the elements are the lavender collars on the rabbits, their tails and the dotted cornerstones.


In these couple of closeups you can better see some of the free-motion quilting I did. The outer border is leaves and vines, the sashings are reversing loops, the block backgrounds are meander with a squiggle under the bunny. All of the bunnies are 'outlined' with little scallops facing the inside edge and a looping fill. The tails are filled with swirls.


I selected a lavender sheet to use for the backing (matches the collars on the rabbits) and binding. However, it turned out to be cotton/poly in a strange weave that made it extremely ravel-y. I left the excess batting and backing on the quilt while I secured the binding and then used the serger to overlock the edges while its blade trimmed off the quilt. This was all covered when I turned the binding over to the back and stitched it down. Whew!

First quilt of the year is DONE! Gonna be snuggling under this one tonight.

Ddd


Posted by studio3d@ccgmail.net at 5:11 PM PST
Monday, 11 January 2021
Taking the Lesson to my Bible
Topic: Bible Journaling

All the colored pencil shading and blending I did for online class in the last couple of days culminated in a bible journaling page.

The lesson had us combining the sphere coloring, color blending and use of odorless mineral spirits to create a forest of round trees. I found a place for them in Leviticus.


I added some shadows cast by the tree trunks!

Ddd


Posted by studio3d@ccgmail.net at 12:01 AM PST
Sunday, 10 January 2021
Blending It Out
Topic: Online Class

While I was in the groove from yesterday's class I jumped right in to Lesson 5... Well, that was my intention anyway. Then I discovered that the lesson did not have any worksheets but were intended to use specific stamps. Oh, poo! I don't have any of those stamps.

So I went on the internet and searched for 'how to draw a cartoon bunny' and combined a couple of those to make my own. The trees were simple shapes so I drew those as well. THEN I got to do the coloring we were shown in the class videos.

This lesson was all about blending. I used three colored pencils for each object and blended with odorless mineral spirits.


The final part of this lesson was to do a bible journaling page with the trees, coloring and blending. Since that is a different topic in my blog, I'll share that tomorrow.

Ddd


Posted by studio3d@ccgmail.net at 10:22 PM PST
Saturday, 9 January 2021
Colored Pencil Class
Topic: Online Class

I finally got back into one of the online classes I registered for. This is Colored Pencil Jumpstart and I am up to Lesson 4 - Shading.

First we tackled spheres and eggs, then on to cubes and cylinders. All of them were to learn how to shade differently to demonstrate where the light source was.


Then we learned to identify various shapes in drawings so we could apply the appropriate shading techniques to them to render them in 3D.


Another exercise had us create a 3D colorwheel using shading and blending.


The last worksheet is set up so you can try out lots of color combinations 'just for fun'.


Ddd


Posted by studio3d@ccgmail.net at 12:01 AM PST
Friday, 8 January 2021
Looking Sharp
Topic: Around the House

Over the course of the time we've been in our house we have seen a wide variety of wildlife hanging about. This hawk is fairly relatively new for us and it has taken us about a year and a half to get a realy good photo.

This is a Sharp Shinned Hawk. We had four of them around for a good part of the summer - hunting in the pasture, sitting in the front yard trees eyeing the squirrel feeders, hanging out on the railing of the deck keeping watch over the bird feeder... These birds feed on smaller birds and sometimes small rodents. We have seen them snatching up a chipmunk!

It is difficult to distinguish these guys from the Cooper's Hawk but, based on size and habits, we're pretty sure we've figured it out.


There is a bird feeder just to his right side so I assume he's waiting for his lunch to arrive!

Ddd


Posted by studio3d@ccgmail.net at 12:01 AM PST
Thursday, 7 January 2021
In the Beginning
Topic: Bible Journaling

Welcome to another year on my blog!

This year, in scripture writing, I am planning to focus on the Names/Attributes of God in order as they are introduced in the Bible. This includes Father, Son and Holy Spirit. Thses scriptures will be written in my Happy Planner and will be my activities for Monday through Friday. I am also planning to do Bible journaling pages around some of these scriptures which will happen on random days.

I picked up some of Shanna Noel's devotionals: 100 Days of... and will use those as my Saturday-Sunday activities. These will sometimes involve art pages and be shared here. I haven't decided which of the three books I bought will be the one I use this year.

I also do Verse Mapping which is scheduled once per week, but not assigned to a specific day.

For the first Bible page of the year, I went to Genesis 1:1 and, focusing on the name itself, I shortened the scripture to read "In the beginning... GOD"

I had a piece of clipart from Creative-Bible-Journaling.com as the starting point. I took out their lettering inside the banner and added the same words back in Old English (Gothic) lettering. I hand drew all of this lettering as well as the GOD (same font) for the bottom of the page.

I added more doodles to the original artwork and then traced all of it into my Bible. The black fill for the letters is all with Prismacolor markers and the coloring on the artwork is Prismacolor Premier colored pencils.

Ddd


Posted by studio3d@ccgmail.net at 10:35 PM PST
Thursday, 31 December 2020
Two Magical Squares
Topic: Quilting

Just by the skin of my teeth I finished these last two quilts within the year - bringing the total to 26, a new high for a single year. These also bring the total I will have donated to our hospital to 99 though these won't be delivered to them for a month or so.

I found the pattern for these in a quilting magazine and it was a totally new concept for me. Start with 4o squares and frame them with sashing and cornerstones on two sides. Set them together in a 5 x 8 layout (leave that one side and top without sashing). From the bottom left corner slice at a 45 degree angle to the right side. Take the resulting bottom triangle and stitch it to the top. You now have a trapezoid. Make another 45 degree angle from side to side and sew the resulting triangles together. Magically you end up with a rectangle again but one in which the squares are all set on point.

I changed the pattern by using wider strips for the sashing and ended up with quilts mesuring 50 x 60 inches.

I really don't like to make a project and then start over and make another just like it. So I let these quilt 'grow up together' step by step. They are made from essentially the same supplies although I did run short on the yellow for the inner border and made it pink (matching the sashing) on the other quilt. Everything was cut together, centers stitched one after the other, border one added to both, outer border added to both and placed on the longarm one after the other on one long backing and batting. Then they were bound one after the other.

The first one throughout all the steps was this one - called First Among Equals (for the process of creating identical quilts in tandem). 


With the exception of the yellow cornerstones and border are all from black and blue background calicos and pink daisy fabric from my late sister's stash.

Here's a closeup of the fabrics. It is quilted with a fine yellow thread.

The second quilt I called Save the Last Dance For Me. This was because it was the last one done AND the song was playing on my iPod during the binding process.


The color really isn't as fat as it appears in the photo. Here are the fabrics and you can see the heavier pink thread used for quilting.


The backing was selected to go with the vintage feel of the calicos. It is a parchment colored print with ledger entries in sepia script dated in the 1700s.


That's it! A close to another quilt year in grand fashion.

Ddd


Posted by studio3d@ccgmail.net at 7:12 PM PST

Newer | Latest | Older