« November 2007 »
S M T W T F S
1 2 3
4 5 6 7 8 9 10
11 12 13 14 15 16 17
18 19 20 21 22 23 24
25 26 27 28 29 30
You are not logged in. Log in
Entries by Topic
All topics  «
3D paperwork
A - Z challenge 5
A - Z challenge 7
A - Z challenge round 4
A to Z challenge round 3
A to Z round 2
A to Z round 6
A-Z round 1
Around the House
Art Challenges
Artist Trading Cards
Backgrounds
Beads
Bible Journaling
Books
Boxes
Collage
Color Challenge
Coloring
cookbook
Die Cuts
Digital Projects
Digital Stamps
Drawing
Dry Embossing
Fabric Stuff
Fantastic Folds
Field Trip
Home Decor
How Does Your Garden Grow?
Hymnal Art
In The Kitchen
In the studio
Jewelry
Lettering
Links
Multi-Technique
Music to Work By
Musings
Nail Art
New Work
Online Class
Other Hobbies
Other Projects
Painting
Paper Embroidery
Paper Piecing
Photo
Pretty Paper
Quilting
Random
reading
Scrap Recovery
scrapbooking
Sewing
Sketch Challenge
Some Backlog
Stamping
Stencils
Stickers
Supplies
Teabag Folding
Techniques
Testing
tips and tricks
Tutorial
Web resources
Welcome to my Blog
Work By My Friends
workflow
Writing
Blog Tools
Edit your Blog
Build a Blog
RSS Feed
View Profile
Group One
In & Out of Studio 3D
Thursday, 1 November 2007
Flames of Glory
Now Playing: a little something to light up your life
Topic: New Work

Only a few days till Ladies' Fall Craft Night at church. Here is one of the projects I am teaching.

To make this you need: A large pillar candle in a very light color (white or cream), a napkin with an overall pattern, a sheet of waxed paper, a heat gun.
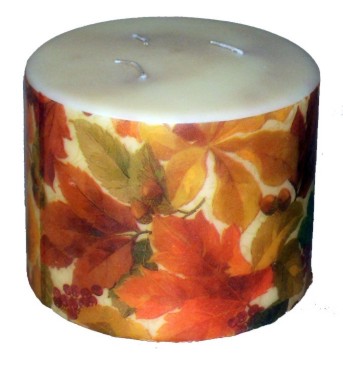
Separate the napkin so you have only the very thin top printed layer. Measure the height of your candle and cut a strip from the napkin the same size. If your piece does not go all the way around the candle, cut another piece (you may have to use a second napkin) to finish encircling it.

Lay the first piece of napkin on the candle, smoothing it to remove any creases and so the top and bottom lay along the edges of the candle. Lay a length of waxed paper over it and pull waxed paper around to the back of the candle holding both ends together so it lays smoothly over the napkin.

Beginning at one end of the napkin use your heat gun to warm the waxed paper. You will see the wax from the paper and the candle melt together and the napkin print will darken. Move on around the candle, melting as you go until you are 'almost' to the end of the napkin.

Wait for the wax to cool and carefully peel away the waxed paper. Lay the other strip of napkin into the blank space, align a NEW piece of waxed paper and complete the melting process. Again, wait for it to cool and remove the waxed paper.

Set aside to cool completely. Then take the leftover napkin (that you peeled away in the beginning) and use it to buff the surface of your candle.

Ddd studio3d@ccwebster.net


Posted by studio3d@ccgmail.net at 6:00 AM PDT
Wednesday, 31 October 2007
Where in the World Are You
Now Playing: Mapping a new strategy
Topic: New Work

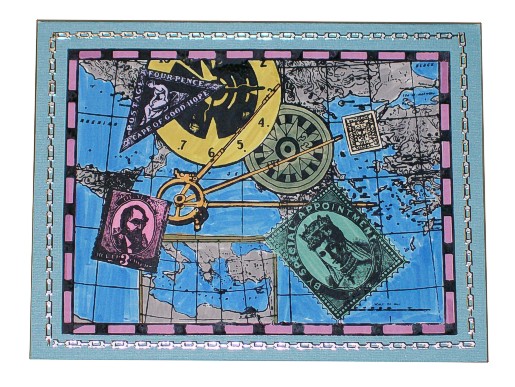
Some rubber stamps just call out to you in the store. This is one I got from the sale bin at a JoAnns a couple of years ago.

I have used it in collage, as a chalked image, colored with markers (here) and colored pencils. I could even use it as a 3D by stamping more than once and using the postage as raised elements. Hmmm, I had better go try that!

Ddd studio3d@ccwebster.net


Posted by studio3d@ccgmail.net at 6:00 AM PDT
Tuesday, 30 October 2007
A New View of Two
Now Playing: seeing double
Topic: New Work

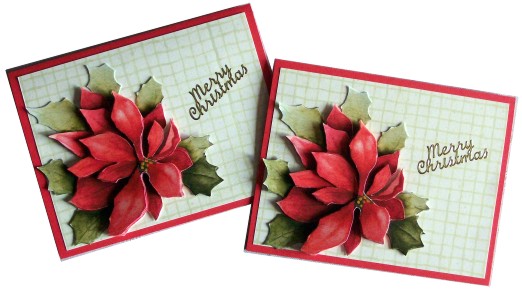
These 3D poinsettias work up so nicely - and I love them because they are quick to cut out, without lots of fussy intricate snipping!

This time I used a plaid  scrapbook paper for background. Thank goodness for peel-offs. It allows me to put a greeting on a finished card without fear of 'ruining it'!

Ddd studio3d@ccwebster.net


Posted by studio3d@ccgmail.net at 6:00 AM PDT
Monday, 29 October 2007

Topic: New Work

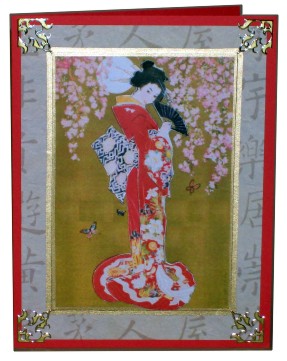
Oh I love the sites that make 3D images for us to download and print for free! From one I made up this lovely geisha. She prints out with her own background which makes for a nice card without searching for all the accompaniments necessary.

Gold Krylon paint pen is used to border the illustration. I did add a Japanese text print paper as a border and gold peel-off corners.

Ddd studio3d@ccwebster.net


Posted by studio3d@ccgmail.net at 6:00 AM PDT
Sunday, 28 October 2007

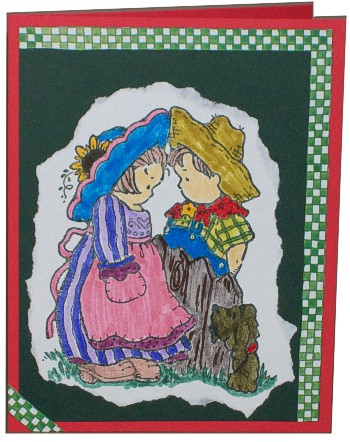
I pulled out another stamped image sent by a friend and colored it with markers. This one is of a couple of adorable farm kids. I tore out the image after coloring an mounted on green paper to match the green checkerboard sticker strip I chose for the border.

Ddd studio3d@ccwebster.net


Posted by studio3d@ccgmail.net at 6:00 AM PDT
Saturday, 27 October 2007
Hats Off To You
Now Playing: a not-quite random gluing of things around the studio
Topic: New Work

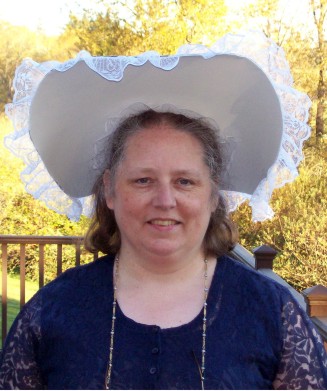
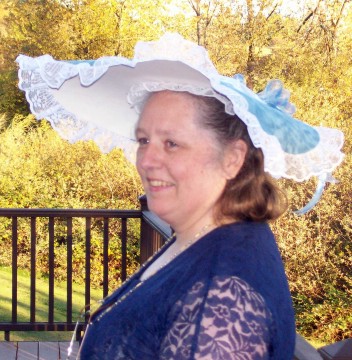
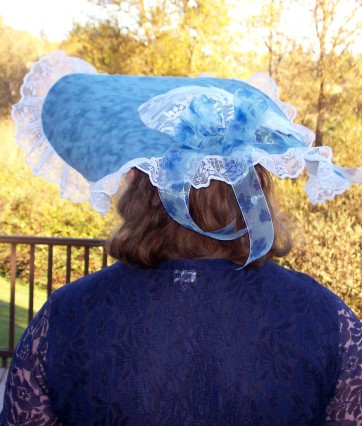
I attended a ladies tea last night. The invitations said "hats encouraged." Not being a 'hat person' I did not have one to wear so earlier in the week I made my own.

The brim is constructed of 300 lb watercolor paper. I made the crown of suede covered paper and shaped it by creating darts with my sewing machine. A lace overlay on the crown is from a drapery sample book. The brim was trimmed out with a 2" lace and then the entire brim was covered with the blue suede paper.

I finished it all off with some silk flowers and a triple bow of blue organza ribbon. Everything is held together with Crafter's Pick The Ultimate glue. (I ended up lining the inside edge of the crown with more lace so I could use it to pin the hat to my hair and hold it on securely)

Here is me modeling it before going to the event.

Ddd studio3d@ccwebster.net


Posted by studio3d@ccgmail.net at 6:00 AM PDT
Friday, 26 October 2007
Simple pleasures
Now Playing: head for the hills
Topic: New Work

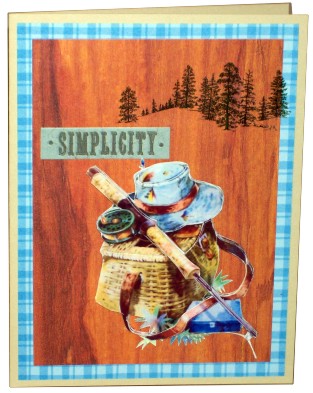
Here's another good card for that guy you know. From my favorite 3D site comes this stack of fishing equipment. I mounted it on cardstock with a wood print and added the forest treeline with rub-ons.

The text sticker is from a sheet I had on hand and really sums it up.

Ddd studio3d@ccwebster.net


Posted by studio3d@ccgmail.net at 6:00 AM PDT
Thursday, 25 October 2007
You Can Do It
Now Playing: and its worth all the work
Topic: New Work

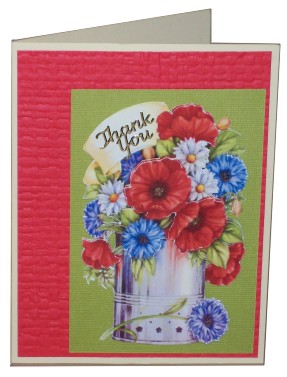
This 3D of a can full of poppies always makes me smile. I think it is nice that it is designed with the little banner at the top to hold a greeting as well.

There are LOTS of frilly little edges to cut on this piece, for every layer, but the end result is worth it.

Ddd studio3d@ccwebster.net


Posted by studio3d@ccgmail.net at 6:00 AM PDT
Wednesday, 24 October 2007
Have a Cuppa?
Now Playing: Tea in 3D
Topic: New Work

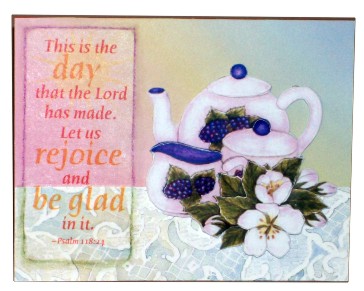
I'm attending a ladies tea this week so this card just seemed to fit.

The tea set is a 3D from one of my favorite websites for them. I had some rainbow paper and covered the lower portion with a scrapbook paper in lace print.

The text block is a vellum sticker (from the dollar store, again). After applying it I colored a line with watercolor pencil - one color above the lace and another on the lace.

The last step was to use a watercolor brush with just a hint of water to bleed out the colored pencil.


Ddd studio3d@ccwebster.net


Posted by studio3d@ccgmail.net at 6:00 AM PDT
Tuesday, 23 October 2007
How to Make a Thingmagig or Whatsamabob
Now Playing: patterns for stuff you never knew you needed
Topic: Web resources

The webhosts of www.freepatternsite.com have researched all over the web and brought together an index of free patterns for all sorts of crafts.

They present them in the categories of: Applique, Basketry, Beading & Jewelry, Candlemaking, Children's Crafts, Crochet, Cross Stitch & Embroidery, Doll Patterns, Floral & Decorating, Holiday Crafts, Knitting, Metalworking, Mosaic, Needlepoint, Origami, Plastic Canvas, Pottery & Ceramics, Quilting, Rubber Stamping, Scroll Saw, Sewing, Stained Glass, Stenciling, Tatting, Tole, Weaving, and Woodworking.

Scroll all the way to the bottom for General Craft Resources and for Other Interesting Craft Sites, links to other craft directories and places to sell your crafts.

There are well over 200 links to explore. You may not find a free pattern for what you went looking for, but odds are you'll find a free pattern for something that interests you on this site.

Ddd studio3d@ccwebster.net


Posted by studio3d@ccgmail.net at 6:00 AM PDT
Monday, 22 October 2007
Fly Away
Now Playing: stitching a frame for focus
Topic: New Work

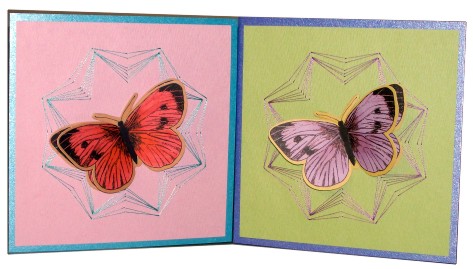
Sometimes the stitching on a card is not meant to be the focus, but an enhancement of some other feature. I don't do very many of these.

However, in my files I found this geometric frame created by Regina from Brazil. I stitched it on a square card (also not a common thing for me) and chose a printed diecut of a butterfly to be the central theme.


I used two butterflies on top of one another on each card. The lower one is mounted flat to the card. The upper one has the wings bent up at the body and they are held in that position using silicon.

Ddd studio3d@ccwebster.net


Posted by studio3d@ccgmail.net at 6:00 AM PDT
Sunday, 21 October 2007
Kitty Bling
Now Playing: using up the scraps
Topic: Some Backlog

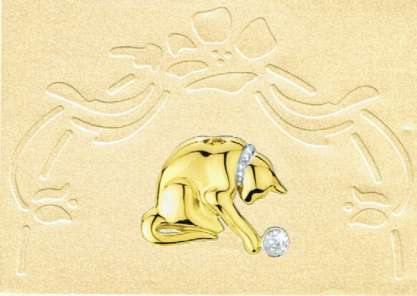
Here's another card I made using a jewelry catalog illustration. With great lighting their photograph makes this piece look very 3-dimensional. I did the embossing using Fiskars Shape-Boss.


Ddd studio3d@ccwebster.net


Posted by studio3d@ccgmail.net at 6:00 AM PDT
Saturday, 20 October 2007
Going in Circles
Now Playing: just stringing you along
Topic: New Work

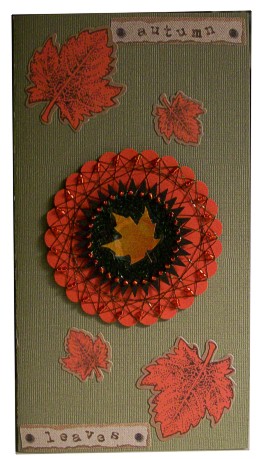
As a swap assignment I had to make a beaded spirelli card. This is NOT my favorite technique to do but I perservered and this is the card I came up with.

 I used some of the flat metallic Sulky for the winding and mounted the circles with separation between to make it dimensional. The center is a clear leaf sticker while those on the card are printed die-cut.

Fabric text stickers finish off the top and bottom.

Ddd studio3d@ccwebster.net 


Posted by studio3d@ccgmail.net at 6:00 AM PDT
Friday, 19 October 2007
So Faux, So Good
Now Playing: two polymer clay resources
Topic: Books

I recently picked up two books on polymer clay, both of which teach faux techniques.

The Art of Polymer Clay Creative Surface Effects (Watson-Guptill, 2007, ISBN 0823103626) by Donna Kato uses transfers, stamps, stencils, ink, paint, and more to treat the surface of polymer clay projects. In doing so she manages to mimic other mediums such as carved wood, metals, and fabulous stones.

Irene Dean' Faux Surfaces in Polymer Clay (Lark, 2005, ISBN 1579907512) creates the look of marble, scrimshaw, mother of pearl, malachite, leather, cork, pewter, and many precious stones.

These two books teach totally different styles but the results of either will be stunning.

Ddd stucio3d@ccwebster.net


Posted by studio3d@ccgmail.net at 6:00 AM PDT
Thursday, 18 October 2007
Tough as Leather
Now Playing: distressing ink makes a manly card
Topic: New Work

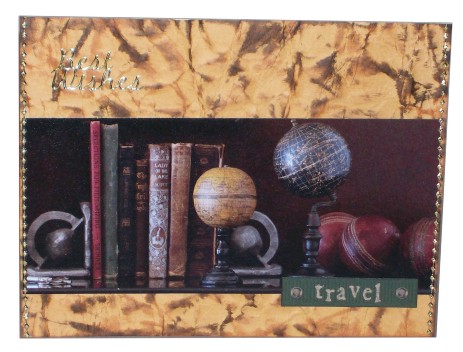
This card started with a piece of cream paper which I wrinkled up and smoothed while leaving ridges on the surface. I used Ranger Industries distressing ink pad and brushed it over the raised ridges. Then a spritz with water makes the ink run and finally it is ironed to dry and flatten it.

I had a neat magazine clipping of the books and globes that I added along with a text sticker at the bottom. The side edges are trimmed out with silver peel-offs and a greeting with silver peel-off at the top.

Ddd studio3d@ccwebster.net


Posted by studio3d@ccgmail.net at 6:00 AM PDT
Wednesday, 17 October 2007
Bordering on Beautiful
Now Playing: getting framed
Topic: New Work

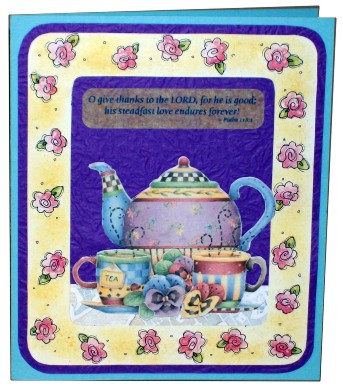
This card has already been shown on one of my groups because it was for a challenge. We were assigned to make a card using a frame.

The border on this card is from a scrapbook sheet that is printed with nested frames in coordinated patterns. I used it for showcasing a 3D cutting of a teaset.

A bit of scrapbook paper with a lace print was used on the bottom portion to serve as a 'tablecloth' for the teaset to rest upon.

The text block is a scripture on a vellum sticker.

Ddd studio3d@ccwebster.net


Posted by studio3d@ccgmail.net at 6:00 AM PDT
Tuesday, 16 October 2007
I'm Falling for Autumn
Now Playing: some 'on the road' stitching stickers
Topic: New Work

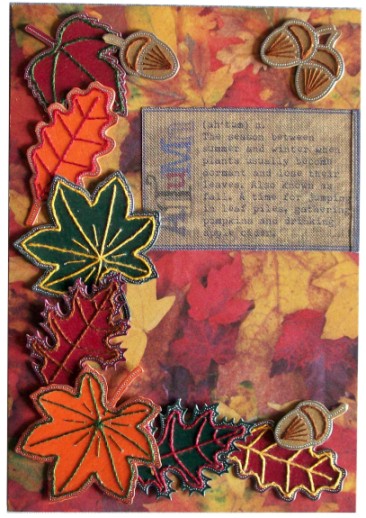
A gift of stitching stickers led to this card. I first stuck each to a colored cardstock and stitched with a single strand of regular embroidery floss. Each was then cut out and I mounted on a card covered with a leaf-print scrapbook paper. The mounting was done using silicone to allow for the depth of the stitched stickers.

A fabric text sticker with the definition of autumn is the finishing touch for this card.

Ddd studio3d@ccwebster.net


Posted by studio3d@ccgmail.net at 6:00 AM PDT
Monday, 15 October 2007
The Magic is Back
Now Playing: such a neat technique
Topic: New Work

I am intrigued by the results of a magic card. Even ones I make myself are fascinating to manipulate - making the image become colorized then black-line only - over and over again.

This is the version that I created today for an assignment.


I was only required to make a single card, but had all the parts so made up three altogether while I was at it. 

Ddd studio3d@ccwebster.net


Posted by studio3d@ccgmail.net at 6:00 AM PDT
Sunday, 14 October 2007
Emboss and Stitch
Now Playing: my new stencil
Topic: New Work

I got a new stencil from a friend that allows for embossing as well as stitching. It is a very free-flowing design.

Now, the problem is I chose a cardstock that was too thick to see through on the lightbox so I had to 'feel around' for the indentations and got discouraged partway through. This is only about 2/5 of the whole stencil.

Next time I'll test the card before I start!

Ddd studio3d@ccwebster.net


Posted by studio3d@ccgmail.net at 6:00 AM PDT
Saturday, 13 October 2007
Peel and Stick
Now Playing: stickers are my friend
Topic: New Work

Isn't this a beautiful dollar store sticker? I've used another of my gift Cuttlebug backgrounds.

The embossed circles reminded me of snowflakes.

Ddd studio3d@ccwebster.net


Posted by studio3d@ccgmail.net at 6:00 AM PDT

Newer | Latest | Older