« July 2024 »
S M T W T F S
1 2 3 4 5 6
7 8 9 10 11 12 13
14 15 16 17 18 19 20
21 22 23 24 25 26 27
28 29 30 31
You are not logged in. Log in
Entries by Topic
All topics
3D paperwork
A - Z challenge 5
A - Z challenge 7
A - Z challenge round 4
A to Z challenge round 3
A to Z round 2
A to Z round 6
A-Z round 1
Around the House
Art Challenges
Artist Trading Cards
Backgrounds
Beads
Bible Journaling
Books
Boxes
Collage
Color Challenge
Coloring
cookbook
Die Cuts
Digital Projects
Digital Stamps
Drawing
Dry Embossing
Fabric Stuff
Fantastic Folds
Field Trip
Home Decor
How Does Your Garden Grow?
Hymnal Art
In The Kitchen
In the studio
Jewelry  «
Lettering
Links
Multi-Technique
Music to Work By
Musings
Nail Art
New Work
Online Class
Other Hobbies
Other Projects
Painting
Paper Embroidery
Paper Piecing
Photo
Pretty Paper
Quilting
Random
reading
Scrap Recovery
scrapbooking
Sewing
Sketch Challenge
Some Backlog
Stamping
Stencils
Stickers
Supplies
Teabag Folding
Techniques
Testing
tips and tricks
Tutorial
Web resources
Welcome to my Blog
Work By My Friends
workflow
Writing
Blog Tools
Edit your Blog
Build a Blog
RSS Feed
View Profile
Group One
In & Out of Studio 3D
Wednesday, 11 October 2023
Craft Fair - Collage Under Glass Jewelry
Topic: Jewelry

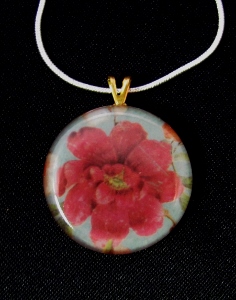
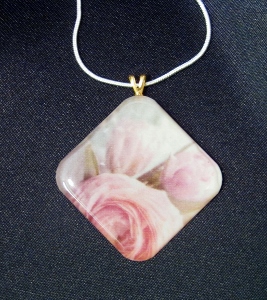
In a drawer labeled 'Other Projects' I found a couple of boxes of microscope slides I used to make jewelry long ago (notice how I cycle through different materials and processes over the years). One box was the standard 1 inch x 3 inch glass and one box was 1 1/2 inch squares.

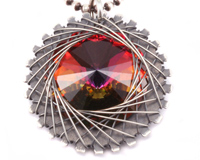
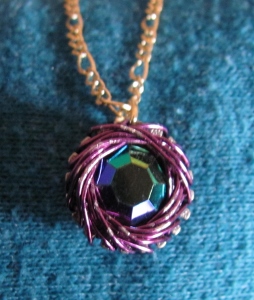
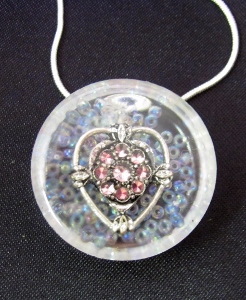
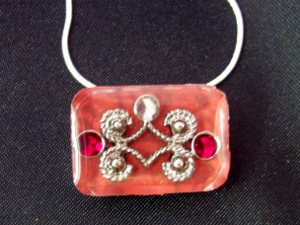
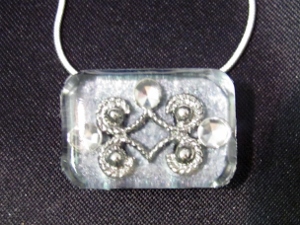
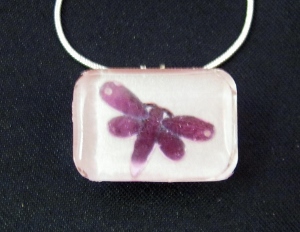
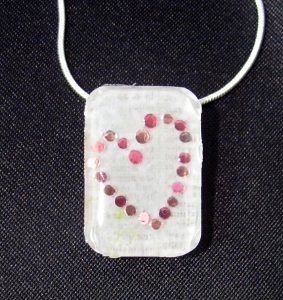
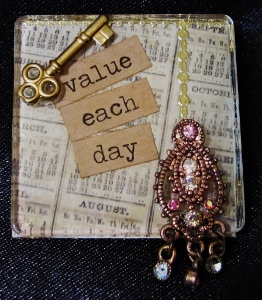
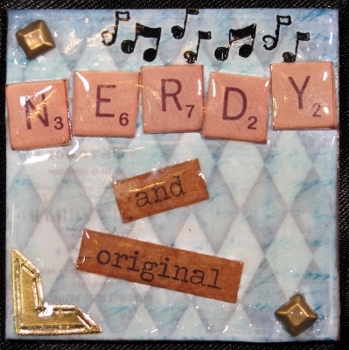
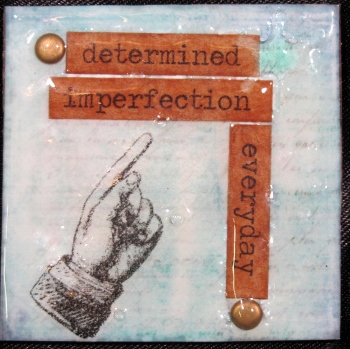
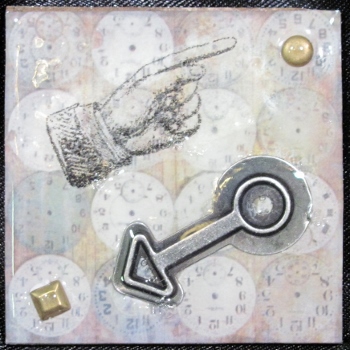
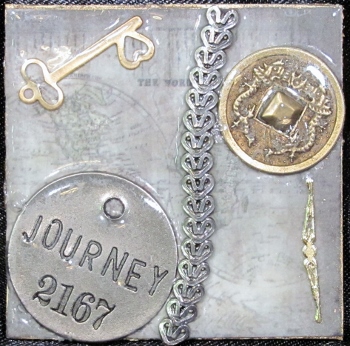
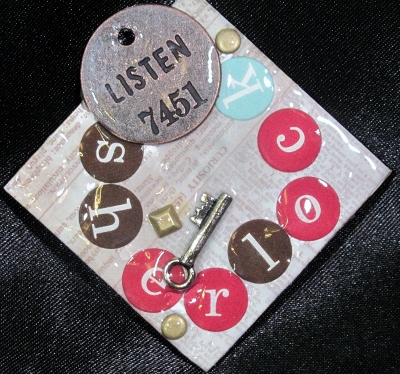
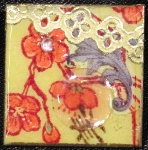
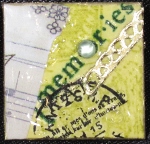
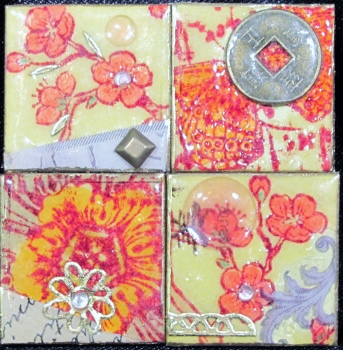
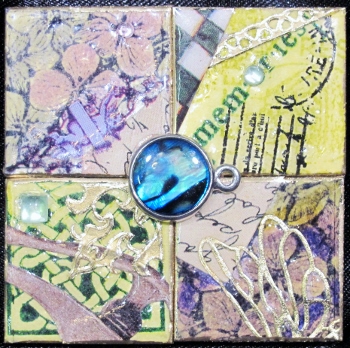
I created miniature collages and sandwiched them under glass. I had metal tape to bind the edges (silver, copper and bronze). 

The faces of the collages are decorated with metallic stickers and/or charms applied with E6000 glue. 

9 of these have pin back and bail combination units so the piece can be worn as a necklace or a pin.

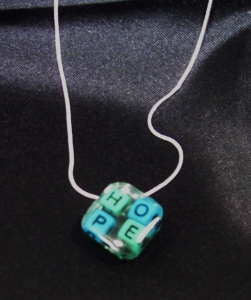
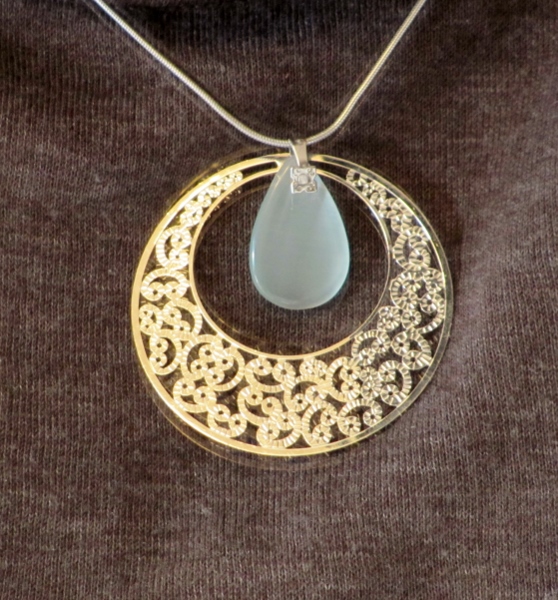
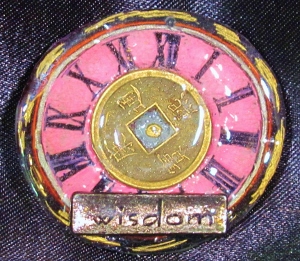
For 3 of the square ones I had metal frames for them to fit into (rather than the metallic tape) and these had a single loop for a bail to clip onto. 

All of the pieces have a chain included.


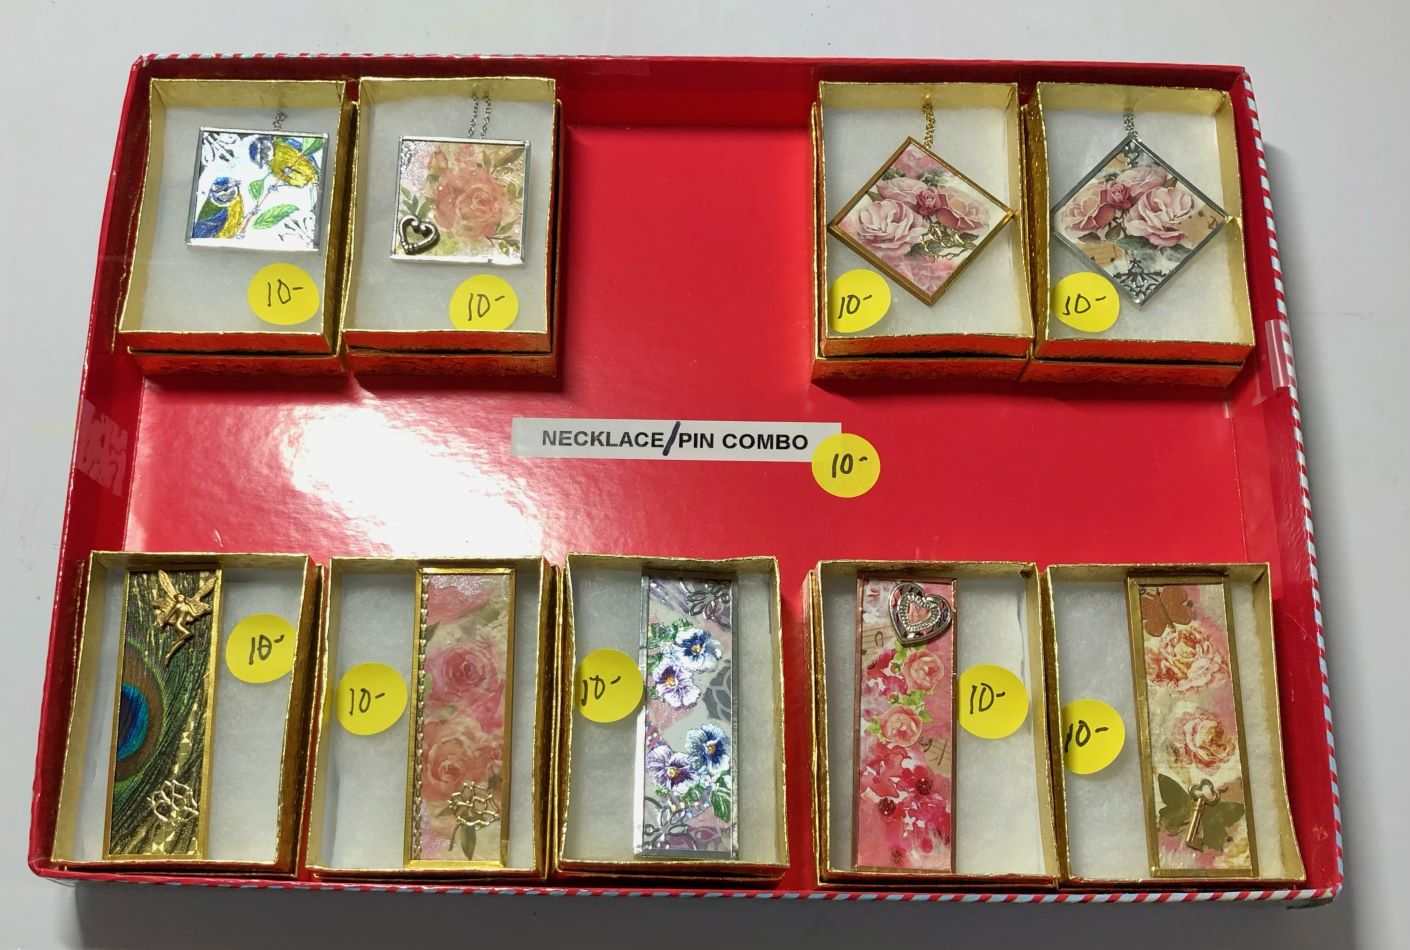
These will all be sold for $10.

Ddd


Posted by studio3d@ccgmail.net at 3:13 PM PDT
Saturday, 17 March 2018
Beady, Beady, Beady
Topic: Jewelry

I attended the Sewing and Stitchery Expo in Puyallup Washington again this year, the first three days of March.

This year I decided to ONLY take classes that let me do hands-on creating. I ended up with 5 classes over three days (one full day and two half days).

I have not completed all my projects but will be posting each as those finishes happen (except for the one that I was so disgusted with that I threw it in the trash when I got home). So I will have a total of 4 art projects to share.

Today, I am very proudly showing a beaded bracelet. We paid for a kit of materials from the instructor and brought our own tools.

Without a clue what I was doing I was able to follow the wonderfully presented instructions and complete and attach three links for the start of my bracelet. The rest I finished at home this week, including the attachment of the clasp.

Here are some various views of my project:


One important thing this taught me was reading of the diagrams for beading that I've been looking at in the beading magazines for years. I feel like I could actually do a project from one of those articles with what I know now.

One thing I DO know is that I will be watching for this instructor in future years as I definitely liked her teaching style and her design asthetic.

Ddd


Posted by studio3d@ccgmail.net at 9:16 PM PDT
Monday, 3 April 2017
Frosty's All Buttoned Up
Topic: Jewelry

I ended up in the craft studio today (as opposed to the quilt studio) to put new clasps on some necklaces that were too hard to fasten with older fingers. They all got changed to magnetic clasps.

Then I had some charms to add to my charm bracelet and a clasp to swap out on a second one.

I had some fun on a project that I can't show until it is gifted and then I picked up a page I had copied from a recent craft magazine and decided to make one of the items they showed.

I dug out the button box and sorted until I found just the right sizes and colors. Then I pulled out the jewelry tools and some wire. The wire was bent into a long loop and the buttons threaded on using two holes in each one.

At the top, I wrapped one wire end around the other and then created a loop.

A snippet of checked ribbon was tied in a knot around the narrowest part and details were added with Sharpie markers.


These are so stinkin' cute! I'm adding chains to make them into necklace pendants.

Ddd


Posted by studio3d@ccgmail.net at 6:23 PM PDT
Tuesday, 5 April 2016
Charm Cuff
Topic: Jewelry

When I ran into a particularly long wait time at the fabric cutting counter in Joann Fabrics I had time to wander up and down Every.Single.Aisle. and it STILL wasn't my turn yet.

However, I had plenty of time to paw through the closeout bins at the ends of aisle and found some great bargains. One of my scores was these cuff bracelets with screw-off endcaps allowing one to add large beads and charms. I got one for $1.49 as well as a package with two gold ones, and some different styled wrap-around ones.

The charms they were selling were hideous so I brought home just the bracelets.

For this one I added some square beads with symbols and initials, silver spacer rings and charms on jump-rings.


Ready for a birthday coming up next month.

Ddd


Posted by studio3d@ccgmail.net at 12:01 AM PDT
Thursday, 12 February 2015
Sprocket Gem
Topic: Jewelry

Weekday mornings I watch four arts and crafts shows on OPB+ (Oregon Public Broadcasting). They range from painting to quilting, scrapbooking to crochet, and sewing to jewelry. One of these is Beads, Baubles and Jewels.

A while back I viewed an interesting project that used a large rhinestone, thin wire and a sprocket. It looked interesting to try.

Here’s a photo of a pendant she made. It is about one inch across.

There is a YouTube video of the project here.

I looked through my supplies and found that: 1) I had no sprockets – so I bought some but the store only had the mini size. 2) My rhinestones were much flatter than theirs and 3) my wire was thicker and I only had colored wire.

I soldiered on; doing the best I could with the supplies I had and came up with a ‘passable’ version. Here is my pendant:


Mine is actually about 1/2 inch across. I'd like to try this again with the proper materials but it's not worth it to me to actually go buy new product just to give it a go.

So I will have to live with this one.

Ddd


Posted by studio3d@ccgmail.net at 12:01 AM PST
Sunday, 6 April 2014
Last Look
Topic: Jewelry

The last project with the first round of resin is this pendant made with a floral scrapbook paper and a round punch.

I used the doming technique to make a simple disk.

This one has the gold bail visible. I only had a silver chain on hand for photography, though.

Ddd


Posted by studio3d@ccgmail.net at 12:01 AM PDT
Saturday, 5 April 2014
Domed Roses
Topic: Jewelry

One of my 6x6 scrapbook paper pads had a sheet of romantic-looking rose illustrations in little squares. I cut one of these out and used a corner rounder to soften the edges.

I used only doming on this project - no mold. The resin is poured directly on the surface and allowed to self-level right out to the edges. Surfact tension keeps it from pouring over the edges.

I decided to mount this one on angle and did so with E6000 glue and a gold pail.

Love this!

Ddd


Posted by studio3d@ccgmail.net at 12:01 AM PDT
Friday, 4 April 2014
Charming Heart
Topic: Jewelry

This parking lot find was a silver heart charm set with pink stones. I used a larger mold and first dropped pink seed beads into the resin. Then I cut the loop off the top of the charm and embedded it in the resin.

This was domed after curing and removing from the mold. A bail was attached with E6000 glue.

Ddd


Posted by studio3d@ccgmail.net at 12:01 AM PDT
Thursday, 3 April 2014
Scrappy Red
Topic: Jewelry

Another piece of the 'found in the parking lot' filigree contained red stones instead of clear. So I used a red scrapbook paper for the background but otherwise treated it just like the silver one.

Also domed after curing.

Ddd


Posted by studio3d@ccgmail.net at 12:01 AM PDT
Wednesday, 2 April 2014
Scrap Silver
Topic: Jewelry

When I went looking for things to embed in the resin I found a lot of pieced of broken jewelry that I have found in parking lots over time. One I liked a lot was a filigree piece with set stones.

I cut scrapbook paper for a background and pressed it into the resin in the mold. Then the scrap piece was added and resin poured in to cover it. Doming was done after the piece was cured and removed from the mold.

I have no idea why these gems look right when the self-adhesive rhinestones do not.

Ddd


Posted by studio3d@ccgmail.net at 12:01 AM PDT
Tuesday, 1 April 2014
Rhinestone Dragonfly
Topic: Jewelry

Just as the round rhinestones looked flattened in yesterday's project, so the rhinestone dragonfly does today. Very shiny - very flat. NOT cool!

This was also cast in a mold and domed after it had cured. E6000 used to attach a bail.

Ddd


Posted by studio3d@ccgmail.net at 12:01 AM PDT
Monday, 31 March 2014
Flattened Rhinestones
Topic: Jewelry

In experiment with the Little Windows product I wanted to try out embedding rhinestones as I thought that would give a lot of sparkle. Um... not so much. For some reason the view through the resin interferes with the refraction of light and the result looks like little shiny disks instead of sparkling rhinestones. What a disappointment!

I used a mold and embedded a set of adhesive rhinestone set into a heart pattern.


I used a scrapbook paper with faint text as a background for this pendant.

Ddd


Posted by studio3d@ccgmail.net at 12:01 AM PDT
Sunday, 30 March 2014
Little Windows Resin
Topic: Jewelry

When I was at the Sewing and Stitchery Expo at the end of February I visited a vendor I had seen the year before. I watched their schtick and decided I needed to try out the product for myself.

I have been seeing a lot of chatter about Ice Resin and had contemplated trying that out. However, here at my fingertips was a product called Little Windows so I went with that. This is the beginning kit plus two sets of molds and extra resin compound:

There are two ways of using the product - casting in molds and doming flat surfaces.  I selected some seed beads, broken jewelry parts, letter beads, scrapbook papers and rhinestones to use in my first attempts.

The resin is mixed in a 2:1 ratio for 2.5 minutes before using. It is poured and then allowed to cure for 24 hours or more.

I started with some letter beads set into one of the small square molds. I was going for a rif on the LOVE block but didn't have all the letters. So I switched up to HOPE instead. The beads unfortunately drifted apart during the curing time so it wasn't as neat as I envisioned.

After it was removed from the mold I used the doming technique to finish off the front surface.

I used E6000 glue to attach a bail on the back corner. The resin is completely clear so the block will allow whatever garment it is worn against to show through the center and edges.

I also bought the materials to make faux dichroic glass but have not tried it out yet:

You can see their website at http://www.little-windows.com/

Ddd


Posted by studio3d@ccgmail.net at 12:01 AM PDT
Sunday, 1 December 2013
Finders Keepers
Topic: Jewelry

A couple of weeks ago my mom spied a dangle earring in a parking lot and gave it to me for crafting. I immediately remembered a stone charm at home from who-know-where and could imagine them combined.

The charm had a bail on it already and that had a long upright shank. No idea what it was designed for but I took some small round-nosed pliers and created a loop out of it. This was used to link onto the hole in the earring where I had removed the ear wire.


I just added a silver chain and it was ready to wear.

The ghost image is from taking the photo in the mirror.

Ddd


Posted by studio3d@ccgmail.net at 12:01 AM PST
Tuesday, 12 November 2013
Stitching Up A Bracelet
Topic: Jewelry

I ran across the most darling charms at the fabric store and bought several that carried the theme of quilting. A link bracelet was available, too, and every one of the charms came with a snap-link to attach it with.

I put this together as a gift in about 15 minutes.


I had the pink heart stone charm already on hand and added that to the dangle to say "I love quilting" when combined with the charm of the quilt block.

Very reasonable pricing on all the parts, too.

Ddd


Posted by studio3d@ccgmail.net at 12:01 AM PST
Monday, 23 September 2013
Joint Efforts
Topic: Jewelry

My niece was here for a crafting day recently and we got distracted by shiny objects... One thing led to another and we found ourselves making pins. I should say SHE was making pins, I was making A pin!

We used davy board as the base for most of them and added in liberal amounts of old inchies, charms, stickers, rub ons, gold trim, coins, rhinestones, nail head stickers, patterned paper, jewelry findings, old chain, old broken jewelry, addage tags, metal embellishments, shrinky dinks, bottle caps, and tissue tape. While I made my one pin, she finished twelve.

This is mine which has a plexiglass top on it and then a key charm and a broken earring fixed to the front. It is 1 1/2 inch across. They all have pin backs on them - held with E6000 glue.


Her collection is quite eclectic. Steampunk, Sherlock Holmes and Vintage are more her style. Most of hers were sealed with two to three coats of UTEE. These squares are all 2 inch.


These two are some inchies I had left over from 2008.


Then she made a couple of companion pieces by combining four inchies on each base.


This one was made from an old shrinky ding charm I had that someone gifted to me.


For this one we flattened a bottle cap as the base.


Can you tell we had tons of fun?

Ddd


Posted by studio3d@ccgmail.net at 12:01 AM PDT
Saturday, 11 May 2013
That Really Pushed My Buttons
Topic: Jewelry

Notice how one thing just leads to another? Well, I had the jewelry findings drawer out and I had the button drawer still out and I spied a package of pastel buttons in three sizes. Add in some beads as spacers and I created a casual, playful band for the medical ID bracelet.


I designed it to have colored buttons facing out and the crea-colored ones facing in. I used beads in the spaced between the holes on the colored button fronts. 

Ddd


Posted by studio3d@ccgmail.net at 12:01 AM PDT
Updated: Thursday, 9 May 2013 10:20 PM PDT
Friday, 10 May 2013
Pearl Band
Topic: Jewelry

When I was sidetracked yesterday, I was really just looking for the lobster-claw clasps to construct this project.

I found these free-form black pearls on discount for .97 cents. I wanted to make another band for the medical alert bracelet and these seemed like a good choice. All I needed was 2 clasps, stretchy beading cord, and 2 crimp beads.

This will dress up my utilitarian band and I will wear it with my black pearl necklace.

Ddd


Posted by studio3d@ccgmail.net at 12:01 AM PDT
Thursday, 9 May 2013
When The Stars Come Out
Topic: Jewelry

I went looking through my jewelry findings drawer for something and had to take a baggie off the top first. As I spied the contents I suddenly had an idea and the original project got sidelined. What? Like that never happens to you?

Anyway, the contents of the baggie were these wire stars that were wire-wrapped. I used jumprings to attach them together. I also attached some spare chain to the back to make it long enough and gave it a lobster claw clasp. Ooh ooh ooh - I spied in the front of another clear drawer some star-shaped buttons. I had the idea to encase them inside the wire stars, which took some doing because they were just a bit too big. Some manovering of the wire wrap was required and then I used some flat-nosed pliers to clamp the wrap flat so the buttons could not shift around or escape.

I like this a lot!

Ddd


Posted by studio3d@ccgmail.net at 12:01 AM PDT
Sunday, 6 May 2012
Puttin' On the Glitz
Topic: Jewelry

On the way from the fabric side of the craft store to the papercrafting side I walked right through the beads and jewelry area. Oh, BIG MISTAKE! They had a bunch of stuff on clearance. I got sucked right in.

I picked up several packages of coordinating styles and sorted them into two equal piles of beads. I had also picked up a beading design board on sale at the same time and I used it to lay out double rows of symetrical strands. Since they did not have two of the same 'charms' I got slightly different looks. I used the leftovers to create dangle earrings for them, each quite different.

Here is the first one I made:


And here it is laid out with the earrings


This is the second one


And with its earrings

I had fun making these jewelry sets. Now I have to decide which one to keep and which to put aside for a a gift.

Ddd


Posted by studio3d@ccgmail.net at 12:01 AM PDT

Newer | Latest | Older