« March 2014 »
S M T W T F S
1
2 3 4 5 6 7 8
9 10 11 12 13 14 15
16 17 18 19 20 21 22
23 24 25 26 27 28 29
30 31
You are not logged in. Log in
Entries by Topic
All topics  «
3D paperwork
A - Z challenge 5
A - Z challenge 7
A - Z challenge round 4
A to Z challenge round 3
A to Z round 2
A to Z round 6
A-Z round 1
Around the House
Art Challenges
Artist Trading Cards
Backgrounds
Beads
Bible Journaling
Books
Boxes
Collage
Color Challenge
Coloring
cookbook
Die Cuts
Digital Projects
Digital Stamps
Drawing
Dry Embossing
Fabric Stuff
Fantastic Folds
Field Trip
Home Decor
How Does Your Garden Grow?
Hymnal Art
In The Kitchen
In the studio
Jewelry
Lettering
Links
Multi-Technique
Music to Work By
Musings
Nail Art
New Work
Online Class
Other Hobbies
Other Projects
Painting
Paper Embroidery
Paper Piecing
Photo
Pretty Paper
Quilting
Random
reading
Scrap Recovery
scrapbooking
Sewing
Sketch Challenge
Some Backlog
Stamping
Stencils
Stickers
Supplies
Teabag Folding
Techniques
Testing
tips and tricks
Tutorial
Web resources
Welcome to my Blog
Work By My Friends
workflow
Writing
Blog Tools
Edit your Blog
Build a Blog
RSS Feed
View Profile
Group One
In & Out of Studio 3D
Sunday, 30 March 2014
Little Windows Resin
Topic: Jewelry

When I was at the Sewing and Stitchery Expo at the end of February I visited a vendor I had seen the year before. I watched their schtick and decided I needed to try out the product for myself.

I have been seeing a lot of chatter about Ice Resin and had contemplated trying that out. However, here at my fingertips was a product called Little Windows so I went with that. This is the beginning kit plus two sets of molds and extra resin compound:
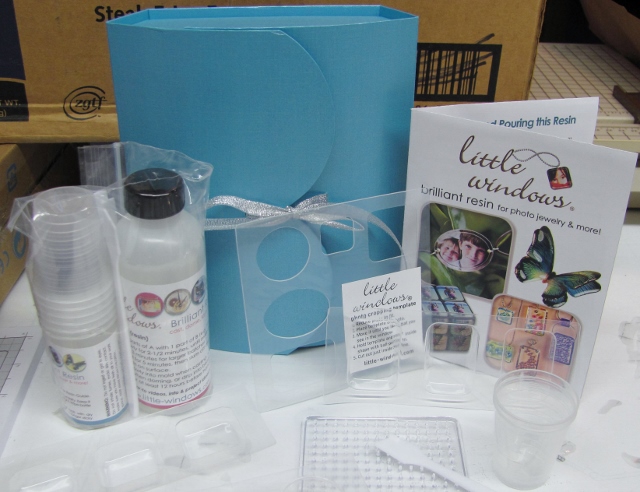
There are two ways of using the product - casting in molds and doming flat surfaces.  I selected some seed beads, broken jewelry parts, letter beads, scrapbook papers and rhinestones to use in my first attempts.

The resin is mixed in a 2:1 ratio for 2.5 minutes before using. It is poured and then allowed to cure for 24 hours or more.

I started with some letter beads set into one of the small square molds. I was going for a rif on the LOVE block but didn't have all the letters. So I switched up to HOPE instead. The beads unfortunately drifted apart during the curing time so it wasn't as neat as I envisioned.

After it was removed from the mold I used the doming technique to finish off the front surface.
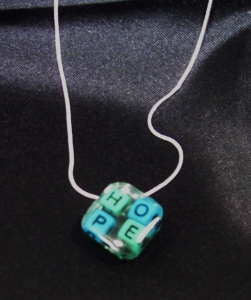
I used E6000 glue to attach a bail on the back corner. The resin is completely clear so the block will allow whatever garment it is worn against to show through the center and edges.

I also bought the materials to make faux dichroic glass but have not tried it out yet:
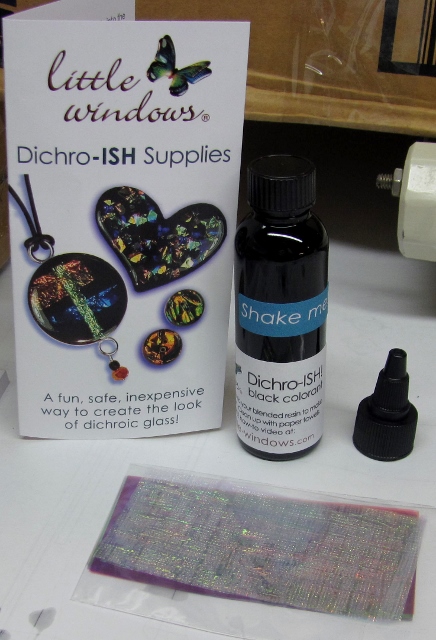
You can see their website at http://www.little-windows.com/

Ddd


Posted by studio3d@ccgmail.net at 12:01 AM PDT

View Latest Entries