« July 2024 »
S M T W T F S
1 2 3 4 5 6
7 8 9 10 11 12 13
14 15 16 17 18 19 20
21 22 23 24 25 26 27
28 29 30 31
You are not logged in. Log in
Entries by Topic
All topics
3D paperwork
A - Z challenge 5
A - Z challenge 7
A - Z challenge round 4
A to Z challenge round 3
A to Z round 2
A to Z round 6
A-Z round 1
Around the House
Art Challenges
Artist Trading Cards
Backgrounds
Beads
Bible Journaling
Books
Boxes
Collage
Color Challenge
Coloring
cookbook
Die Cuts
Digital Projects
Digital Stamps
Drawing
Dry Embossing
Fabric Stuff
Fantastic Folds
Field Trip
Home Decor
How Does Your Garden Grow?
Hymnal Art
In The Kitchen
In the studio
Jewelry
Lettering
Links
Multi-Technique
Music to Work By
Musings
Nail Art
New Work
Online Class
Other Hobbies
Other Projects
Painting
Paper Embroidery
Paper Piecing
Photo
Pretty Paper
Quilting
Random
reading
Scrap Recovery
scrapbooking
Sewing
Sketch Challenge
Some Backlog
Stamping  «
Stencils
Stickers
Supplies
Teabag Folding
Techniques
Testing
tips and tricks
Tutorial
Web resources
Welcome to my Blog
Work By My Friends
workflow
Writing
Blog Tools
Edit your Blog
Build a Blog
RSS Feed
View Profile
Group One
In & Out of Studio 3D
Thursday, 14 December 2017
Card Mill
Topic: Stamping

I recently got the Tim Holtz Stamp Platform. It is a stamp positioner with a gridded base, and a hinged gridded clear lid. You put your cardstock on the base, arrange stamps on it, close the lid and raise it. Now you can ink the stamp, close the lid to stamp, raise it, change out cardstock and repeat.

If you don't get a good impression you can ink and stamp again and it always goes back to the same place!

The difference on this positioner is that the lid is removable so you can use one side for clear stamps and the other for the thicker red rubber stamps.

So, for this card, I had a swath of snowfalkes plus several individual ones, the sentiment and the bear. All could be stamped in one go. Then I turned the card around, removed everything but the swath and repositioned that to fill the opposite corner. 

Just like that, I had a dozen card fronts ready to color.


I used Distress Markers for all the coloring. Then I got out the bulb spritzer and used it with two colors of marker to create the mist over the surface.

I do believe I am going to like this new tool.

Ddd


Posted by studio3d@ccgmail.net at 12:01 AM PST
Sunday, 10 April 2016
Special To Me
Topic: Stamping

The last couple of days I told you about a technique I found at http://stamptv.ning.com/video/embossing-over-watercolor called embossing over watercolor.


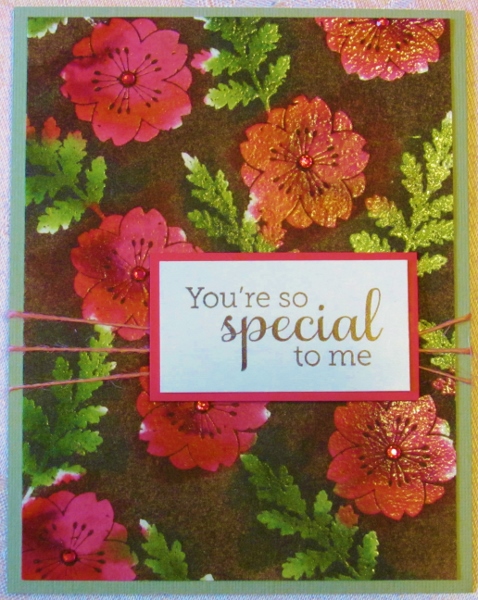
By scribbling on watercolor paper with three values of a color and of green where you want flowers and leaves then spritzing with water and using a heat gun to dry the piece, you set up for a floral background.

Versamark is used to stamp solid flower heads over the colored areas and solid leaves over the green areas then they are embossed with clear powder and a heat gun.

Sponging over the surface with dark ink lets the flowers and leaves shine through and then any extra ink is buffed off with a paper towel.

The second piece I did had better composition and more even results so I decided to use it as a whole background.


I tied twine in three strands and added a pre-stamped sentiment with a border popped up on foam tape.

Each flower got a pink rhinestone center and the whole piece was added to a green base card.

Ddd


Posted by studio3d@ccgmail.net at 12:01 AM PDT
Saturday, 9 April 2016
Watercolor Under Gloss
Topic: Stamping

I started yesterday telling you about a technique I found at http://stamptv.ning.com/video/embossing-over-watercolor called embossing over watercolor.


On watercolor paper you scribble three values of a color where you want flowers, then three values of green where you will stamp the leaves.

You spritz with water and use a heat gun to dry the piece.

Stamp solid flower heads with Versamark over the colored areas and  solid leaves over the green areas then emboss with clear powder a heat gun.

Sponge over the surface with dark ink and buff any extra off with a paper towel.

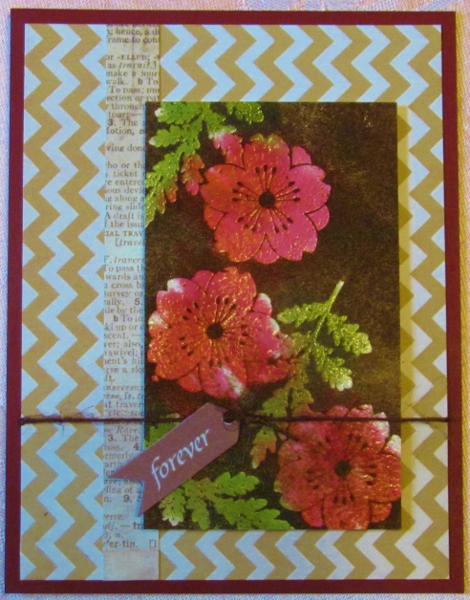
This is the second half of the first piece I made:


I mounted this on foam tape over a chevron paper and a text strip. Then I tied with twine and added a text tag.

The base card is burgundy cardstock.

Ddd


Posted by studio3d@ccgmail.net at 12:01 AM PDT
Friday, 8 April 2016
Embossing Over Watercolor
Topic: Stamping

I was watching some video tutorials on my favorite blogs the other day and ran across a technique I had not used before. If you want to see the original, visit Gina K Designs at http://stamptv.ning.com/video/embossing-over-watercolor for a technique she calls embossing over watercolor.


Start with watercolor paper and scribble three values of a color where you want flowers, then three values of green where you will stamp the leaves.

Spritz the surface with water and let the colors bleed. When it gets where you want it to be, use a heat gun to dry the piece.

Ink a solid flower head with Versamark embossing ink and stamp over the colored areas, Ink solid leaf with Versamark ink and stamp over the green areas. Cover with clear embossing powder and set with heat gun.

Use a foam tool and dark ink to sponge over the surface. The embossing will resist the ink but you can buff any extra off with a soft cloth or paper towel.

With the first one I made, I cut the piece in two and made separate cards out of them.

The first is shown here

I used walnut ink for the dark background. I made a base card with a green floral and strips of coordinating papers.

I added twine and a little tag before popping the focal up on foam tape.

Ddd


Posted by studio3d@ccgmail.net at 12:01 AM PDT
Thursday, 3 September 2015
Bringing Home the Tree
Topic: Stamping

Time to make art for the County Fair!

We'll start with the assignment for a Christmas card with rubber stamping.

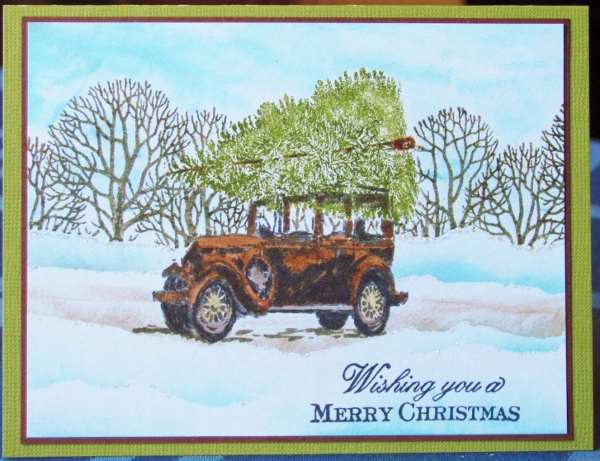
I began the process by inking a pine tree stamp with Distress Markers and stamping it on white cardstock. I masked the tree and inked an old-fashioned car with black Distress Marker and stamped that. I added brown Distress marker to color the car.

I masked the car and tore some post-it paper. This was used to mask a line below the car and blue Distress ink was brushed upward to create a snow bank. The torn paper was moved higher and blue inked again. Then a layer of brown was inked under the car followed by two higher snow banks.

At last, I moved the mask higher and stamped bare trees.

I removed all the masks and then used foam with Blue Distress ink to color the sky. I used a Distress Marker to sketch in a shadow underneath the car to ground it.

I stamped the greeting in the lower corner with black archival ink.

Stickles glitter was used sparingly across the tops of the snow banks and then dotted in the bare trees.


I used a brown bordering paper and then mounted it all on a green card base.

Ddd


Posted by studio3d@ccgmail.net at 12:01 AM PDT
Friday, 12 December 2014
I'm So Blue
Topic: Stamping

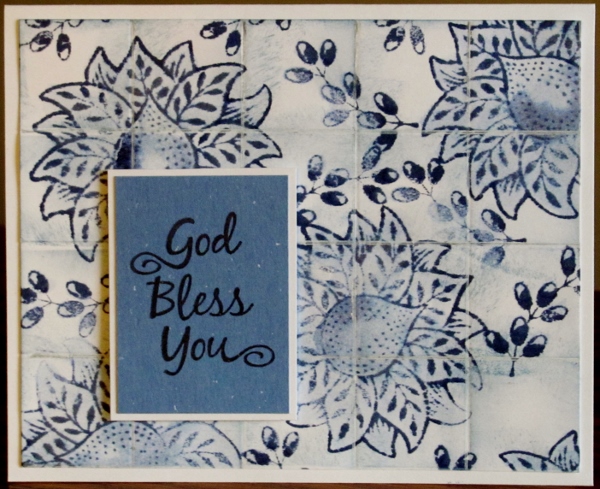
I had so much fun wandering around the SplitCoastStampers tutorials. I ran across a technique I haven't done for a long time - blue delft tile.

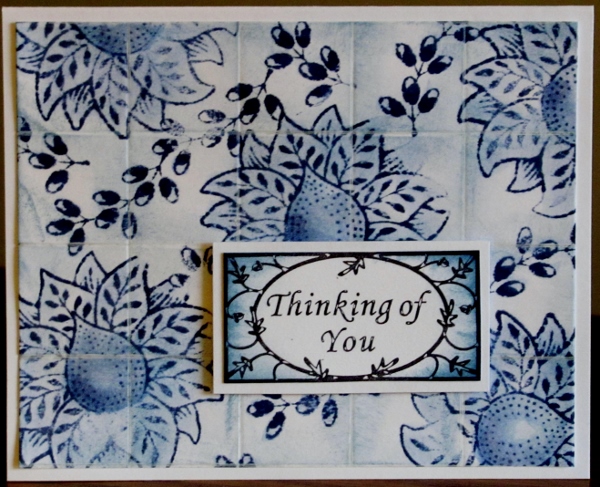
I decided to use 1-inch increments for the tiles, scored them on my ScorPal and stamped with dark blue Distress Ink. After the ink was dry I used an aqua-brush to blend the ink. I used a heat gun to dry it and then used a lighter blue Distress Ink and a sponge to tint the edges of the 'tiles' for dimension.

I went over the lines with a white gel pen (not effective) and then a white Distress Marker (much better).

I ended up with two panels to use and treated them only slightly differently.

First was by adding a sentiment stamped onwhite. I used some of the blue ink to tint the edges and popped it up on foam tape.


For the second card I added a blue stamped sentiment which I banded in white. This was also popped up on foam tape.

I'm going to have to go do more cruising around the SplitCoastStampers site for techniques and tutorials. These experiments have been a blast.

Ddd


Posted by studio3d@ccgmail.net at 12:01 AM PST
Updated: Friday, 24 October 2014 10:22 PM PDT
Tuesday, 18 November 2014
Stamp and Scrap Flower
Topic: Stamping

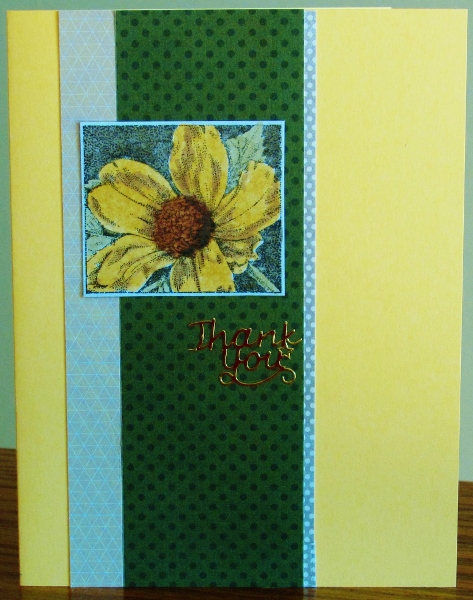
I think this is the last of the images I colored on the day with no power a couple of months back. I guess I might have missed one somewhere, but this is it for the time being.

I trimmed the image with a thin border and combined it with table scraps that picked out hues from the coloring.

I chose a solid yellow background for the same reason.

Again, with the gold Thank You sentiment sticker.

Ddd


Posted by studio3d@ccgmail.net at 12:01 AM PST
Sunday, 16 November 2014
Thanks, Guy
Topic: Stamping

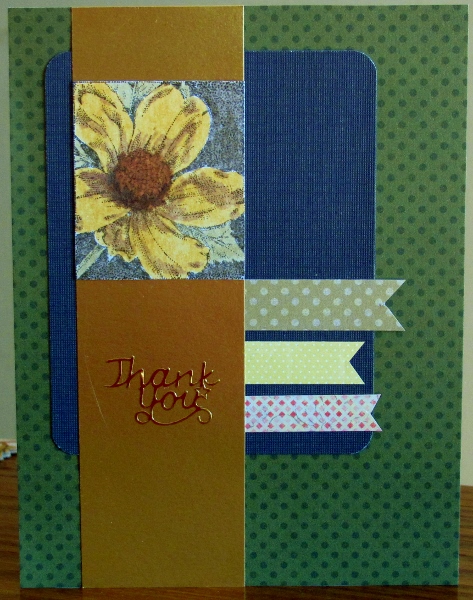
I wanted to have a card that had a more masculine feel to it. I chose table scraps with dark hues and low contrast.

I decided to enliven this with a strip of shiny gold the exact width of the stamped image.

Three strips of scraps pick up colors from the image and balance the right side of the card.

The shiny gold Thank You sticker on top of the shiny gold strip resembles embossing.

Ddd


Posted by studio3d@ccgmail.net at 12:01 AM PST
Saturday, 15 November 2014
Zippy Pastels
Topic: Stamping

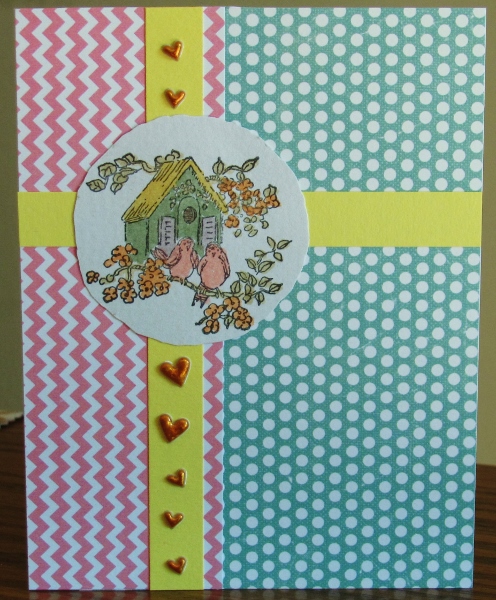
Some of the table scraps I pulled out were just meant to be together like these pink chevron and teal dot papers. I added the yellow crosspieces because of the yellow roof on the birdhouse.

I cut the image in a circle instead of the usual square.

I wanted something to pull out the orange from the image and chose these puffy hearts.

Ddd


Posted by studio3d@ccgmail.net at 12:01 AM PST
Friday, 14 November 2014
Scrappy Birdhouse
Topic: Stamping

Since the birdhouse was so colorful in this version I wanted to keep the background fairly neutral, thus keeping the focus on the image.

I used table scraps with low contrast and soft hues but cut and arranged them in a casual style.

The addition of a pink border on the image separates it from the background.


I made use of those gold Thank You stickers again.

Ddd


Posted by studio3d@ccgmail.net at 12:01 AM PST
Thursday, 13 November 2014
Coral Concoction
Topic: Stamping

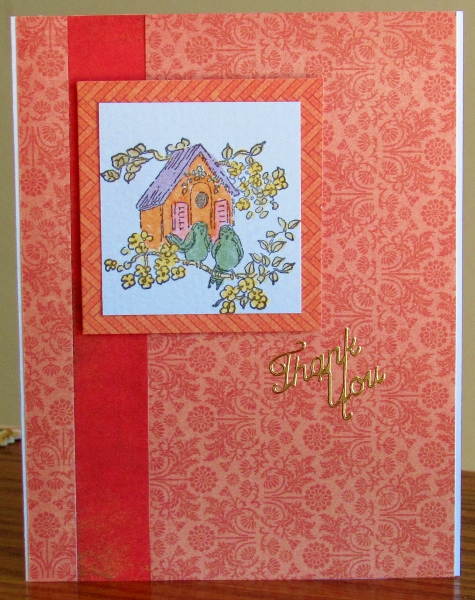
I had a lot of left over of this birdhouse. I had colored this in many different ways during the session with no power.

I trimmed this version down to nearly square and combined table scraps in a variety of coral patterns. The border on the feature is popped up on foam tape to separate it from the similar colored background.


The sentiment is a gold peel-off sticker.

Ddd


Posted by studio3d@ccgmail.net at 12:01 AM PST
Updated: Monday, 27 October 2014 7:55 PM PDT
Sunday, 19 October 2014
Three Watercolored Flowers
Topic: Stamping

OK, I am officially addicted to this technique. Once I showed it to the granddaughters they were addicted and now I am, too.

I amde this card larger than the usual ones I make so it will not go off to Operation Write Home. I might finally have some cards on hand to send to friends and relatives!

I used a different watercolor paper that I found when we ran out of the little pad I had been using. This was a bunch of loose sheets I had cut out of a letter-sized pad and of a higher quality. Not only were the pages thicker but there was less tooth and the surface could be manipulated when wet without pilling.

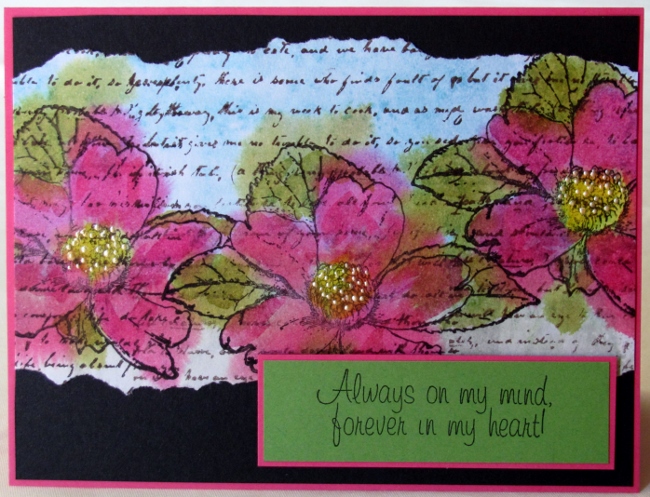
I worked on a half sheet filling the whole area. The top background was inked with tumbled glass and the bottom with sage green. Then I did the spot coloring with a green, pink and yellow. When this was dry I over-stamped with the flowers and the script.

I tore the top and bottom edges and placed on wide black borders. I trimmed the whole block and mounted it on a pink background that matches the flowers.

I added a sentiment block, bordered in the same pink and popped up on foam tape.

At the last minute I decided to use little dots of yellow pearl pen on the flower centers.

Ddd


Posted by studio3d@ccgmail.net at 12:01 AM PDT
Friday, 17 October 2014
Bottles And Blooms
Topic: Stamping

I liked that watercolor background card I made the first day so much that I decided to do it again - note to self: buy more watercolor paper.

This time I selected the stamp with the bottles with flowers standing in them. What a great technique this was to use with this stamp. I decided to start with a two-toned purple background. To this I added the blue and green for the bottles and an orange and red for the flowers.

After the last dry I used an unreadable text stamp to add some background in espresso ink and then stamped the image with black.

I mounted it on a purple card base with a very fine black border and hand drawn pen doodles around the stamped panel.


I attached a stamped sentiment block at the upper left.

Ddd


Posted by studio3d@ccgmail.net at 12:01 AM PDT
Thursday, 16 October 2014
Butterflies Rising
Topic: Stamping

I had three granddaughters here a while back and, as with all my grandkids, we needed to have some crafty time. Having just finished up the stretching stamps class I wanted to show one of them a technique I had learned.

I chose to demonstrate the spot watercoloring that we learned on the bonus day.

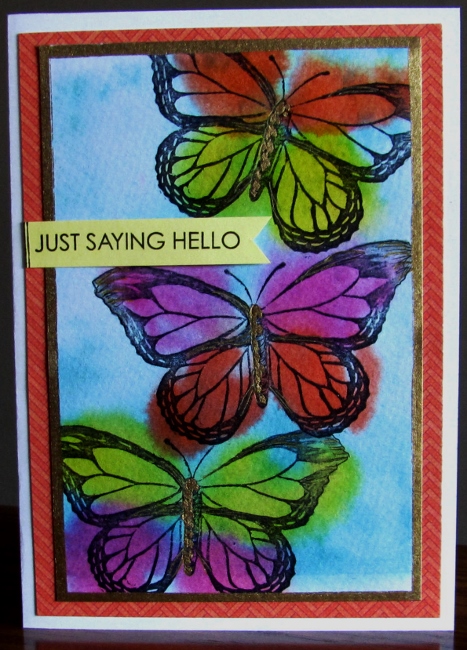
In this you tape watercolor paper to the table, apply Distress Ink to a large acrylic block, spritz it with water and press it to the paper, hold for a bit for the color to soak in the paper some, and lift it off. Then you use a heat gun to day it. It is swiped with water on a brush and you hold an image stamped on acrylic over it and drop ink onto the damp paper underneath. You then let the color bleed out into the background some.

It is dried once again and then you stamp over it with black ink and make it into a card.

I chose to border the panel with gold paint pen, added some of this gold to the image and gave it a border of patterned paper. Then I added a sentiment strip cut as a banner, popped up on foam tape.

The granddaughter made hers with a purple background and an over-all butterfly background stamp enhanced with peacock blue.

Some fun!

Ddd


Posted by studio3d@ccgmail.net at 12:01 AM PDT
Saturday, 6 September 2014
Another Category For the Fair
Topic: Stamping

My next category to participate in at the County Fair was in the area of rubber stamping and other paper crafts.

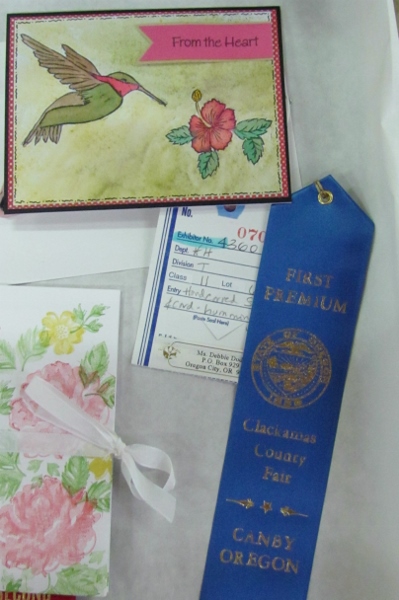
First was the entry of hand carved rubber stamps and a card made with them. I used my humbingbird and my hibiscus - awarded 1st place:

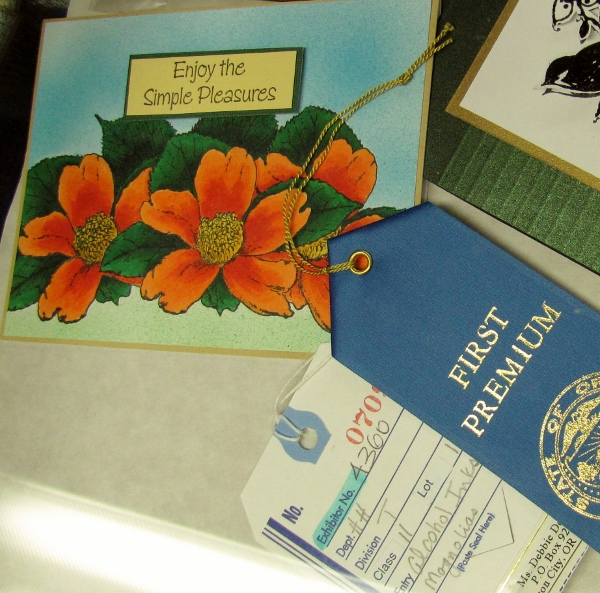
In alcohol ink coloring - awarded 1st place:

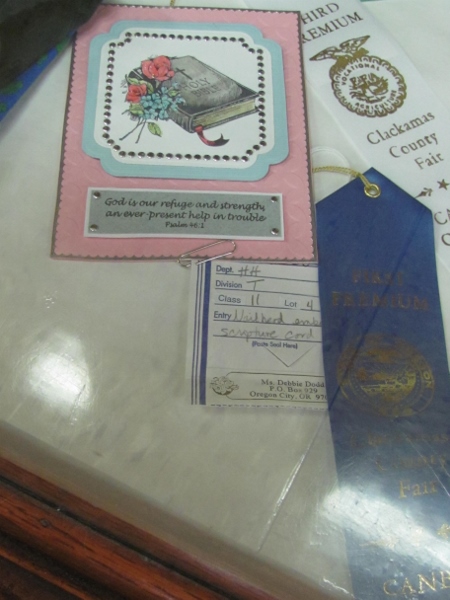
For an embellished card - awarded 1st place:

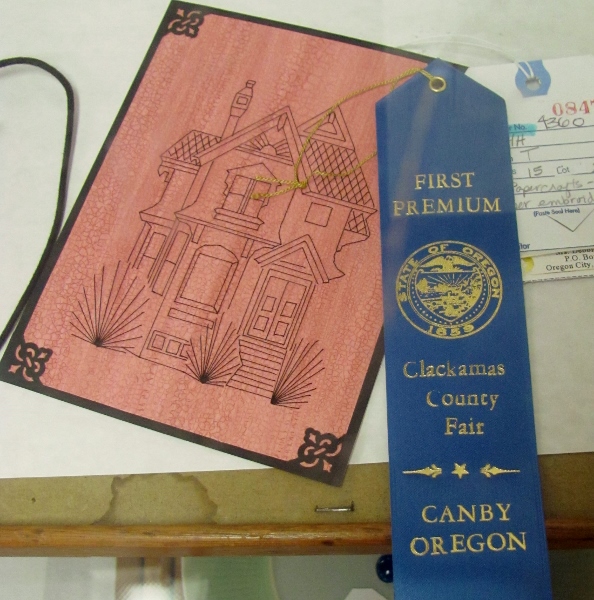
For Paper Embroidery - awarded 1st place:


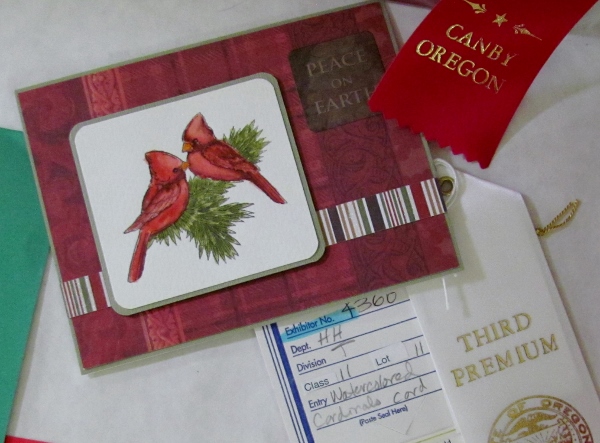
For a Watercolored Card - awarded 3rd place

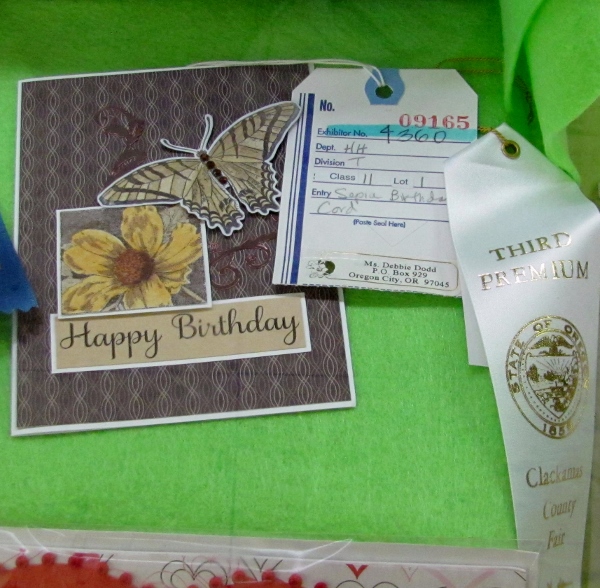
For a Birthday Card - awarded 3rd place:

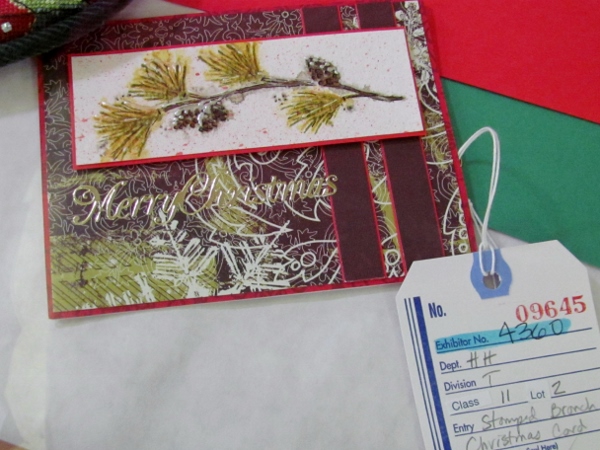
Cards entered without getting awards were a Christmas Card:

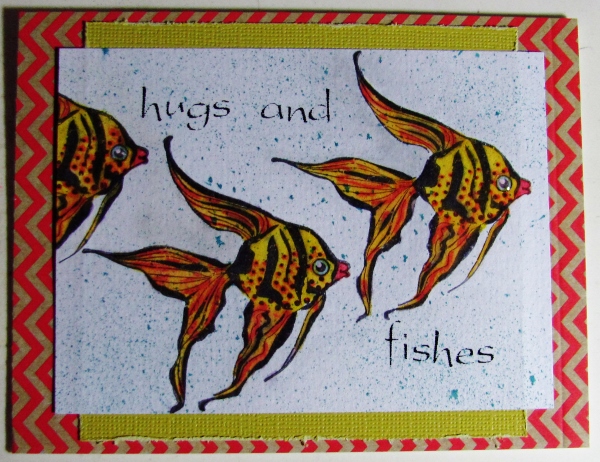
... and a Greeting Card:

Wow! Only two cards without an award of any kind.

Ddd


Posted by studio3d@ccgmail.net at 12:01 AM PDT
Updated: Wednesday, 13 August 2014 8:09 PM PDT
Friday, 5 September 2014
Off To the Fair
Topic: Stamping

Last month I entered a number of items in the County Fair. Over the next few days I will show the entries and awards in the categories I entered.

First up is the Agricultural Products class.

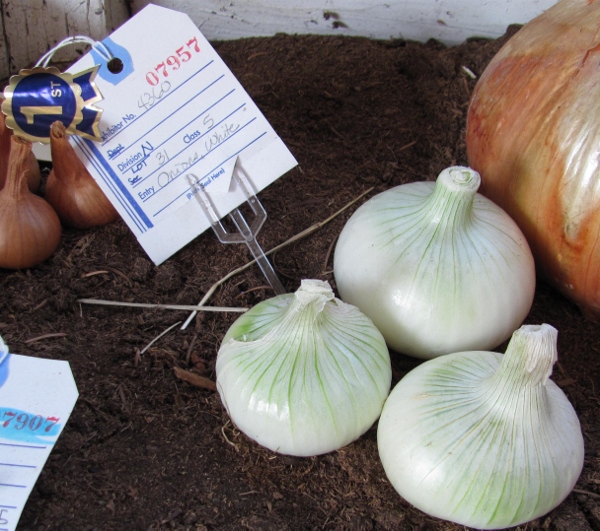
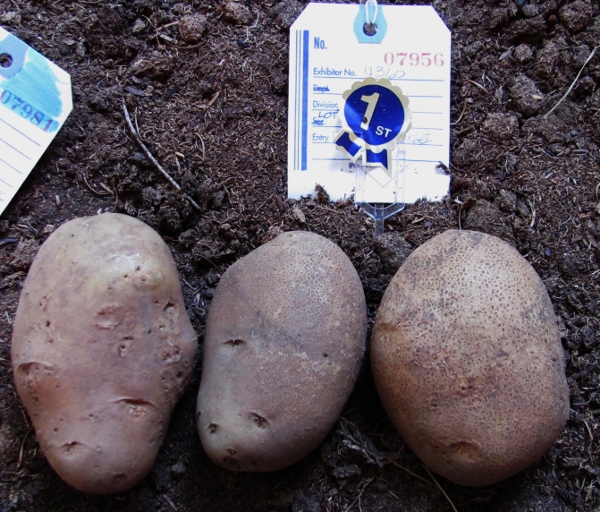
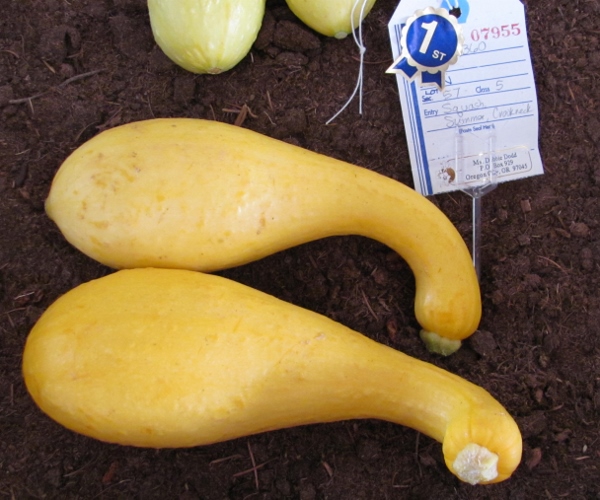
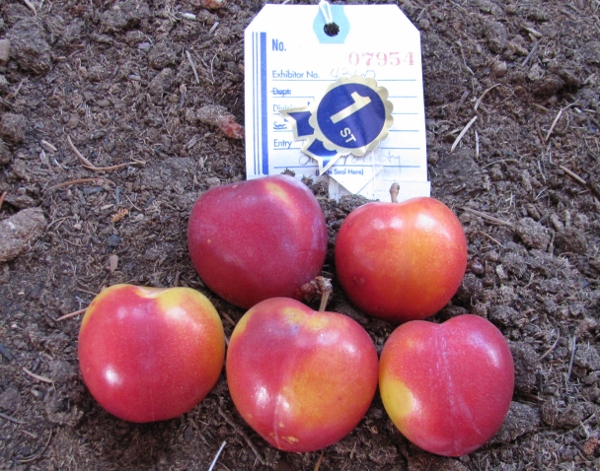
In this I entered White Onions - awarded 1st place:


Russet Potatoes - awarded 1st place:

Crookneck Squash - awarded 1st place:

Plums - awarded 1st place:


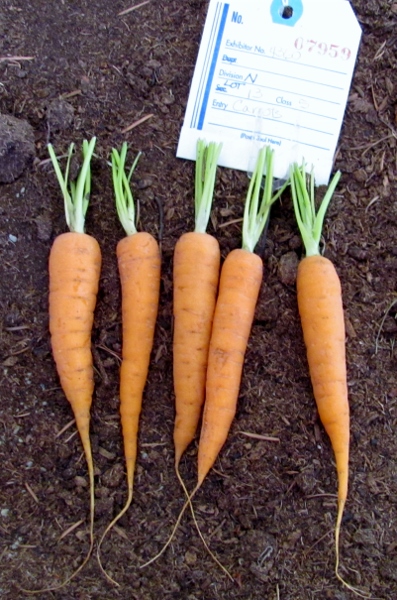
Those items not awarded prizes were Carrots:

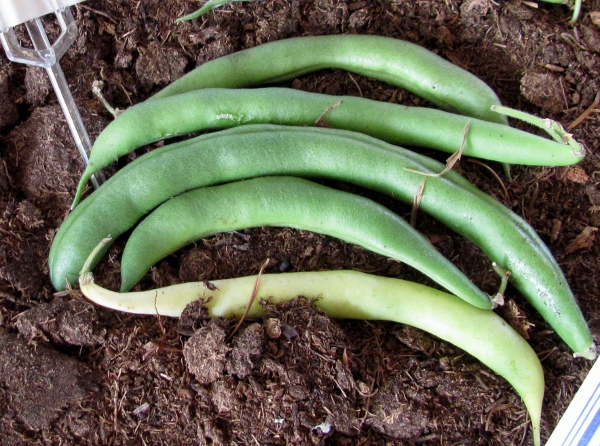
Green Beans:

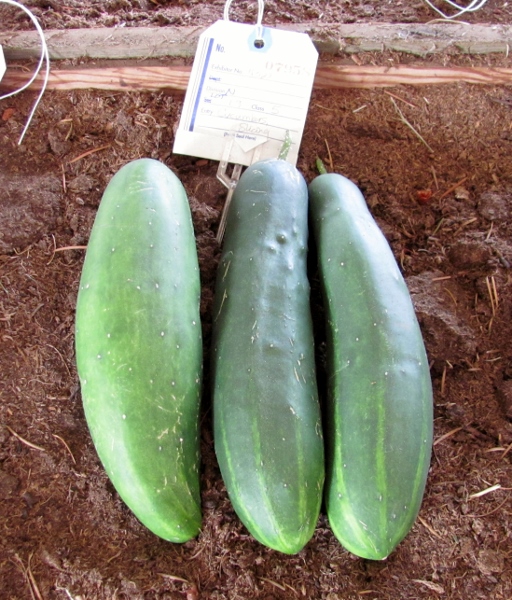
and Cucumbers:


This is the first year I have entered any garden produce so it was a very good showing.

Ddd


Posted by studio3d@ccgmail.net at 12:01 AM PDT
Updated: Wednesday, 13 August 2014 7:55 PM PDT
Monday, 30 June 2014
Sadly Needed
Topic: Stamping

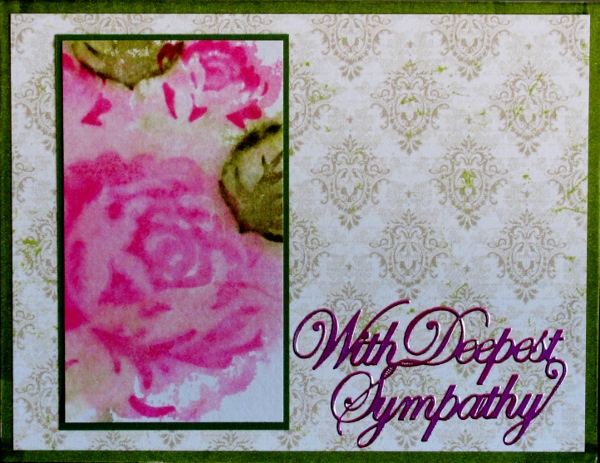
I was truly saddened to need another sympathy card so soon.

I had a single one of the watercolor stamping roses left and it was already trimmed. This got bordered by a matching paper and thus began the layout process.

I found a nice, subtle paper for the background and wanted to include a border around it also. Unfortunately, I did not have any more of the border used on the feature. So I used a Distress Marker to color the edges of the white base card and trimmed the background paper to let that color peek out.


I found a large silver Dazzles sticker for the sentiment and colored it with alcohol marker while it was still on the sheet.

Ddd


Posted by studio3d@ccgmail.net at 12:01 AM PDT
Saturday, 28 June 2014
Caring Thoughts
Topic: Stamping

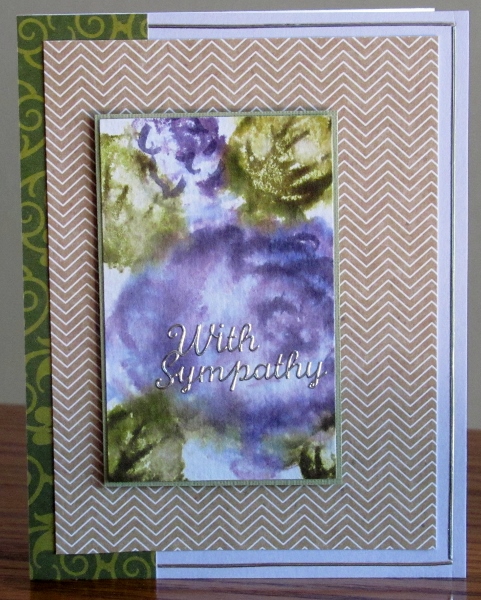
I wanted to use more of the watercolor stamping roses but did not have a sketch upcoming that suited the shape or size that I had remaining. So I abandoned the sketch project for a bit and pulled out some paper scraps to make my own layout.

I started with a lavender card base to coordinate with the color of the illustration and added a green swirled paper to work with the leaves. The chevron paper in a neutral creates a nice setting for the bordered centerpiece which is bound by strips of silver peel-off sticker.

The sentiment is provided by a silver script Dazzles sticker and the feature panel is popped up on foam tape.

Ddd


Posted by studio3d@ccgmail.net at 12:01 AM PDT
Friday, 13 June 2014
Panda Stamp
Topic: Stamping

Grandmas tend to be rather accomodating with their grandkids and this Grammie is no exception. When some of the grands came to visit one made a special request that I do some crafts with him. Oh yeah! That's a big "Yes".

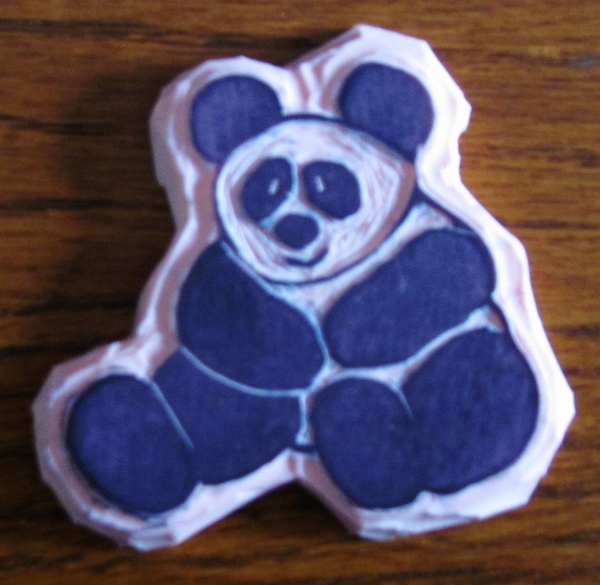
He was working on stamping a scene using some of my hand carved stamps and wanted to know about the process I used to make them. I got out the carving toolbox to show him and he asked if I would carve a stamp just for him.

He wanted a panda as that is his favorite animal and I was happy to do this for him:


Actual size is about 3 1/2 inches.

Ddd 


Posted by studio3d@ccgmail.net at 12:01 AM PDT
Thursday, 9 January 2014
March of My Penguins
Topic: Stamping

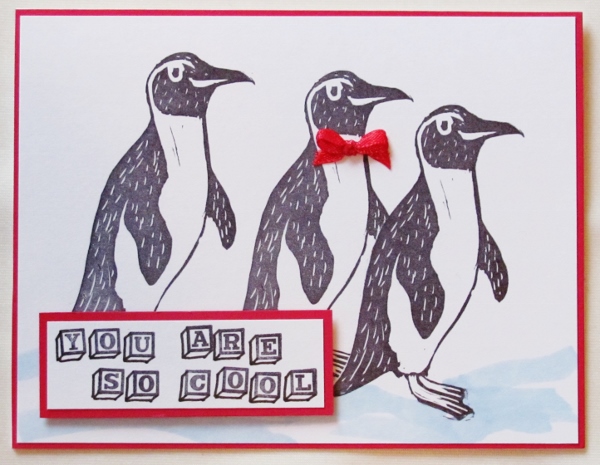
A challenge over at the OWH blog was to make a card with a penguin - and to use your most original image so everyone wouldn't make near duplicates. No problem there - the only penguin stamp I have is the one I carved several years ago.

I started with plain white cardstock and used masking to stamp the penguin three times. The only bit of coloring is the little bit of blue in the snow underfoot. I trimmed the panel so I could give it a red border and made a matching bowtie for one of the birds using 1/8" ribbon.

I used some little peg stamps to make the sentiment and added lines with black pen to turn the squares into cubes. This got bordered in red and popped up on foam tape.

Ddd


Posted by studio3d@ccgmail.net at 12:01 AM PST

Newer | Latest | Older