« July 2024 »
S M T W T F S
1 2 3 4 5 6
7 8 9 10 11 12 13
14 15 16 17 18 19 20
21 22 23 24 25 26 27
28 29 30 31
You are not logged in. Log in
Entries by Topic
All topics
3D paperwork
A - Z challenge 5
A - Z challenge 7
A - Z challenge round 4
A to Z challenge round 3
A to Z round 2
A to Z round 6
A-Z round 1
Around the House
Art Challenges
Artist Trading Cards
Backgrounds
Beads
Bible Journaling
Books
Boxes
Collage
Color Challenge
Coloring
cookbook
Die Cuts
Digital Projects
Digital Stamps
Drawing
Dry Embossing
Fabric Stuff
Fantastic Folds
Field Trip
Home Decor
How Does Your Garden Grow?
Hymnal Art
In The Kitchen
In the studio
Jewelry
Lettering
Links
Multi-Technique
Music to Work By
Musings
Nail Art  «
New Work
Online Class
Other Hobbies
Other Projects
Painting
Paper Embroidery
Paper Piecing
Photo
Pretty Paper
Quilting
Random
reading
Scrap Recovery
scrapbooking
Sewing
Sketch Challenge
Some Backlog
Stamping
Stencils
Stickers
Supplies
Teabag Folding
Techniques
Testing
tips and tricks
Tutorial
Web resources
Welcome to my Blog
Work By My Friends
workflow
Writing
Blog Tools
Edit your Blog
Build a Blog
RSS Feed
View Profile
Group One
In & Out of Studio 3D
Sunday, 9 July 2017
Sunset Nails
Topic: Nail Art

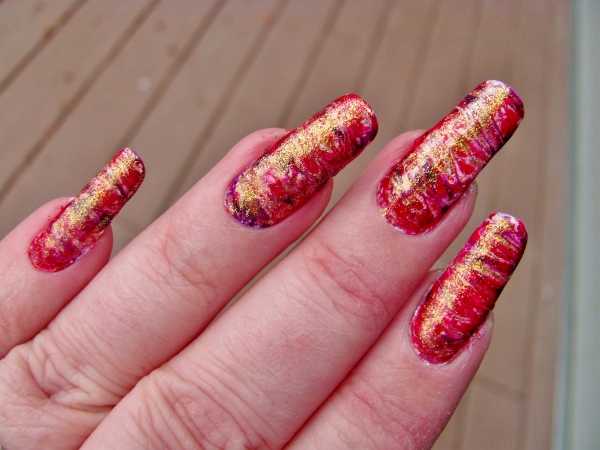
 To decide on a look for a new manicure, I took to Pinterest and did a search for "Summer Nail Art". The one I was ezpecially taken with was this:
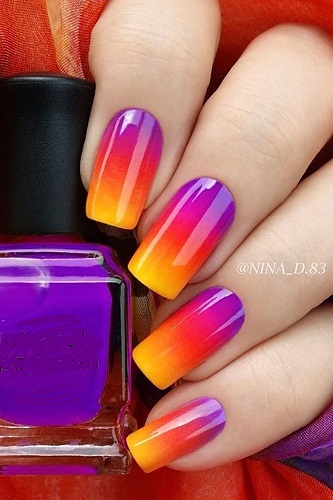
Unfortunately, those particular colors were not in my selection of polish so I selected some from the same color families but more subdued and came closer to this:
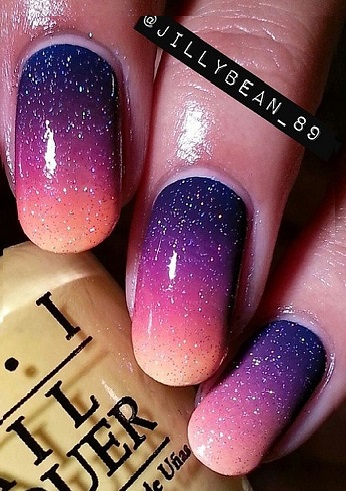
 

I first did a sample chart combining various purples, reds and copper. Then I overlaid these with a variety of clear polishes with glitters.


You can see the set of polishes I selected as the one that is circled on the chart.

This was the selection of polishes I used:


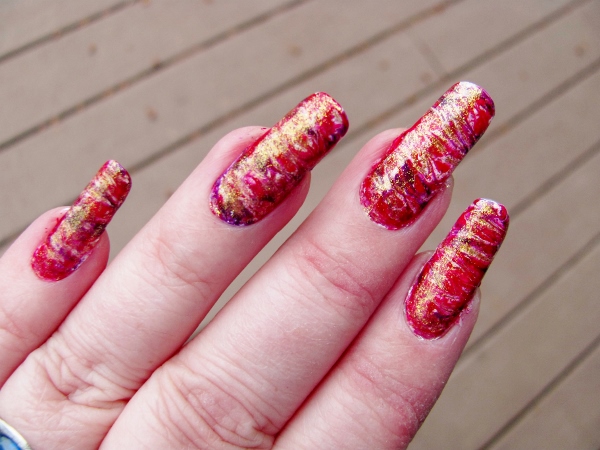
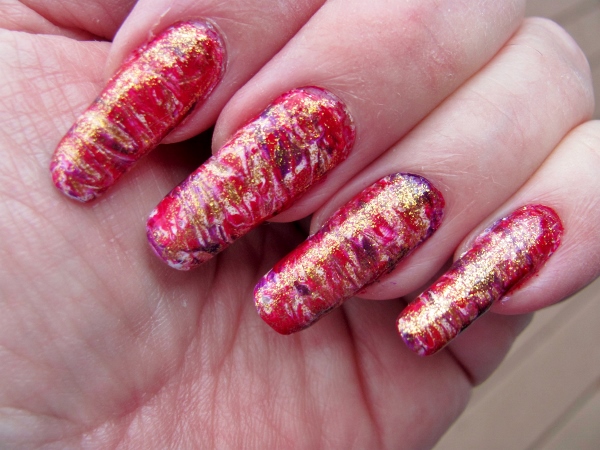
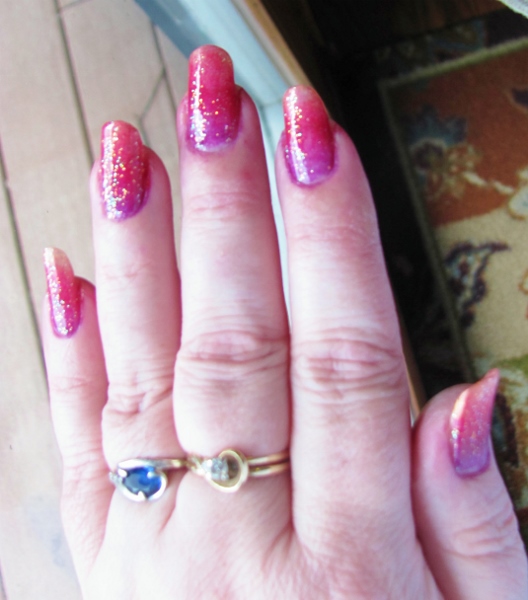
I started out with liquid latex surrounding the nail to keep sponged colors off my fingers. Then I gave the nails a clear base coat and a single layer of white polish. The white gives the colors life as it is brighter than the plain nail color and allows sheer sponging to show up in true color. (Think of the difference you get when using a marker on a brown paper bag as opposed to a white paper.)

For the application of color, I painted stripes of each polish, in order, onto a plastic sandwich bag.


This was picked up onto a makeup sponge by dabbing onto the bag.


The sponge was then tapped onto the nail moving to and fro to blend where the colors meet. I did two coats on each nail. After this I tapped a little more red over part of the purple for a smoother transition.

A clear coat with fine irridescent glitter was the next step, followed by clear top coat.


The latex peels off easily leaving little cleanup required.


I find that complete drying overnight will allow the little bits in the cracks of the cuticles to be removed with soap and water when scraped with the point of my nail file.

Yep, I like these just fine.

Ddd


Posted by studio3d@ccgmail.net at 12:01 AM PDT
Tuesday, 20 June 2017
Frosted Flags
Topic: Nail Art

I've welcomed summer by decorating the house with red, white and blue items as I do most every year. Soon after, my manicure began to chip so I decided to carry that theme onto the new nail enamel.

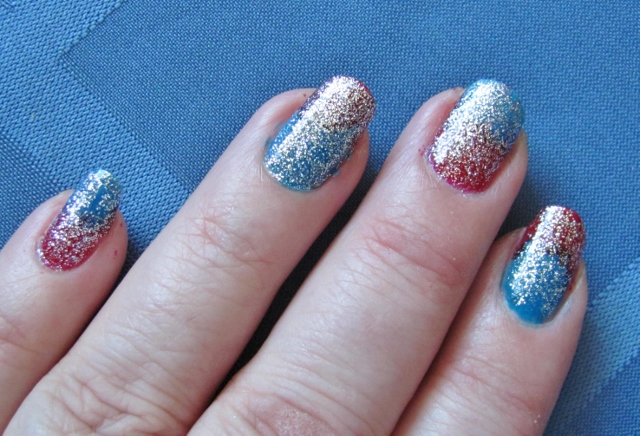
I chose a berry red, shimmery blue and silver to work with. Red was first applied in wide stripes to the the outer edges of the nails leaving a wide opening in the middle on the diagonal. I skipped the ring finger on each hand.

Those ring fingers got solid blue.

After giving all the colors a second coat and letting it set I went back to the red nails and added a wide silver stripe across the open area. Then the blue nails got tiny dots of silver.

I added a second coat of silver to the red nails and let everything set.

Finally, I gave everything a coat of clear that has a fine irridescent glitter in it (this is the 'frosting' refered to in the title). A coat of topcoat protects the finish.


These are all Dollar Tree polishes and a manicure will last about 10 to 12 days.


I'm hoping this lasts until the 4th of July and then I'll think of something else fun to do.

Ddd


Posted by studio3d@ccgmail.net at 10:01 PM PDT
Monday, 5 June 2017
Flash of Summer
Topic: Nail Art

After a couple of ho hum nail painting sessions I asked for ideas from my hubby. He suggested 'something with flowers'.

I started with clear base coat, as usual, followed by two coats of silver.

Then I used the brushes in the bottles of three soft colors to dot on 5-petal posies and added yellow centers to them. Lastly, I brushed on a few light green leaves.

When everything was set, I put on clear top coat.


I did three flowers on the thumbnails, two on all the middle fingers and one on the pinkies.

I think they turned out really cute!

Ddd


Posted by studio3d@ccgmail.net at 2:06 PM PDT
Sunday, 21 May 2017
Spring Nails
Topic: Nail Art

I finally grew my nails back out to a length that I think looks good with decorative polish.

I grabbed two pastels that I got at the dollar store. The first half, from the nail bed, I did in two layers of soft green. Then I painted one layer of frosted lavender on the tip and, when that was set, I used a makeup sponge to blot on a second layer blending it up into the green.

Third step was to run a thin line of black from nail bed to tip and when that was set, I added an overcoat of clear with a fine multicolored glitter.

The effect looks very summery and graphic - almost metallic.


The way I kept the color off my cuticles and fingers was to border the skin around the whole nail with liquid latex - sold at the beauty supply as glue for hair extensions. No muss - no fuss!

Ddd


Posted by studio3d@ccgmail.net at 1:35 PM PDT
Friday, 18 November 2016
Denim Glitter
Topic: Nail Art

It's been a while since I posted nail art. I was waiting for my nails to grow back out after the last breakage.

A trip to the dollar store the other day netted me 10 new bottles of polish. My store carries a brand called L.A.Color. I find it to be long lasting with little chipping for up to two weeks. I always start with Revlon base coat and I add up to three color layers followed by Revlon top coat.

I rarely use one color as I like the depth I get by combining colors and textures.

I started this manicure with a pale, almost gray, purple. I did two layers of this. Then I added a clear containing two sizes of silver glitter.

The final effect makes the color look more blue and it comes off resembling a glittery denim.


No need for fancy patterns and stuff when the polish itself can present such a stunning look.

Ddd


Posted by studio3d@ccgmail.net at 12:01 AM PST
Saturday, 11 June 2016
Guess the Medium
Topic: Nail Art

I don't know if this is a new idea for you but it sure was for me. 

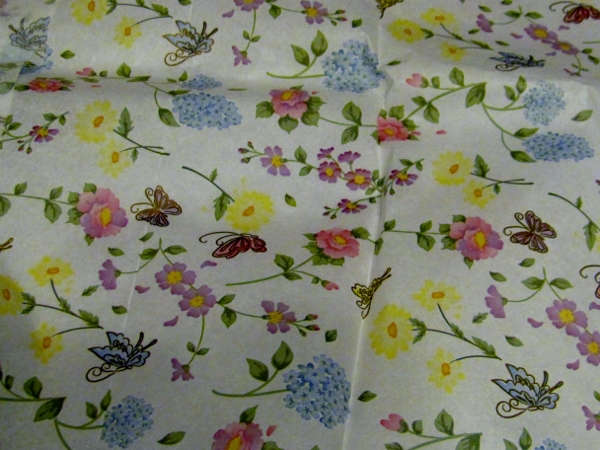
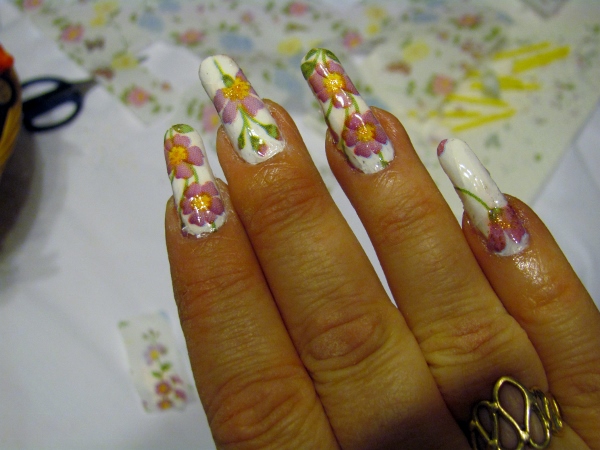
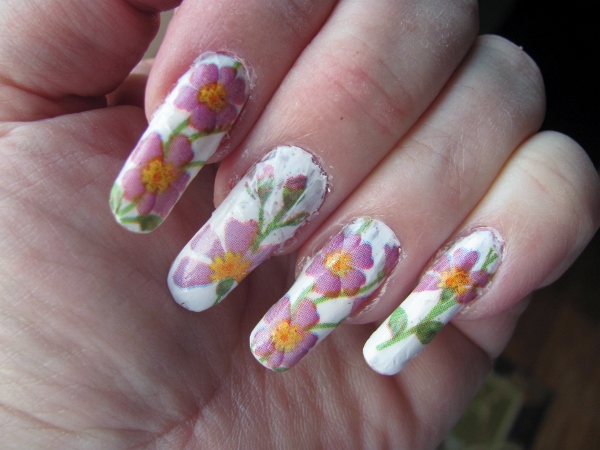
I had a wild thought the other day when contemplating what to put on my nails next. I wanted some kind of artwork look and decided to see if I had any tissue paper in the studio that had small motifs on it.

Sure enough I found this piece:


I had the idea to try a tissue wrap on my nails much like the ones I used recently on the Tim-tags.

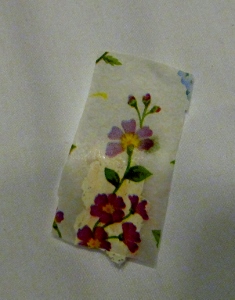
So, I started out by cutting out small purple flowers and then I cut slits into the paper all around right up to the flowers (this was so the tissue would mold to the shape of the nail.


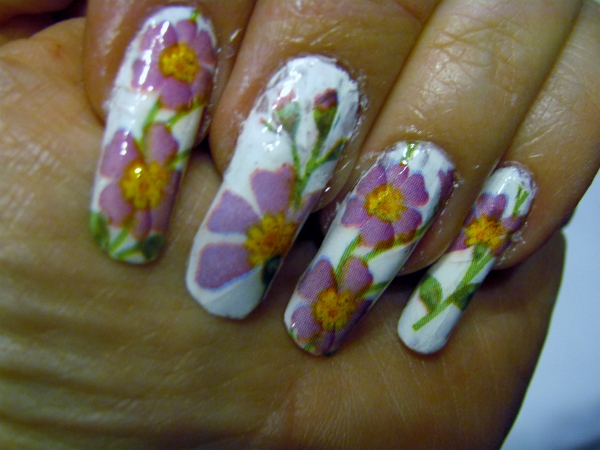
I used clear base coat and two coats of white polish on each nail. When they were completely dry I worked one-by-one. I applied a coat of clear topcoat, placed and burnished a tissue and trimmed around all the edges and tip wiith small scissors.

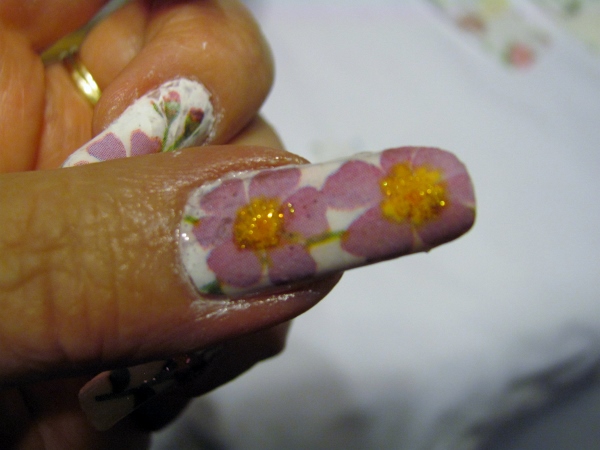
Then I put a small dot of gold glitter on the yellow flower centers.

After all was dry I filed the edged smooth and then used two coats of topcoat to seal them.

They ended up looking like painted porcelain and I love them.


I have no idea how long something like this will last. It's all an experiment at this point.

Also, this was a LOT of work, so I probably won't do it again.

Ddd


Posted by studio3d@ccgmail.net at 7:31 AM PDT
Friday, 3 June 2016
Gilded Marble
Topic: Nail Art

I know it hasn't been that long since I posted nail art but, I was looking at my nails and the longest one looked like it had a crack from the tip to the finger. DRAT!

It was only after I took the manicure off that I discovered it had been the polish that was cracked and not the nail.

So I just got busy repainting them.

I started this manicure by painting liquid latex around the nail on the skin and cuticles. After it was dry I did the manicure and then peeled off the latex. This allows you to get right up to the edge of the nail and do easy cleanup.

After a coat of clear base I put on a layer of white. Then, working nail by nail I applied a second coat of white, dropped on red and purple and swirled them together with an orange stick.

They all got a coat of gold fine glitter followed by clear top coat.

Not much of the white shows, just enough to create the marbled effect.


Here is the best view of the gold layer:


Can you believe how long these nails have survived?

Ddd


Posted by studio3d@ccgmail.net at 12:10 AM PDT
Friday, 27 May 2016
Close To the Breaking Point
Topic: Nail Art

On average, a manicure lasts me about 2 weeks. By that time the base of the nail is growing out and leaving a gap. Then, too, some little chips may be appearing along the edges of the tips.

Lately, every time I do my manicure I expect it to only be a few days until a nail breaks. When one goes, I cannot leave them alone and have to clip them all back to the same as the shortest one.

Well, they survived another two week span so I did a new manicure to see how long it will hold out.

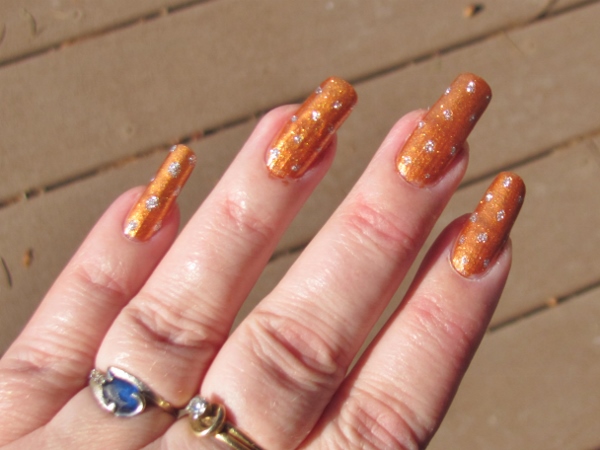
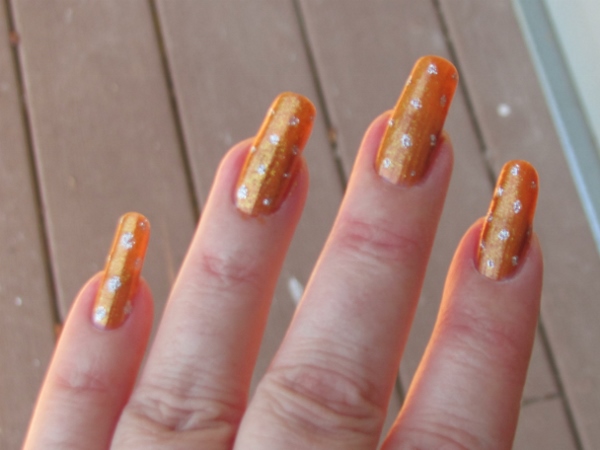
I used a base coat, two coats of copper, one of sheer gold glitter, silver glitter dots, and a topcoat.


Glitter is hard to capture in a still photo so I took pictures in sunlight and in shade to see if one was better than the other.

Not better, just different.

Ddd


Posted by studio3d@ccgmail.net at 12:01 AM PDT
Thursday, 7 April 2016
Sunset Nails
Topic: Nail Art

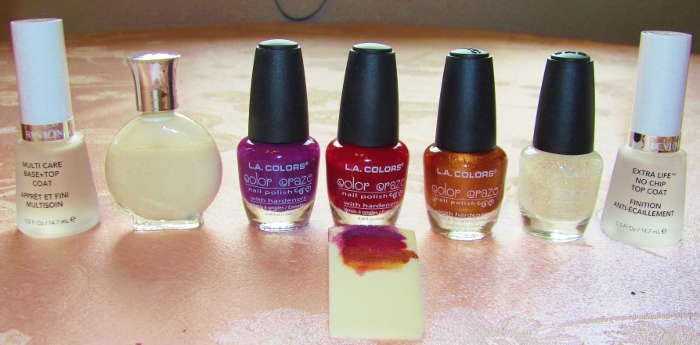
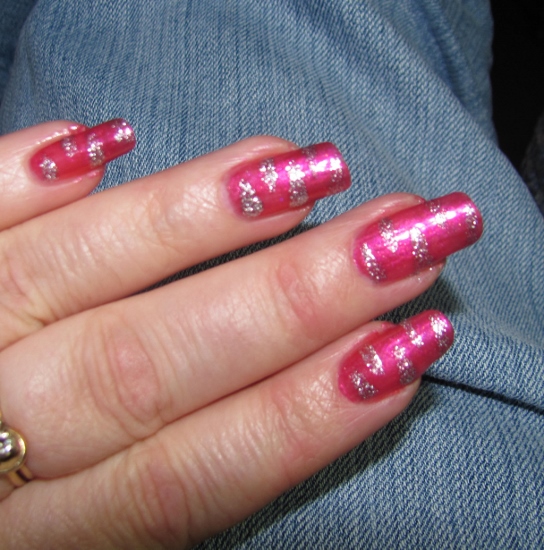
Here are the products I used to create nails with a sunset look:

From the left - base coat, two coats of sheer white, makeup sponge with stripes of purple, red and copper and used to sponge on the nails. This was done twice. The sheer with glitter went on over the top, followed with clear topcoat.

This is a messy process so it takes a lot of cotton swabs dipped in polish remover to get all the over-sponging off the cuticles and sides of the fingers.


I like the effect of a sunset sky.


As always, I'm a fan of layering glitter on my nails, so that adds to my satisfaction with this manicure.

Ddd


Posted by studio3d@ccgmail.net at 12:01 AM PDT
Sunday, 6 March 2016
Quilter's Fingers
Topic: Nail Art

I'm headed off to three days at a Sewing and Stitchery Expo out of state with a bunch of ladies from our quilting group. In addition, it was time for a new manicure.

MASHUP!

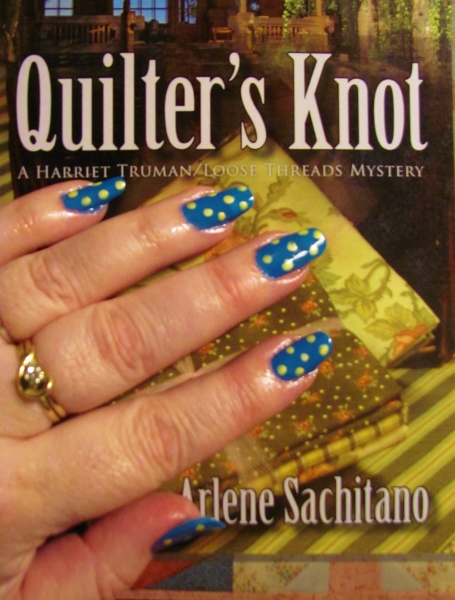
I decided to do some funky nail art and gave myself bright blue nails with yellow dots in a 'fabric' imposter theme.

Since I'm reading a quilting novel right now, too, I decided to include that in the photo-shoot.


Some fun, huh?


The blue polish is one I got at the dollar store. The yellow was 50 cents at a yard sale.

Ddd


Posted by studio3d@ccgmail.net at 12:01 AM PST
Wednesday, 2 September 2015
Blue Lightning
Topic: Nail Art

When you paint long nails it gives a very large canvas for nail art. It also makes wild and crazy artwork look not so 'out there'.

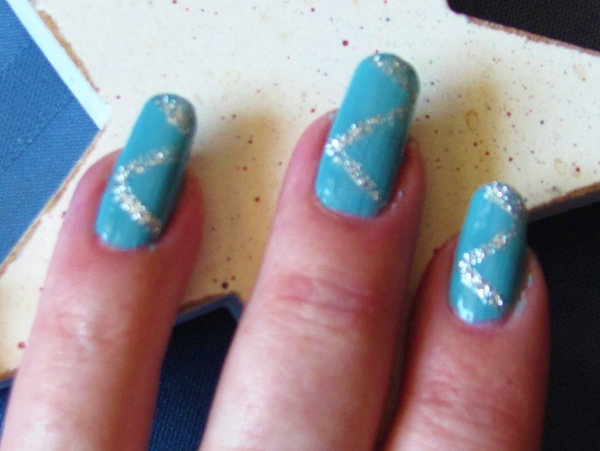
This time around I wanted a look that spoke of summer storms so chose a sky blue and added silver lightning. The lightning is stylized to be two zigzag lines plus the tips.


The glitter makes the camera freak out and not completely focus.


It won't last ALL summer but we'll see what comes next when the time comes.

Ddd


Posted by studio3d@ccgmail.net at 12:01 AM PDT
Tuesday, 30 June 2015
Nailed It!
Topic: Nail Art

It's been quite a while since I did any art on my nails. Having my nails grown out to an attractive length is my preference for nail art and in the growing-out time span I just paint them without any art on them.

My nails have reached a great length for designing AND there's a holiday coming that makes me want to have a little celebration at the end of my fingers.


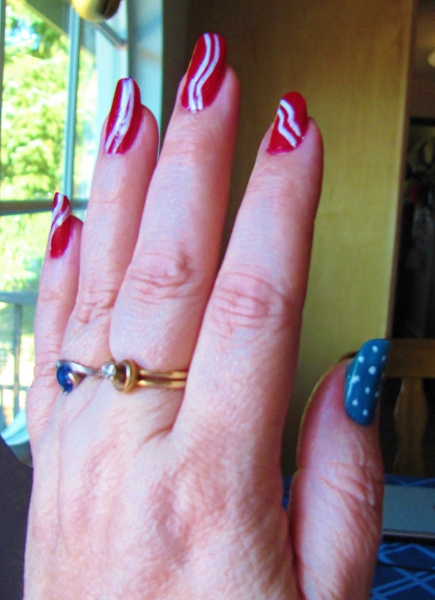
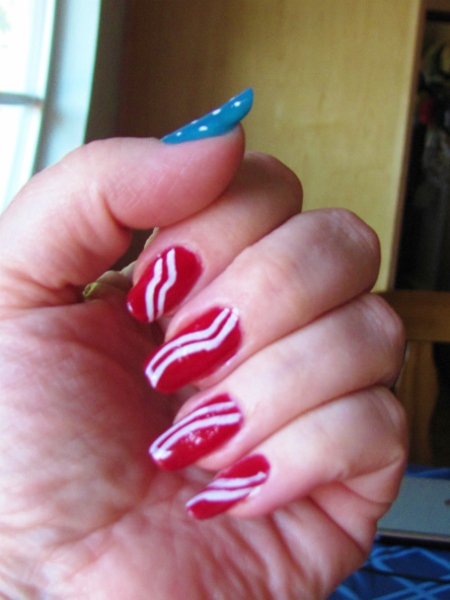
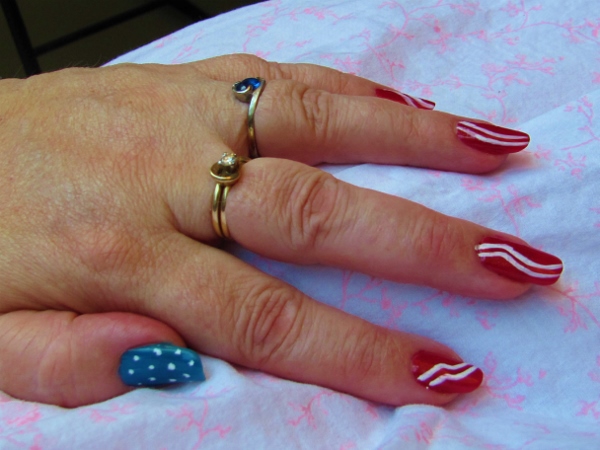
I went with a stars and stripes theme. The thumbs got blue with tiny white dots and the fingers got red with double white stripes.


This is before the cleanup of color from the cuticles. Actually, there is very little to clean up AND the stripes are remarkably neat.

Remarkable in that they were done start to finish while a three-year-old was continually trying to convince me to change my color scheme to purple, silver glitter and gold glitter, asking a lot of questions about the purpose of the supplies, and bounced against my knees as he tried to get a closer look.


Hooray for LEGOs that I managed to get out of a cupboard to entertain my little friend WITHOUT smearing any of my manicure!

Bring on the holiday, I'm ready!

Ddd

Posted by studio3d@ccgmail.net at 8:35 AM PDT
Sunday, 3 August 2014
Sparkle and Shine
Topic: Nail Art

I like to celebrate the WHOLE summer with red, white and blue in my house and, if my nails are long enough to do up, that theme carries over onto them.

Though not as long as I like them to be with a real flashy treatment, I did have a go at them. 

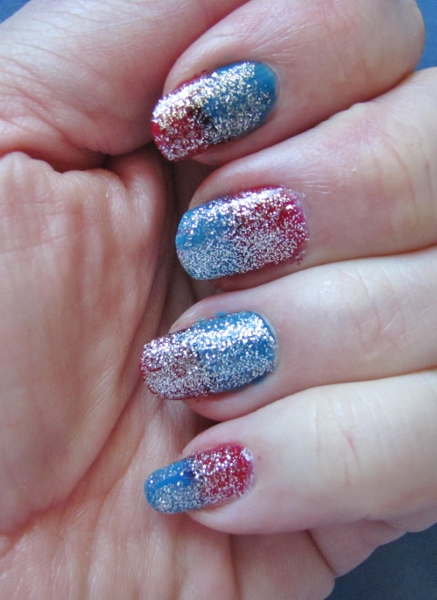
I began with a double doat of blue and red, working from opposite ends of the nails on alternate fingers. Then I layered on a coat of silver glitter that just lets the color peek through.

A couple of coats of clear topcoat smooths out the rough texture left by the glitter.

These will last a couple of weeks and then I'll have to think of something new for the last few weeks of summer. What to do?

Ddd


Posted by studio3d@ccgmail.net at 12:01 AM PDT
Friday, 23 May 2014
Hydrangea Nails
Topic: Nail Art

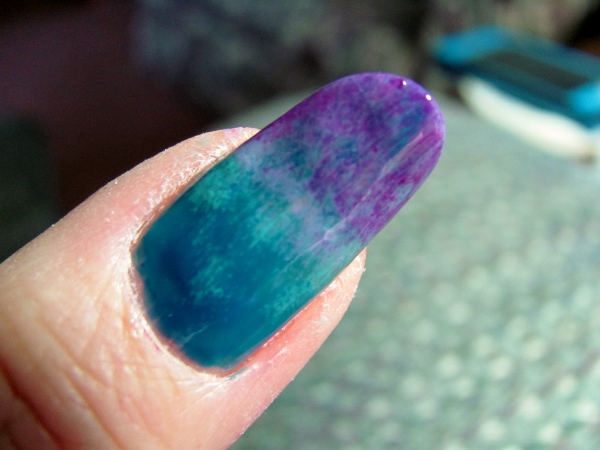
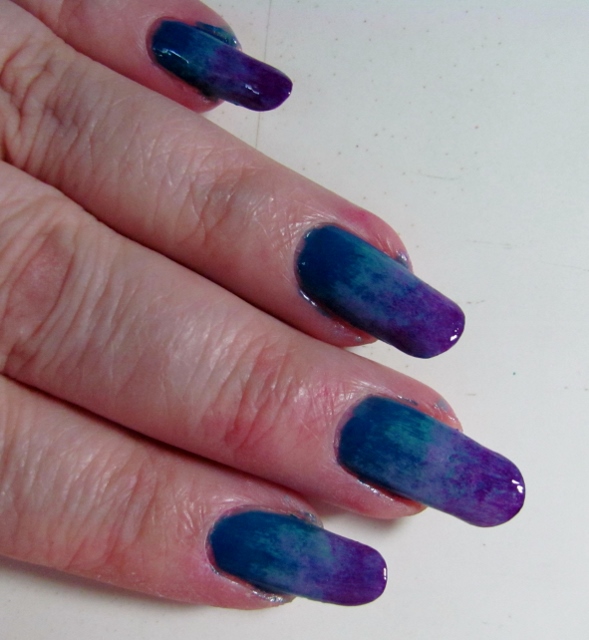
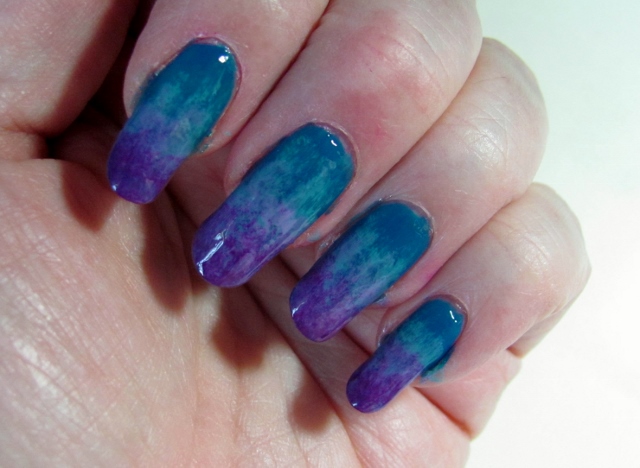
I needed a new manicure and decided I wanted to do something with sponging which gives a gradient effect. For this to work you need to have at least three related colors of polish. The only ones I had were blue and purple - by chance two shades of each.

The first step is to base coat and then apply the polish you want to be closest to the nail bed over the whole nail. Apply a second coat to the half nearest the cuticle. I chose my darker blue for these coats.

Then a makeup sponge is used to pat on the next color to 3/4 of the nail starting at the tip of the nail, blending as this color ends. This polish was my light blue.

Repeat this process to only half of the nail from the tip up with the next color. This was my light purple.

Finish with the fourth color on only the 1/4 of the nail at the tip. This was my dark purple. Then everything gets one to two coats of topcoat to smooth and seal the nails.

Here is a closeup of the thumb so you can see the way the blend works.


This color combination reminds me of hydrangea blooms which are my favorite flower.

This is a really easy treatment to accomplish - on both hands. Some manicures are hard to do on your dominant hand because of coordination/control issues. But this one only requires patting with the sponge and does not need precision.

Both the dark blue and dark purple are dollar store polishes while the light tones were coupon specials. What a beautiful effect for a bargain price!

Ddd


Posted by studio3d@ccgmail.net at 12:01 AM PDT
Sunday, 18 May 2014
Chewing Your Fingernails?
Topic: Nail Art

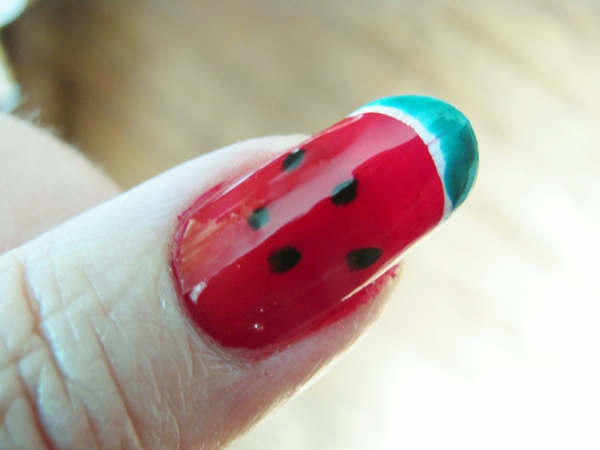
If your nails looked as refreshing as these, you might be tempted to have a little nibble! I saw an ad in a magazine, advertising nail polish in a 'pen' and showing various ways to use them for nail art. I liked the look of the watermelon slices and thought I'd give it a go with my regular nail polishes.

The layers/sequence: base coat, red (2 coats), white strip at tip, green strip at tip over most of the white, black dots, top coat, quick dry. The white and black have very fine tip brushes but the rest are all regular - in fact the red and green are from the dollar store.


I think I'm ready for a little taste of summer.

Ddd


Posted by studio3d@ccgmail.net at 12:01 AM PDT
Friday, 11 April 2014
Verdigris Nails
Topic: Nail Art

Today's nail post is not so much nail 'art' but a note on color. Rarely do I ever use only one color on my nails. I prefer to combine colors to create patterns or overlay them to make new colors.

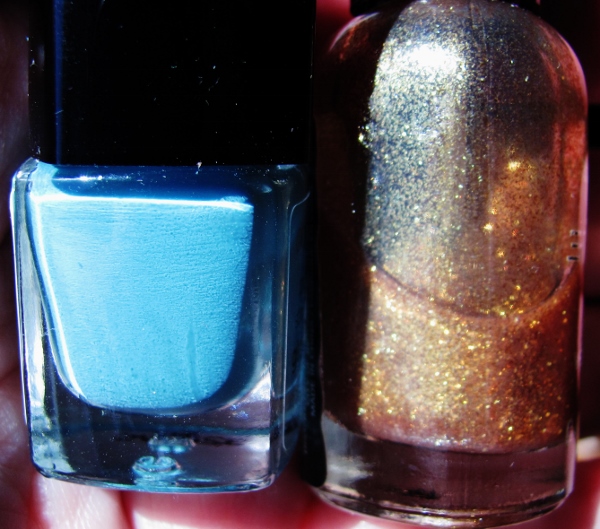
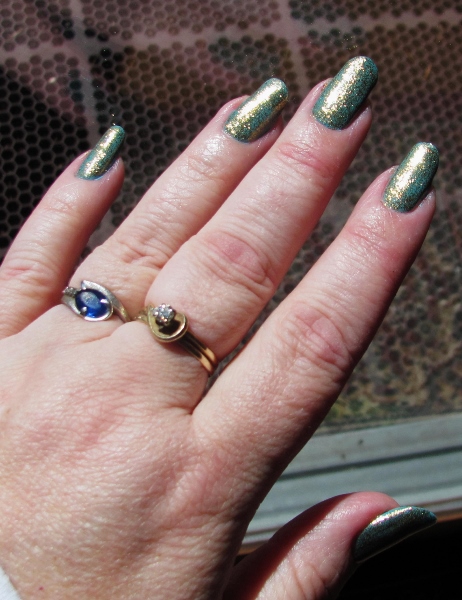
This time I put on two base coats of robin egg blue and overlaid this with two coats of golden glitter polish. Oh yes!

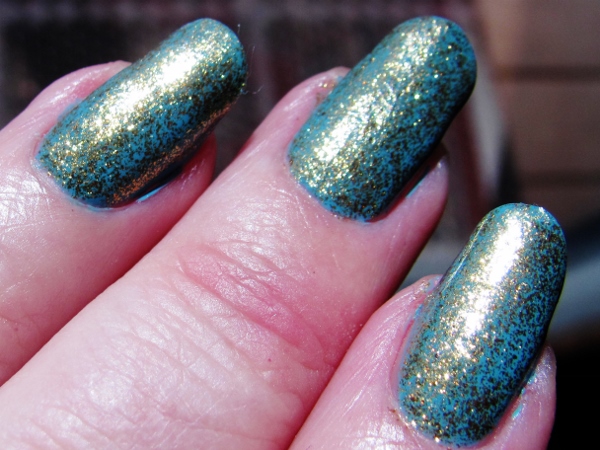
Viewing the blue through the filter of the gold magically creates a greenish hue reminiscent of weathered copper. This verdigris finish has a lot of depth to it and quite a bit of shine.

I always finish up with clear topcoat and a quickdry liquid that also conditions the cuticles.

Here is a closeup of the nails.

Yep, I think I'll write down the 'recipe' for these so I can do them again.

Ddd


Posted by studio3d@ccgmail.net at 12:01 AM PDT
Thursday, 20 March 2014
It's NOT a Pox
Topic: Nail Art

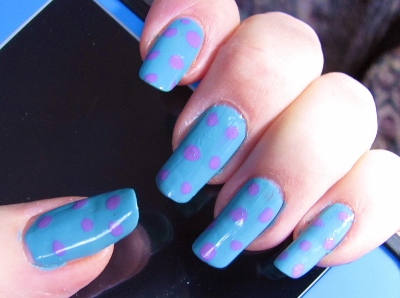
Inspired by the new spring pastel nail colors in a Cover Girl ad and sucked in by a coupon offer, I bought two small bottles of polish. Unfortunately, the new pastels did not come in the little bottles so I ended up with slightly brighter shades than I anticipated. Oh Well...

I wanted to use both of my new shades and found the easiest way to do that was to immediately dot on color two as soon as color one's second coat was laid on - nail by nail. This allowed the dots to self-level and spread rather than sitting on top and being slightly raised.

Overall, I like the effect even though it is a smidge bright for me.

Not only that, but look how coordinated and hip I look when dialing my new iPhone! LOL!

Ddd


Posted by studio3d@ccgmail.net at 12:01 AM PDT
Monday, 17 March 2014
Kitten Claws
Topic: Nail Art

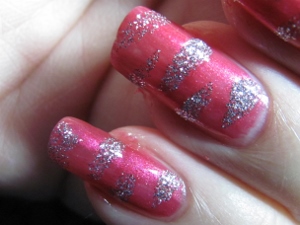
Quite a while back I shared some nail art of tiger stripes - yellowish base coat with black tiger stripes. I wanted to use the same paint method but with different colors for a more feminine look.

I used some Barbie pink polish as a base and added the stripes with silver glitter.


Here's a couple of the nails close-up


Sorta like tiger stripe but probably more like kittens.

Ddd


Posted by studio3d@ccgmail.net at 12:01 AM PDT
Friday, 3 January 2014
Inspired By Starry Night
Topic: Nail Art

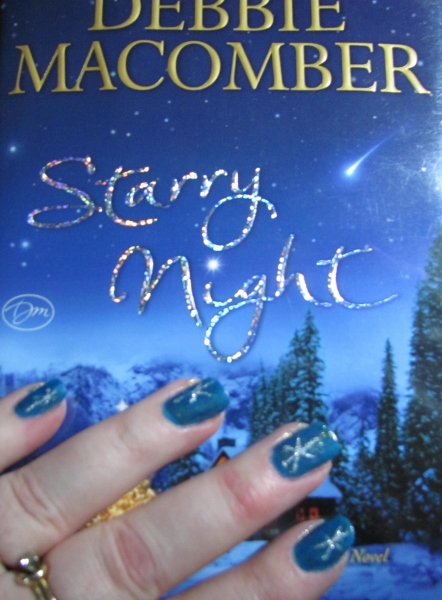
I recently picked up this book from the library and was inspired by the title and the colors to create some winter nail art. 

The book spends some time in Alaska where the characters are enthralled with the vast amount of stars in the sky. I painted my nails with blue and then created the starry sky with an overlay of gold glitter in clear polish. The wintery portion was to create snowflakes with silver glitter polish.

These nails don't match a single thing in my wardrobe so I might have to carry this book around everywhere until it's time to change them out! LOL!

Ddd


Posted by studio3d@ccgmail.net at 12:01 AM PST
Monday, 23 December 2013
Nailed It
Topic: Nail Art

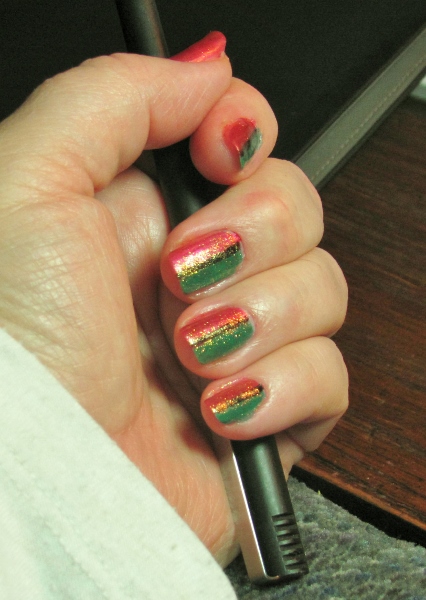
I decided to have a little holiday fun with my nails again.

I chose a dark rose and a bright green to color each nail half and half. Then I used black to create a dividing line in the center and covered over them all with gold ultra-fine glitter polish.

Very festive!

Ddd


Posted by studio3d@ccgmail.net at 12:01 AM PST

Newer | Latest | Older