« July 2024 »
S M T W T F S
1 2 3 4 5 6
7 8 9 10 11 12 13
14 15 16 17 18 19 20
21 22 23 24 25 26 27
28 29 30 31
You are not logged in. Log in
Entries by Topic
All topics
3D paperwork
A - Z challenge 5
A - Z challenge 7
A - Z challenge round 4
A to Z challenge round 3
A to Z round 2
A to Z round 6
A-Z round 1
Around the House
Art Challenges
Artist Trading Cards
Backgrounds
Beads
Bible Journaling
Books
Boxes
Collage
Color Challenge
Coloring
cookbook
Die Cuts  «
Digital Projects
Digital Stamps
Drawing
Dry Embossing
Fabric Stuff
Fantastic Folds
Field Trip
Home Decor
How Does Your Garden Grow?
Hymnal Art
In The Kitchen
In the studio
Jewelry
Lettering
Links
Multi-Technique
Music to Work By
Musings
Nail Art
New Work
Online Class
Other Hobbies
Other Projects
Painting
Paper Embroidery
Paper Piecing
Photo
Pretty Paper
Quilting
Random
reading
Scrap Recovery
scrapbooking
Sewing
Sketch Challenge
Some Backlog
Stamping
Stencils
Stickers
Supplies
Teabag Folding
Techniques
Testing
tips and tricks
Tutorial
Web resources
Welcome to my Blog
Work By My Friends
workflow
Writing
Blog Tools
Edit your Blog
Build a Blog
RSS Feed
View Profile
Group One
In & Out of Studio 3D
Tuesday, 24 May 2016
Diecut Scrap
Topic: Die Cuts

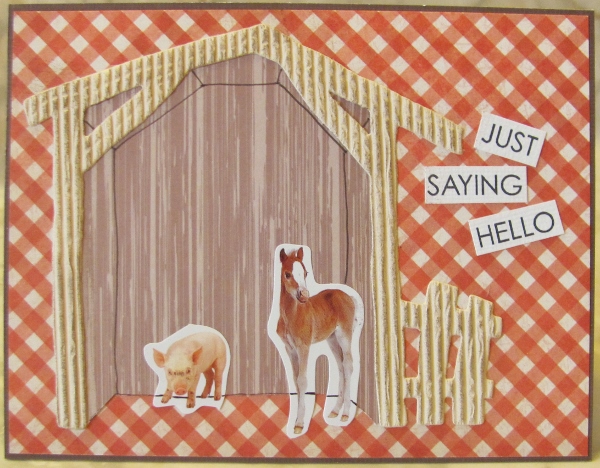
That nativity card I made almost two weeks ago used a diecut from corrugated cardstock. I kept the cutout piece of the barn for later use and, guess what, its later!

I also had some red checked paper which just screamed 'country' to me so that had to be included.

I backed the barn with some woodgrain and cut the base for dimensionality. Then I drew in some lines to represent the back wall.

I used some Distress Ink (sponged) on the surface of the barn piece and then glued the whole thing onto the red paper.

I added a couple of animal stickers from my stash to 'make sense' of the barn.

A pre-stamped sentiment was cut into separate words to adhere on the card.


OK - it's not high class or fancy but it will make a suitable card for a young child someday.

Ddd


Posted by studio3d@ccgmail.net at 12:01 AM PDT
Wednesday, 27 January 2016
And NOW We Have a Bingo
Topic: Die Cuts

I decided to have another go at the papercrafts bingo again, this time using the correct grid!

I actually made a bingo two ways on this by using: Diecuts, Spring and Ribbons from one column and Punches, Ribbons and Green from one row. I also used Flowers from elsewhere on the grid but it didn't line up with any other items that I used on the card.

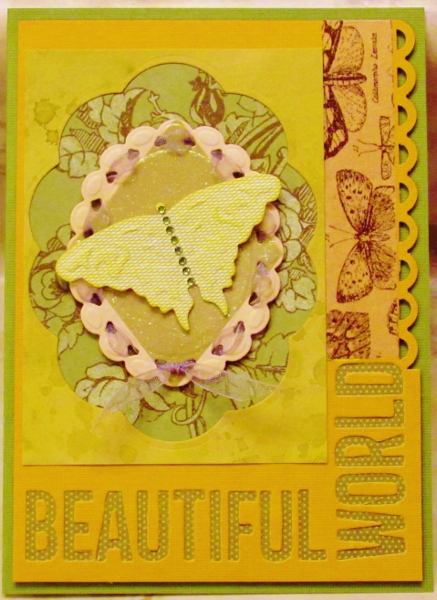
I used the topic of 'die cuts' for this entry because I used so many of them on this project. From front to back the die cuts are: butterfly (cut from fine green diamond cardstock), scalloped oval medallion (cut from a cream cardstock with textured diamond), scalloped frame (cut from wrinkle-free distress background and layered over green floral), words (cut from golden cardstock with Tim Holtz dies and backed with a fine green dotted paper).

I wove sheer ribbon through the holes on the medallion and knotted it at the bottom. The scallop up the right side is a border punch and the butterfly has a line of green rhinestones as the body.

I added a strip of butterfly washi tape just inside the punched scallop border.


There is foam tape under the golden layer, under the medallion and raising the butterfly wings.

I gave the project a green base card.

Ddd


Posted by studio3d@ccgmail.net at 12:01 AM PST
Wednesday, 13 January 2016
12 Tags of 2015 - A Late Creation For December
Topic: Die Cuts

Despite my best intentions - making all of the 12 tags of 2015 by Tim Holtz - I got so wrapped up in the holidays that I didn't get December's done last year. But I decided to go ahead and make it anyway, even though it is a month late.

Here is the original tag created by Tim:

Once again, I chose to make a showpiece instead of a tag. Here is the process I used.

- Cut a piece of grasscloth wallpaper sample into  the desired size.

- Place on paper towel

- Use Distress Stain to tint the piece

- Lay stencil over the piece and spritz with another color of Distress Stain

- Place a clean paper towel over the top and blot away extra ink

- Remove stencil and dry piece with a heat gun

- Run piece through Xyron to apply adhesive to the back

- Adhere to stiff backing and trim backing to size

- Ink edges of piece and backing

- Select various greens of kraft core cardstock and a red piece for other parts

- Diecut different greenery from each color of kraft core

- Sand surface with sanding block

- Lightly ink edges with Distress Ink

- On the base piece, trace a circle

- Gently crunch and crumple the diecut foliage

- Use glossy Accents to adhere greenery around the circle

- Create a dimensional bow from red kraft core cardstock

- Adhere bow to bottom of wreath using Glossy Accents

- Punch tiny dots from red kraft core cardstock. Adhere to wreath in twos and threes as holly berries

- Diecut greeting from red kraft core cardstock

- Sand surface with sanding block

- Cut a piece of sage green kraft core into a wide strip and ink edges with Distress

- Attach to main piece with small brads

- Adhere greeting to strip with Glossy Accents

And here is the final piece:
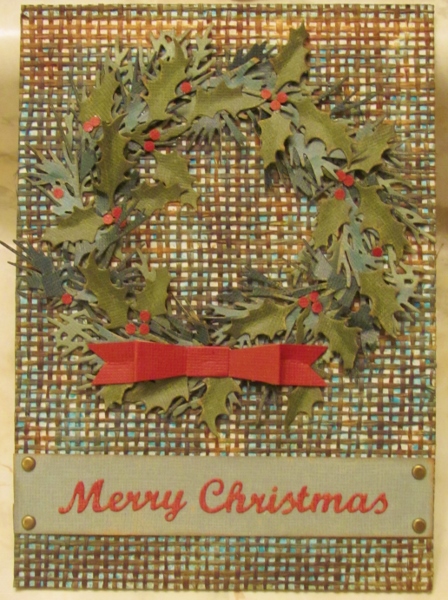

And, finally I am truly done with the 2015 'tags' series.

I do intend to give it a go for 2016 as well, so we'll see where that takes us.

Ddd


Posted by studio3d@ccgmail.net at 12:01 AM PST
Thursday, 3 July 2014
Berry Sweet
Topic: Die Cuts

Many, many years ago I ran across an idea for a card embellishment and tucked it away in the back of my brain 'for later'. Mostly because I didn't have the punches or dies to make it come to life.

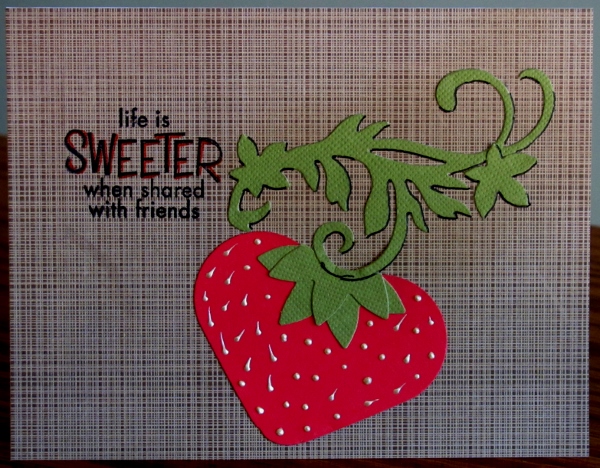
Since coupons and papercrafting sales were in my schedule a few weeks ago I made it a point to buy a heart punch and a set of flower dies. I had wanted these for quite a while and when I got them home it suddenly occured to me that I now had the elements to make this sweet strawberry.

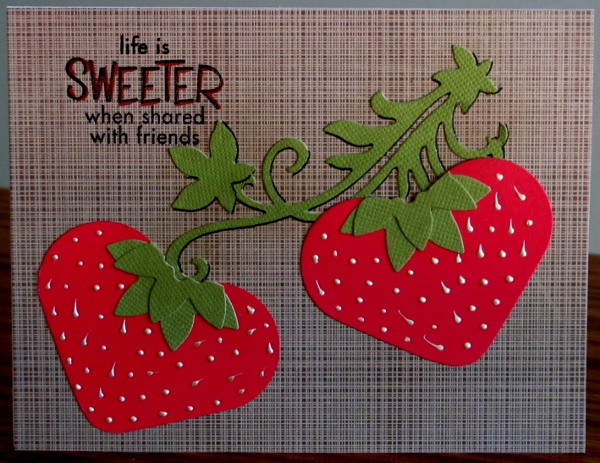
From red cardstock I punched the heart and then used a corner rounder on the bottom. From green cardstock I diecut a flower, cut it in half and layered it at the top of the heart. The addition of 'seeds' with Liquid Pearls brings the berry to life.

I first made a card with a single berry, using a cross-hatched brown background. I used green cardstock to diecut swirls and leaves and glued everything down. I stamped the sentiment in black. Then, to tie the elements together, I outlined one word in red and created a drop-shadow on the vines in black.

Then I made a second card with two berries on it - all of the processes and materials are the same.


The two cards do use different flourishes for the vines.

Ddd


Posted by studio3d@ccgmail.net at 12:01 AM PDT
Friday, 10 January 2014
It's A White-Out
Topic: Die Cuts

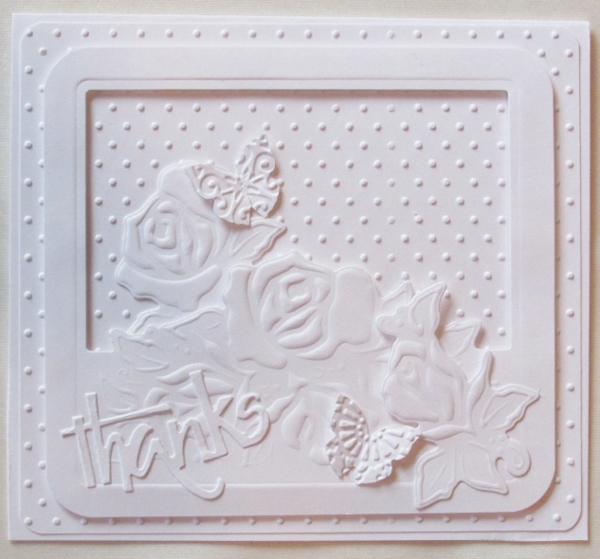
For a swap I needed a card using nothing but white. Well, short of turning in a single piece of white cardstock folded in half, the only way I know to do this effectively is to use lots of layers and textures.

I used dies to cut roses, butterflies and words and I used folders to emboss the butterflies and a background. The roses are embossed with the same die that cuts them.

Foam tape raises the floral frame off the background and the butterflies are glued only at the centerline.

Ddd


Posted by studio3d@ccgmail.net at 12:01 AM PST
Friday, 15 November 2013
On The Drift
Topic: Die Cuts

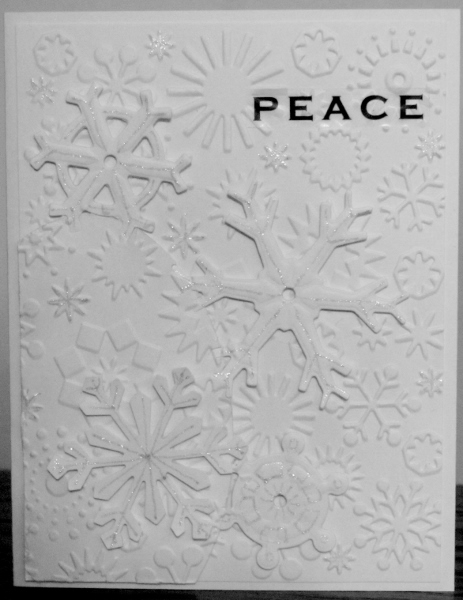
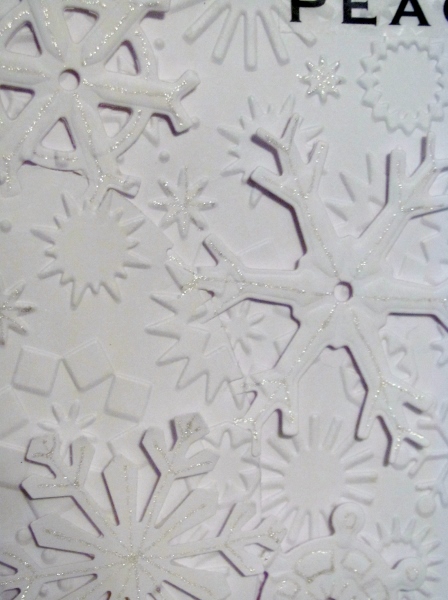
I know it is early to be talking about SNOW but I had an idea for a Christmas card that required the white stuff. This is a multi-step, multi technique project AND an experiment so...

First, I used an oval shaped dry embossing frame in the Cuttlebug to cut some snowflakes on the edge while leaving two legs of each attached to the oval. Then I used a craft knife to cut the rest of the oval away.

The next step was to use the oval shape from the center of the frame to spot-emboss a snowflake folder onto the oval portion of the shaped piece. I then used the whole folder to emboss a background piece.

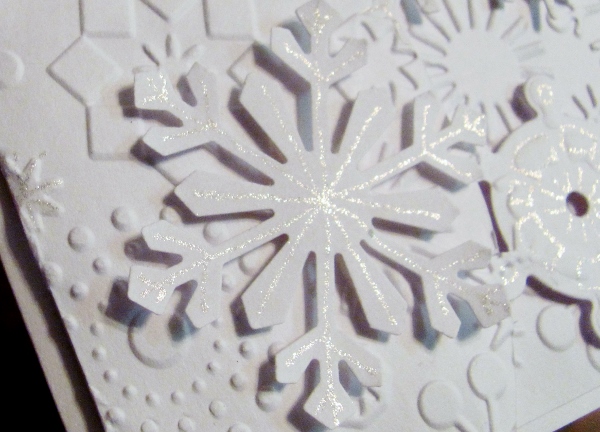
The shaped piece was mounted on the background with foam tape so all the snowflakes stand away from the card face. I used a Martha Stewart punch to make another large snowflake and mounted that on top of the oval with foam tape.


I applied a clear text sticker to the upper right and burnished it to flatten the embossing under it. The whole piece was then mounted to a white base card which creates a frame around the edges. Here you can see the oval line a little better.


The last step was to use a Sakura Stardust pen in silver to trace lines on all the diecut/punched snowflakes and the smallest embossed ones in the backgrounds.


All in all I think I like it. I was trying to find a style to mass-produce for Christmas this year. This may be more than I want to do over and over... and over... and over.

We'll see as time progresses.

Ddd


Posted by studio3d@ccgmail.net at 12:01 AM PST
Monday, 16 September 2013
Branching Out
Topic: Die Cuts

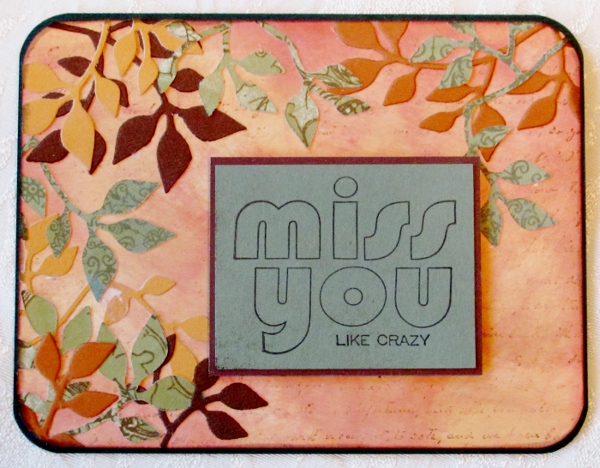
Start with a piece of white cardstock... that's the way this card began.

I sponged the cardstock with three Distress Inks (a yellow orange, a red, and a brown. Then I used a brown chalk ink to stamp a script in the background, wiping some of the ink off before stamping. I used a leafy branch die to cut from three solids and two printed papers. [BY THE WAY: I hate this die. Love the design but getting it to cut cleanly all the way through and release the leaves from the background is a giant, annoying pain.]

I glued all the leaves on the background, rounded the corners and sponged the edges with brown ink.


The feature panel is mounted on a dark green card base with rounded corners. A stamped sentiment on green is bordered in brown.

Ddd 


Posted by studio3d@ccgmail.net at 12:01 AM PDT
Tuesday, 3 September 2013
Spellbinders Cut and Tuck
Topic: Die Cuts

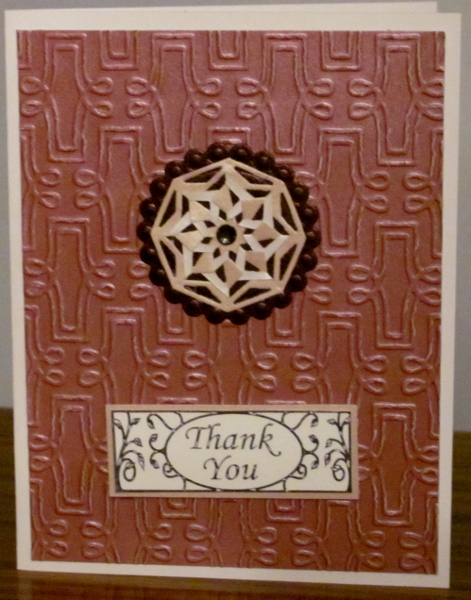
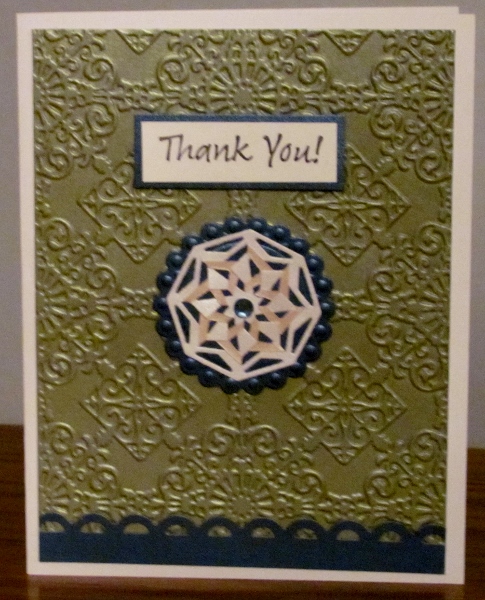
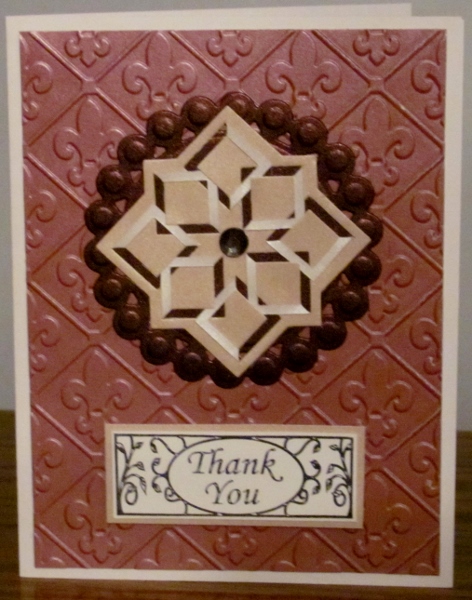
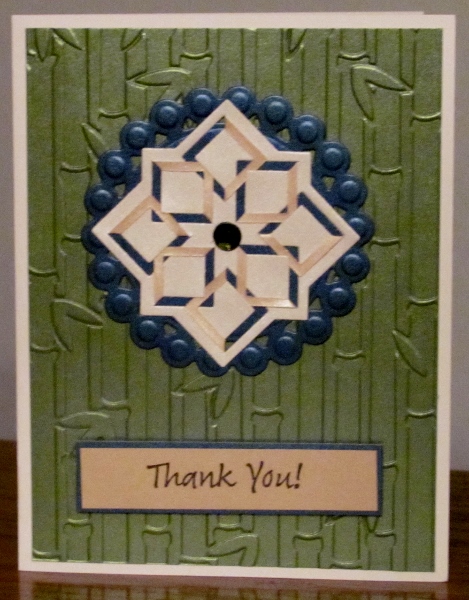
I recently got a new set of Spellbinders dies that has three sizes and patterns of cut and tuck medallions. The die cuts out the item as well as all the inner slices that allow you to fold back a 'V' shape and tuck it under the vacated 'V' from the neighboring cut.

I picked out the two smaller dies to play with. I used all shimmer materials - a duo tone paper for the medallions and cardstock for the embossed background as well as diecut scallops to frame the medallions.

The smaller medallion has additional cut out areas so has a more lacy feel. For the card with two pink shimmers I used an asian embossing folder.


For a green and blue combo I used the folder called Ornamental Iron. I added a scalloped border at the bottom to balance out the sentiment. (the camera has some issues will all this shine and texture)


Then I used the same sets of papers with the large medallion. The pink version got a fleur-de-lis embossed background.


And the blue/green version got embossing of bamboo.


I turned all of these into Thank You cards with the sentiments popped up on foam tape. Also, in each case the medallion got a rhinestone as a centerpiece.

Ddd 


Posted by studio3d@ccgmail.net at 12:01 AM PDT
Monday, 2 September 2013
Starring You
Topic: Die Cuts

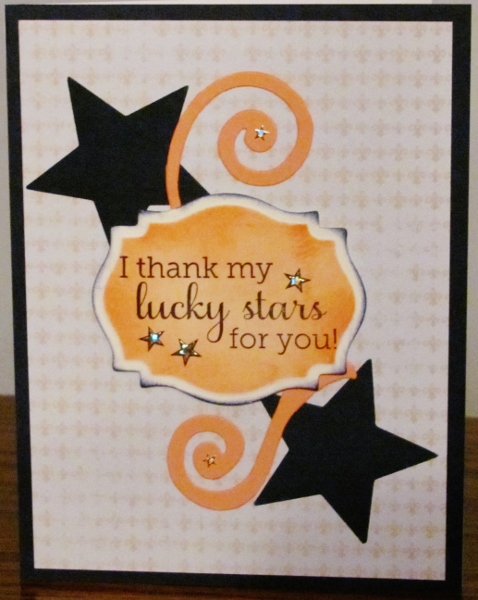
As I work on projects I take all the little leftover bits and toss them in a bin together. Occasionally, I will spread these contents out and pull some things together that I think will make a good combination. That's how I came up with today's card.

I had the punched stars from that slew of patriotic cards. The salmon diecut swirls were the last two left from a whole packet that someone had sent me in a swap. When I remembered that I had this sentiment already stamped on white cardstock, the plan started coming together.

I used a Spellbinders die to cut out the sentiment and, while it was still in the die, I used Distress Ink to sponge the same color as the swirls onto the center, leaving a white border. I used a second color of Distress Ink to sponge the edges to match the stars (They are really a very dark blue, not place as they appear).

I glued the stars and swirls to a patterned paper with lighter versions of the salmon and blue over a dark blue card base.


The sentiment is popped up on foam tape and I used holographic star stickers in three sizes as a finishing touch.

Ddd


Posted by studio3d@ccgmail.net at 12:01 AM PDT
Wednesday, 3 April 2013
The Flowers Die
Topic: Die Cuts

I had some ideas for using diecut flowers but don't have a die for flowers. I always had to cut them out by hand... no fun! So, on a craft supplies swap group, I saw a set of flower dies offered and in turn I offered a die that cuts parts for quilled flowers. I've never liked quilling so I was disappointed when I bought that die and never used it.

What a great trade! My partner also threw in a tiny flower die, a brackets die, and a little embossing folder with text.

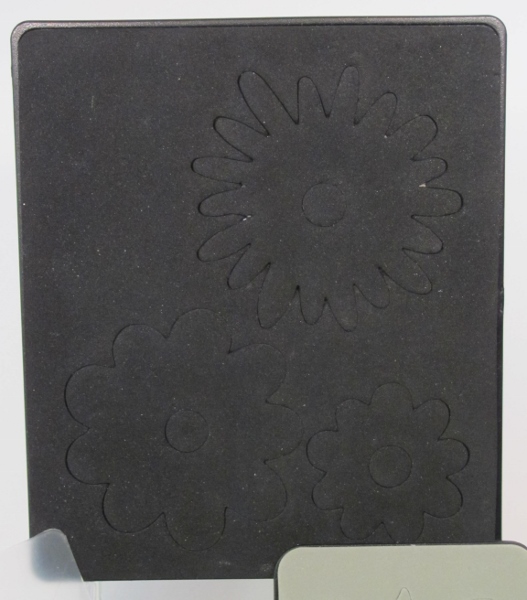
Here is the main die:

It is a Sizzix that cuts three sizes / two styles of blooms.

Looking forward to using this.

Ddd


Posted by studio3d@ccgmail.net at 12:01 AM PDT
Tuesday, 9 October 2012
It's a Frame-Up
Topic: Die Cuts

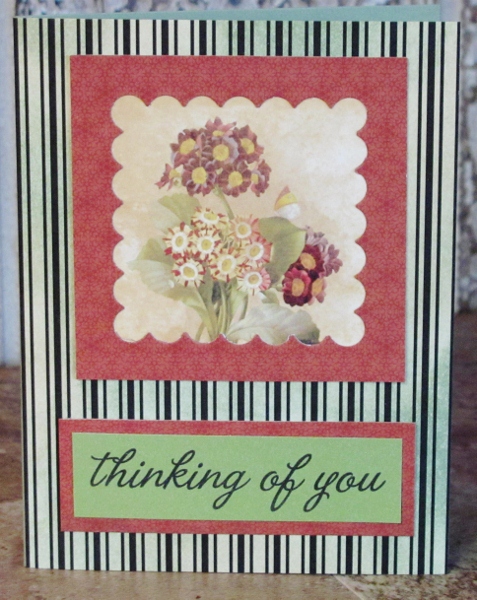
Technically the die cut item is the HOLE in the frame but I guess this qualifies.  I started out just messing with things on the table left over from other projects. I started with the frame and then found a paper with spot-printed botanical groupings I pulled out a stamped greeting to use that matched the green in the illustration and a bit of stock matching the frame. With all those elements on the table I looked for a good background and chose a cream and black stripe. WHAT? Cream and Black? Yeah, I used distress inks to make it green.


It all came together so easily.

Ddd


Posted by studio3d@ccgmail.net at 12:01 AM PDT
Sunday, 29 July 2012
Get Out Your Party Dress
Topic: Die Cuts

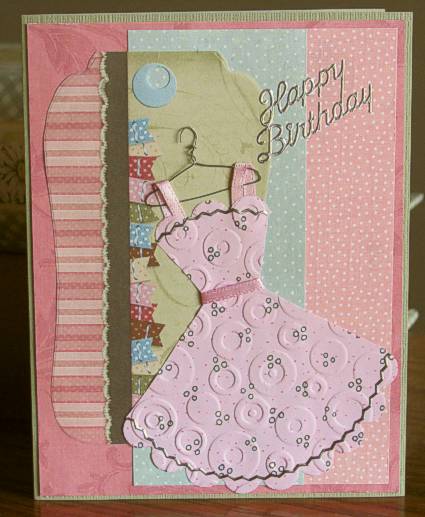
Some time ago I made a bunch of these little dresses by cutting Vs out of the sides of diecut scalloped circles. They were originally designed to be strapless but I think adding loops of ribbon makes them even cuter. I also used a strip of the same ribbon for a waistband. I used floral wire to construct the little hanger.

For background I selected a printed tag and then found papers that copied some of the same elements. I aligned one edge of the blue dot paper with a line in the tag and adhered the little dress at an angle.

I added a line of silver peel-off zig-zag border to the bottom and top edges of the dress and then applied a silver peel-off greeting.

Ddd


Posted by studio3d@ccgmail.net at 12:01 AM PDT
Sunday, 24 June 2012
Fancy Pants
Topic: Die Cuts

I was going for simple and elegant on this card but I don't think it turned out that way.

Love the background paper. Love the diecut flower. Loved the corner brackets but they may be too large. Loved the pink swirls but they didn't stand out enough so I added white dashed lines and now they stand out too much and the casual lines don't match the formal character of the card. Like the bow - don't love it, just like it.


Possible fixes: use the white pen to turn the dashed lines into solid lines, change up the bow for something more elegant like a rhinestone. Other suggestions?

Ddd


Posted by studio3d@ccgmail.net at 12:01 AM PDT
Tuesday, 19 June 2012
Think About Flying
Topic: Die Cuts

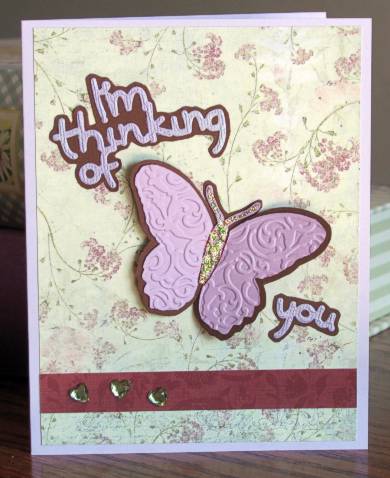
I love a butterfly with raised wings on a card. Someone sent me this purple butterfly that has been embossed and I had some purple diecut words as well. The background paper I chose had brownish/purple toned flowers on a green background. So I backed the words and butterfly with brown and then added a dark strip at the bottom.


I popped the butterfly wings up on foam and added some green Stickles to the body and antenae. Then I placed three heart-shaped rhinestone stickers on the bottom strip.

Ddd


Posted by studio3d@ccgmail.net at 12:01 AM PDT
Monday, 18 June 2012
Blue On Blue
Topic: Die Cuts

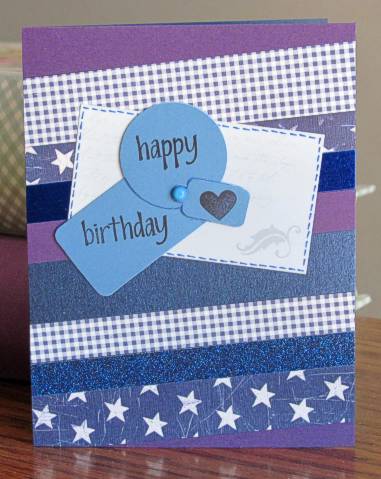
The assignment: make a card that is tone-on-tone blue. I raided the table scraps, the sticker bin and the die cuts stash for parts to use.

I started with a dark blue card base and cut strips from the table scraps to glue on in a tilted strips. Over to top I added a rectangle sticker on an opposite tilt.

Three shaped tags were stamped with the sentiment and mounted with glue dots and a blue brad.


Hey, what's with the camera inserting purple where I put in blue?

Ddd


Posted by studio3d@ccgmail.net at 12:01 AM PDT
Sunday, 17 June 2012
Swoosh!
Topic: Die Cuts

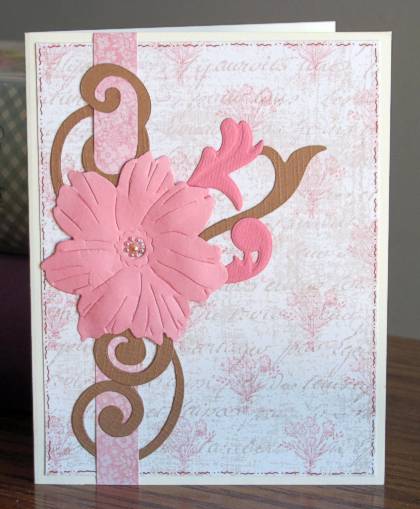
In rummaging around in my scraps I ran across some die cuts I had tossed in a bin for 'later'. First I pulled out a lovely flower piece and used foam as a base under it to burnish and get a rounded shape. Then I pulled out the brown swirls - 5 of them and found the colors went so well with a particular piece of patterned paper that I had.

Adding a pink swirl and a pink patterned strip made it all come together.


I added some doodle lines around the edges, placed foam under the raised parts of the flower petals and a little multi-pearl center to the flower.

Yummy!

Ddd


Posted by studio3d@ccgmail.net at 12:01 AM PDT
Tuesday, 17 April 2012
Impressed - Not Impressed
Topic: Die Cuts

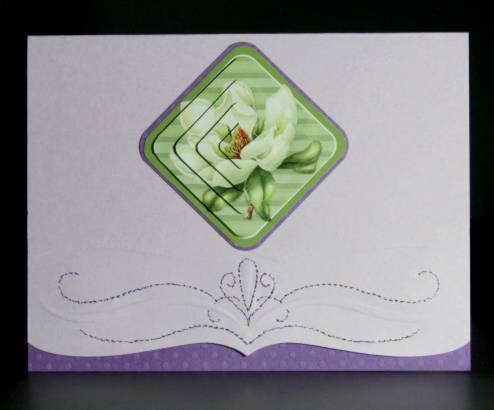
I bought a couple of new sets of Spellbinders dies called 'Piercabilities' that I thought had promise for cutting card edges. This is the first one I used. They have a cutting edge, scrolls or other shapes that emboss, and little holes that I thought might emboss or even I could pierce through them and do stitching.

The edge cuts fine.

The embossing is faint.

The holes embossed so little that it looked tacky. So I left the die in place and pierced through the holes. Looked pretty lame. I decided to do faux stitching with a purple fine-line marker. Still looks tacky.

I decided to back it with purple to match the stitching lines and to cover up the pierced holes on the other side. Then I added a pyramid 3D illustration that I had backed with more purple.


I am not impressed with how this is impressed. I will try out the other 3 dies but don't hold out much hope for them. They may end up in my 'gift stash' to send of with a swap to someone.

Ddd


Posted by studio3d@ccgmail.net at 12:01 AM PDT
Saturday, 17 March 2012
Doilies, Diecuts and Punches - Oh My!
Topic: Die Cuts

On one group we were challenged to use doilies on a card and another group challenged us to use diecuts and punches. So I used all three on one card to meet both challenges.

I embossed the front panel of the base card with a Cuttlebug Hearts folder and built directly on it. The purple background circle and the red foreground circle are both doilies. The scalloped circle is a texturized cardstock that I diecut with a scalloped circke and used a 1/8-inch punch to create the holes. I glued the red doily to the front and added heart brads and rhinestones before mounting over the purple doily using foam tape.


The script is also a diecut whick I glittered with Stickles.

Ddd


Posted by studio3d@ccgmail.net at 12:01 AM PDT
Wednesday, 14 March 2012
Hot Tropics
Topic: Die Cuts

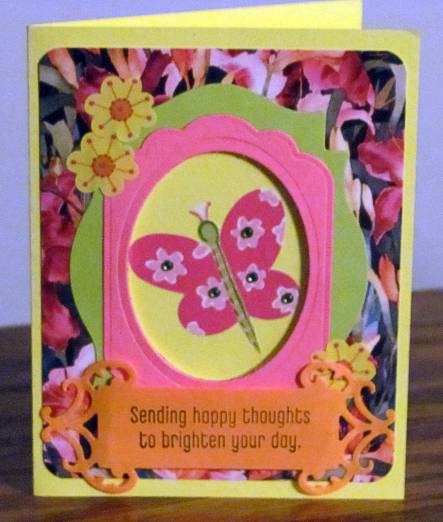
This challenge was to use hot troical versions of pink, green and yellow. I found an old card front image that had the right colors in it and used that for my background.

I diecut varying sizes of frames in multiple colors and shapes and layered until I had an arrangement I liked. This was glued to the card front and then the center oval was cut out of all the layers together.

The base card is neon yellow and I attached a butterfly sticker to the center. The constructed piece is mounted with foam tape around the opening and with glue (flat to the card) around the outside edges.


I stamped and diecut the text label out of neon orange and mounted with foam tape on the middle and glue on the ends. Three sticker hearts decorate the front and I added rhinestones to the flower centers on the butterfly.

Ddd


Posted by studio3d@ccgmail.net at 12:01 AM PDT
Tuesday, 18 October 2011
I Was Framed
Topic: Die Cuts

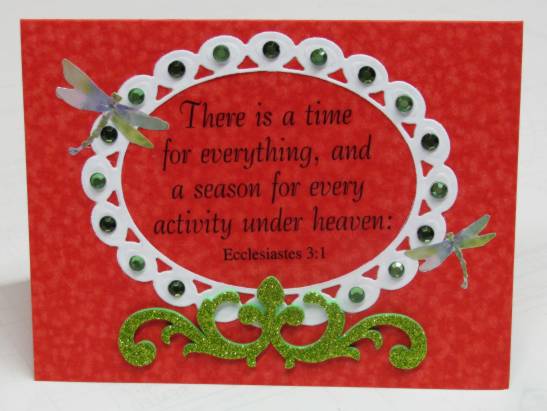
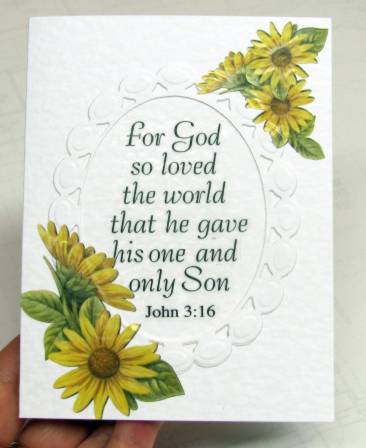
Left over from the 'dog days' project I had two of the beaded oval frames left over. Here are the two projects I made with these:

The first uses the same red splotchy cardstock as the base and the white frame placed the same as the dog cards. However, I had a clear scripture sticker which I added to the center. I found an awesome glittered foam bracket for the bottom and then added two tones of green rhinestones to the frame. A couple of irridescent green dragonfly stickers finish it off.


This one has the white frame added to white cardstock so you just get a subtle look. I used a clear scripture sticker for the center again and added some sunflower stickers at the corners.


So hard to photograph white on white - looks much better in person.

Ddd


Posted by studio3d@ccgmail.net at 6:00 AM PDT

Newer | Latest | Older