« May 2011 »
S M T W T F S
1 2 3 4 5 6 7
8 9 10 11 12 13 14
15 16 17 18 19 20 21
22 23 24 25 26 27 28
29 30 31
You are not logged in. Log in
Entries by Topic
All topics  «
3D paperwork
A - Z challenge 5
A - Z challenge 7
A - Z challenge round 4
A to Z challenge round 3
A to Z round 2
A to Z round 6
A-Z round 1
Around the House
Art Challenges
Artist Trading Cards
Backgrounds
Beads
Bible Journaling
Books
Boxes
Collage
Color Challenge
Coloring
cookbook
Die Cuts
Digital Projects
Digital Stamps
Drawing
Dry Embossing
Fabric Stuff
Fantastic Folds
Field Trip
Home Decor
How Does Your Garden Grow?
Hymnal Art
In The Kitchen
In the studio
Jewelry
Lettering
Links
Multi-Technique
Music to Work By
Musings
Nail Art
New Work
Online Class
Other Hobbies
Other Projects
Painting
Paper Embroidery
Paper Piecing
Photo
Pretty Paper
Quilting
Random
reading
Scrap Recovery
scrapbooking
Sewing
Sketch Challenge
Some Backlog
Stamping
Stencils
Stickers
Supplies
Teabag Folding
Techniques
Testing
tips and tricks
Tutorial
Web resources
Welcome to my Blog
Work By My Friends
workflow
Writing
Blog Tools
Edit your Blog
Build a Blog
RSS Feed
View Profile
Group One
In & Out of Studio 3D
Monday, 9 May 2011
Frog Pond
Topic: Paper Embroidery

Assignment: Make a paper embroidery card with the theme "Pond Life".

This is one of my own patterns. I stitched in coral and olive threads on light blue cardstock. These are backed with a green woodgrain print and a coral folded card base.

The text and the frog are both stickers.

Ddd


Posted by studio3d@ccgmail.net at 6:00 AM PDT
Sunday, 8 May 2011
We've Got the Blues
Topic: Paper Embroidery

Assignment: Make a paper embroidery card with only blue and white

When I got this assignment I immediately thought of blue delft plates. But I couldn't find a stitching pattern for one and then I ran across this coffee set in a paper embroidery book I have. Perfect! It was even stitched in blue in the sample.

This is stitched in two blues and I placed it on a blue paper that has the imprint of water taffeta as I thought it looked like a tablecloth fabric. The corners got silver peel-off stickers and they are connedted by blue peel-off borders.

Ddd


Posted by studio3d@ccgmail.net at 6:00 AM PDT
Saturday, 7 May 2011
Dreams of Easter
Topic: Stamping

I had a dream... well actually I woke up one morning and this card was already created in my head - completely. I sketched it out while I ate breakfast and later in the day went off to the studio to see how it would work out. Result? No changes needed from the dream to the reality! Here's how it all went together:

I folded up light blue cardstock and used a yellow chalk ink pad direct-to-paper to make some 'rays' on the top of the left side. I stamped the cross on yellow card and colored it in with copic markers. It was then cut and the edge embossed with a round nestabilities die. I wanted to use a shimmery white card for the foreground elements but had none. So I mixed some hairspray and 'pearl' Pearl-Ex powder in a misting sprayer and spritzed it over plain white cardstock. From this I cut the cloud shapes and ran them through the 'd'vine' Cuttlebug folder.Then I used more of it to stamp the text and cut these out with a scalloped nestabilities die. Three tiny flower rubons were applied to this piece (two at the bottom and one in the middle of the 'O') and then it was popped up on foam dots.

And there it is - a dream come true! Here's something you WON'T see much, though - I set up an assembly line and made 8 of these while I had the supplies out.

Tah Dah!

Ddd


Posted by studio3d@ccgmail.net at 6:00 AM PDT
Friday, 6 May 2011
Three Inches of Broken Glass
Topic: Stamping

Assignment: make a card using inchies

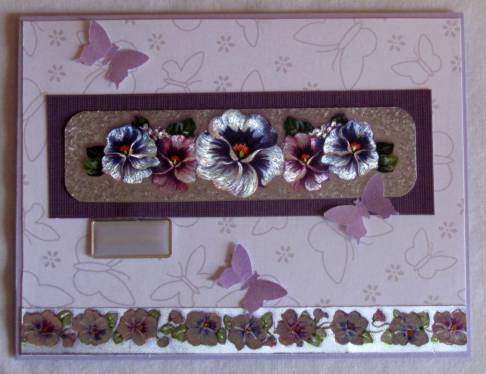
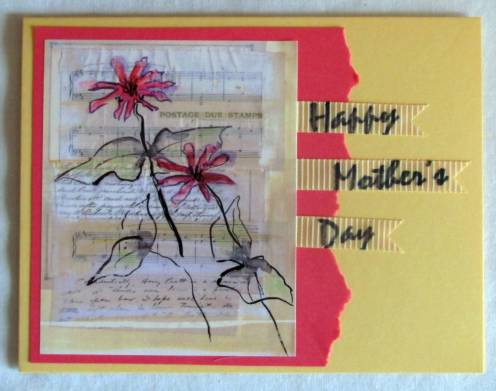
For those who may not know, inchies are one inch square pieces of art. In this case, I had just purchased a little set of one inch acrylic stamps so I chose to try one of them out. I stamped it three times and colored with copic markers. I color-blocked the backgrounds - using the same colors but in blocked areas rather than doing the whole background one color. I rotated the color areas for each inchie.

I wanted to make the inchies look like they were glassy so I covered them entirely with a thick layer of Glossy Accents and left them to dry overnight. Unfortunately, they were slightly curled then they dried. Sometimes they can be flattened out but the studio was cold so they started cracking when I bent them. Solution? Make them crack a LOT and then rub walnut ink into the cracks. This gives the evvect of broken glass. 

I chose some table scraps to layer on a yellow folded card base and glued the inchies on with more Glossy Accents. I drew some pen 'stitching' around the top panel and added a gold peel-off greeting.

Ddd


Posted by studio3d@ccgmail.net at 6:00 AM PDT
Thursday, 5 May 2011
For Father
Topic: Stickers

More from the sticker stash. I layered with green cardstock over a red and yellow check. I tied a yellow ribbon around the focal image and stamped the text on shimmery yellow paper. This was then cut into a tab shape and mounted adjacent to the green frame.

After adding layers of yellow and a green folded card base I pulled out some clear stickers and found the little ladybug I added to the bottom. Cute!

Ddd


Posted by studio3d@ccgmail.net at 6:00 AM PDT
Wednesday, 4 May 2011
Simple Thanks
Topic: Scrap Recovery

I wanted to feature the small image from the stamp catalog so just added multiple layers in coordinating colors pulled from the watercolor markers I had used.

The layers are all made from table scraps mounted on a green folded card base.

Ddd


Posted by studio3d@ccgmail.net at 6:00 AM PDT
Tuesday, 3 May 2011
Too Cute Tutu
Topic: Scrap Recovery

This tutu image is from the stamp catalog, colored with watercolor markers. I framed it out with a scrap of white from which I had previously cut a scalloped circle. The folded card base shows through as the cream background. I drew the hanger in with flack fine-line marker.

The scalloped paper was backed with rose print scrapbook paper from an old page-a-day calendar. It matched the rosebud on the tutu neckline.

I used silver peel-off sticker to create the frame on the white layer and then used silver sticker 'waste' to make the little hash marks around the scallops.

Ddd


Posted by studio3d@ccgmail.net at 6:00 AM PDT
Monday, 2 May 2011
Easter Pansies
Topic: Scrap Recovery

The pansy elements for this card are leftovers from a foil 3D sheet I bought. The butterflies are punched from leftover shimmery paper scraps. White butterfly background was left over from a previous project. Text tag is part of a previously used package.

I used a folded card base of lavender and a frame for the pansies of orchid. These tie all the elements together.

Ddd


Posted by studio3d@ccgmail.net at 6:00 AM PDT
Sunday, 1 May 2011
Couch Call
Topic: Collage

This card features stamping and stickers to create a cozy scene. The wallpaper is printed scrapbook paper and the floor is a strip of printed cardstock. I added the topiary sticker and also used a sticker for the wall art.

The couch caller is a rubber stamp image - from the stamp catalog - which I colored with watercolor markers.

I hand drew and lettered the conversation balloon and then glued it on.

Ddd


Posted by studio3d@ccgmail.net at 6:00 AM PDT
Saturday, 30 April 2011
Sending You Love
Topic: Stamping

Don't you love these little hedgehogs? I colored them up with watercolor markers and sent them on a mission to deliver Mother's Day greetings. They run across a field of red checked paper to which the greeting was inked.

I selected a folded card base in yellow to match the balloons.

Ddd


Posted by studio3d@ccgmail.net at 6:00 AM PDT
Friday, 29 April 2011
Spring Fling
Topic: Stickers

When I pulled out this sticker to use I saw that at one time I had clipped out bits of the right-hand side of it to use on some other project. Solution - cut the whole right side with a wavy edge. Then I tore the edge of a shimmery pink paper with an echoing curve and mounted the sticker on top. I sliced through the image on each side of the vase to thread a pink ribbon through and knotted on a greeting tag that says 'spring'.

A teal folded card base matches the leaves on the sticker.

Ddd


Posted by studio3d@ccgmail.net at 6:00 AM PDT
Thursday, 28 April 2011
Double Delight
Topic: Stickers

You may be wondering why I need so many Mother's Day cards? I am sending many of these holiday cards to operationwritehome.org, an organization that provides hand-made cards to deployed soldiers so they can write home with them. They requested cards for Mother's Day, Father's Day, Easter, and Spring.

Today I have a card using two stickers from the same sheet. I used gold peel-off stickers to enhance the flower centers with tiny dots and to add corners to the large image. The main image is mounted on green shimmery paper and a block of orchid is stamped with the greeting.

The folded card base is a flecked light lavender to tie all the elements together.

Ddd


Posted by studio3d@ccgmail.net at 6:00 AM PDT
Wednesday, 27 April 2011
Easter Dove
Topic: Stickers

Today's card features another collage sticker which I mounted on lavender cardstock for a frame. This was so large as a result that most of the cream colored card base is covered. This allowed for only two accents: a dove charm threaded with cream colored ribbon and a metal/epoxy word charm that says 'Happy Easter'.

This was so simple I wonder why I waited so long to use these stickers?

Ddd


Posted by studio3d@ccgmail.net at 6:00 AM PDT
Tuesday, 26 April 2011
Mother's Day Ribbons
Topic: Stickers

The other sticker sheets of florals are collage-look with sketched blooms and plants. For this one I chose matching folded card base and a backing block for simple layering.

The text is stamped onto ribbon which was then trimmed with fancy ends and mounted between the layers.

Ddd


Posted by studio3d@ccgmail.net at 6:00 AM PDT
Monday, 25 April 2011
Father's Sunflower
Topic: Stickers

This large sticker and it's border are from the same sheet as yesterday's card. I mounted the sticker on a green border to distinguish its brown frame from the chosen background. That background is shimmery brown paper which I ran thru a Cuttlebug folder for texture. The text is also a sticker mounted on green which I cut into a tag shape, hole punched, and threaded onto yellow ribbon.

Both the main image and the tag are raised up on foam dots while the ribbon is glued flush to the card. I used a cream-colored folded card base.

Ddd


Posted by studio3d@ccgmail.net at 6:00 AM PDT
Sunday, 24 April 2011
Tiger Lily for Father
Topic: Stickers

I've had a few sheets of floral stickers around for several years and have found that they are too large and flashy to use as accents on cards like Iusually do with stickers. So I decided to use them as a starting point and build cards around them.

This is from one of the sheets resembling watercolored flowers. I liked the simplicity of it and wanted to keep the other card elements simple to not detract from the image. I chose a mottled paper, a solid brown and a folded card base of a peachy orange.

The border on the left is a sticker from the same sheet and the text was stamped.

Ddd


Posted by studio3d@ccgmail.net at 6:00 AM PDT
Saturday, 23 April 2011
Mother Like No Other
Topic: Scrap Recovery

This image is from the stamp catalog (someday I'll run out of these, but not anytime soon). Het pattern was so busy I went with a dard background paper with a fine print - still matching the colors. I placed these over a teal folded card base.

The flowers each got a milky flower sticker and a rhinestone that was colored with Copic marker to match.

The illustration was slashed at the backet handle to thread in the red tag. I used the tape technique discussed yesterday to create the greeting. The part of the greeting that reads 'like no' is hand written with Sharpie marker.

Ddd


Posted by studio3d@ccgmail.net at 6:00 AM PDT
Friday, 22 April 2011
Thinking of Mother
Topic: Scrap Recovery

Layers and more layers of scraps from the desktop: illustration from the stamp catalog, a scrap of printed paper, an embossed paper, and a folded card base.

I stamped the text at the top using a stamp that actually says "Mother's" as part of a set that lets you combine greetings. I cover the 's with transparent tape, ink the stamp, peel of the tape, then stamp with it.

Ddd


Posted by studio3d@ccgmail.net at 6:00 AM PDT
Thursday, 21 April 2011
For You Mother
Topic: Scrap Recovery

Assignment: Another Mother's Day card

This started with the tiny illustration from the stamp catalog, colored with watercolor markers. I mounted this to gold cardstock and popped up on foam over the blue and white stripe paper. 

I stamped the text on a green tag and knotted a pink ribbon through the hole. This, too, is on foam dots. Pink folded cardstock is the base.

Ddd


Posted by studio3d@ccgmail.net at 6:00 AM PDT
Wednesday, 20 April 2011
Mom's Plant
Topic: Stamping

Assignment: Make a Mother's Day card

After coloring this image I got in a swap I slit the image next to the stem and tied a knot in a ribbon threaded through. Then I slit around the pot and slid in the piece of pink polkadot paper. A bit of grey marker makes a shadow for the pot and a stamped tag addresses the gift to 'Mom'.

After rounding the top two corners I mounted it on the black and white checked paper and this over a pink folded card base.

Ddd


Posted by studio3d@ccgmail.net at 6:00 AM PDT

Newer | Latest | Older