Topic: Stamping

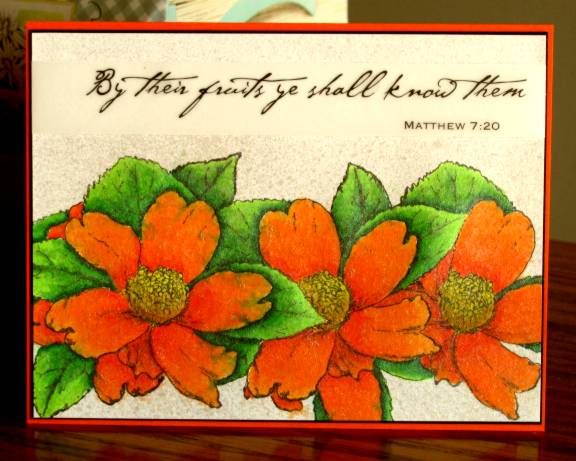
Our first demonstration was stamping on burnished glitter. Well, I don't use glitter since I started making cards for Operation Write Home becuase the glitter gets on the soldiers' clothing and makes them visible to night scopes. BAD THING! In order to keep from contaminating OWH cards I just don't use glitter at all. So I had to think of a way to make the concept work for me. I had some white cardstock that I had sprayed with a shimmer mist a long time ago. I used a piece of that and stamped a floral on it with Archival ink, masking so I could get three blooms and extras of the leaves. I used watercolor markers - three of each color group - to color up the image and blend the colors. I was liking it pretty well at this point but the coloring took away some of the shine. I decided to spritz over the top with Perfect Pearl mist. This caused the colors to start running together and I FELL IN LOVE! I used a heat gun to dry the image so the running would't go too far. I cut a strip of printed vellum for the text and wrapped it to the back to adhere it. I also tucked a couple of mini glue dots under the text and they don't show. Then I mounted with a very fine black border and an orange card base.
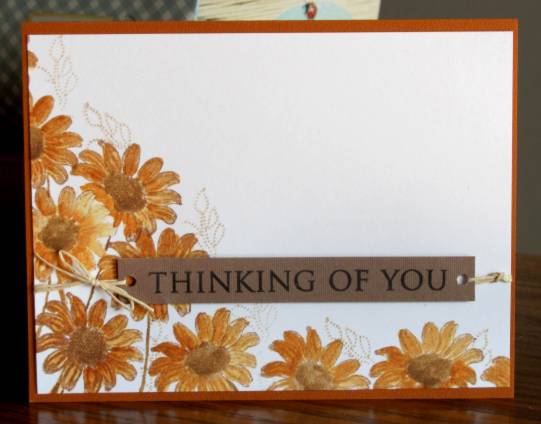
Next I used a different floral image and stamped all over a white card with Archival Ink. I colored in only one of the images with watercolor markers, using three of each color group. I spritzed over the top with a mist spray and, after drying, used old paper distress ink to tone the panel while leaving a white area around the feature bloom. I mounted on colored cardstock and added a bordered pre-stamped sentiment. Three small purple rhinestones under the sentiment help balance the design.

Another floral image was chosen and stamped repeatedly in a corner treatment using pale chalk ink. I used distress inks like watercolors to paint the blooms. It was a little sparse so I stamped some fillers from another set and painted them as well. For the sentiment panel I punched two 1/8 inch holes on each end and removed the cardstock between them to make slots. This I used to thread sheer ribbon. I used foam tape to pop up the sentiment and then pulled the ribbon ends to the back to attach before adding to a colored card base.

I repeated the technique in a monochrome look by stamping with a darker chalk ink and painting only with brown tones. I did not paint the fillers on this one either. The sentiment is tied on with scrappers floss through single holes instead of ribbon and slots.
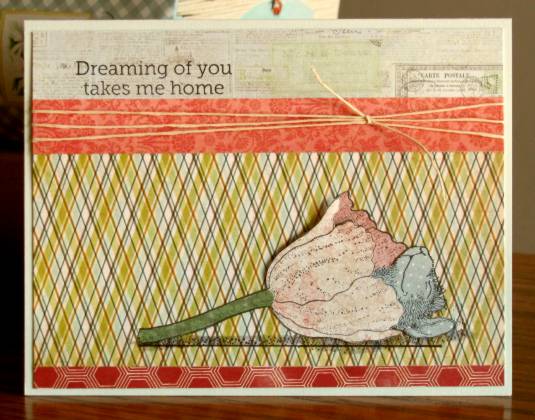
One of the techniques suggested was paper piecing in a 3D manner. I pulled out my little sleeping mouse and stamped once on a patterned paper base and then on 4 other patterned papers for the parts of the picture. The elements were cut out, leaving parts underneath so you can see 'into' the image. I mounted the back of the flower flat to the background, then added the mouse with his head popped up on foam tape but the body not popped. The flower front is on foam at the open edge and stuck to the background at the base. The whole stem is glued directly on the backbround. I added a shadow underneath with a marker. Three strips were selected to band the top and bottom and scrappers floss was tied around one of the top strips. Then I mounted it to colored cardstock. On this first one I stamped the sentiment directly on the background.
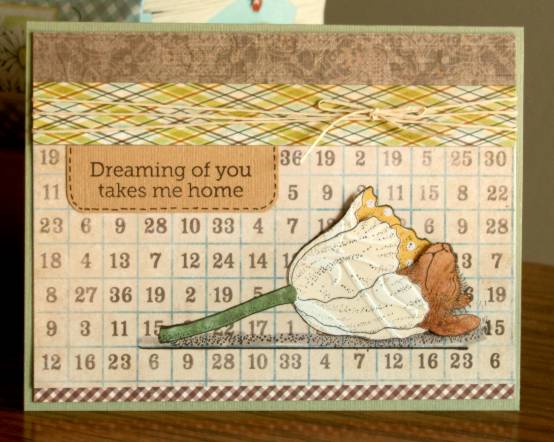
The next one is the same concept with different papers for all of it. I also used a pre-stamped sentiment and trimmed it, rounded the corners and added dashed lines. Then I stuck it on, aligned with a paper seam. (How different that diamond plaid looks when it is on it's side!)
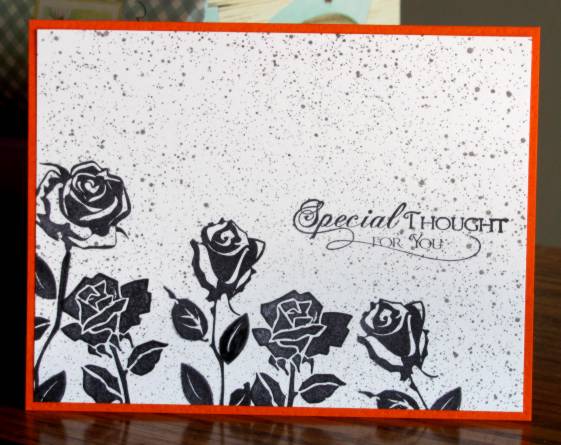
The final card is the most simple one. We used a more graphic floral stamp in black to create a silhouette. I used three stamps from two different sets and then grabbed a leaf from a third set as a filler. I spritzed the whole thing with black mist and stamped a sentiment with Momento black ink. The only color is the card base.
Another successful day of stretching my stamps!
Ddd
