Topic: Stamping
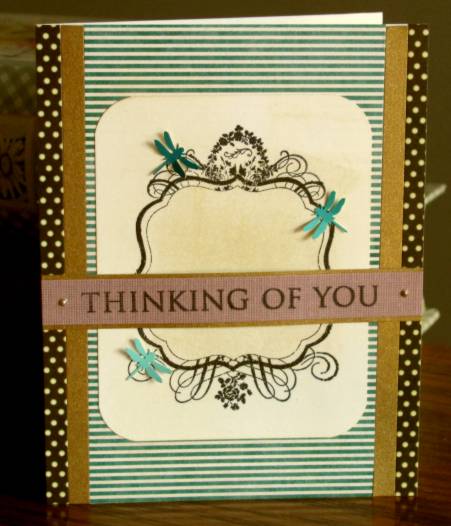
Our first lesson was using a smallish label as a supporting element for a larger sentiment. I used the label in a pretty straitforward way by stamping on white cardstock with black ink. I used distress ink to tone it darker in the center. I trimmed this panel down and rounded the corners. then I used a black Spica glitter pen to darken the thickest lines and give them some shine. I layered the panel over the green stripes and added a gold and a dot strip to each side while mounting to the card base. I bordered a long sentiment strip with gold and added it to the card front by gluing at the ends and popping the middle on foam tape. I added three dragonflies punched from a paint strip and made dots of Liquid Pearl at the ends of the sentiment strip.
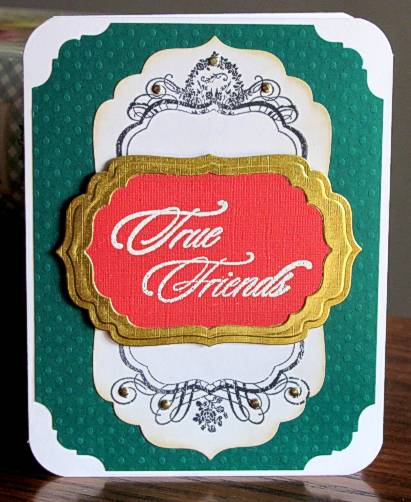
The next suggestion was to make the label seem larger by stamping the top and bottom separately. I did this on white cardstock and tinted the edges with distress ink. Then I cut it out with a nestabilities die by cutting the top and the bottom separately. I attached this panel to the green dotted cardstock and used corner scissors to trim it. This was placed on a white card base and those corners were rounded. On coral cardstock I stamped a sentiment with versamark and embossed it in white. I cut a gold frame using two nestabilities dies and mounted it on the coral piece. These were popped up on foam tape. I added gold nail head stickers to the scrolls on the stamped label.
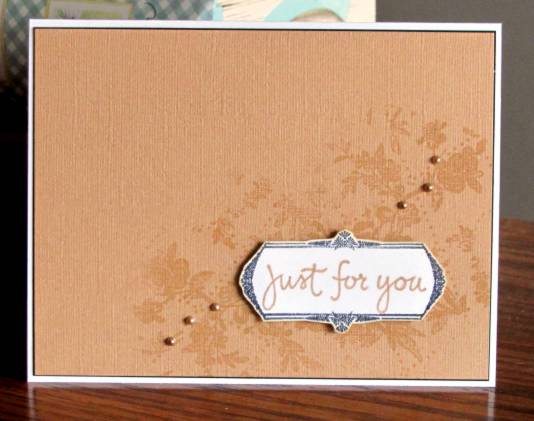
I switched to the other label for these next two. I stamped a floral spray with versamark on a tan cardstock and embossed in clear just to give a tone on tone background. I trimmed and bordered this panel and mounted to a white card base. I stamped the label on white cardstock with black ink, trimmed and tinted the edges with distress ink. I stamped the sentiment on the label with chalk ink and mounted to the card front with foam tape. Three pearls added to each side of the spray are the finishing touch.
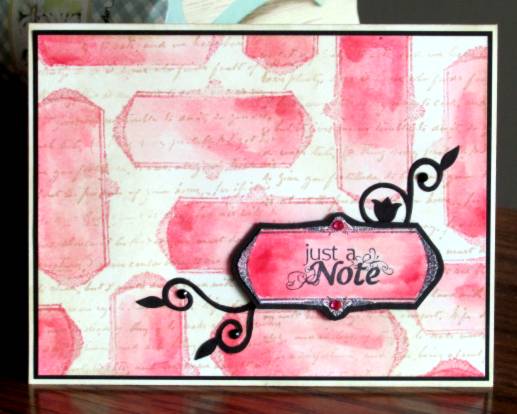
For this card I used the label to create a background by stamping repeatedly on white cardstock with red chalk ink. Then I colored with a red marker on an acrylic block and used that ink to watercolor the labels. When it was dry I stamped the script image with light brown chalk ink, trimmed the panel, bordered it with black and mounted it to a white card base. The layers were then all tinted with distress ink. I stamped the label on white cardstock with black ink and watercolored it as well. Then I stamped the sentiment in black and trimmed the label. I backed it in black and popped it up on foam tape. I used a Cuttlebug die to cut black scroll elements and glued them in place. Three black rhinestones are set in the scroll ends and two pink rhinestones grace the top and bottom of the label.
I think I am definitely learning in this class.
Ddd
