Topic: Stamping

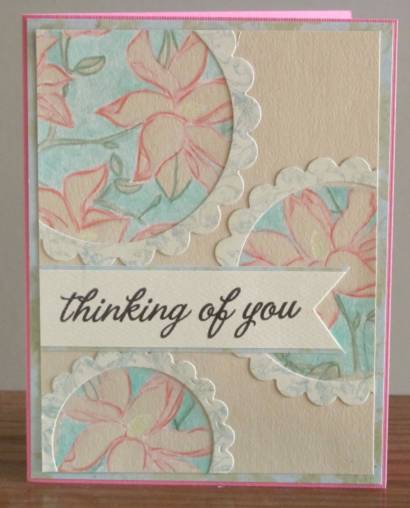
The first set was done by masking a piece of kraft cardstock with circle openings and stamping the background stamp with white pigment ink. I heat set the ink and then used colored pencils to color over the white inked portions. I also traced the outlines of the open areas in colors appropriate for each area of the design. I Used a Prismacolor blender pencil to smooth out the coloring. I used a plain and scalloped spellbinders die to make decorative frames from patterned paper, trimmed out the panel and backed it with another patterned paper and a colored card base. The sentiment was stamped on kraft paper, trimmed, and backed with patterned paper. The first one is done in pastels.
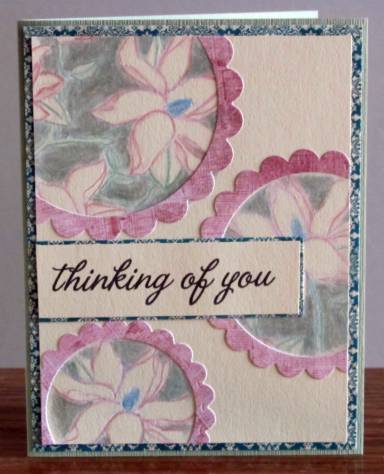
This one in the same style was colored with metallic colored pencils.
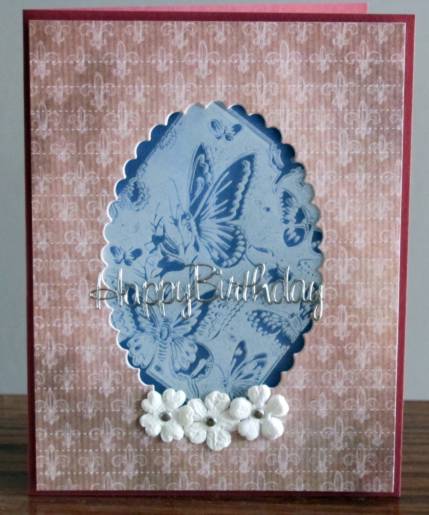
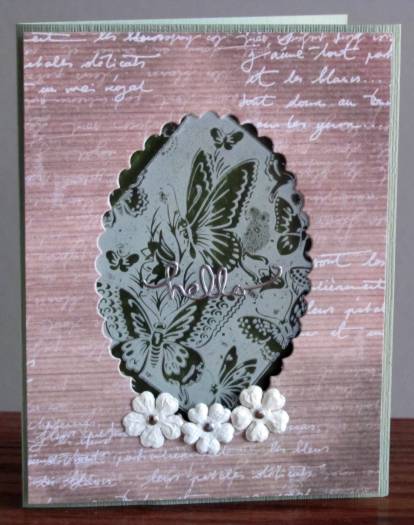
I next used the other reverse stamp with white Staz-On ink on transparency. I did two of these as well. I cut a scalloped oval in patterned paper and mounted the transparency to the back. On a folded card base I mounted a contrasting color and then placed the aperture panel on it with foam tape. I placed a silver sentiment sticker in the middle of the transparency and added three paper flowers with silver nail head centers along the bottom of the opening.
The first is a birthday card.
And the next is a generic 'hello' card.
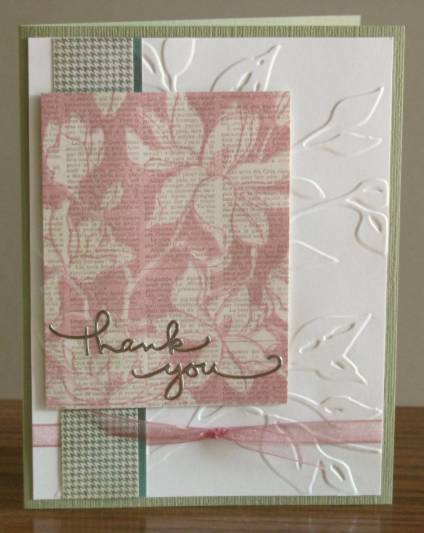
Back to the first stamp. I stamped this on text print designer paper with light-toned chalk ink. The first was trimmed out and placed on a Cuttlebug embossed white background along with two designer paper strips. I tied a sheer ribbon at the bottom and added a green card base and silver sentiment sticker.
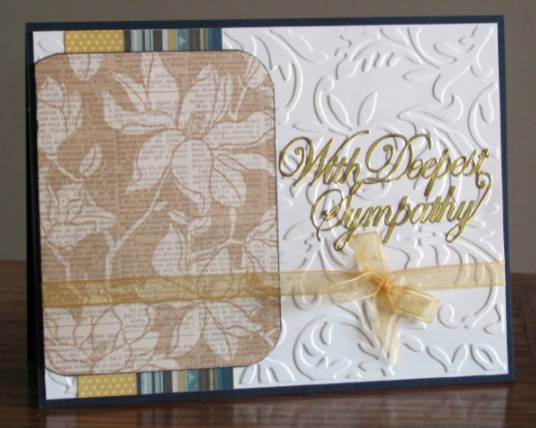
Then I used a single strip behind the next one and tied the ribbon vertically. Both the designer paper and the stamped panel were backed with brown to match the card base.

The next one got a horizontal treatment to show more of the embossed background. I backed it with two designer paper strips and let the stamped panel, with rounded corners, runn off the left edge. The ribbon goes over the top this time and I used a gold sentiment sticker. I picked up one of the colors in the designer paper by using a dark blue card base.
Now, get out your sunglasses because it's going to get BRIGHT in here.
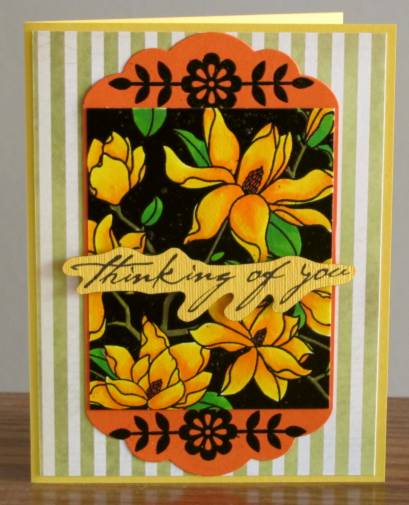
This time I stamped on white cardstock with Versamark ink and embossed in black. Then I colored in the image with blended watercolor markers. I trimmed the panel and cut an orange backing with a nestabilities die. This is cut on the two ends separately and the sides trimmed to meet. Then I stamped and embossed in black a border element at the top and bottom. The feature panel is mounted to the orange backer and both are adhered to a striped designer paper over a yellow card base. I stamped the sentiment on yellow and trimmed it out before mounting on foam tape.
And, that's it... class dismissed.
Ddd
