Lettering From the Beginning
Topic: Lettering
On the Bible journaling group I belong to I started a new series on lettering. I begins with Genesis and then skips back and forthe between the old and new testaments.
The lettering itself, however is constructed in such a way as to build one skill upon another to move from a basic round print all the way through bounced brush lettering - one small step at a time.
Let's begin with the first lesson...
Day 1 – A Basic Round Print
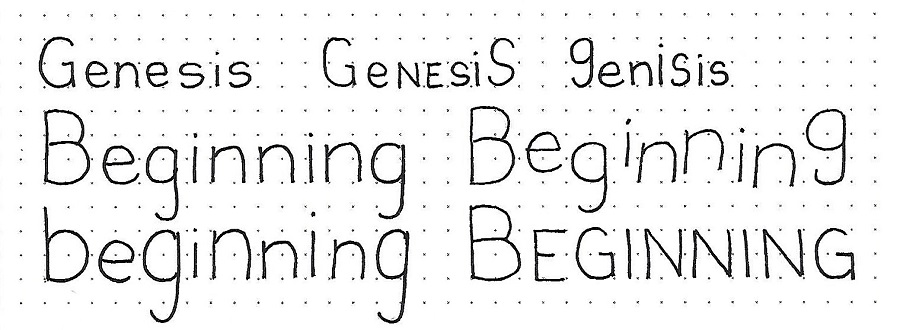
| This week we will be learning a basic round print style. For this first exercise, note that the ‘bowls’ of the letters are very round and straight upright. After practicing with the standard print, try changing it up a little by mixing the capitals with the lower-case, making some lower-case letters exceed their standard ½ height or bouncing letters off the base line. It is best to do only one change at a time so the integrity of the base style is not lost.
All week long, we will sketch out the letters and words lightly in pencil, correct until they are exactly as you want them, trace over the pencil with pen and then, when the ink is dry, erase the pencil.
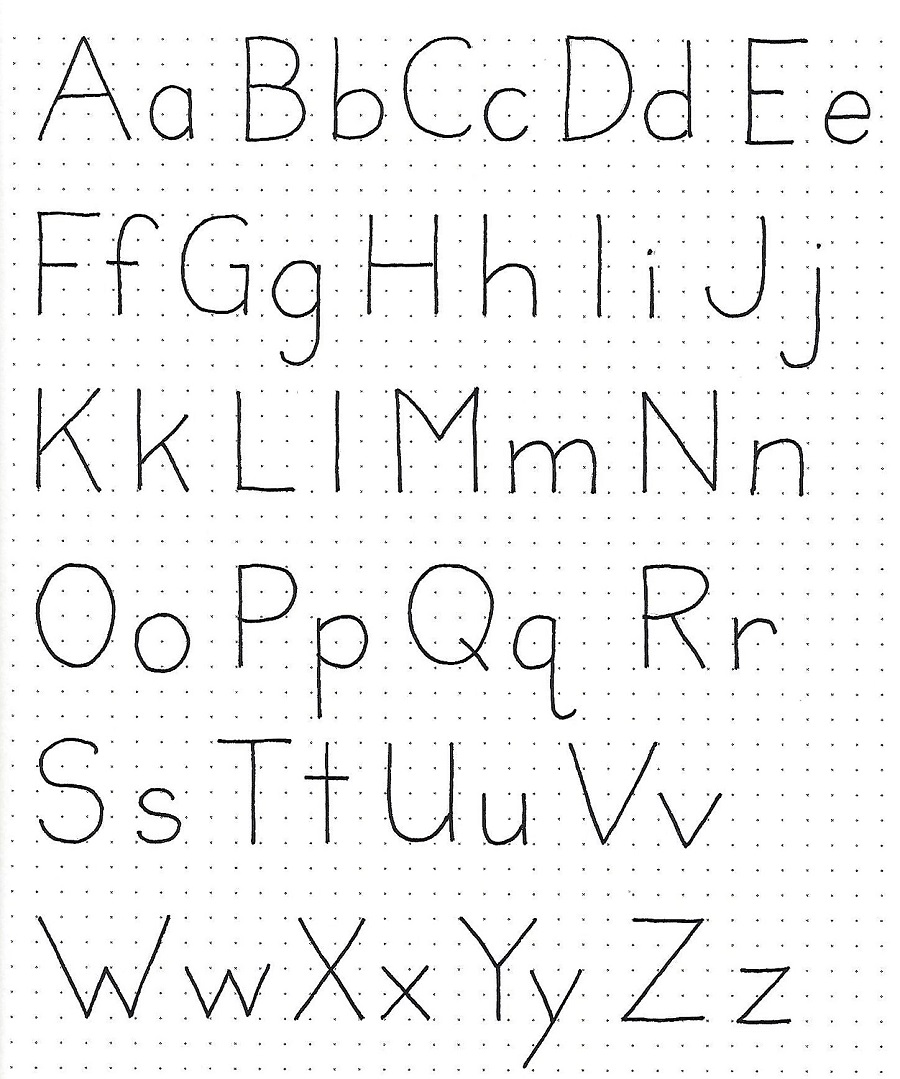
Day 2 – A Basic Round Print – Full Alphabet | This is the full alphabet for the basic round print style. Note that the ‘bowls’ of the letters are very round and straight upright. The x-height is ½ the full letter height. Sketch out the letters lightly in pencil, correct until they are exactly as you want them, trace over the pencil with pen and then, when the ink is dry, erase the pencil. |
Day 3 – A Basic Round Print – Options | This sheet introduces some options for lower-case letter styles and sizes. The changes to note are those marked in red pen. Any of these can be incorporated into this style to make it feel more like your own. We are still keeping the bowls round and the letters fully upright. Sketch out the letters lightly in pencil, correct until they are exactly as you want them, trace over the pencil with pen and then, when the ink is dry, erase the pencil. 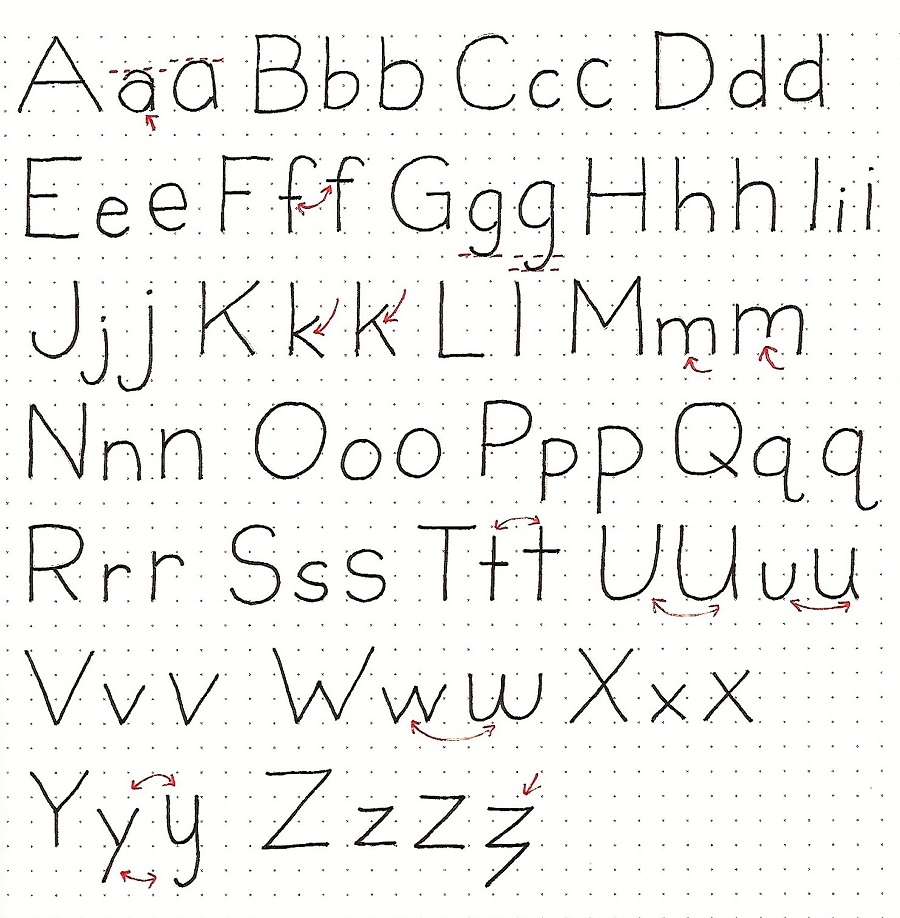
Day 4 – A Basic Round Print – Word Play
| A thesaurus yielded up synonyms for the word ‘beginning’ and they were incorporated into a sort of crossword in celebration of the book of Genesis as well as the beginning of a new year and a new plan for the Lettering Lodge lessons. The two key words were then drawn over with highlighter. For your piece, sketch out the letters lightly in pencil, correct until they are exactly as you want them, trace over the pencil with pen and then, when the ink is dry, erase the pencil and apply highlighter. 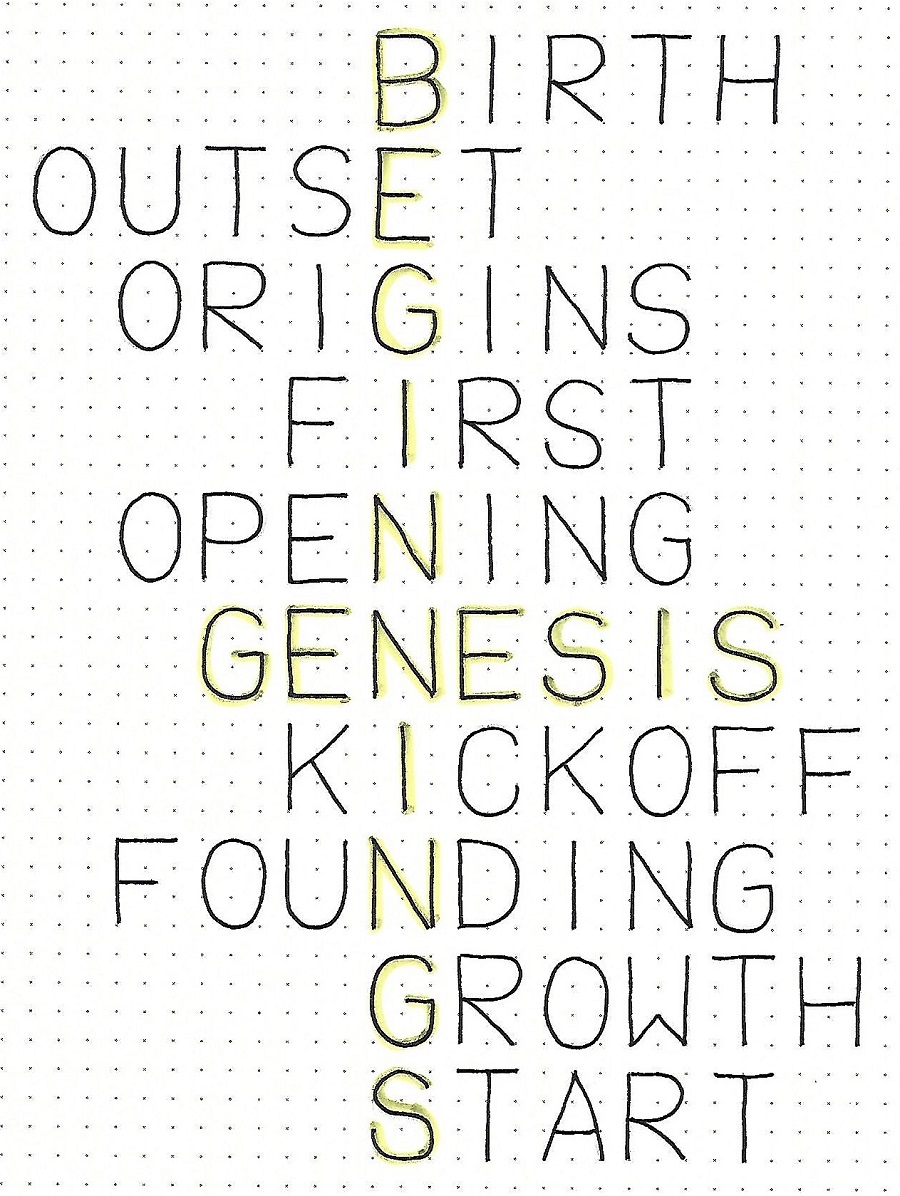
Day 5 – A Basic Round Print – Bible Page | The culmination of the lesson plan, every week, is to use the lettering style in the Bible. Use any of the options that were presented this week to write out a scripture from Genesis. For your page, sketch out the letters lightly in pencil, correct until they are exactly as you want them, trace over the pencil with pen and then, when the ink is dry, erase the pencil. Illustrate the scripture as you wish. This page uses the Drawing Room Lesson (Life Preserver) from this week with Genesis 45:5b. 
| | End of Week 1 Ddd | |
Posted by studio3d@ccgmail.net
at 12:01 AM PST
Updated: Friday, 1 February 2019 1:46 PM PST
