Topic: Bible Journaling
Wait till you see the style that I've 'chosen' to teach this week!
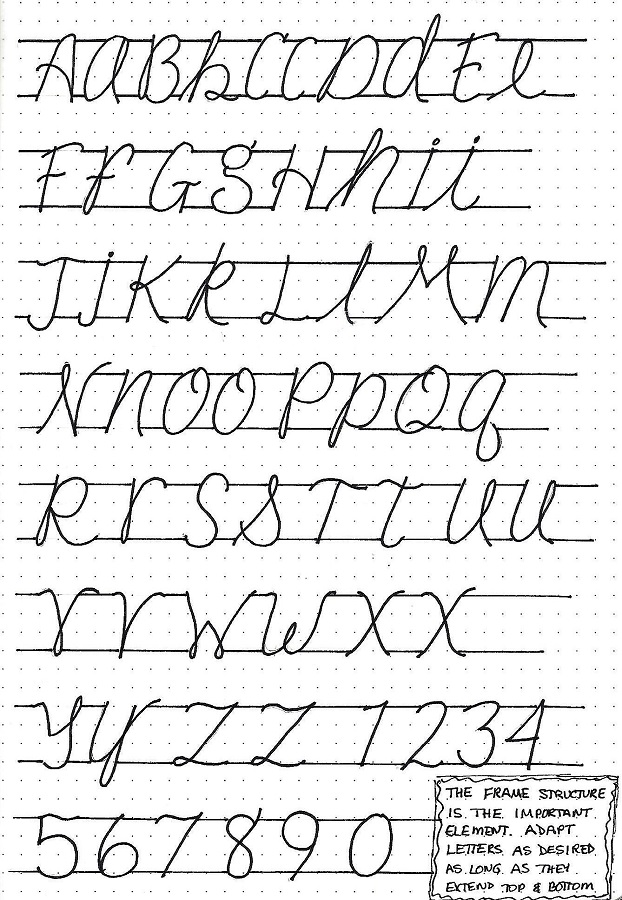
CHOSEN FONT – DAY 1 – INTRODUCTION
Not long ago we saw a font ‘introduction’ with lines showing on the top and bottom. In that case, they were guidelines only and were erased for the final product. In this case, however, those lines are added on at the END and they are a permanent part of the font style.
There are both a lower- and an upper-case but they are THE SAME SIZE. It is the style that distinguishes them.
Follow along with the steps at the bottom of the page: 1) Start by establishing the height of your letters with a penciled guide at the top and the bottom. 2) Draw your letters. Note that every one of them will extend slightly below AND above the guidelines. 3) Ink your letters 4) Use a ruler and draw on the top and bottom guidelines ONLY between the letters. Do not draw inside the letters at all.
When coloring (which is recommended) do so between the letters OR inside the letters. My favorite is shown in samples 1, 4, 5, and 6. When the side of a letter form is open, fade the color out without going all the way inside.
Keep your colors light to medium. If you use too dark of a color (dark green, navy blue, chocolate brown) you won't be able to distinguish the lines for the letters.

You’ll note that the letter forms for upper- and lower-case letters are sometimes the same in this alphabet. And here’s the good news… you can use your OWN form for a letter as long as it is a semi-script that fits with the general styling.
You may prefer to write an all-caps alphabet and then al all lower-case alphabet since that is how you will use them in projects.
I’ve included numbers for this style as well.
Since today you are making your own reference sheet for the alphabet construction you can leave it uncolored. If you DO wish to color it, use some of the ideas shown yesterday.
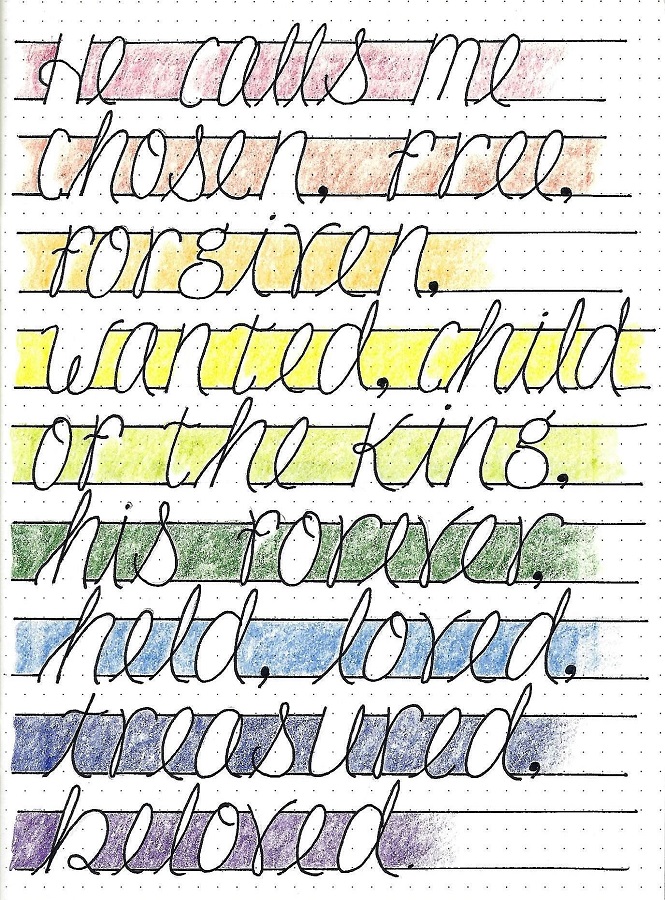
CHOSEN FONT – DAY 3 – QUOTE DAY
Today, use the CHOSEN font to write a quote or lyrics that contain the word.
When we use this font for projects we DO want to color them as it reinforces the look of the structure (with the top and bottom bands). I colored my quote with a rainbow of hues.
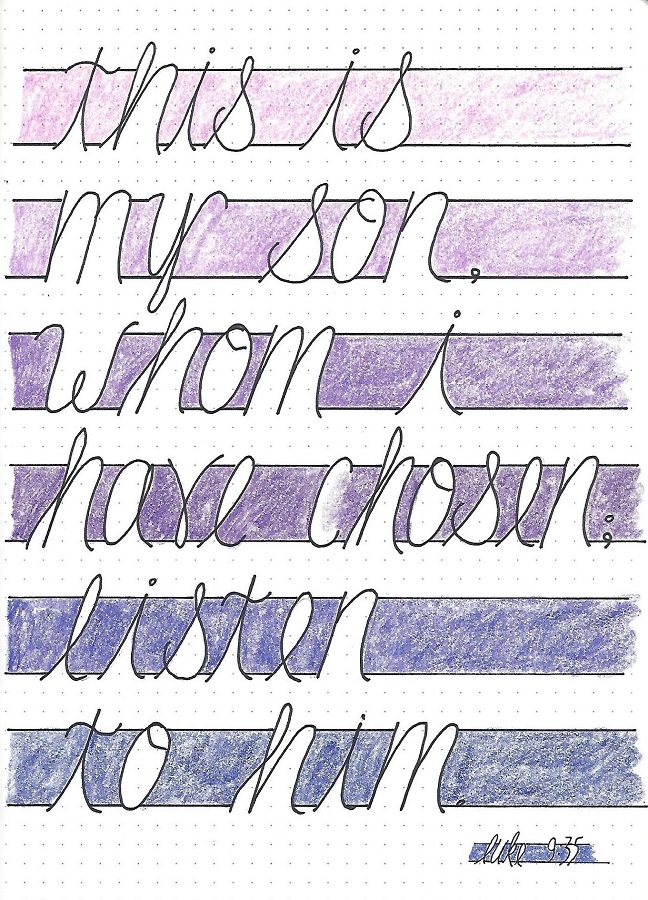
CHOSEN FONT – DAY 4 – SCRIPTURE WRITING
Use the new font style to write a scripture with the word CHOSEN. Use your journal, notebook or plain paper and color as desired.
Note that because my scripture was shorter than yesterday’s quote I was able to use a larger scale for it. I used a range of purples for an ombre effect in the coloring.
Here is another option that I did not do on any of my samples. Consider using TWO very close together lines at the top and the bottom to make it a little more decorative. Or, leave those bordering lines the same and use a heavier marker for the letters themselves to help the words stand out from the coloring.
What other ways can you think of to customize this font?
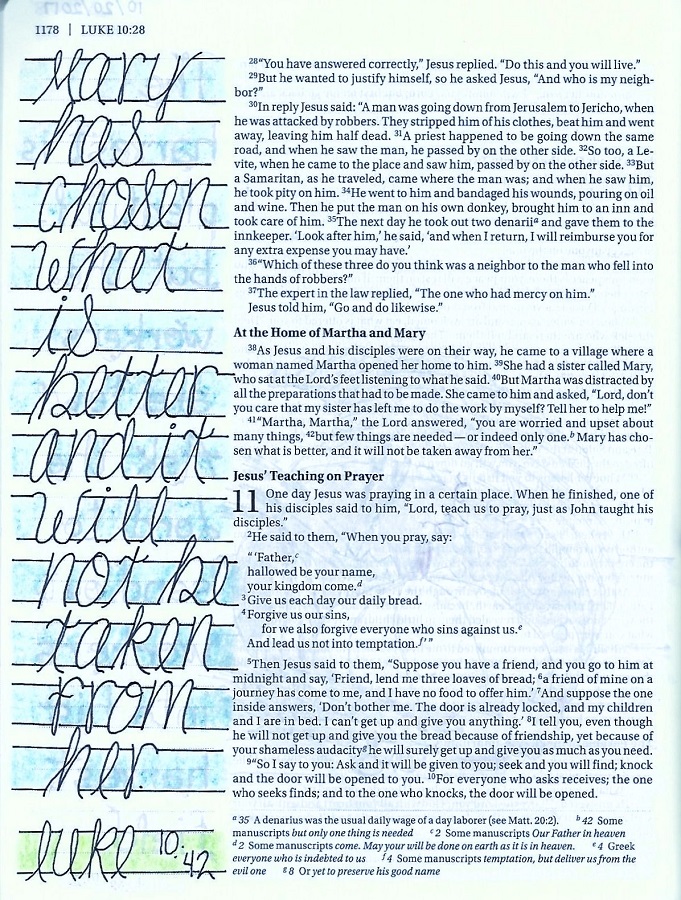
CHOSEN FONT – DAY 5 – TAKE IT TO YOUR BIBLE
This is the day we use the newly learned font in our Bible.
I was able to fit one word per line in my margin and colored it with a consistent blue all the way down.
If you have a longer scripture, simply reduce the scale of the guidelines, even if you have to go to 1 ½ spaces. A single space is probably too small though.
Because of all the color used and the decorative nature of the font, I decided not to add any artwork.
I hope many people will try out this unique and beautiful font and get it into their Bibles.
Ddd
