« March 2009 »
S M T W T F S
1 2 3 4 5 6 7
8 9 10 11 12 13 14
15 16 17 18 19 20 21
22 23 24 25 26 27 28
29 30 31
You are not logged in. Log in
Entries by Topic
All topics  «
3D paperwork
A - Z challenge 5
A - Z challenge 7
A - Z challenge round 4
A to Z challenge round 3
A to Z round 2
A to Z round 6
A-Z round 1
Around the House
Art Challenges
Artist Trading Cards
Backgrounds
Beads
Bible Journaling
Books
Boxes
Collage
Color Challenge
Coloring
cookbook
Die Cuts
Digital Projects
Digital Stamps
Drawing
Dry Embossing
Fabric Stuff
Fantastic Folds
Field Trip
Home Decor
How Does Your Garden Grow?
Hymnal Art
In The Kitchen
In the studio
Jewelry
Lettering
Links
Multi-Technique
Music to Work By
Musings
Nail Art
New Work
Online Class
Other Hobbies
Other Projects
Painting
Paper Embroidery
Paper Piecing
Photo
Pretty Paper
Quilting
Random
reading
Scrap Recovery
scrapbooking
Sewing
Sketch Challenge
Some Backlog
Stamping
Stencils
Stickers
Supplies
Teabag Folding
Techniques
Testing
tips and tricks
Tutorial
Web resources
Welcome to my Blog
Work By My Friends
workflow
Writing
Blog Tools
Edit your Blog
Build a Blog
RSS Feed
View Profile
Group One
In & Out of Studio 3D
Tuesday, 24 March 2009
A Negative Impression
Topic: New Work

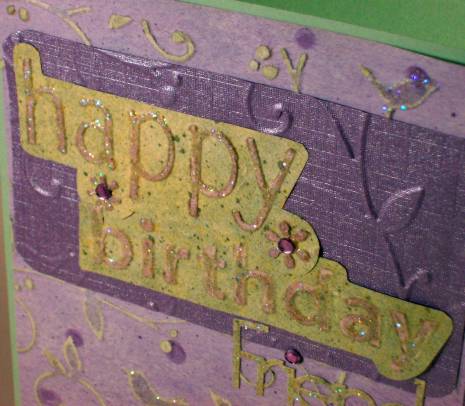
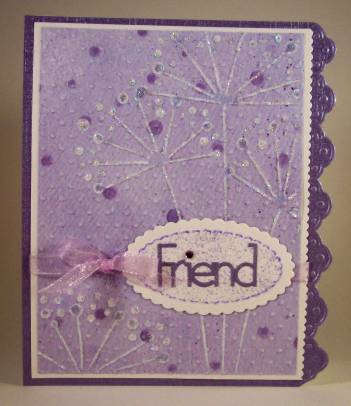
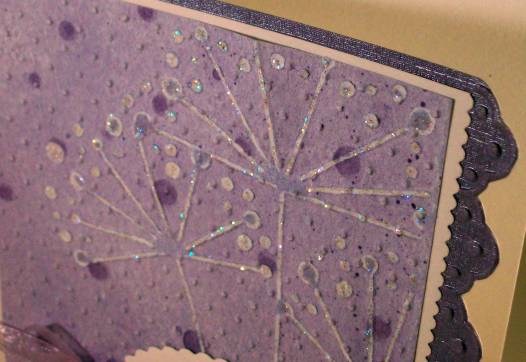
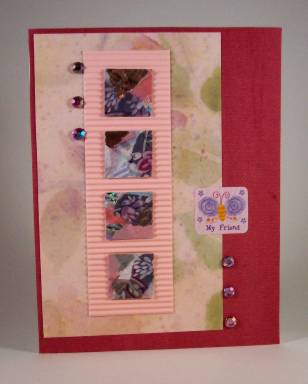
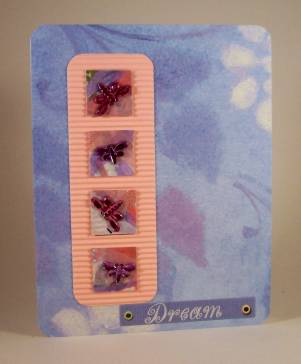
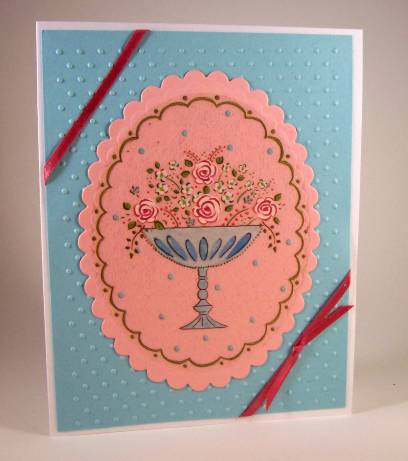
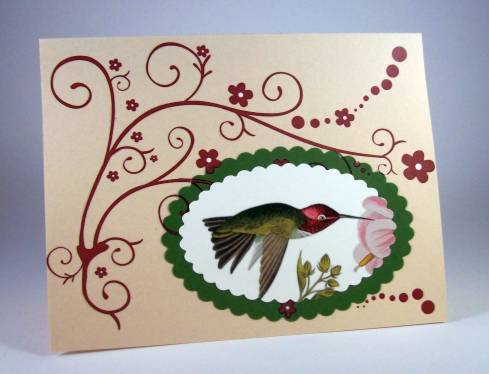
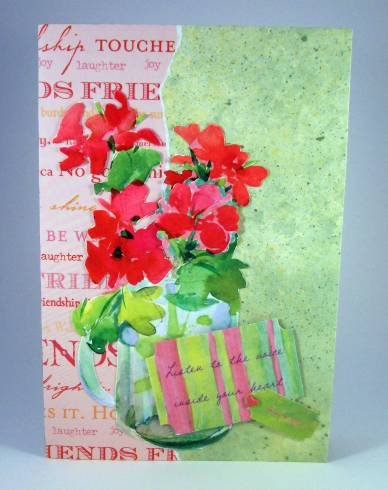
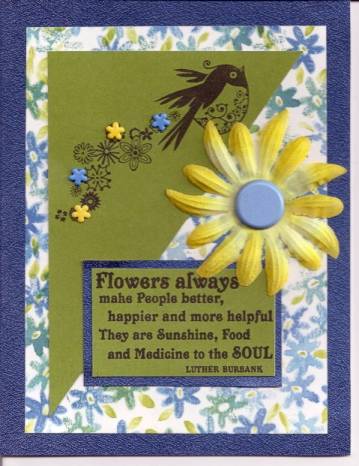
This card, using the same spotted paper, is much simpler than the last two. I impressed the Forever Friends folder in reverse and scuffed with sandpaper. This gives a whole new look to the 'flowers'. The band is made with a border folder on dark purple paper which I also used to cut a text script.  

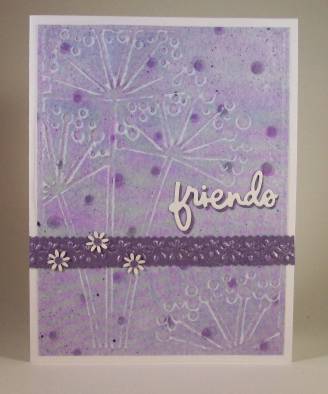
I used scalloped scissors on the band and added three punched out flowers of white cardstock. I also cut the same text script of the white cardstock and layered the two as a shadowed piece. Dots of the dark purple make centers for the white flowers.

Ddd


Posted by studio3d@ccgmail.net at 6:00 AM PDT
Monday, 23 March 2009
Take a Little Off, Put a Little On
Topic: New Work

For this card I used the same spotted paper from yesterday. In this case after I scuffed off the surface of the impressed paper, I used direct-to-paper with a very light green Whispers pad to color in the white areas. I did the reverse with the green paper, impressing it with the Happy Birthday folder, scuffing, tinting purple and cutting the words I wanted. 

I impressed the dark paper with a border and another piece with the same as the background. After mounting the pieces together I used the Forever Friends die to cut the third word and put it all together. I added Stickles to three of the birds in the background, the text and the two flowers in the Happy Birthday. Three rhinestones are the final accent.

Here's a closeup:

Ddd


Posted by studio3d@ccgmail.net at 6:00 AM PDT
Sunday, 22 March 2009
Double Bugged
Topic: New Work

I took a suggestion from Cuttlebug Challenges to combine Cuttlebug folders for a new background. I first used my new folder to impress the 'flowers' on spotted purple scrapbook paper. Then I used sandpaper to scuff it to white. Then I ran it through the Swiss Dots folder to flattten out the scuffed portions and raise the overall dot pattern. 

I used one of my new border folders to create the right edge on some darker purple shiny paper and also cut the text out of it with the Forever Friends die. A Nestability die was used to cut, emboss and screen the oval while I speckled it.

A white cardstock was scalloped down one side and the parts were layered together including an organza ribbon tied across the face of the card. I added a rhinestone to dot the I and applied Stickles to the scuffed 'flowers'

Here is a closeup of the glitter.


Ddd


Posted by studio3d@ccgmail.net at 6:00 AM PDT
Saturday, 21 March 2009
Whole Pile o' Pretty
Topic: New Work

Rummaging through my bin of parts and starts I found a whole stack of strips decorated with serendipity squares. I pulled out a few sheets of scrapbook paper and some white cardstock and put together 13 cards in a couple of hours.

I decorated them with rhinestones, brads, stickers and stickles - whatever struck my fancy.


And there you have it.

Ddd


Posted by studio3d@ccgmail.net at 6:00 AM PDT
Friday, 20 March 2009
Mosaic Quilt
Topic: New Work

I needed a card for a swap onwhich the main theme was 'punches'.

I used mosaic punches to cut glittery papers and then trimmed them to consistent square sizes. They are laid out in a grid on glittery green cardstock and glued in place. Then I wove ribbon and used mini-glue dots to attach at the crossing points. 

Last to go on were the outer edges. I wanted it to look like a quilt and the ribbon represents the binding.

Ddd


Posted by studio3d@ccgmail.net at 6:00 AM PDT
Thursday, 19 March 2009
Swiss Dot Flower Pot
Topic: New Work

Of course, this is not really a flower pot, but it sounds neat as a title! The background is made with the Swiss Dots Cuttlebug folder and a Nestability scallop die was used to cut the pink element.

I added a clear sticker with the floral design to the pink scallop and trimmed up the corners with ribbon. 

Once again, I left off any sentiment.

Ddd


Posted by studio3d@ccgmail.net at 6:00 AM PDT
Wednesday, 18 March 2009
Swirl of Hummingbird
Topic: New Work

This swirl of interest is a Heidi Grace rubon. I cut the hummingbird and the green mat with a Nestability. The green was glued on and the rubon applied over it. Then the bird was glued on top.

No trim or sentiment for this one.

Ddd


Posted by studio3d@ccgmail.net at 6:00 AM PDT
Tuesday, 17 March 2009
Thank You Glitter
Topic: New Work

Here's another of the glittered Cuttlebug cards like the one I made yesterday. For this one I used blue on blue and added a center element cut from another old card. The colors in real life actually match!

I added three button brads to the centerpiece before attaching and tied a ribbon around the spine. 

Here is a closeup of the glitter on the card. I used Martha Stewart ultra-fine glitter on both of these cards.

Ddd


Posted by studio3d@ccgmail.net at 6:00 AM PDT
Monday, 16 March 2009
Hearts & Flowers That Shine
Topic: New Work

The Cuttlebug Challenges blog used this technique as a tutorial on February 27 and I ran right home and tried it. Fantastic!

It uses a two-way glue in the indented parts of a Cuttlebug embossing. The glue is allowed to dry to tacky and then ultrafine glitter is burnished into the glue. 

I used purple glitter on purple cardstock and then used two layers of heart stickers for the centerpiece. After I took the photo I added stickles to the roses in the center. Just a bit more interest.

Ddd


Posted by studio3d@ccgmail.net at 6:00 AM PDT
Sunday, 15 March 2009
Bread Box
Topic: New Work

This was made for a challenge to use paper embroidery on a box. I made the stitched panel and then constructed a box to fit it on. I trimmed it out with gold peel-off corners. 

The box measures 6"x6" square.

Ddd


Posted by studio3d@ccgmail.net at 6:00 AM PDT
Saturday, 14 March 2009
Still Life
Topic: Around the House

Here's a little vignette from around my house. This is the arrangement on my kitchen table this week. 

Ddd


Posted by studio3d@ccgmail.net at 6:00 AM PDT
Friday, 13 March 2009
Little Yellow Birds
Topic: New Work

This does NOT look like the original calendar illustration. I trimmed the flowers close around and arranged them to look like a vine. Some leaf stickers were added to cover the gaps. Two birds from the same page were cut with the scalloped nestabilities. I cut two tones of textured cardstock and uses my scallop scissors to trim up one edge. 

The text is a vellum sticker and I added three green rhinestones.

Ddd


Posted by studio3d@ccgmail.net at 6:00 AM PDT
Thursday, 12 March 2009
Apples for Father
Topic: New Work

Somewhere I came up with a card front that said Grandfather and had these apples on it. There were more apples that I trimmed away with the first half of the word. I used 4 layers of scrapbook paper and a couple of text stickers. 

Three square brads finish this off.

Ddd


Posted by studio3d@ccgmail.net at 6:00 AM PDT
Wednesday, 11 March 2009
It's HIS Anniversary, Too!
Topic: New Work

I realized that anniversary cards usually end up being girly looking so I wanted to make one that is more suited for a guy.

These plainly colored birds look well put on a leather printed scrapbook paper. I had a tag with a printed oval so I used a vellum sticker in its center, cut curved slits and threaded green dotted ribbon through.

I placed all this on afolded cream cardstock base.

Ddd


Posted by studio3d@ccgmail.net at 6:00 AM PDT
Tuesday, 10 March 2009
Scalloped Tulips
Topic: New Work

You may recognize these tulips from 4 or 5 other projects I have used them on. I had just two sheets of them left and combined them by cutting and layering. Since I had done the ovals with scallops I used scallop scissors on two edges of yellow cardstock and then mounted that over an orange card base.

I tied a couple of bows in orange ribbon and affixed it at the top and the bottom of the yellow borders. The text is a sticker.

Ddd


Posted by studio3d@ccgmail.net at 6:00 AM PDT
Monday, 9 March 2009
Birds of a Feather
Topic: New Work

What will I do when all my bird calendars are gone?

I cut this with a scalloped nestability die. The feathers are from my handcarved rubber stamp and colored with watercolor pencils. The text is cut from a Cuttlebug impression and the piece is enhanced with rhinestones. 

Ddd


Posted by studio3d@ccgmail.net at 6:00 AM PDT
Sunday, 8 March 2009
A Friendly Bouquet
Topic: New Work

This scrapbook paper with friendship text was a perfect foil for a watercolor illustration from a greeting card. I hand-cut the flowers and vase and made a few 'paint strokes' of my own with watercolor markers. One bloom was WAY off to one side so I snagged it and cut it out separately with a nestability die. It is popped up on foam tape. 

A preprinted tag used only the glue and greens so I used those watercolor markers again to fill in the pink stripes. A supplemental tag s attached with a heart brad. Can't read it? It says "Listen to the voice inside your heart. Believe."

Ddd


Posted by studio3d@ccgmail.net at 6:00 AM PST
Saturday, 7 March 2009
Queen's Decree
Topic: New Work

Some advertising piece used this woodcut illustration of a queen so I hijacked her for this card for "Queen of the Month" on one of my lists. I gave her a hand-cut crown to which I added sitck-on rhinestones. I gave her a necklace of stickles and added a large rhinestone to it.

Gold gel pen enhances the scallops from the nestabilities die and I inked in the 'decree' on her paper. The text is a peel-off followed by more gel-pen to which I added just a bit of Stickles.

Ddd


Posted by studio3d@ccgmail.net at 6:00 AM PST
Friday, 6 March 2009
Serial Inspiration
Topic: Work By My Friends

 A few months ago I was working a lot from inspiration pieces. I got the idea to sign up a few friends to work with me in a series. I selected the inspiration piece and created my card. Then I sent ONLY my scanned card to the next person. When they sent their scan to me I sent ONLY that one on to the next person. Here's the resulting serial inspiration...

This is the inspiration piece...

I used the colors, flowers, and the ruffle from the bed skirt to create this... 

Elaine used some of the same colors, kept flowers, and a little of the layout. She substituted lace for my ruffle...


 Janet kept the diagonal in the layout and the large flower, though she moved it. She also used rubber stamping on her card like Elaine did. Her sentiment has been framed and she changed up all the colors...

Robin kept the triangle but changed it to a center alignment. She also uses a single large flower but has changed out the little florals for a center embossed band. In place of the framed sentiment she uses a framed 3D cutting. Also, new color scheme...

So, we're at the end. Now go back and compare Robin's piece with the inspiration piece. What a ride!

Ddd


Posted by studio3d@ccgmail.net at 6:00 AM PST
Thursday, 5 March 2009
Manly Birthday
Topic: New Work

If you're a carpenter and having a birthday, this card's for you.  Behind the hammer I added two blocks of paper impressed with houndstooth. The burnt orange background sets off the 'nail heads' from brads and greeting.

The greeting is gold peel-off re-colored with sharpie markers.

Ddd


Posted by studio3d@ccgmail.net at 6:00 AM PST

Newer | Latest | Older