Now Playing: using up the scraps
Topic: Some Backlog
Here's another card I made using a jewelry catalog illustration. With great lighting their photograph makes this piece look very 3-dimensional. I did the embossing using Fiskars Shape-Boss.
« | October 2007 | » | ||||
S | M | T | W | T | F | S |
1 | 2 | 3 | 4 | 5 | 6 | |
7 | 8 | 9 | 10 | 11 | 12 | 13 |
14 | 15 | 16 | 17 | 18 | 19 | 20 |
21 | 22 | 23 | 24 | 25 | 26 | 27 |
28 | 29 | 30 | 31 |
Here's another card I made using a jewelry catalog illustration. With great lighting their photograph makes this piece look very 3-dimensional. I did the embossing using Fiskars Shape-Boss.
As a swap assignment I had to make a beaded spirelli card. This is NOT my favorite technique to do but I perservered and this is the card I came up with.
I used some of the flat metallic Sulky for the winding and mounted the circles with separation between to make it dimensional. The center is a clear leaf sticker while those on the card are printed die-cut.
Fabric text stickers finish off the top and bottom.
I recently picked up two books on polymer clay, both of which teach faux techniques.
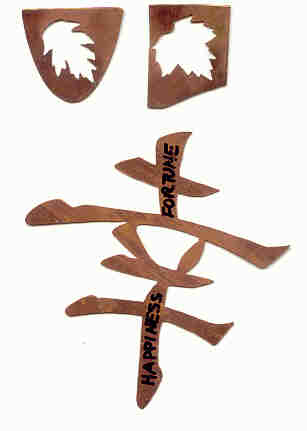
The Art of Polymer Clay Creative Surface Effects (Watson-Guptill, 2007, ISBN 0823103626) by Donna Kato uses transfers, stamps, stencils, ink, paint, and more to treat the surface of polymer clay projects. In doing so she manages to mimic other mediums such as carved wood, metals, and fabulous stones.
Irene Dean' Faux Surfaces in Polymer Clay (Lark, 2005, ISBN 1579907512) creates the look of marble, scrimshaw, mother of pearl, malachite, leather, cork, pewter, and many precious stones.
These two books teach totally different styles but the results of either will be stunning.
This card started with a piece of cream paper which I wrinkled up and smoothed while leaving ridges on the surface. I used Ranger Industries distressing ink pad and brushed it over the raised ridges. Then a spritz with water makes the ink run and finally it is ironed to dry and flatten it.
I had a neat magazine clipping of the books and globes that I added along with a text sticker at the bottom. The side edges are trimmed out with silver peel-offs and a greeting with silver peel-off at the top.
This card has already been shown on one of my groups because it was for a challenge. We were assigned to make a card using a frame.
The border on this card is from a scrapbook sheet that is printed with nested frames in coordinated patterns. I used it for showcasing a 3D cutting of a teaset.
A bit of scrapbook paper with a lace print was used on the bottom portion to serve as a 'tablecloth' for the teaset to rest upon.
The text block is a scripture on a vellum sticker.
A gift of stitching stickers led to this card. I first stuck each to a colored cardstock and stitched with a single strand of regular embroidery floss. Each was then cut out and I mounted on a card covered with a leaf-print scrapbook paper. The mounting was done using silicone to allow for the depth of the stitched stickers.
A fabric text sticker with the definition of autumn is the finishing touch for this card.
I am intrigued by the results of a magic card. Even ones I make myself are fascinating to manipulate - making the image become colorized then black-line only - over and over again.
This is the version that I created today for an assignment.
I was only required to make a single card, but had all the parts so made up three altogether while I was at it.
I got a new stencil from a friend that allows for embossing as well as stitching. It is a very free-flowing design.
Now, the problem is I chose a cardstock that was too thick to see through on the lightbox so I had to 'feel around' for the indentations and got discouraged partway through. This is only about 2/5 of the whole stencil.
Next time I'll test the card before I start!
Isn't this a beautiful dollar store sticker? I've used another of my gift Cuttlebug backgrounds.
The embossed circles reminded me of snowflakes.
I stitched up another of these floral wreaths, this time in purple. Then I received a commercail card from a friend and stole the Thank You 3D letters from it. I mounted them in 3D on my card and now it is ready to go.
This is another of the black and white stamped images sent to me by a friend. I colored these little birdhouses with watercolor markers.
I mounted on really bright cardstocks to keep up the cheeriness of the image. Too much camera flash on the vinyl sticker prevents you from seeing that it says 'Laughter'.
I truly can't remember where I found this great illustration but I found a paint strip that perfectly enhanced the colors.
One little sticker says it all.
This is another of the Cuttlebug background shared with me by an online friend. I found this great teddy on a sheet of stickers from the dollar store.
I gave him the tea set and he is set to have a party.
Lately it seems that I am stuck on doing 3D cards! Have you noticed?
I really like this poinsettia illustration and found some vellum in my stash printed with white diamonds. I laid this over some scrapbook paper of sheet music.
The finishing touch is the gold peel-off greeting.
I got a notecard from someone a few years back. It was a shaped card and consisted of these stacked teacups. Well, I have been saving it for reuse and finally put it together.
I used scraps of striped scrapbook paper up the sides and a patterned paper up the middle. The text is a vellum sticker.
I got several of these sheets of vellum stickers at the dollar store.
I really like to cull illustrations from good quality jewelery catalogs. Their photography is so crisp and the images enhance cards like nothing else.
The center square of this card is a paint sample of a Ralph Lauren paint . Into it is mounted the cloisonne butterfly from the catalog and enhanced it with self-stick rhinestones in green and gold - including a green teardrop for the body.
At the top and the bottom of the opalescent white card are irridescent rubons from the dollar store - made for use on blue jeans!
On one of the groups I belong to we were given a challenge to make a card from leftovers from previous projects.
This card uses a scrap of printed sheer ribbon, a scrap of 1/8 inch satin ribbon, and a scrapbook paper. A leftover green tag with an illustration from a collage sheet is affixed and more ribbon used for a bow. The text is the final scrap from a sheet of vellum stickers. And finally the oval 3D sticker finishes it off.
Related to quilling, husking is a technique that creates images with strips of paper mounted on edge. The major difference is that quilling features rolling the paper into a coil and then shaping it.
Husking, on the other hand, uses a board with pins in it and the strip of paper is wound out around a far pin and back, then glued to the point of origination.
At our retreat in Pittsburgh, J'Lu taught us to do both quilling (which I do not like doing) and husking (which I do like doing).
The most frustrating thing is that it is difficult to find patterns for husking. I would like to find lots of patterns and do more husking.
Several years ago I took a jewelery and metalsmithing class - several times. One of the techniques we had to work on was called metal piercing. Essentially, this is sawing shapes out of sheet metal.
I chose to make some brass stencils of shapes and/or sizes that I could not find elsewhere. These two leaf stencils are about the size of a penny. The Japanese character for happiness is avout 2 inches tall.
I've not done any more stencil cutting since leaving the class but I now have the skills and the tools to do so if I wish.
This flower illustration was much more square but I wanted to fill a longer card. So I laid a matte over it and cut behind. This allowed me to move the right and the left sides outward creating an elongated illustration.
The jeweled hummingbird is a jewelry catalog illustration that I cut out for use.