Topic: In the studio

Posted by studio3d@ccgmail.net
at 6:00 AM PST
| « | December 2007 | » | ||||
| S | M | T | W | T | F | S |
| 1 | ||||||
| 2 | 3 | 4 | 5 | 6 | 7 | 8 |
| 9 | 10 | 11 | 12 | 13 | 14 | 15 |
| 16 | 17 | 18 | 19 | 20 | 21 | 22 |
| 23 | 24 | 25 | 26 | 27 | 28 | 29 |
| 30 | 31 | |||||

Ddd studio3d@ccwebster.net

Ddd studio3d@ccwebster.net

Ddd studio3d@ccwebster.net

Ddd studio3d@ccwebster.net
If you have a WILD IDEA about creating seven ‘stained glass’ windows for your church fellowship hall and you are CRAZY enough to TELL somebody about your idea and you get carried away and agree to ACTUALLY DO IT… let me tell you what you will be doing for the next three weeks of your life:
1. Search Google Images for stained glass window nativities.
2. Save to your PC.
3. Import image into your graphics program and scale or crop to correct perspective (in my case they needed to be twice as tall as wide).
4. Use graphics program to draw ‘leading’ lines over pieces of glass.
5. Use fill feature to color individual sections.
6. Draw a grid in fine white lines marking off four sections wide and 8 sections tall.
7. Scale to full printing height of printer.
8. Print.
9. Mark the row numbers on the right side.
10. Repeat with 6 more windows.
11. Get a 200-foot roll of 4-foot wide black paper.
12. Get a large package of tissue paper in assorted colors.
13. Using the roll of black paper, measure off a 6-inch band at the end and mark with lead pencil.
14. Measure off 1-foot grid and mark with lead pencil.
15. Mark the row numbers on the right edge.
16. Measure and cut a 6-inch band at the other end (after your grid is 8 feet long.)
17. Make a leading tool by gluing two white-leaded pencils together, separated by a stack of 6 popsicle sticks.
18. All drawing takes place with the new tool. Begin by making a leading band on each margin (ends and sides) of the paper.
19. Use your printed cartoons as reference and draw out the design square by square on your grid-marked black paper (this is where those row numbers on both the cartoon and the black grid will come in handy.)
20. Put a huge cutting mat on your table, under the black paper.
21. Put a new blade in two craft knives. Use one to cut out a single section of the drawing. Remember to ONLY cut on white leading lines – your grid will be in regular pencil to distinguish it.
22. Apply a thin line of white glue close to the edge of the opening.
23. Carefully lay on the appropriate color of tissue paper.
24. Use the second craft knife to lightly cut the tissue just outside the glue line. Remove the excess tissue.
25. Proceed thus to the end of the 8-foot grid.
26. At the bottom, turn up the 6-inch band to make a cuff. Glue across the width of the paper.
27. Roll gently, being careful not to wrinkle or crease, till you are back at the top.
28. Bind the other end.
29. Set aside.
30. Change the tissue blade to the grid blade and get a new tissue blade.
31. Proceed thus until all 7 panels are completed, going to the store to buy more tissue paper in selected colors as needed.
32. To display, insert 5-foot dowels in each cuff.
33. Attach to wall over existing windows, using 3M removable hooks.
34. When displayed you can be as impressed as everyone else because:
35. Take pictures to prove you really did it!
36. Get some sleep!
37. Prepare yourself for the let-down when the season is over and these are discarded because they are ‘just paper’.
Over the next few days I’ll post the ‘cartoons’ of the windows I’ve completed. They go up on Tuesday the 4th and I WILL take pictures and start posting them soon after.
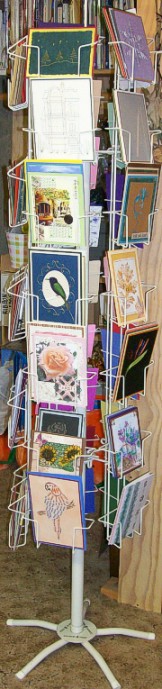
My dear hubby really listens to me! The other day I walked from work over to the post office to mail a package. To get there I have to pass by a Hallmark store and they had a lovely card rack sitting on the sidewalk marked $20.
As I passed by I twirled it around and then put my hand up as a 'blinder' and walked away muttering "you do not need this...you do not need this...". Of course I had to to the same on the way back to work (including twirling it around).
I laughingly told my husband this story that evening. Then today he announced that we had a stop to make in town because he had bought me something. Oh, the delight when he pulled up to the Hallmark shop and loaded that rack in the back of the truck.
Is this a cool guy, or what? So now I have this rack holding my card inventory right inside the door to my studio. Doesn't it look great?
So, what do you listen to while you're crafting? I have a little stereo in my studio where I cycle through a variety of things.
There's always the radio - set to a local Christian music, oldies, or jazz station.
Books on tape, CD or MP3 are favorite listening, too. I love reading, and being able to read a book while I craft is a bonus. (I listen while I clean house and drive, as well)
I have some music on CD in the studio and can load up to 5 disks to play straight through or randomly select from the stack. I have a variety of musical styles in my collection including all of the above as well as Celtic, men's quartets (Statlers, Oak Ridge Boys), and (don't laugh) Yanni. I also like to listen to Julie Cruise, Nickel Creek, Charlotte Church, and Sarah McLachlan.
However if I had to pick just one thing to listen to forever it would be Alan Jackson's CD Precious Memories. This man has the perfect voice for singing my favorite old hymns and he presents 15 of them in this 2005 release. Disappointingly, the title song is not included!
Someday, I hope to have a mini TV and media player in the studio so I can play instructional DVDs and craft along with the instructions. I guess I could do that now with my laptop..... say..... I better go check out some DVDs!
