« August 2012 »
S M T W T F S
1 2 3 4
5 6 7 8 9 10 11
12 13 14 15 16 17 18
19 20 21 22 23 24 25
26 27 28 29 30 31
You are not logged in. Log in
Entries by Topic
All topics  «
3D paperwork
A - Z challenge 5
A - Z challenge 7
A - Z challenge round 4
A to Z challenge round 3
A to Z round 2
A to Z round 6
A-Z round 1
Around the House
Art Challenges
Artist Trading Cards
Backgrounds
Beads
Bible Journaling
Books
Boxes
Collage
Color Challenge
Coloring
cookbook
Die Cuts
Digital Projects
Digital Stamps
Drawing
Dry Embossing
Fabric Stuff
Fantastic Folds
Field Trip
Home Decor
How Does Your Garden Grow?
Hymnal Art
In The Kitchen
In the studio
Jewelry
Lettering
Links
Multi-Technique
Music to Work By
Musings
Nail Art
New Work
Online Class
Other Hobbies
Other Projects
Painting
Paper Embroidery
Paper Piecing
Photo
Pretty Paper
Quilting
Random
reading
Scrap Recovery
scrapbooking
Sewing
Sketch Challenge
Some Backlog
Stamping
Stencils
Stickers
Supplies
Teabag Folding
Techniques
Testing
tips and tricks
Tutorial
Web resources
Welcome to my Blog
Work By My Friends
workflow
Writing
Blog Tools
Edit your Blog
Build a Blog
RSS Feed
View Profile
Group One
In & Out of Studio 3D
Tuesday, 7 August 2012
Stretch Your Stamps - Day 2
Topic: Stamping

For day 2 the focus was on ways to use collage stamps. I had a couple that I am really ambivilent about and picked up two more smaller ones for the class. Alas, I have confirmed to myself that I really am not a 'collage stamp' kind of girl. But I did my homework and came up with three cards from the lessons.

For the first I used the one collage stamp I have that I LOVE - the hydrangea on script. First, the watercolor paper is painted with bright colors. Then the image is stamped with Versamark ink and embossed with clear detail powder. Finally, a black ink pad is used to color over the whole thing and then the ink is wiped off the embossing. This allows the colors to shine through from behind. My original colors got a bit muddied so are not as vibrant as I would like. I cut an aperture in the front of a card and mounted the stamped collage behind it. Then I covered the inside with a full panel to hide the 'uglies'. The sentiment is stamped directly on the card front and I glued on three purple paper flowers as accents.


Next up is a color-blocked card. I stamped on white cardstock with Versamark ink and embossed with clear detail powder. Then I masked off in quarters and applied chalk inks direct-to-paper. I trimmed close to the colored panel and backed it with black card. This is mounted over a white card base using foam tape. I added two gold peel-off leaf stickers to the center and colored inside them with black Copic marker.


Finally, I realized that three of my collage stamps contained butterflies and I had another non-collage stamp with one as well. (That should tell me something about how I am attracted to collage stamps, huh?) I stamped each of these on white cardstock and punched them out with a square punch. On the one that was not quite in keeping with the style of the others I over-stamped it with a script stamp and strengthened the lines in the image with Sharpie marker. The edges of each block were tinted with distress ink and then the butterflies were colored with colored pencils. I used foam tape to mount them in a grid on black cardstock. I treated a pre-stamped sentiment in a similar manner and then adhered all the elements to a green folded card base.


OK, I did my homework for the day. But I can't see this increasing my use of collage stamps.


NOTE: When I was working on cataloging my newer stamps I opened the 'Christmas' drawer and realized that I have a Christmas collage stamp. Now THAT would have been handy to remember earlier!


Ddd


Posted by studio3d@ccgmail.net at 12:01 AM PDT
Updated: Tuesday, 31 July 2012 5:24 PM PDT
Monday, 6 August 2012
Stretch Your Stamps - Day 1
Topic: Online Class

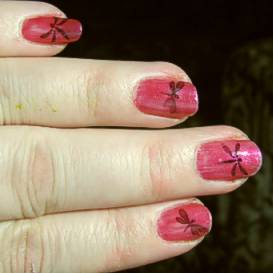
I took an online class recently called Stretch Your Stamps. Popular stamp artists focus on multiple ways to use the stamps you already have to get more mileage from them. Day 1 the lessons were ways to use background stamps. I don't have a lot of these and didn't have the one they used for the lessons, so I just pulled out the 3 I did have: A field of dots, a distressed plaid, and swirls with butterflies.

Our first lesson was using Cut 'n Dry felt pad and reinkers to make a custom rainbow stamp pad. I've had the material for years and have not used it yet, so 'yay for me'. I used Adriondack reinkers to create an ink pad that is color bands on a diagonal.

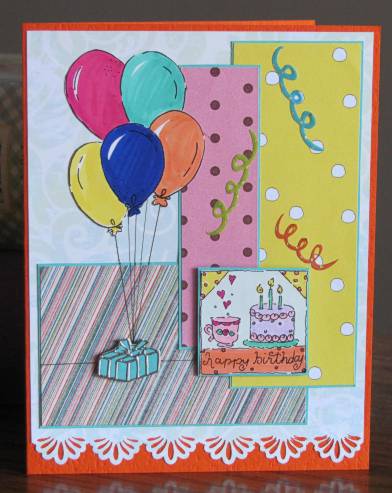
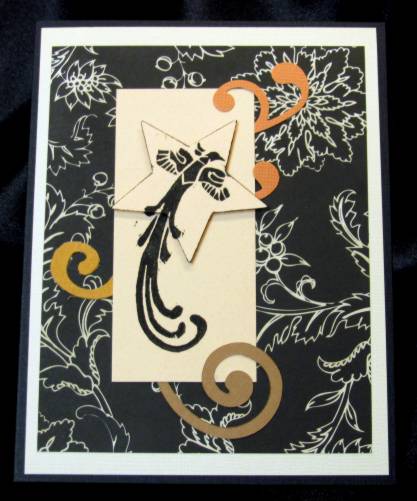
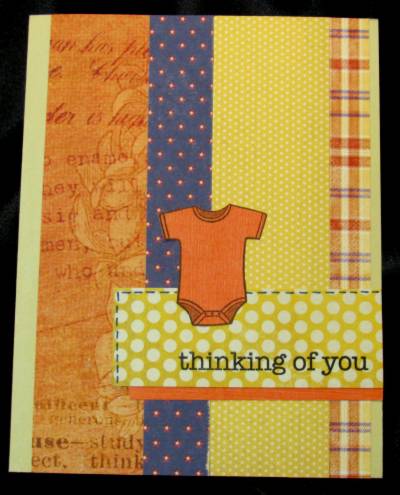
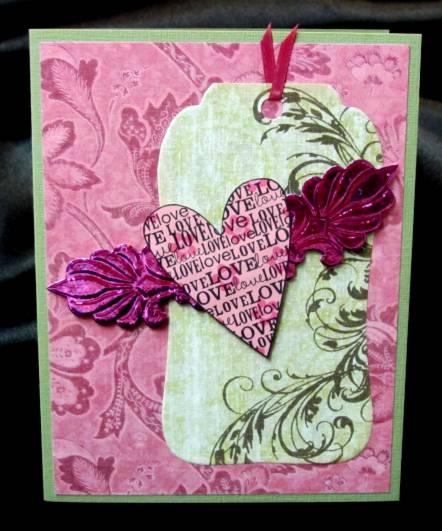
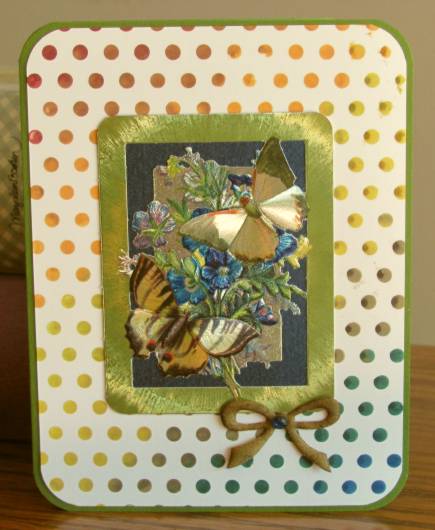
This first card uses the dot background on the ink pad. I used the background to feature a foil illustration and tied everything together with rounded corners. The bow is fabric and I added a sticky rhinestone to the center.


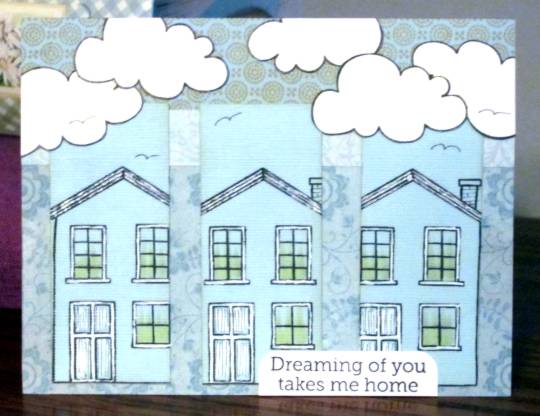
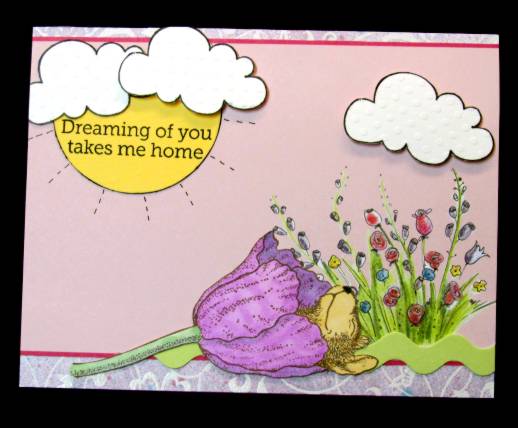
Then I made a whole bunch of these backgrounds with the distressed plaid stamp. On this card I stamped the Hero Arts / OWH house and hearts directly on the background. I used a water brush to blend the background colors in these areas. Then I drew stems for the hearts and stamped grass. The greeting is from my pre-stamped file and I rounded two corners and placed stamped and cut out clouds on top.


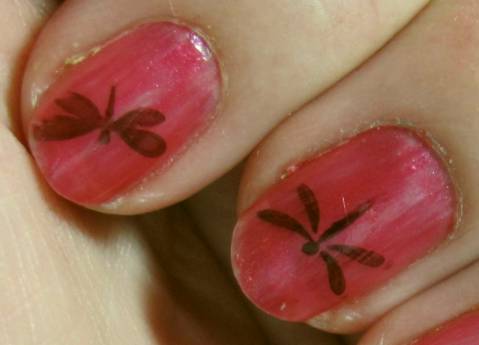
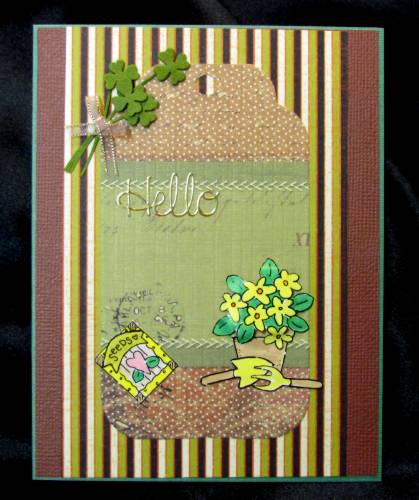
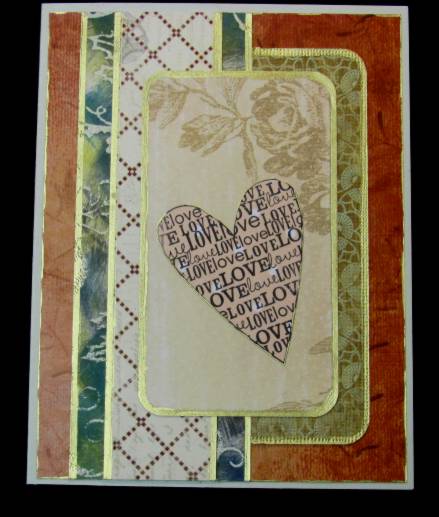
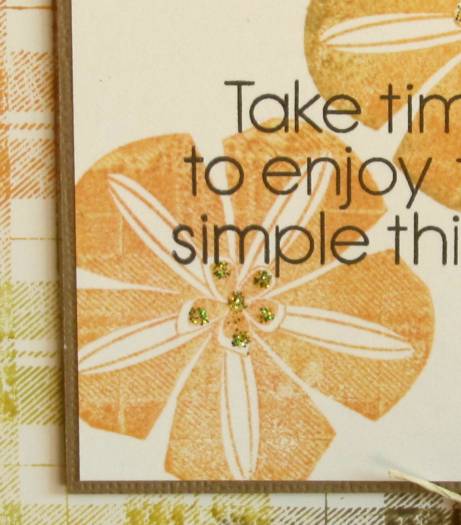
I used another of the rainbow backgrounds for the next lesson which was using a background stamp to 'kiss off' some of the ink on a solid stamp. I used the same plaid to kiss the flower stamp, added a sentiment and mounted with a scrappers floss winding accent. Here is a full view:

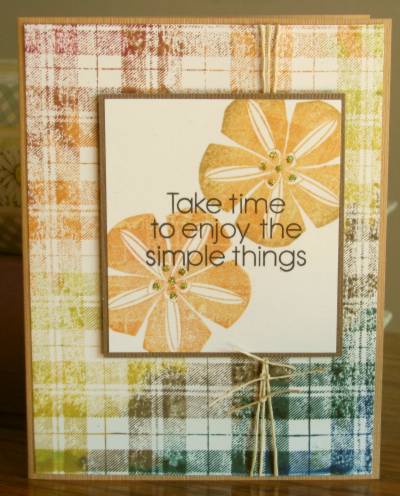
And on the close-up you can see the kissed plaid better. Also note that I added green Stickles to the flower centers.


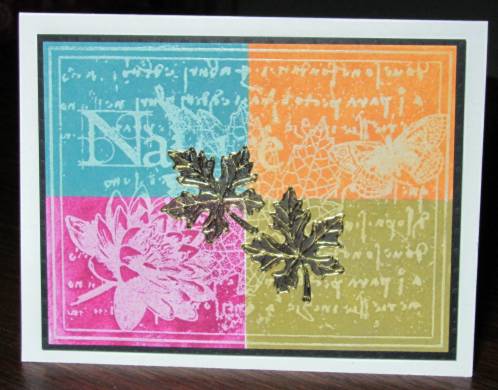
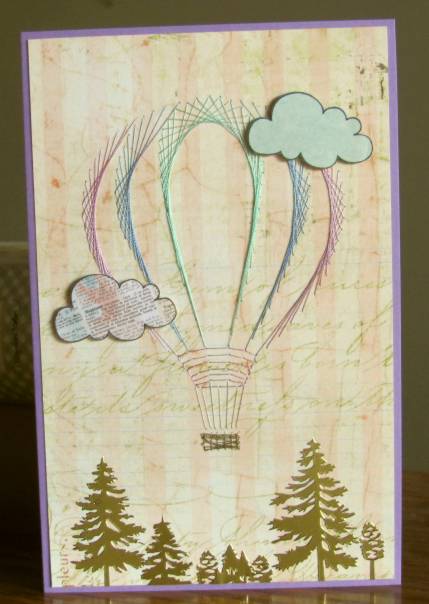
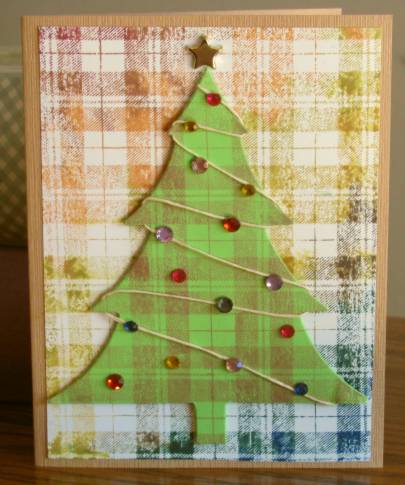
I also used the rainbow plaid for the background on this next card. The lesson for this one was using the background stamp on a shaped element. I used mine on the die-cut tree creating what I call a 'scotch pine'. LOL! I popped it up on foam tape aligned with the plaid in the background and then added a winding of scrappers floss and sticky rhinestones. I also added a star brad to the tree top. (A very 'country' Christmas)

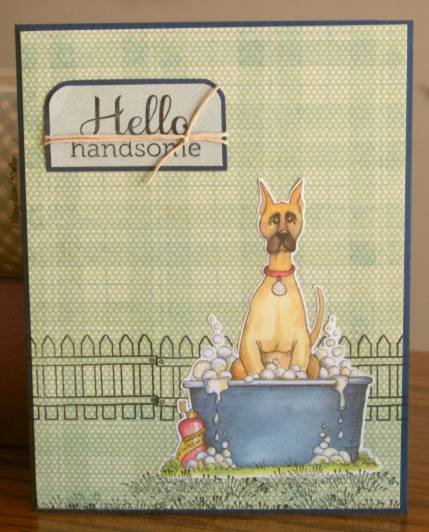
Next lesson was using a background stamp on patterned paper. I inked the plaid in three shades blue chalk ink and stamped on dotted green paper. I stamped the fence from the Hero Arts / OWH set and cut out the image from the scrapbooking page-a-day calendar. The paper for the text has a subtle white/blue dot pattern and I gave it a twist of scrappers floss. The grass is a stamp of several impressions.

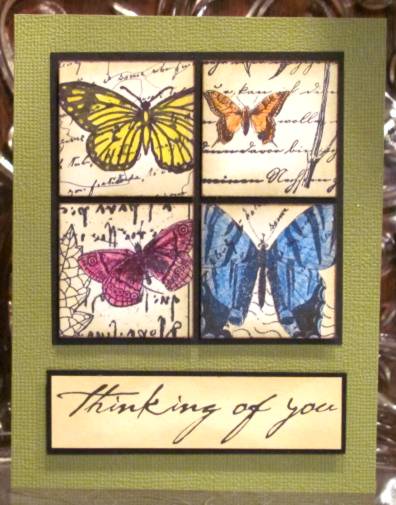
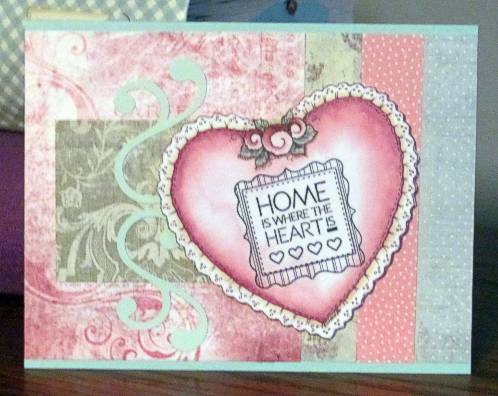
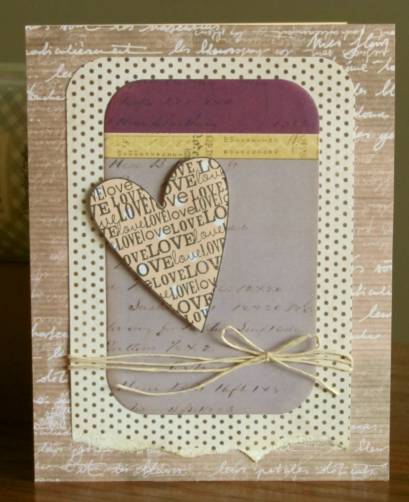
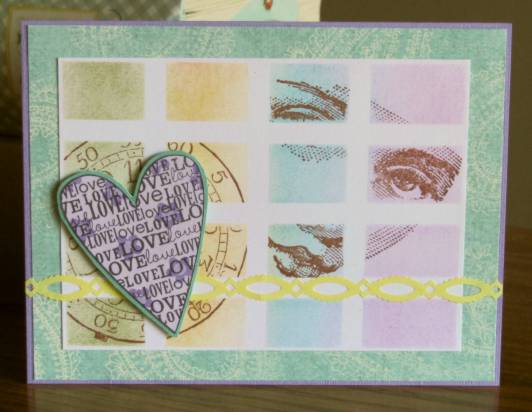
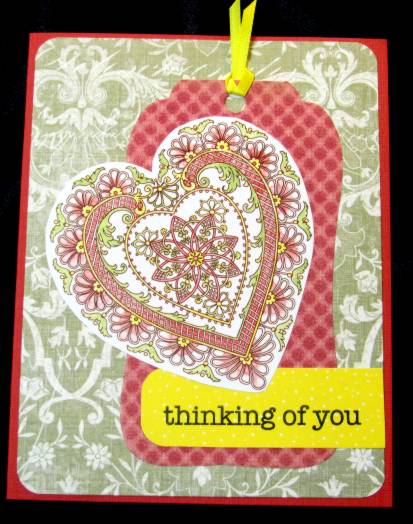
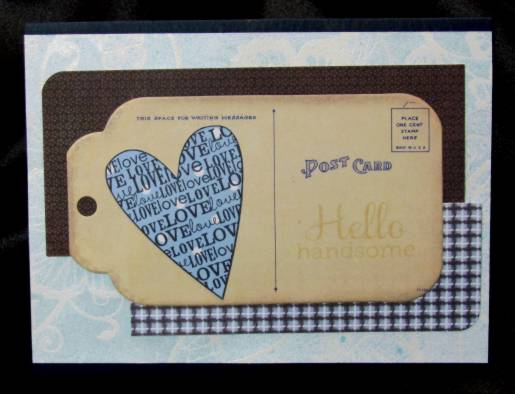
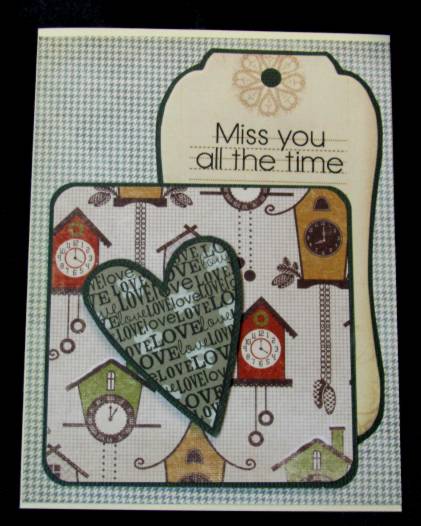
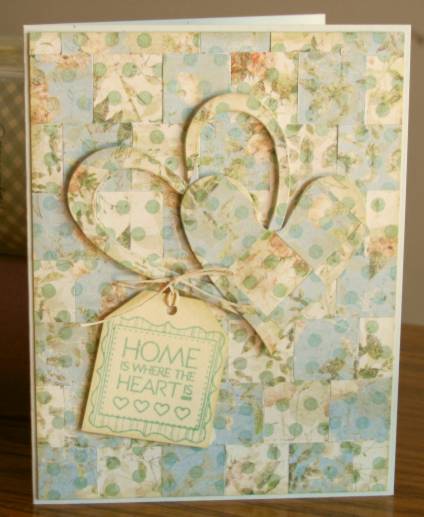
The next lesson was stamping on TWO patterned papers with different ink colors, cutting the papers into shapes and reassembling them. I had two papers that were the same print but one had a cream background and one blue. I stamped both with the dots background and cut 3/4 inch squares. These were reassembled over a xyron background. There was enough for the card front plus so I used the plus to die-cut the hearts. These were then popped up on foam tape. I stamped the tag and tied it to the heart with scrappers floss.

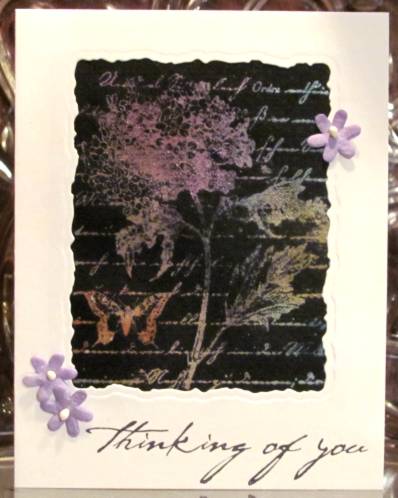
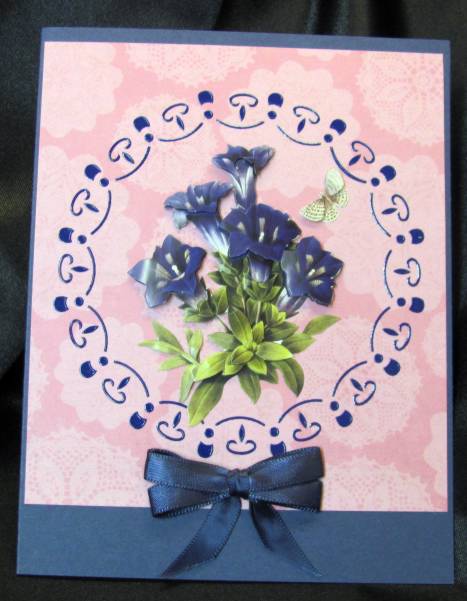
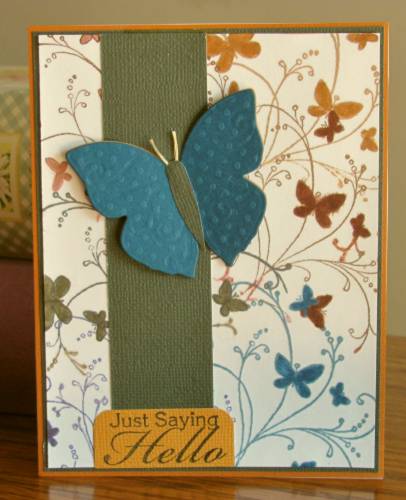
And, finally, I used a smaller background stamp with swirls and butterflies. I inked with one color of chalk ink and stamped and then repeated with 5 other ink colors. I used Distress Markers to color in the butterflies. I placed a strip of dark green to tone down some of the purple that was too bright at the bottom. Then I die-cut two butterflies in colors to match the background and layered them so the top one has its wings raised. The greeting is from the pre-stamped bin.

And so ends Day 1 of the class. If the rest of the class is this informative, I will be VERY happy.

I made extras of the backgrounds while I had the materials out and put together a few more cards. This one is from the 'kissing' technique. I used the dotted background stamp on the solid flower. By adding some cut out leaves and some liquid pearl flower centers I had a great feature panel for a card. I added it to a blue background from the scrapbooking page-a-day calendar and popped up a sentiment on foam tape.


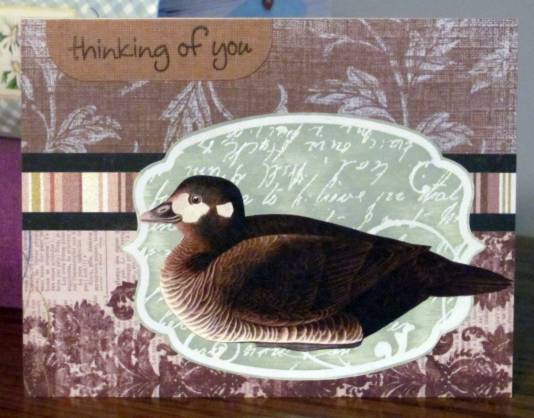
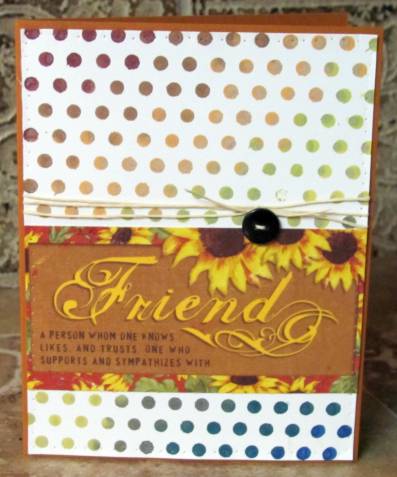
This one with the dots background just got a printed tag cut down for it, a twist of twine and a button. I mounted on colored cardstock base.


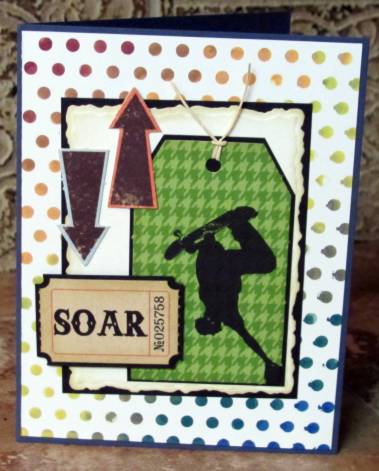
Anotherdotted background got a printed tag, an addage ticket, a deckle die-cut panel all backed with black plus two die-cut arrows and a bit of twine for the tag. This one got a denim blue cardstock base.


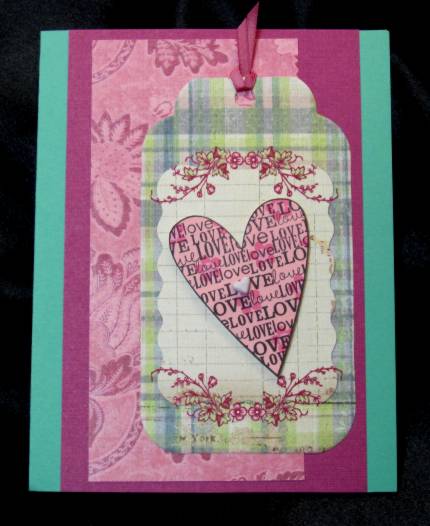
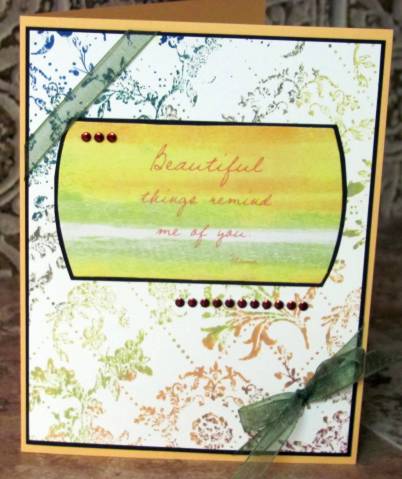
For this one I used a different background - one I had inked up but set aside from class as I wasn't really pleased with it. Then I found this printed tag and it suddenly had more appeal. I backed both with a thin black border and tied some sheer moss-green ribbon on the diagonals. As a final touch I added some red 'nail head' sticker dots.

A total of 11 cards from day one.

Ddd


Posted by studio3d@ccgmail.net at 12:01 AM PDT
Updated: Tuesday, 31 July 2012 5:32 PM PDT
Sunday, 5 August 2012
Row Houses
Topic: Sketch Challenge

I made a card for the Operation Write Home sketch challenge #128. As soon as I saw the sketch I knew what I wanted to do. Here is the sketch:


Ignoring the measurements they provided I stamped up three of the Hero Arts / Operation Write Home houses and five of the clouds from the same set. I cut off a bit of each of the houses to show more of the background papers and used a white gel pen to trim out the roofline, windows and door. Then I added white woodgrain to the door and yellow copic marker to the windows.

I let the clouds run off the edges of the card and trimmed them off. I added hand-drawn birds to the sky and cut down a pre-stamped sentiment to glue at the bottom edge.

Ddd


Posted by studio3d@ccgmail.net at 12:01 AM PDT
Saturday, 4 August 2012
My Heart Is So Blue
Topic: Collage

ANOTHER HEART? Will they never end? If they do, I can always stamp more, huh?

I fell in love with this background paper - actually, BOTH of the background papers. I naturally gravitate to the dotted ones but that diagonal plaid is unusual for me. It is pretty busy so the dotted paper tones it down a bit. I pulled colors from the plaid for other elements of the card: brown for the scallops and the sentiment, green for the dotted paper, blue for the heart and the rhinestones.

I wrapped some scrappers floss three times around the decorative paper and knotted it on the right. The heart is popped up on foam tape over the top of the floss.

Ddd


Posted by studio3d@ccgmail.net at 12:01 AM PDT
Friday, 3 August 2012
Sitting Duck
Topic: Scrap Recovery

From the kits I selected one with some table scraps, a 'ColorMe' tag that I had already colored with chalk ink, and a duck from an old calendar. I selected a sentiment from the pre-stamped bin in the same color as the bird and applied it on the upper edge like a tab.

This will make a nice card for a guy, I think.

Ddd


Posted by studio3d@ccgmail.net at 12:01 AM PDT
Thursday, 2 August 2012
Here's My Heart
Topic: Scrap Recovery

From the scrapbooking page-a-day calendar I culled this printed lacy heart and stamped a framed sentiment into it. I created a background from table scraps and a couple of die-cut swirls.

The heart is popped up on foam tape.

This was created with another one of the 'kits' I assembled a while back.

Ddd


Posted by studio3d@ccgmail.net at 12:01 AM PDT
Wednesday, 1 August 2012
Buggy Fingers
Topic: Nail Art

We were having a barbeque at the house and I needed to have a new manicure. I REALLY wanted to have little ants on my nails but did not have a stencil for them in my kit. So I settled for dragonflies, of which there were two. But that is A-OK cause I do like me some dragonflies.

I used a metallic magenta for the base color and stamped with the black nail art polish. This time I sealed the tips with an extra coat of topcoat in hopes of making the manicure last a little longer.


As you can see I used the two dragonflies on apternate fingers and also twisted them this way and that for a little more interest.

Here is a close view of two nails.

Ddd

Posted by studio3d@ccgmail.net at 12:01 AM PDT
Tuesday, 31 July 2012
Birthday Bash
Topic: Scrap Recovery

From the old stamp catalog I colored up the balloons and the cake square with matching colors. Then I selected some 'party papers' and bordered them all with teal. Very light teal printed paper was border-punched and used as the background. I then layered the party papers and topped these with the balloons and cake square. The package is a silver peel-off that is backed with more of the teal and popped up on foam. Then I used a ruler to draw in strings for the balloons.

The squiggle streamers are stickers.

Ddd


Posted by studio3d@ccgmail.net at 12:01 AM PDT
Monday, 30 July 2012
Written On My Heart
Topic: Stamping

I can't even remember what project originally inspired me to stamp SO MANY of these hearts on patterned paper. I just keep running across more of them!

I started the background with a brown script paper and then prepared a layer of dots by rounding the top corners and tearing the bottom edge. Over this I glued MOST of a tag printed with script and used scrappers floss to wind and tie into a bow.

The stamped heart is mounted with foam tape.

Ddd


Posted by studio3d@ccgmail.net at 12:01 AM PDT
Sunday, 29 July 2012
Get Out Your Party Dress
Topic: Die Cuts

Some time ago I made a bunch of these little dresses by cutting Vs out of the sides of diecut scalloped circles. They were originally designed to be strapless but I think adding loops of ribbon makes them even cuter. I also used a strip of the same ribbon for a waistband. I used floral wire to construct the little hanger.

For background I selected a printed tag and then found papers that copied some of the same elements. I aligned one edge of the blue dot paper with a line in the tag and adhered the little dress at an angle.

I added a line of silver peel-off zig-zag border to the bottom and top edges of the dress and then applied a silver peel-off greeting.

Ddd


Posted by studio3d@ccgmail.net at 12:01 AM PDT
Saturday, 28 July 2012
A Passing Glance
Topic: Stamping

Wh, here I am with another 'kit' card. I wanted to use a collage stamped piece that was a make-and-take from a stamp show I went to several years ago. I love the range of colors in this and the use of masking paper strips to create the grid for stamping.

I used a lavender card base and a printed teal background paper to pull colors from the stamped piece. A yellow punched border is in keeping with the overall pallette and I bordered the stamped purple heart with teal before mounting on foam tape.


Very, very simple - oh, so classy!

Ddd


Posted by studio3d@ccgmail.net at 12:01 AM PDT
Friday, 27 July 2012
View From On High
Topic: Paper Embroidery

With an assignment for 'the great outdoors' I took to the skies with my hot air balloon pattern. The background paper selected was so expressive that I went with pastel versions of my standard hot air balloon colors. I think it looks very 'French' in this combination of thread colors and background.


I stamped clouds on decorative papers, trimmed them out and popped them up on foam tape over the edges of the balloon. Then I added some gold peel-off tree-tops to the bottom edge to set the scene.

Ddd


Posted by studio3d@ccgmail.net at 12:01 AM PDT
Thursday, 26 July 2012
Dear Little Deer
Topic: Paper Embroidery

I have an assignment coming up to stitch a card with a favorite animal. That was easy! We have plack-tail deer on our property and are delighted when the does drop their fawns in the back yard. This year we have two single babies and a set of twins. We've been enjoying watching the pair play together - jumping, playing tag and hide-and-seek.

I found this pattern in the paper embroidery book I own and had to stitch it upin honor of our local babies. I colored the spots black as the instructions specified but, in reality, our fawns have white spots.

I also added more grass than the pattern contained, but it was needed. A little butterfly gold peel-off is perched on the fawn's nose.

Ddd


Posted by studio3d@ccgmail.net at 12:01 AM PDT
Wednesday, 25 July 2012
Rising Star
Topic: Stamping

For some project a long time ago I stamped out a bunch of these phoenix on kraft cardstock from my hand-carved stamp. I don't even remember what I was going to make with them!

I pulled out a black and white paper to use but the white was too stark so I toned it with 'old paper' distress ink. So the layers are black folded card base, cream cardstock, toned black and cream patterned paper, stamped image. I also pulled out a variety of die-cut swirl in different neutral tones. Since I had multiples of the image I used a star punch on one and inked the edges in black to make it stand out. This is popped up on foam over the main image.

No sentiment for this one.

Ddd


Posted by studio3d@ccgmail.net at 12:01 AM PDT
Tuesday, 24 July 2012
Frilly Heart
Topic: Scrap Recovery

I had one of these frilly heart prints left from the scrapbooking book with pages of images to use. I trimmed it out close around and combined with a tag, sentiment and background using colors pulled from the image.

I rounded the corners to unify the elements.

Ddd


Posted by studio3d@ccgmail.net at 12:01 AM PDT
Monday, 23 July 2012
Orange You Glad I Showed You This?
Topic: Stamping

This little 'onesie' is another image that I stamped a long time ago for another project and then didn't use it. It is stamped on patterned paper so no coloring was needed. I did, however,do some shading in the leg holes and neckline for dimension.

I just selected a bunch of masculine-looking papers for a fun mix and added a pre-stamped sentiment.

As a finishing touch, I used blue marker to make faux-stitching on two sides of the sentiment block.

Ddd


Posted by studio3d@ccgmail.net at 12:01 AM PDT
Sunday, 22 July 2012
Potted Plant
Topic: Scrap Recovery

From the old stamp catalog I colored up all the elements of a little garden set and cut them all. Then I arranged them into a little vignette on a tag for this card front. Some bright striped paper and a brown cardstock complete the scene and I added some 3D elements to the upper left for balance.

The sentiment is a gold peel-off.

Ddd


Posted by studio3d@ccgmail.net at 12:01 AM PDT
Saturday, 21 July 2012
Hearts A Plenty
Topic: Stamping

I decided to work from the 'kits' I put together the other day and pulled out a bunch of them that use the stamped 'Love' heart image.

This one uses a variety of patterned papers. I unified them by using a gold metallic paint marker toadd a band to all of them. Two have rounded corners as well.

I had this 'postcard' tag  and decided to make the love heart the message. For the address portion I stamped 'hello handsome' in 'old paper' distress ink so it was a subtle image. I chose papers for the background that were more masculine.

I gave this heart some holographic pink brackets as 'wings'. A green card base coordinates with the green flourish tag and I added pink floral paper and a pink ribbon in the tag to go with the heart.

Some of the clock print was paired with a lined tag and a green heart. There was not enough contrast so I banded all the elements with dark green. A very tiny green houndstooth print is featured in the background.

All the colors of this card are keyed off the tag I selected. This gave me a pink, burgundy, and a seafoam green to work with. For a little interest I added a single white heart brad to replace the 'O' in one of the words.

These went together really quickly since I already had all the elements selected.

Ddd


Posted by studio3d@ccgmail.net at 12:01 AM PDT
Friday, 20 July 2012
Dreaming Mouse
Topic: Stamping

I just can't stop using this cute stamp! I had colored this one up and set it aside. But when I ran across this page from the scrapbooking page-a-day calendar I thought how fun it would be to feature him laying in the flowers. I used a bit of wiggly green trim to stand in for the grass and made a sun by punching a circle from yellow cardstock. I had lots of clouds stamped out on white card with raised dots so I trimmed out three of them to mount on the card.


I stamped the text on the sun and added dashed rays around it. Some fun, huh?

Ddd


Posted by studio3d@ccgmail.net at 12:01 AM PDT
Thursday, 19 July 2012
Blue on Blue
Topic: 3D paperwork

I used up more of the blue Hobby Dots as designed. This one makes a round frame which I had pricked out on a pink cardstock with doily print. I filled it with a dark blue floral 3D image and added a dark blue double-loop satin bow to the bottom. This is backed with a dark blue folded card base.


This is also a 5 x 6.5 card, like yesterday's.

Ddd


Posted by studio3d@ccgmail.net at 12:01 AM PDT

Newer | Latest | Older