« October 2016 »
S M T W T F S
1
2 3 4 5 6 7 8
9 10 11 12 13 14 15
16 17 18 19 20 21 22
23 24 25 26 27 28 29
30 31
You are not logged in. Log in
Entries by Topic
All topics
3D paperwork
A - Z challenge 5
A - Z challenge 7
A - Z challenge round 4
A to Z challenge round 3
A to Z round 2
A to Z round 6
A-Z round 1
Around the House
Art Challenges
Artist Trading Cards
Backgrounds
Beads
Bible Journaling
Books
Boxes
Collage
Color Challenge
Coloring
cookbook
Die Cuts
Digital Projects
Digital Stamps
Drawing
Dry Embossing
Fabric Stuff
Fantastic Folds
Field Trip
Home Decor
How Does Your Garden Grow?
Hymnal Art
In The Kitchen
In the studio
Jewelry
Lettering
Links
Multi-Technique
Music to Work By
Musings
Nail Art
New Work
Online Class
Other Hobbies
Other Projects
Painting
Paper Embroidery
Paper Piecing
Photo
Pretty Paper
Quilting
Random
reading
Scrap Recovery
scrapbooking
Sewing  «
Sketch Challenge
Some Backlog
Stamping
Stencils
Stickers
Supplies
Teabag Folding
Techniques
Testing
tips and tricks
Tutorial
Web resources
Welcome to my Blog
Work By My Friends
workflow
Writing
Blog Tools
Edit your Blog
Build a Blog
RSS Feed
View Profile
Group One
In & Out of Studio 3D
Wednesday, 5 October 2016
WHat's For Lunch?
Topic: Sewing

As I am packing up to go to quilting twice a month I keep reminding myself that I should have an insulated lunch bag to keep my food cold instead of just tossing it into a gallon zip-lock bag.

When I was trolling the internet for something else the other day, I came upon a link to a digital pattern for just such a lunch bag and ordered the pattern for download.

I did change up a few supplies along the way but the pattern was useful and got me going in the right direction.

I already had a large piece of fabric on hand that was marked in the selvege as being Scotchguarded. Since it was the only fabric in my stash with this treatment I decided to use it for both the exterior and lining of the bag.

I also already had on hand some of the InsulBrite which is an insulating batting like one would use in making potholders and... lunch bags!

The instructions called for webbing to use as the handle and the binding. I made my own handlle from the fabric and folded it in and in again (to make four layers) and edge stitched it. I used some on-hand double-fold seam binding for the binding edges and I had sew-in velcro on hand for the closure.

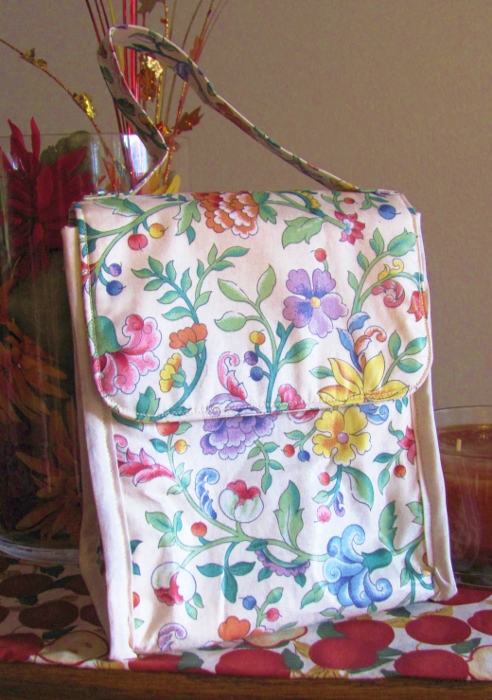
Here is a front view of the bag:


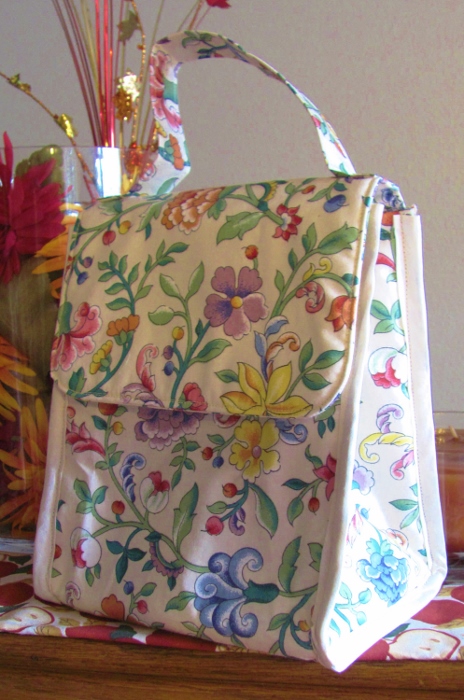
This 3/4 view shows how wide the bag is on the sides:


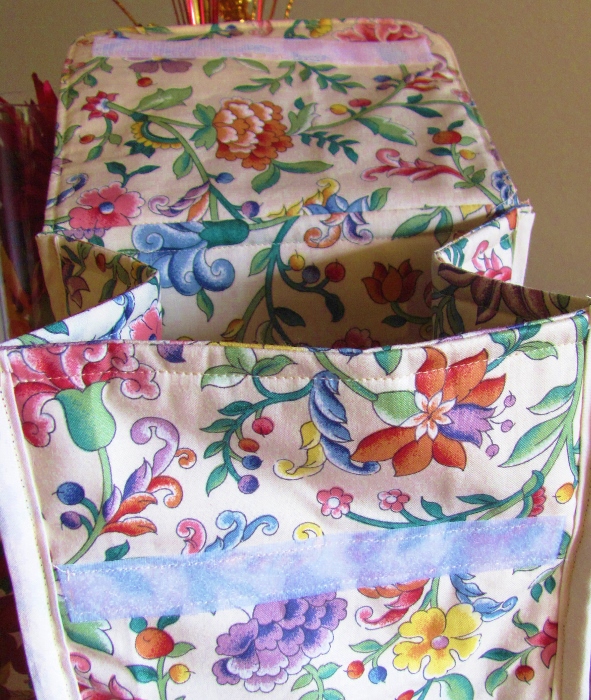
Here is a view of the interior. You can see the velcro closure, the way the sides fold in and the lining:


The base is large enough for my freezer block to lay in the bottom as well as having enough room left for a drink bottle, and all the other lunch foods (plus snacks).

Thanks to the Scorchguard finish, I will be able to swipe out the inside from crumbs and other debris.

I'm looking forward to using it this weekend.

Ddd


Posted by studio3d@ccgmail.net at 5:08 PM PDT
Wednesday, 28 September 2016
Sew Darned Cute
Topic: Sewing

I had an idea for a project for a gift and then couldn't find any pattern for what I wanted to do. You know what that means... gotta make my own pattern - cause I'm not going to let this idea go!

The Idea: Make a set of placemats that look like vintage camp trailers and have a bit of flair. My daughter-in-law is a big fan of 'glamping' (glamour camping) and I thought this would be just the ticket for her birthday.

I started with 6 pieces of paper the same size and did rough sketches of camper bodies in various outlines. Then I drew in the same tire/hub, door and propane tank for each - with variations in exact placements of them.

I then drew over each element with a Sharpie marker, refining the shapes as I went.

Every element was then traced onto the paper of Steam-a-Seam2 and rough-cut outside the lines. I had to remember to reverse the elements that were directional (a swoosh, a shaped window, etc).

Then I laid all the patterns out on the table and started pulling fabrics from my scraps. This was the MOST FUN part! I selected retro-looking, repesentational, and funky fabrics that made me think of campers actually rolling down the road. I selected window fabric, tires, hubs, doors and tanks that were the same for all for consistency.

Where the upper and lower sections were of different fabrics I stitched them together so the background would be all one piece. Then I laid the background over the pattern on the ironing board.

Each piece got the Steam-a-Seam2 pressed onto the back, trimmed up to its outline and the backing peeled off. Working from the background forward each element was placed and then pressed down.

Then began the tedious business of appliqueing every piece in place. I did this with my machine using a small blanket stitch and a taupe thread for everything. Special elements like the lines in the windows and such got a different specialty stitch.

When all the pieces were stitched down, I turned the piece face down. I trimmed out the original pattern to its outline and laid it down over the fabric. By aligning the pattern with the stitching on the tires, door bottom and propane tank I could set it right in place. I traced the outline with a marker that disappears when heated (Frixion).

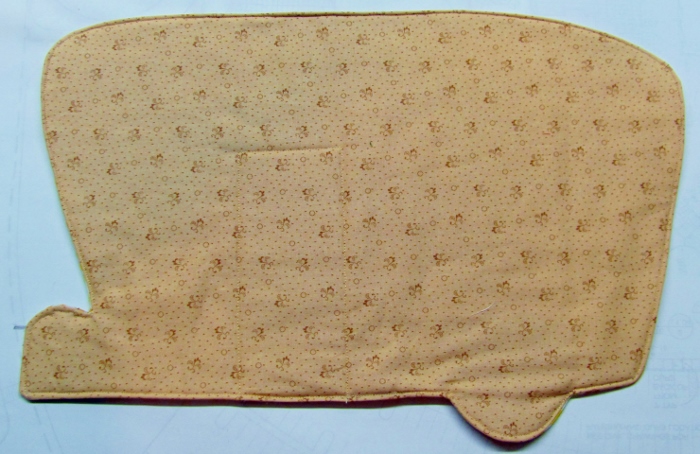
The placemat was then layered... batting, backing face up, camper face down... and pinned together. The backing fabric is consistent across all 6 mats.

Leaving a gap along the base, I backtacked and then sewed the entire traced outline, backtacking again at the other end of the gap.

I trimmed the batting to 1/16 all around and the seams to 1/4 and I clipped the curves. I also cut out a wedge of batting in the gap and turned back the seam allowances and pressed them along the gap.

Then the whole mat was turned right side out, the curves worked out, and I topstitched 1/8 inch all around, using the topstitching to close the gap.

I used a straight stitch to go around the door and this is usually the only quilting (a couple of windows needed outlined where the door was way off the center).

Then they were done!

Ready to see them?

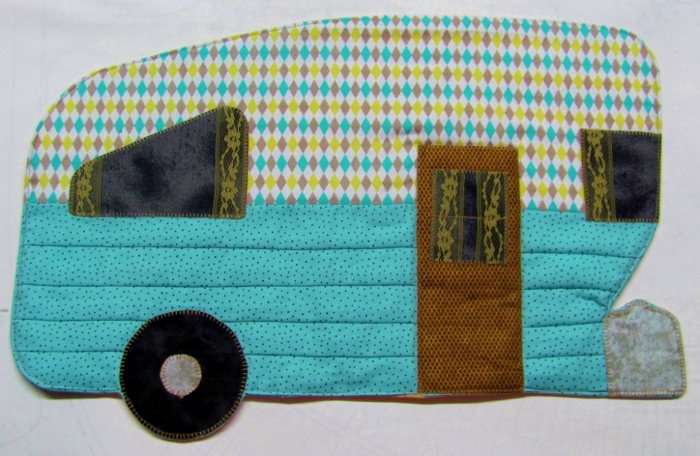
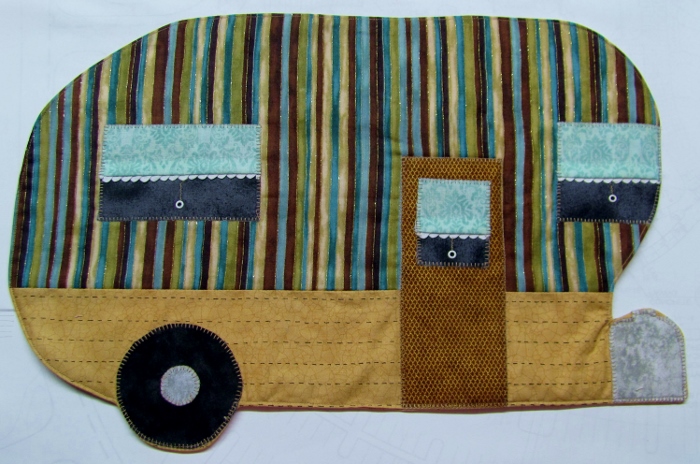
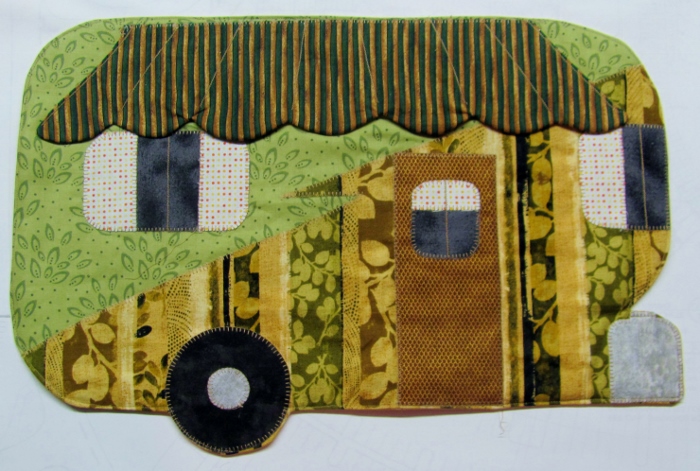
First up is an aqua glamper featuring a retro diamond print on top and a dot on the bottom. It features curtains of lace seam binding and a shaped window:

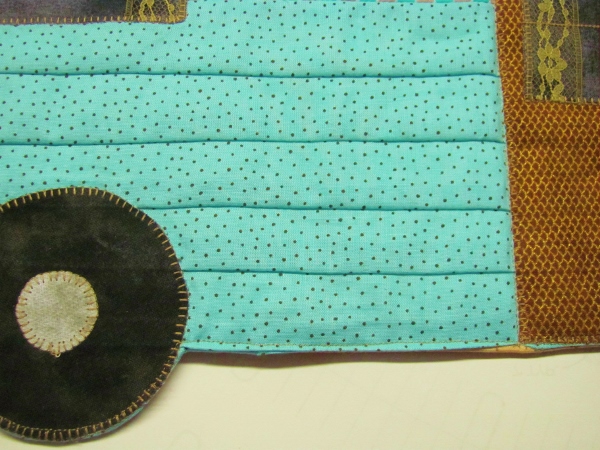
My favorite thing on this (other than the fabric) is the lap siding on the lower half. I did this by stitching tucks before sewing it to the upper part. Then it was treated just as if it were flat for the rest of construction.


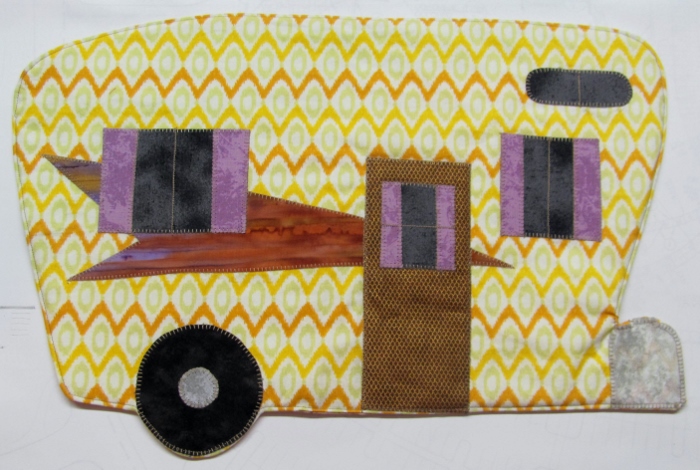
Next is the 1970s glamper. Totally weird fabric for the siding! It has a nifty window where the overhead bed would be, too.


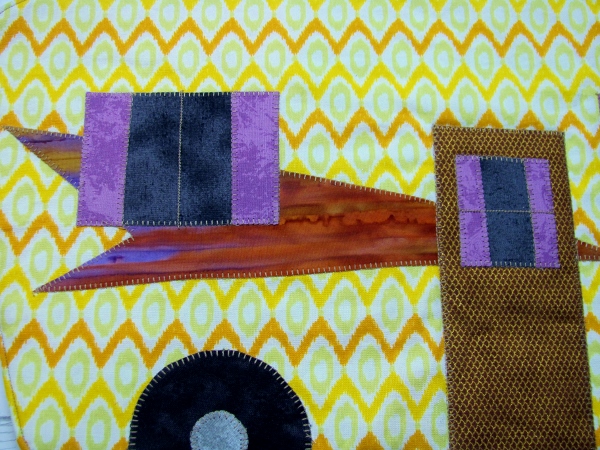
My favorite part of this one is the batik swoosh on the side. This was one of the elements that had to be reversed when cutting its pattern.


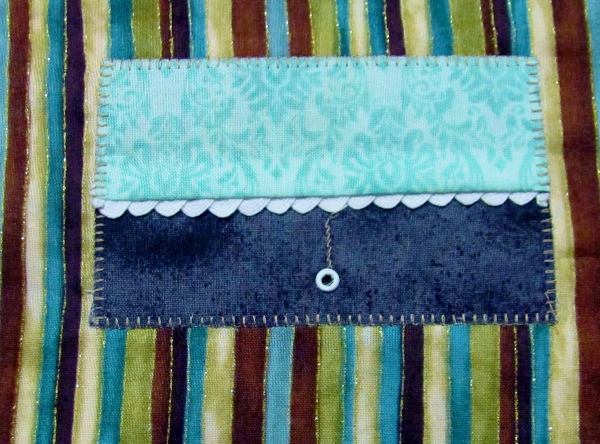
And then we have this striped cutie. So far, I think this has been everyone's favorite.

The overwhelmingly favorite element on this glamper is the window shades. They were stitched to the window fabric with a braided rickrack layered between and then the widow was cut out from that. After the blanket stitching was done around the edge I added a heavy line for the string and used my eyelet setter to install the pulls. I did have to iron on a little fabric behind the pulls so the batting would not beard out.


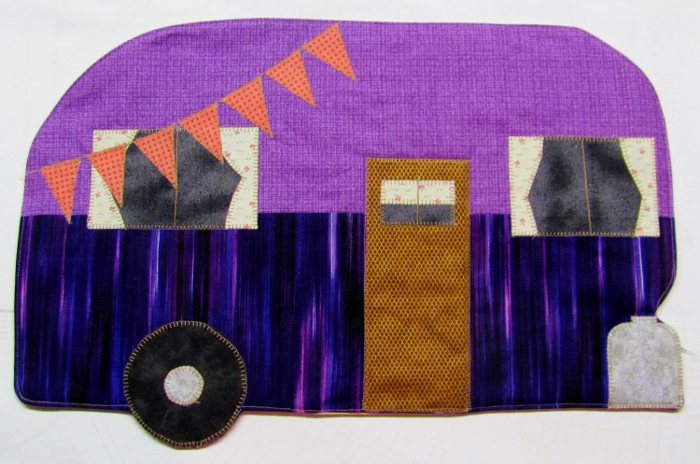
Next up is the purple palace:


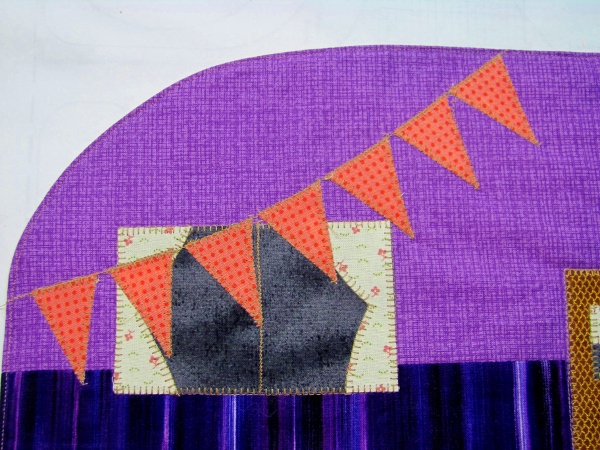
My favorite feature on this one is the bunting hanging on the side. I guess that means this one is parked since you wouldn't want to leave that flapping while going down the road.


Then we have a semi-camoflage model. this would look good when glamping in the woods instead of in a park.


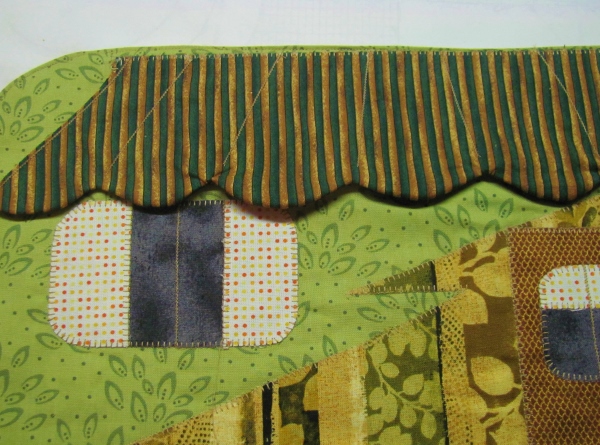
My favorite thing on this is that big roll-out awning. Just perfect for some shade to read or nap. Those stitching lines keep the awning flat while leaving it open on the lower edge.


And last is a zig-zag stripe that looks like it is on the move. The wheel on this one is WAY forward so it really has to go on stabilizers when it is parked:


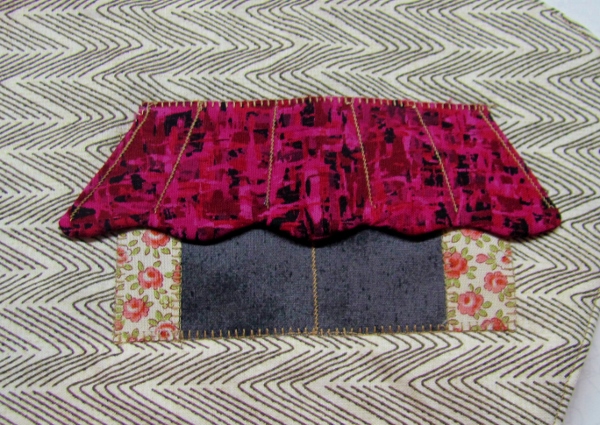
You can see BOTH my favorite elements in the photo below. 1) the flowered curtains 2) the awning over one window.


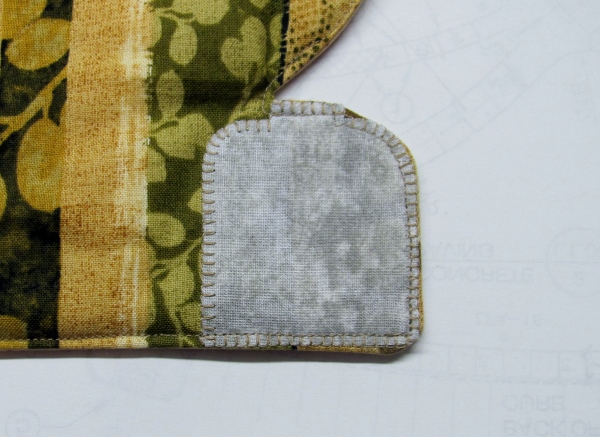
One of the cutest things about all of these is the little propane tank on the front. I didn't want a towing hitch sticking out there so this was a way to define the front and have a little fun at the same time.


As I mentioned before, all the glampers have the same backing. Here you can also see how little quilting was needed to hold these together because the batting allows for 9-inch spacing.


So there you have it! I am sure my daughter-in-law is going to love these whether she takes them in their camper for use on the road or sets the home table with them when she wishes she were on the road.

Happy Glamping!

Ddd


Posted by studio3d@ccgmail.net at 12:01 AM PDT
Tuesday, 27 September 2016
Way Beyond Cute
Topic: Sewing

I was strolling through Pinterest yesterday and ran across a link to the cutest little cosmetics bag with pleats. It is just adorable so I followed the link and came to a video tutorial here.

The tutorial audio is in German but there are English sub-titles along with measurements in both centimeters and inches, so it was easy to follow.

Today I selected some fabrics from my scraps and made TWO of them, using different colors of zippers. All the photos below are of the version with the gold zipper. The other unit has a light green zipper.

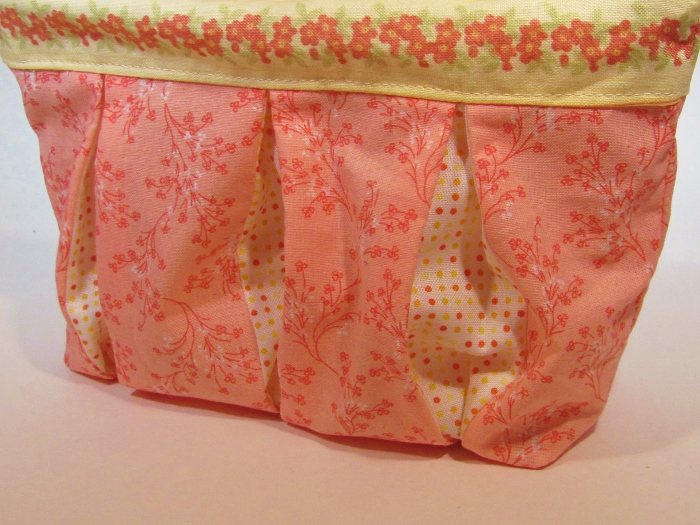
Here is the bag in whole:


In this shot I exposed the inside of the pleats so you can see the fabric there:


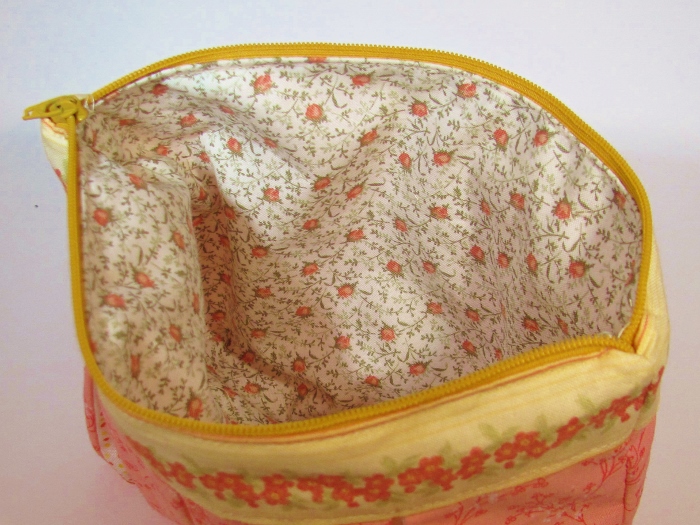
And here you get a look at the lining fabric:


Isn't this neat?

The bottom corners are boxed so the bag stands up on its own.

Now I want to adjust the pattern so I can make a bigger bag, add some handles, put some pockets inside...

What fun!

Ddd


Posted by studio3d@ccgmail.net at 6:36 PM PDT
Wednesday, 1 June 2016
Sleep On It
Topic: Sewing

I obviously didn't stay idle too long as, the day after my BIG ANNOUNCEMENT, I'm back with a completed project.

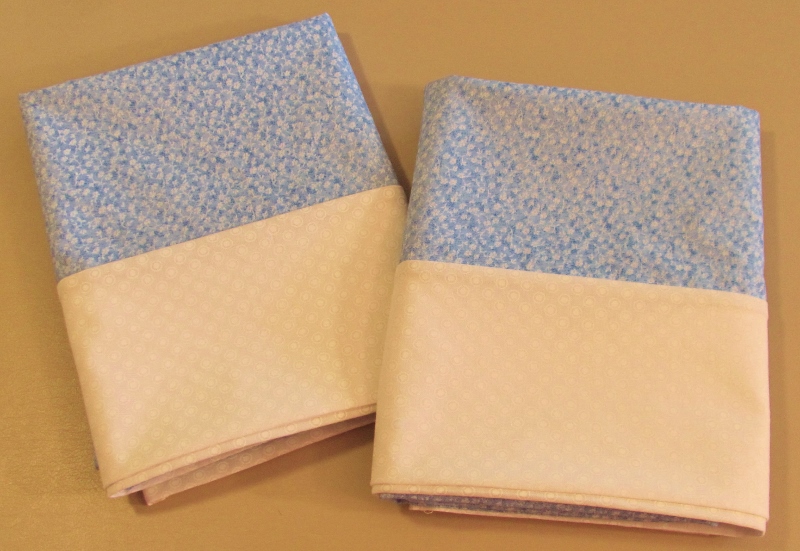
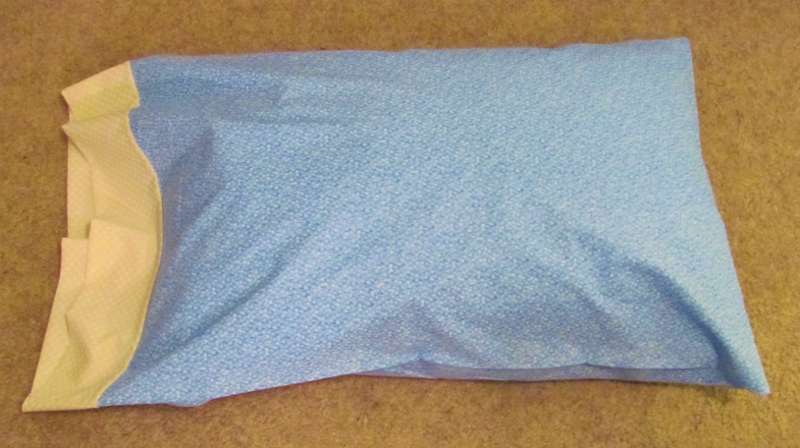
Mom needed a set of pillowcases that were larger than standard.

We had seen them while shopping but they are ridiculously spendy.

While at the store it suddenly occured to me, "I have three sewing machines. I can MAKE pillowcases."

We walked right over to the fabric store next door and bought fabric!


The cuff on these is actually pure white but, you know my issues with the color rendition on my camera.


Doesn't that look comfy?

Ddd


Posted by studio3d@ccgmail.net at 12:01 AM PDT
Sunday, 17 April 2016
These Pants Flow
Topic: Sewing

One more pair of pants for travel.

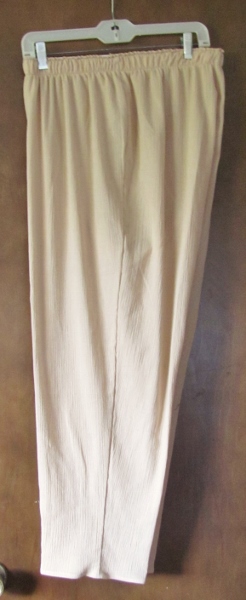
I got a fabric that has a crinkle to it in a light taupe. I stitched these up with the same new pattern as the blue and black.


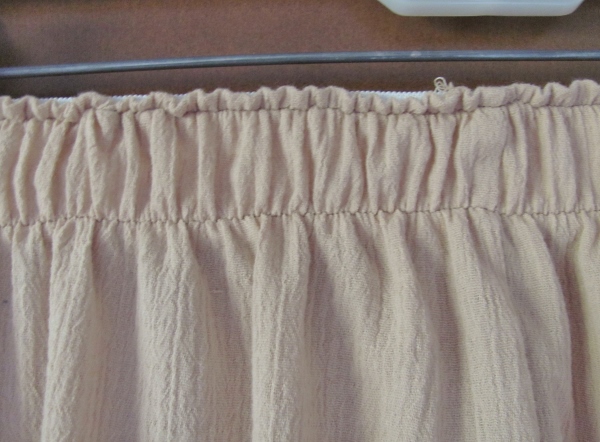
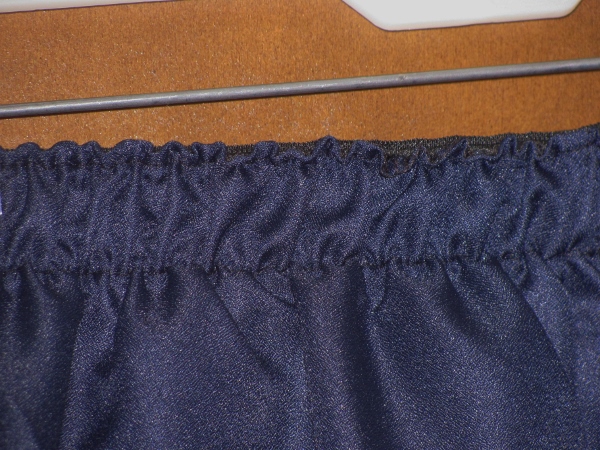
Yep - the same elastic waistband:


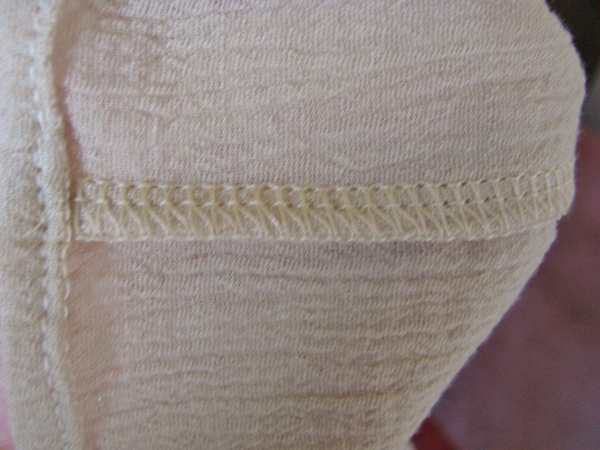
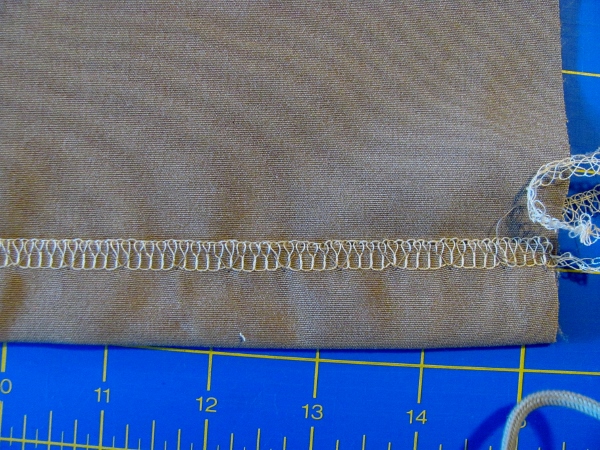
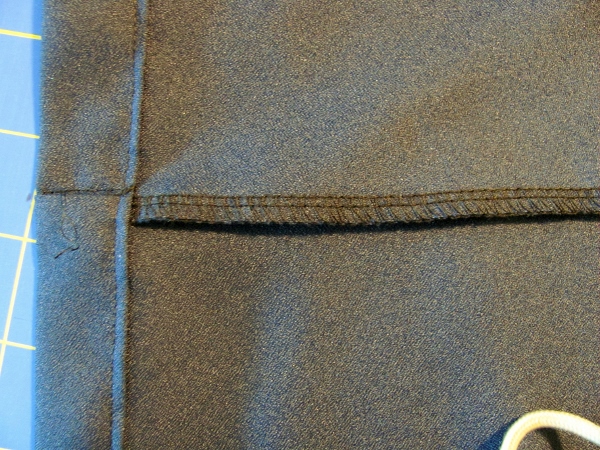
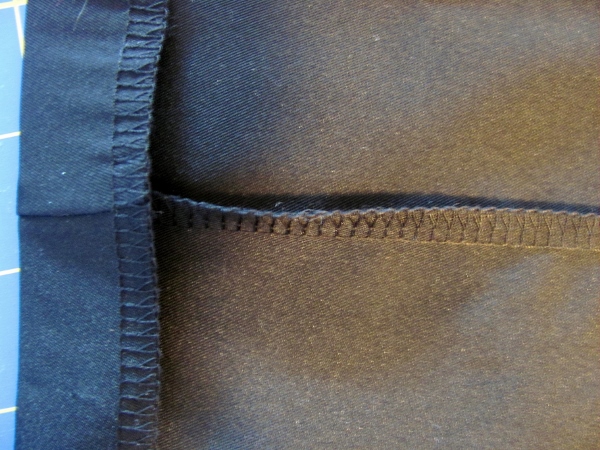
These got a simple hem, serged and then turned under twice and top-stitched.


All ready to fly away with a wardrobe of new pants!

Ddd


Posted by studio3d@ccgmail.net at 12:01 AM PDT
Saturday, 16 April 2016
Black Pants
Topic: Sewing

The next pair of slacks I made were black.


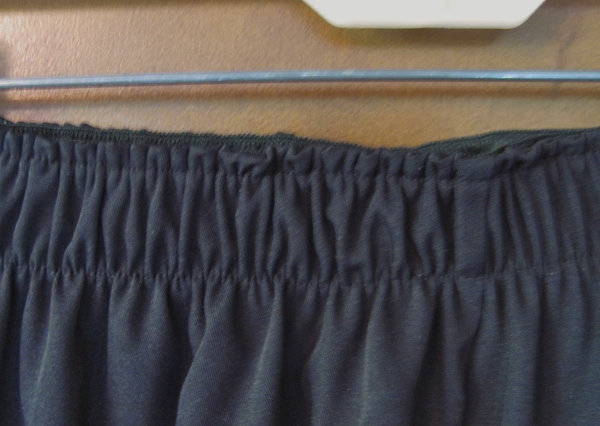
These also have the elastic waistband:


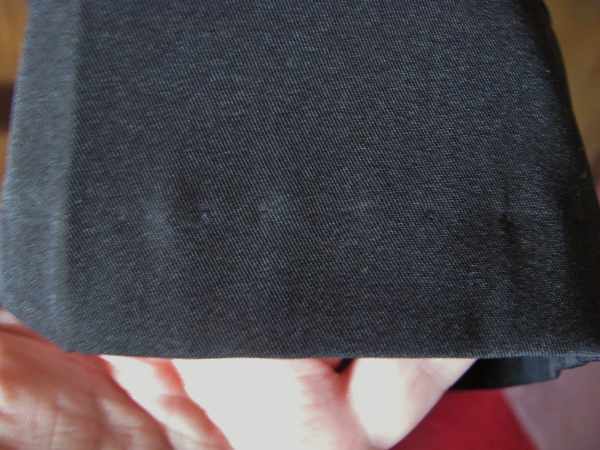
These pants got a blind hem.


Two pair down.

Ddd


Posted by studio3d@ccgmail.net at 12:01 AM PDT
Friday, 15 April 2016
Blue Trousers
Topic: Sewing

I put that new serger and my new custom pants pattern to work immediately.

I bought three pieces of 100% polyester yardage to make trousers for travel.

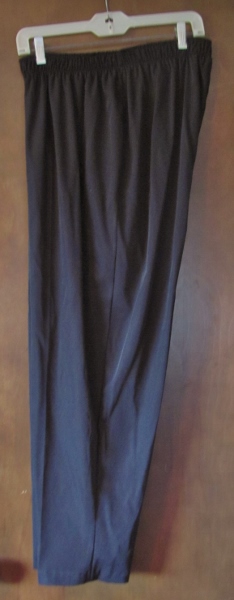
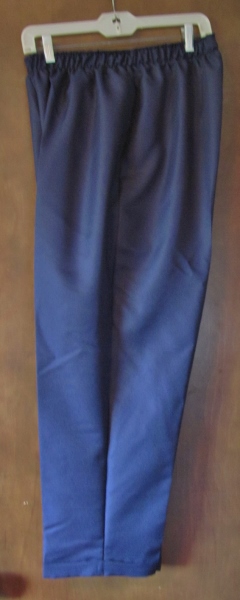
The first pair I made was navy blue. Yes, they DO hang strangely on the hanger - but the important thing is that they hang right on my body!


The waist is elastic and there are no pockets in this pattern.


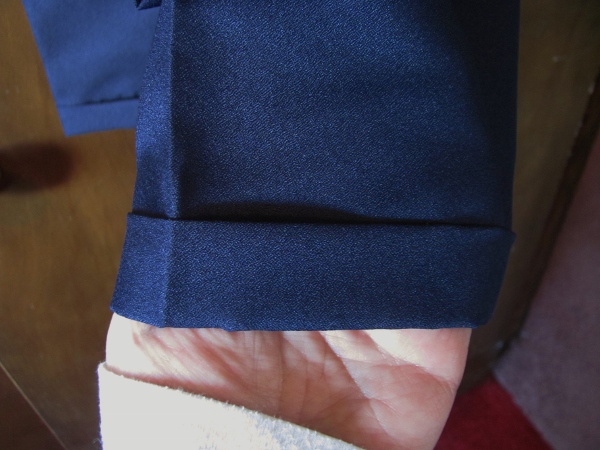
I gave this pair a one-inch cuff and pressed in a sharp crease.


Nice!

Ddd


Posted by studio3d@ccgmail.net at 12:01 AM PDT
Thursday, 14 April 2016
New Workhorse In the Stable
Topic: Sewing

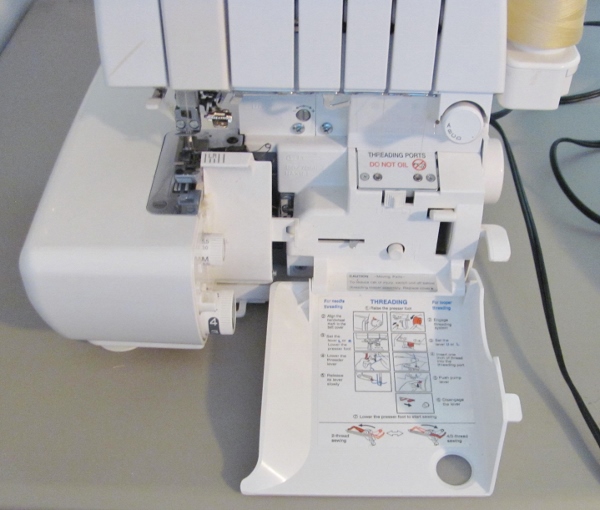
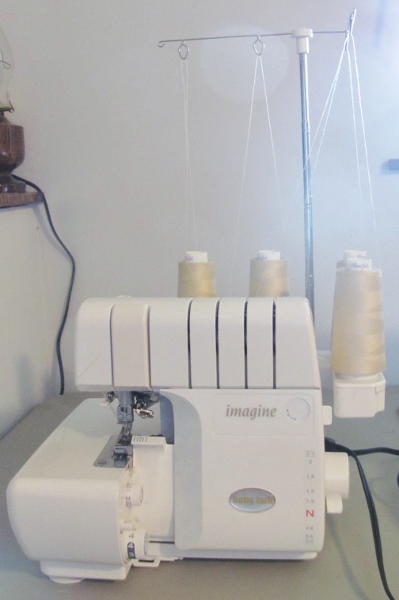
I recently had the opportunity to buy a gently used Baby Lock Imagine serger at a very good price. It had belonged to the cousin of a friend and she had only used it a few times fefore she passed away.

I took it straight to the shop for an overhaul and then set it aside hoping to learn to use it at the Sewing and Stitchery Expo. Unfortunately, the class I wanted was full so I just took one that gave tips for advanced use. I did buy that book/dvd on using a serger.

None of this had any effect on my being freaked out by the thought of threading a serger and knowing that sharp blade was lurking near the presser foot.

So, I took the machine with me to quilting group on my recent visit where I knew there were some serger users who could help me out.

Much to my delight, I found that my machine has air-treading of the two looper threads! With the help of Ruth and three sets of printed directions I was soon threaded up with 4 cones and serging samples.


Now it's time to take on some 'real' projects.

Ddd


Posted by studio3d@ccgmail.net at 12:01 AM PDT
Wednesday, 13 April 2016
Polka Pants
Topic: Sewing

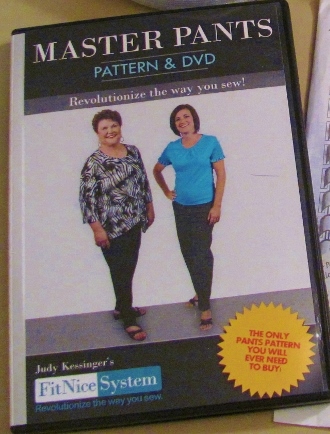
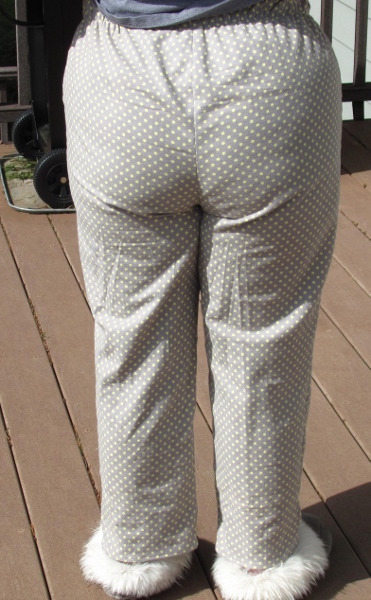
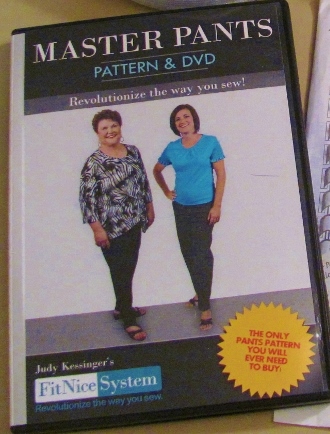
I decided it was time to break out the pants patterns I bought at the Sewing and Stitchery Expo last month. I chose to work with the DVD/Pattern called Master Pants from FitNice System.


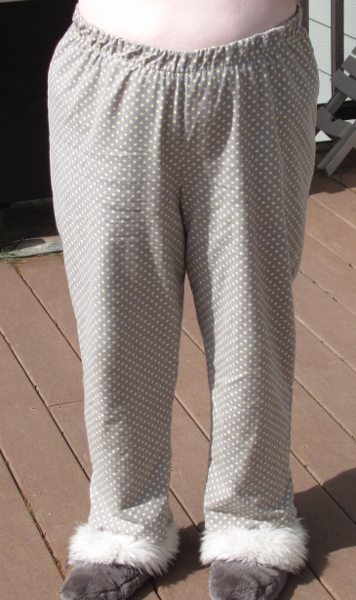
I took my measurements, drew out the tissue pattern, made some alterations as recommended and then made my 'muslin' (sample) from a warm gray flannel with yellow dots.

They turned out great and though there were a few more adjustments to make for future finished trousers, these will be great for hanging out around the house.

Yes, I'm wearing my furry slippers for this viewing.

Don't judge MY shape, just the pants.

Ddd


Posted by studio3d@ccgmail.net at 12:01 AM PDT
Tuesday, 12 April 2016
Choking Hazard
Topic: Sewing

While I was in the mode of alterations I dug out a top that has pockets on the sides near the underarms for carrying materials out of sight. I use mine for wallet, cash, etc. when traveling.

The problem was that the neckline was so high that it rested up around the throat. Not only was it uncomfortable to wear but I have no tops with necklines that high so it came off like I was wearing a high-neck white t-shirt under everything - NOT a good look.

I fixed this by putting the garment on, topping it with my lowest neckline top, and marking the opening with a Sharpie marker. Then I took it off and made a line 1/4 inch outside that marked line.

The new neckline was then enclosed in fold-over elastic which was sewn with a tripple-stitch zig-zag.

The last step was to take a tuck at the end of the V-neck.

This is the result:


The garment is body-hugging so the ripple on the neckline disappears when it is being worn.

Ddd


Posted by studio3d@ccgmail.net at 12:01 AM PDT
Monday, 11 April 2016
Hemmed In
Topic: Sewing

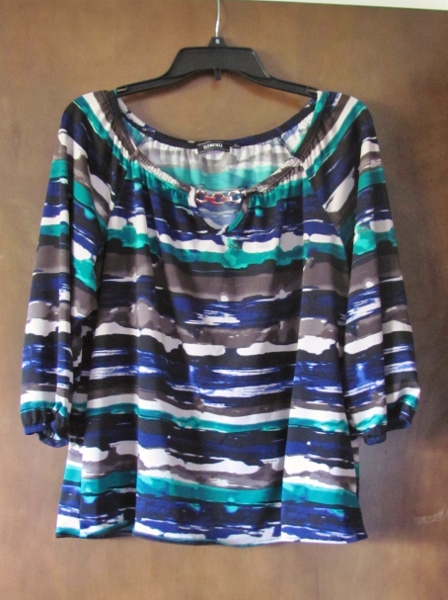
I bought a blouse about this time last year and have only worn it occasionally. The other day I realized what it was that I was having an issue with - the elastic in the hem.

This elastic made the back of the blouse ride up to the waistline in the back but was loose enough that the hem dropped down in the front. The result was very unattractive.

I decided to remove the elastic and re-hem the blouse so it would just hang free.

This is the result:


Such a simple fix!

Ddd


Posted by studio3d@ccgmail.net at 12:01 AM PDT
Tuesday, 8 March 2016
Pants and Slacks
Topic: Sewing

At the Sewing and Stitchery Expo I decided to get some patterns for pants. I had three pairs of thin fabric pants for travel last year but one pair was ruined when I fell. You think I could find them again... NO!

So I've decided to make them while applying things I have learned about fitting on PBS shows.


I also bought some pants elastic in white and black (for light and dark fabrics).

I will do the fitting and make 'muslins' for both patterns before buying my fashion fabrics.

Ddd


Posted by studio3d@ccgmail.net at 12:01 AM PST
Saturday, 9 January 2016
Boxed Bag
Topic: Sewing

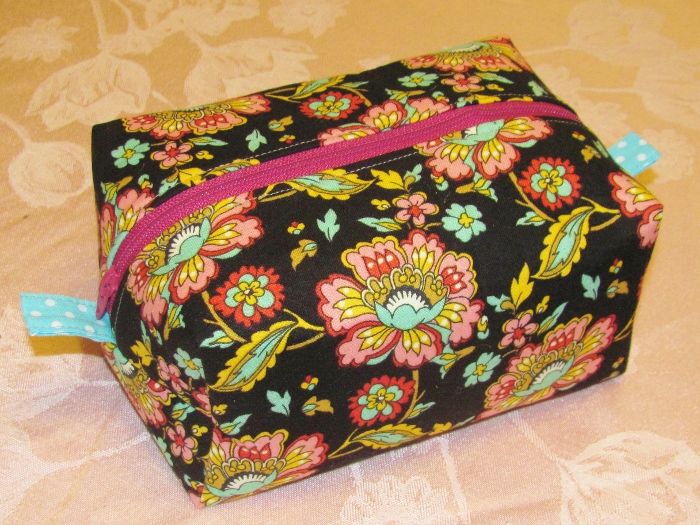
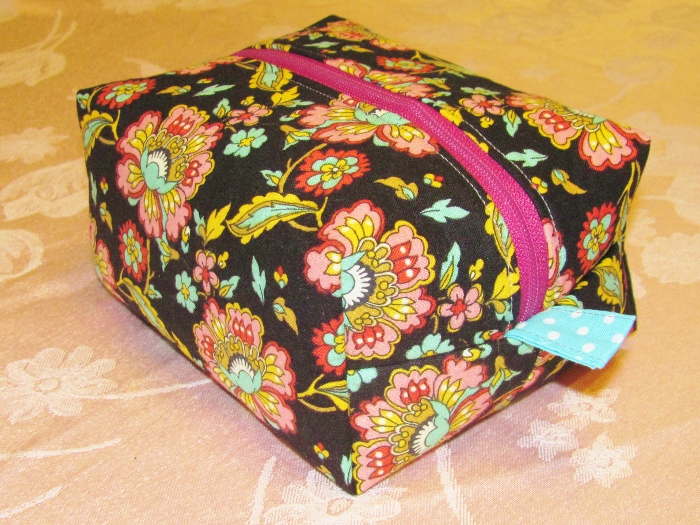
I ran across a video tutorial ( https://www.youtube.com/watch?v=KChUsEJPHqk ) on making a small boxed bag like would be used for cosmetics. The process looked so easy that I jotted a few notes to myself and went right to the studio to give it a try.

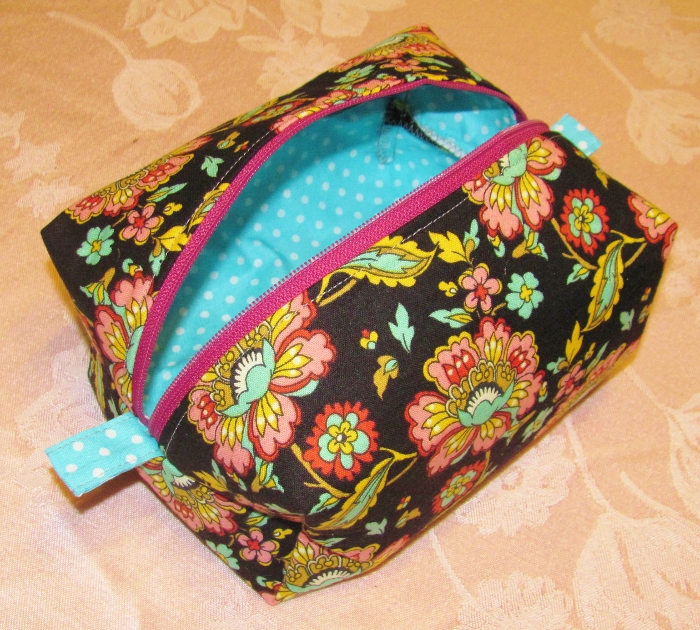
As it happened, I had the same fabrics that I had used for this duffel bag (black floral exterior and teal polkadot interior):

What I did not have was more of the teal zipper but I found a raspberry one in my stash so I was off to the races.

The project takes only a 14" zipper, two exterior fabric pieces (8 x 10), two interior fabric pieces (8 x 10), two fusible interfacing (8 x 10) and two tabs (2 x 3).

It uses straight and zigzag stitches throughout and also uses a standard and a zipper foot.

Total construction took less than one hour.

Here are a couple of exterior views


And one showing the interior:


The finished size is about 3 x 5 x 7. This will go in my duffel when I use it as a carryon bag so I can corral my phone, medications and other small items.

Ddd


Posted by studio3d@ccgmail.net at 12:01 AM PST
Saturday, 28 November 2015
I'll Put a Hexie On You
Topic: Sewing

My sister and I have had a long-standing bond over how much we dislike hexagons in quilting and sewing. I think it harkens back to grandmother's day when they were all the rage, then they became popular during our teen years, and now they are back AGAIN!

We whine and moan about being exposed to them (and those annoying yo-yos, too) and have sworn to not use them.

... then I went on a quilting cruise and our welcome bag had a kit in it for making little one-inch hexagons (hand stitched, no less) - calling them addictive and contagious.

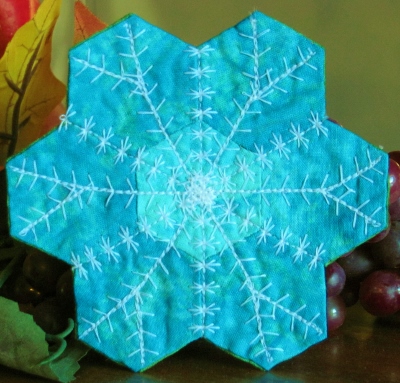
The provided fabric was even ghastly, so I took some left over from one of the classes and, while we were going through the locks in the Panama Canal, I cut and stitched together 7 in one color and 7 in another and then stitched them back to back.

Now what? I have a lame coaster.

I took it to the next 'Open Sew' time and used the decorative stitches in the sewing machine to 'draw' radiating lines until it looked like a snowflake. I can almost pretend it doesn't look like hexagons anymore.


I've already determined how I'm going to get it out of my house... with a ribbon loop it will become an ornament and end up in the Christmas stocking of someone special.

Hope her sense of humor is intact! Hi Sis Laughing

Ddd


Posted by studio3d@ccgmail.net at 12:01 AM PST
Friday, 9 October 2015
It's In the Bag
Topic: Sewing

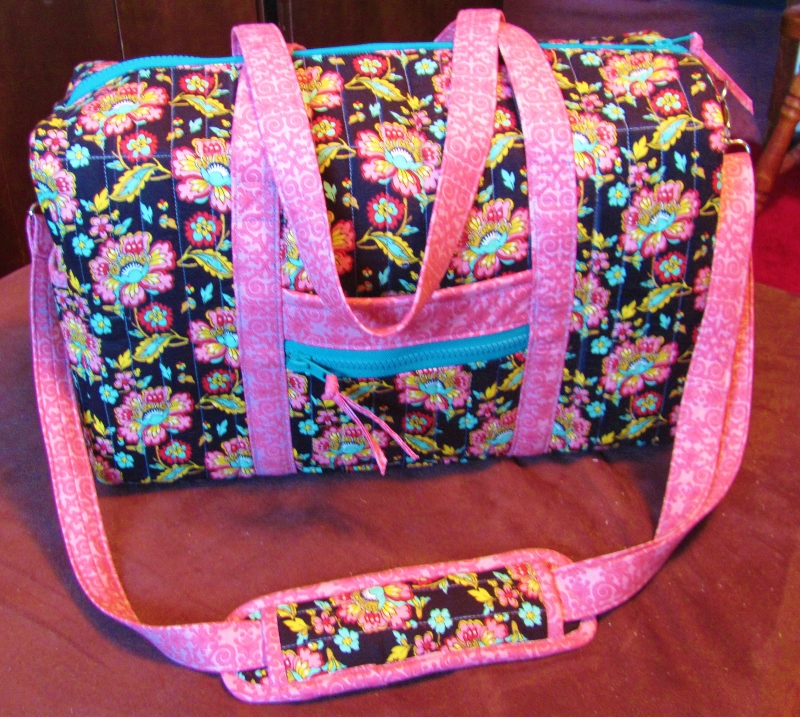
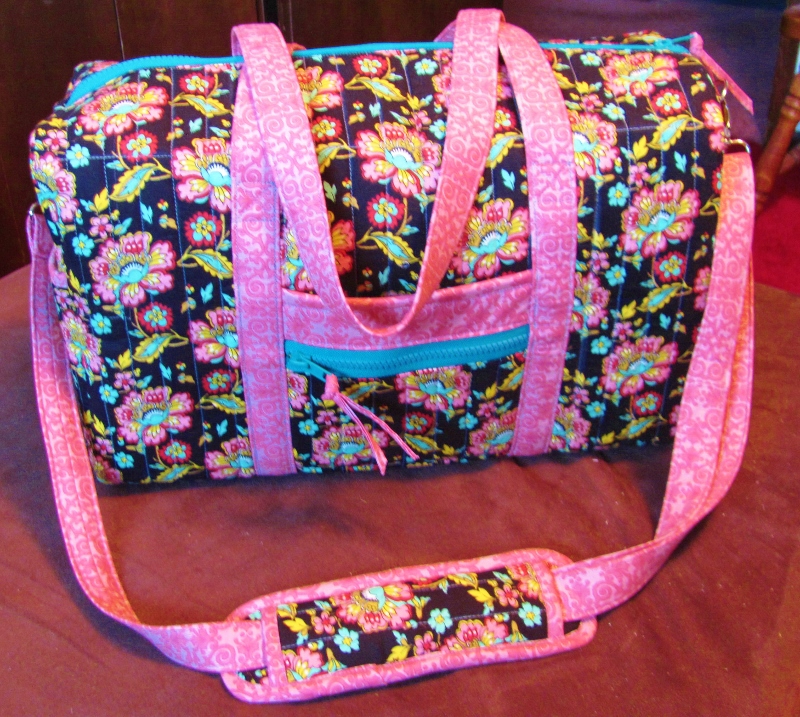
Back in March I was in Puyallup Washington for the Sewing and Stitchery Expo. I bought a pattern and special batting for making a duffel bag.

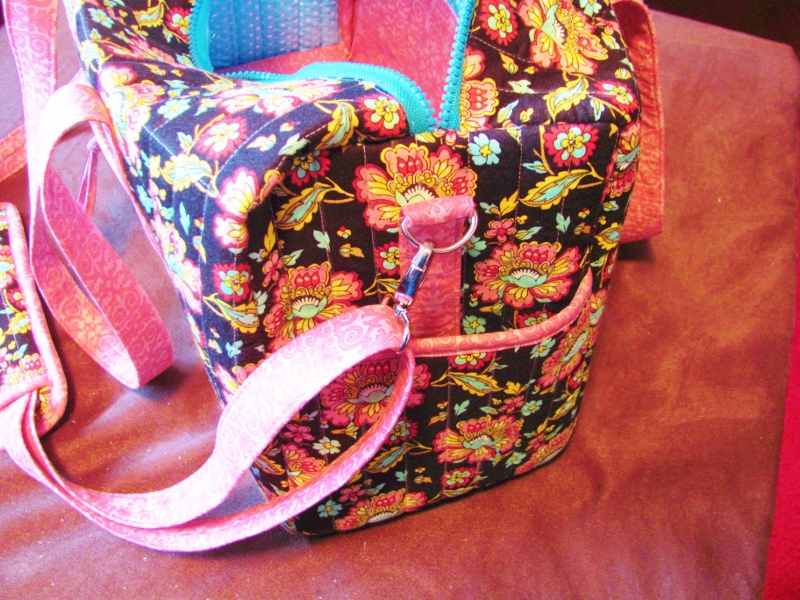
Six months later, I finally decided what fabric I wanted to use (from my stash) and bought the D-rings, sliders and swivel clips as well as two zippers. And I was ready to go.

First off you have to take your lining fabric and your main fabric, sandwich the batting between them, and quilt top to bottom at 3/4-inch intervals across the entire width. The construction pieces are then cut from this quilted 'fabric'.

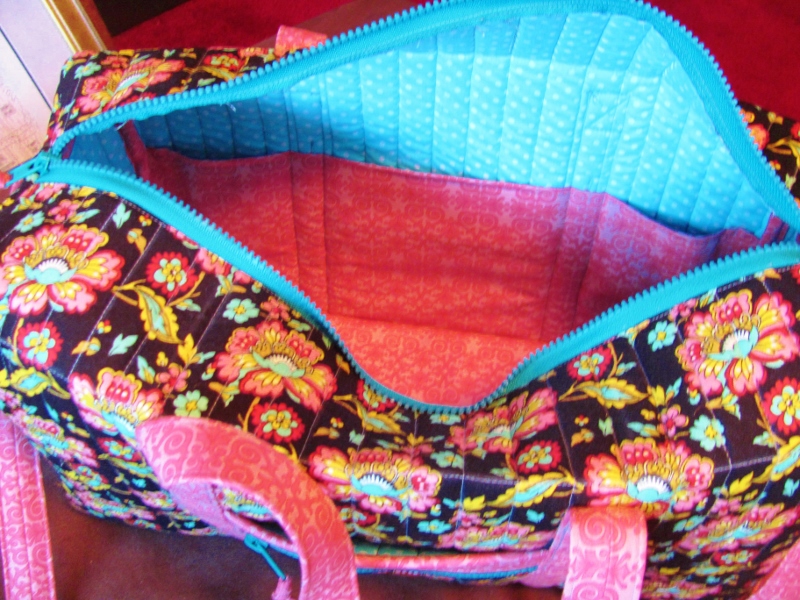
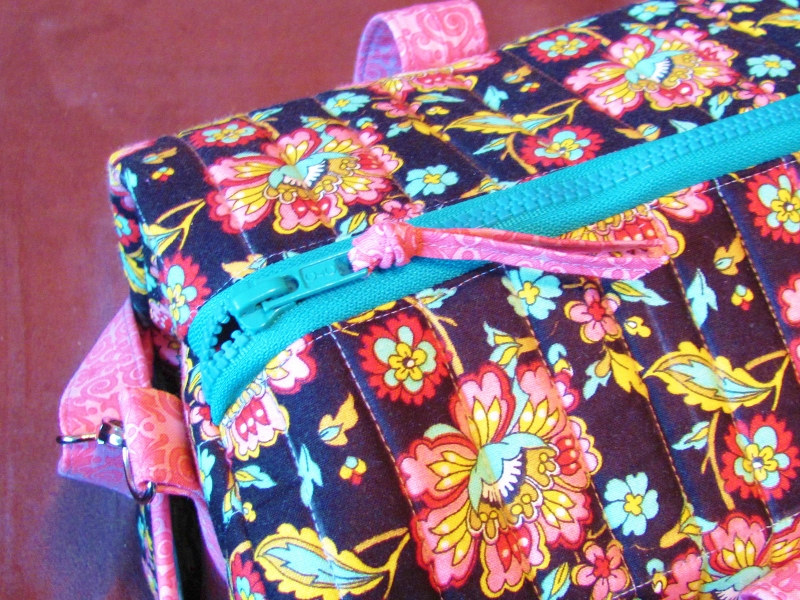
For my main fabric I chose a black background with pink and teal flowers. For the trim I chose a two-tone pink. And for the lining I chose a teal with white polka-dots.

Here is a view of the overall bag:

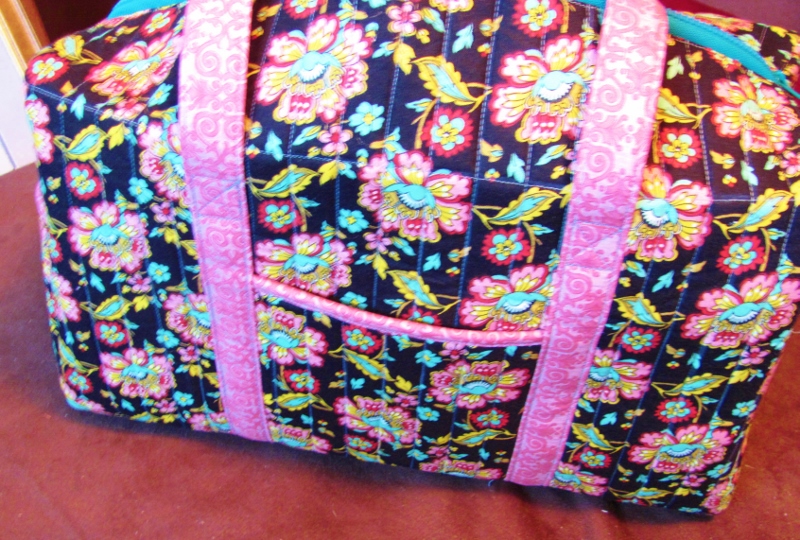
The exterior features a slip-on pocket on each side and each end. There is also a zippered pocket on the front. Teal zippers were a lot of fun.

The back:


On the ends you can see where the padded, adjustable shoulder strap clips on:

Here's a look at the adorable polka-dot interior and the three-section pocket:


The instructions even include little zipper pulls in the trim fabric:


This a generous size and turned out SO CUTE!

It was a two-day project for me, including time to tear out a few times when I didn't catch on to the directions the first time around.

Ddd


Posted by studio3d@ccgmail.net at 12:01 AM PDT
Saturday, 14 February 2015
Table Taker
Topic: Sewing

When I bought my new sewing machine, the SewSteady clear acrylic table I had used with my Janome did not fit. So I ordered a new table when I got the machine.

When the table came, it did not come with a carry case so I have been hauling it back and forth to workshops, tucked under my arm. I always remove the legs and drop them in one of my supply cases.

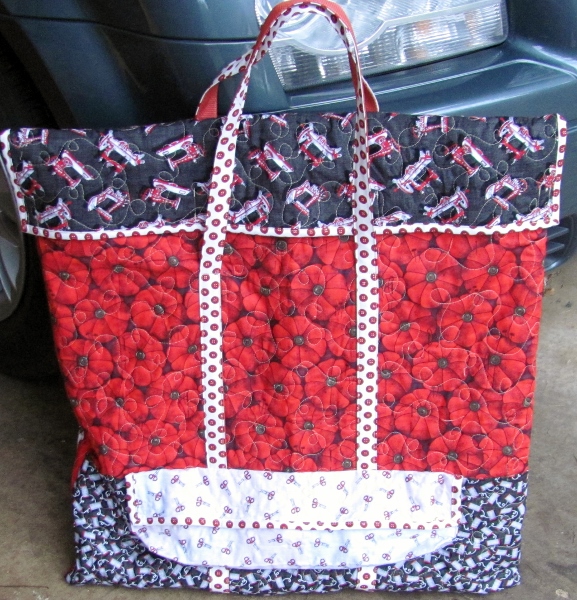
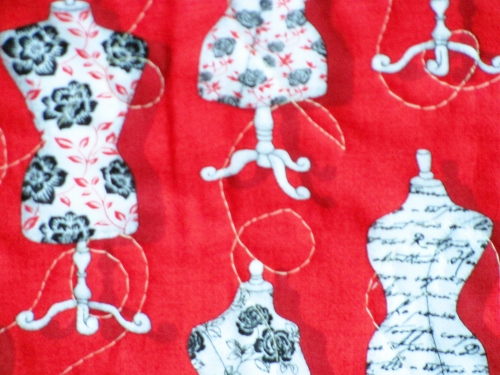
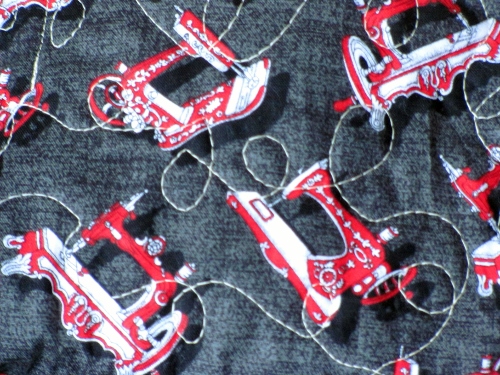
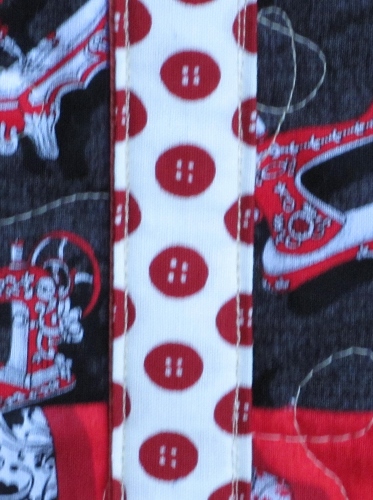
Flash forward to Christmas when I received a stack of 1/2 yard cuts of 6 fabrics with sewing materials printed on them. they are all in blacks, reds and white. The minute I saw them I knew I was going to construct a carry case for my acrylic table.

I measured the table, drew a plan on graph paper, wrote myself some step-by-step directions and started cutting.


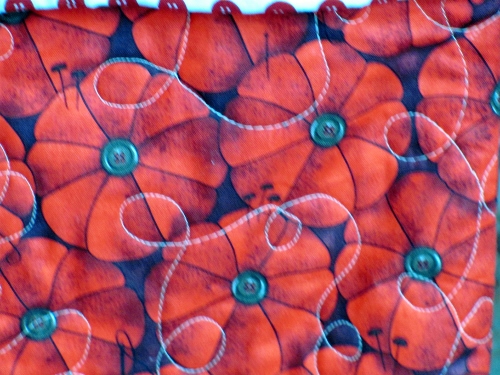
The front and back of the case are sandwiched with batting and backing and I did overall loopy quilting.

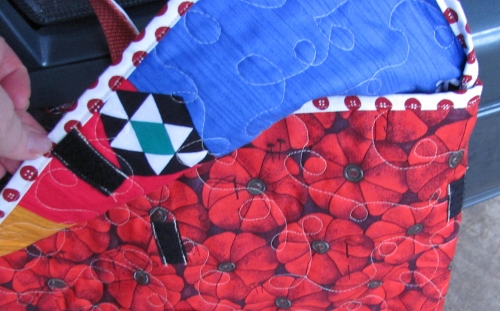
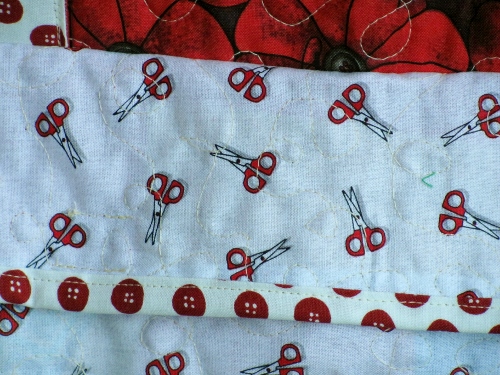
I constructed a pocket for the outside which closes with velcro and hold the table legs.


I bought 1" webbing and top-stitched fabric onto it before stitching to the case.


The case closes with velcro. For the lining, I used a gifted-to-me fabric that was so ugly I couldn't imagine what else I would ever do with it (note blue, yellow, red, white above).

The case fabrics are MUCH cooler than the lining:


I used the reds and blacks for the front and back of the case. I used smaller amounts of the whites as I thought they might show dirt sooner. The scissors are only used on the pocket and the buttons are used for the carry straps as well as a binding for the raw edges of the flap, front of case under the flap and the flap of the pocket.

The table measures 23 inches square and the case is about 25 inches square when closed.

Ddd


Posted by studio3d@ccgmail.net at 12:01 AM PST
Wednesday, 12 November 2014
What's Your Bag? - a Stencil Tutorial AND Sewing Lesson
Topic: Sewing

I have had SO much fun creating with the stencils I got from My Favorite Things and had one more technique I wanted to try using the Graduated Dots stencil - painting on fabric.
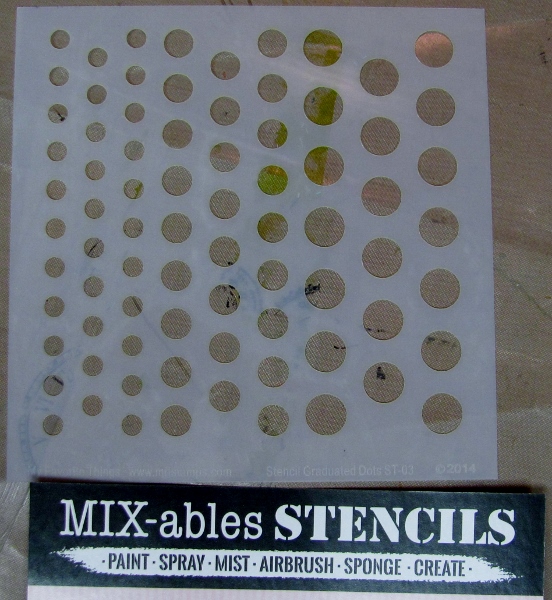
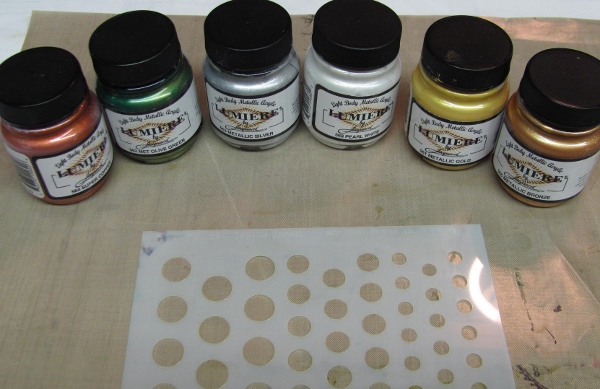
I had on hand 6 different colors of metallic Lumiere acrylic paints and a non-stick craft sheet.
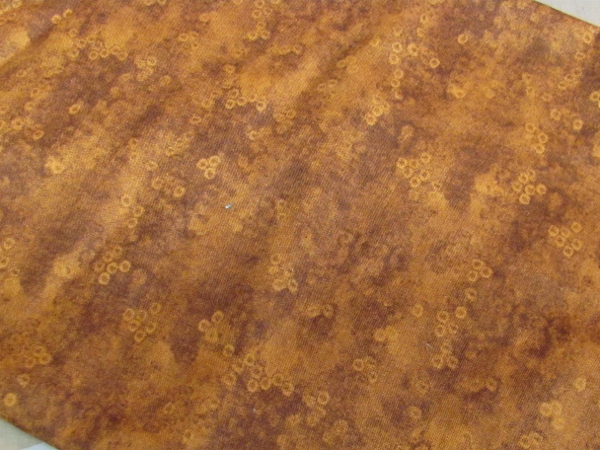
I chose from my stash a piece of printed quilting cotton to work on.
I cut 12 squares from the fabric to work on. Then I cut up some sponge to apply the paint with.
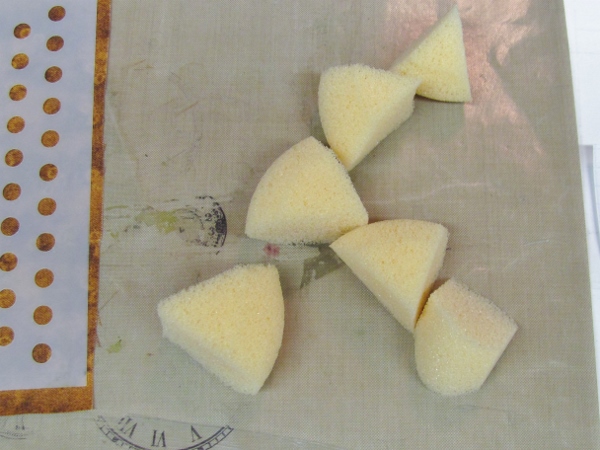
The paint was applied through the stencil by tapping until solid coloring was achieved.
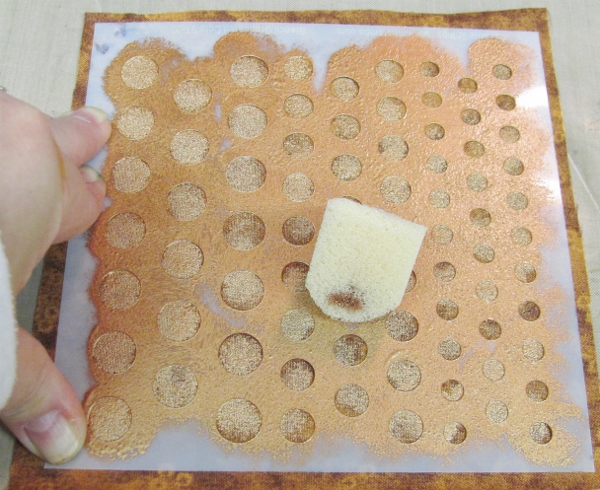
I made two panels of each color and washed the stencil between colors.
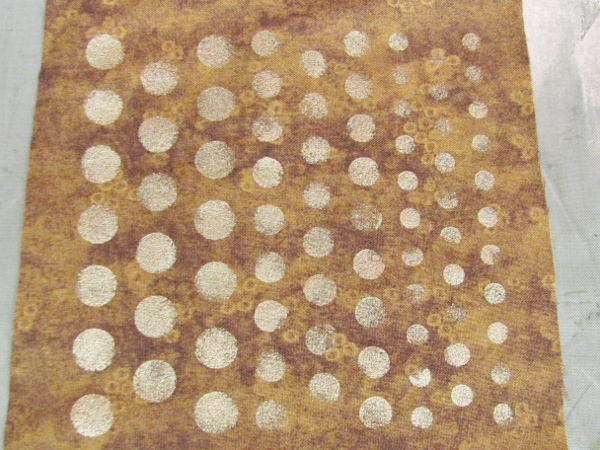
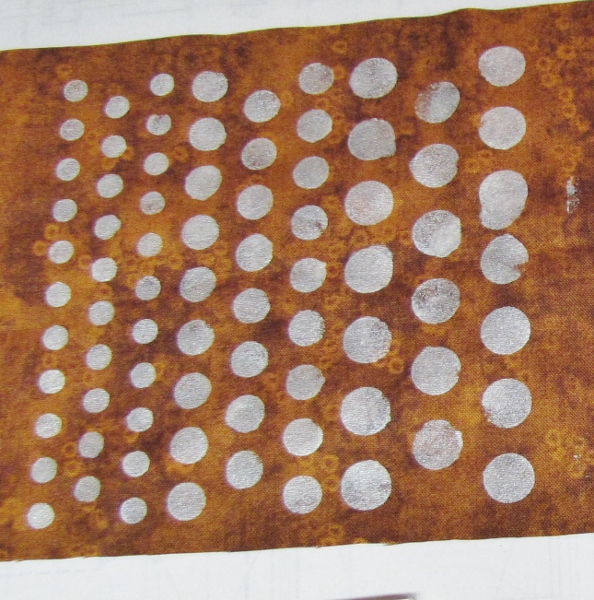
The silver and the White Pearl look almost the same!
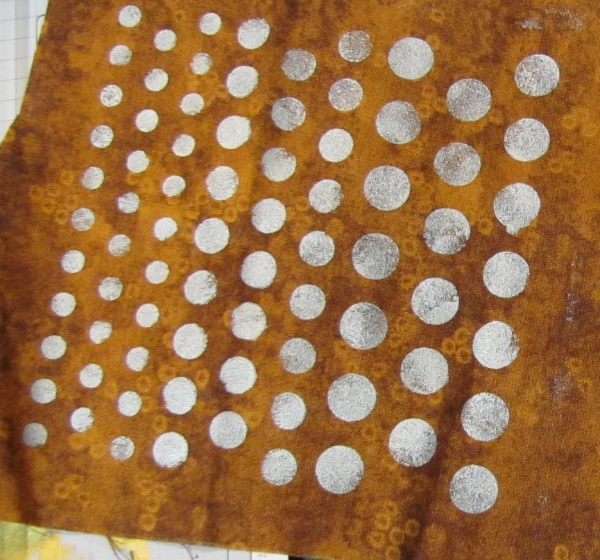
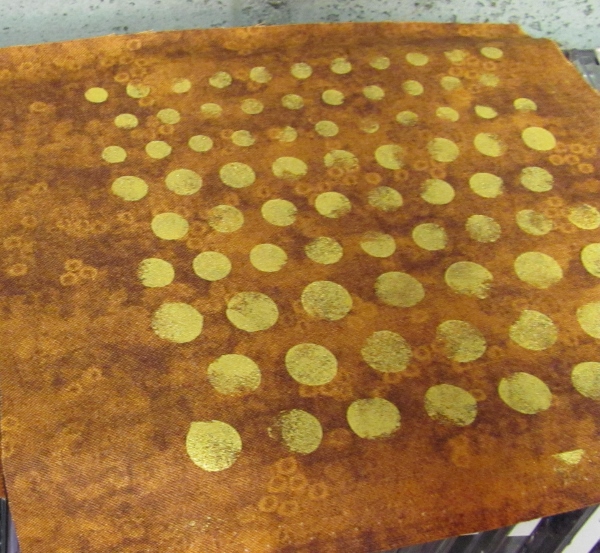
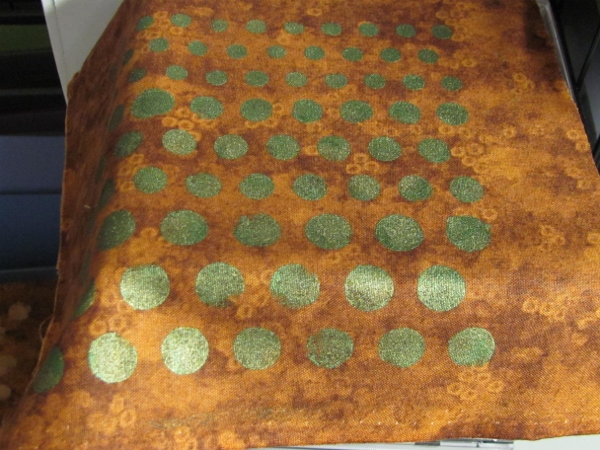
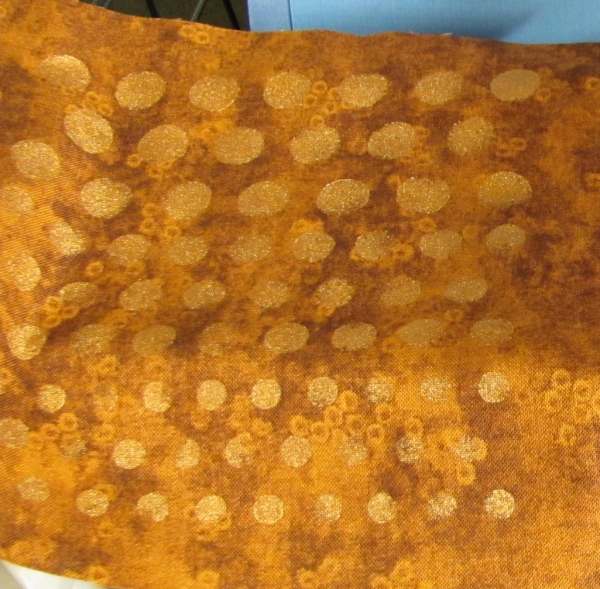
After 24 hours drying time the fabric was ironed on the front (which reminds me of the time I looked at the settings on my iron and, upon seeing 'acrylic' wondered why you would want to iron paint?) Well, this is such an occasion, but most likely not what they meant.
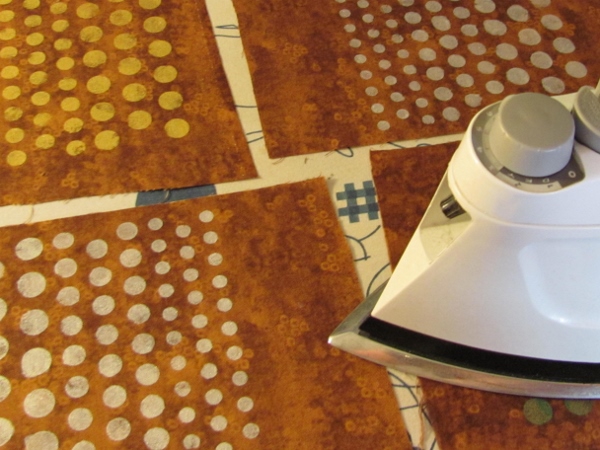
The paint jar said to also press the fabric on the back.
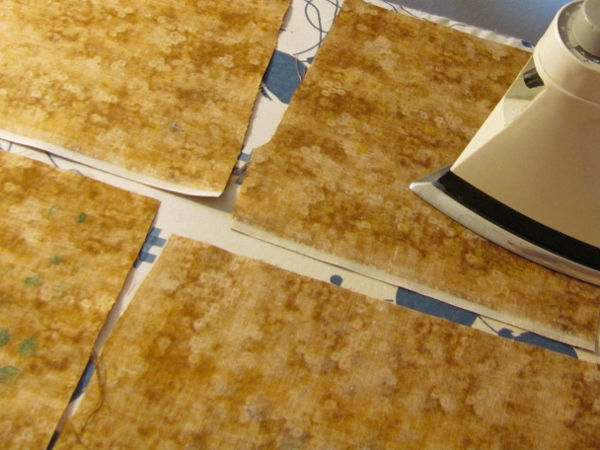
AND NOW WE SWITCH TO A SEWING LESSON!

I had this wonderful painted fabric and just started creating on-the-fly to see what I could make with it.

I started by trimming all the blocks down to 5 7/8 inches square. This strange measurement came about because that was the size the smallest one was and they all had to be the same.
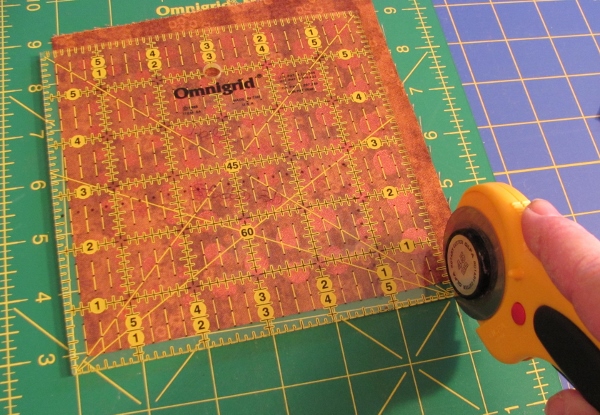
Each block was then quartered.
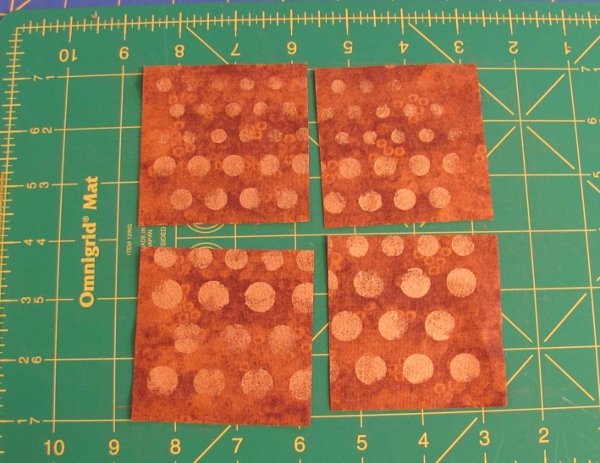

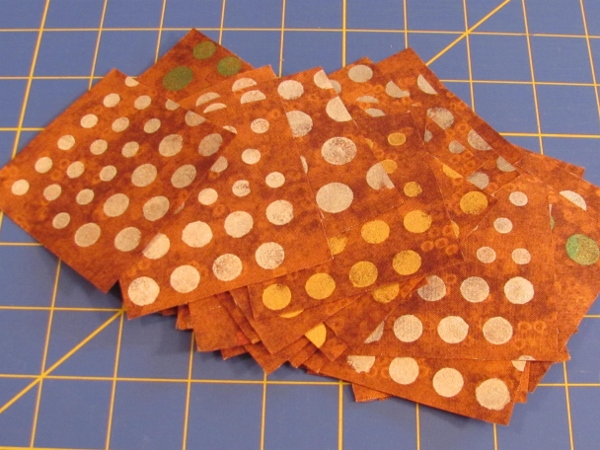
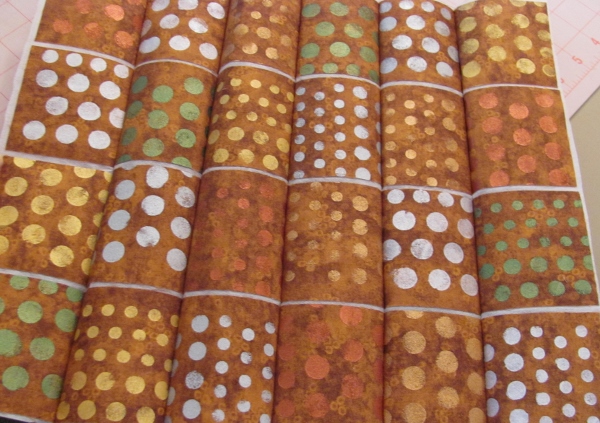
The result was a mix of 48 awesome dotted fabrics.
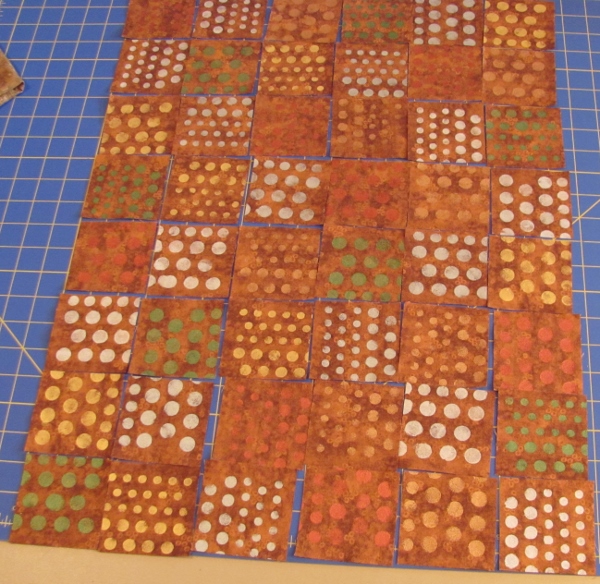
I worked to find a layout I liked - semi-random.
I remembered I had some iron-on interfacing with 1-inch grid marks on it - left over from making a watercolor quilt. And I also decided at this point that I wanted to make two pieces of 'fabric' out of my squares.

I laid out half of the blocks, face up, on the 'sticky' side of the grid, centering the blocks inside of a 3 inch alignment. This left a little bit of adhesive exposed between the blocks.
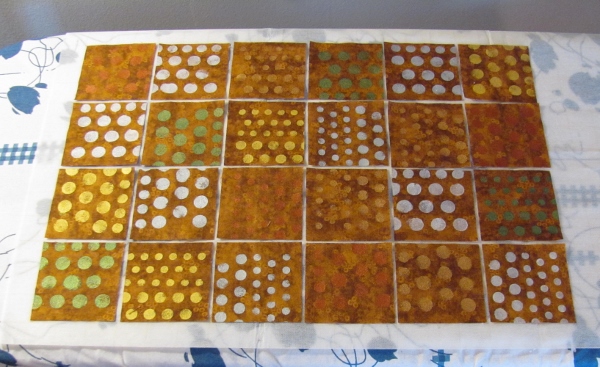
This was covered with a pressing cloth and ironed to adhere the fabric squares to the backing.

I folded the piece, right sides together with a crease along the marked grid.
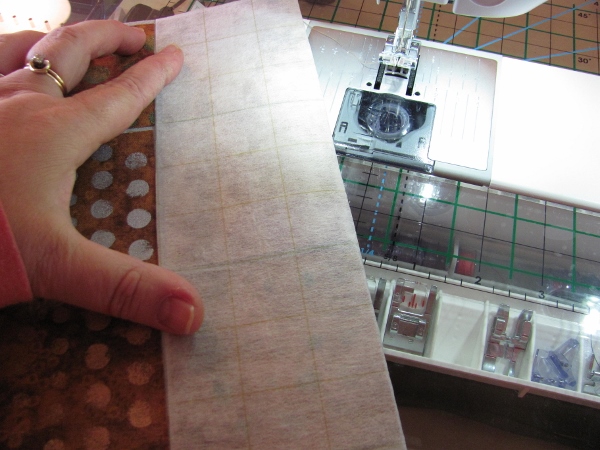
I set the stitch length to 2 and stitched 1/4 inch from the edge of the fold.
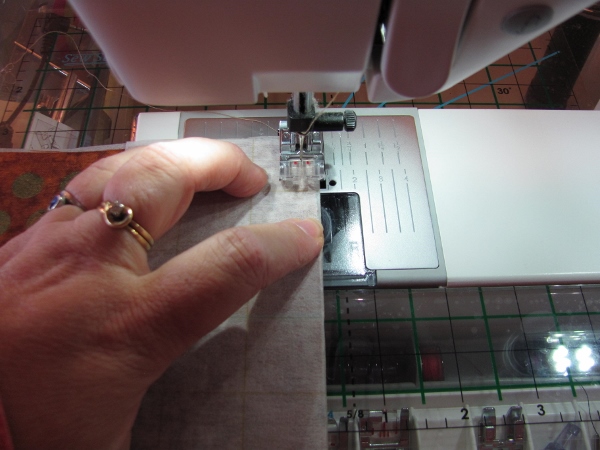
I continuee with all of the seams which went in this direction. Here's how it looked at this point.
I turned to the back and clipped almost to the stitching line at each of the intersections.
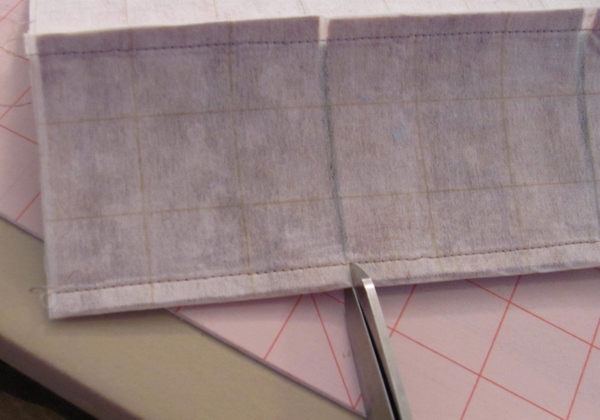
This clipping is what allows the fabric to be folded in the other direction without binding at the intersections.
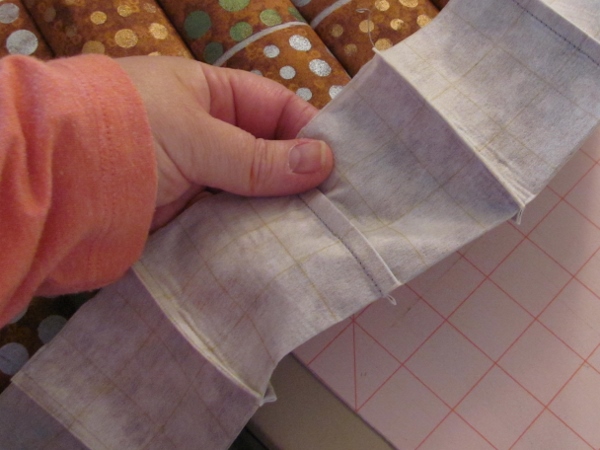
I folded along the marked grid and turned the seams in opposite directions to reduce bulk.

Then I stitched 1/4 inch from the fold.
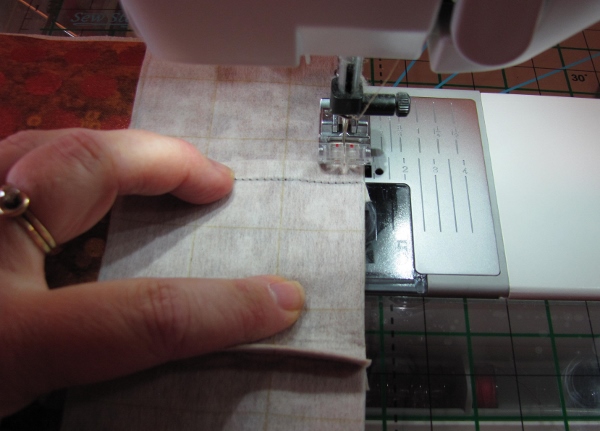
On the next pass the seams fell in the opposite directions so they would lay flat.
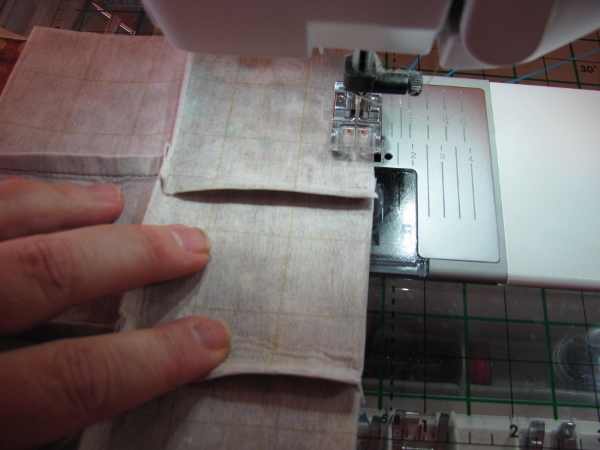
I worked my way across and when done, pressed all the seams from the back.
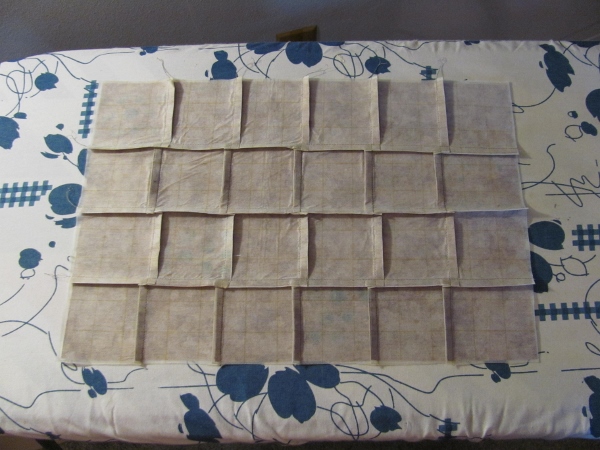
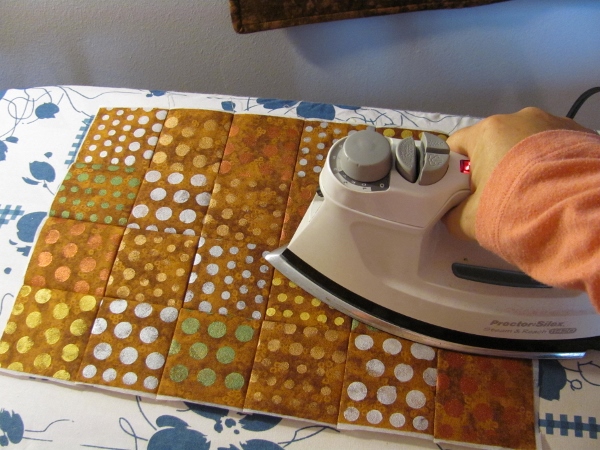
And then pressed from the front.
I trimmed off all the stray edges of the interfacing.
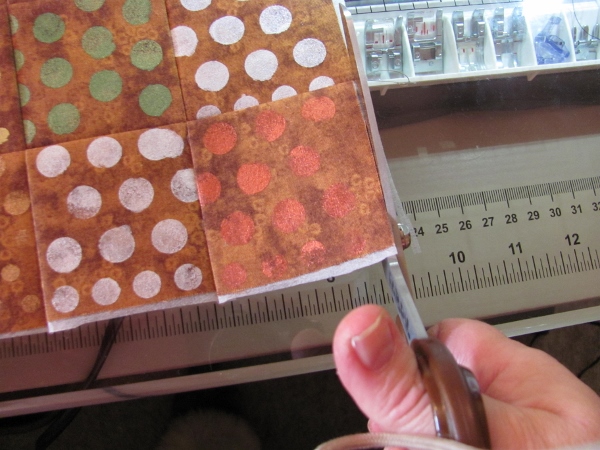
And now I had two pieces of 'fabric' from which to make???? something!

I DECIDED TO MAKE MY NEW FABRIC INTO A PURSE:

First I measured to see what size I had to work with (everything from hereon out was made up as I went along). My fabrics measured 14 7/8 by 10 inches.
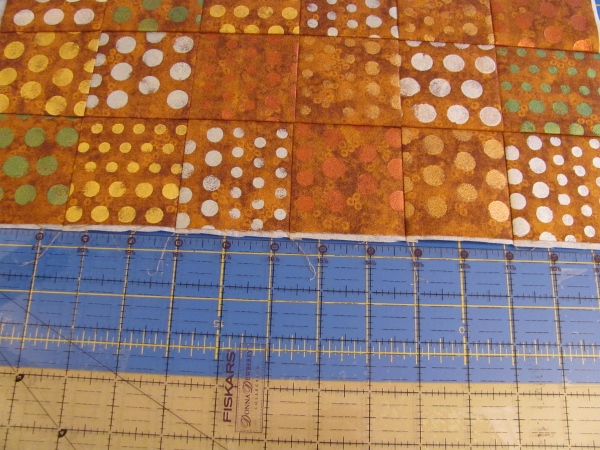
I cut two pieces of unbleached muslin to the same size, to use for a lining.
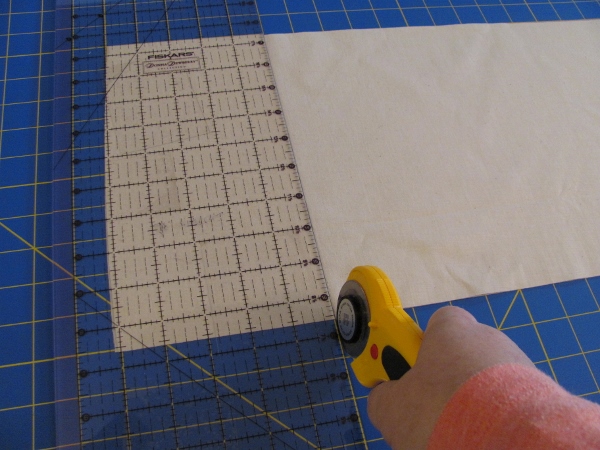
From the original un-painted fabric I cut 4 strips at 1 1/2 x 22 inches. These would become the handles.
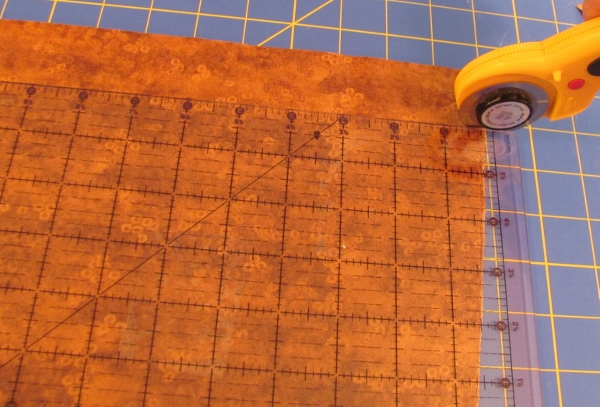
I set the stitch length to 1.5 and stitched the two lining pieces together 1/4 inch from the edge on one long side and both short sides. I backstitched at the top edges.
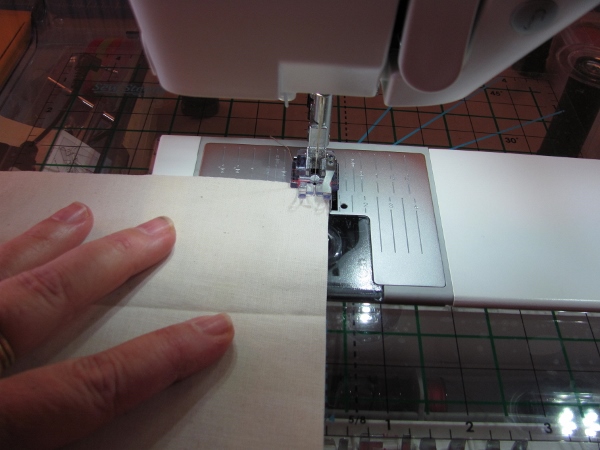
I placed the feature fabric right sides together, carefully matching the seams on the feature blocks, and stitched down the short sides and across the long edge at 1/4 inch. I also backstitched the ends of this.
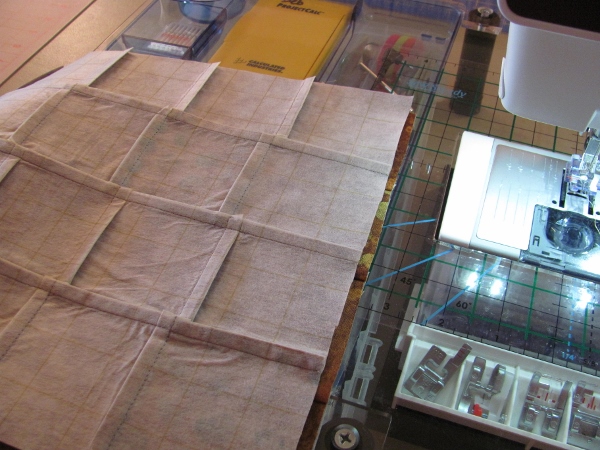
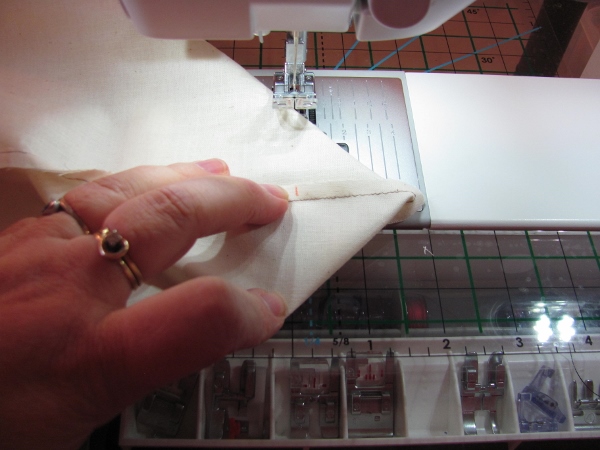
I put my hand inside the bag and made the corners lay with the seams on top of each other.
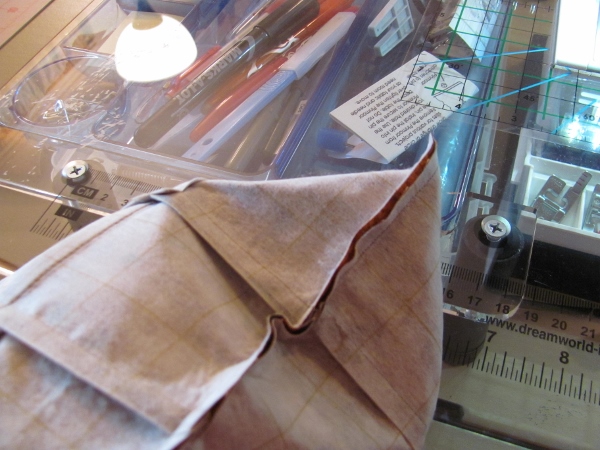
I measured up 2 inches from the corner and stitched straight across (this is called 'boxing the corners).
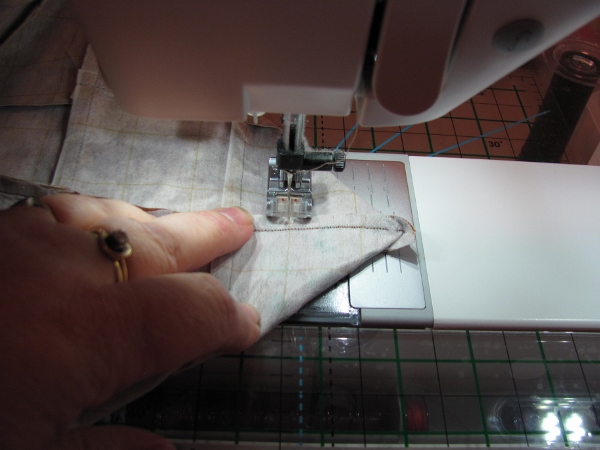
I trimmed away at 1/4 inch from the seam.
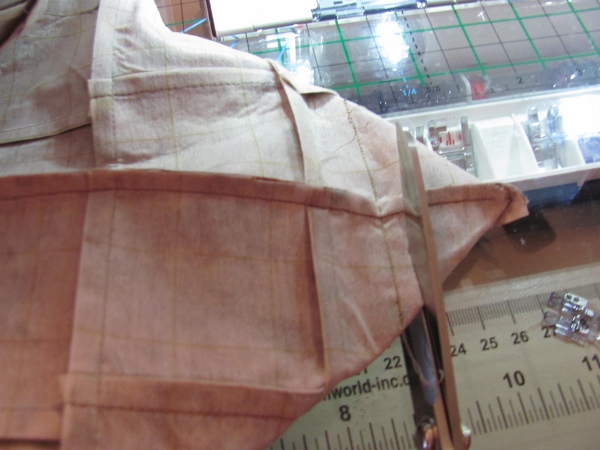
These steps were repeated with the lining.
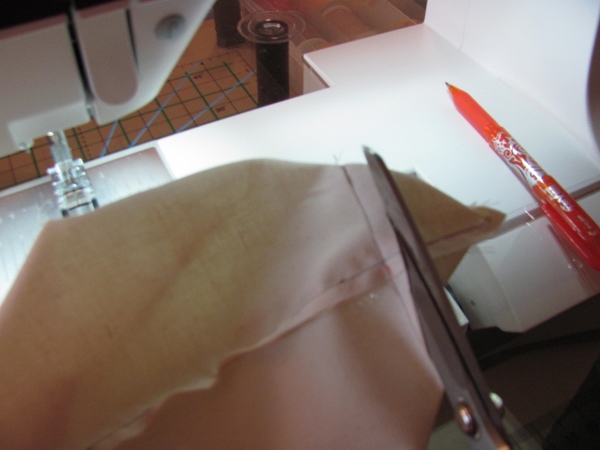
I set these pieces aside to tackle making the handles.

I placed two of the strips together and stitched up one long side. Before stitching the end I placed a long cord inside and stitched over it. Then I kept pushing it back against the completed seam as I stitched the other long edge.
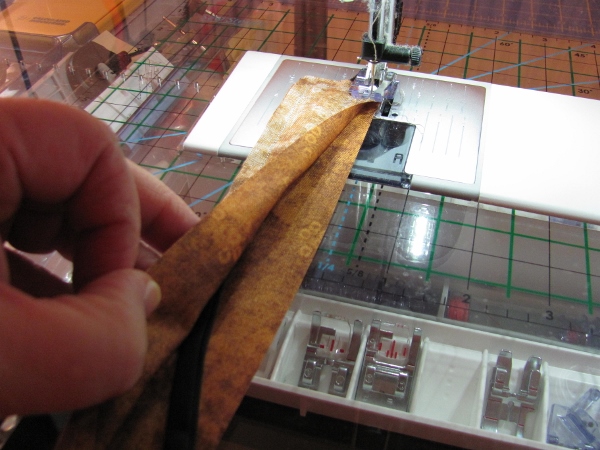
To turn the strip, I just pulled on the cord and voila!
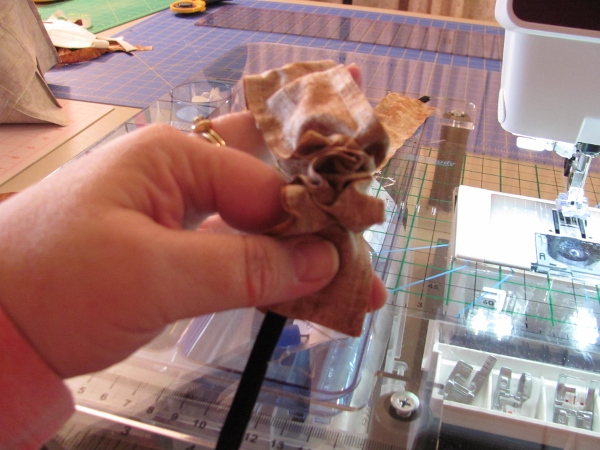
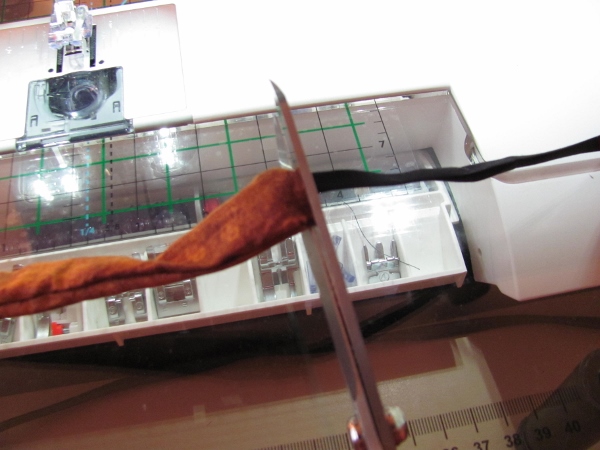
I cut the end off to release the stitched-in cord.
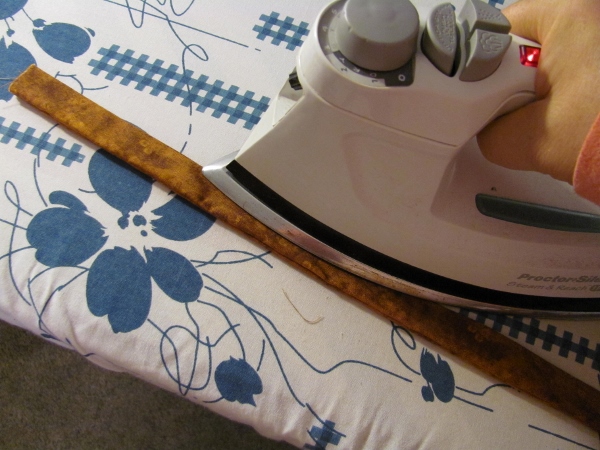
I worked to square the seams and pressed them flat.
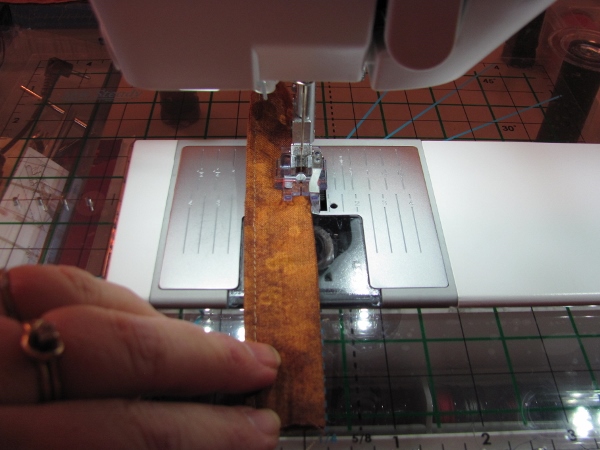
Then I top-stitched 1/8 inch from both edges with a 3.0 stitch length.
I added a magnetic snap to another piece of the plain fabric and built a 'tab' around it that looks like the handles. I also attached the other half of the magnetic snap to the feature fabric.
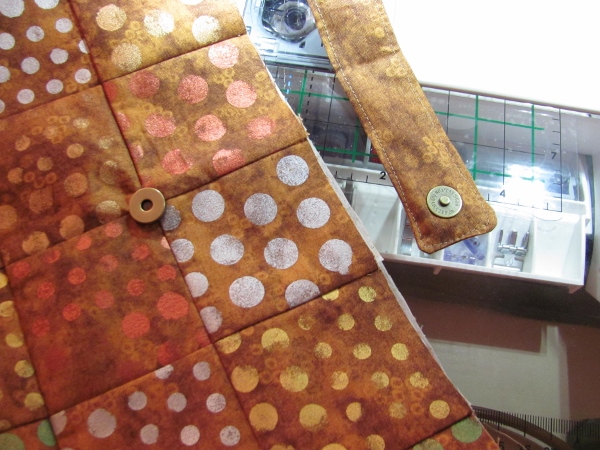
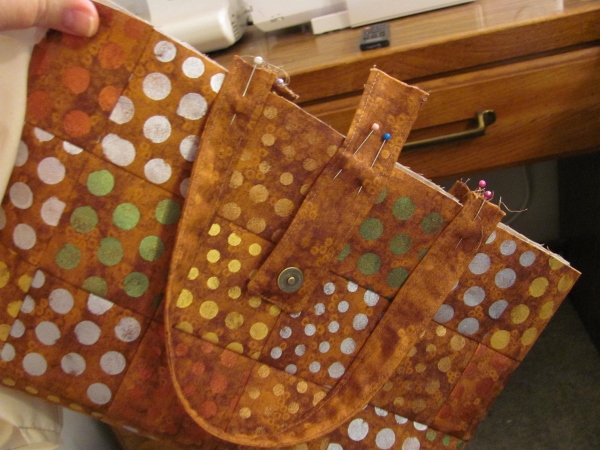
With the bag right side out the handles (cut down to 16 inches) and tab were pinned to the bag with extra fabric extending off the edge for construction strength.
The lining was turned wrong side out and the bag was slipped inside of it.
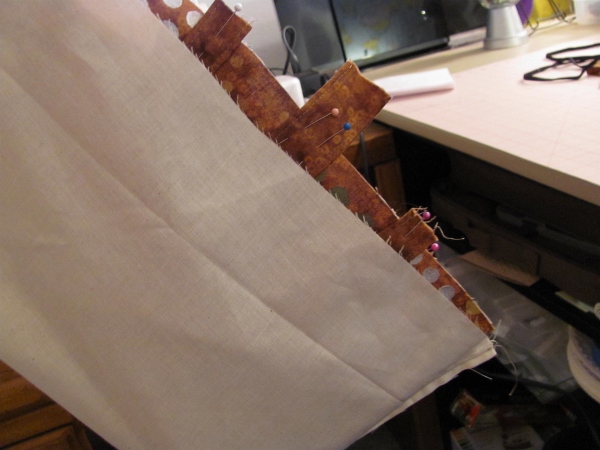
The side seams were opened flat and pinned together.
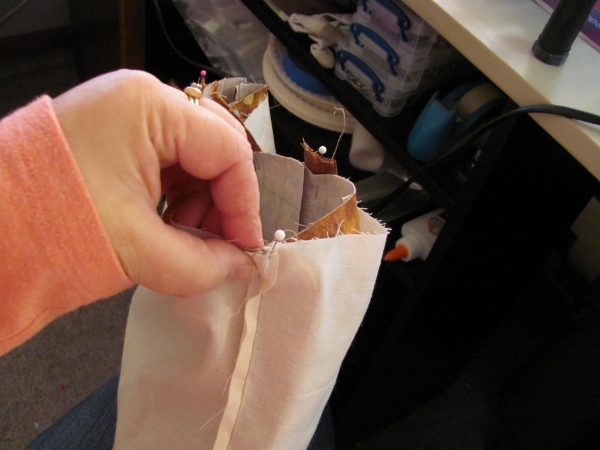
The remainder of the top edge was pinned together.
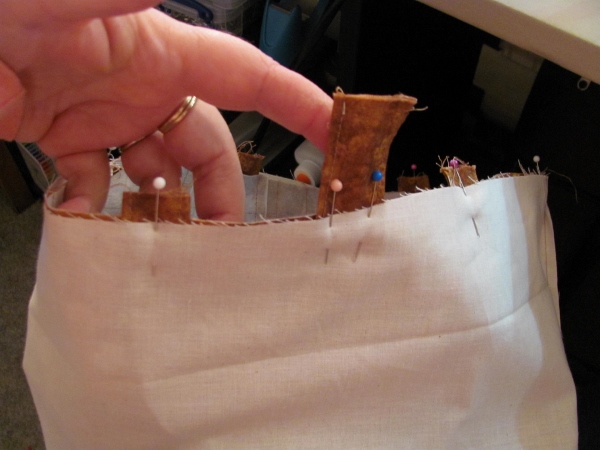
The stitch length was set back to 1.5 and I started on the front straps and sewed right around to the back and to the front again. I did this with a 1/4 inch seam allowance and backstitched the beginning, the end and over each of the handles and the tab.
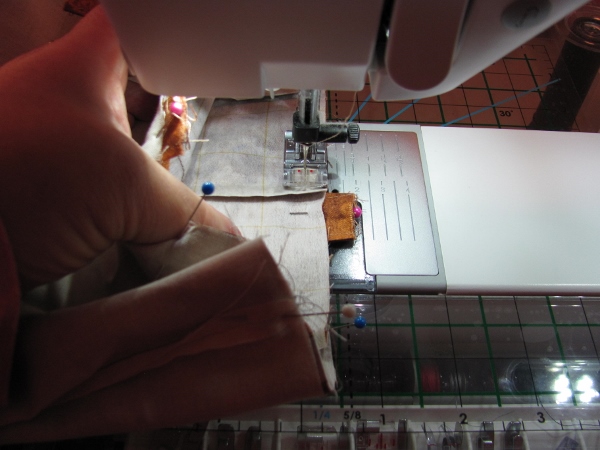

This left an opening between the handles on the front.
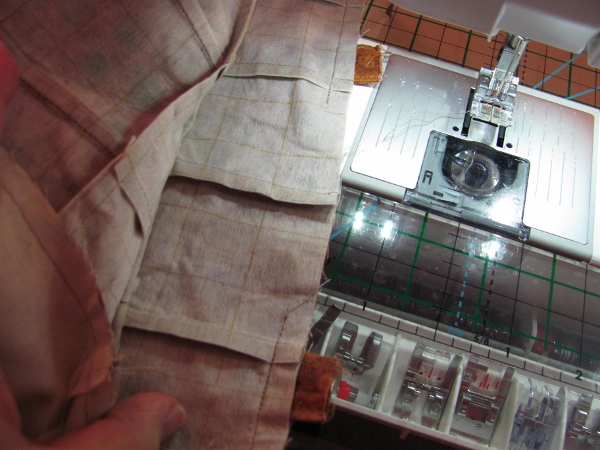
The bag was turned right side out through this opening.
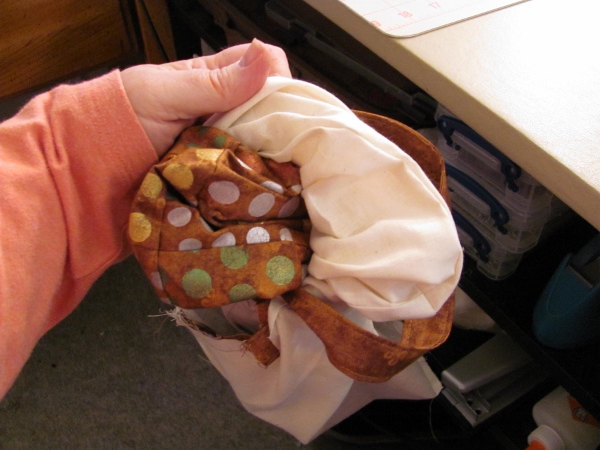
The lining was tucked inside the bag.
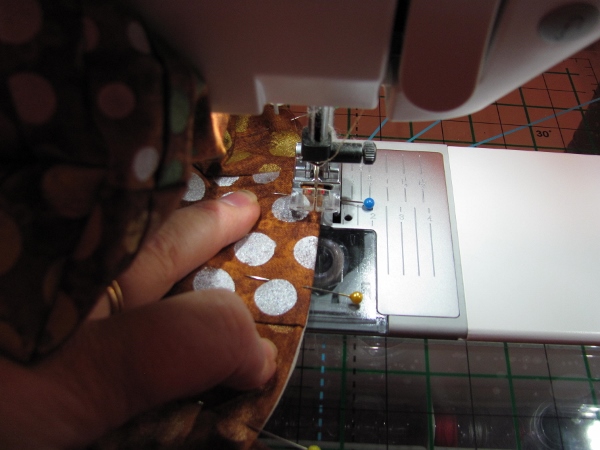
The edges of the opening were turned in and stitch length was set to 3.0. I then started at one side seam and top-stitched at 1/8 inch around the top edge.

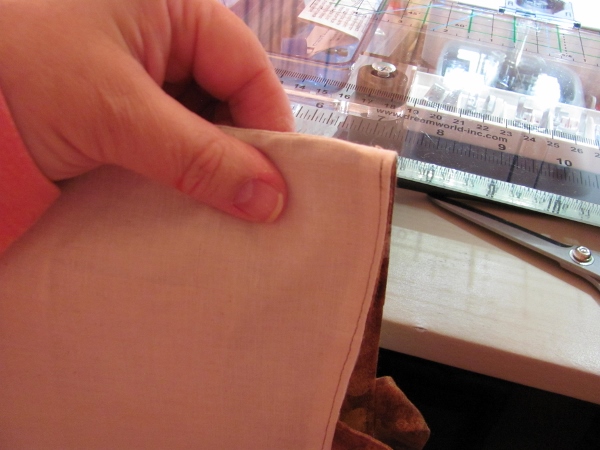
I turned the entire bag wrong-side out and folded at the side seams.

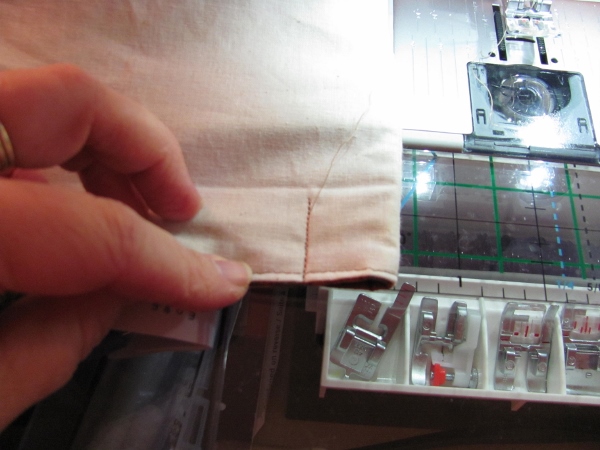
I used a 2.0 stitch length to make a 1-inch seam through all layers, 1 inch from the side seam. (yep, I backstitched both ends of the seam).

I turned the bag right side out and... tah dah!

ARE YOU READY FOR THE BIG REVEAL?
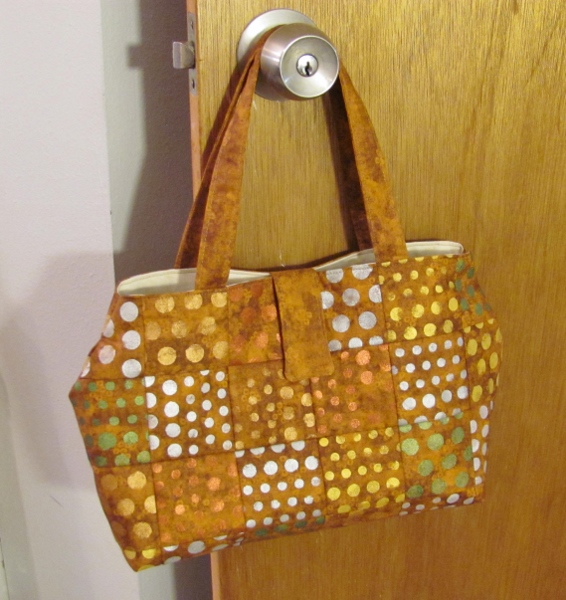
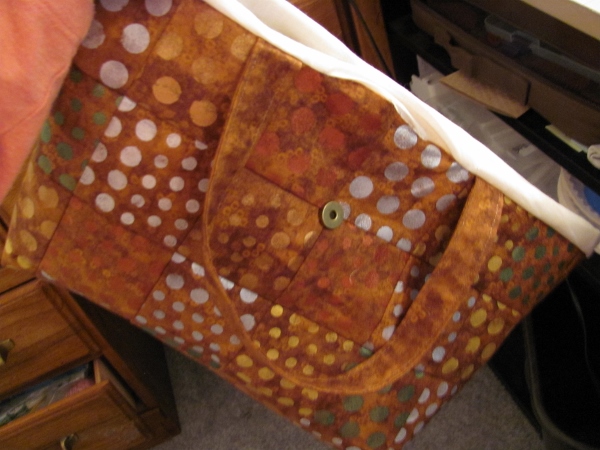
Squeal! Is that the cutest? And no pattern required!

And I really did make it up as I went along.

Ddd


Posted by studio3d@ccgmail.net at 12:01 AM PST
Saturday, 4 January 2014
Bath Curtain
Topic: Sewing

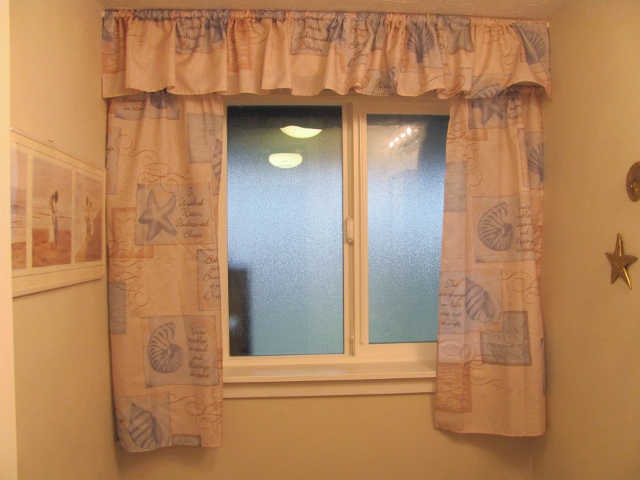
In a new bath we added to the house we needed to have curtains for the window. Since the window glass is frosted the curtains did not to be concealing, but only decorative.

A beautiful shower curtain from a previous bathroom was on hand and matched the theme and coloring in the new bath. So I cut it up to use.

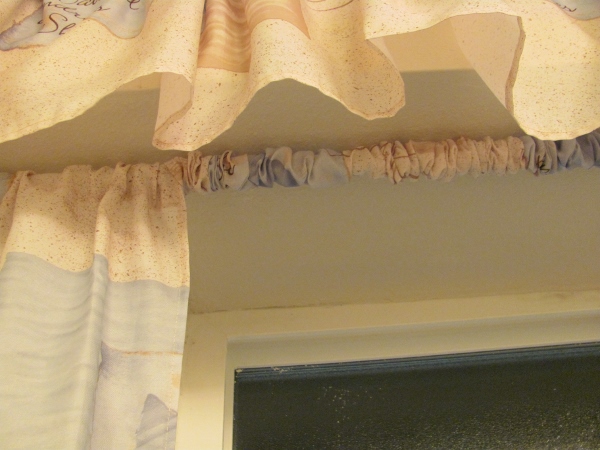
The window has a 'box' over it that conceals plumbing from the upstairs bath so I created a valance to cover that. Then a separate rod was used below the box for the side curtain panels.


To keep the side panels off to the edges where they belong I created a rod cover that is gathered on fairly tightly.


You never really know what's coming next on this blog, do you?

Ddd


Posted by studio3d@ccgmail.net at 12:01 AM PST
Wednesday, 1 January 2014
A Whole New Wardrobe
Topic: Sewing

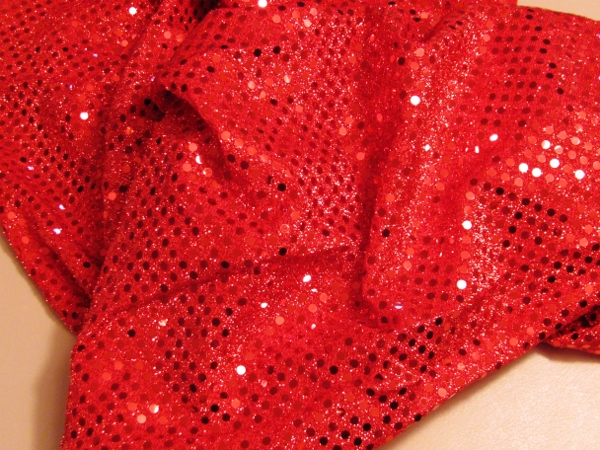
You've probably seen those TV cooking shows where the participants are given a basket of ingredients and an inspiration theme and have to create something edible. Well, in a twist on that I started with THIS fabric:

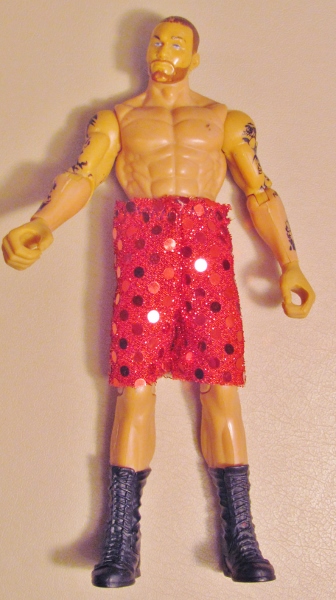
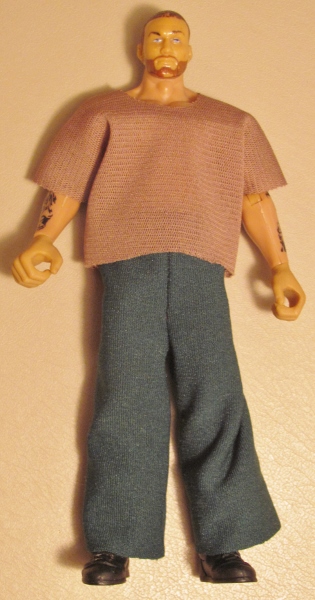
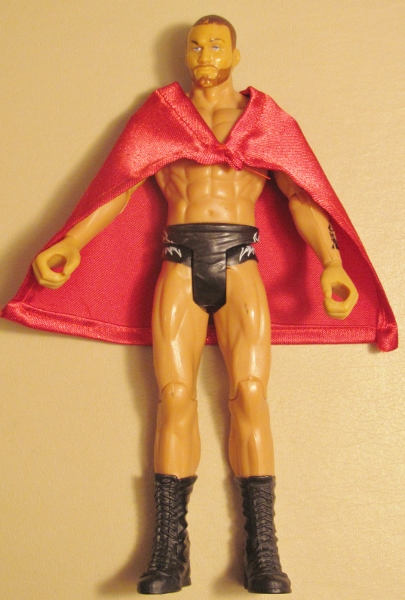
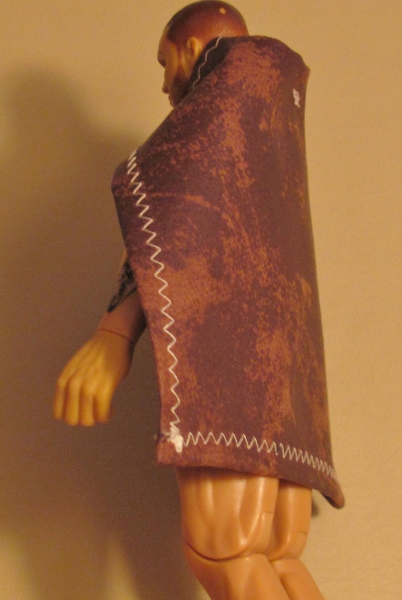
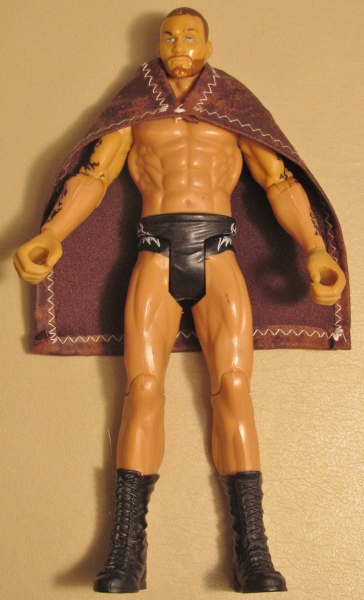
...and the assigned inspiration theme of ''Wrestlers". Actually, I didn't get a 'basket of ingredients' so this was from the 'pantry and fridge'. I was sent a wrestler action figure to make clothing for and the assignment was under way.

This was the piece I made from the flashy red sequin fabric... trunks!

Very manly, huh? And this is after a lot of pattern drafting and test garments. When I made clothes for my teen dolls and later for my daughter's dolls, they had fully moveable parts, small hands and feet and no molded on clothing. For this doll his arms tend to move away from the body, he has balled fists and booted feet, non-moveable legs and he has bulky undies. These things make for great wrestling action but a challenge in fitting clothes!

I found some advice on the internet on drafting clothing patterns with no shoulder seams, built in sleeves, and one-piece legs on pants. A bit of experimenting with sewing order and I was ready to roll.

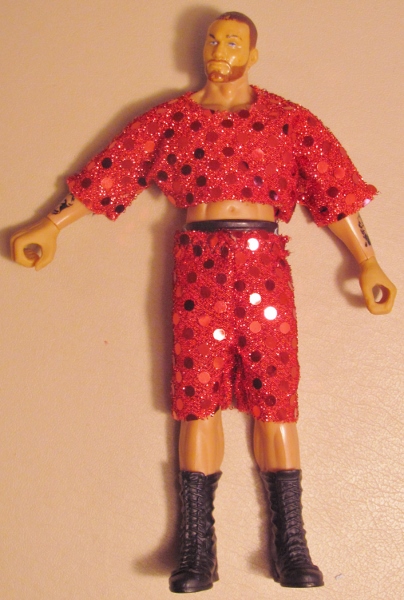
After making the trunks I decided to add a crop-top shirt to match it:

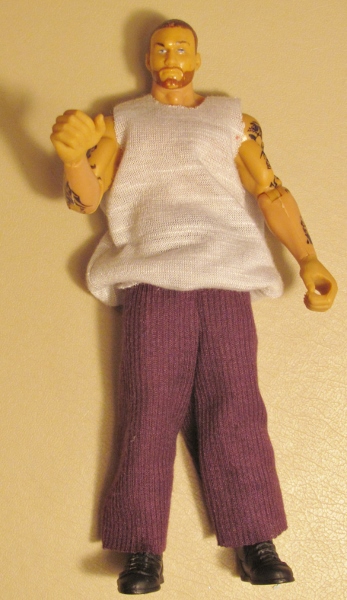
Then, because most of my 'pantry' is quilting fabrics, I needed to have stretchier fabrics to allow for dressing him around his physical challenges. I went to the fabric store and got 6 stretchy knits. Another nice thing about these is that the edges don't have to be hemmed and they still won't fray. YAY!

I now had one shirt pattern and one pants pattern and just made whatever adjustments were needed for styling other clothes. I made him a sleeveless tee and slacks:

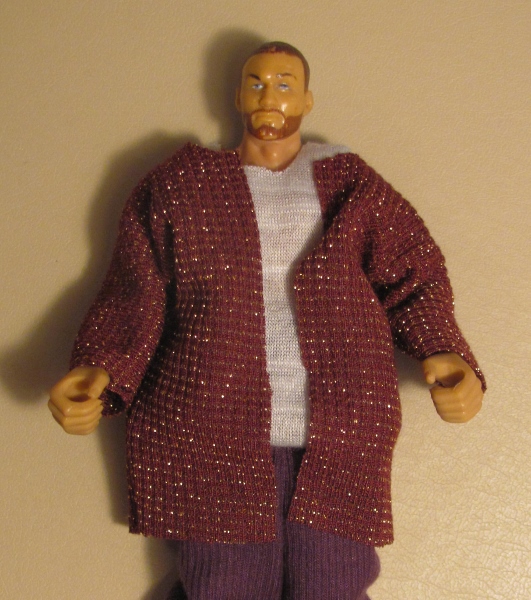
Then I added a jacket:


He got a standard tee and another pair of pants (which are actually green):


Then I went back to my own stash and made him a few capes towear into the ring. This one is a crispy red with glitter in it:

I made one of faux leather:


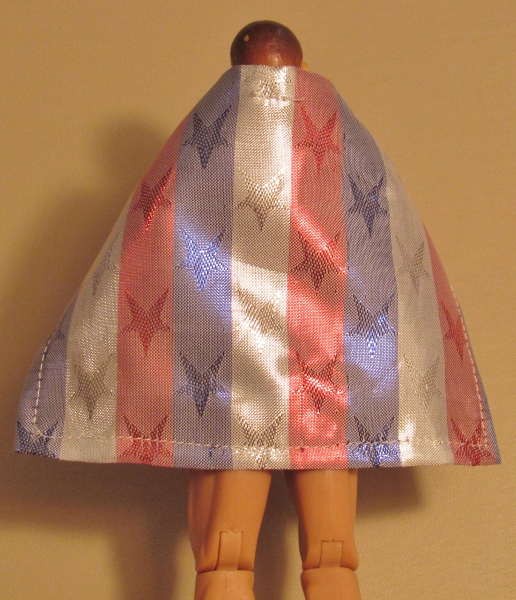
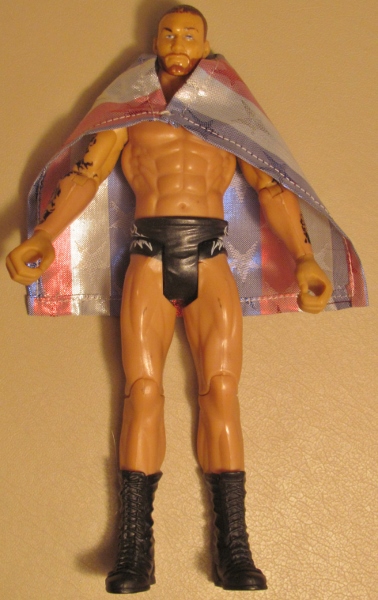
And a patriotic one (I call this one his Captain America cape)


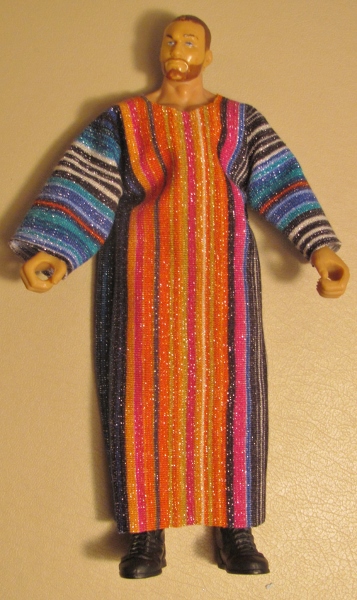
Then because he needed something to wear lounging around the dressing room between bouts, I made him a long robe:

This wrestler dude is really ready for anything now.

Ddd


Posted by studio3d@ccgmail.net at 12:01 AM PST
Updated: Tuesday, 24 December 2013 9:25 PM PST
Saturday, 28 December 2013
The Cat's Out Of the Bag
Topic: Sewing

Another Christmas gift from the sewing room.

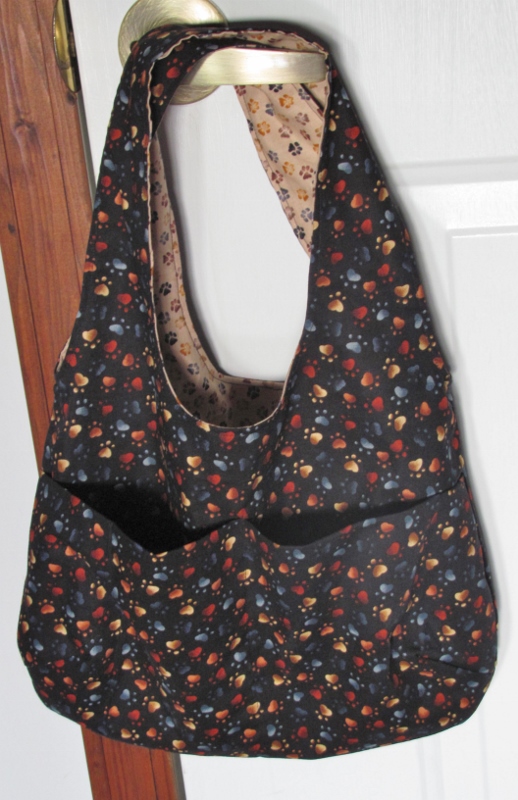
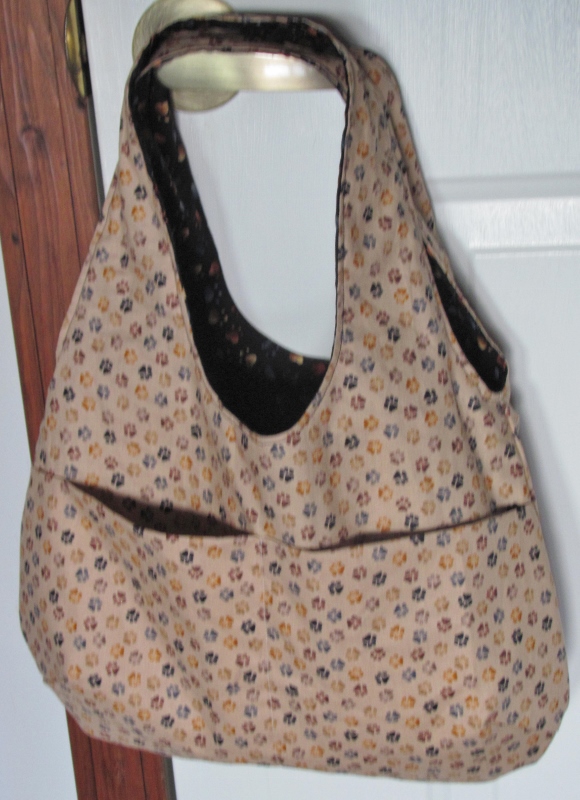
I got a free pattern from the internet of a hobo bag small enough to be a purse. I edited the pattern to add a split pocket on the inside and the outside. Since this is a reversible bag you always have one in and one out!

I used scraps of fabric with paw prints on them - one black with multicolored light paws and one tan with darker paws. When I used this fabric for a quilt they were dog prints - but since the recipient is a cat lover they've magically been transformed into cat paw prints.

This is the view with the black side out:


And here is the view when reversed to the light side:

The pockets are on opposite sides of the bag so one side will not be bulkier than the other.

Ddd


Posted by studio3d@ccgmail.net at 12:01 AM PST
Updated: Tuesday, 17 December 2013 6:59 AM PST
Newer | Latest | Older