« September 2014 »
S M T W T F S
1 2 3 4 5 6
7 8 9 10 11 12 13
14 15 16 17 18 19 20
21 22 23 24 25 26 27
28 29 30
You are not logged in. Log in
Entries by Topic
All topics  «
3D paperwork
A - Z challenge 5
A - Z challenge 7
A - Z challenge round 4
A to Z challenge round 3
A to Z round 2
A to Z round 6
A-Z round 1
Around the House
Art Challenges
Artist Trading Cards
Backgrounds
Beads
Bible Journaling
Books
Boxes
Collage
Color Challenge
Coloring
cookbook
Die Cuts
Digital Projects
Digital Stamps
Drawing
Dry Embossing
Fabric Stuff
Fantastic Folds
Field Trip
Home Decor
How Does Your Garden Grow?
Hymnal Art
In The Kitchen
In the studio
Jewelry
Lettering
Links
Multi-Technique
Music to Work By
Musings
Nail Art
New Work
Online Class
Other Hobbies
Other Projects
Painting
Paper Embroidery
Paper Piecing
Photo
Pretty Paper
Quilting
Random
reading
Scrap Recovery
scrapbooking
Sewing
Sketch Challenge
Some Backlog
Stamping
Stencils
Stickers
Supplies
Teabag Folding
Techniques
Testing
tips and tricks
Tutorial
Web resources
Welcome to my Blog
Work By My Friends
workflow
Writing
Blog Tools
Edit your Blog
Build a Blog
RSS Feed
View Profile
Group One
In & Out of Studio 3D
Tuesday, 9 September 2014
Stretch Your Stamps 2 - Day 1 - Backgrounds - Lines
Topic: Online Class

Wow! Long title, huh?

I took an online class last month on learning more ways to use stamps I already own. The instructors selected two stamps for each category and spent two days covering techniques.

This is the first background stamp I used for the class - an overall pattern in line art. The one used in class was a graphic grid of sorts.

The technique was to stamp on watercolor paper with Versamark and emboss in white. Elements were watercolored and, before they dried, a brush with clear water was swished over them to dilute the color and spread it into the background. Then the background was dried. the original colors were again painted onto the elements and dried.

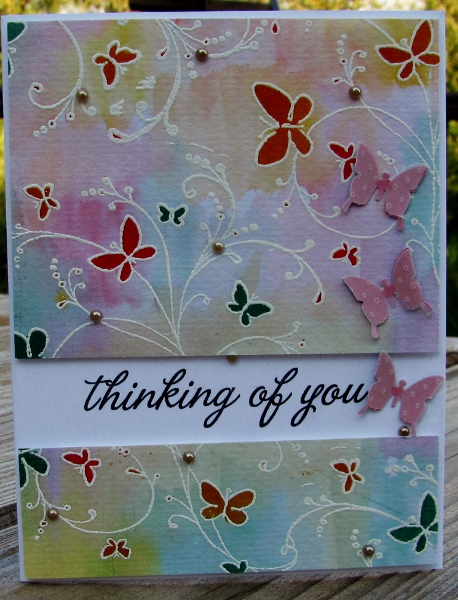
For this first card I cut the painted panel down to create a top and bottom panel and mounted them on foam tape on a white card base. The sentiment was stamped in the open space and the background was embellished with sticky back pearls and punched butterflies.

I used the left over piece of the created background as a strip across a white card base. This was combined with a black diecut sentiment and a thin black strip below the colored panel.


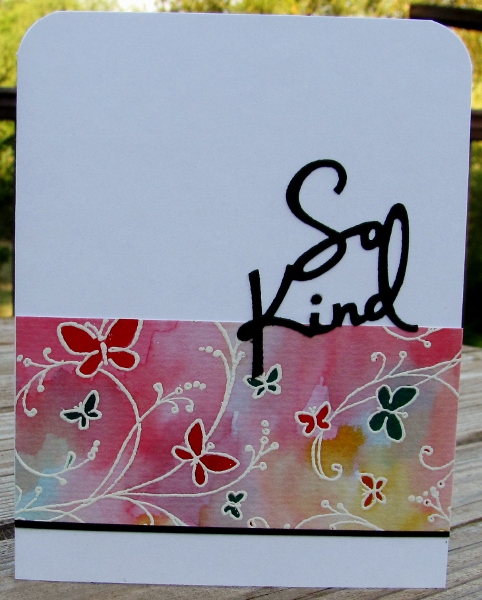
I used a 1/2 inch corner chomper to round the top corners.

Ddd


Posted by studio3d@ccgmail.net at 12:01 AM PDT

View Latest Entries