« September 2014 »
S M T W T F S
1 2 3 4 5 6
7 8 9 10 11 12 13
14 15 16 17 18 19 20
21 22 23 24 25 26 27
28 29 30
You are not logged in. Log in
Entries by Topic
All topics  «
3D paperwork
A - Z challenge 5
A - Z challenge 7
A - Z challenge round 4
A to Z challenge round 3
A to Z round 2
A to Z round 6
A-Z round 1
Around the House
Art Challenges
Artist Trading Cards
Backgrounds
Beads
Bible Journaling
Books
Boxes
Collage
Color Challenge
Coloring
cookbook
Die Cuts
Digital Projects
Digital Stamps
Drawing
Dry Embossing
Fabric Stuff
Fantastic Folds
Field Trip
Home Decor
How Does Your Garden Grow?
Hymnal Art
In The Kitchen
In the studio
Jewelry
Lettering
Links
Multi-Technique
Music to Work By
Musings
Nail Art
New Work
Online Class
Other Hobbies
Other Projects
Painting
Paper Embroidery
Paper Piecing
Photo
Pretty Paper
Quilting
Random
reading
Scrap Recovery
scrapbooking
Sewing
Sketch Challenge
Some Backlog
Stamping
Stencils
Stickers
Supplies
Teabag Folding
Techniques
Testing
tips and tricks
Tutorial
Web resources
Welcome to my Blog
Work By My Friends
workflow
Writing
Blog Tools
Edit your Blog
Build a Blog
RSS Feed
View Profile
Group One
In & Out of Studio 3D
Sunday, 14 September 2014
Stretch Your Stamps 2 - Day 2 - Backgrounds - Line-art (3/4)
Topic: Online Class

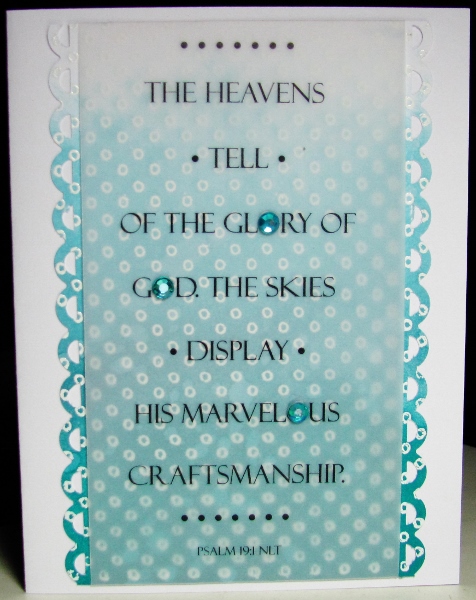
Day 2 of the class presented more ways to use background stamps. I went to my collection to find some alternatives to those already used in class. The technique was to stamp a line-art background with Versamark and emboss in white. Then three tones of a single color family were sponged on dark-to-light to create an ombre effect.

For my first sample I chose a stamp of tiny circle dots and inked in shades of teal Distress Inks. I trimmed the panel and punched the side edges with a scallop. A printed vellum strip was wrapped top to bottom. Three teal rhinestones substitute for 'O's in the text. All this was mounted on a white card base.

For the second card I used a script background stamp and tones of purple. The panel was trimmed and backed with a dark green cardstock and placed on a white card base. Then I diecut two leafy branches from a sticky-back cardstock and decorated them with five purple paper flowers.

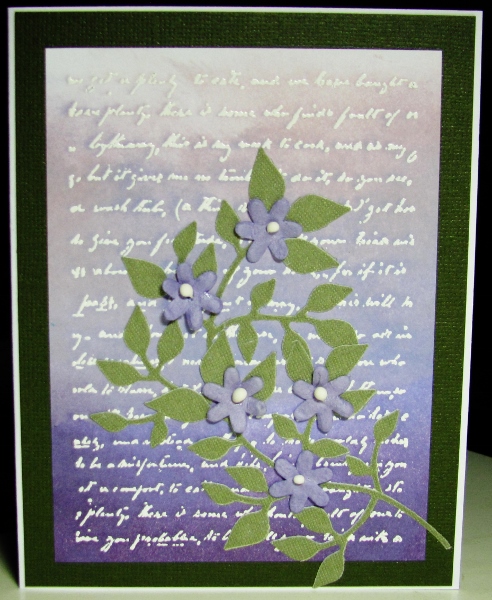
This was too busy to add a sentiment. This lends itself to any occasion.

Ddd


Posted by studio3d@ccgmail.net at 12:01 AM PDT

View Latest Entries