« September 2014 »
S M T W T F S
1 2 3 4 5 6
7 8 9 10 11 12 13
14 15 16 17 18 19 20
21 22 23 24 25 26 27
28 29 30
You are not logged in. Log in
Entries by Topic
All topics  «
3D paperwork
A - Z challenge 5
A - Z challenge 7
A - Z challenge round 4
A to Z challenge round 3
A to Z round 2
A to Z round 6
A-Z round 1
Around the House
Art Challenges
Artist Trading Cards
Backgrounds
Beads
Bible Journaling
Books
Boxes
Collage
Color Challenge
Coloring
cookbook
Die Cuts
Digital Projects
Digital Stamps
Drawing
Dry Embossing
Fabric Stuff
Fantastic Folds
Field Trip
Home Decor
How Does Your Garden Grow?
Hymnal Art
In The Kitchen
In the studio
Jewelry
Lettering
Links
Multi-Technique
Music to Work By
Musings
Nail Art
New Work
Online Class
Other Hobbies
Other Projects
Painting
Paper Embroidery
Paper Piecing
Photo
Pretty Paper
Quilting
Random
reading
Scrap Recovery
scrapbooking
Sewing
Sketch Challenge
Some Backlog
Stamping
Stencils
Stickers
Supplies
Teabag Folding
Techniques
Testing
tips and tricks
Tutorial
Web resources
Welcome to my Blog
Work By My Friends
workflow
Writing
Blog Tools
Edit your Blog
Build a Blog
RSS Feed
View Profile
Group One
In & Out of Studio 3D
Friday, 19 September 2014
Stretch Your Stamps 2 - Day 3 - Alphabets & Sentiments - a
Topic: Online Class

Day three of class began a focus on using alphabet and sentiment stamps. The first technique is for creating a 'word search' look for a card front.

I arranged my main message in individual letters on a gridded block. This was stamped in black and embossed in clear. Then those letters were removed from the block and a string of random letters were arranged. These were stamped on the left and the right of every other line using a golden yellow ink. Different letters were arranged on the block and the voids filled in with the golden yellow ink.

I masked out 'thinking of you' on a sentiment stamp and inked up the remainder with black ink. Removed the mask and stamped 'all the time'.

Stamped the clock image in the upper left using black. Used a sponge dauber to apply golden yellow ink to the clock image.

I trimmed the panel and wrapped it with yellow twine.

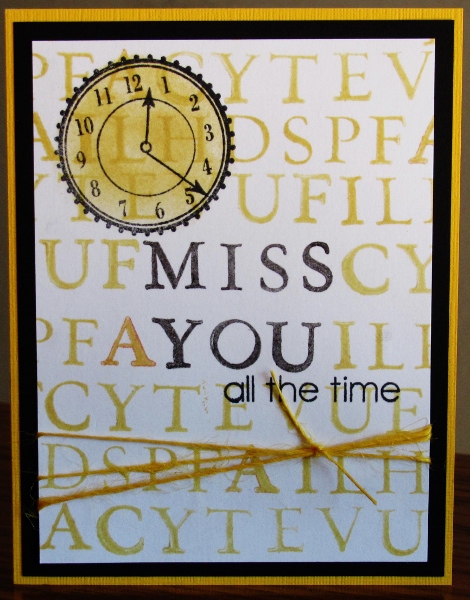
Bordering with yellow and black finishes off this card.

Ddd


Posted by studio3d@ccgmail.net at 12:01 AM PDT

View Latest Entries