« September 2015 »
S M T W T F S
1 2 3 4 5
6 7 8 9 10 11 12
13 14 15 16 17 18 19
20 21 22 23 24 25 26
27 28 29 30
You are not logged in. Log in
Entries by Topic
All topics  «
3D paperwork
A - Z challenge 5
A - Z challenge 7
A - Z challenge round 4
A to Z challenge round 3
A to Z round 2
A to Z round 6
A-Z round 1
Around the House
Art Challenges
Artist Trading Cards
Backgrounds
Beads
Bible Journaling
Books
Boxes
Collage
Color Challenge
Coloring
cookbook
Die Cuts
Digital Projects
Digital Stamps
Drawing
Dry Embossing
Fabric Stuff
Fantastic Folds
Field Trip
Home Decor
How Does Your Garden Grow?
Hymnal Art
In The Kitchen
In the studio
Jewelry
Lettering
Links
Multi-Technique
Music to Work By
Musings
Nail Art
New Work
Online Class
Other Hobbies
Other Projects
Painting
Paper Embroidery
Paper Piecing
Photo
Pretty Paper
Quilting
Random
reading
Scrap Recovery
scrapbooking
Sewing
Sketch Challenge
Some Backlog
Stamping
Stencils
Stickers
Supplies
Teabag Folding
Techniques
Testing
tips and tricks
Tutorial
Web resources
Welcome to my Blog
Work By My Friends
workflow
Writing
Blog Tools
Edit your Blog
Build a Blog
RSS Feed
View Profile
Group One
In & Out of Studio 3D
Tuesday, 15 September 2015
Letterpress To the Limit
Topic: Dry Embossing

You would never guess how this was made if not for all the step-by-step that I have been posting.

To start with, I inked the folder with four different Distress pads using the corners of them toapply color to specific areas. I used peacock feathers for the background and picked raspberry and mustard for the flowers. Mowed lawn was used for the leaves.

I did the same as on the previous cards, misting for cardstock and the folder before running through the Cuttlebug and drying with the heat tool.

I pressed these same ink pads to an acrylic block and picked up the color with a brush to paint onto the white lines.

Finally, after drying with the heat tool, I used a fine-line black marker to trace all the lines in the design.


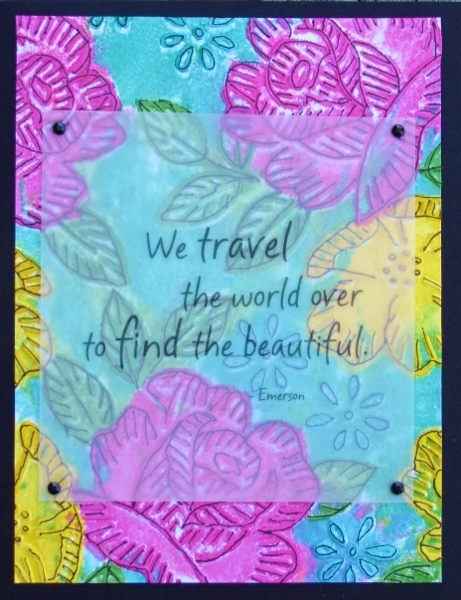
I found a sentiment printed on vellum and trimmed it to allow more of the original art to show around the edges. It is mounted with tiny glue dots and there are black rhinestones to cover them.

I mounted this on a black card base.

Ddd


Posted by studio3d@ccgmail.net at 12:01 AM PDT
Updated: Wednesday, 19 August 2015 7:25 AM PDT

View Latest Entries