« February 2019 »
S M T W T F S
1 2
3 4 5 6 7 8 9
10 11 12 13 14 15 16
17 18 19 20 21 22 23
24 25 26 27 28
You are not logged in. Log in
Entries by Topic
All topics  «
3D paperwork
A - Z challenge 5
A - Z challenge 7
A - Z challenge round 4
A to Z challenge round 3
A to Z round 2
A to Z round 6
A-Z round 1
Around the House
Art Challenges
Artist Trading Cards
Backgrounds
Beads
Bible Journaling
Books
Boxes
Collage
Color Challenge
Coloring
cookbook
Die Cuts
Digital Projects
Digital Stamps
Drawing
Dry Embossing
Fabric Stuff
Fantastic Folds
Field Trip
Home Decor
How Does Your Garden Grow?
Hymnal Art
In The Kitchen
In the studio
Jewelry
Lettering
Links
Multi-Technique
Music to Work By
Musings
Nail Art
New Work
Online Class
Other Hobbies
Other Projects
Painting
Paper Embroidery
Paper Piecing
Photo
Pretty Paper
Quilting
Random
reading
Scrap Recovery
scrapbooking
Sewing
Sketch Challenge
Some Backlog
Stamping
Stencils
Stickers
Supplies
Teabag Folding
Techniques
Testing
tips and tricks
Tutorial
Web resources
Welcome to my Blog
Work By My Friends
workflow
Writing
Blog Tools
Edit your Blog
Build a Blog
RSS Feed
View Profile
Group One
In & Out of Studio 3D
Friday, 1 February 2019
Lettering Series - Week 5
Topic: Lettering

Can you believe it? In just 4 weeks we have learned 7 basic and enhanced lettering styles! This week we will actually learn 3 more. And since it is all done in a progressive manner - one little step at a time - the process is easy and stress-free.

Now on to week 5

Day 1 – Adding to the Round Print – Introduction

This week we are going to make more changes to the basic round print to create three new alphabets.

Start by writing the book name ‘Jude’ in the basic round print learned in week 1. On one set, add a single line off to the right side and the bottom of all lines. We are calling this the offset line.

On the next set, widen the main downstroke (just on one side) and fill in with dark ink.

Then make another set like the second and add simple serifs like we learned in week 3.

Just do the single word in all three styles for today. Tomorrow we will begin to see how these look in full alphabets.


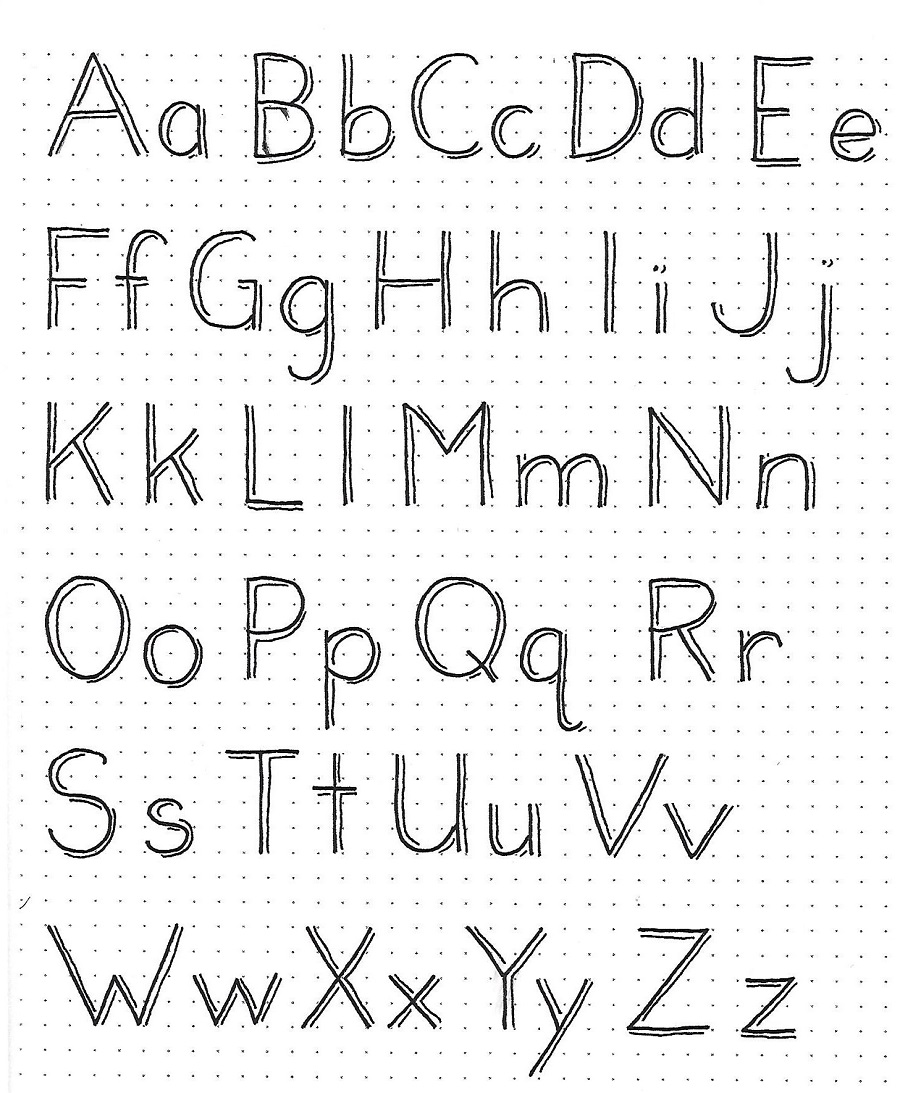
Day 2 – Offset Line Print – Alphabet

Here’s alphabet one for the week. Write out the basic round alphabet we learned in week 1 and then add a single offset line on the right and bottom of all lines. Notice that the ends of the lines to not overlap nor do they touch.

Watch for where you can put tiny lines like under the bottom curve of the a, d, u and at the upper left of the m and n.


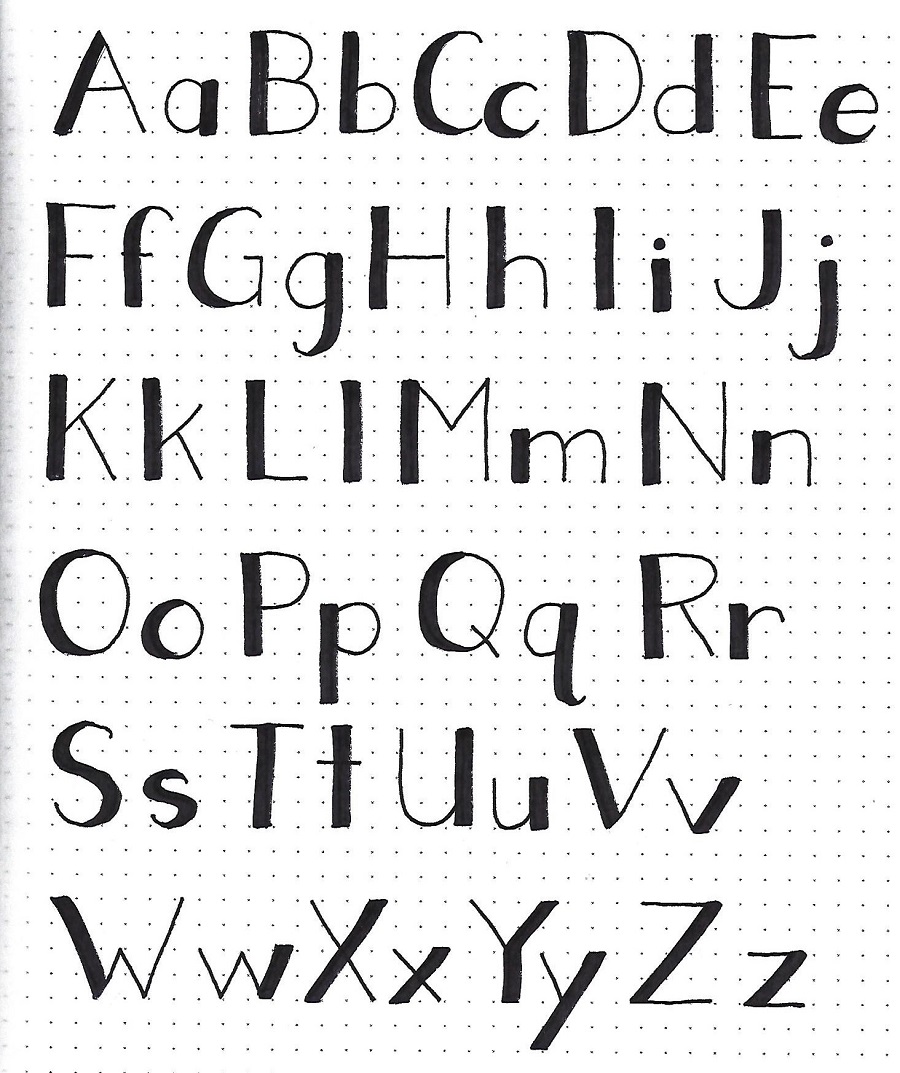
Day 3a – Thick Single Line – Alphabet

There will be two alphabets today! First, write up the basic round print from week 1. Add a thickened line to one of the verticals on each letter. If that thickened line has a curve, taper so the curve ends up skinny, not wide.

Remember, there is only ONE thickened line on each letter.


Day 3b – Thick Single Line with Serif – Alphabet

How similar this looks to the previous alphabet, right. Well, it certainly starts out that way. So, draw up the basic round print, thicken one vertical line like we did yesterday and then, add serifs like we learned to do in week 3.

See how easy it is to make new lettering styles? 

Day 4 – Shaping Words to Forms – Word Art

Our lettering does not always have to be lined up in neat rows across the page. Are you ready to bust out?

We are going to use the three versions of lettering that we learned this week and fit them into shapes. I decided to reference Jude 1:2 – “Mercy, peace and love be yours in abundance.” The natural shape for me was the heart.

I drew three hearts in pencil, overlapping them a bit. Then I drew the words in pencil, using the basic round print while stretching and shaping them to echo the outlines of the hearts. Then I inked the letters and, finally, added the variants from this week’s lessons: offset lines, thickened lines and serifs.

The last step was to outline the hearts and erase the pencil.

You can do this with all sorts of shapes (houses, clouds, flowers, leaves)


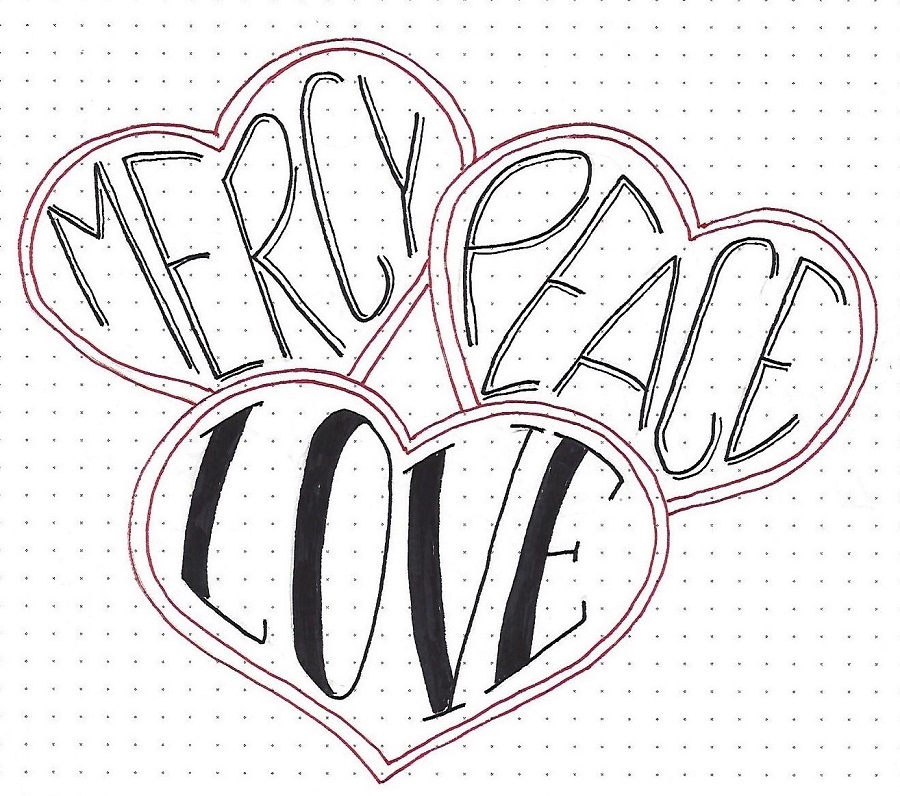
Day 5 – In Your Bible

Despite the teaser on word shaping yesterday, when I used this week’s lettering in my Bible, I went to the simplest form and lined it right up on the straight sidebar. HA!

But this seemed to suit the simple message of the scripture which I combined with the dove from the Drawing Room and some stick people, lifting one another up.

Use any of the alphabets and/or techniques we studied this week to add journaling to your Bible in the book of Jude.


End of Week 5

Ddd


Posted by studio3d@ccgmail.net at 2:23 PM PST

View Latest Entries