Topic: A to Z round 2
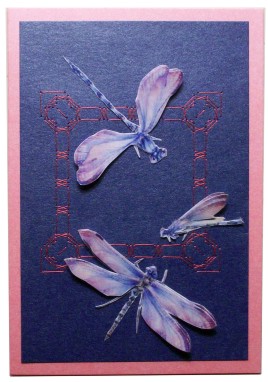
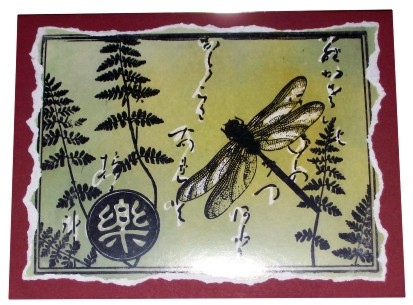
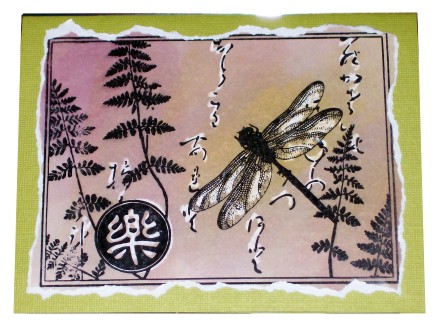
I used my needle to stitch up this embroidery card using a new stencil from Crealies. I added 3D dragonflies.
Posted by studio3d@ccgmail.net
at 6:00 AM PST
| « | February 2008 | » | ||||
| S | M | T | W | T | F | S |
| 1 | 2 | |||||
| 3 | 4 | 5 | 6 | 7 | 8 | 9 |
| 10 | 11 | 12 | 13 | 14 | 15 | 16 |
| 17 | 18 | 19 | 20 | 21 | 22 | 23 |
| 24 | 25 | 26 | 27 | 28 | 29 | |
I used my needle to stitch up this embroidery card using a new stencil from Crealies. I added 3D dragonflies.
This magnet is made using reverse painting on the back of a fla-back glass marble. Acrylic paints were used to paint first the white center, then the brown throats, then the yellow petals, the brown stripes, and finally the dark yellow petals.
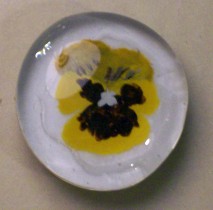
After the paint is dry clear glue is used to coat the back and adhere to a circle of white craft foam and that to a disk magnet.
This was one of the crafts offered on my recent cruise although the project was really supposed to be a big yellow sunflower. I don't follow directions very well! LOL!
I love the luminescence of peacock feathers.I started with a photograph of the peacock and added adhesive to the face of it with my Xyron. Then I used my fingertip and tapped Pearl-Ex powders in interference green (eyes of the feathers), interference blue (body and head) and interference violet (main tail). After covering this way I burnished in the color to take up all the tackiness of the adhesive. Finally, I used a cloth and rubbed away all the excess powder.
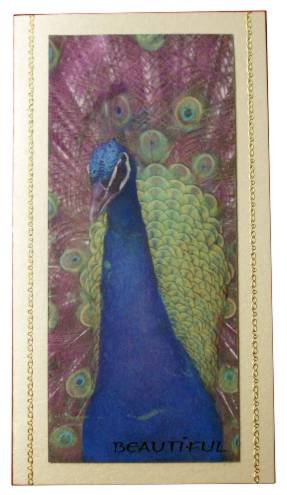
I mounted with foam tape for dimension on an irridescent cardstock and added a clear text sticker and borders of gold peel-off.
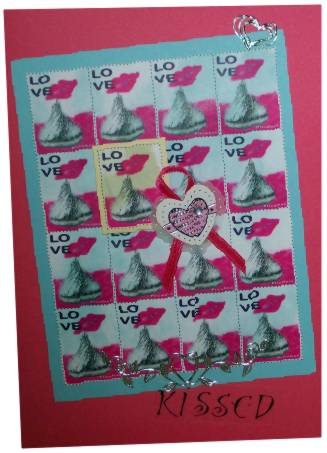
I created the stamp sheet digitally with a photo of a Hershey's Kiss and CorelDraw. I printed several copies and used faint stamp pads to lightly color the backgrounds. The blue tinted sheet is mounted first with a blue border. Then a single stamp of the green tinted is bordered in green and mounted with foam tape for dimension.
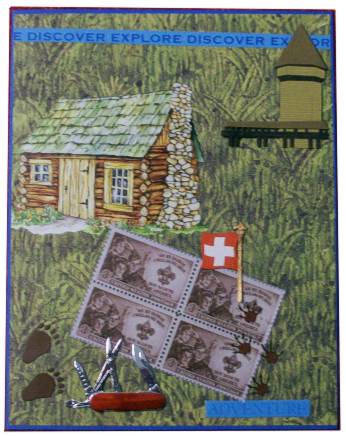
OK, you may not immediately see the connection, but this is a salute to the Boy Scouts of America! It's not exactly a jamboree-ish illustration but the BSA is famous for it's jamborees. So there you are!
I used 'grassy' scrapbook paper for a background, added rubons (cabin, animal tracks), 3D stickers (tower, flag, knife), digital illustration (stamps), and scrapbook paper (text strips).
Hmmm, what is it about the letter I that makes me turn to digital imagery? LOL!
I know a couple who are quite fond of all things Celtic aso I wanted to do something along that line for them. I looked up images of the Claddagh and then found photos that I could edit and combine to recreate it. I used PhotoPaint for this.
Then I brought the whole graphic over into CorelDraw to give it a background (Kelly Green) and a greeting in an Irish font (red to go with the crystal heart).

This was printed directly onto cardstock and folded.
My husband voted this 'one of the top 10' cards I've ever made! The paper pricking pattern is from the book 'The Art of Decorative Paper Pricking' by Janet Wilson.
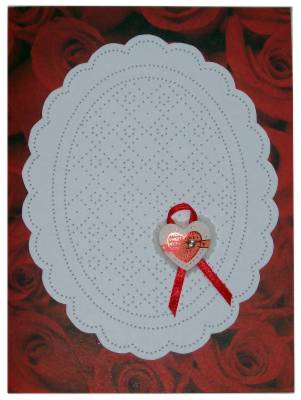
I trimmed around the pierced cardstock and mounted on rose imprinted scrapbook paper. The heart and ribbon is a pre-made element.
The cruise ship had a ceramics studio where we could go to paint objects and have them fired for us. Since we had visited parrots in Puerto Vallarta and had our pictures taken with them I decided to recreate thim on this giant plate. It is a 13 inch diameter platter.
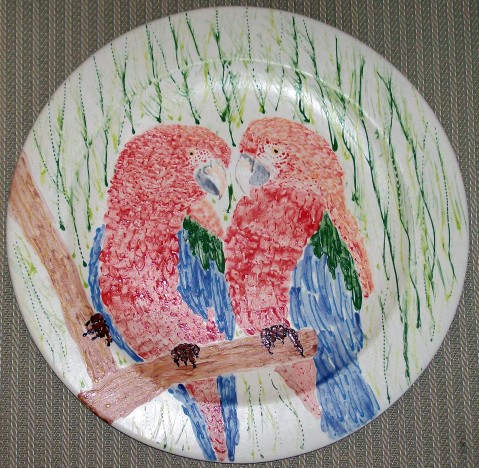
All of the color was applied by brush and fine point squeeze bottle. I copied the illustration from the cover of a book they had on hand Keys to Painting Fur and Feathers. Here is the cover on which the birda appear, as well as inside:

On a cruise recently we had a great crafts person teaching short projects. This wooden frame covered with a map-printed scrapbook paper was one of them. We used Mod-Podge as a glue and a sealant. I did my corners on the ourside by clipping and folding down and the inside corner are lined first to cover any gaps on the turned-in paper.
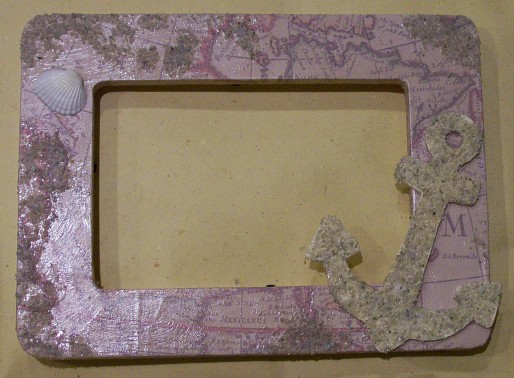
We were also given a wood piece to cover with sand before glueing onto the front along with a seashell. I also added sand around parts of the frame itself.
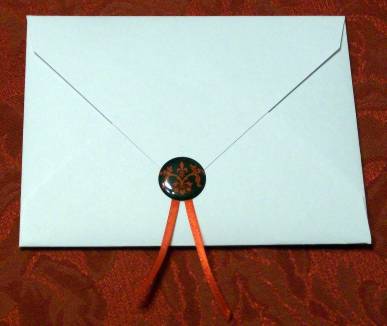
From the outside this cardstock envelope shows only the distinctive folds and a beribboned seal.

Attendees are invited to dress formally and walk the red carpet. There are three categories of nominees on the outer panels on which each person can mark their votes.
(This is a non-existent event)
These sweet little puppies are one of the sample pictures on the back of a wall calendar. I always cut out the 12 pictures on the back for use on cards. This is from my 2007 edition.

I added some clear stickers for a finishing touch. Unfortunately, they pick up the camera flash.
I used the same stamp with different colors for these two cards. The technique is crayon resist. An image is stamped with waterproof ink onto glossy cardstock and the image dried. Then selected parts are colored with a white crayon.
The final step is to buff the surface with a tissue to remove any ink that is on the face of the white crayon.
I tore my images out and mounted to cardstock.
I made this box following the instructions from a lesson on Craft TV Weekly. I first fell in love with the cover paper which is a set of scrapbook papers from the dollar store!
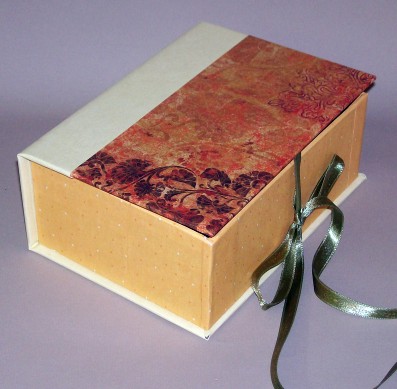

All of the instructions on Craft TV Weekly are clear and shown on a video. Some also give written guides. Although they are usually showing projects that use specific projects, in many they will give measurements for making your own 'kit' instead of buying theirs.
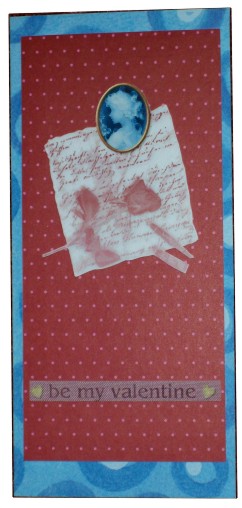
I am making about 40 of these valentine cards so needed something simple but elegant. The text and the large heart are printed on the center panel of a cardstock divided into thirds. Then with the right panel folded inside the red large red heart is cut out of both layers with a craft knife.
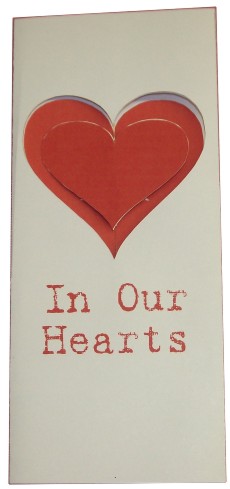
With the card completely folded, the removed red heart is then glued to the inside, aligning carefully with the aperture.
Before gluing the two aperture parts together a strand of stretchy nylon beading cord is glued in place at the top and bottom. Closing the glued parts sandwiches the ends, thus hiding them.
Two smaller red hearts are glued back to back on either side of this stretchy cord.
Before mailing the card the suspended hearts are twisted round and round on their cord and the card closed.
When the recipient gets the card and reads the front "In Our Hearts" they open the card which sets the hearts spinning in the aperture and they read the larger inside heart "You Are Loved".
This 3D cutting of camelias has its own distressed background and a oriental style pink border. So I backed it with scrapbook paper with Kanji characters in repeating circles.
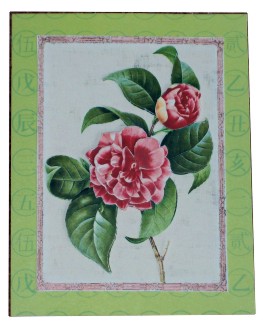
The final result is very restful, so I'm calling it Zen.
This strip of sunflowers (including the red band) were part of a 3D sheet I printed. I mounted it on the green dotted scrapbook paper and then on a yellow scrapbook paper with a brush-stroke look.
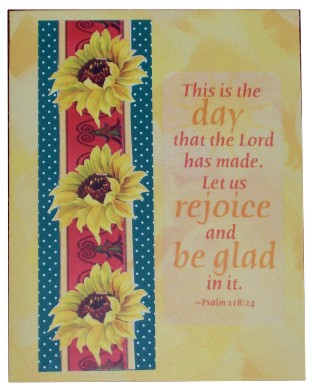
To finish it I added the vellum text sticker on the right.
I turned the Xs and Os into a game of tic tac toe with sticker strips for the lines and punchout letters. I added dimensional broken lines around the letters in the opposite color to the letter (green on peach, raspberry on green). I used watercolor marker in grey to add a drop shadow to all the elements for some dimension.

White on white parchment work is my absolute favorite. This little dress is a free pattern I got online.
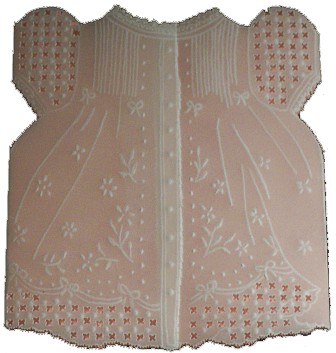
Since none of the embossing shows up if the liner is also white I added a pink one.
One of the 3D sheets I printed came with this graphic which is NOT a 3D. So I clipped it out and mounted on two layers of scrapbook paper. I occastionally like to use an oblong card shape.
I added a printed fabric sticker for the greeting.
I wondered how I was going to work 'underwear' into a decent card. Then I found that I had these 'corset' peel-off stickers that were given to me in a swap.
I mounted one on a blue glossy card and cut it out. It is mounted with silicone on the card front and 4 blue feathers are tucked under and glued to form the skirt.

Peel-offs and a fabric sticker are the finishing touches.
