« July 2009 »
S M T W T F S
1 2 3 4
5 6 7 8 9 10 11
12 13 14 15 16 17 18
19 20 21 22 23 24 25
26 27 28 29 30 31
You are not logged in. Log in
Entries by Topic
All topics  «
3D paperwork
A - Z challenge 5
A - Z challenge 7
A - Z challenge round 4
A to Z challenge round 3
A to Z round 2
A to Z round 6
A-Z round 1
Around the House
Art Challenges
Artist Trading Cards
Backgrounds
Beads
Bible Journaling
Books
Boxes
Collage
Color Challenge
Coloring
cookbook
Die Cuts
Digital Projects
Digital Stamps
Drawing
Dry Embossing
Fabric Stuff
Fantastic Folds
Field Trip
Home Decor
How Does Your Garden Grow?
Hymnal Art
In The Kitchen
In the studio
Jewelry
Lettering
Links
Multi-Technique
Music to Work By
Musings
Nail Art
New Work
Online Class
Other Hobbies
Other Projects
Painting
Paper Embroidery
Paper Piecing
Photo
Pretty Paper
Quilting
Random
reading
Scrap Recovery
scrapbooking
Sewing
Sketch Challenge
Some Backlog
Stamping
Stencils
Stickers
Supplies
Teabag Folding
Techniques
Testing
tips and tricks
Tutorial
Web resources
Welcome to my Blog
Work By My Friends
workflow
Writing
Blog Tools
Edit your Blog
Build a Blog
RSS Feed
View Profile
Group One
In & Out of Studio 3D
Wednesday, 8 July 2009
Stained Glass Grapes
Topic: New Work

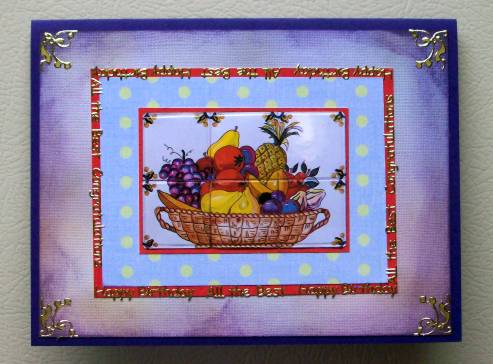
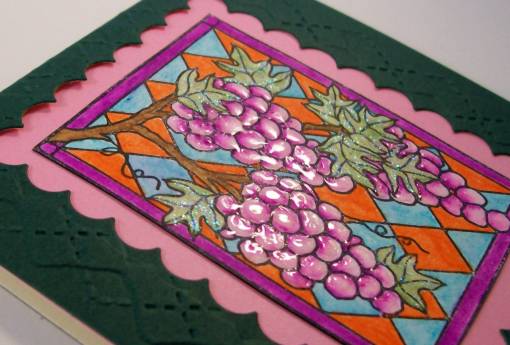
More of the stamped and colored images... this one is a stained glass stamp of grapes which I did a lot of blending on. The other thing I did differently was to add Glossy Accents on the grapes and leaves. 

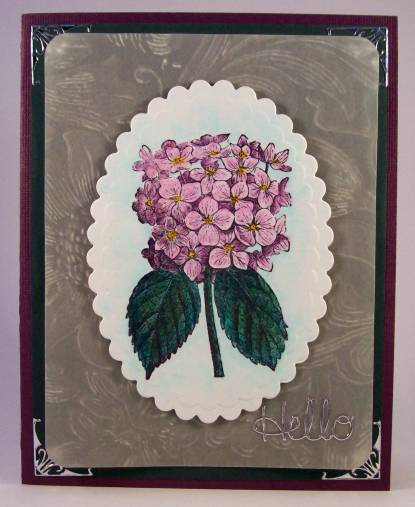
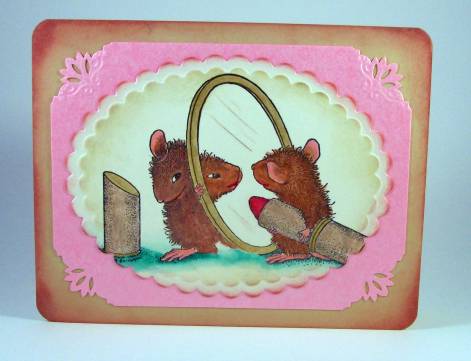
I used the 'argyle' Cuttlebug folder on the card front and then cut an aperture with the scallopedrecrangel Nestability die. I backed this with pink paper and added the focal piece in the center.

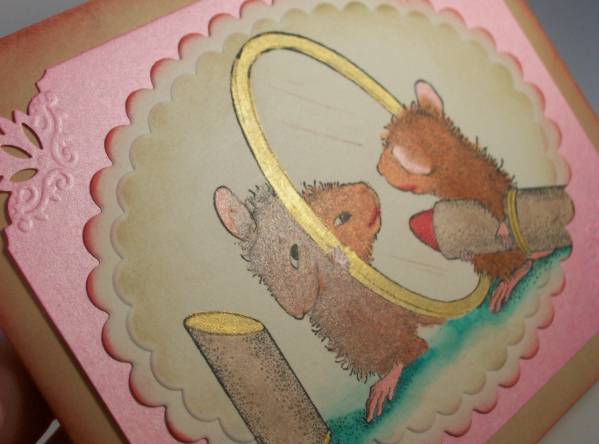
Here a closeup shows the result of the application of the Glossy Accents.


Ddd


Posted by studio3d@ccgmail.net at 6:00 AM PDT
Tuesday, 7 July 2009
Enjoy Life in the Trees
Topic: New Work

This is the other half of the block of trees I stamped a few days ago. This time I used a green background over a printed scrapbook paper. 

After applying the text sticker I used a fine-line marker to draw borders around every layer to unify them.

Ddd


Posted by studio3d@ccgmail.net at 6:00 AM PDT
Monday, 6 July 2009
Lase Fall Leaf
Topic: New Work

Another stamped image colored with pencils. I went over this one with a yellow marker as well to unify the colors.

Two scrapbook papers make up the background and I've added a clear sticker for text. 

Ddd


Posted by studio3d@ccgmail.net at 6:00 AM PDT
Sunday, 5 July 2009
Enjoying Trees
Topic: New Work

This is another stamped/colored image. It is a simple silhouette of trees which I stamped in the foreground and then stamped again behind without reinking. Three greens define the distances further.

I mounted on foam tape over some paste paper scrap and a gold folded card base. 

The text block is a sticker.

Ddd


Posted by studio3d@ccgmail.net at 6:00 AM PDT
Saturday, 4 July 2009
Hello in Elegance
Topic: New Work

I've begun a kick lately of stamping images, coloring with watercolor pencils and then brushing with just a touch of water.

Today's card is one of these that I then cut out with a scalloped Nestabilities and used it to impress the border. I mounted it with foam tape on afloral textured parchment with rounded corners.


I layered burgundy and dark green cardstock, added silver corners on the green and then placed the focal unit on top. The greeting is a silver peel-off.

Ddd


Posted by studio3d@ccgmail.net at 6:00 AM PDT
Friday, 3 July 2009
Down By the River Side
Topic: Field Trip

A little at a time we work on the country place. This is a recent project - clearing a path down to the river through the woods. 

So cool and secluded, and the entry to the access is well hidden so you have to know it is there to find it.

Ddd


Posted by studio3d@ccgmail.net at 6:00 AM PDT
Thursday, 2 July 2009
What Are YOU Lookin' At
Topic: Field Trip

On a weekend visit to the country place we were delighted to see a squirrel had found the feeder we installed. This was the biggest squirrel we had either ever seen. He was a foot long in the body.

As a measure, that is a gallon jar and look how far his tail hangs down from there. He just watched us from his feeder and kept on stuffing his face. 

This is some sort of gray squirrel. Up at our city place we only have redish squirrels about half this size and brown ones with red bellies that are the size of chipmunks.

What fun!

Ddd


Posted by studio3d@ccgmail.net at 6:00 AM PDT
Wednesday, 1 July 2009
Lanterns in the Trees
Topic: New Work

Challenge today was to pick a single stamp and design a card around it. The one I chose was the string of lanterns. Then I picked out a stamp of blossoming branches for the lanterns to hang from and, finally, a grass image to define the ground. All were stamped on white cardstock with archival ink, colored with watercolor pencils and gone over lightly over with a water brush.  I used blue pencil very lightly on the sky to create a sunny sky and brushed with water as well.

I stamped the greeting with the archival ink and trimmed the image to size. Two pieces of pink card are placed behind opposing corners and an oriental gold corner laid on. All this is placed on green folded card base.

Rub-on borders are applied to the top and the bottom. Then a pair of teardrop rhinestones were arranged to form a heart. A little stem finished it off.

Ddd


Posted by studio3d@ccgmail.net at 6:00 AM PDT
Tuesday, 30 June 2009
Triple Shell
Topic: New Work

This entry WAS posted but then never showed up at the appointed time. SOMEWHERE out there this may magically appear again. Pretend like you never saw it! LOL!

For this card I stamped with Versamark on black cardstock and then used three different tones of Pearl-Ex powder, applied with a fingertip. First I tap it on and then rub it in and finally buff away stray powder from the background.

I then cut them out with a scalloped Nestability die and for each cut a larger scallop in an irridescent cardstock to match a shell.  

The larger scallops went through the Cuttlebug with the 'tapestry'  folder and then all was assembled with foam dots for dimension. The right panel is metallic gold cardstock and it has a clear text sticker on it.

Here is a close-up view of the shimmer.


Each motif also got two matching rhinestones for 'water droplets'.

Ddd


Posted by studio3d@ccgmail.net at 7:10 AM PDT
Monday, 29 June 2009
Scallop and Scallops
Topic: New Work

Here's another nice picture from my page-a-day calendar. I love the green in the water! I cut a variety of scalloped circles to mimic the edge of the shell and then ran them through the Cuttlebug for a pattern to mimic the waves. A border of golden cardstock frames the illustration and three silk flowers, colored with alcohol inks, have tiny button brad centers. All elements are mounted in a series of 3D stages.

The stitching is hand drawn with watercolor marker and then shaded with a different tone to add depth. The text strip is a cardstock sticker.

Ddd


Posted by studio3d@ccgmail.net at 6:00 AM PDT
Sunday, 28 June 2009
Lipstick Mice
Topic: New Work

This is a stamp owned by a friend who sent me this impression on cream background. I colored with watercolor pencils and then used a water brush to apply Twinkling H2Os over. This blends the base color and also applies a shine. 

Then I used a Nestabilities scalloped oval die to cut out and also to emboss the edges of the piece. While the die was still in place I used 'old paper' distress ink to shade the inner scallops and after removing the die I used 'worn lipstick' distress ink to color the outer edges of the piece.

I used a two-stage corner punch that also embosses a design. This is for the pink backing. Then I cut a folded kraft cardstock, rounded the corners and distressed with more of the 'worn lipstick'.


This shows a closeup so you can see the lovely shine of the card.

Ddd


Posted by studio3d@ccgmail.net at 6:00 AM PDT
Saturday, 27 June 2009
Another Rose Stitching
Topic: New Work

I pricked out these roses at the same time as the last set using the same paper and even stitched with the same threads. The difference is all in the finish.

I used pink and green watercolor markers and then added touches of yellow marker as highlights rather than adding shading.

Then the green cardstock was cut to 1/4 inch larger and a corner punch was used. This allowed the corners of the pink paper to tuck into the fancy corners. 

I mounted to a pink card base and added a clear text sticker.

Ddd


Posted by studio3d@ccgmail.net at 6:00 AM PDT
Friday, 26 June 2009
Best Birthday
Topic: New Work

I started this with the grouping of tiles from a catalog and creased them at the seams. Then I layered with alternating scrapbook papers and finally a purple cardstock. I used a purple ink to distress the edges of the largest layer. 

I used tiny peel-off greetings to create a border "happy birthday, all the best, and congratulations"

Peel-off fancy corners are the finishing touch.

Ddd


Posted by studio3d@ccgmail.net at 6:00 AM PDT
Thursday, 25 June 2009
Vagabond
Topic: New Work

I made a reverse photocopy of this caboose sketch and hand-colored it using watercolor markers and a water brush. I wanted just a hint of the original color to make it look weathered.

I used lines to frame it out and a scrapbook paper background, antique brads anchor the corners and two cardstock text stickers are the finishing touch.

Ddd


Posted by studio3d@ccgmail.net at 6:00 AM PDT
Wednesday, 24 June 2009
At the Pool
Topic: New Work

Here is the last of my little mannaquins. For this one, I created a little swimsuit with a mesh cover. The flip-flops are created with cardstock and ribbon. 

The tiles are drawn by hand and the lettering, as well.

Ddd


Posted by studio3d@ccgmail.net at 6:00 AM PDT
Tuesday, 23 June 2009
See A Pattern?
Topic: New Work

For this mannaquin I left more of it showing! I just snipped out some squares of scrapbook paper and attached them. Then I drew in some 'pins' and attached half-pearls as pin tops. 

The background is dress pattern tissue over scrapbook paper and the stand is drawn in free-hand. I used the pinking scissors on the tag to reinforce the theme.

Ddd


Posted by studio3d@ccgmail.net at 6:00 AM PDT
Monday, 22 June 2009
Try It - You'll Like It
Topic: New Work

Mirkwood Designs website of templates has this adorable manaquin that can be dressed up. I printed it out in a variety of sizes so I could have some choices. I cut them out of scrapbook paper with a fabric print.

For this I drew up a shirtwaist, even though all you see of the manaquin is the neck. I drew on detailing with Sharpie marker and gave it a belt of ribbon with a cardstock buckle. 

I free-handed a stand and covered a lightly patterned background paper with old dress pattern tissue. The tag is hand-lettered and I colored the string with watercolor marker.

Ddd


Posted by studio3d@ccgmail.net at 6:00 AM PDT
Sunday, 21 June 2009
Pony Girl
Topic: New Work

I got three impressions of this little girl in a swap a LONG time ago. I colored them up with watercolor markers and put in some grey marker shading. Then I cut them up and made it into one 3D image. 

I've mentioned before that these little girls with no mouth look creepy to me so I always draw one in.

I made a 'tent' card format and used some subtle print scrapbook paper for background.

All of the text is stickers and I used the grey marker shading under those as well.

Ddd


Posted by studio3d@ccgmail.net at 6:00 AM PDT
Saturday, 20 June 2009
The Last Word
Topic: New Work

I found these scraps laying on the table when I went to clean up the studio so I put them together and covered them with laminate to protect from damage. 

I found the cardstock text sticker that I 'needed' to use for this bookmark.

Ddd


Posted by studio3d@ccgmail.net at 6:00 AM PDT
Friday, 19 June 2009
Change is Good
Topic: New Work
This card is made from the new free pattern at www.prickandstitch.ismycraft.com. However, I absolutely can't do anything according to the instructions, so I added some lines to the roses trying to make them more realistic and changed the internal structure of the leaves for the same reason. Then I doubled the lines on the stems.


After stitching on scrapbook paper I did something I've never done before - I colored in the design. I used two pinks and two greens of colored pencils so I could do some shading.
After all that, I thought the text sticker I found to match was a perfect fit!
Corrugated cardstock and a mulberry paper are used for backing and three rhinestones are the finishing touch.
Ddd

Posted by studio3d@ccgmail.net at 6:00 AM PDT

Newer | Latest | Older