« June 2007 »
S M T W T F S
1 2
3 4 5 6 7 8 9
10 11 12 13 14 15 16
17 18 19 20 21 22 23
24 25 26 27 28 29 30
You are not logged in. Log in
Entries by Topic
All topics  «
3D paperwork
A - Z challenge 5
A - Z challenge 7
A - Z challenge round 4
A to Z challenge round 3
A to Z round 2
A to Z round 6
A-Z round 1
Around the House
Art Challenges
Artist Trading Cards
Backgrounds
Beads
Bible Journaling
Books
Boxes
Collage
Color Challenge
Coloring
cookbook
Die Cuts
Digital Projects
Digital Stamps
Drawing
Dry Embossing
Fabric Stuff
Fantastic Folds
Field Trip
Home Decor
How Does Your Garden Grow?
Hymnal Art
In The Kitchen
In the studio
Jewelry
Lettering
Links
Multi-Technique
Music to Work By
Musings
Nail Art
New Work
Online Class
Other Hobbies
Other Projects
Painting
Paper Embroidery
Paper Piecing
Photo
Pretty Paper
Quilting
Random
reading
Scrap Recovery
scrapbooking
Sewing
Sketch Challenge
Some Backlog
Stamping
Stencils
Stickers
Supplies
Teabag Folding
Techniques
Testing
tips and tricks
Tutorial
Web resources
Welcome to my Blog
Work By My Friends
workflow
Writing
Blog Tools
Edit your Blog
Build a Blog
RSS Feed
View Profile
Group One
In & Out of Studio 3D
Monday, 4 June 2007
A few Tips
Now Playing: Here are a few little tips for you
Topic: tips and tricks

I read a couple of tips this past month (can't remember which books/magazines) and put them into practice. Handy things...

1) Keep blank 3x5 file cards with you when you're reading your scrapbooking and other craft magazines. When you see a technique you want to try, a product to buy, a website you want to visit - just jot it down - one item per card. File these by topic and use as inspiration when your muse is having an off day.

I started doing this and now have consolidated lots of little torn scraps of paper into a useful file. I also clip out photos of neat card ideas and I tape these to cards for filing as well.

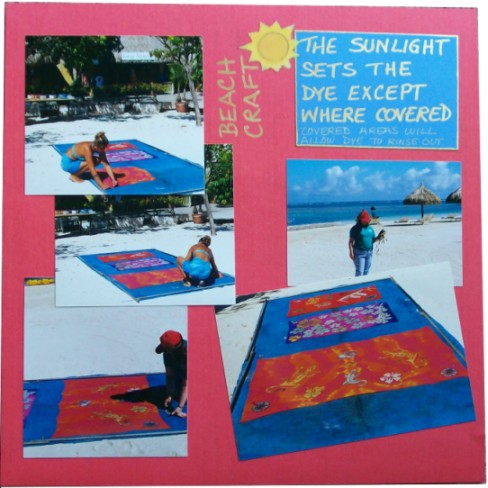
I started a separate file of scrapbook layouts. Many I had saved from the internet, some copied from magazines, some are photocopied, some are hand drawn. All ended up on file cards with a notation of how many photos the spread holds. I filed them with dividers for the number of photos.

2) I read a tip that you should get one of those lucite cubes of 3x3 papers and use them to off-stamp the extra ink left on your rubber stamp after making your chosen impression. What a great idea! It leaves a shadow of the impression and you can use these decorated papers to jot a quick note to include with mailings.

I already had a holder but the paper was all gone. I dug into my fancy scraps and cut small paper pieces down to 3x3 to put in the holder. Now I'm all ready to make some decorated note papers when I am stamping on a project.

3) When preparing to prick out a pattern for paper embroidery I tape two or three papers together. I can prick it out once and stitch up to three times. Usually by the end of three I am tired of the pattern but I rarely do anything exactly the same way twice. I usually prick out a dozen or so different patterns in multiples of each, with varying papers. When I am ready to stitch I can select the paper I want to work with and after completion I rotate to a different pattern.

That's it for today!

Ddd


Posted by studio3d@ccgmail.net at 9:25 PM PDT
Sunday, 3 June 2007
Scrapbooking
Now Playing: A few pages from my scropbooks
Topic: scrapbooking

I READ a lot about scrapbooking, I PLAN a lot about scrapbooking, but I haven't DONE a lot of scrapbooking. In fact, I have only done scrapbooks about our grand vacations (cruising and island trips). I do have a box crammed full of photos, binders, supplies, and ephemera from at least three other trips that I haven't gotten to yet.

 However, I thought I'd share some of the work that I HAVE done.

This page is from a trip to Tahiti. One afternoon a lady set up crafts on the beach. How could I NOT go play. She made available sun-reactive dye, cloth, and plastic templates of island motifs. We soaked the cloth in the dye and staked it out on the beach with protective layers beneath. Then we placed our selected templates over the cloth and went to play elsewhere for an hour. When we returned we rinsed the un-exposed dye out of the cloth and our pattern remained in white on our colored background. I love the color combinations on this page.

This next spread is also from Tahiti. The corners are from a calendar with antique map illustrations. The 'cloth' backgrounds are from a wallpaper sample book. I made the mini shopping bag from a Karen Thomas origami DVD. The photos were all matted with the same color to unify the spread.

Everywhere we went on Tahiti and Moorea there were beautiful tropical blooms. I took lots of photos of them and combined them all on one spread for impact. Each photo is bordered in the color of the flower. They are then arranged to separate the like colors from each other. I trimmed this up with pre-printed diecuts and punchout letters.

Some of my friends have seen the following before, but for those who aren't on any of the Yahoo lists I subscribe to - here is an idea I had to rebind one of my scrapbooks.

This is from our cruise to Alaska. The cruiseline gives out these canvas shopping bags to each cabin and I have collected a number of them. I tried to think of a way to include it IN the scrapbook but ended up cutting open the seams and using the front and the back separately to bind the covers of the scrapbook.

When the book is closed it looks like a scrapbook IN a bag.

But when you open the book the handles each go with their covers and the viewer is always surprised.

Here are views of the corners and of the spine showing how it all came together. I used Crafter's Pick The Ultimate glue. Only these inside edges are glued so the outside remains a giant pocket into which more stuff can be inserted.

Until later.

 Ddd


Posted by studio3d@ccgmail.net at 2:41 PM PDT
Updated: Sunday, 3 June 2007 3:16 PM PDT
Saturday, 2 June 2007
Studio Tour
Now Playing: Let's take a walk around Studio 3D

It's time for a little tour around the studio.

We'll start at the left of the door as you enter. Here is my 'digital' station. A color printer and scanner 'live' here. The laptop travels all over the house (and the world) with me, but comes here to print.

To the right of the digital station is my stereo (gotta have your tunes!) sitting on a dresser with supplies and small equipment. Continuing on to the right begins my seated workstation with the paper cutter. Underneath are Iris carts with rubber stamping inks and supplies, and polymer clay.

Here you see the rest of the workstation. The lower iris cart here contains envelopes sorted by size. On the back of the tabletop are things I use for nearly every project - scissors, pens, tape, x-acto knives, etc. On the wall, lighted from above, are mounted important references and my circle ruler and circle cutter. On the shelf above that I have mini-drawers with embellishments, pen &, pencils, colorants of all types, tags and die cuts, and postal materials.


This view turns the corner at the end of the room.  You can see that on the end of my seated workstation is a sorter with cardstock separated into color groups. I keep my box of finished cards on top, sorted by occasion, theme, or design. On the right is a metal cupboard with closeable doors. This is where I keep plastic bins of supplies such as punches, buttons, game pieces, rotary tools, stickers, napkins, acrylic paints, beads, etc. There is also a big plastic file box with patterns and instructions filed by topic. On top are some portfolios of artwork and photo clippings sorted by color group. The books on the left are waiting for altering.

Now on the right of that are lots of iris carts where I have separated papers. I have drawers of asian papers, handmade, wrapping paper, tissue, cardstock scrap, paper scraps, backgrounds, scrapbook paper scraps, specialty papers, and what I call "wow" papers. Then I have a drawer called "parts and starts". To the right of the iris carts I have a wire rack holding 12 x 12 scrapbook papers sorted into color groups. Finally we come to another corner and find the sewing station.

This slant-shelf cabinet is perfect for holding 12" pizza boxes in which I have rubber stamps (sorted by theme, of course). To the right of that is the end of my standing worktable on which I store ribbons and some scrap paper for gluing. There's my polymer clay oven as well.

Here is a view of the standing-height worktable from the other side. Underneath I store mailing boxes of all sizes (probably the only thing in the room not 'sorted'! LOL!)

On past the table is the ironing station and wrapping paper storage.

Then you come to the open closet. On the lefthand shelves I store supplies for handmade paper, wallpaper books, teaching materials, scrapbooking stuff, spray stuff like adhesives paints glitter etc, and fabric scraps.

And then on the back of the closet I have my reference books, hanging bags of ribbon scraps, fibers, feathers, etc. Below that is my metalsmithing tool box, some project supplies, and then my 'gift cupboard'.

And after that you're back at the door - which I am not going to show because you've all seen a door before and this one is nothing special!

SO! Now you've had a look around to orient yourself and you'll be able to 'picture it' when I refer to bits and pieces in the future.

More later...

Ddd


Posted by studio3d@ccgmail.net at 8:04 PM PDT
Friday, 1 June 2007
Look who's talking!
Now Playing: A view of the author
Topic: Photo
Today I thought I'd give you a view of who owns the blog. This was shot by my DH at one of the local parks.

My Studio 3D name came about when I was in a jewelery design class at the community college and needed a moniker to sign my work. 3D represents my three initials. I decided as soon as I was married that there was no sense to having all those D's if I didn't make use of them! (Hard to find a monogram kit with enough to go around, though!)

I had, long before, been playing in the field of paper crafts without anything more than Ddd to identify finished products. So I began applying the Studio 3D label to everything I was working on: Paper crafts, Fiber art, Metalsmithing, Fine arts and painting, and Writing. When I took a class on HTML and web design I brought the name with me and designed the first logo. Two iterations later I have settled on this design with the block of 3 D's embedded.


So, there you have it. The story of Studio 3D...

More to come...

Ddd


Posted by studio3d@ccgmail.net at 8:25 AM PDT
Updated: Friday, 1 June 2007 8:41 AM PDT
Thursday, 31 May 2007
The opening salvo
Now Playing: On the first day of blogging...
Topic: Welcome to my Blog

Well I've jumped into the fray, thrown my hat in the ring, got my toes wet, and started a blog. What a lot of ways to get in trouble!

 The intention of this bit of cyberspace is to keep a diary of what's happening in Studio 3D - the part of my basement and the portion of my brain dedicated to creating art, crafts and writing.

 Watch this space for activities, scans of new creations and announcements of updates on my website.

 ...And welcome!

Ddd


Posted by studio3d@ccgmail.net at 9:30 AM PDT

Newer | Latest | Older