« October 2011 »
S M T W T F S
1
2 3 4 5 6 7 8
9 10 11 12 13 14 15
16 17 18 19 20 21 22
23 24 25 26 27 28 29
30 31
You are not logged in. Log in
Entries by Topic
All topics
3D paperwork
A - Z challenge 5
A - Z challenge 7
A - Z challenge round 4
A to Z challenge round 3
A to Z round 2
A to Z round 6
A-Z round 1
Around the House
Art Challenges
Artist Trading Cards
Backgrounds
Beads
Bible Journaling
Books
Boxes
Collage
Color Challenge
Coloring
cookbook
Die Cuts
Digital Projects
Digital Stamps
Drawing
Dry Embossing  «
Fabric Stuff
Fantastic Folds
Field Trip
Home Decor
How Does Your Garden Grow?
Hymnal Art
In The Kitchen
In the studio
Jewelry
Lettering
Links
Multi-Technique
Music to Work By
Musings
Nail Art
New Work
Online Class
Other Hobbies
Other Projects
Painting
Paper Embroidery
Paper Piecing
Photo
Pretty Paper
Quilting
Random
reading
Scrap Recovery
scrapbooking
Sewing
Sketch Challenge
Some Backlog
Stamping
Stencils
Stickers
Supplies
Teabag Folding
Techniques
Testing
tips and tricks
Tutorial
Web resources
Welcome to my Blog
Work By My Friends
workflow
Writing
Blog Tools
Edit your Blog
Build a Blog
RSS Feed
View Profile
Group One
In & Out of Studio 3D
Tuesday, 25 October 2011
Trim the Tree
Topic: Dry Embossing

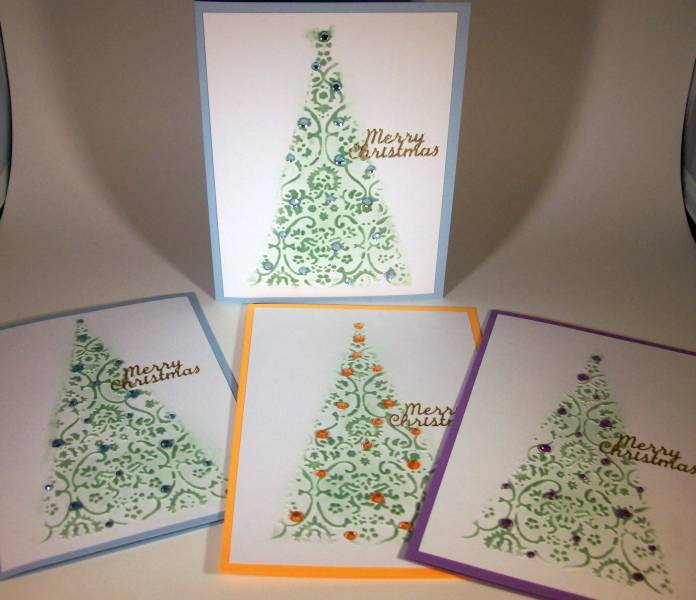
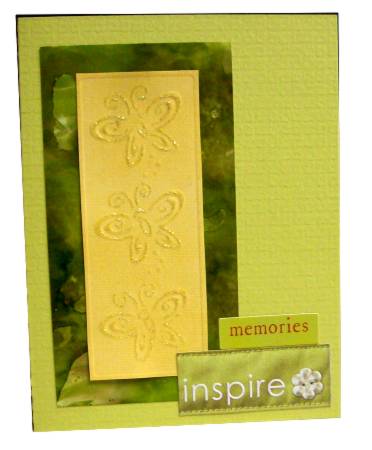
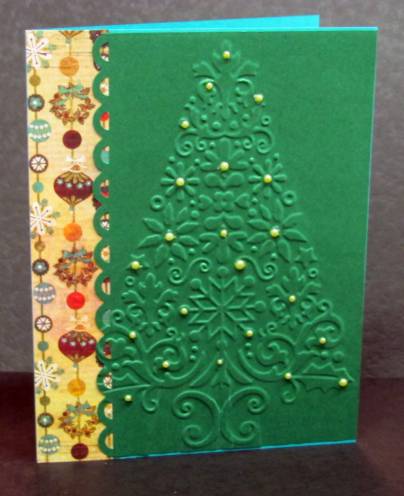
In a swap of dry embossed papers I was sent 4 lovely Christmas trees. I decided it was time to use them and liked the first layout so much that I copied it for all the rest. I pulled out printed paper scraps from last year's 6 x 6 pads and used them to create a border on the left. Then I used the open scallop border punch doen the left edge of the tree, glued it on and trimmed the tree.

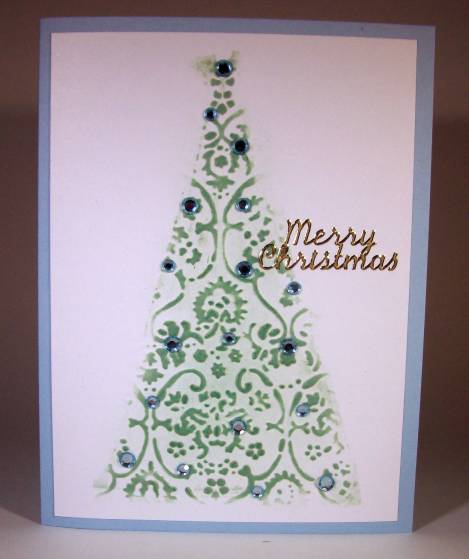
For this first one I used sticky-back clear rhinestones in a symetrical layout.

Theother green tree was decorated with sticky-back green pearls in various sized in an informal arrangement.

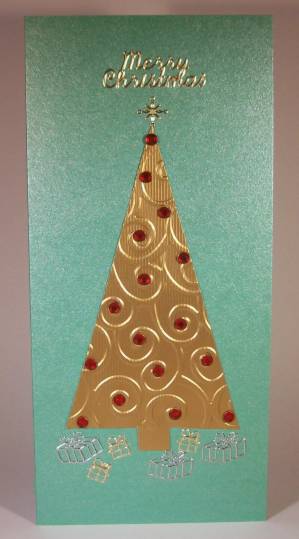
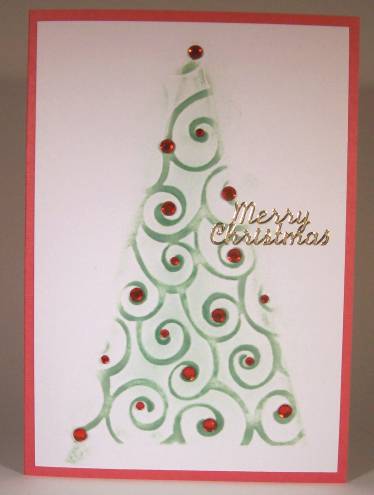
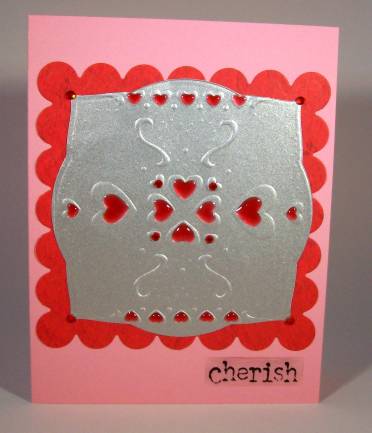
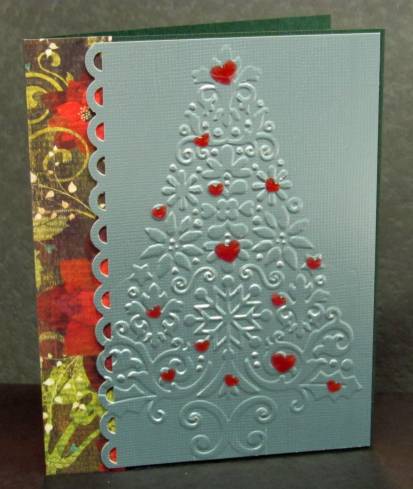
Two of the trees were on a bluish metallic finished cardstock with a linen texture. Very elegant. For the first, I trimmed the tree with red acrylic heart stickers.

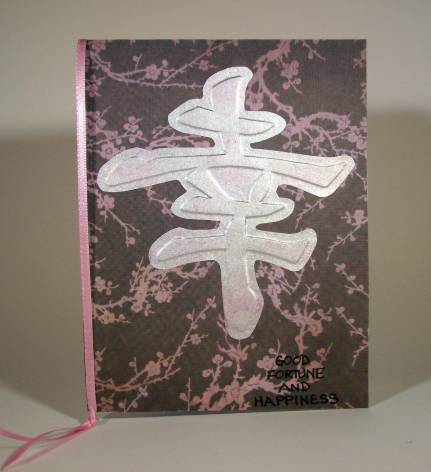
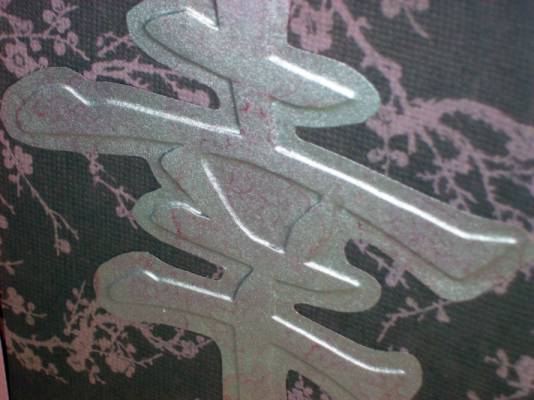
Finally, I trimmed up the fourth tree with borders and sticker waste from gold peel-offs.

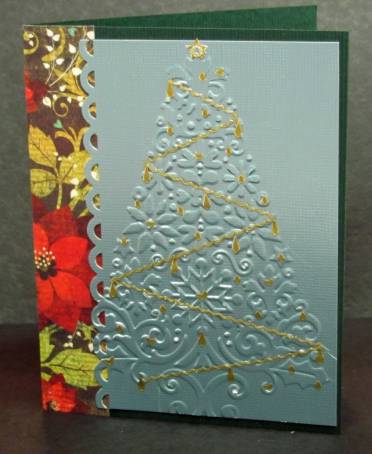
This is one of those embossing folders that I would like to have for myself. I've been relying on the generosity of others since it first came out!

Ddd


Posted by studio3d@ccgmail.net at 6:00 AM PDT
Friday, 11 March 2011
Dandelion Script
Topic: Dry Embossing

I made this card to try out a technique demonstrated by Tim Holtz in his "12 Tags of Christmas" series. He stamped on the inside of an embossing folder and then impressed it onto cardstock. It makes the result look like it is stamped behind the embossing. Way Cool!

The problem is that I do not havebackground stamps and really wanted to use a script. These will come out with the writing in reverse. Fortunately, this 'script' stamp is illegible anyway, so I forged on ahead.

The script is stamped in 'Old Paper' distess ink on the 'Forever Friends' Cuttlebug folder. Then I impressed it on light yellow cardstock. I used a blender tool and 'Tea Dye' distress ink to color the edges and the raised parts of the impression. The greeting is stamped with 'Old Paper' ink and I mounted the card on dark brown folded cardstock for a base.

Tim Holtz has a new stamp set coming out that has text in reverse specifically to use with this technique so the text will be readable in the resulting card. I think they are being released at CHA (February) so I will have to watch for them. I like this technique and it would be good to have his stamps to use for it. I might have to pick up some background stamps as well.

Ddd


Posted by studio3d@ccgmail.net at 6:00 AM PST
Sunday, 31 October 2010
Cops & Robbers
Topic: Dry Embossing

Ooooh, Lookie! A BONUS POSTING!

I wanted to share our Halloween 'costumes' for a party. We went as 'cops and robbers' and the scary thing is that we dressed 90% from things around the house and our own wardrobe! I did buy my shirt from Goodwill, bought hubby's ski mask for 40% off, I made his swag-bag and my badge:

I just noticed he forgot to put on his black gloves for the picture: 

For his bag, I used an old T-shirt turned upside down, stitched and cut off the collar and sleeves. It is stuffed with poly-fill and I hung jewelery coming out of the center.

For my badge I used gold foil cardstock, cut with a nestability die, placed another nestability die and re-cut the top, ran it through a Tim Holtz Texture Fades embossing folder, cut a ring of more gold cardstock. placed a silver Dazzles sticker in the center, creased on the embossed lines, attached 'stacked' craft foam to the back to hold the shape, and attached a pin back.

Here is the front:

the stacked foam support shown from the top end

and the back

We both had little squirt guns in holsters but never had occasion to use them!

HAPPY HALLOWEEN!

Ddd


Posted by studio3d@ccgmail.net at 11:13 PM PDT
Saturday, 16 October 2010
Thin Ice
Topic: Dry Embossing

Since I didn't stamp the image (sent to me in an image swap) I decided to code this one regarding the background. I ran the blue through the Cuttlebug snowflake folder, pressed all over it with clear Versamark and heat embossed with 'icy sparkle' powder.

I used the image to practice my Copic coloring techniques - made harder since it is a rough paper. I added texture to their outfits with the Copics as well and Stickles to the skates. (As always, I finished the faces of these poor children)

Dots and dashes around the die-cut image simulate stitching. The ribbon is tied around the front panels and a clear thick acrylic sticker was backed with matching cardstock.

Ddd


Posted by studio3d@ccgmail.net at 6:00 AM PDT
Sunday, 26 September 2010
Winter Blues
Topic: Dry Embossing

Can you find FOUR embossing plates used on this card?

1) Obviously, the background. This is a large-sized folder which was impressed onto white cardstock and colored using a 'denim' distress ink pad and a brayer to color the raised portions.

2) Little house and trees are a winter border.

3) Dotted swiss folder was impressed in the left upper portion.

4) Distressed stripes folder was used in a very small portion to carry the 'ground' area across from the house scene.

Folders 2-4 are used on a white-core blue cardstock and then the surface was sanded to expose the white. This panel was bordered with white cardstock and then mounted with foam dots for lift. 

I added a blue text sticker at the top and then places 5 clear snowflake stickers across the text and scene.

Ddd


Posted by studio3d@ccgmail.net at 6:00 AM PDT
Monday, 2 August 2010
Oh My Stars
Topic: Dry Embossing

I hope you are patient with me while I try to figure out the color balance on my new camera. Outdoors it is fantastic but, with the indoor photo booth, not so much. I always end up doing a lot of 'tweaking' in the photo editor program on the computer and it is never 'exact'.

With that said...

I had two scraps laying around that just sort of fell together for this card. I had made the Cuttlebug star background a while back and then set it aside as I wanted to try an inking technique for a the project I was working on. So this one was in my 'pile' and I also ran across the gold bordered star that I had cut off of a Christmas card front a couple of years ago. The star fit perfectly on the background so I glued it right on there.

After I had assembled the card, including a vellum sticker that matched to colors and images to perfection, I though it needed a little 'punch' so I applied Stickles in 'ice' and 'diamond' to the two parts of the star. Perfect!

Ddd


Posted by studio3d@ccgmail.net at 6:00 AM PDT
Saturday, 19 June 2010
This Is My Country
Topic: Dry Embossing

Assignment: Create a card for swap that tells about your country. So I created this little history lesson!

The stars are a Cuttlebug folded on which I applied Adriondack 'denim' directly on the folder before impressing. The same is true of the stripes using Adriondack 'cranberry' ink. I tore both and glued together.

I used a Marvy marker to hand write in the patriotic phrases and used the denim ink to stamp the image at the lower right.

After mounting on white then cranberry cardstock I added a gold star to the stamped image and a border of gold stars to represent the flagpole.

Ddd


Posted by studio3d@ccgmail.net at 6:00 AM PDT
Thursday, 13 May 2010
Purple and White
Topic: Dry Embossing

OK, I signed up to do a Purple and White swap on one of my lists and then sat down and created this card. I used purple printed cardstock for the background and ran it through the Cuttlebug folder to add the script. Then I sanded it to expose the white core. Next are two torn pieces of white mulberry paper with white paper behind to intensify the contrast.

The flower was cut off of a commercial card and mounted with 3D glue dots. Then I made the text block with torn purple card, white rub-ons, and a Cuttlebugged green paper, sanded. This is mounted 3D also.

I looked up who I was supposed to send it to for the swap and discovered my BIG mistake - it was for the wrong group! The Purple and White swap was for a Paper Embroidery group and my card has no embroidery on it. RATS!

Oh well, it works for another groups' swap that was due - one that requires some kind of embossing. Since I used dry embossing for the background I'm all set.

Ddd


Posted by studio3d@ccgmail.net at 6:00 AM PDT
Monday, 26 April 2010
What Happiness Means
Topic: Dry Embossing

Used a Nestabilities Label 4 die to cut the illustration off a card in my salvage pile. The flowers are slightly raised so I embossed the border of the panel and then made two textured panels to bring out the colors in the illustration. Ribbons that go all the way through the card, using slits at the fold, hide the seams.

I used a cardstock sticker with yellow print showing the definition of 'happy'.

This is a complete reversal for this illustration as it originally came from a sympathy card.

Ddd


Posted by studio3d@ccgmail.net at 6:00 AM PDT
Monday, 12 April 2010
Bright Spirits Gift Card
Topic: Dry Embossing

This gift card started as the embossed insert from a Christmas card. I cut it out and used a distressing pad with 'cranberry' ink to make the raised impression stand out.

After mounting on teal cardstock, I added a gold sticker medallion to cranberry cardstock and cut it out.

Glued to the card, added a light blue rhinestone... done!

Ddd


Posted by studio3d@ccgmail.net at 6:00 AM PDT
Tuesday, 30 March 2010
White Out
Topic: Dry Embossing

"Make a card using nothing but white." What a challenge!I decided that texture was going to be the key to making something that looked good so I brought out the Cutlebug.

I used a Spellbinders Edgeabilities die to cut and emboss the daisy border and two sets of individual blossoms. Another Spellbinders die was used for the two butterflies which I then ran through a Cuttlebug  folder for texture. A background piece was run through with a Cuttlebug folder of leaves and vines. Then I used a Cuttlebug die to cut the text.

Everything was mounted to a matching folded cardstock of shimmery white using either mini glue dots or 3d glue dots. I cut a slit at the fold to tie a white satin ribbon through.

White on white is NOT as hard to photograph as the silver shown the other day - but it does tend to skew to either the yellow or the blue side of the color spectrum.

Ddd


Posted by studio3d@ccgmail.net at 6:00 AM PDT
Saturday, 2 January 2010
Ten Wreaths
Topic: Dry Embossing

For these ten wreath cards I used the shaped embossing technique, the brocade folder and a donut shaped chipboard. I also did not do any direct-to-paper coloring but only used the shaving brush and applied Whispers ink in a circular motion. 

Each has five red rhinestones, a red bow and a clear acrylic sticker. Here's a close-up of one of them.

Aren't these elegant?

Ddd


Posted by studio3d@ccgmail.net at 6:00 AM PST
Friday, 1 January 2010
Golden Tree
Topic: Dry Embossing

Before I figured out the shaped embossing I did a standard one onto this ridged gold cardstock and cut out the tree. The rhinestones in a single size makes this a little more formal than the others, too. 

This is mounted on a irridescent green cardstock and I added gold and silver peel-off packages, topper, and greeting.

Ddd

Yes, yes I know it's the new year - but I'm NOT done showing Christmas cards yet. Think of them as imspiration for NEXT year!


Posted by studio3d@ccgmail.net at 6:00 AM PST
Thursday, 31 December 2009
Brocade Trees
Topic: Dry Embossing

Oooooh! I LOVE this technique! For these four I switched to the brocade folder but kept the same triangle cutout. The coloring is done exactly the same way and I switched out the colors of the rhinestones and backing cardstocks. 

Here's a closeup of the one I like best.


Ddd


Posted by studio3d@ccgmail.net at 6:00 AM PST
Wednesday, 30 December 2009
Rhinestone Tree
Topic: Dry Embossing

OK, moving along... Oh, we're still on Christmas cards - just moving on to different techniques!

I saw on a cuople of blogs that I could change the shape of the impression of a plate in the Cuttlebug by cutting that shape from thisk chipboard and using it on top of the folder instead of the B plate. SO COOL!

I cut a tall triangle and made the 'sandwich' of (bottom up) A plate, folder with cardstock inside, cut chipboard, C plate. This is run through the Cuttlebug and this is the result! 

I used a Whispers ink pad direct-to-paper to color the raised portions. Then I used a 'shaving brush' style tool to apply a shading of a slightly different green.

The last step was to adhere red rhinestones to the swirls in two different sizes.

Ddd


Posted by studio3d@ccgmail.net at 6:00 AM PST
Thursday, 12 November 2009
The Inspiration of Memories
Topic: Dry Embossing

After this was embossed with a brass stencil in the Cuttlebug I trimmed it down and used a straw colored distress ink pad to tine the raised portions. These same lines were traced out with a gold-toned Stickles.

The green piece is an alcohol ink test piece from another project. These are layered onto a green textured folded card base. 

I used cardstock text stickers from two different sets to finish it off. The 'button' in the lower corner is a part of the sticker.

Ddd


Posted by studio3d@ccgmail.net at 6:00 AM PST
Friday, 23 October 2009
How to Stay Alive
Topic: Dry Embossing

Another brass stencil impression in the Cuttlebug results in this panel, kept square this time. I did use a corner punch for a bit of interest and then used purple heart brads to hold it to scrapbook paper.

I distressed the edges with purple and then with a rough edge. 

The text is a clear sticker and all is placed on a white folded card base.

Ddd


Posted by studio3d@ccgmail.net at 6:00 AM PDT
Wednesday, 21 October 2009
Soft Flight
Topic: Dry Embossing

I used a brass stencil in the Cuttlebug to emboss the butterfly panel. I used Fiskars border punch on more of the same material. These were placed over and under the striped scrapbook paper.

Some of those new Fiskars zings were placed along the side and two sizes of stickon rhinestones added.

Ribbon with tripple knots is tied at the spine of the folded card base.

Ddd


Posted by studio3d@ccgmail.net at 6:00 AM PDT
Monday, 19 October 2009
Cherishing Hearts
Topic: Dry Embossing

Silver metallic paper was dry embossed with a brass stencil in the Cuttlebug. Then I used a Spellbinders label die to cut it out and mounted it on a red scrapbook paper cut with another die. I got some new Fiskars stickons called zings and used three sizes of red hearts on the embossed hearts. Then I added some red stickon rhinestones.

After attaching to a pink folded card base I added a thick clear sticker with text.

Ddd


Posted by studio3d@ccgmail.net at 6:00 AM PDT
Sunday, 18 October 2009
Silver Fortune
Topic: Dry Embossing

I used my hand cut brass stencil in the Cuttlebug to emboss on this metallic silver paper. After cutting around it I used two tones of pink alcohol ink on a felt pad to add interest. The background is a printed cardstock from a small pad of them and I liked the asian feel that it added to the Kanji. 

I tied a thin ribbon at the spine of the folded card base and hand lettered the text. "Good Fortune and Happiness" are the two meanings for the character.

Here you can see the effect of the alcohol inks.


Ddd


Posted by studio3d@ccgmail.net at 6:00 AM PDT

Newer | Latest | Older