« December 2015 »
S M T W T F S
1 2 3 4 5
6 7 8 9 10 11 12
13 14 15 16 17 18 19
20 21 22 23 24 25 26
27 28 29 30 31
You are not logged in. Log in
Entries by Topic
All topics
3D paperwork
A - Z challenge 5
A - Z challenge 7
A - Z challenge round 4
A to Z challenge round 3
A to Z round 2
A to Z round 6
A-Z round 1
Around the House
Art Challenges
Artist Trading Cards
Backgrounds
Beads
Bible Journaling
Books
Boxes
Collage
Color Challenge
Coloring
cookbook
Die Cuts
Digital Projects
Digital Stamps
Drawing
Dry Embossing
Fabric Stuff
Fantastic Folds
Field Trip
Home Decor
How Does Your Garden Grow?
Hymnal Art
In The Kitchen
In the studio
Jewelry
Lettering
Links
Multi-Technique
Music to Work By
Musings
Nail Art
New Work
Online Class
Other Hobbies
Other Projects
Painting
Paper Embroidery
Paper Piecing
Photo
Pretty Paper  «
Quilting
Random
reading
Scrap Recovery
scrapbooking
Sewing
Sketch Challenge
Some Backlog
Stamping
Stencils
Stickers
Supplies
Teabag Folding
Techniques
Testing
tips and tricks
Tutorial
Web resources
Welcome to my Blog
Work By My Friends
workflow
Writing
Blog Tools
Edit your Blog
Build a Blog
RSS Feed
View Profile
Group One
In & Out of Studio 3D
Saturday, 19 December 2015
Shapely Face
Topic: Pretty Paper

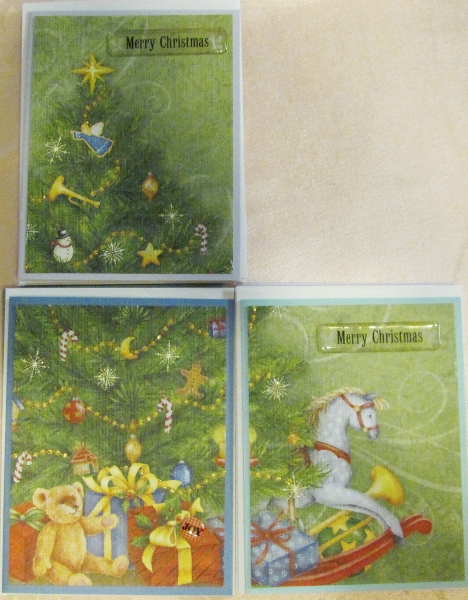
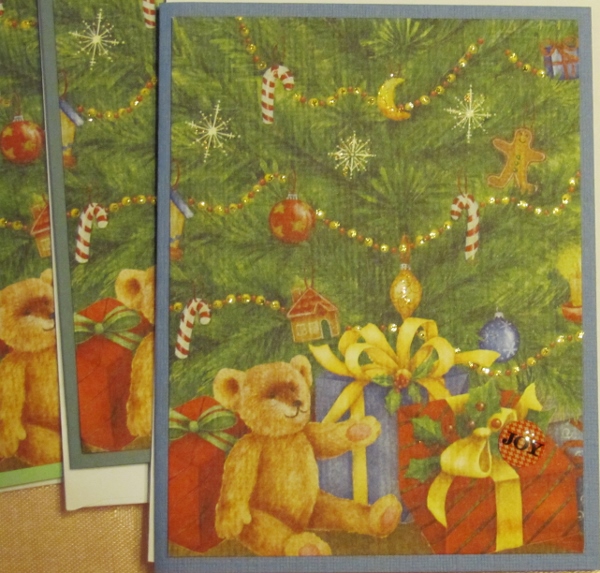
In a swap a while back I received a pad of Christmas papers with shaped edges. I pulled three of them out to make this set of cards.

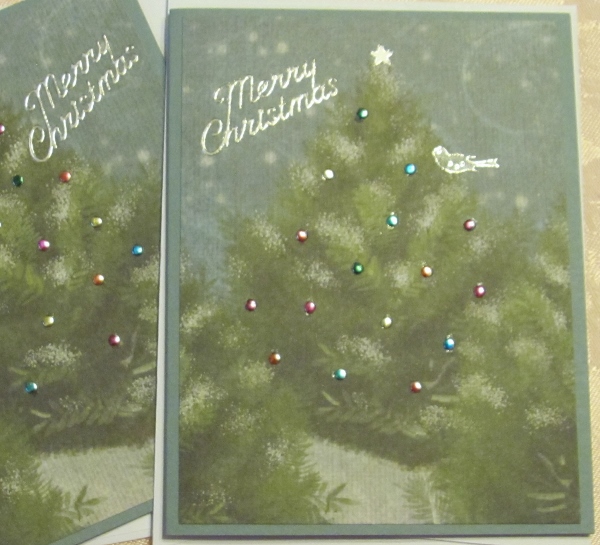
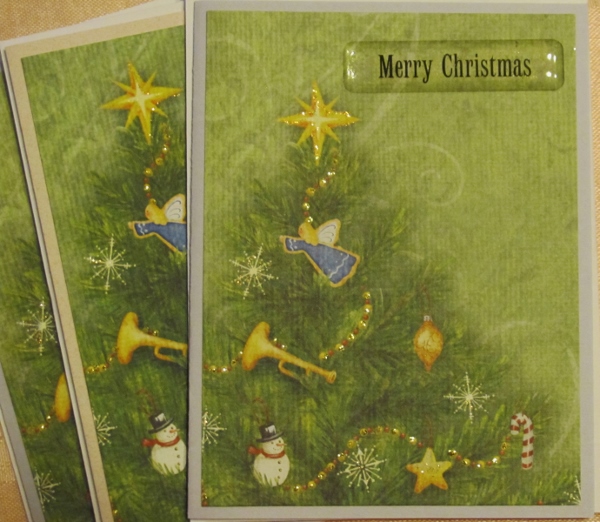
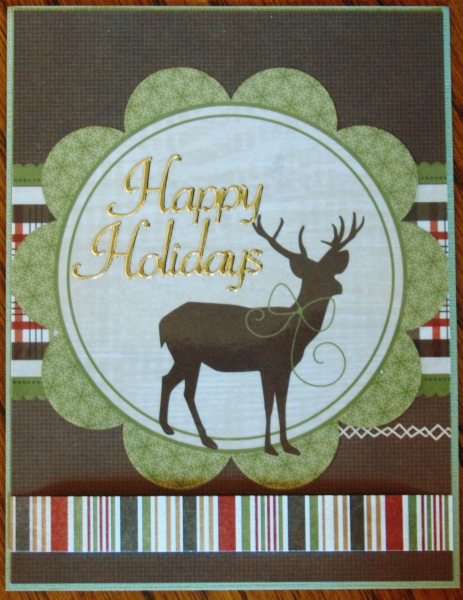
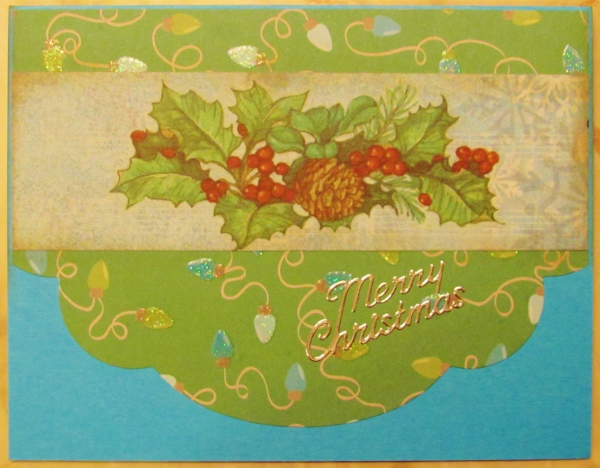
First is a green sheet with a scalloped edge and printed with a shiny string of lights.

I added a strip of music print on blue and over that a vellum foliage sticker. The greeting is a silver peel-off sticker.

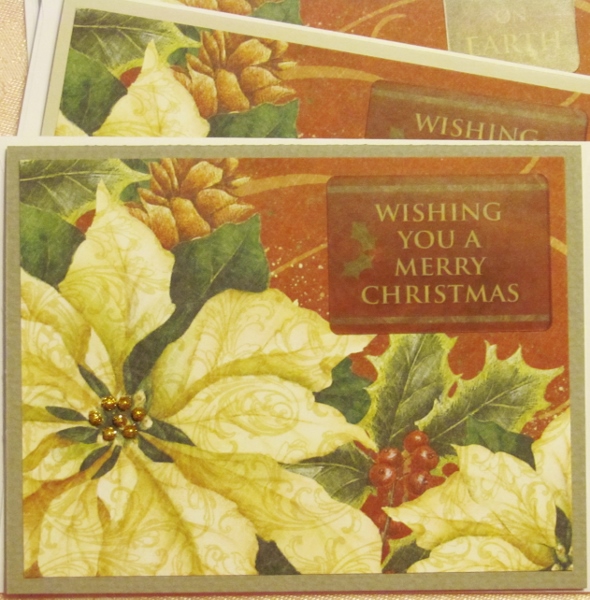
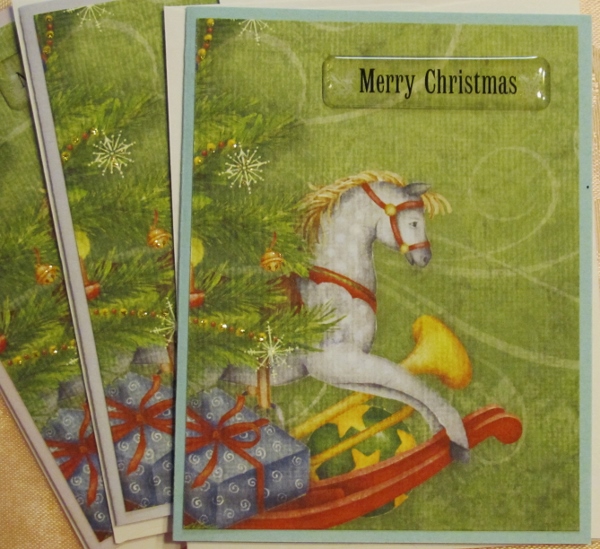
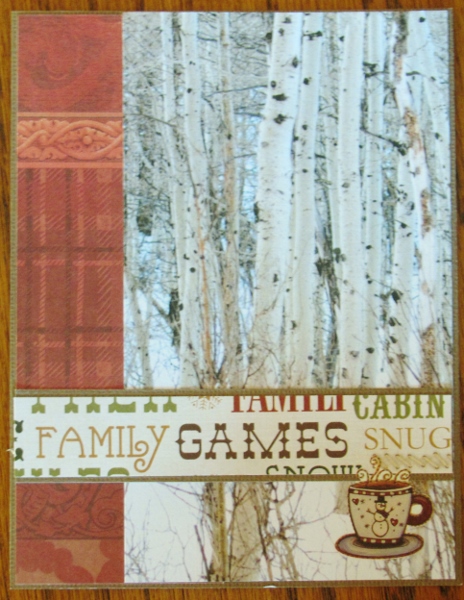
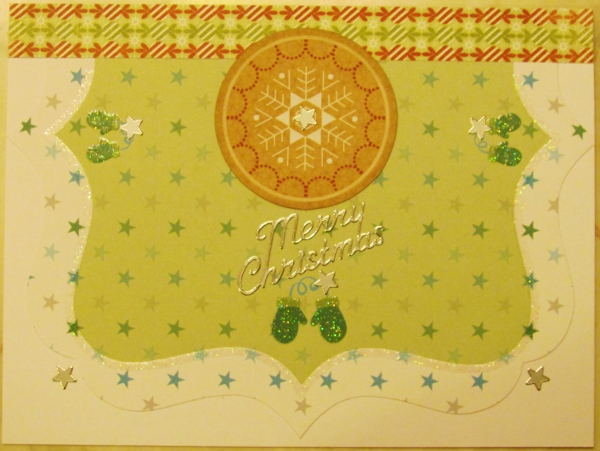
The next sheet, printed with stars and mittens, has a great shaped edge. It wasn't quite tall enough for the card front so I added another patterned strip above it.

Silver peel-off stickers provide some of the stars and the greeting. The round element is from the tags and journal blocks sheet.


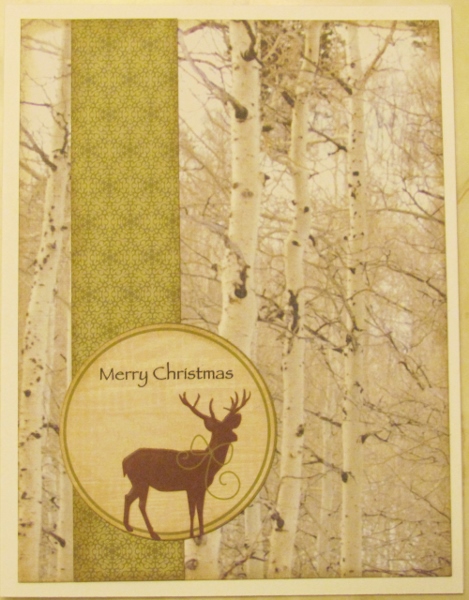
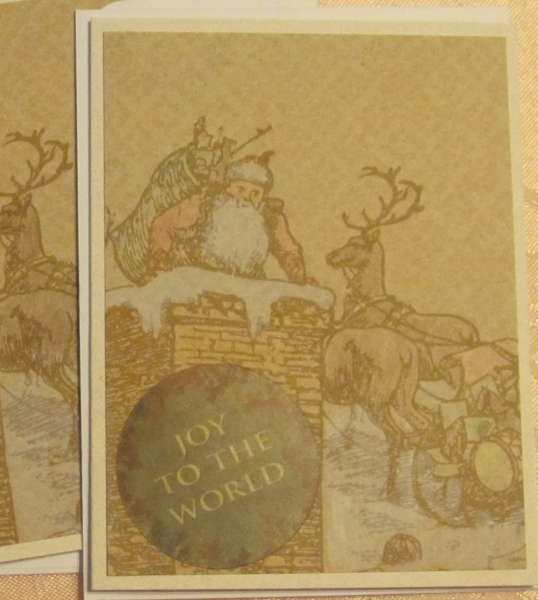
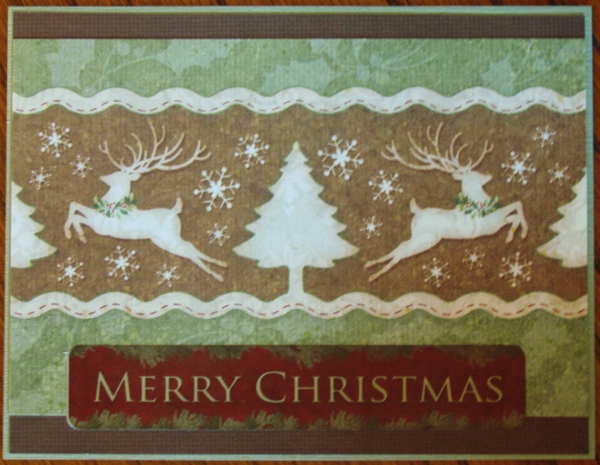
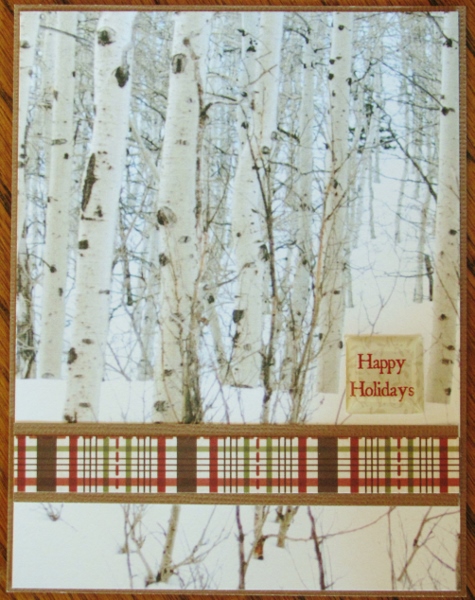
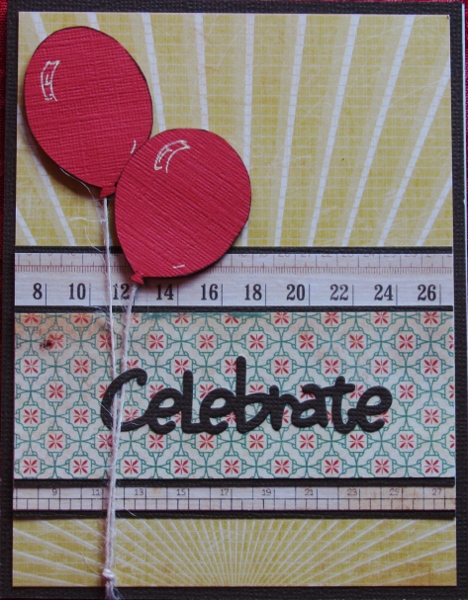
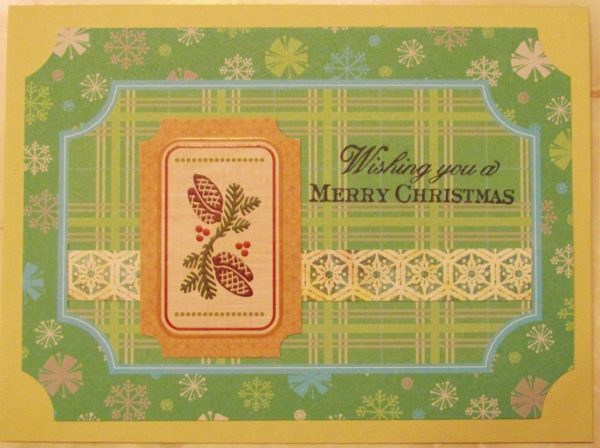
The thirdpage I used from this pad has a 'ticket' shape to it. I repeated that with the embellishment I selected. I added a patterned strip to the plaid background and stamped the greeting.


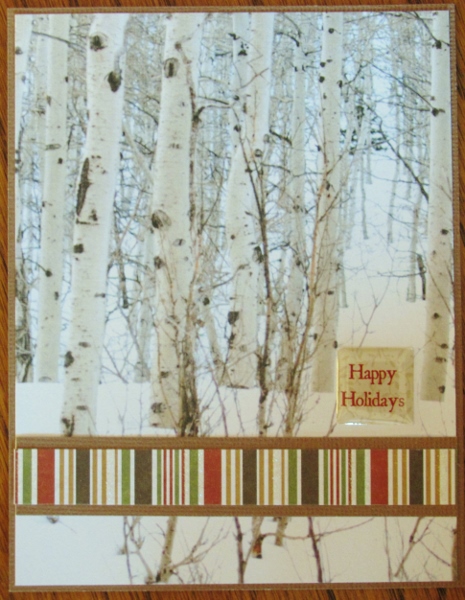
These cards are in two different sizes and each has a different color of card base.

Ddd


Posted by studio3d@ccgmail.net at 12:01 AM PST
Friday, 18 December 2015
Merry Christmas, Deer
Topic: Pretty Paper

It was time to do a massive card-making endeavor for Christmas. I have a bin that contains papers (cut into card-front sizes and strips to use for accents), embellishments (tags, stickers, placards...), and word art (including stickers and stamps). I bought some of the papers in 12x12 pads years ago and I am still working my way through them. Even after making over 25 cards in this session, there is plenty of paper and supplies to last for several more years!

I went through the precut papers and laid out one or two of each type for use. Then to each I added an accent piece (usually a strip). The last step was to put an accent with each one.

When I sat down to play, I had all these sets of supplies and I could just combine each into an attractive card.

Today I'll show you two that are very similar. I had two pieces with birch trees printed on them. They are from different parts of a 12 x 12 sheet.

To this first one, I added a strip with text and snowflakes in a light green. These and the round element were all distressed with ink for better definition. 

Then I added a clear sticker sentiment to the round tag.


The only thing different on this one is the accent strip.


Those round elements are from a cardstock sheet of tags and journaling cards.

Both of these cards are on white card bases.

Ddd


Posted by studio3d@ccgmail.net at 12:01 AM PST
Tuesday, 24 February 2015
Take Flight
Topic: Pretty Paper

While I was scouting for backing papers for the last few day's projects I ran across a piece of ColorMe paper that I had spritzed with Glimmer Mist - a couple of YEARS ago!

Time to use that!

I pulled some plaid paper with the same blue and then added purple elements to pick up on the other major tome in the plaid.

I had a sentiment already stamped on a coordinating lavender cardstock so I banded that with the blue of the other border.

The camera really did not like all the pastel so the photo did not come out well.  Here is another angle that looks a little better.

You can see that the sentiment is popped up on foam tape.

Ddd


Posted by studio3d@ccgmail.net at 12:01 AM PST
Monday, 12 January 2015
Hearts On The Side
Topic: Pretty Paper

I'd been enjoying using those 'love' papers from the 6x6 pad so I pulled out more for this card.

I love that diagonal plaid - both the colors and the design of it. I added a strip of the hearts and still had a gap, so I cut a strip of the XOXOXO paper for the side.

I tied red twine around the heart panel before sticking it down and then added a thick acrylic heart sticker.


I had some silver puffy hearts stickers so added three of them over hearts in the paper pattern.

Ddd


Posted by studio3d@ccgmail.net at 12:01 AM PST
Thursday, 25 December 2014
Outdoor Lights
Topic: Pretty Paper

I needed a couple more Christmas cards so I went looking through the trims from 12x12 papers I had already used. The leftover scrap from the Santa and Rudolph cards had a lovely stand of outdoor trees.

I trimmed these down to the required size and 'decorated' the trees with silver 'nail head' stickers. I then used alcohol markers to color these 'lights' and added a bird sticker to the tree tops.

Those silver peel-off sticker sentiments fit in perfectly.

Two papers = two cards, again.

Total made from the 12x12 card-making session 27. And it all started with 16 sheets and only 7 paper designs.

A perfect marathon session saw them all come together in just a couple of hours.

Ddd


Posted by studio3d@ccgmail.net at 12:01 AM PST
Tuesday, 23 December 2014
Snow Bird
Topic: Pretty Paper

I know - doves are not really snow birds - but these cards have birds and they have snowflakes, so there you go.

After trimming the illustration down to fit on the card front with a little border I mounted it on a blue card base.

I used the paper design as a guide to add 6 silver peel-off sticker snowflakes as well as a tiny silver eye.

I had some silver peel-off sentiments on hand which made the perfect finishing touch.

Two papers = two cards

Ddd


Posted by studio3d@ccgmail.net at 12:01 AM PST
Monday, 22 December 2014
Up On the Rooftop
Topic: Pretty Paper

The 12x12 paper I used for today's cards is a brown line-art illustration on taupe cardstock. Not a lot of interest or contrast.

This was a large corner illustration that I cropped WAY down to just the essentials for a 4 x 5.5 panel.

I used colored pencils to lightly color in the picture. the beard, fur trim and snow were colored with Picket Fence Distress Marker as a whitener.


Vinyl sentiment stickers finish these off. Two papers = two cards.

Ddd


Posted by studio3d@ccgmail.net at 12:01 AM PST
Sunday, 21 December 2014
Leaping Rudolph
Topic: Pretty Paper

Most of the 12x12 papers I've been working with were from a pad that all had a vintage feel to them. This is the case with the paper used for today's cards.

The leaping deer is a very subtle tone-on-tone silhouette on a swirl background. Not much was needed to elevate this to an attractive card front.

I simply added a red rhinestone nose - because that's what I do - and used a vinyl sentiment sticker.


Three papers, three cards.

Ddd


Posted by studio3d@ccgmail.net at 12:01 AM PST
Saturday, 20 December 2014
The Christmas Flower
Topic: Pretty Paper

Well, this was even more simple than the last few examples.

1) crop corner illustration

2) glue to card base

3) add glitter dots to the flower center

4) put on a vinyl sticker


And, just like that, I have three more Christmas cards done.

Ddd


Posted by studio3d@ccgmail.net at 12:01 AM PST
Friday, 19 December 2014
The Big Guy
Topic: Pretty Paper

The next 12x12 paper I selected had one large corner illustration. I actually had to crop down to the bare essentials to fit it on a card front but I think it looks good this way.

The illustration started out as a generic reindeer but I turned it into Rudolph with the addition of a red rhinestone on his nose.

The colors were very muted in this and the snow and fur areas looked awfully yellow to me. So I used some Picket Fence Distress Marker over top to whiten them. This marker is a lot like a whitewash effect that allows you to still see the original artwork underneath - just whiter.


A clear acrylic sticker was used on the lower right.

I had two of these papers so only two cards came from this pattern.

Ddd


Posted by studio3d@ccgmail.net at 12:01 AM PST
Thursday, 18 December 2014
A Little Bird Told Me
Topic: Pretty Paper

The next 12x12 paper I selected from my Christmas bin was a bottom border of sweet little chickadees. Here is what the border arrangement looked like.

You can see that I was able to get two card fronts from each sheet.

Both cards were decorated with red rhinestones covering berries printed on the illustration, plus I added a few in a fit of artistic license.


Sentiment stickers from the Christmas bin are varied.

I had two of these sheets so that made 4 more cards for the supply.

Ddd


Posted by studio3d@ccgmail.net at 12:01 AM PST
Wednesday, 17 December 2014
A 12 x 12 Christmas
Topic: Pretty Paper

I haven't been making Christmas cards hand over fist all year as I usually do so found myself short when it was time to mail cards to family and friends. I only had half of what I needed for the demand.

I went looking through my bin of Christmas supplies for some inspiration. This bin includes stickers, embellishments, some 3D images, 6x6 printed cardstock and 12x12 scrapbook cardstocks. 

Many of the 12x12 papers had corner or border designs that could be trimmed down to fit on a card front. Then I had only to embellish them and add a sentiment to come up with finished cards. I had 2 to 3 of each design so the stock of cards grew quickly.

I started with a 12x12 with a very large corner pattern of toys under the Christmas tree. This was big enough to trim down to three card fronts. Here is the original layout.


I started in the lower left corner. I cut the scene to 4x5.25 so I would have a 1/8 inch border of the base card showing. Aaaak! I ran out of white cardstock so I chose a variety of colored solids for my cards.

I decorated these cards with gold Stickles on the yellow parts of the garland and Diamond Stickles on the sparkly lights.


I used a variety of dimensional acrylic stickers as greetings.

With three sheets of 12x12 cardstock I have 9 cards done, just like that. BOOM!

Ddd


Posted by studio3d@ccgmail.net at 12:01 AM PST
Monday, 17 November 2014
Brights With a Band
Topic: Pretty Paper

I had lots of table scraps left and pulled three brights that looked good together. The two chevrons were just a smidge off so I pulled out the black striped strip to separate them.

Each of the colors got a medium doodle line for more definition.

All this is on a teal background with the additon of a gold sentiment and two puffy heart stickers.

Ddd

Posted by studio3d@ccgmail.net at 12:01 AM PST
Sunday, 22 December 2013
Leaping Away
Topic: Pretty Paper

This is from another 12 x 12 sheet, this one with a border print. I would have prefered the reindeer to be leaping toward the tree instead of away, this is how the layout worked out.

I only added chocolate borders to the top and bottom and a vinyl sticker greeting before bordering with sage green.


Like yesterday, my embellishing spirit wants to add ornaments to the tree with tiny rhinestones - or at least a star on top. We'll see.

Ddd 


Posted by studio3d@ccgmail.net at 12:01 AM PST
Saturday, 21 December 2013
Happy Holidays, Deer
Topic: Pretty Paper

Some of the 12 x 12 papers I bought in closeout a couple of years ago had such large elements printed on them that they weren't really suitable for cards. I though this was going to be one of those but with judicious trimming it works pretty well.

It may be difficult to tell but the only thing added is the Happy Holidays greeting and the striped paper at the base. Everything else is printed on the chocolate background with glossy ink. 


I am sorely tempted to add a red rhinestone to the end of the nose on the reindeer. What do you think?

Ddd


Posted by studio3d@ccgmail.net at 12:01 AM PST
Friday, 20 December 2013
Fields of Birches
Topic: Pretty Paper

While searching for just the right background papers for all the colored images I made lately I came across two sheets of 12 x 12 that were printed with a photo of birch trees. I cut them both down to include some of the snowy ground and the stand of trees behind.

Snippets and strips of the scraps of papers I had laying on the desktop became the simple decor and I went through stickers and stuff for small items to embellish with.

The first for a teddy bear image I had colored eons ago. After the photo I added a faux stitching line around the image, so you'll have to use your imagination on that.

With the same layout I added a simple cup of steaming coffee.


Another part of the winter scene was large enough to cover the whole card. A simple holiday greeting of thick acrylic is the only added element other than the paper strip - one plaid, one stripe.


The last set uses the same plaid and stripe trims. They each for a cardinal acrylic sticker high in the tree. Then one got a Noel sticker and one a larger cardinal above the stripe.


I used the same taupe for bordering on all of these to call attention to the coloring in the trees. After doing so many where the focus was on the stamped element it was not easy to let the background be the focus. This called for restraint in the embellishment stage.

Ddd


Posted by studio3d@ccgmail.net at 12:01 AM PST
Saturday, 7 December 2013
Poinsettia Patchwork
Topic: Pretty Paper

I always make a Christmas card for our quilting group leader that has a 'quilted' look to it.

This year I went BIG with a 6 x 6 inch card. I used scraps from some of the recent Christmas papers I had on my desktop and started cutting lots of strips from them. Then I used the plaid and cut a 1 inch square. I used the strips around the squares to create a log cabin block - 9 times. 

These were arranged in a grid with a quarter turn between each placement. The seams between the blocks were then covered with a striped band to make a faux sashing and borders.


I used some plastic stickers of poinsettias to create a little focal area and then applied a gold peel-off greeting to some of the brown and trimmed it out. The greeting is popped up on foam tape and I added a gold star to the center of each flower.

Ddd


Posted by studio3d@ccgmail.net at 12:01 AM PST
Tuesday, 15 October 2013
And Then There Were Three
Topic: Pretty Paper

I needed just three more cards to round out a box of 40 to go to Operation Write Home so I decided to break out the third of the 6x6 pad I picked up at the Tuesday Morning store.

This one is a Crate Paper set called DIY Shop. It has rulers, wood grains, typewriter, vintage florals, music, ledger and sewing patterns.


For two of the cards I started with a number background and the third uses a burst. I selected a ruler paper and a couple of small patterns to mix and match with these. All of the cards got brown bordering papers, although each is a different shade.

When I got this far I went looking for a diecut of Happy Birthday and discovered that I don't even have one! WHAT? So I went with Celebrate instead. There was going to be a lot of open space and all of the cards has a bit of muted red so I pulled some cardstock of that tone and hand cut two balloons for each card. I attached twine to the back of them and tied a knot near the bottom. the tails were then tucked and adhered on the back.


Finishing details included catching the C of the diecut word in the balloon strings before gluing it down, popping the balloons up on foam tape and adding some balloon highlights with gel pen.

With the generic text these can be used for birthday, anniversary, gradulation, or any other achievement.

Ddd 


Posted by studio3d@ccgmail.net at 12:01 AM PDT
Thursday, 3 October 2013
End Cuts
Topic: Pretty Paper

FINALLY, the end of the card pieces I cut from the Paper Crate 'Random' 6x6 pad. I've only used half of the pad, too (minus the whole 4 sheets of plain paper with only a black border around the edge). I lost count of how many cards I completed from these cuts, though.

For the card today the result looks feminine and sweet. I used a plum color to pull it all together.


The scripture sentiment uses a bordering treatment with offset corners to add more interest.

Ddd


Posted by studio3d@ccgmail.net at 12:01 AM PDT
Wednesday, 2 October 2013
Thinking On The Diagonal
Topic: Pretty Paper

After all the busy cards I've been creating out of the 'random' paper pack today's entry seems to fall pretty flat. I guess if it is viewed on its own it is 'okay' but certainly not up to my usual standards.


The red bordering color saves the piece but I may have to go back and add more elements to dress this up.

Ddd


Posted by studio3d@ccgmail.net at 12:01 AM PDT

Newer | Latest | Older