« July 2009 »
S M T W T F S
1 2 3 4
5 6 7 8 9 10 11
12 13 14 15 16 17 18
19 20 21 22 23 24 25
26 27 28 29 30 31
You are not logged in. Log in
Entries by Topic
All topics  «
3D paperwork
A - Z challenge 5
A - Z challenge 7
A - Z challenge round 4
A to Z challenge round 3
A to Z round 2
A to Z round 6
A-Z round 1
Around the House
Art Challenges
Artist Trading Cards
Backgrounds
Beads
Bible Journaling
Books
Boxes
Collage
Color Challenge
Coloring
cookbook
Die Cuts
Digital Projects
Digital Stamps
Drawing
Dry Embossing
Fabric Stuff
Fantastic Folds
Field Trip
Home Decor
How Does Your Garden Grow?
Hymnal Art
In The Kitchen
In the studio
Jewelry
Lettering
Links
Multi-Technique
Music to Work By
Musings
Nail Art
New Work
Online Class
Other Hobbies
Other Projects
Painting
Paper Embroidery
Paper Piecing
Photo
Pretty Paper
Quilting
Random
reading
Scrap Recovery
scrapbooking
Sewing
Sketch Challenge
Some Backlog
Stamping
Stencils
Stickers
Supplies
Teabag Folding
Techniques
Testing
tips and tricks
Tutorial
Web resources
Welcome to my Blog
Work By My Friends
workflow
Writing
Blog Tools
Edit your Blog
Build a Blog
RSS Feed
View Profile
Group One
In & Out of Studio 3D
Wednesday, 29 July 2009
Row Upon Row Border Punch
Topic: New Work

Well, I really 'went to town' with the frills for this card. The back layer was border punched, then a liner which was inset from the back, then the front which was inset from that. When it is closed it forms three layers of border in contrastinc colors.

Then I layered the focal piece on the same paper as the card liner and rounded the corners. 

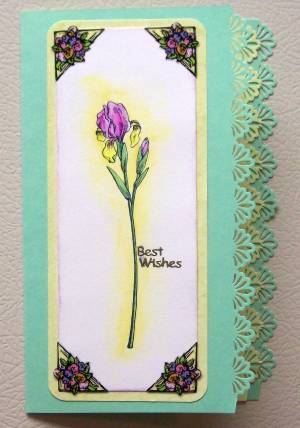
I added clear floral corner stickers to frame up the image. There was not enough contrast between the image and its backing paper so I ran a line of colored pencil around it and then wet it to blend.

Here in the closeup you can see that border better as well as how the punched edges line up when the card is closed.

I added the greeting with small gold peel-off stickers.

Ddd


Posted by studio3d@ccgmail.net at 6:00 AM PDT

View Latest Entries