Topic: Pretty Paper
Four pieces of patterned paper with polka-dots and a trio of tiny roses were the jumping off point for the cards today. I pulled some papers to support them along with some embellishments and made four very different finished projects.
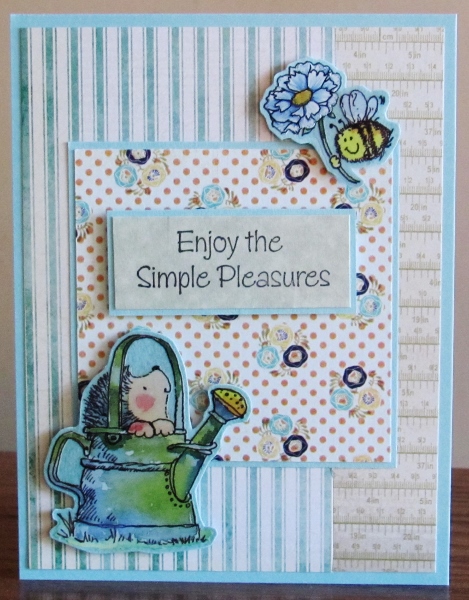
For the first one the support papers are a teal stripe and a beige number strip that support the colors of two of the tiny roses. I chose a light teal card base and bordering paper. From a sheet of clear stickers I chose a little hedgehog in a watering can and a bumblebee. These were placed on the bordering paper and trimmed out with a thin border. A stamped sentiment was bordered, too, and it as well as the stickers were popped up on foam tape.
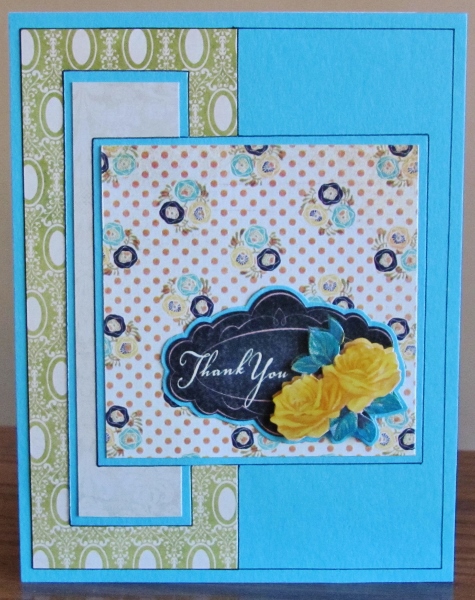
For the next one I went with a much brighter base card and bordering color. The patterned papers I used in the background were smaller pieces so I added black line borders to help everything pop out more. I had the sticker with the sentiment and popped up roses on it but the roses were cream colored. I used an alcohol marker to change them to yellow to match the roses in the feature paper.
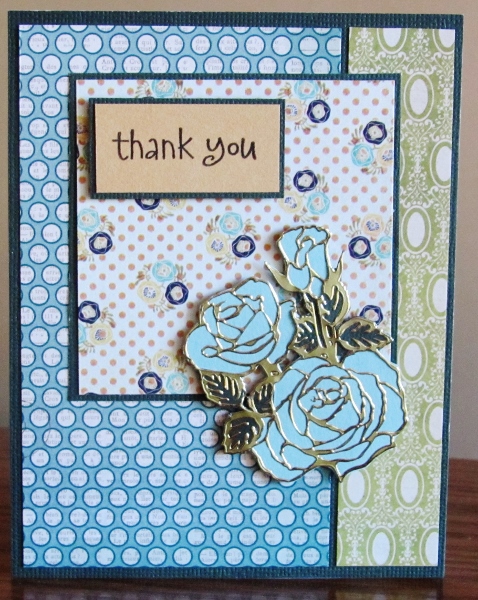
For the third card I pulled out a gold peel-off sticker of a grouping of roses. I placed them on blue cardstock with green under the leaves and trimmed along the outside. This maked a feature of roses that match the tiny ones in the designer paper. The color theme is continued with the teal patterned paper (with dots) and bordering color of dark green which is the same paper used behind the leaves. The sentiment is stamped on a coordinating kraft paper and it as well as the feature roses are popped up on foam tape.
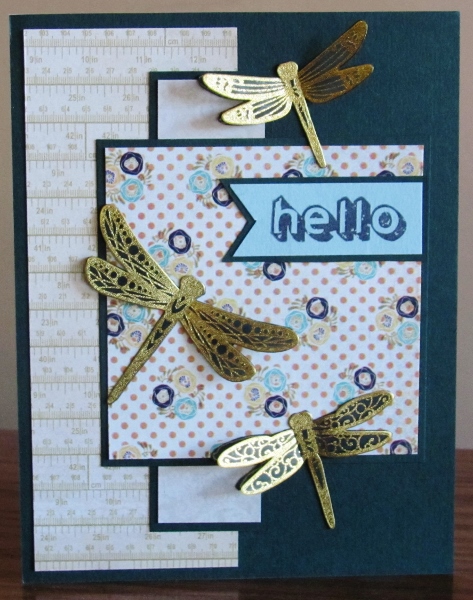
The final card keeps the dark green base card and bordering but the background papers are too small to cover the entire surface. This leaves some nice blocks of solid color to work with. I had these dragonfly stickers where only the bodies stick down. They are gold but the wings are transparent. I stuck them to some of the dark green and trimmed them out along the wings. On the green I used a gold gel pen to trace the wings and then stuck them down to the card front. The gold wings are then folded up to float over the surface.
I sat around one day and got out bunches of my sentiment stamps and stacks of small scraps in all colors. A marathon stamping session ensued after which I filed them with dividers for easy access.
One of these stamped sentiments was trimmed out for this card, getting a banner end and a thin green border.
Ddd
