« January 2014 »
S M T W T F S
1 2 3 4
5 6 7 8 9 10 11
12 13 14 15 16 17 18
19 20 21 22 23 24 25
26 27 28 29 30 31
You are not logged in. Log in
Entries by Topic
All topics  «
3D paperwork
A - Z challenge 5
A - Z challenge 7
A - Z challenge round 4
A to Z challenge round 3
A to Z round 2
A to Z round 6
A-Z round 1
Around the House
Art Challenges
Artist Trading Cards
Backgrounds
Beads
Bible Journaling
Books
Boxes
Collage
Color Challenge
Coloring
cookbook
Die Cuts
Digital Projects
Digital Stamps
Drawing
Dry Embossing
Fabric Stuff
Fantastic Folds
Field Trip
Home Decor
How Does Your Garden Grow?
Hymnal Art
In The Kitchen
In the studio
Jewelry
Lettering
Links
Multi-Technique
Music to Work By
Musings
Nail Art
New Work
Online Class
Other Hobbies
Other Projects
Painting
Paper Embroidery
Paper Piecing
Photo
Pretty Paper
Quilting
Random
reading
Scrap Recovery
scrapbooking
Sewing
Sketch Challenge
Some Backlog
Stamping
Stencils
Stickers
Supplies
Teabag Folding
Techniques
Testing
tips and tricks
Tutorial
Web resources
Welcome to my Blog
Work By My Friends
workflow
Writing
Blog Tools
Edit your Blog
Build a Blog
RSS Feed
View Profile
Group One
In & Out of Studio 3D
Monday, 13 January 2014
Operation Write Home sketch 06
Topic: Sketch Challenge

Sometimes a sketch just hollers out what it wants to be! Such was the case with OWH sketch 96:

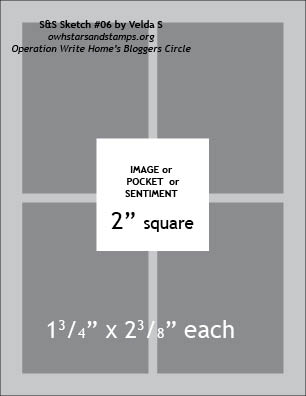
When I saw this I immediately thought of a paneled door with a wreath on it. The effort was all in execution.

I had an awesome woodgrain scrap and cut that up into the 4 panels. Since I did not have any more for the door base I created some on glossy paper with ink pads and markers. It did not have to be precise because so little of it shows in the end.

I used a scoring board to score 1/8" from all the edges of the panels and turned them back to crease. I had to clip the corners so they would not wrinkle or bunch up.  Each panel got a full coverage of foam tape on the back and was adhered to the door base. I then used alcohol markers in warm greys to shadow the sides of the panels (Copic W7 for right and bottom, Copic W5 for left and top).

The wreath is a clear sticker adhered to a green printed background and trimmed out. The same green was used to back the clear text sticker.


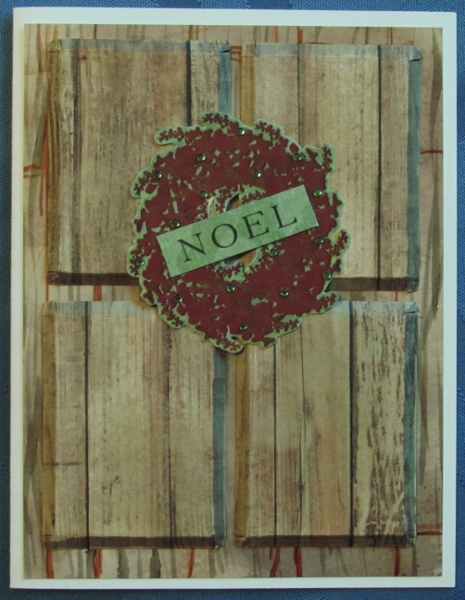
I added tiny green rhinestones to the wreat as a finishing touch.

Ddd


Posted by studio3d@ccgmail.net at 12:01 AM PST

View Latest Entries