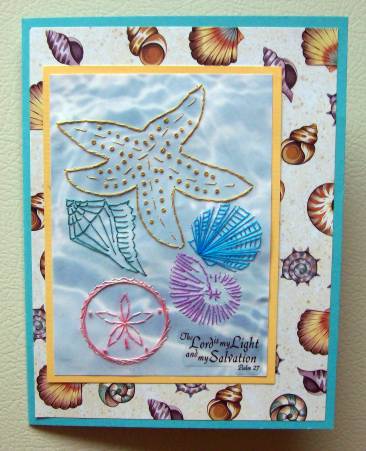
Topic: New Work
« | June 2009 | » | ||||
![]() |
||||||
S | M | T | W | T | F | S |
1 | 2 | 3 | 4 | 5 | 6 | |
7 | 8 | 9 | 10 | 11 | 12 | 13 |
14 | 15 | 16 | 17 | 18 | 19 | 20 |
21 | 22 | 23 | 24 | 25 | 26 | 27 |
28 | 29 | 30 |
It is rare we can catch a glimpse of these little birds at the feeder because it hangs right in front of the garden window in the kitchen. As soon as they see our movement, away they fly.
I've been told many times what kind of bird they are, but can never remember for sure. I'm thinking it might be a goldfinch, but don't quote me on that.
This one stayed around while I went and got the camera, came back, ant took shots from several angles. Only two came out since I was shooting through the window and my camera is auto-(un)focus.
She took off when the brighter male flew in briefly. He wasn't there long enough to get even a blurry picture.
Ddd
I made up this floral wreath and it was my hubby who pointed out that the center formed a heart. So I took advantage of that and centered a gold peel-off heart inside. A few gold swirls and hearts at the corners add a little panache.
I cut slits to thread the ribbon through before tying in a bow. The backing cardstocks (red and purple) and scrapbook paper (yellow check) are colors pulled from the wreath.
Ddd
I put together this 3D watering can image and backed it with a little 'grassy' area of scrapbook paper and a piece of printed cardstock. I used a gold sticker greeting and added some rhinestones to enhance it.
I tied a bow on the handle with ribbon.
Ddd
Are you sick of these little dresses? Maybe I'll go work on something else for a while - after this one more!
The background paper on the left is one that I have been hoarding for a long time. It is SO beautiful, I just couldn't bring myself to cut into it. At last I've done it and I do like the result.
Bits and pieces pulled together to complement one another - so there you go.
Ddd
This picture was peeled off my picture-a-day calendar. I stamped up the greeting for a different card and then didn't use it. The colors worked well for this one, though.
Just a new mix of elements but this time I added rhinestone brads with little bits of ribbon tied onto them.
I really like this simple layout.
Ddd
The text strips have been cut from scrapbook paper and I dropped in the 'Joy' sticker to interrupt their thought line with my own. The ribbon on the dress is selected to match the joy sticker.
It was two simple-looking so I added rhinestone flowers all over the dress with foam dots.
Ddd
This block of butterflies is part of the Anna Griffin set I bought recently. I stamped on the diamond paper and then used a marker to enhance the lines on the background.
The butterflies are colored with watercolor marker, then the background lines and parts of the butterflies were enhanced with Stickles.
I enhanced the corners with black brads and then mounted to a shimmery cardstock with foam dots. Another shimmery cardstock makes up the folded card base.
Here you get a better look at the glitter.
Ddd
This combination started with the impressed hearts on the background as I was looking for something with good contrast to the dress. Then I found the text sticker and finally, selected ribbon for the dress embellishments.
After the top was assembled I thought it still needed something so added the three gold heart brads before attaching to the folded card base.
Ddd
I wish this showed up as vibrant as the real card!
I used two VERY oversized gold peeloffs as part of the background, overlapping them for effect. A mixture of scrapbook papers set the backing and the borders.
The text is a cardstock sticker.
Ddd
I've been waiting for just the right place to use this oversized text sticker. Today is the day!
It had some flowers on the right but I added more from another clear sticker set and then created a floral spray in the lower right as well.
This version of the dress got a bow at the waistline.
Ddd
You're going to be seeing a LOT of these little dresses for a while! I cut a stack of the scalloped circles out of a variety of 'fabrics' with my Cuttlebug and cut out the dress shapes. I used a variety of embossing folders on them, too. As I made them into dresses I used a couple of different paper doilies for the lace and also adjusted the placement of the bodice to make the lace topper different.
For this card I used the Swiss Dots folder on pink paper. 1/8" ribbon matches the background and I added a decorated text sticker. Three large flower brads in antique silver have had pink rhinestones glued in their centers.
Ddd
Here's another of my patterns that I have neglected too long. I used the water-print scrapbook paper again and worked with a single strand of embroidery thread as it makes for a fuller bodied stitching.
As soon as I was done stitching I knew what paper I wanted to use as a background. I pulled the solid cardstock colors from it and the added a clear text sticker.
I enjoyed using unusual colors for the seashells on this card. I went with tropical colors even though they would not be found on the shells in real life.
Ddd
I think this comes under the category of "what were they thinking?"
The other day I was driving to an appointment. I pulled up to a T intersection and look straight ahead at a sign that reads:
Perennial Plant Sale
This Weekend Only
Hmmmmm... Somebody need a proofreader? LOL!
Made me want to show up the NEXT weekend to see if the perennial plant sale was still going on! How long SHOULD a perennial plant sale last? Forever, right?
Then I wondered if they were going to have an annual perennial plant sale. I got to laughing so hard the other drivers must have thought I lost my mind (I was in the car alone, after all). Of course, this leads to "if they just advertise an annual plant sale, can they sell any perennials?"
Oh, my.
Ddd
This card combines 4 stamps from the See-D's stamp set "Tropical". The background text is the first, just 3 lines of flower names which I repeated. There are two sizes of leaves and then the main flower image, which I masked to stamp the leaves.
I stamped on shimmery cardstock using Archival black ink and colored with watercolor markers in two pinks and two greens.
All three of the cardstocks are the shimmery finish so it really makes the whole card seem to glow.
I used a clear text sticker and added rhinestones to the 4 corners of the image.
Ddd
This is one of the new Spellbinders dies I picked up recently. It not only cuts out the part but embosses a background pattern. In this case I Stickle'd the embossed portions and added rhinestones on the head and body.
The background paper has been enhanced with some pen tracings and the Scor-it used to make raised creases at 3/4 inches from the edges, twice. A sheer ribbon bow borders the top, all corners rounded and mounted on green cardstock.
Here is a closer picture to show the embossing and glitter.
Ddd
I can't stop playing with this stamp! This is on a bubble background, cut with Nestabilities, backed with green card and Stickles grace the bee's wings.
The ribbon was colored with the same marker as the poppy and all was added to a red card base along with the text sticker.
Ddd
More of the lovely new poppy stamp I picked up. This was stamped on printed scrapbook paper and colored with watercolor markers. I used the leaf from the same set to stamp a border on the base card.
I added Stickles to the wings of the bee and applied a clear text sticker.
Ddd
I have this little voice in the back of my head that insists it is cheating to call it gardening if you buy plants half grown and just put them in the dirt. Even more so if flowers are blooming in your garden at the moment you cover the roots with soil!
Alas, I have delayed so long in planting my garden this year that I stooped to the depths and bought tomato plants to plop in the ground. I'm SO ashamed (but hopefully will have tasty tomatoes out of it).
However, the rest of the barrels (11 of them) have been planted with their little seeds in the manner of proper gardening.
I planted on Monday afternoon. Here on Thursday afternoon I have three barrels sprouting.
Here's the spinach:
The lettuce:
and the radishes:
Yeah, I know they're small - but for only three days old...
The other thing is that they look pretty much the same. Good thing I labeled the barrels:
I did all the lettering with a chisel point marker upside-down leaning over the barrel! Pretty good, huh?
Ddd