« April 2010 »
S M T W T F S
1 2 3
4 5 6 7 8 9 10
11 12 13 14 15 16 17
18 19 20 21 22 23 24
25 26 27 28 29 30
You are not logged in. Log in
Entries by Topic
All topics  «
3D paperwork
A - Z challenge 5
A - Z challenge 7
A - Z challenge round 4
A to Z challenge round 3
A to Z round 2
A to Z round 6
A-Z round 1
Around the House
Art Challenges
Artist Trading Cards
Backgrounds
Beads
Bible Journaling
Books
Boxes
Collage
Color Challenge
Coloring
cookbook
Die Cuts
Digital Projects
Digital Stamps
Drawing
Dry Embossing
Fabric Stuff
Fantastic Folds
Field Trip
Home Decor
How Does Your Garden Grow?
Hymnal Art
In The Kitchen
In the studio
Jewelry
Lettering
Links
Multi-Technique
Music to Work By
Musings
Nail Art
New Work
Online Class
Other Hobbies
Other Projects
Painting
Paper Embroidery
Paper Piecing
Photo
Pretty Paper
Quilting
Random
reading
Scrap Recovery
scrapbooking
Sewing
Sketch Challenge
Some Backlog
Stamping
Stencils
Stickers
Supplies
Teabag Folding
Techniques
Testing
tips and tricks
Tutorial
Web resources
Welcome to my Blog
Work By My Friends
workflow
Writing
Blog Tools
Edit your Blog
Build a Blog
RSS Feed
View Profile
Group One
In & Out of Studio 3D
Friday, 9 April 2010
An Asian Kindred Spirit
Topic: Fantastic Folds

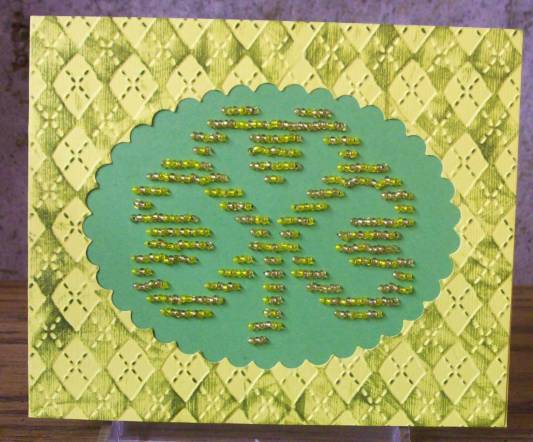
Here is a diamond fold card base I had on the desktop for a while. The asian graphic is a section from a card someone gave me at Christmas. LOVE the colors in the bird so I duplicated them in the top panel by using torn mulberry paper and a diecut text.

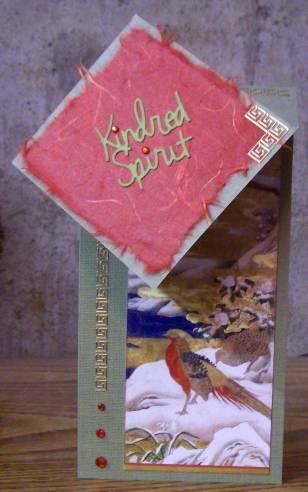
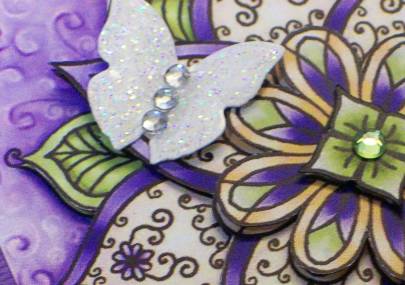
Strategically placed red rhinestones and some gold peel-off stickers pull it all together.

Ddd


Posted by studio3d@ccgmail.net at 6:00 AM PDT
Thursday, 8 April 2010
Happiness for Today
Topic: Die Cuts

Lovin' layers lately...

Since I had a scrap of shimmery parchment with butterflies I decided to use it as a background and then used a Spellbinders die to cut and emboss a butterfly out of shimmery cardstock. Two tones of teal cardstock and a diecut label with organza ribbon pull it all together.

I like to pull up the butterfly wings and attach it only at the body so there is dimensionality to the card. Then I added 4 oval teal rhinestones for the body.

Ddd


Posted by studio3d@ccgmail.net at 6:00 AM PDT
Wednesday, 7 April 2010
No Greater Love
Topic: Stamping

Start with an acrylic stamp, color up with watercolor pencils, fold a brown card, sut an aperture with a Nestability die, mount the stamping behind the aperture, add sticker flowers to the stamping, cut a 'bracker' with a die cutter, mount it at the botton - between the layers, apply rub-on borders down the sides, add a text ticket, sketch out a text block, cut it and apply, and add some more flower stickers here and there. Whew.

So now you know how it's done.

Ddd


Posted by studio3d@ccgmail.net at 6:00 AM PDT
Tuesday, 6 April 2010
Light of Friendship
Topic: Die Cuts

This is the LAST scrap of this lovely paper so I decided to use it as a feature. I used two Nestabilites dies together to create the yellow frame and a circle punch to make the green center piece.

Stacking, stacking and more stacking with colors drawn from the feature paper. I had the little strip of text, cut from a scrapbook paper, in the scrap bin. Everything is mounted with pop-dots and I trimmed it up with gold peel-off stickers.

Ddd


Posted by studio3d@ccgmail.net at 6:00 AM PDT
Monday, 5 April 2010
Zip It
Topic: Collage

 Another bizzare color shift. This is kraft color cardstock, dark teal embossed piece, bright orange script and thread, and all the greens actually match. Of course, with the preview screen on the camera broken, I never know this until I upload it to the computer.

This was another bunch of scraps from the 'leftovers' bin and the zipper element is actually printed on cardstock. Except - I tore apart a real zipper and attached the head on the card. It just seemed like it would be funny.

Ddd


Posted by studio3d@ccgmail.net at 6:00 AM PDT
Sunday, 4 April 2010
Many Blessings
Topic: Collage

Stole  salvaged the stamped text on mulberry paper which was mounted on the leaf-print paper (thanks, Judith). My part of the project was to select coordinating colors of cardstock, plan a layout, and add gold sticker leaves and trim.

This was the result of smooshing things around on the 'leftover pile' until it became obvious which parts belonged together.

Ddd


Posted by studio3d@ccgmail.net at 6:00 AM PDT
Saturday, 3 April 2010
Mother's Love
Topic: Collage

I have NO idea what happened to the colors on this! Let me enlighten you... The background is 'brick', the scalloped oval is 'olive', the text block is 'chocolate', and the flowers are 'bright yellow'. See what I mean?

I added gold dot stickers to the center of the flowers, borders to the top and the bottom, and sticker waste from scroll-y corners to several areas of the card.

Oh, by the way, don't look Mom!

Ddd


Posted by studio3d@ccgmail.net at 6:00 AM PDT
Friday, 2 April 2010
Easel Card
Topic: Fantastic Folds

On Assignment: Make a Mother's Day card with unusual folds... here it is.

This card structure is an easel fold and it is quite popular in the card-making community right now. They are 'popping up' everywhere (hee hee hee).

Mine started with the beautiful printed paper and I pulled colors from it for the various elements. The yellow card base, teal border, tan circles, multi-toned pink flowers, and gold panel. For the inside, I continued but leaned away from the pink to teal elements.

I used silk flowers in multiple layers, held together with flower brads and I made the text using letter punches - doubling their layers in two colors.

This card will be sent away for a swap (sorry Mom!)

Ddd


Posted by studio3d@ccgmail.net at 6:00 AM PDT
Thursday, 1 April 2010
Believe in Yourself
Topic: Stamping

I stamped up this pear image and colored it last summer. It's just been hanging around waiting for me to be inspired by it.

I had cut the teal shape for another project and had leftover purple on the table from yesterday's project. These happened to get laid down together and WOW, this idea was born.

I added a strip of green cardstock, a text sticker, and two types of rubons to pull this all together.

Ddd


Posted by studio3d@ccgmail.net at 6:00 AM PDT
Wednesday, 31 March 2010
Medallion of Thanks
Topic: 3D paperwork

This 3d medallion is a design from the blog fred-she-said. What beautiful colors she put together!

The printed background is part of the original design and I used it to select a purple cardstock for the folded base. I pulled the green out in other cardstock to create a double-layered medallion for the text.

I cut the greeting and the butterfly from shimmery white cardstock and added Stickles that have just a hint of purple glitter.

In this closeup you can see the rhinestones I added to the medallion center and as a body for the butterfly.

Here is a closeup of the glitter on the text.

Ddd


Posted by studio3d@ccgmail.net at 6:00 AM PDT
Tuesday, 30 March 2010
White Out
Topic: Dry Embossing

"Make a card using nothing but white." What a challenge!I decided that texture was going to be the key to making something that looked good so I brought out the Cutlebug.

I used a Spellbinders Edgeabilities die to cut and emboss the daisy border and two sets of individual blossoms. Another Spellbinders die was used for the two butterflies which I then ran through a Cuttlebug  folder for texture. A background piece was run through with a Cuttlebug folder of leaves and vines. Then I used a Cuttlebug die to cut the text.

Everything was mounted to a matching folded cardstock of shimmery white using either mini glue dots or 3d glue dots. I cut a slit at the fold to tie a white satin ribbon through.

White on white is NOT as hard to photograph as the silver shown the other day - but it does tend to skew to either the yellow or the blue side of the color spectrum.

Ddd


Posted by studio3d@ccgmail.net at 6:00 AM PDT
Monday, 29 March 2010
Spotlighted Roses
Topic: Stamping

Challenges are back! This one was an assignment for a spotlight card. To do this you stamp the background in plain outline and then on another piece of card stamp and color in only one element of the picture. 

The  colored portion is cut out and attached over the line stamp with a colored border underneath. I used blended watercolor pencils for my rose.

I stamped mine in grey staz-on and then, after it was pretty much done, decided it was not dark enough. So on the spotlighted part I traced over the lines with black marker. I did this to some of the background as well.

The greeting was stamped in the grey as well, cut out and bordered with the pink scallops. I attached the blue ribbon before placing the greeting over the top.

As a last step I used Stickles on the 'Thinking' and on the highlighted portions of the colored rose.

Ddd


Posted by studio3d@ccgmail.net at 6:00 AM PDT
Sunday, 28 March 2010
Birdhouse Neighborhood
Topic: Paper Embroidery

I make up this stitching pattern last week on request. Each little house is stitched with a different color of thread and then I used watercolor pencils to fill them in. A bit of water-brush action smooths the color.

I found the little birds on a parchment sticker sheet and separated them from the greeting so all three pars could be attached separately.

Everything is attached to a folded cardstock base.

Ddd


Posted by studio3d@ccgmail.net at 6:00 AM PDT
Saturday, 27 March 2010
Birds, Bits & Bobs
Topic: Collage

The center illustration is from a pre-printed parchment page. I had the double-mounted scallops lefr over from another project so placed those over the parchment. The parchment was white so I placed a couple of yellow papers under the lattice portions then placed a dotted lavender scalloped piece behind all of that.

The yellow bird was part of the page and I glued it to a yellow backing and cut out. This is attached with glue dots to raise it up a bit. Each corner of the blue got a silver corner sticker and then I mounted the whole thing to folded cardstock base.

As a last step I added a bit of border and a silver peel-off greeting to the open stace at the borrom.

Ddd


Posted by studio3d@ccgmail.net at 6:00 AM PDT
Friday, 26 March 2010
Beaded Luck
Topic: Beads

I had a leftover card with the cross-stitch pricked out and decided to bead it. I used yellow beads but they pick up the color of the green panel and it darkens them.

I folded a side-fold card front in yellow and used a scalloped Nestability die to cut an aperture. Then I ran it through the Cuttlebug with the 'argyle' folder and then used a 'lettuce' Adriondack ink pad direct-to-paper to color the raised portions.

I attached the beaded panel to the inside of the cut-out.

Ddd


Posted by studio3d@ccgmail.net at 6:00 AM PDT
Thursday, 25 March 2010
Silver Sails
Topic: Paper Embroidery

I must say - silver is VERY hard to photograph!

I first stitched up the sailboat using silver thread on blue cardstock. Then I ran a folded cardstock through the Xyron to apply adhesive and then placed scraps of all sorts of silver papers all over it. Where there were gaps I applied ultrafine silver glitter and burnished it in.

After attaching the stitched panel I trimmed up the corners of the panel and of the card with silver corner stickers.

Here is a closeup of one of the corners.

Ddd


Posted by studio3d@ccgmail.net at 6:00 AM PDT
Wednesday, 24 March 2010
Swirl of Sea
Topic: Paper Embroidery

After stitching up this pattern of mine I used a diecut 12 x 12 cardstock to cover a background. I liked how the swirls look like waves. 

Four puffy actylic stickers tie it all together visually as well as adding the text for the theme.

Ddd


Posted by studio3d@ccgmail.net at 6:00 AM PDT
Tuesday, 23 March 2010
Spring Sky
Topic: Photo

The plum tree is blooming, the grass is greening, and the sun is trying so hard to break through the clouds. SPRING IS HERE!

Love this view from the back of the house . . .

Ddd


Posted by studio3d@ccgmail.net at 6:00 AM PDT
Monday, 22 March 2010
Snips & Snails
Topic: New Work

Last little onesie. This little boy card has a design made with rub-ons.

I drew a little placket around the buttons with a marker.

Ddd


Posted by studio3d@ccgmail.net at 6:00 AM PDT
Sunday, 21 March 2010
Now I Lay Me Down to Sleep
Topic: New Work

 For a change I used a printed cardstock for this onesie so it looks a little more like fabric.

The front design is a vellum sticker.

Ddd


Posted by studio3d@ccgmail.net at 6:00 AM PDT

Newer | Latest | Older