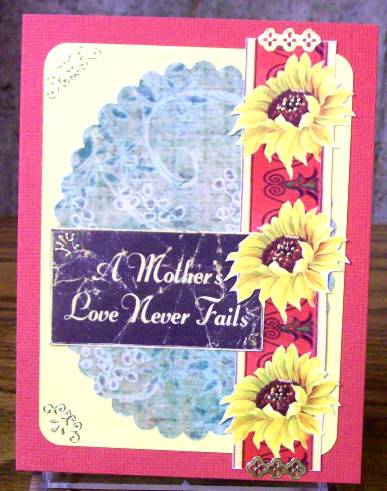
« April 2010 »
S M T W T F S
1 2 3
4 5 6 7 8 9 10
11 12 13 14 15 16 17
18 19 20 21 22 23 24
25 26 27 28 29 30
You are not logged in. Log in
Entries by Topic
All topics  «
3D paperwork
A - Z challenge 5
A - Z challenge 7
A - Z challenge round 4
A to Z challenge round 3
A to Z round 2
A to Z round 6
A-Z round 1
Around the House
Art Challenges
Artist Trading Cards
Backgrounds
Beads
Bible Journaling
Books
Boxes
Collage
Color Challenge
Coloring
cookbook
Die Cuts
Digital Projects
Digital Stamps
Drawing
Dry Embossing
Fabric Stuff
Fantastic Folds
Field Trip
Home Decor
How Does Your Garden Grow?
Hymnal Art
In The Kitchen
In the studio
Jewelry
Lettering
Links
Multi-Technique
Music to Work By
Musings
Nail Art
New Work
Online Class
Other Hobbies
Other Projects
Painting
Paper Embroidery
Paper Piecing
Photo
Pretty Paper
Quilting
Random
reading
Scrap Recovery
scrapbooking
Sewing
Sketch Challenge
Some Backlog
Stamping
Stencils
Stickers
Supplies
Teabag Folding
Techniques
Testing
tips and tricks
Tutorial
Web resources
Welcome to my Blog
Work By My Friends
workflow
Writing
Blog Tools
Edit your Blog
Build a Blog
RSS Feed
View Profile
Group One
In & Out of Studio 3D
Tuesday, 20 April 2010
Bear With Me
Topic: Collage

These bears are printed on parchment and I glued them to cream colored stock so I could stack them to make them 'go' together.

The scallop should look familiar - from the marquee cards - and I had the text block in a box of die-cuts. Just added some matching cardstock and pen doodles to pull it all together.

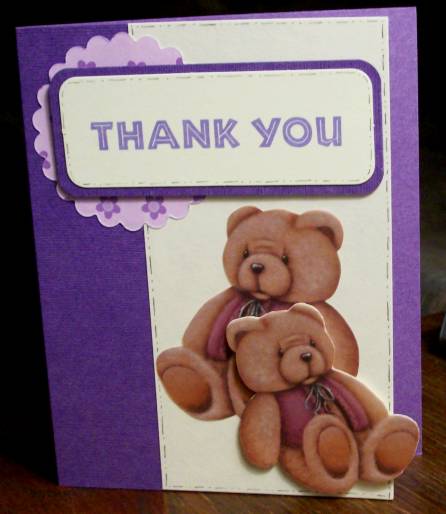
The purple band on the right is really the back of the card. The front ends at the edge of the cream color and you can see how the little bear's foot hangs over the edge.

Ddd


Posted by studio3d@ccgmail.net at 6:00 AM PDT
Monday, 19 April 2010
More Blessings to Count
Topic: Scrap Recovery

If this looks familiar it is because I had two of these text stamped pieces mounted on scrapbook paper. I decided to not reinvent a layout and started out making it pretty much the same as last week's. But then I had to change up the paper colors, use different trims and added brad.

The same - but different.

Ddd


Posted by studio3d@ccgmail.net at 6:00 AM PDT
Sunday, 18 April 2010
Sew Faux Sew Good
Topic: Collage

No pins, no needles, no thread, no stitching! That's right... this card has absolutely not a single stitch on it.

I started with the blocks which are preprinted on cardstock. I used a square punch so they would be identical. They were glued down and little 'stitches' were drawn all around them with fine-line markers. Then I added a cardstock sticker at the borrom that looks like it is quilted. This, too, got the pen stitching. Finally, I added two side strips of rub-on borders that look like fabric tape with stitching.

The background cardstock has a linen finish so it looks a little like fabric, too.

Ddd


Posted by studio3d@ccgmail.net at 6:00 AM PDT
Saturday, 17 April 2010
Window on Another World
Topic: Scrap Recovery

A junk mail brochure recently netted me this great photo of a field of yellow flowers backed by trees. I selected similar colors in cardstock and tore them and layered to create an imitation of the landscape for a background.

The picture is trimmed out with gold peel-off sticker border and I added a matching gold greeting.

Ddd


Posted by studio3d@ccgmail.net at 6:00 AM PDT
Friday, 16 April 2010
Missing You
Topic: Collage

Bits and pieces left over from other projects come together to make this little card. In trying to find some border stickers I ran across these rub-on stitches that I forgot I had. The colors were perfect!

Lots of layers!

Ddd


Posted by studio3d@ccgmail.net at 6:00 AM PDT
Thursday, 15 April 2010
Window on Good Luck
Topic: Paper Embroidery

To feature this cross-stitched clover I actually cut the aperture in the front of the card. The stitched piece is mounted inside and the cut out piece is mounted on the back of it to cover up the stitching.

The interior has a copy of an Irish plessing glued in.

Ddd


Posted by studio3d@ccgmail.net at 6:00 AM PDT
Wednesday, 14 April 2010
Side Hinge Card
Topic: Fantastic Folds

Taking up the 'challenge' again, I put together this 'side hinge' card. The front and back are scored at 1/4 inch from the fold then the front only is slit and the front piece slides in and the whole hinge is sealed closed. 

This allows the front to swing away and allows you to decorate under it.

It still opens as a card normally would so the final greeting can be placed inside.

I decorated with cutouts, ribbon, stamping, gel pens, and stickers.

Ddd


Posted by studio3d@ccgmail.net at 6:00 AM PDT
Tuesday, 13 April 2010
More Blessings
Topic: Collage

Since I had more of these little rose squares already punched out I decided to put together another card, much like the first one. However, I did not have the same embellishments available so this one is changed up a bit.

I used a parchment sticker for the greeting, mounted over rose colored paper and distressed. This is curved in mounting so it does not lie flat on the surface of the card. Two of the little squares had buttons in them so I added a button of my own to the card and tied a bit of the chenille yarn through the holes.

Again, I used the chenille yarn at the fold, bu this time tied a bow instead of a knot.

Ddd


Posted by studio3d@ccgmail.net at 6:00 AM PDT
Monday, 12 April 2010
Bright Spirits Gift Card
Topic: Dry Embossing

This gift card started as the embossed insert from a Christmas card. I cut it out and used a distressing pad with 'cranberry' ink to make the raised impression stand out.

After mounting on teal cardstock, I added a gold sticker medallion to cranberry cardstock and cut it out.

Glued to the card, added a light blue rhinestone... done!

Ddd


Posted by studio3d@ccgmail.net at 6:00 AM PDT
Sunday, 11 April 2010
Time Card
Topic: Collage

These little artworks with roses were part of a full sheet and I used a square punch to make individual tiles from them. They had this old script in the background so I added a similar background to the folded card base.

The text strip and text block are from a sheet of stickers, one of which is layered on a piece of toen mulberry paper.

I used a piece of chenille yarn tied on the spine to resemble twine.

Ddd


Posted by studio3d@ccgmail.net at 6:00 AM PDT
Saturday, 10 April 2010
Diamond Thanks
Topic: Fantastic Folds

Another diamond fold from the 'I'll use that later' pile has its day in the sun.

The stamping of the flower background is also a leftover from last summer. It has been colored up with watercolor pencils. A diecut 'thanks' block was the extra when I cut out another piece with a multi-text die.

I added a silk flower with a flower brad center and added the rest of the greeting with black pen.

Ddd


Posted by studio3d@ccgmail.net at 6:00 AM PDT
Friday, 9 April 2010
An Asian Kindred Spirit
Topic: Fantastic Folds

Here is a diamond fold card base I had on the desktop for a while. The asian graphic is a section from a card someone gave me at Christmas. LOVE the colors in the bird so I duplicated them in the top panel by using torn mulberry paper and a diecut text.

Strategically placed red rhinestones and some gold peel-off stickers pull it all together.

Ddd


Posted by studio3d@ccgmail.net at 6:00 AM PDT
Thursday, 8 April 2010
Happiness for Today
Topic: Die Cuts

Lovin' layers lately...

Since I had a scrap of shimmery parchment with butterflies I decided to use it as a background and then used a Spellbinders die to cut and emboss a butterfly out of shimmery cardstock. Two tones of teal cardstock and a diecut label with organza ribbon pull it all together.

I like to pull up the butterfly wings and attach it only at the body so there is dimensionality to the card. Then I added 4 oval teal rhinestones for the body.

Ddd


Posted by studio3d@ccgmail.net at 6:00 AM PDT
Wednesday, 7 April 2010
No Greater Love
Topic: Stamping

Start with an acrylic stamp, color up with watercolor pencils, fold a brown card, sut an aperture with a Nestability die, mount the stamping behind the aperture, add sticker flowers to the stamping, cut a 'bracker' with a die cutter, mount it at the botton - between the layers, apply rub-on borders down the sides, add a text ticket, sketch out a text block, cut it and apply, and add some more flower stickers here and there. Whew.

So now you know how it's done.

Ddd


Posted by studio3d@ccgmail.net at 6:00 AM PDT
Tuesday, 6 April 2010
Light of Friendship
Topic: Die Cuts

This is the LAST scrap of this lovely paper so I decided to use it as a feature. I used two Nestabilites dies together to create the yellow frame and a circle punch to make the green center piece.

Stacking, stacking and more stacking with colors drawn from the feature paper. I had the little strip of text, cut from a scrapbook paper, in the scrap bin. Everything is mounted with pop-dots and I trimmed it up with gold peel-off stickers.

Ddd


Posted by studio3d@ccgmail.net at 6:00 AM PDT
Monday, 5 April 2010
Zip It
Topic: Collage

 Another bizzare color shift. This is kraft color cardstock, dark teal embossed piece, bright orange script and thread, and all the greens actually match. Of course, with the preview screen on the camera broken, I never know this until I upload it to the computer.

This was another bunch of scraps from the 'leftovers' bin and the zipper element is actually printed on cardstock. Except - I tore apart a real zipper and attached the head on the card. It just seemed like it would be funny.

Ddd


Posted by studio3d@ccgmail.net at 6:00 AM PDT
Sunday, 4 April 2010
Many Blessings
Topic: Collage

Stole  salvaged the stamped text on mulberry paper which was mounted on the leaf-print paper (thanks, Judith). My part of the project was to select coordinating colors of cardstock, plan a layout, and add gold sticker leaves and trim.

This was the result of smooshing things around on the 'leftover pile' until it became obvious which parts belonged together.

Ddd


Posted by studio3d@ccgmail.net at 6:00 AM PDT
Saturday, 3 April 2010
Mother's Love
Topic: Collage

I have NO idea what happened to the colors on this! Let me enlighten you... The background is 'brick', the scalloped oval is 'olive', the text block is 'chocolate', and the flowers are 'bright yellow'. See what I mean?

I added gold dot stickers to the center of the flowers, borders to the top and the bottom, and sticker waste from scroll-y corners to several areas of the card.

Oh, by the way, don't look Mom!

Ddd


Posted by studio3d@ccgmail.net at 6:00 AM PDT
Friday, 2 April 2010
Easel Card
Topic: Fantastic Folds

On Assignment: Make a Mother's Day card with unusual folds... here it is.

This card structure is an easel fold and it is quite popular in the card-making community right now. They are 'popping up' everywhere (hee hee hee).

Mine started with the beautiful printed paper and I pulled colors from it for the various elements. The yellow card base, teal border, tan circles, multi-toned pink flowers, and gold panel. For the inside, I continued but leaned away from the pink to teal elements.

I used silk flowers in multiple layers, held together with flower brads and I made the text using letter punches - doubling their layers in two colors.

This card will be sent away for a swap (sorry Mom!)

Ddd


Posted by studio3d@ccgmail.net at 6:00 AM PDT
Thursday, 1 April 2010
Believe in Yourself
Topic: Stamping

I stamped up this pear image and colored it last summer. It's just been hanging around waiting for me to be inspired by it.

I had cut the teal shape for another project and had leftover purple on the table from yesterday's project. These happened to get laid down together and WOW, this idea was born.

I added a strip of green cardstock, a text sticker, and two types of rubons to pull this all together.

Ddd


Posted by studio3d@ccgmail.net at 6:00 AM PDT

Newer | Latest | Older