Topic: Collage
Bits and pieces left over from other projects come together to make this little card. In trying to find some border stickers I ran across these rub-on stitches that I forgot I had. The colors were perfect!
Lots of layers!
Ddd
« | April 2010 | » | ||||
![]() |
||||||
S | M | T | W | T | F | S |
1 | 2 | 3 | ||||
4 | 5 | 6 | 7 | 8 | 9 | 10 |
11 | 12 | 13 | 14 | 15 | 16 | 17 |
18 | 19 | 20 | 21 | 22 | 23 | 24 |
25 | 26 | 27 | 28 | 29 | 30 |
Bits and pieces left over from other projects come together to make this little card. In trying to find some border stickers I ran across these rub-on stitches that I forgot I had. The colors were perfect!
Lots of layers!
Ddd
To feature this cross-stitched clover I actually cut the aperture in the front of the card. The stitched piece is mounted inside and the cut out piece is mounted on the back of it to cover up the stitching.
The interior has a copy of an Irish plessing glued in.
Ddd
Taking up the 'challenge' again, I put together this 'side hinge' card. The front and back are scored at 1/4 inch from the fold then the front only is slit and the front piece slides in and the whole hinge is sealed closed.
I decorated with cutouts, ribbon, stamping, gel pens, and stickers.
Ddd
Since I had more of these little rose squares already punched out I decided to put together another card, much like the first one. However, I did not have the same embellishments available so this one is changed up a bit.
I used a parchment sticker for the greeting, mounted over rose colored paper and distressed. This is curved in mounting so it does not lie flat on the surface of the card. Two of the little squares had buttons in them so I added a button of my own to the card and tied a bit of the chenille yarn through the holes.
Again, I used the chenille yarn at the fold, bu this time tied a bow instead of a knot.
Ddd
This gift card started as the embossed insert from a Christmas card. I cut it out and used a distressing pad with 'cranberry' ink to make the raised impression stand out.
After mounting on teal cardstock, I added a gold sticker medallion to cranberry cardstock and cut it out.
Ddd
These little artworks with roses were part of a full sheet and I used a square punch to make individual tiles from them. They had this old script in the background so I added a similar background to the folded card base.
The text strip and text block are from a sheet of stickers, one of which is layered on a piece of toen mulberry paper.
I used a piece of chenille yarn tied on the spine to resemble twine.
Ddd
Another diamond fold from the 'I'll use that later' pile has its day in the sun.
The stamping of the flower background is also a leftover from last summer. It has been colored up with watercolor pencils. A diecut 'thanks' block was the extra when I cut out another piece with a multi-text die.
I added a silk flower with a flower brad center and added the rest of the greeting with black pen.
Ddd
Here is a diamond fold card base I had on the desktop for a while. The asian graphic is a section from a card someone gave me at Christmas. LOVE the colors in the bird so I duplicated them in the top panel by using torn mulberry paper and a diecut text.
Strategically placed red rhinestones and some gold peel-off stickers pull it all together.
Ddd
Lovin' layers lately...
Since I had a scrap of shimmery parchment with butterflies I decided to use it as a background and then used a Spellbinders die to cut and emboss a butterfly out of shimmery cardstock. Two tones of teal cardstock and a diecut label with organza ribbon pull it all together.
I like to pull up the butterfly wings and attach it only at the body so there is dimensionality to the card. Then I added 4 oval teal rhinestones for the body.
Ddd
Start with an acrylic stamp, color up with watercolor pencils, fold a brown card, sut an aperture with a Nestability die, mount the stamping behind the aperture, add sticker flowers to the stamping, cut a 'bracker' with a die cutter, mount it at the botton - between the layers, apply rub-on borders down the sides, add a text ticket, sketch out a text block, cut it and apply, and add some more flower stickers here and there. Whew.
So now you know how it's done.
Ddd
This is the LAST scrap of this lovely paper so I decided to use it as a feature. I used two Nestabilites dies together to create the yellow frame and a circle punch to make the green center piece.
Stacking, stacking and more stacking with colors drawn from the feature paper. I had the little strip of text, cut from a scrapbook paper, in the scrap bin. Everything is mounted with pop-dots and I trimmed it up with gold peel-off stickers.
Ddd
Another bizzare color shift. This is kraft color cardstock, dark teal embossed piece, bright orange script and thread, and all the greens actually match. Of course, with the preview screen on the camera broken, I never know this until I upload it to the computer.
This was another bunch of scraps from the 'leftovers' bin and the zipper element is actually printed on cardstock. Except - I tore apart a real zipper and attached the head on the card. It just seemed like it would be funny.
Ddd
Stole salvaged the stamped text on mulberry paper which was mounted on the leaf-print paper (thanks, Judith). My part of the project was to select coordinating colors of cardstock, plan a layout, and add gold sticker leaves and trim.
This was the result of smooshing things around on the 'leftover pile' until it became obvious which parts belonged together.
Ddd
I have NO idea what happened to the colors on this! Let me enlighten you... The background is 'brick', the scalloped oval is 'olive', the text block is 'chocolate', and the flowers are 'bright yellow'. See what I mean?
I added gold dot stickers to the center of the flowers, borders to the top and the bottom, and sticker waste from scroll-y corners to several areas of the card.
Oh, by the way, don't look Mom!
Ddd
On Assignment: Make a Mother's Day card with unusual folds... here it is.
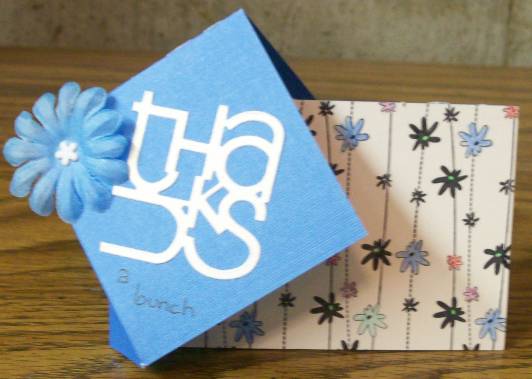
This card structure is an easel fold and it is quite popular in the card-making community right now. They are 'popping up' everywhere (hee hee hee).
Mine started with the beautiful printed paper and I pulled colors from it for the various elements. The yellow card base, teal border, tan circles, multi-toned pink flowers, and gold panel. For the inside, I continued but leaned away from the pink to teal elements.
I used silk flowers in multiple layers, held together with flower brads and I made the text using letter punches - doubling their layers in two colors.
This card will be sent away for a swap (sorry Mom!)
Ddd
I stamped up this pear image and colored it last summer. It's just been hanging around waiting for me to be inspired by it.
I had cut the teal shape for another project and had leftover purple on the table from yesterday's project. These happened to get laid down together and WOW, this idea was born.
I added a strip of green cardstock, a text sticker, and two types of rubons to pull this all together.
Ddd
This 3d medallion is a design from the blog fred-she-said. What beautiful colors she put together!
The printed background is part of the original design and I used it to select a purple cardstock for the folded base. I pulled the green out in other cardstock to create a double-layered medallion for the text.
Here is a closeup of the glitter on the text.
Ddd
"Make a card using nothing but white." What a challenge!I decided that texture was going to be the key to making something that looked good so I brought out the Cutlebug.
I used a Spellbinders Edgeabilities die to cut and emboss the daisy border and two sets of individual blossoms. Another Spellbinders die was used for the two butterflies which I then ran through a Cuttlebug folder for texture. A background piece was run through with a Cuttlebug folder of leaves and vines. Then I used a Cuttlebug die to cut the text.
Everything was mounted to a matching folded cardstock of shimmery white using either mini glue dots or 3d glue dots. I cut a slit at the fold to tie a white satin ribbon through.
White on white is NOT as hard to photograph as the silver shown the other day - but it does tend to skew to either the yellow or the blue side of the color spectrum.
Ddd
Challenges are back! This one was an assignment for a spotlight card. To do this you stamp the background in plain outline and then on another piece of card stamp and color in only one element of the picture.
The colored portion is cut out and attached over the line stamp with a colored border underneath. I used blended watercolor pencils for my rose.
I stamped mine in grey staz-on and then, after it was pretty much done, decided it was not dark enough. So on the spotlighted part I traced over the lines with black marker. I did this to some of the background as well.
The greeting was stamped in the grey as well, cut out and bordered with the pink scallops. I attached the blue ribbon before placing the greeting over the top.
As a last step I used Stickles on the 'Thinking' and on the highlighted portions of the colored rose.
Ddd
I make up this stitching pattern last week on request. Each little house is stitched with a different color of thread and then I used watercolor pencils to fill them in. A bit of water-brush action smooths the color.
I found the little birds on a parchment sticker sheet and separated them from the greeting so all three pars could be attached separately.
Everything is attached to a folded cardstock base.
Ddd