« December 2017 »
S M T W T F S
1 2
3 4 5 6 7 8 9
10 11 12 13 14 15 16
17 18 19 20 21 22 23
24 25 26 27 28 29 30
31
You are not logged in. Log in
Entries by Topic
All topics
3D paperwork
A - Z challenge 5
A - Z challenge 7
A - Z challenge round 4
A to Z challenge round 3
A to Z round 2
A to Z round 6
A-Z round 1
Around the House
Art Challenges
Artist Trading Cards
Backgrounds
Beads
Bible Journaling
Books
Boxes
Collage
Color Challenge
Coloring
cookbook
Die Cuts
Digital Projects
Digital Stamps
Drawing
Dry Embossing  «
Fabric Stuff
Fantastic Folds
Field Trip
Home Decor
How Does Your Garden Grow?
Hymnal Art
In The Kitchen
In the studio
Jewelry
Lettering
Links
Multi-Technique
Music to Work By
Musings
Nail Art
New Work
Online Class
Other Hobbies
Other Projects
Painting
Paper Embroidery
Paper Piecing
Photo
Pretty Paper
Quilting
Random
reading
Scrap Recovery
scrapbooking
Sewing
Sketch Challenge
Some Backlog
Stamping
Stencils
Stickers
Supplies
Teabag Folding
Techniques
Testing
tips and tricks
Tutorial
Web resources
Welcome to my Blog
Work By My Friends
workflow
Writing
Blog Tools
Edit your Blog
Build a Blog
RSS Feed
View Profile
Group One
In & Out of Studio 3D
Saturday, 16 December 2017
A Little Gift Or Two For You
Topic: Dry Embossing

I realized I was still short of cards for Christmas! So, I decided to work with an idea I saw on Pinterest - with changes, of course!

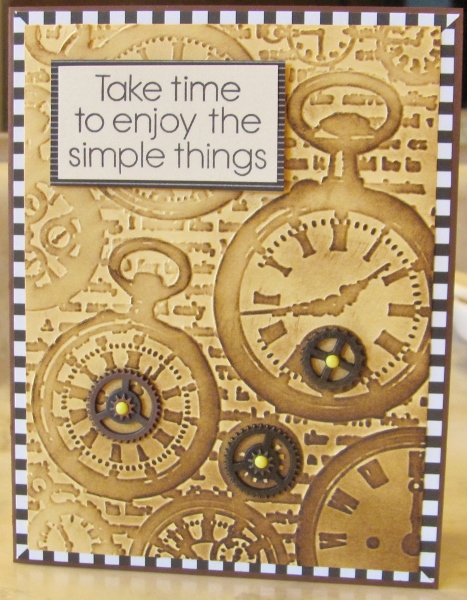
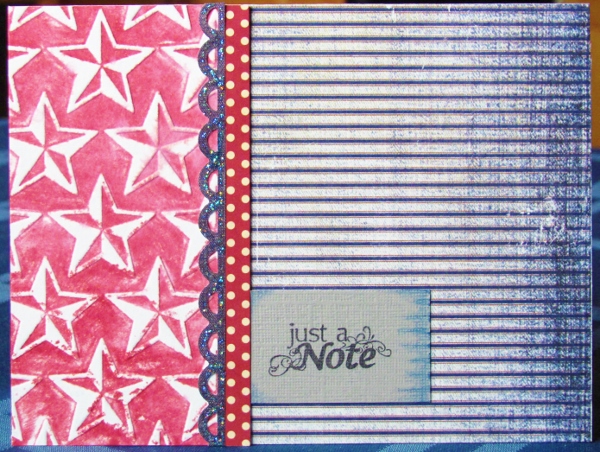
I used my stamp platform for a top border and a bottom sentiment on the card fronts. 

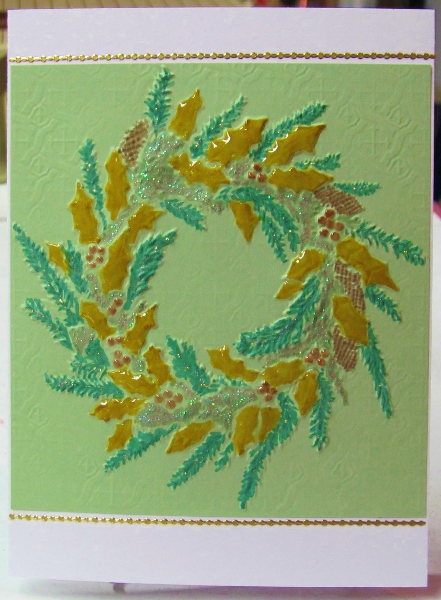
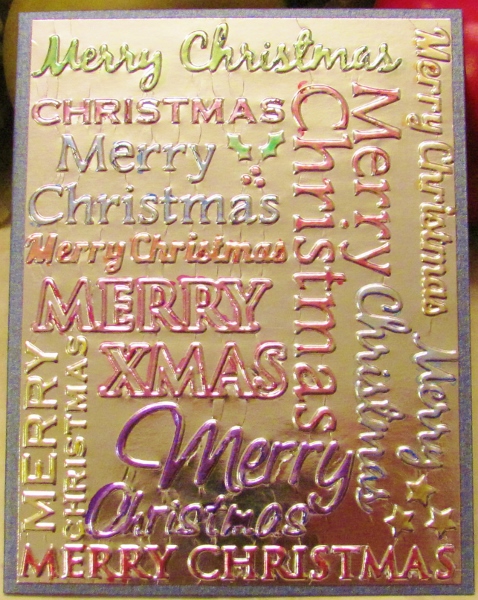
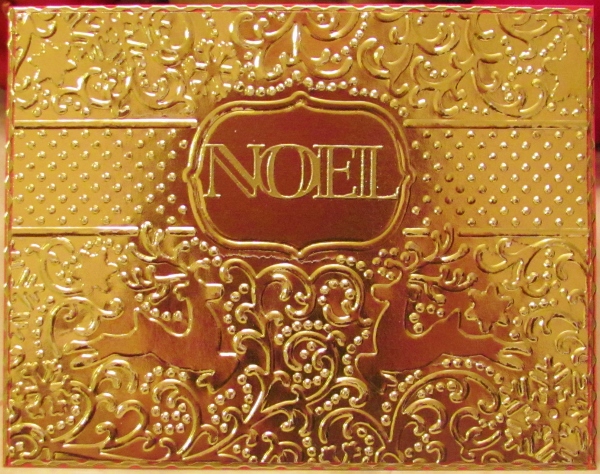
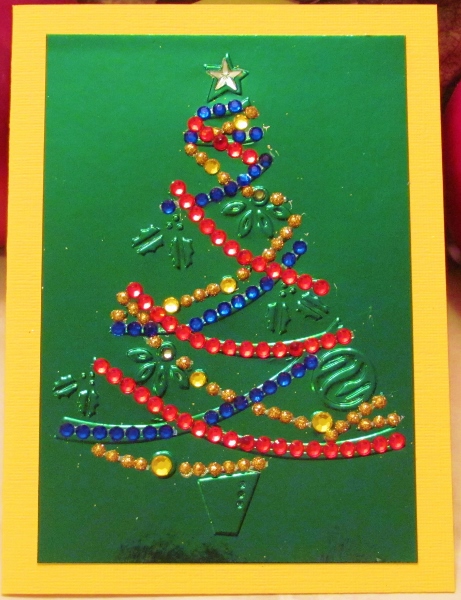
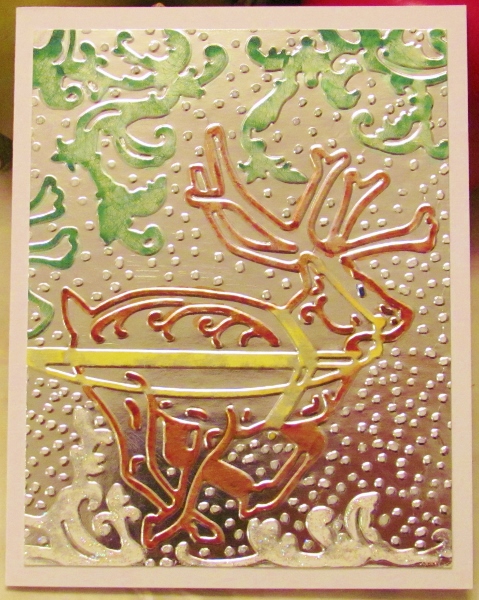
Then I gathered some shimmery cardstock in several colors. These were run through different embossing folders using the Cuttlebug and cut into various sizes of rectangles.

I used sticky-backed satin ribbons to decorate these as packages and added bows punched out of other shimmery cardstock.

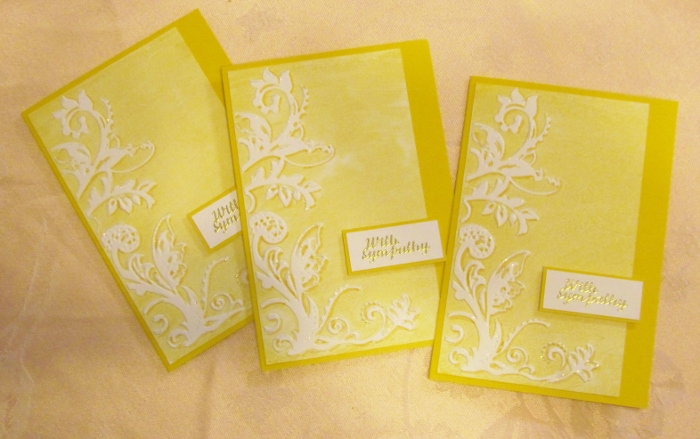
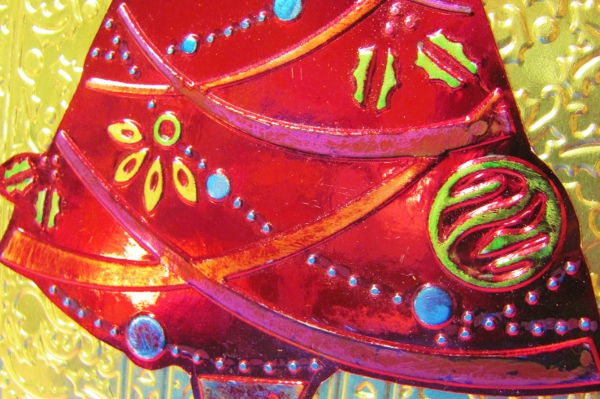
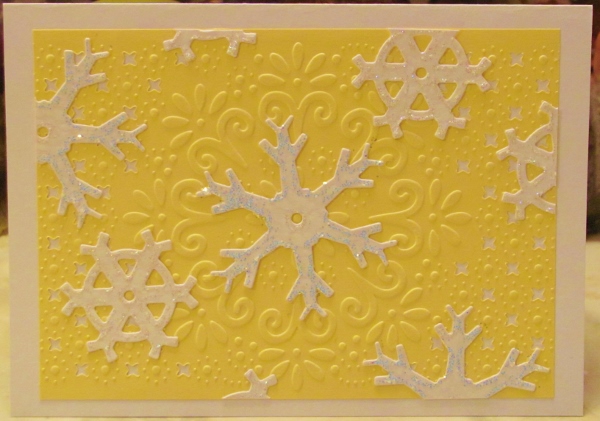
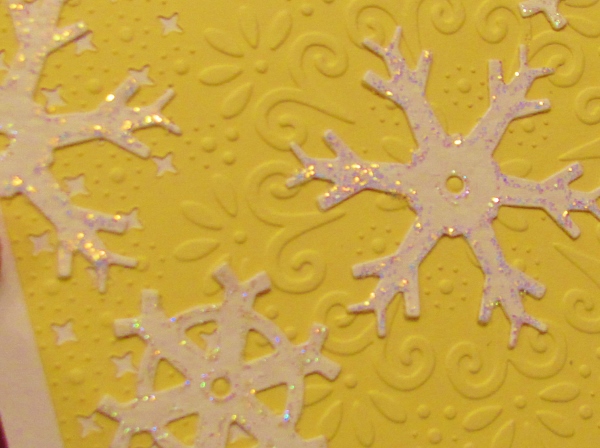
These are hard to photograph because of all the shine. Reality lies somewhere between  these two images.


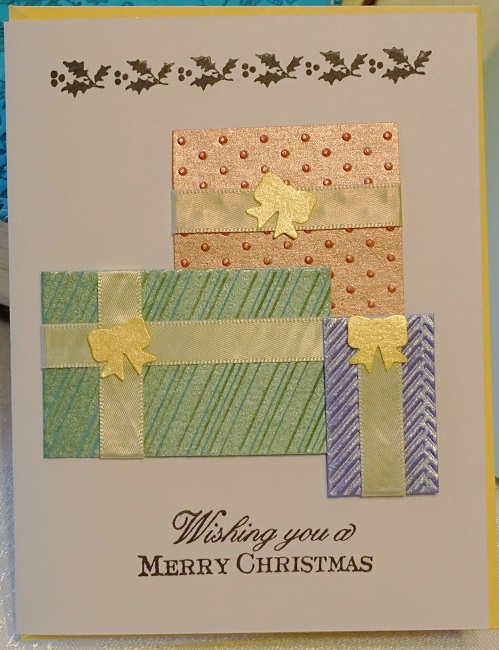
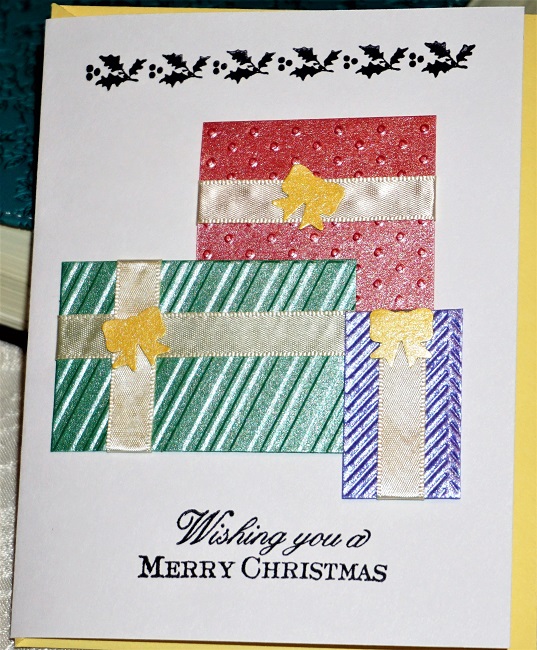
Only the front package is up on foam tape for dimension. All of the bows are held on with mini glue dots.

Ddd


Posted by studio3d@ccgmail.net at 12:01 AM PST
Thursday, 26 May 2016
It's About Time For This
Topic: Dry Embossing

I dug back into the papers my friend sent in a dry embossing swap and caame up with a great image of watches on yellow cardstock.

I sponged on Distress Ink to the raised surfaces, with more concentrated color in the lower right and fading up to the upper left.

Three of the clock elements got gears attached using tiny brads.

I selected a brown card base and then needed some contrasting element. I came up with the black and white striped paper and mounted it to the card base with mitered corners. I think it gives sort of a steampunk vibe without being overt about it.


A pre-stamped sentiment was bordered with black showing fine white lines and this was popped up on foam tape.

Ddd


Posted by studio3d@ccgmail.net at 12:01 AM PDT
Wednesday, 25 May 2016
You Gotta Feel It
Topic: Dry Embossing

I did not do ANY dry embossing on this card! Really! All of the embossing was done by a friend and sent to me in a swap.

I chose different textures she embossed on the same color of yellow cardstock along with one strip of red. By lining them all up on a card base I got a very tactile background.

I trimmed down a framing element also on the yellow and backed it with a piece of the same red. A cat sticker takes center stage in to red circle.

By chance, I had a sentiment pre-stamped on a similar yellow and I bordered it with more of the red before mounting it on foam tape.


I used some fine line red marker to outline the big areas of yellow to give them some separation.

I still like the concept even though the reality is not as neat as I had hoped.

Ddd


Posted by studio3d@ccgmail.net at 12:01 AM PDT
Thursday, 7 January 2016
Re-Creating a Favored Card
Topic: Dry Embossing

Some time ago I created a dry-embossed card using the letterpress method - which colors the background and leaves the raised areas white. I particularly liked the way it turned out and pulled it out to copy when I needed multiple sympathy cards to send.

The original one used a stamped sentiment but for this version I used a gold peel-off sticker on the raised, bordered panel.


They have drop-shadows drawn in with a coordinating marker and little bits of Stickles along the top edges of the pattern.

Ddd


Posted by studio3d@ccgmail.net at 12:01 AM PST
Thursday, 17 December 2015
Snowy Silver City
Topic: Dry Embossing

The sanding of shiny embossing has worked so well I used it again for the card today.

This one was a snowy village embossed on silver. There was so much open space I knew I couldn't restrict the sanding to the raised areas so I intentially went into the background with the tool. I sanded on both the vertical and the horizontal to create a crosshatched look.

I colored in the houses and trees with pastel alcohol markers for a low-key look.


I left the chimney smoke and the snow plain and added just a hint of color as a shadow on the roofs so they would look snow-covered.


This may get a sentiment stamped in Staz-On on the snowy ground.

Ddd


Posted by studio3d@ccgmail.net at 12:01 AM PST
Wednesday, 16 December 2015
Shiny Red Tree
Topic: Dry Embossing

For the treatment of a Christmas tree embossed on shiny red cardstock I combined a technique  I used before with a new treatment.

First, I used a sanding block to remove most of the red shine. Then I used alcohol markers to color the raised elements.


I cut out around the tree and mounted it over a shiny gold panel that I had embossed with stripes of holly.

I used a white card base and no sentiment.

Ddd


Posted by studio3d@ccgmail.net at 12:01 AM PST
Tuesday, 15 December 2015
Glossy, Glittery Wreath
Topic: Dry Embossing

I'm back to using some of the dry embossed panels I got in a swap. One of these was a wreath (shown before on shiny gold) that was on green cardstock.

I started out by using Distress markers to color in the raised areas with various colors. It was too plain so I added Glossy Accents to the holly leaves and berries.

The rest of the wreath looked plain in comparison so I added two different Stickles. One on the evergreen sprigs and one on the sage-colored filler.


The raised shine on the raised leaves looks particularly nice.

I added this panel to a white base card and added a strip of gold peel-off border at the top and bottom.


I just realized that a LOT of my cards this Christmas are going out without a greeting on the front.

Ddd


Posted by studio3d@ccgmail.net at 12:01 AM PST
Thursday, 10 December 2015
You Said a Mouthful
Topic: Dry Embossing

I have a couple of these embossing folders (Happy Birthday and Thank You) but not one for Christmas. I was delighted to get this impression on shiny silver cardstock.

So, what to do with it?

I decided to just use alcohol markers to color the individual phrases so they would be distinguished from one another.

There were some stars and a sprig of holly to color in as well.

I mounted the panel on a shimmery blue card base.

Ddd


Posted by studio3d@ccgmail.net at 12:01 AM PST
Wednesday, 9 December 2015
Noel, Framed
Topic: Dry Embossing

This overly intricate embossed frame was pressed out on shiny gold cardstock. I trimmed smaller to fit on an A2 card.

It certainly did not need more color, texture or... anything really.

I decided to go with a gold peel-off sentiment (NOEL) in the only open place on the panel.


After mounting the panel on a dark pink folded card base, I had room to add gold peel-off borders to all 4 edges.

Ddd


Posted by studio3d@ccgmail.net at 12:01 AM PST
Tuesday, 8 December 2015
Golden Holiday Dots
Topic: Dry Embossing

While I had the yummy pearlized cream cardstock out I decided to use it as the card base and sentiment strip for this second gold embossing.

This card was not specifically Christmas but just looked festive anyway. 

I added a simple strip of the cream cardstock, framed it out with gold peel-off borders and added a peel-off gold sentiment.


This card, though smaller than the last, is still larger than my usual. 

Ddd


Posted by studio3d@ccgmail.net at 12:01 AM PST
Monday, 7 December 2015
Golden Wreath
Topic: Dry Embossing

Oh. My. Yes.

From a shiny gold oversized dry embossing I cut down right to the edges of the wreath. 

I mounted this on a pearlized cream cardstock base and trimmed it with three strips of gold peel-off borders.


I added a peel-off greeting inside the lower panel.

This card i much larger than my usual at 5 x 7 inches.

Ddd


Posted by studio3d@ccgmail.net at 12:01 AM PST
Sunday, 6 December 2015
All That Glitters
Topic: Dry Embossing

Like the candles yesterday, the embossing used today was also on the super-shiny green cardstock. In fact, they were on opposite end so the same page before I cut them apart.

The tree, however, was not so plain as it was of a decorated tree. I started adding rhinestones over top of the embossed garlands and before I knew it I was in a bling frenzy.


I even added a sticky-back rhinestone star on the top.

Ddd


Posted by studio3d@ccgmail.net at 12:01 AM PST
Saturday, 5 December 2015
Simply Shiny Green
Topic: Dry Embossing

If this dry embossed image had been on white it could have been colored in a veritable rainbow. But, instead, it was embossed on super-shiny dark green. Any color added would be invisible.

So I simply trimmed it, mounted it on a yellow card base and that is all.


I will probably add a sentiment block to this one after I determine the recipient. It is just too plain like this.

Ddd


Posted by studio3d@ccgmail.net at 12:01 AM PST
Friday, 4 December 2015
Silver Reindeer
Topic: Dry Embossing

When I received this dry-embossed image it was HUGE! Like, 8 1/2 x 5 1/2 huge. I couldn't image using it at that size so I trimmed a main image down to the size that would fit on a card front.

The super-shiny silver was a bit confusing with all that was going on. So I used a sanding block to rough up the raised areas. Then I used alcohol markers to color in the branches, reindeer and harness.

I left the snow white.


I added Stickles to the snowbanks but left the falling snow plain.

Ddd


Posted by studio3d@ccgmail.net at 12:01 AM PST
Thursday, 3 December 2015
Sculpted Snowflakes
Topic: Dry Embossing

Just in time for holiday card making a swap partner included lots of Christmas-themed pages in the embossed papers she sent. YAY!

Not only that, many of them are embossed on super-shiny metallic cardstock. YAY YAY!

I didn't choose one of the shiny ones today, though. Even though it was buttery yellow and mostly just scrolls, this impression reminded me of snowflakes. As it happens, I had some white diecut snowflakes already on hand so I cut them into pieces and glued them on top.


I added two different Stickles as outlines on the snowflakes.


I am undecided on whether to include a sentiment.

Ddd


Posted by studio3d@ccgmail.net at 12:01 AM PST
Friday, 18 September 2015
Letterpress Stars Still Shining
Topic: Dry Embossing

This really is the last of the letterpress backgrounds.

When looking for patriotic papers I found a great blue stripe that looks like matress ticking. I set it up beside the red star letterpress and added a strip of red dot and a scalloped piece of denim blue.

I added Stickles to the scallop to give it a 'spangled' look.


A pre-stamped sentiment fount its way onto the striped paper and I used colored pencils to add some detail work.

Ddd


Posted by studio3d@ccgmail.net at 12:01 AM PDT
Thursday, 17 September 2015
Letterpress Is Still In the Stars
Topic: Dry Embossing

HA! Just when you thought I was all done with the letterpress technique (I did say I was done) I ran across two more pieces I had made and turned them into cards. I had originally set them aside because they were splotchy but after I trimmed them down to pieces that were the best parts they were still big enough to use.

Both use the same folder - the stars. One today, one tomorrow...

I started out going for a patriotic theme so I pulled out a distressed blue paperfor the background. Another paper had a linen look with what looked like stitched flowers along two edges. I trimmed these away with a craft knife and used colored pencils to give them some color.

I didn't want to add green and spoil the two-tone look so I colored the leaves and stars lightly with yellow.


Simple layering on a dark red card base was followed with the tuck-in of a prestamped sentiment.

Ddd


Posted by studio3d@ccgmail.net at 12:01 AM PDT
Wednesday, 16 September 2015
Letterpress and Watercolor
Topic: Dry Embossing

For this letterpress card I combined techniques used on previous ones.

I used a folder of a flower garden in a landscape format.  I applied ink only to the background (sky), blending blue and yellow for some interest. As before I misted the cardstock and the folder then ran it through the Cuttlebug and dried it with a heat gun.

I pressed inkpads to acrylic blick and used an aquabrush to 'watercolor' the leaves and flowers. After this layer was dry, I applied darker versions of the same inks to portions of the illustration.

When this was dry I used a fine-line black marker to trace out all the raised areas of the design. I also used the marker to add a double lne border all around the card 'behind' the flowers. I gave this a double green border.


I used jet black Archival ink to stamp the greeting directly on the panel.

Ddd


Posted by studio3d@ccgmail.net at 12:10 AM PDT
Tuesday, 15 September 2015
Letterpress To the Limit
Topic: Dry Embossing

You would never guess how this was made if not for all the step-by-step that I have been posting.

To start with, I inked the folder with four different Distress pads using the corners of them toapply color to specific areas. I used peacock feathers for the background and picked raspberry and mustard for the flowers. Mowed lawn was used for the leaves.

I did the same as on the previous cards, misting for cardstock and the folder before running through the Cuttlebug and drying with the heat tool.

I pressed these same ink pads to an acrylic block and picked up the color with a brush to paint onto the white lines.

Finally, after drying with the heat tool, I used a fine-line black marker to trace all the lines in the design.


I found a sentiment printed on vellum and trimmed it to allow more of the original art to show around the edges. It is mounted with tiny glue dots and there are black rhinestones to cover them.

I mounted this on a black card base.

Ddd


Posted by studio3d@ccgmail.net at 12:01 AM PDT
Updated: Wednesday, 19 August 2015 7:25 AM PDT
Monday, 14 September 2015
Letterpress With Leaves
Topic: Dry Embossing

I watched an episode of "Scrapbook Soup" on public television with a guest from Spellbinders who demonstrated using embossing folders and inkpads to make letterpress backgrounds. I chose seven different embossing folders and used a variety of additional techniques to make each card different.

For this fifth background I used a brocade folder. I smeared the  Distress ink pad over the surface of the folder and misted it with water. I also misted a piece of white cardstock and inserted it in the folder. Once through the Cuttlebug and I hit it with the heat gun to dry it.

Then I used the same ink pad to apply direct to paper hitting just the raised parts, changing them from white to colored. I had a vellum sheet with colorful leaves printed on it. I ran it through the Xyron to apply adhesive to the entire back of it. This was adhered to the letterpress piece and both were trimmed together.

I used a 1/2" corner chomper to round all four corners. Then I tied twine around the panel and attached a pre-stamped sentiment.

I used a dotted card base for this one.

Ddd


Posted by studio3d@ccgmail.net at 12:01 AM PDT

Newer | Latest | Older