« July 2013 »
S M T W T F S
1 2 3 4 5 6
7 8 9 10 11 12 13
14 15 16 17 18 19 20
21 22 23 24 25 26 27
28 29 30 31
You are not logged in. Log in
Entries by Topic
All topics  «
3D paperwork
A - Z challenge 5
A - Z challenge 7
A - Z challenge round 4
A to Z challenge round 3
A to Z round 2
A to Z round 6
A-Z round 1
Around the House
Art Challenges
Artist Trading Cards
Backgrounds
Beads
Bible Journaling
Books
Boxes
Collage
Color Challenge
Coloring
cookbook
Die Cuts
Digital Projects
Digital Stamps
Drawing
Dry Embossing
Fabric Stuff
Fantastic Folds
Field Trip
Home Decor
How Does Your Garden Grow?
Hymnal Art
In The Kitchen
In the studio
Jewelry
Lettering
Links
Multi-Technique
Music to Work By
Musings
Nail Art
New Work
Online Class
Other Hobbies
Other Projects
Painting
Paper Embroidery
Paper Piecing
Photo
Pretty Paper
Quilting
Random
reading
Scrap Recovery
scrapbooking
Sewing
Sketch Challenge
Some Backlog
Stamping
Stencils
Stickers
Supplies
Teabag Folding
Techniques
Testing
tips and tricks
Tutorial
Web resources
Welcome to my Blog
Work By My Friends
workflow
Writing
Blog Tools
Edit your Blog
Build a Blog
RSS Feed
View Profile
Group One
In & Out of Studio 3D
Thursday, 4 July 2013
Soup's On
Topic: Sewing

I wanted to have a gift for a guy and thought a necktie would be classic. However, this guy doesn't really have a need for more ties and but could use a fancier clothing protector for 'nice' occasions.

I decided to make a Sunday dinner necktie bib.

I pieced it with a background 'shirt' fabric, a checked 'tie' fabric and bias tape binding. The knot in the tie is a separate piece as is the collar. The bottom of the tie is loose and under the point is a faux placket with a shirt button. I added small buttons to the collar points.

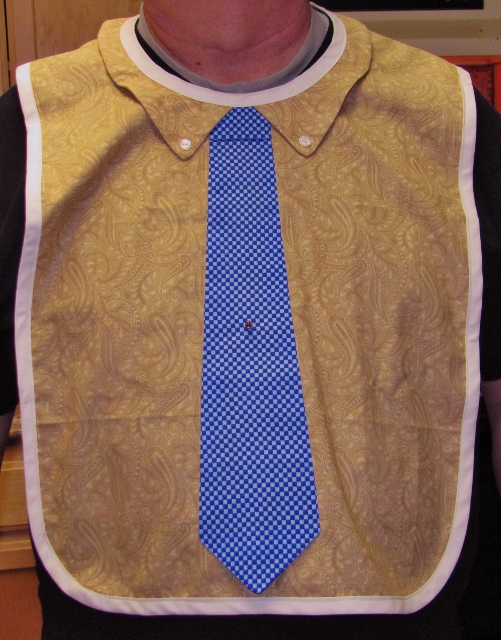
My model has a larger neck so it is not lying as smoothly as it will with the actual recipient.

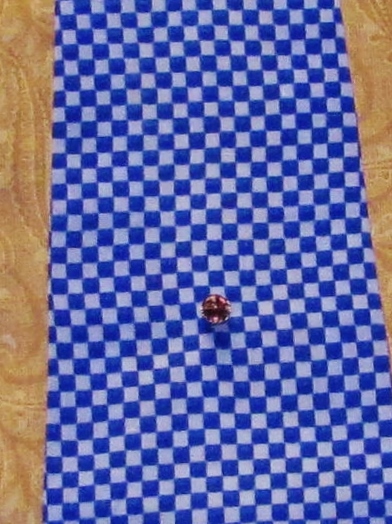
I used a single bead and bead cap to make a faux tie tac.


I think this will be a hit!

Ddd


Posted by studio3d@ccgmail.net at 12:01 AM PDT

View Latest Entries