« November 2012 »
S M T W T F S
1 2 3
4 5 6 7 8 9 10
11 12 13 14 15 16 17
18 19 20 21 22 23 24
25 26 27 28 29 30
You are not logged in. Log in
Entries by Topic
All topics
3D paperwork
A - Z challenge 5
A - Z challenge 7
A - Z challenge round 4
A to Z challenge round 3
A to Z round 2
A to Z round 6
A-Z round 1
Around the House
Art Challenges
Artist Trading Cards
Backgrounds
Beads
Bible Journaling
Books
Boxes
Collage
Color Challenge
Coloring
cookbook
Die Cuts
Digital Projects
Digital Stamps
Drawing
Dry Embossing
Fabric Stuff
Fantastic Folds
Field Trip
Home Decor
How Does Your Garden Grow?
Hymnal Art
In The Kitchen
In the studio
Jewelry
Lettering
Links
Multi-Technique
Music to Work By
Musings
Nail Art
New Work
Online Class
Other Hobbies
Other Projects
Painting
Paper Embroidery
Paper Piecing
Photo
Pretty Paper
Quilting
Random
reading
Scrap Recovery
scrapbooking
Sewing
Sketch Challenge
Some Backlog
Stamping
Stencils
Stickers
Supplies  «
Teabag Folding
Techniques
Testing
tips and tricks
Tutorial
Web resources
Welcome to my Blog
Work By My Friends
workflow
Writing
Blog Tools
Edit your Blog
Build a Blog
RSS Feed
View Profile
Group One
In & Out of Studio 3D
Monday, 5 November 2012
Punch JUNK - Product Review
Topic: Supplies

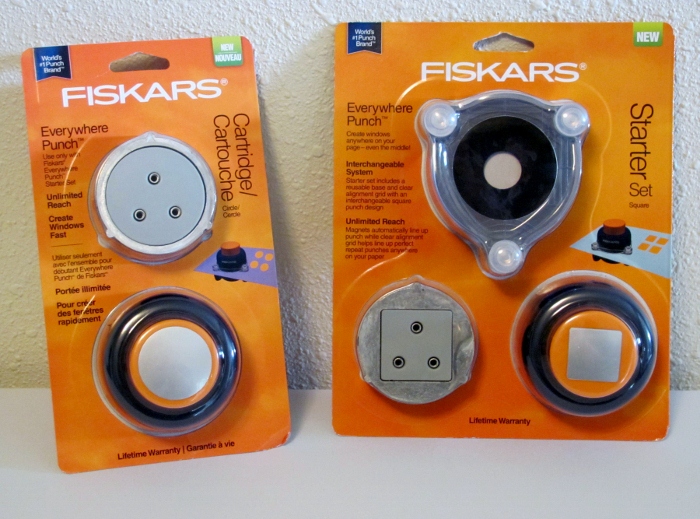
My large circle punch started chewing the edge and will not punch plain paper at all. So I went looking for another and decided to get the Fiskars Everywhere Punch to give myself more versatility. Unfortunately, the round punch is an 'add on' and you have to buy the 'starter kit' to use it. OK, I did it - I bought them both. The starter kit comes with a square Everywhere Punch.

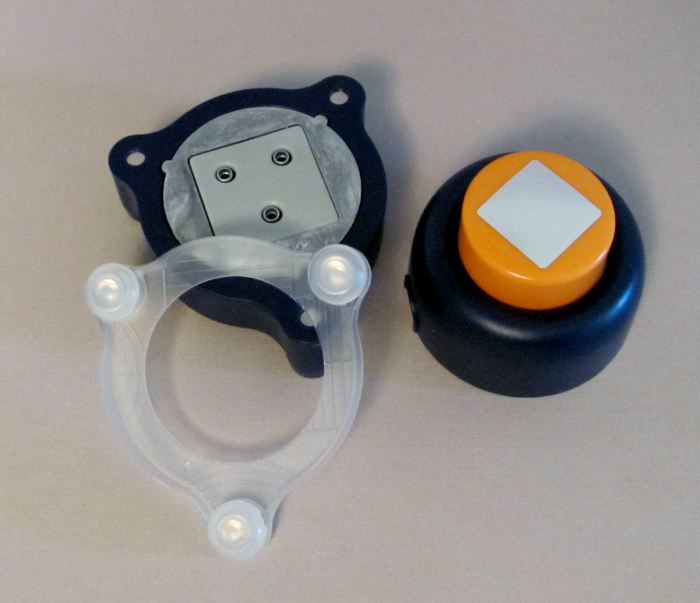
The starter kit is the black base ring and the clear alignment ring. Half of the punch drops into the base and then the clear alignment ring is placed on the paper and both are laid on the base. They hold together with the embedded magnets and then the punch is placed on top and depressed to punch out the shape.

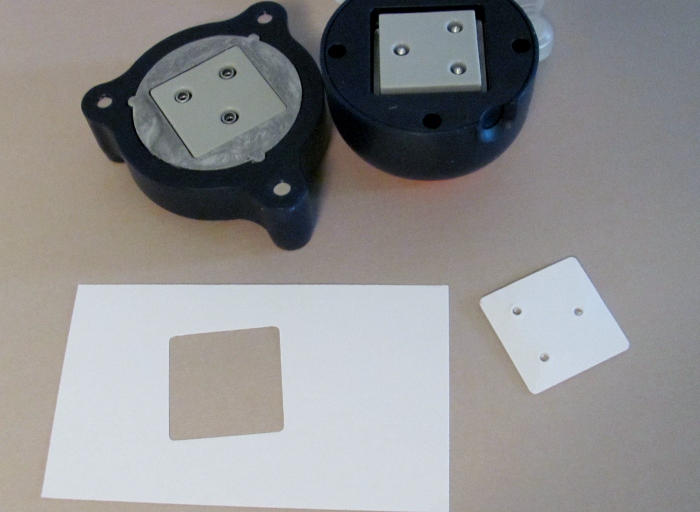
Here's the bad news - you CANNOT use the part that is punched out! WHAT???? All I get is a shaped hole and a piece of scrap paper? Yep!

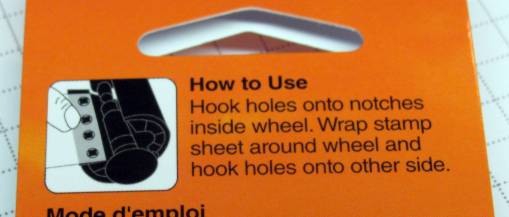
See those three prongs in the center of the punch? They poke three holes in the paper before they punch out the shape!


Well, frankly that makes it pretty much useless to me. The worst part? There is no hint of this on the packaging anywhere. And to get into the product you have to totally destroy the packaging so there is no returning it.

Extremely disappointing all around.

NOT RECOMMENDED.

Ddd


Posted by studio3d@ccgmail.net at 12:01 AM PDT
Monday, 17 September 2012
What a Cutup!
Topic: Supplies

I've bought several 12 x 12 pads of printed cardstock over time andhave been storing them separately from the card-sized stuff. So today I decided that, since I really use it all for cards, I would cut it down to suit that.

Depending on the pattern I cut some to 6 x 6, some to 5.25 x 4, and some I cut to feature items on the cardstock. The 'backgrounds' stuff in 6 x 6 all went into the box with the stuff from 6 x 6 pads


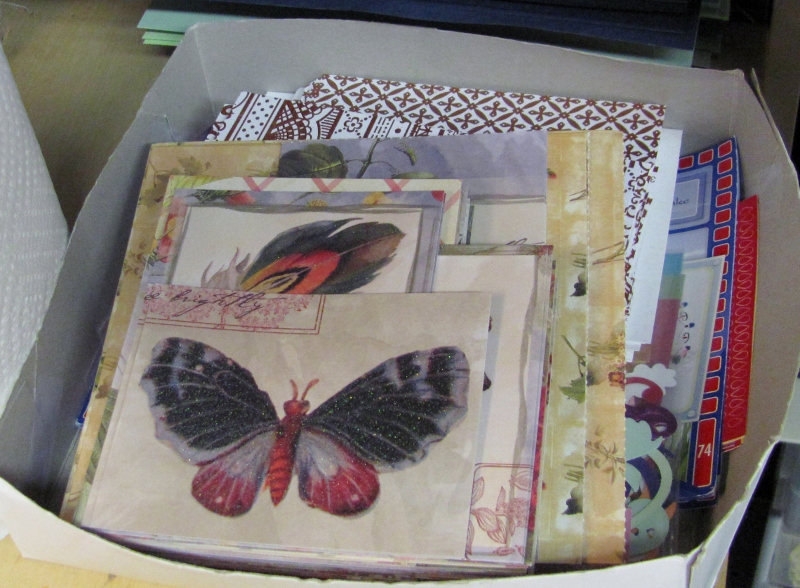
The feature items got set aside in another box so they are ready to pull out for card fronts


Then all the smaller bits got sorted in with the table scraps for use as 'whatever'

Now I'm all stocked and ready to make a bunch more cards.

Ddd


Posted by studio3d@ccgmail.net at 12:01 AM PDT
Tuesday, 4 September 2012
Shiny Wafers
Topic: Supplies

A quick stop by the craft store the other day had me scanning the shelves for things marked for clearance. I happened upon a package of round and oval stickers that are acrylic domes but still very low profile. These are perfect for cards.

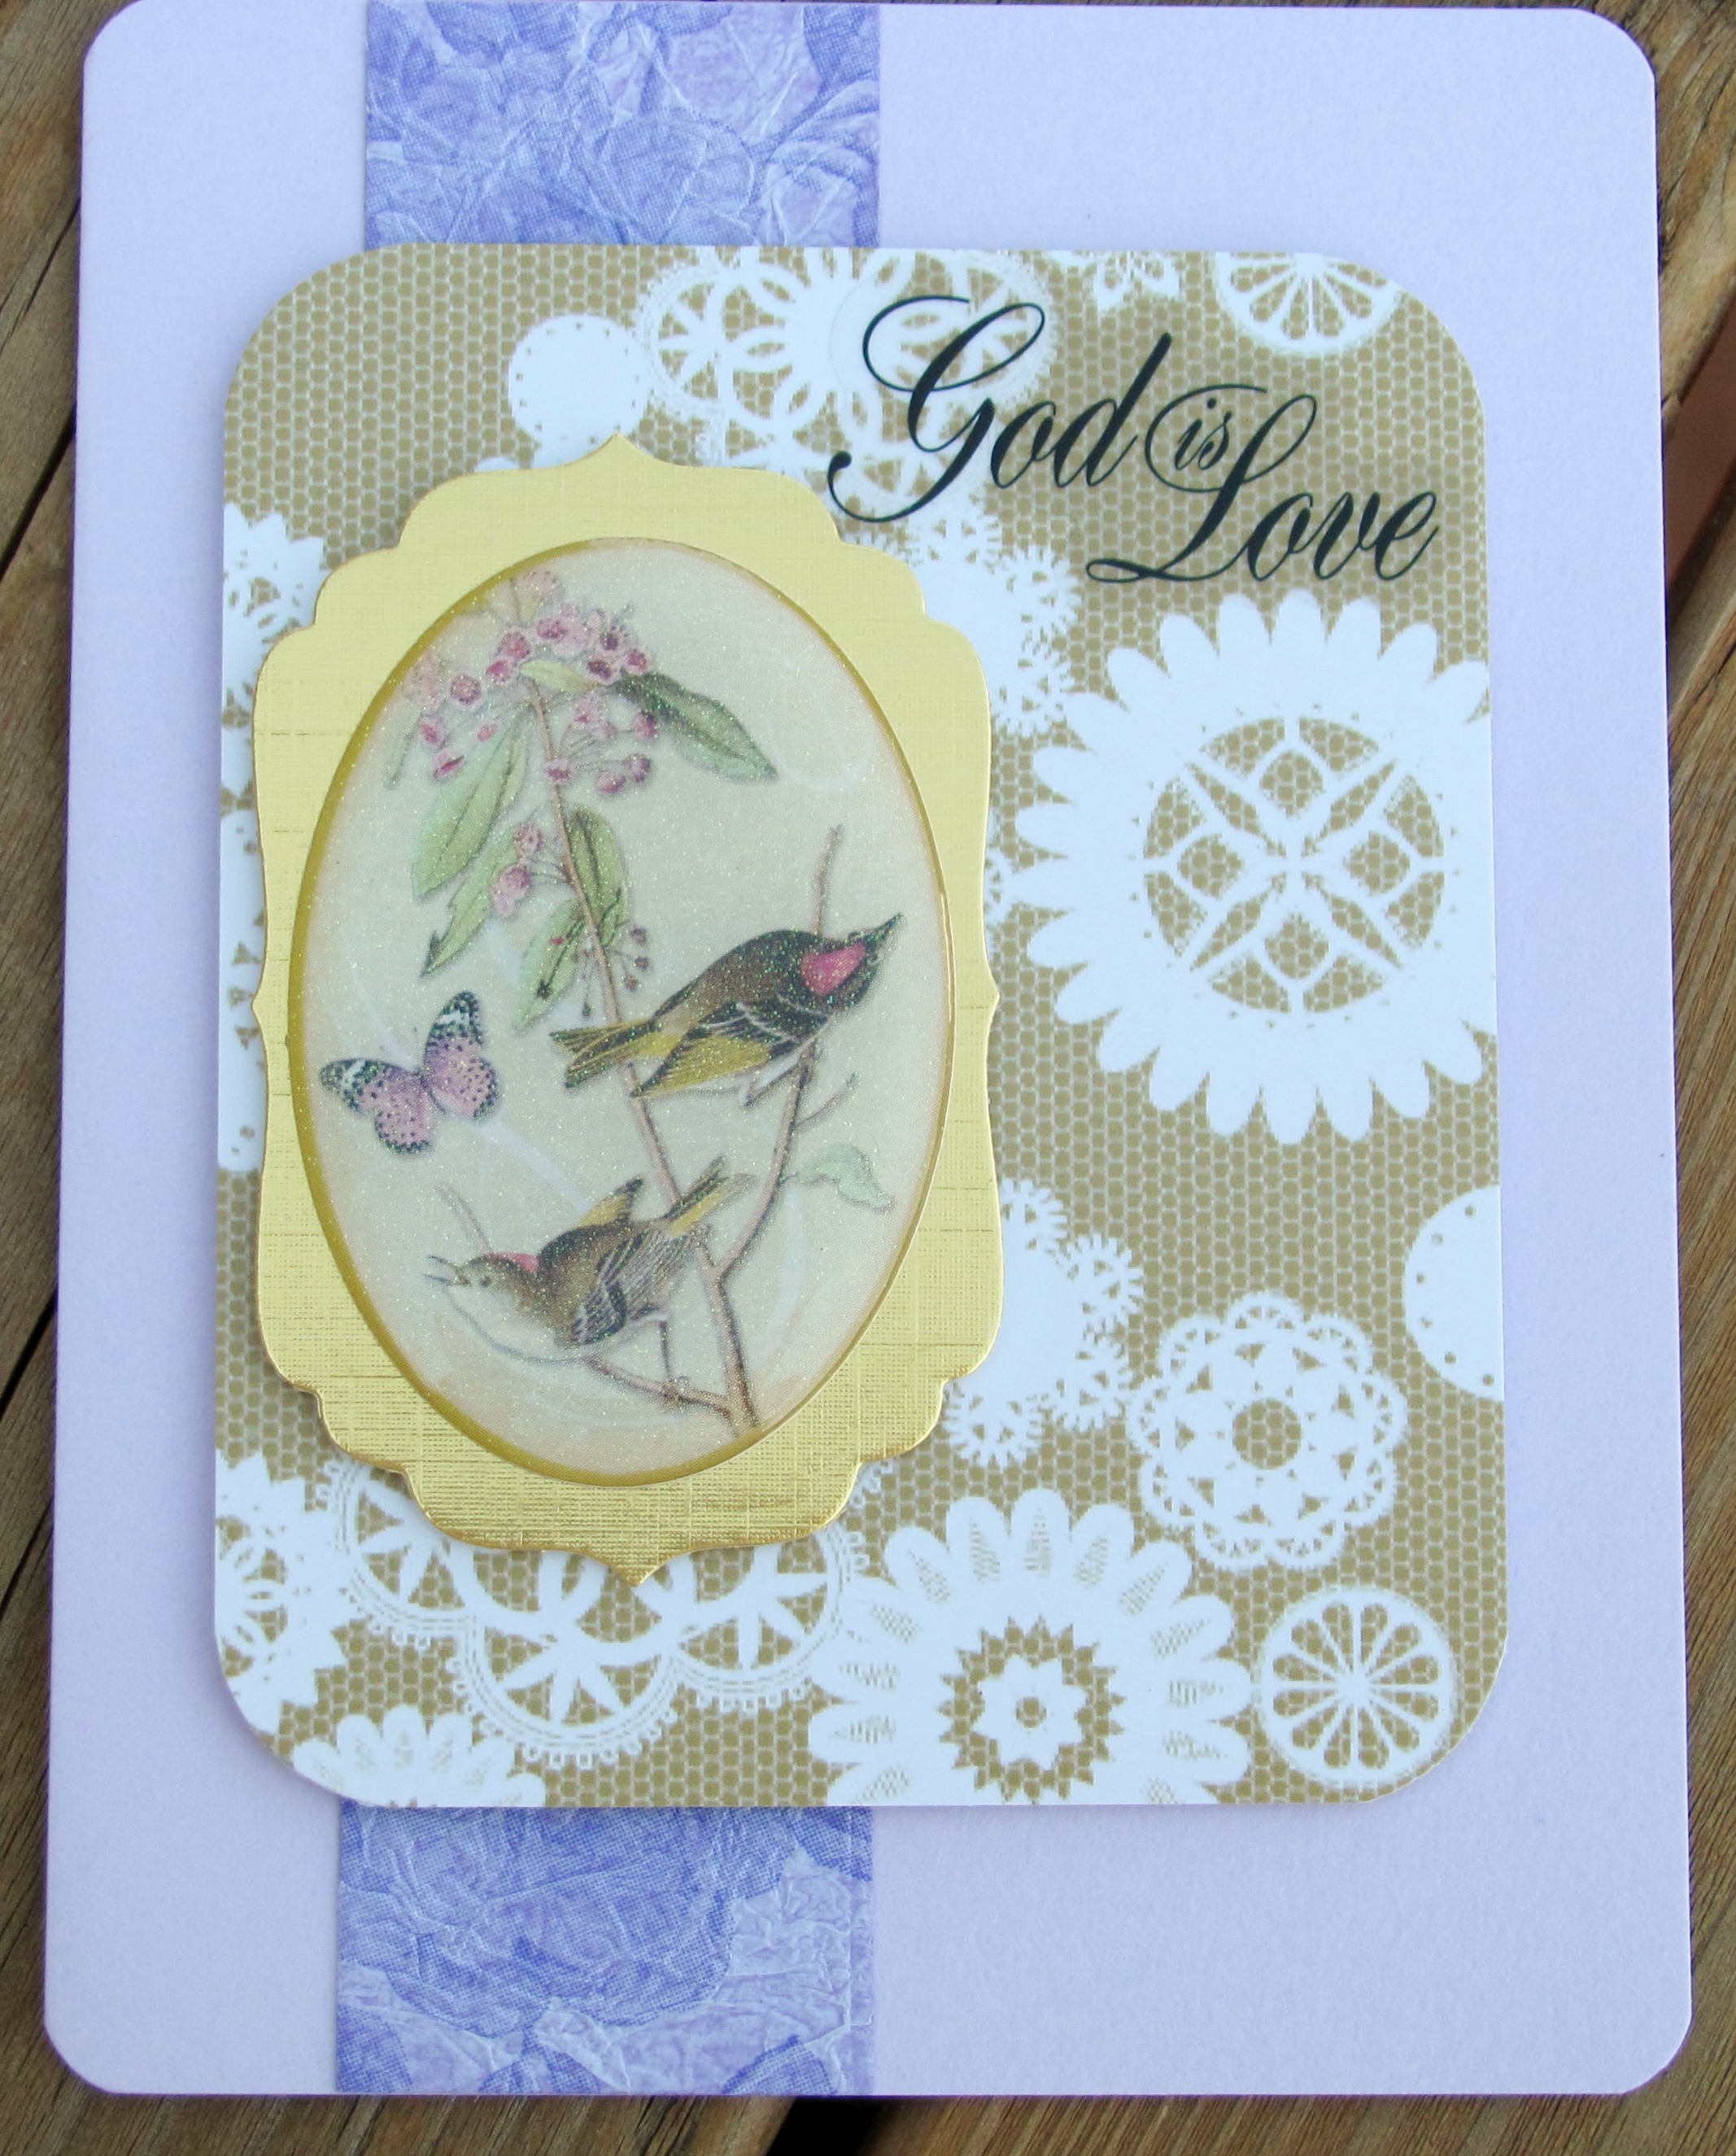
I grabbed up some of the kits I had made up and took out the old 'feature items' and replaced with these new disks. First up is one using some crushed tissue paper over cardstock (the background purple strip) and a 'sample' of cardstock off the cover of a pad (the netting and lace circle page) as well as a gold metallic diecut (the shaped item) and a clear greeting sticker.


Next I used three pieces of printed cardstock (left, center, right) and a clear plastic greeting bar. It had to be mounted over white cardstock and trimmed out as the colors showing through made the text unreadable.


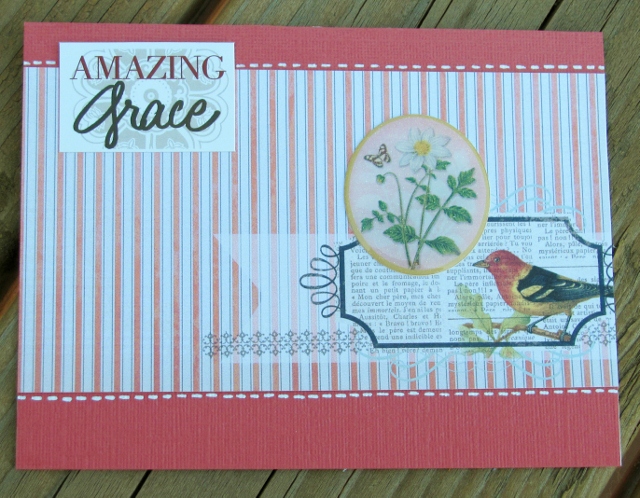
This one is simply a strip of striped paper and a cardstock text block. The bird, label and scrollwork are all printed on the striped paper. I just had to place the circle sticker carefully to cover up the printed sentiment.


This has a green card base, pink colored panel and a floral stripe panel with rounded corners. The flowers on the striped panel are glittered. I added a clear scripture at the top.

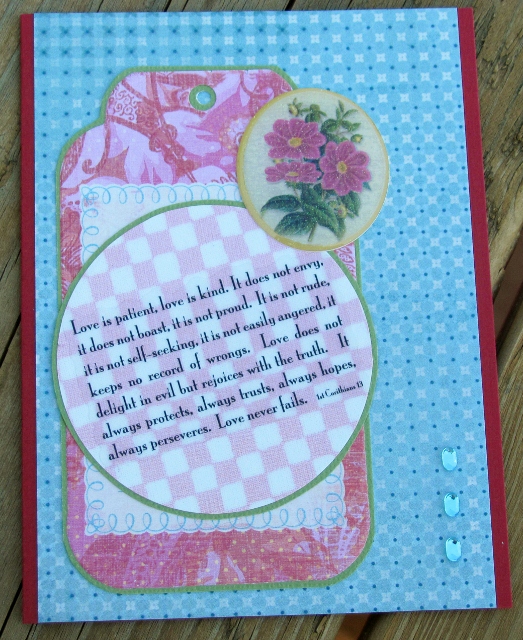
A blue patterned paper, a tag backed with green and a diecut circle backed with green. A clear scripture sticker covers the circle. Three losenge-shaped gemstones are pn the right.

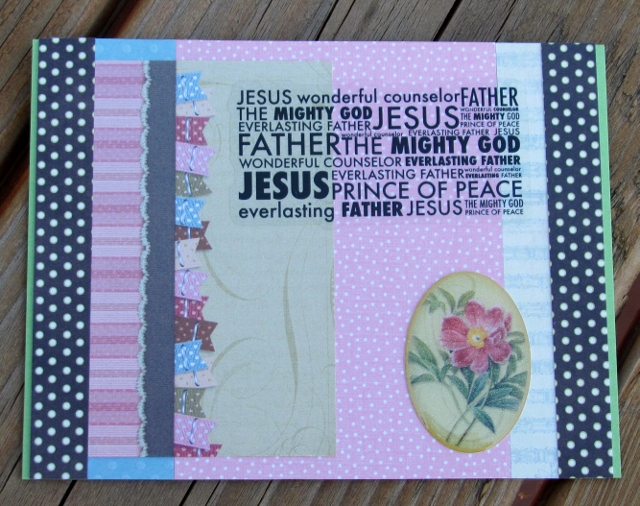
I used a couple of table scraps for background and added dotted stripes to each side. Then I placed a block cut from a printed tag at the left side. The text is a large clear sticker. 

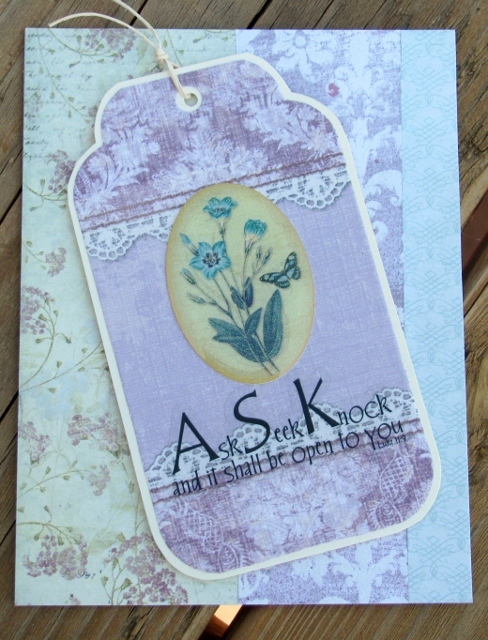
Three strips of patterned paper, a bordered tag with scrappers floss knot and a clear sticker. 


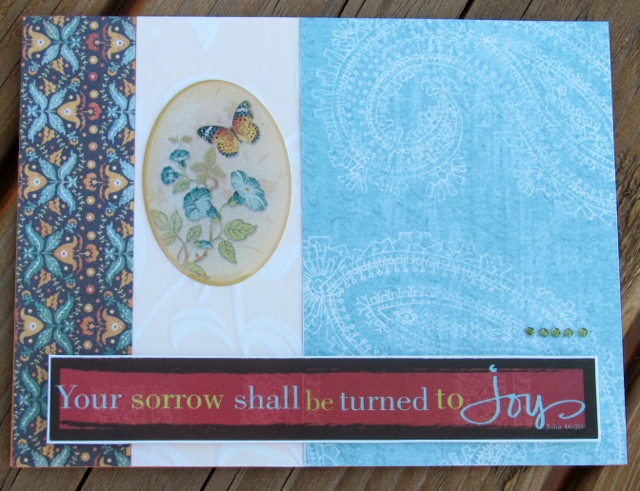
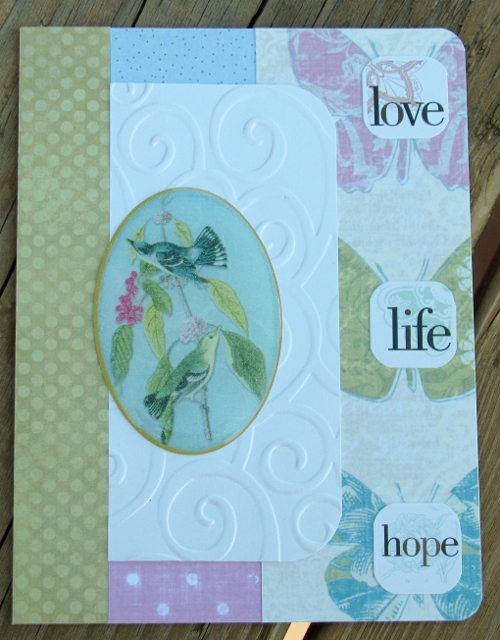
For this one the printed papers included this with the butterflies printed down it. I gave each butterfly a color-coordinating word sticker. Then I mounted some textured shiny paper with two rounded colors to be the backpiece for the focal wafer.


Sorry about the quality of the photos. I got a new computer and that meant new photo-editing software. Still learning!

Ddd


Posted by studio3d@ccgmail.net at 12:01 AM PDT
Monday, 16 July 2012
You Just Gotta Stick With It
Topic: Supplies

I thought I'd talk a bit about adhesives today. I realized that I had reached for three different products in the process of making one card and decided someone might benefit from knowing what choices I make for different parts of a process. So I wanted to share the products I have on hand and what I use them for. In some cases I am particular about the brand and in others I usedifferent brands of a similar product interchangeably.

LIQUID ADHESIVES:

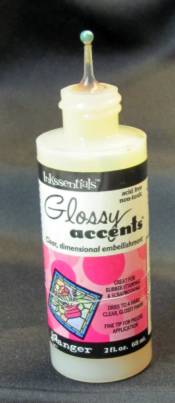
Without a doubt the liquid I use most is Glossy Accents. I use it as tiny dots to glue paper to paper, as a thin coat to glue acrylic to paper, as a top coat to seal glitter or create a shiny surface, and as a fill for 3D effect.
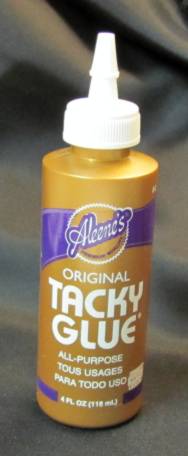
I use Aleene's Tacky Glue for adhering FlowerSoft to accent pictures. It also works pretty well when gluing cardboard and wood objects.
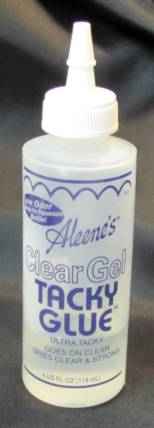
Aleene's Clear Gel Tacky Glue is also on hand. I think I got it to use with quilling but since I don't do quilling, I don't use this glue. Must be some other good use for it, though.
Also from the Aleene's line is Tack It Over & Over. I use this in a very thin coat on rubber unmounted stamps. This makes them cling to my acrylic blocks as well as to the CD cases I use to store them in. If it ever gets 'unsticky' it can easily be removed and reapplied.

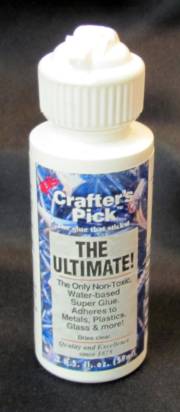
For heavy-duty adhesion I really like Crafters Pick The Ultimate. This is a super thick white glue that grips like nobody's business and creates a bond quickly. I used it to glue a canvas cover to a scrapbook and it works like a dream.

TAPES:

No sense in picturing the standards: Scotch Magic Tape which I use mostly to stick down my threads when doing paper embroidery, Scotch Removeable Tape which I use for taping patterns and templates to my cardstock, and Scotch Double Stick Tape which I use occasionally for a variety of applications.

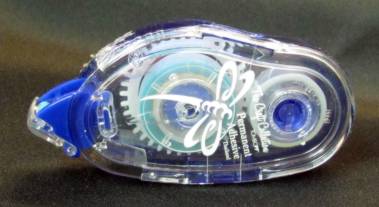
Mostly I use a 'snail' refillable tape runner for layering papers and cardstock on cards. I don't know what brand this is, I just buy 'the blue one' when I need refills! I have had other brands that did not have the staying power of this one.
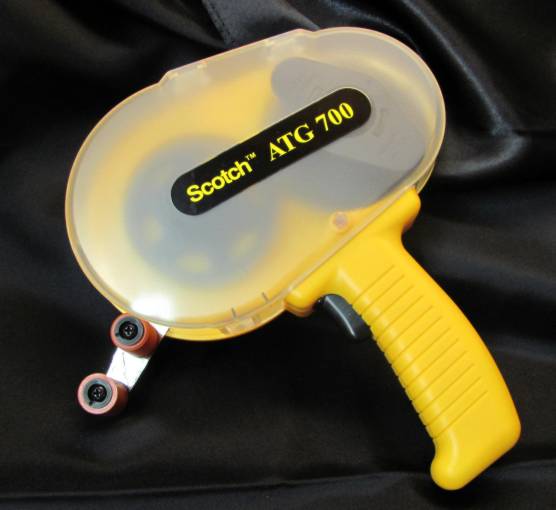
I bought an ATG gun on deep discount but picked up the wrong rolls of tape for it. So I haven't used the gun but I have used the tape right off the rolls. It is some powerful stuff.
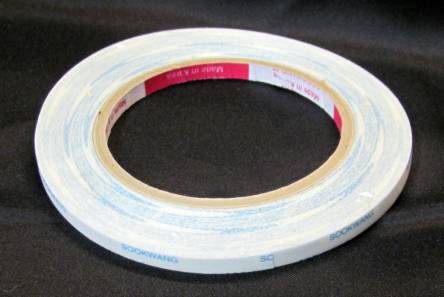
I use Scor-Tape when I want a dry adhesive that has gorilla-strength. I used this for adhering the papers to the wooden lighthouses and the cardstock would shred long before you could get the adhesive to let go.
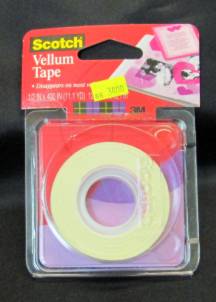
I have some vellum tape that is 'supposed' to not show under vellum and parchment. I am not impressed. You can still see it.
 

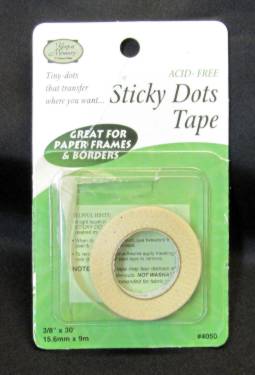
I also have some Sticky Dot Tape for the same uses. It is some better for vellum and parchment but I don't find it to adhere as well.

DIMENSIONALS:

Not Pictured: Clear Silicone  Kitchen and Bath Adhesive. This is used in little dabs (applied with a toothpick) to separate the layers of 3D images.

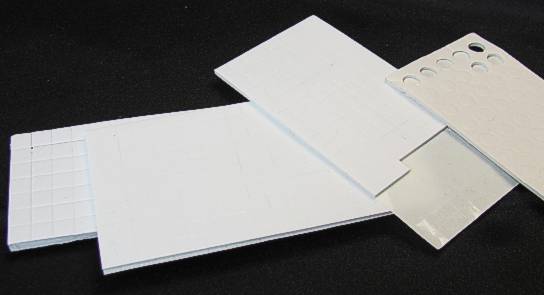
Foam squares are used for layering elements on cards, for making 3D pictures and for making focal pieces 'pop'. They come in varying thicknesses. Some are even round instead of square. The round ones waste so much product! I find they are all acceptable but preference goes to ones where the liner comes off easily, the foam is not as thick so layering does not raise your card to absurd heights, and ones that can be cut with scissors to make smaller pieces. There are some good ones that are about 1/4 inch square and 1/16 thick. Many of these have some from swaps or as gifts and they just keep getting put to the back of the supplies.
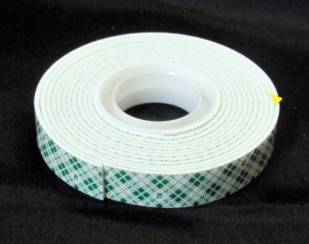
This is my REAL preference - 3M Foam Tape on a roll. It is thinner than many squares and can be esaily cut to whatever size needed. For a sentiment I can even just cut a strip of it.

SPOT ADHESIVES:

I use two products interchangeably and have no problems with either. Zots is one brand and Glue Dots is the other. I get them in 1/2 inch, 1/4 inch, 1/8 inch and 1/2 inch that is thick for 3D.
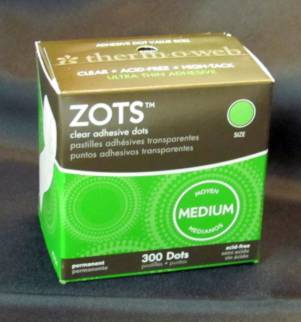
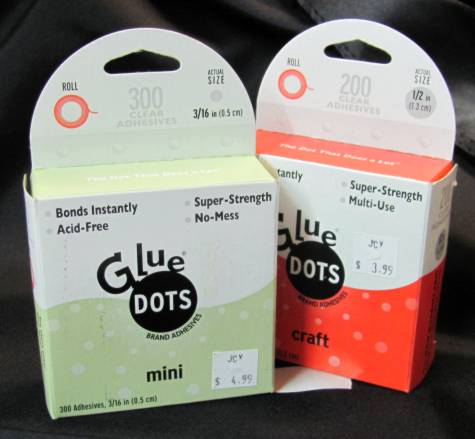

OTHER ADHESIVES I USE:

Quickit Glue Pen is a new-to-me adhesive. It rolls off the pen like a gel roller ball so you can put the glue right where you need it. Unfortunately it takes some time to dry so you have to hold it in place to keep it from popping off. Goes on blue and dries clear so you can see where you are putting it.

For a spray adhesive (when I need one) I prefer 3M Super 77. It does not come undone like other brands I have tried. WARNING: Despite what you see on TV craft and decorating shows you don't want to just spray this willy-nilly. It gets on everything and is a bear to clean up. Use a spray box to contain overspray, mask anything that it might get on where you don't want it and use sparingly - it stinks!
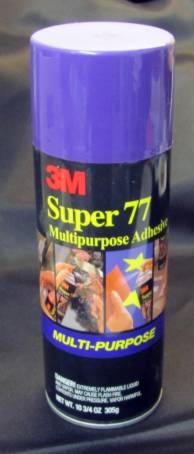
I have some sheet adhesive with a red liner front and back. This is great when you need super-grip with a strange shape. You can trim it to whatever shape you need and peel the liner to adhere it. It also comes in rolls in varying widths but I am all out of those.
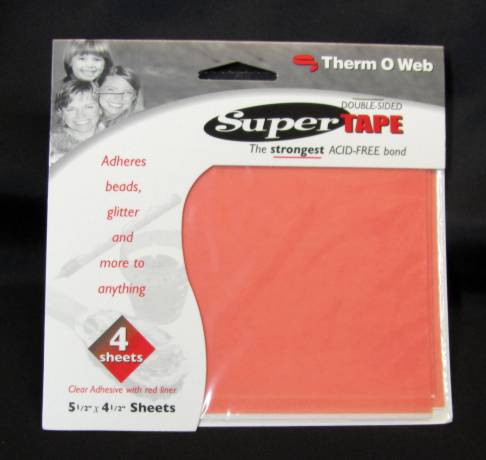
And finally, the Xyron. I only have the one size although they have larger and smaller ones, down to sticker size. Mine will do a card front and that is big enough for me. I find this is my pest option for sticking down parchment or vellum as the adhesive goes over the whole thing so there are no lines or dots to show.

Ha! I almost forgot my glue gun. I have hot glue and cooler glue, large gun and mini. I mostly use the cooler mini. Actually, I mostly don't use my glue gun!


So there you have it. I can stick most anything to most anything else and be pretty sure of a secure hold.

Ddd


Posted by studio3d@ccgmail.net at 12:01 AM PDT
Friday, 4 May 2012
Hey, What's In the Box?
Topic: Supplies

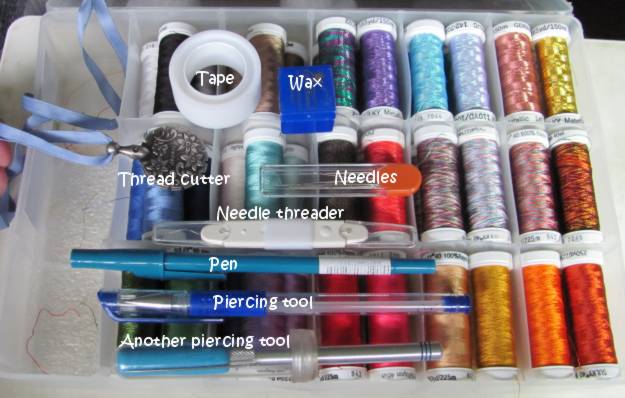
Since I do quite a bit of paper embroidery I wanted a set-up of supplies that would keep everything together and be portable. I take mine in the car, on the plane, to waiting rooms, and when I'm at home it is handy in a drawer by my favorite chair.

I got the box on sale at the craft store and here is how I have it set up:

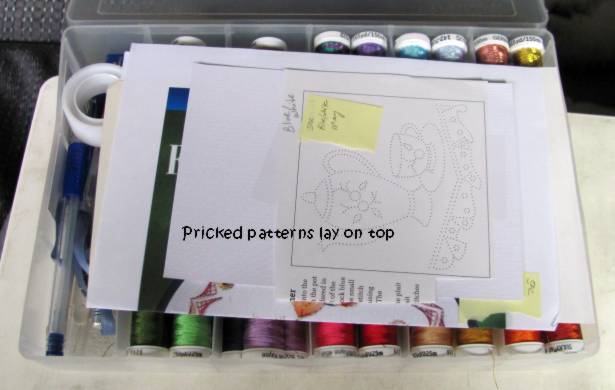
On top is a stack of already pricked papers, still taped to their patterns. If they are for a specific occasion they have a sticky note with a date and are arranged in order of stitching rotation. The lid is flexible and has a good latch so I can stack 4 to 5 projects in here. While I am working on a project the others get moved to the open lid, out of the way of thread selection. Completed pieces get moved to the bottom of the stack until I get home when they are moved to the studio for assembly into a card.


On the right side of the box I have all my threads. The brand I buy (Sulky) will fit 4 to a section. I group them by thread type (metallics, shimmers, verigated, and solids) The solids are grouped by colors so I can easily choose from 3 greens, 4 pinks, 3 browns, etc. I move the spool I am working from over to the left side tool section so I don't lose track of it.

So, what's in the tool section? First of all I used a sharp knife and cut out the divider in the left section so it would run the full width of the box, to fit longer tools inside. From upper left: roll of regular scotch tape. This is used to hold the loose thread ends to the back of the cardstock at the beginning and end of each length of thread. To the right is a tiny box of wax. This is used to condition threads that have a tendency to twist, knot and fray. Next row from the left: I use a Clover thread cutter. It has no sharp or pointed parts to I can take it on the plane without any problem. The thread is pulled into any one of the slots around the edge where there is a razor blade that slices through it. To the right is my needle case. This is actually the container that replacement leads for a mechanical pencil came in. Then there is a needle-threader. I seldom need this but it is a handy place to wind more tape and I use the rounded ends to burnish the back of the finished project to close up the holes around the threads. I keep a pen (and usually a mechanical pencil) in the box to make notations on patterns. I have two piercing tools. The one that looks like a pen is newer and, like a pen, comes with it's own cap. The older one on the bottom is just a 'needle on a stick' type so I devised this set-up to make it safe. The plastic tube is off of a fresh flower from the florist. It includes the rubber cap with a cross-cut opening to slide the stem through. I placed a sponge grip meant for a pencil inside. This way I just push the tool through the rubber cap and it slides into the foam sleeve. Keeps it from rattling around and protects the tip from breaking.


I put a little piece of packing material in the bottom of each well to keep everything from clacking around when I carry it.

....now back to stitching!

Ddd


Posted by studio3d@ccgmail.net at 12:01 AM PDT
Friday, 6 April 2012
Vision Check?
Topic: Supplies

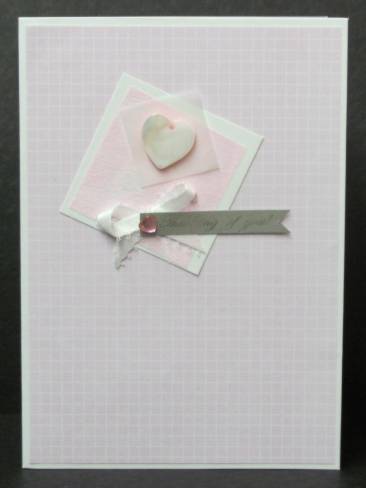
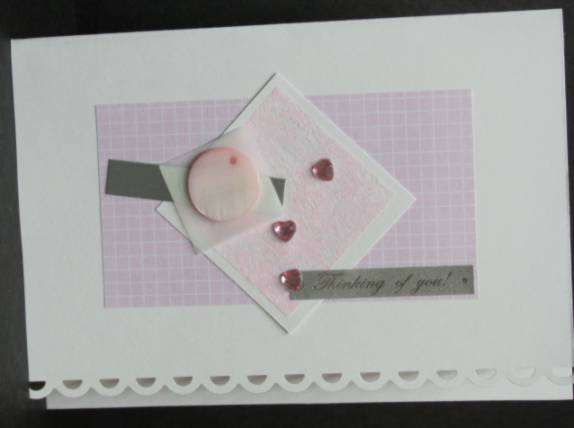
In a recently recieved gift package I got a card 'kit'. There were 5 envelopes, 4 folded white cards and 3 cello packets of silver, white and pink snippets. I pulled some light pink checked paper from another packet and - for one card - also added some burgundy table scraps. I came up with 4 cards but they are very sparse on the decor and, due to the coloring of the elements, really freaked out the camera. It was like taking pictures of a white rabbit eating cotton balls in a snow bank.

If you can manage to see any detail on these, consider yourself fortunate!

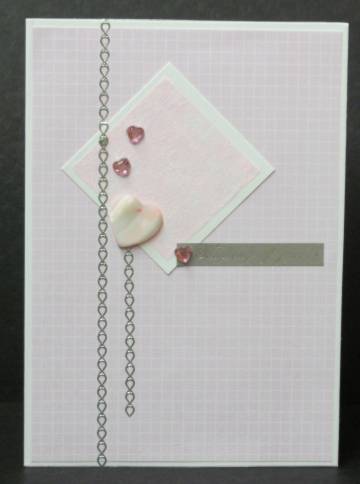
This uses the pink background paper, a square of white cardstock (part of the packaging), a square of pink non-woven mesh, a square of vellum, a mother-of-pearl heart charm, a white bow (not part of the kit), a silver paper imprinted 'thinking of you', and a single heart rhinestone.


This card was turned on its side and border punched throught the front layer. It uses the pink background paper, a square of white cardstock (part of the packaging), a square of pink non-woven mesh, a square of vellum, a mother-of-pearl circle charm, a strip of silver cardstock, a silver paper imprinted 'thinking of you', and three heart rhinestones.


I went back to the original orientation for the rest. This uses the pink background paper, a square of white cardstock (part of the packaging), a square of pink non-woven mesh, a mother-of-pearl heart charm, a silver paper imprinted 'thinking of you', three heart rhinestones, and a couple of strips of silver peel-off borders (not part of the kit).


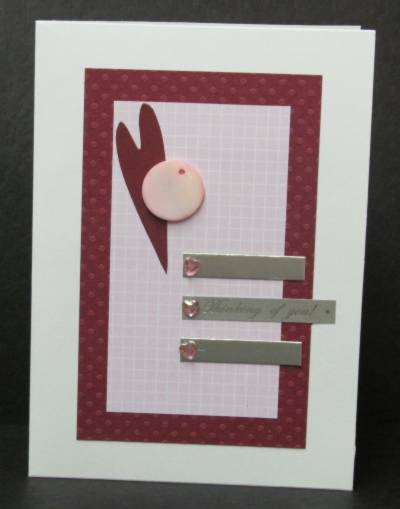
Running short on the provided bits I added some burgundy dotted cardstock for more impact. To this I added the pink background paper, a mother-of-pearl circle charm, two strips of silver cardstock, a silver paper imprinted 'thinking of you', three heart rhinestones, and a diecut burgundy heart (not part of the kit).


I guess it is OK that the 5th folded card was not in the kit as I only have a single pink rhinestone heart to decorate it with. THAT would be understated!

Ddd


Posted by studio3d@ccgmail.net at 12:01 AM PDT
Friday, 16 March 2012
Yummy Ribbons
Topic: Supplies

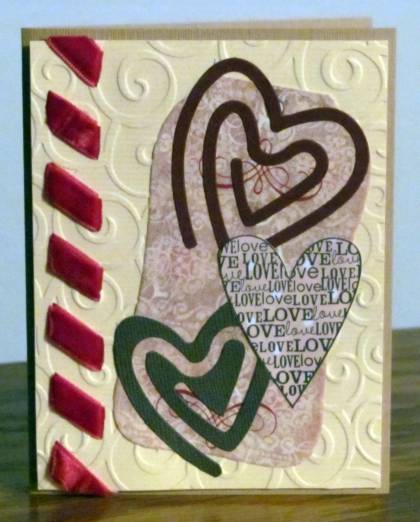
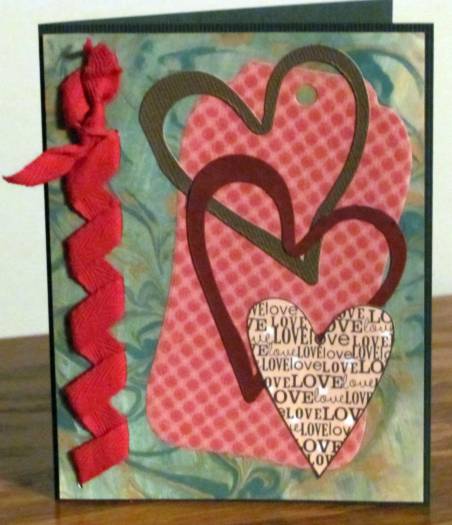
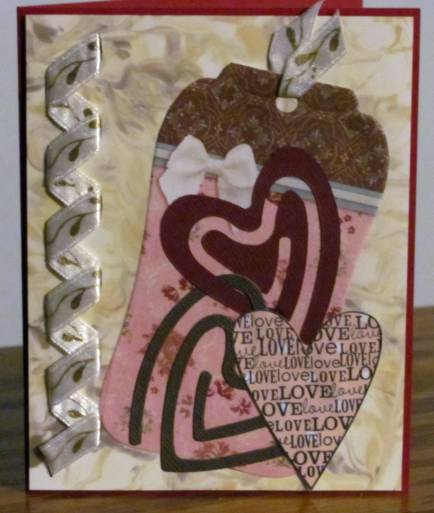
For Christmas I received three of the punches from We R Memory Keepers that allow you to punch anywhere on a page and weave ribbon through. They come with a 3-pack of ribbon that you can use to do the weaving. I did three cards with one of the punches, used thrie ribbon for two of them and a ribbon I had on hand for the third card.

This one uses their velvet ribbon. I felt it was too thick to do the second step of the ribbon weaving so just tucked the ends to the back. I mounted the front piece onto a folded card base using foam tape so the ribbon would not make it bulge up from the back. I used a Sizzix die to cut 'primative hearts' to layer with a printed tag and a text heart stamped on decorative paper.


The second card uses their twill ribbon which I wove in the prescribed manner. I also added a bit of knotted ribbon at the top end. This background is one made with the 'shaving cream' technique. I mounted it to the base card with foam tape again and continued with the primative heart die cuts, tag and stamped heart.


For this third card I used ribbon I had on hand. More of the shaving cream background, tag, diecut hearts and stamped text heart. I added a snippet of the ribbon to the top of the tag on this one.


I think this is my favorite of the three.

I have two more of these punches to try out along with more ribbons that came with them and more of them on hand. If I get bored with these, there are actually three more punches that I don't own. Oh the possibilities!

Ddd


Posted by studio3d@ccgmail.net at 12:01 AM PDT
Thursday, 20 October 2011
Double Pocket Front
Topic: Supplies

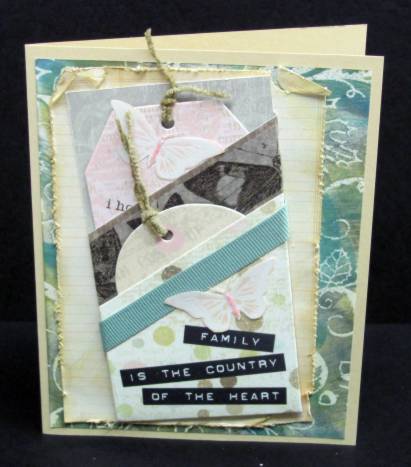
I've had this double pocket element with two tags hanging around for a long time. I pulled out some ledger print and roughed up the edges before coloring with 'old paper' distress ink. The background print is some of the Color Me papers with chalk inks. These are all layered on a tan folded card base.

The text is part of the original artwork - printed directly on the cardstock. The grossgrain ribbon is original to the piece as well, though the butterfly is part of the Color Me tags sheet.

I pulled the tags out to decorate them as well. They each got a chenille cord tied through the hole. The larger tag got another butterfly as well as two stamped ones. I colored in the stamped wings with Stickles and used an acrylic stamp across the middle by sticking it down to a block in a wavy curve. The round tag only got a stamped text.

Hard to tell from the photos - the larger tag is really pink and the round one is green. They have a text printed all over them very lightly.

Ddd


Posted by studio3d@ccgmail.net at 6:00 AM PDT
Sunday, 16 October 2011
Color Me Labels
Topic: Supplies

I have showed the sheets from the sampler pack of Color Me papers I bought but have never showed anything using the page of labels . I cut them up into individual units before coloring them with Distress Inks, Shimmer Sprays, or Chalk Inks. Today I have a couple of cards I made using these labels.

This first one I colored with Distress Ink and trimmed close around. I colored a piece of the Color Me full sheet with some Shimmer Spray and mounted it on a Pink folded card base. The corners were rounded with a punch and I added a peice of clipart from a book. Then I stamped the text.


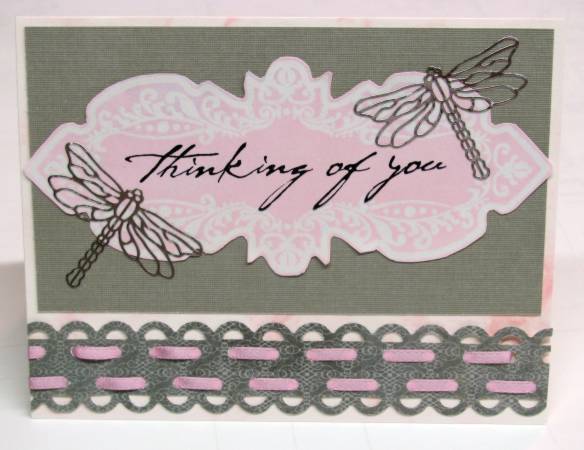
This one I colored with chalk ink and added to a piece of gray cardstock then stamped the text. For the bottom piece I wasdoing some experimenting with a border punch and a 1/8-inch punch. I threaded narrow pink ribbon through the holes and placed it on the card. I added two silver peel-off dragonflies.


I colored up the whole page of labels but these were the only ones I pulled out to use right away.

Ddd


Posted by studio3d@ccgmail.net at 6:00 AM PDT
Updated: Sunday, 16 October 2011 2:55 PM PDT
Friday, 7 October 2011
Tag, You're It
Topic: Supplies

Ooooh, goodie! Shopping in the $1 bin at JoAnn Fabrics I found these really cute notebooks of 26 printed tags (I think there were 6 styles in all). Each style has two of each tag. I bought 2 of each style so I could play with half and send half in goodie bags for swaps.

So I set about using some of these tags to make cards:

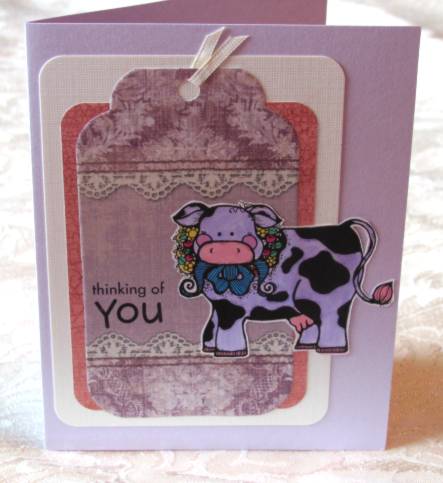
This vintage-look tag, imprinted with lace and fabrics was layered with a crackle-print paper and a cream panel of cardstock, both with rounded corners. I chose a lavender card base to go with the stamped, watercolored cow I wanted to use (remember the old poem, "I never saw a purple cow..."?). I added a fold of ribbon through the hole in the tag to finish it off. The greeting is stamped.


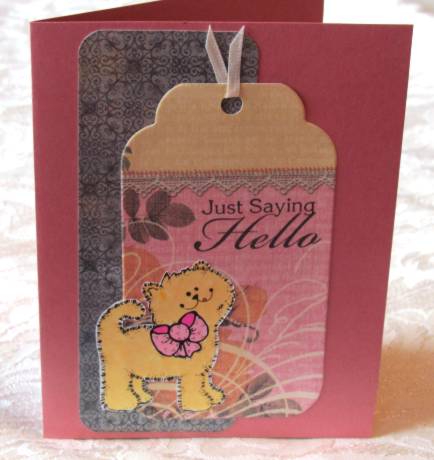
This tag was purrrr-fect for the little kitty I stamped, colored and cut out. Apanel of printed cardstock from the table scraps and a dusty rose card base rounded out the supplies. I stamped the greeting and added the snippet of ribbon to the tag.


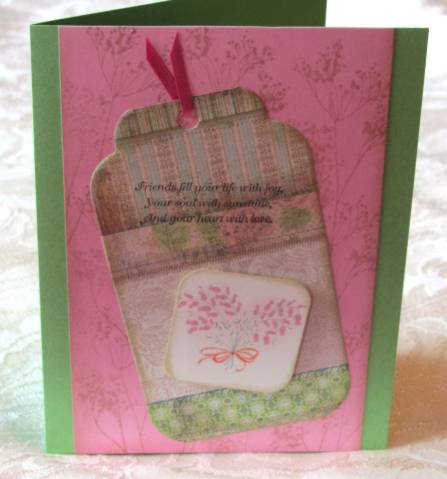
I stamped a background for this tag to rest upon using the 'weeds' (Tim Holtz) and distress ink in Old Paper. I used the distress ink to tone the edges of the pink panel, the tag and the little square, punched from an old greeting card and punched with a corner rounder. A green card base was selected, as well as the ribbon snippet and a stamped greeting.


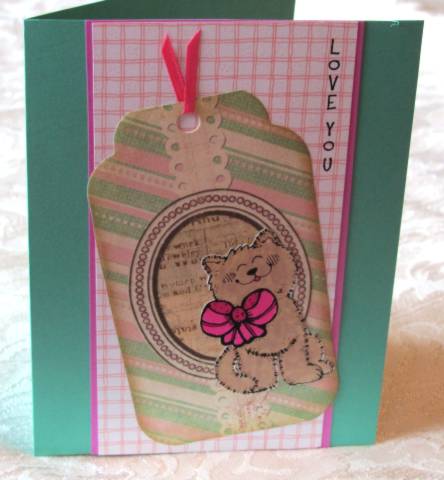
This tag, with it's diagonal stripes and oval frame made the perfect setting for a playful kitty stamp. The cat was stamped separately, colored and cut out. I had a scrap of checked print and reinforced the cat's bow with the ribbon snippet and the borders on each side of the checked paper. The soft green card base matches the green in the tag. Again, the text is stamped.


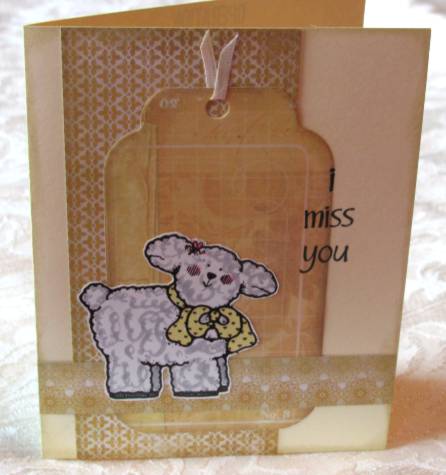
This little tag looks like ledger paper and I chose other table scraps with the same golden hues. Each piece was distressed edges using Old Paper distress ink, as does the card base. I colored and cut out the little lamb and added a ribbon snippet and stamped the card greeting.


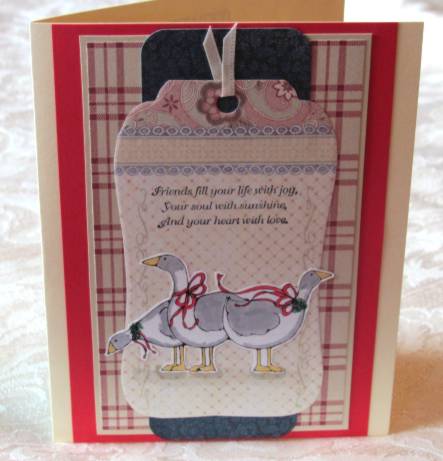
These geese were time consuming to cut out! I added shadows under their feet with copic markers and let them stretch their necks outside the edges of their tag. The stamped greeting seemed especially to fir the scene of the three geese. I added mulpiple panels of table scraps and a cream card base.


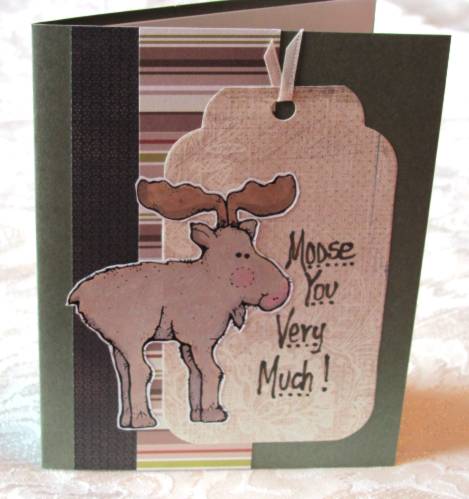
I love a good pun so "Moose You Very Much" seemed right for this fella, stamped, colored and cut out for mounting (yes, I mounted a WHOLE moose - not just his head). The tag was quite plain so I hand-lettered the greeting directly onto it in a casual style. More table scraps make up the layers and the card base has a little bit of texturized look to it.


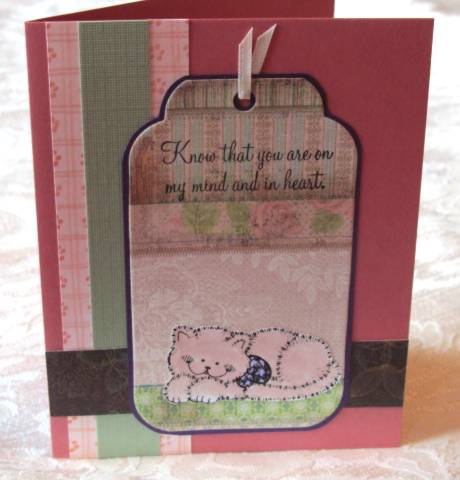
This tag had a natural line that I used to serve as a 'carpet' for this kitty. The upper line provided a natural panel for stamping the greeting. The table scraps in the background left little definition for the edges of the tag so I backed it with a purple border to pick up the purple in the cat's bow. A dusty rose card base keeps the cozy  feeling going.


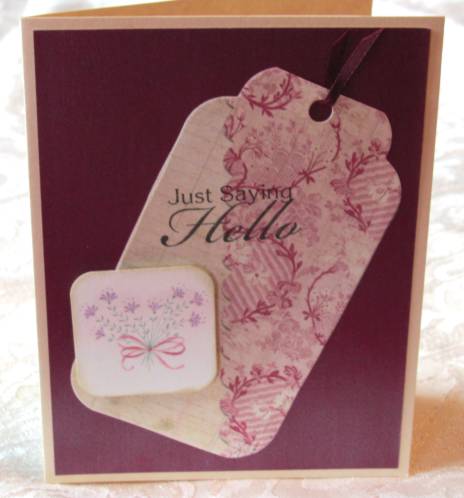
I like the vintage look to this tag and the diagonal line needed accenting. So used the diagonal line to create the centerline for the card and kept the backing simple - just a single piece of simmery plum paper. I punched the square from an old greeting card, rounded the corners and color-distressed the edges. It is popped up on foam tape. The greeting is stamped and I added that snippet of ribbon to the tag.


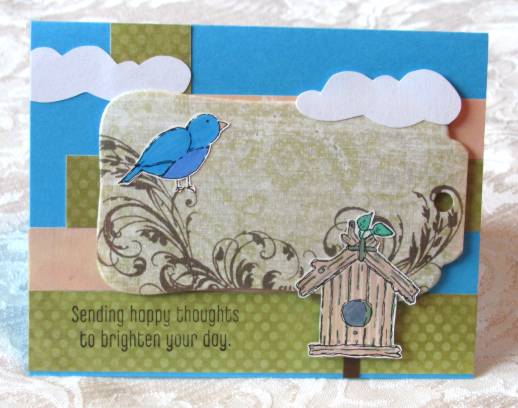
I used the tag on this card to create a landscape, using the swirls as tree branches. It is mounted on foam tape over a background of table scraps and a blue folded card base. I cut the clouds freehand from white cardstock and mounted the right one on foam tape. The bird and house were stamped, colored and cut for mounting. The bird is directly on the tag while the house extends over the edge and it's bottom is mounted on foam tape. The pole for the birdhouse is glued to the card base level for dimension. I did not add ribbon to this tag as it serves as a scene rather than a tag on this card. I stamped the greeting.


As you can see, there is a lot of variety in these sets of paper tags - and I've only scratched the surface. There are many more tags left to play with.

Ddd


Posted by studio3d@ccgmail.net at 6:00 AM PDT
Tuesday, 27 September 2011
Manipulating the Numbers
Topic: Supplies

In the clearance bin at my local craft store they had piles of this one stamp.


I have no number stamps so I'm thinking I can butcher this set and use the digits separately. I mean, look at the price!


When I got it home I realized why there were so many. This actually is designed to clip on to some sort of a wheel and be used as a self-inking background.


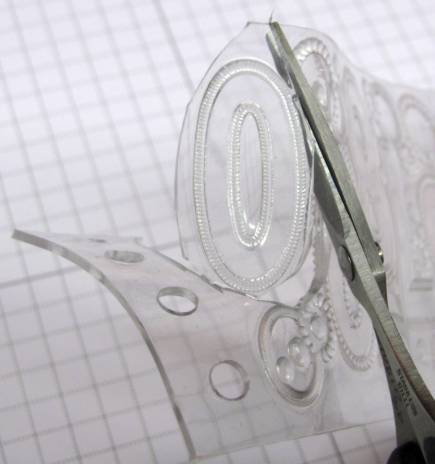
So I set to with a pair of sharp mini-scissors and cut out the individual numbers.


They were pretty close together so it took some finesse to keep from snipping a part of the border away. It helped to bend the sheet to make the numbers bulge out when cutting where they were close.

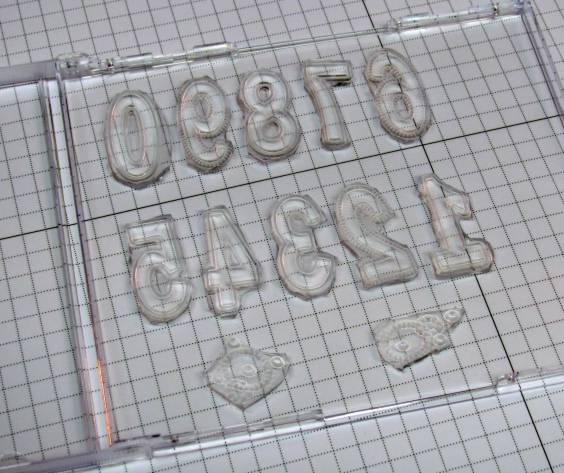
As I snipped out each number I placed them in their new storage, the inside of a CD case.


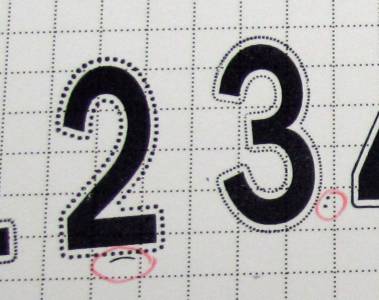
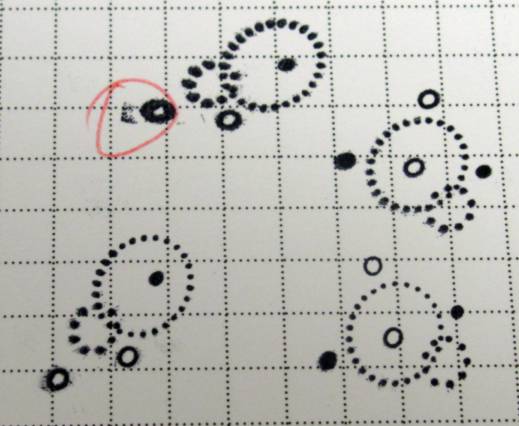
When the whole set was cut I placed a few digits at a time on an acrylic block and stamped on scratch paper. Then I circled the bits I missed cutting off with red pen.


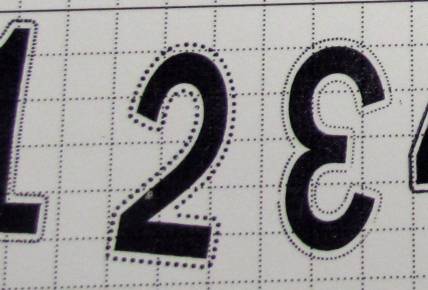
I pulled these off the acrylic block and did some additional surgery on them to clean them up and stamped again.


Perfect! Here is the whole set which I will be able to use for birthday, anniversary and holiday cards. Ooooh, I just thought of another project for these. I've been planning to make a set of countdown blocks and these will be perfect!


I even salvaged a couple of bits of the background 'noise.


What a great lot of use I will get out of my $1.97 investment.

Ddd


Posted by studio3d@ccgmail.net at 6:00 AM PDT
Saturday, 10 September 2011
What Can You Do With Silver and Blue
Topic: Supplies

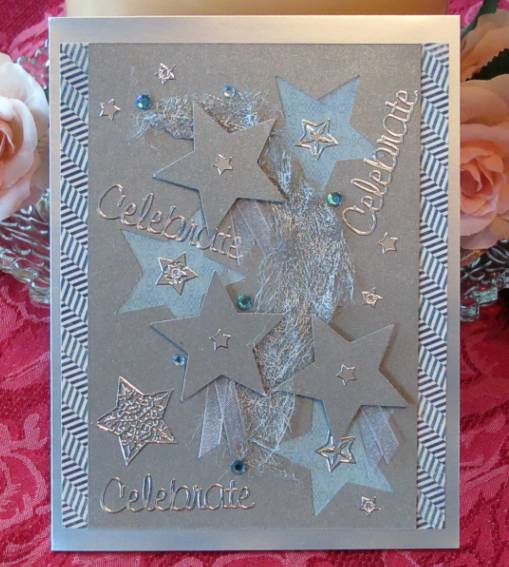
ASSIGNMENT: Make a card using only Silver and Blue

I started with a piece of silver cardstock and a new star punch. I took the randomly punched stars and popped them up on foam tape. Then I backed the holes with blue paper and bordered the sides with more blue. I've had a piece of silver mesh for years (from a supplies swap) and tore out a strip to weave behind the stars. The rest is accessorizing with two tones of blue rhinestones and lots of silver peel-off stickers.

Little folds of silver sheer ribbon peek out from each of the punched silver stars and the whole is mounted on a shiny silver folded card base.

What a party!

Ddd


Posted by studio3d@ccgmail.net at 6:00 AM PDT
Tuesday, 16 August 2011
Six Pack
Topic: Supplies

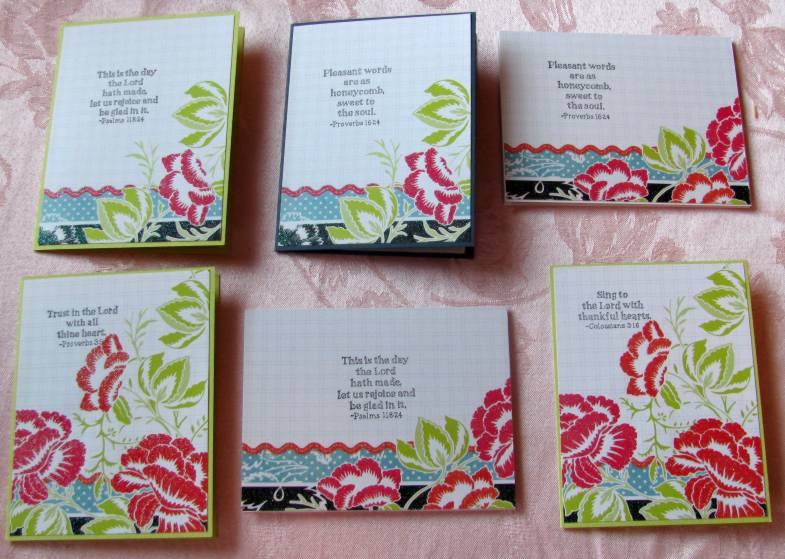
I got some awesome printed cardstock in a pack that was printed with bold graphic flowers in sparkly paint AND the background was a grid. Oooooh, I DO like me some grid! There was a fun border printed along one edge which was also patrially in sparkles.

Since these were 12 x 12 I was able to get several card full fronts from each sheet and have some lovely scraps to play with later. Using the pieces with the bold flowers, I stamped them with a variety of scripture stamps (Stampin' Up)and backed them with bright green, white, or dull blue. So simple.

This was the best part of the cardstock pad - which I got on steep discount as the cover of the pad was damaged. SCORE!

Ddd


Posted by studio3d@ccgmail.net at 6:00 AM PDT
Updated: Tuesday, 16 August 2011 7:15 AM PDT
Saturday, 13 August 2011
Table Scraps
Topic: Supplies

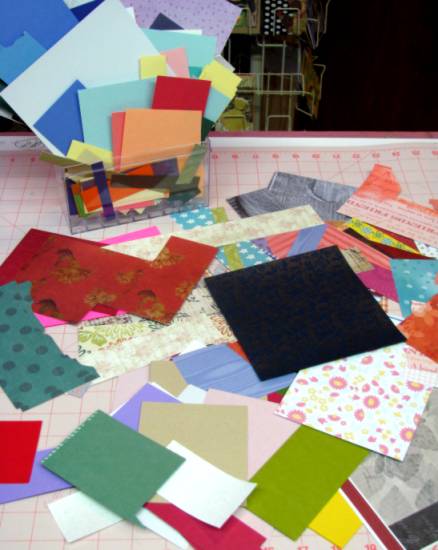
I realize that I am always refering to 'table scraps' as the source of contents for some (a lot of) of my cards. I thought I'd define that a little for you today.

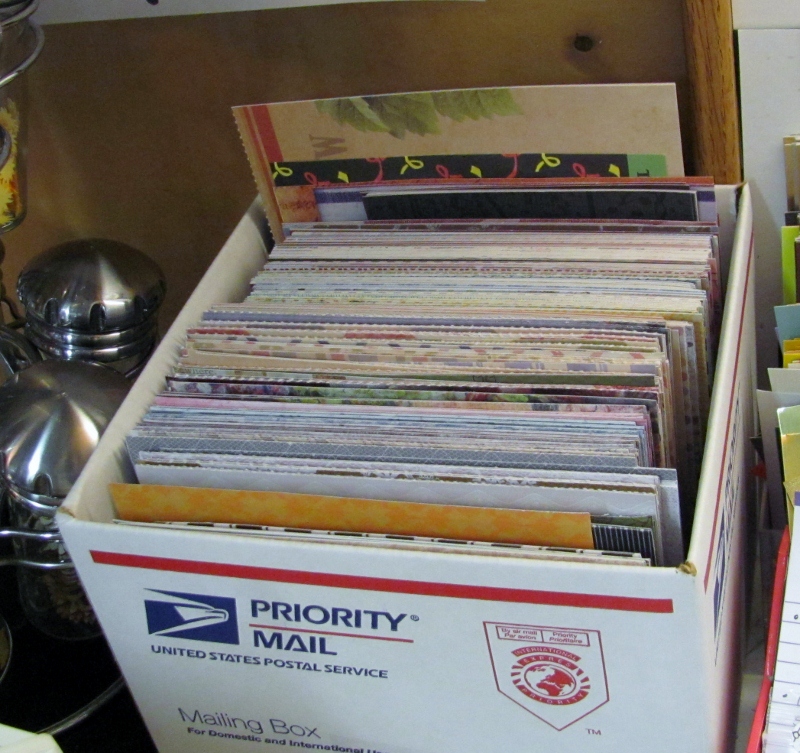
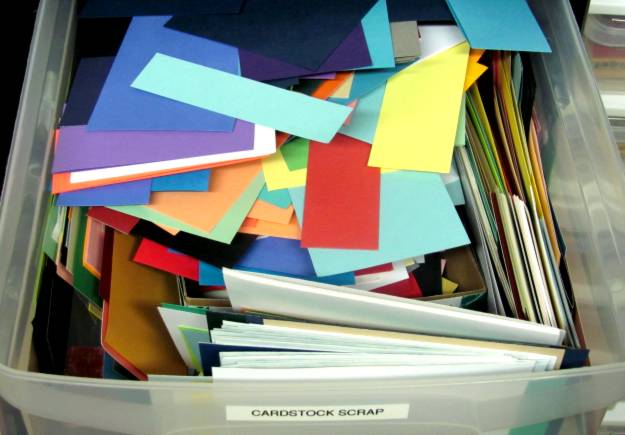
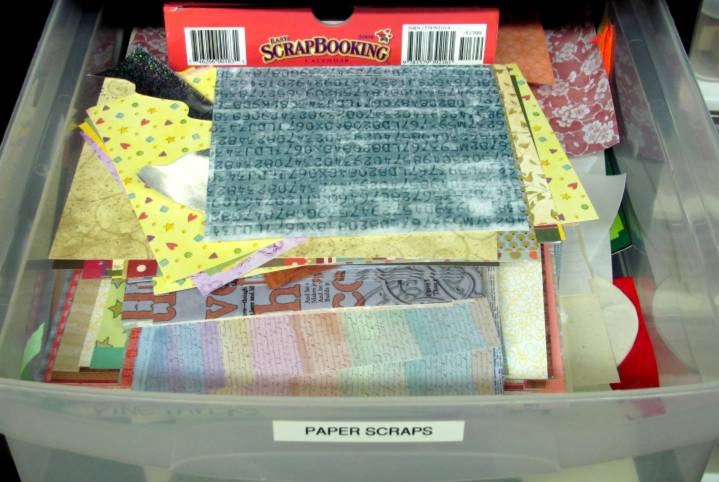
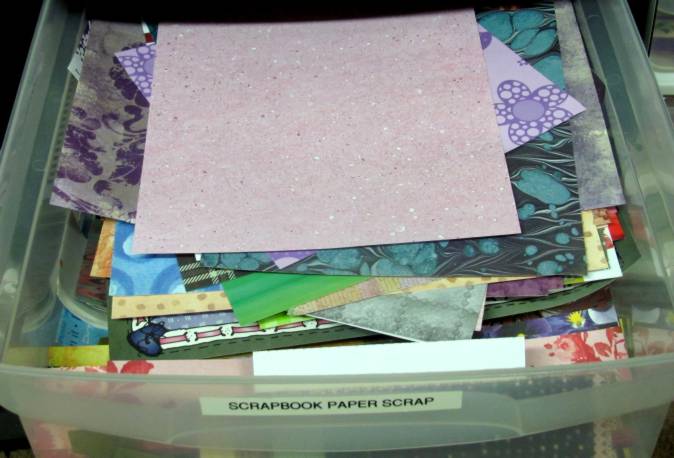
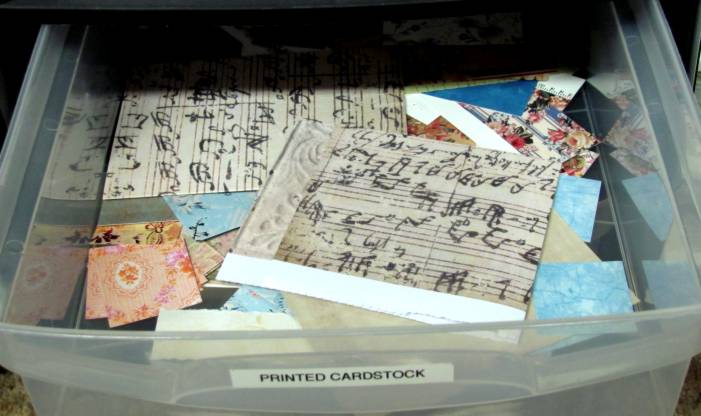
As I am making cards and cut larger pieces of scrapbook paper, printed cardstock, and colored cardstock I end up with lots of scraps - large, medium and small. I sort them into plain and printed and tuck them into a clear standing box.  Here's a look at what is currently in that box:

When I work on cards I will take out a focal image and then first shuffle through the table scraps box to see what goes with it. This way I can often use up scraps before having to cut up new sheets of paper.

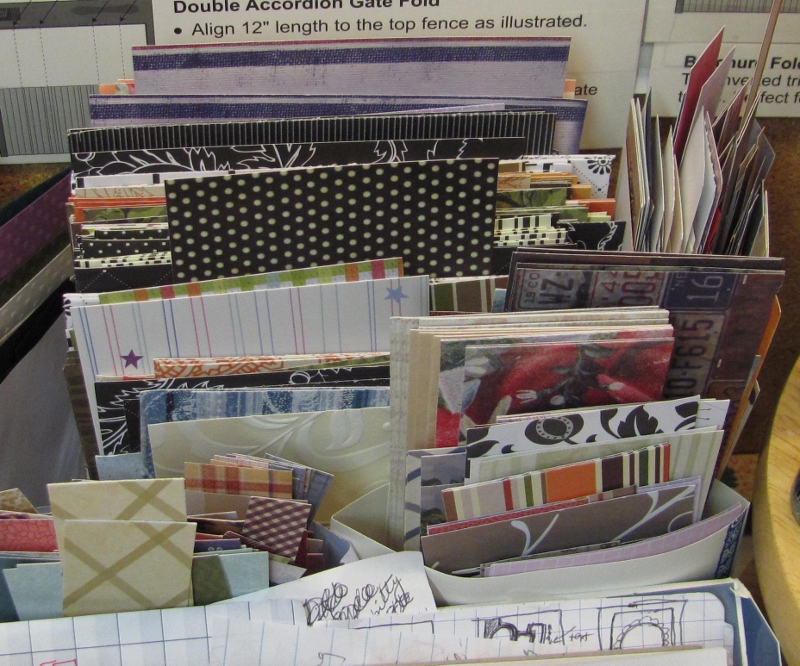
When I get tired of using the same materials over and over I will sort them into my bigger bins of scraps. These are where I go when I DON'T find anything in the table scraps box. And if nothing in any of these fits the bill, THEN I move on to the new printed cardstock and/or scrapbook paper.

These are the drawers of scraps I have going all the time:


So now you know what I mean when I say I built a card from 'table scraps'.

Ddd


Posted by studio3d@ccgmail.net at 6:00 AM PDT
Friday, 8 July 2011
Make Your Own
Topic: Supplies

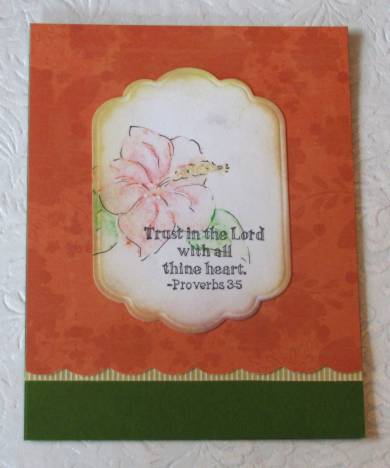
I finally used the Teresa Collins Stampmaker that I got for Christmas. I decided that I didn't have enough stamps with scripture on them so I made three large packets of them. It allowed me to make about 15 stamps. Unfortunately, I made the stencils go too close to the edges of the packet on a few of them so I think I ended up with 12 useable ones. This is one of them:

I did them with differing fonts and a variety of layouts to give myself some design options. I think this is a good use of the materials as I really don't need any specialty stamps of little pictures, etc.

Ddd


Posted by studio3d@ccgmail.net at 6:00 AM PDT
Tuesday, 14 June 2011
Blocky Stamp Coloring
Topic: Supplies

I have had a set of 'coloring things' in my supplies for several years but never really had any idea how to use them properly until now. They are marked 'Silky' and they come in a tube like a glue stick. Very strong pigment in a stick that is water soluble. Hmmm.

Well, I saw Donna Downey playing with something similar on her blog the other day and it set me to thinking about how I might make use of these 'coloring things' (not sure what to call them).

What I did was take out a solid stamp and misted it with water. Then I used two tones of pink, two of green, and one of yellow-gold and colored right on the stamp. Another mist of water and then I stamped on plain white cardstock. I was able to mist again and again, getting 4 impressions before I had to color the stamp again.

This image is one of the 4th generations. When I had all of these stamped out I dired with the heat gun and then sketched around the image with a Pigma pen.

I used the set of Stampin Up scriptures that I got at Goodwill and placed text over the image. Then it was cut with a Nestabilities die. In this case I also distressed the edges before mounting on a scalloped cardstock.

I added a bit of yellow striped ribbon under the scallops and then glued to a green folded card base.

While I was experimenting with these supplies I made a total of 8 flower panels ( 2 sets of 4 generations ). This means that you'll be seeing several similar cards coming up. I do have plans to share some other techniques first, though.

Ddd


Posted by studio3d@ccgmail.net at 6:00 AM PDT
Tuesday, 17 May 2011
Distressed Panel
Topic: Supplies

The focal element on this card is a new product I picked up from www.paperwishes.com called Color Me Papers. They have clear embossed images all over the surface that allow one to color in multiple ways and leave the pattern in stark white relief.

For this one I used Ranger Distress Inks with a foam applicator, using two colors for a little variety. I stamped with a text stamp over the top with Old Paper distress ink. After roughing the edges I attached brads for decoration only, then used adhesive to attach it to the floral panel.

A rubon provides the text and a punched butterfly is glued at the body only with wings bent up.

Ddd


Posted by studio3d@ccgmail.net at 6:00 AM PDT
Friday, 11 February 2011
Stamp(maker) of Approval
Topic: Supplies

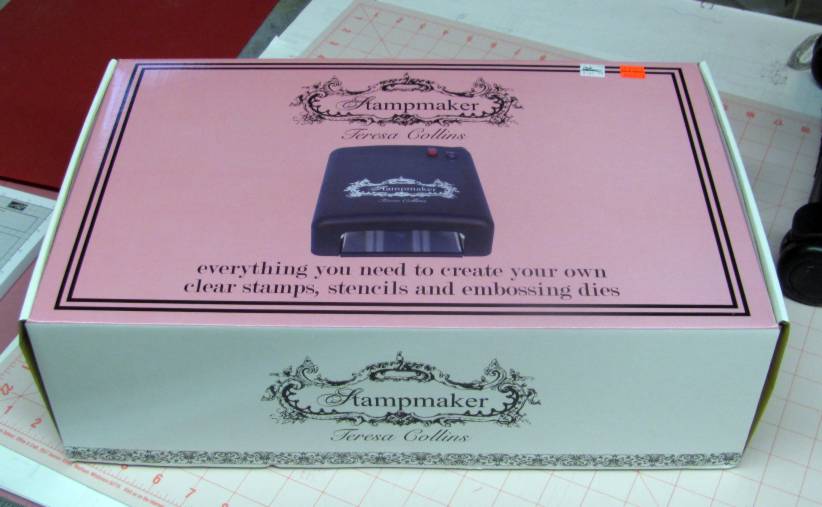
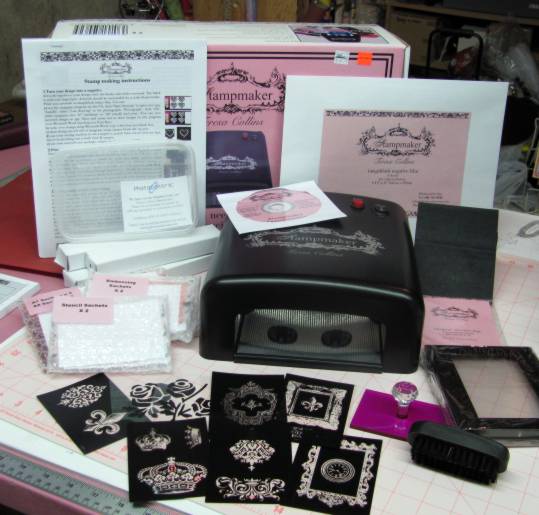
New toy alert! When I saw that the Teresa Collins Stampmaker was on sale before Christmas I asked my personal Santa to get it for me. He kindly drove 60 miles to the store that had it marked down and I didn't even have to wait to open it (he never wrapped it!)

This unassuming box opens up to reveal all this:

It includes a CD of instructions.

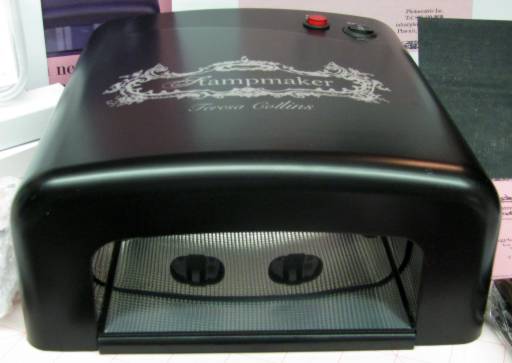
So, what does it do? It allows you to make your own clear stamps from any black and white artwork (samples included). You create a 'sandwich' of the artwork and a packet with a gel-like medium between two clear plates. This goes inside the machine which has 4 UV lights in it. After a few minutes explosure the packet is opened and rinsed off and scrubbed with a little brush. Then you put it back in the machine to harden. Sticky-back medium is included to make the stamp a cling. A block with a handle is included.

Here's the machine up close:

There are materials included so the machine can be used for making stencils and embossing dies.

I haven't had a chance to play with it yet but will post when I have done so.

Ddd


Posted by studio3d@ccgmail.net at 6:00 AM PST
Friday, 15 October 2010
Goodie, Goodie for Goodwill!
Topic: Supplies

A trip to Goodwill the other day was a real coup in craft goodies. Here's what I got:

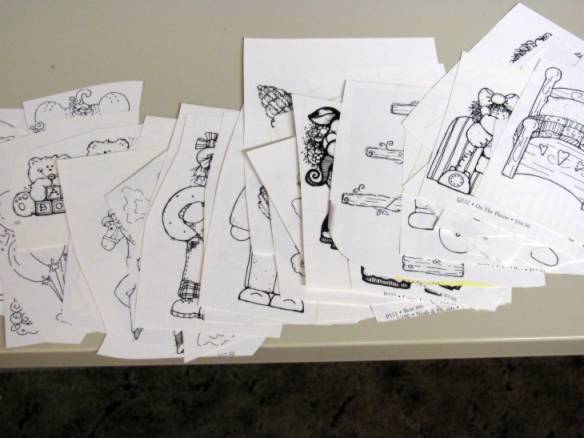
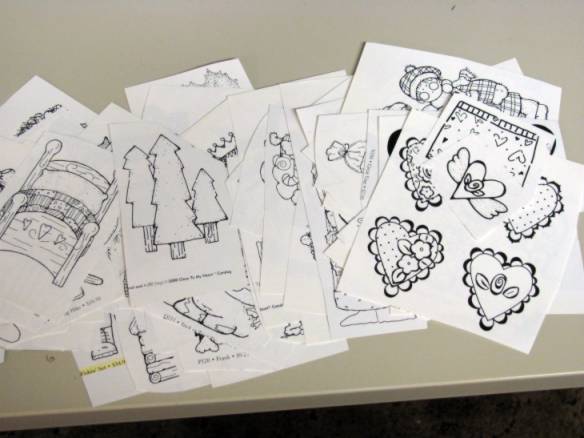
1) An outdated rubber stamp catalog with full-sized illustrations. These I cut out and will color and use just as though I had stamped them:

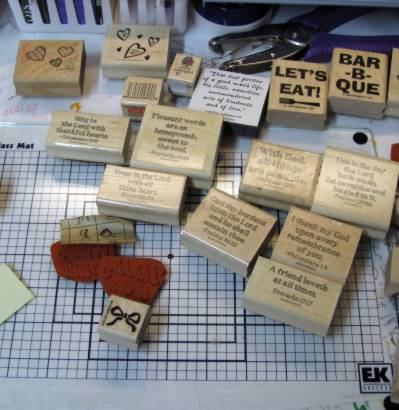
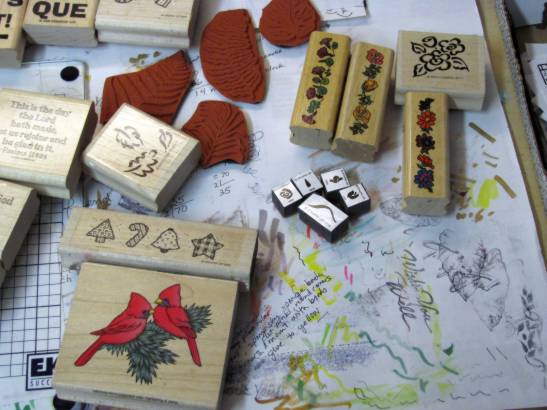
2) A grab-bag of rubber stamps:

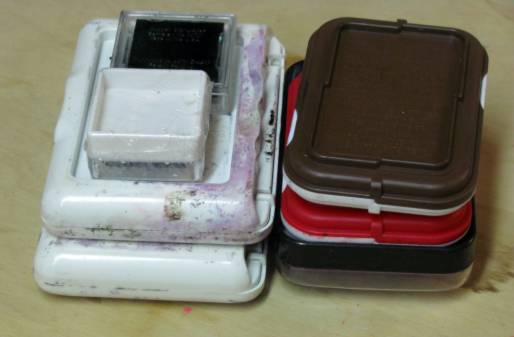
3) Some stamp pad ink:

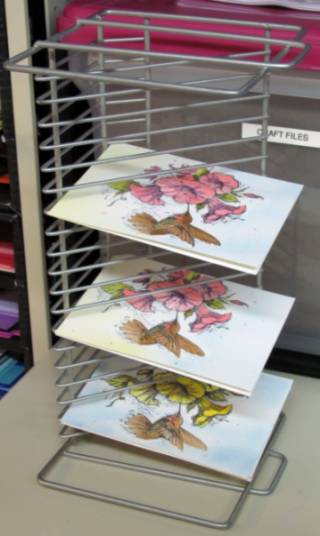
4) A CD rack which I will use to hold cards while glue/stickes/etc are drying (this would have come in very handy when I was doing the 30 cards recently):

Other random things were not craft related, so I won't share those.

Ddd


Posted by studio3d@ccgmail.net at 6:00 AM PDT
Thursday, 14 October 2010
HB To ME
Topic: Supplies

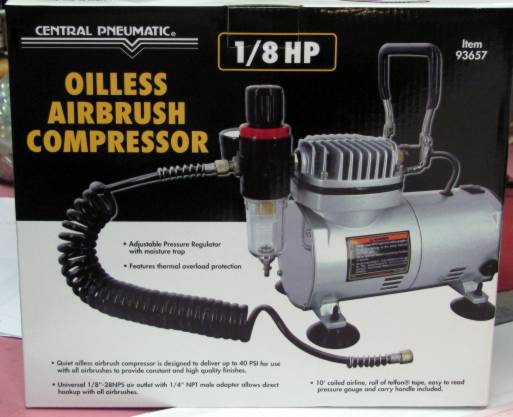
Since I bought the Copic markers and the airbrush system with the canned air, I have been enjoying both very much. However, the canned air goes pretty quickly.

So, for my birthday, I requested a small compressor... voila! 

Haven't had a chance to use it, yet, but soon... very soon.

Ddd


Posted by studio3d@ccgmail.net at 6:00 AM PDT

Newer | Latest | Older